ignition BMW 320i 2004 Owner's Manual
[x] Cancel search | Manufacturer: BMW, Model Year: 2004, Model line: 320i, Model: BMW 320i 2004Pages: 182, PDF Size: 2.76 MB
Page 82 of 182
82
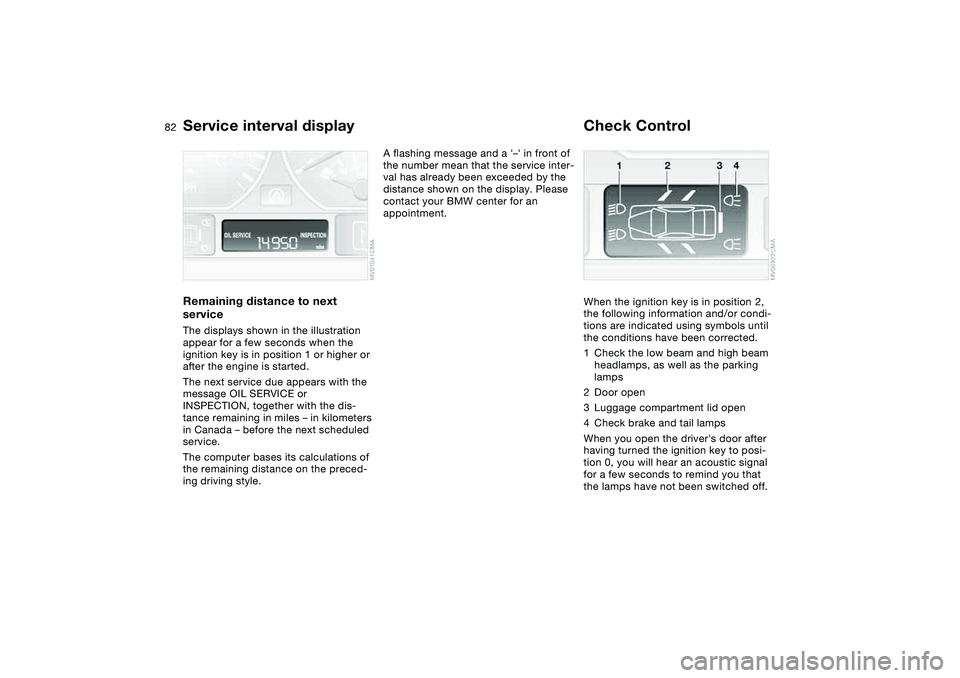
Service interval displayRemaining distance to next
serviceThe displays shown in the illustration
appear for a few seconds when the
ignition key is in position 1 or higher or
after the engine is started.
The next service due appears with the
message OIL SERVICE or
INSPECTION, together with the dis-
tance remaining in miles – in kilometers
in Canada – before the next scheduled
service.
The computer bases its calculations of
the remaining distance on the preced-
ing driving style.
A flashing message and a '–' in front of
the number mean that the service inter-
val has already been exceeded by the
distance shown on the display. Please
contact your BMW center for an
appointment.
Check ControlWhen the ignition key is in position 2,
the following information and/or condi-
tions are indicated using symbols until
the conditions have been corrected.
1Check the low beam and high beam
headlamps, as well as the parking
lamps
2Door open
3Luggage compartment lid open
4Check brake and tail lamps
When you open the driver's door after
having turned the ignition key to posi-
tion 0, you will hear an acoustic signal
for a few seconds to remind you that
the lamps have not been switched off.
Page 83 of 182
83
ClockIf you wish to have a permanent time
display, you can make this adjustment
in the radio display, refer to the Owner's
Manual for Radio.
You can adjust the clock and the time
display in the car radio as follows.
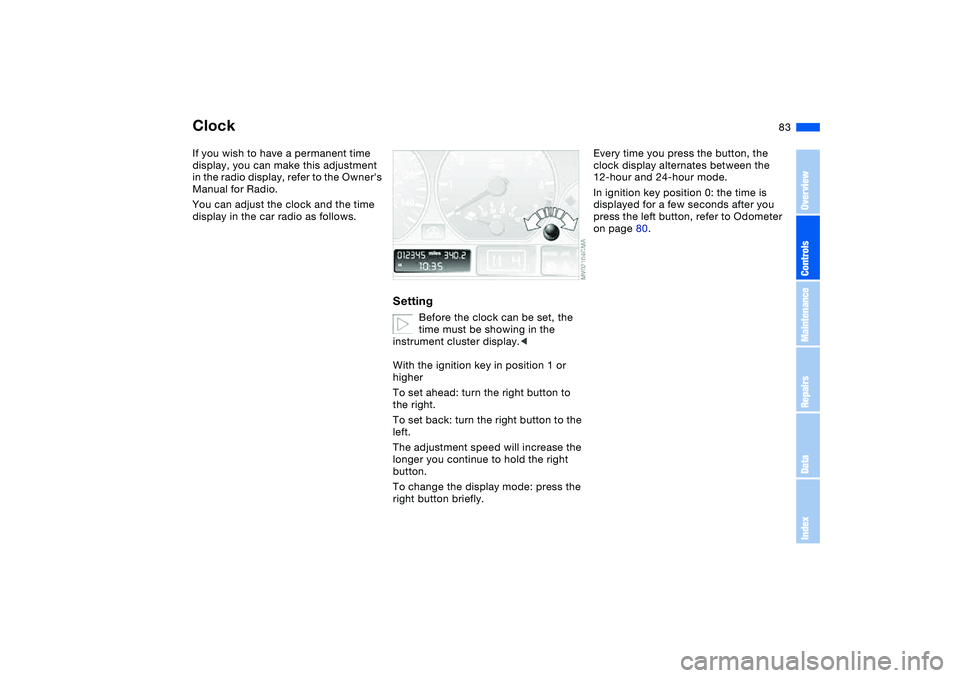
Setting
Before the clock can be set, the
time must be showing in the
instrument cluster display.<
With the ignition key in position 1 or
higher
To set ahead: turn the right button to
the right.
To set back: turn the right button to the
left.
The adjustment speed will increase the
longer you continue to hold the right
button.
To change the display mode: press the
right button briefly.
Every time you press the button, the
clock display alternates between the
12-hour and 24-hour mode.
In ignition key position 0: the time is
displayed for a few seconds after you
press the left button, refer to Odometer
on page 80.
OverviewControlsMaintenanceRepairsDataIndex
Page 84 of 182
84
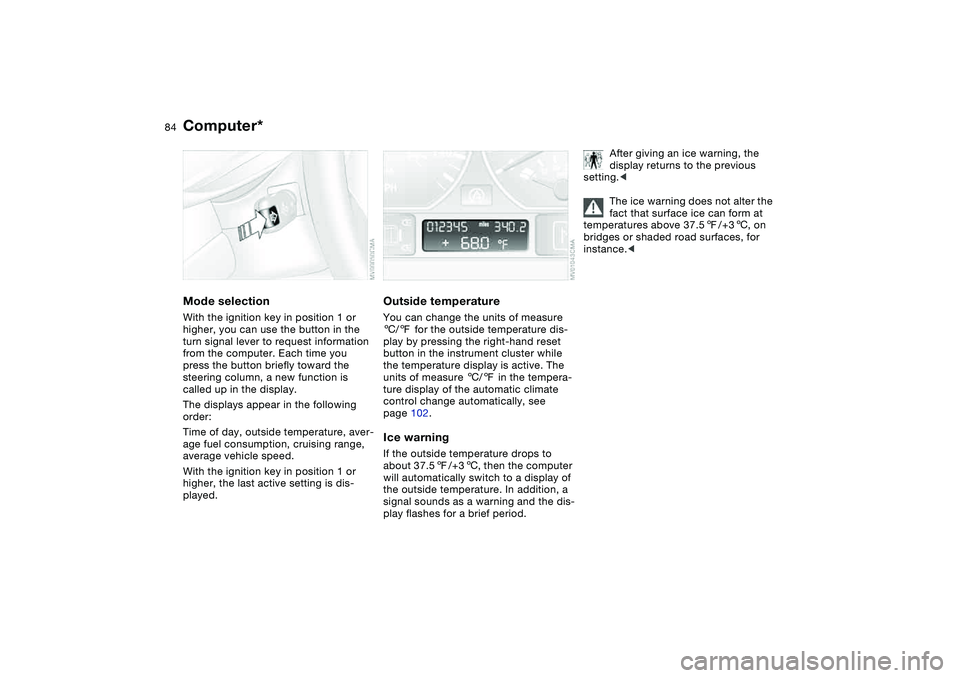
Computer*Mode selectionWith the ignition key in position 1 or
higher, you can use the button in the
turn signal lever to request information
from the computer. Each time you
press the button briefly toward the
steering column, a new function is
called up in the display.
The displays appear in the following
order:
Time of day, outside temperature, aver-
age fuel consumption, cruising range,
average vehicle speed.
With the ignition key in position 1 or
higher, the last active setting is dis-
played.
Outside temperatureYou can change the units of measure
6/7 for the outside temperature dis-
play by pressing the right-hand reset
button in the instrument cluster while
the temperature display is active. The
units of measure 6/7 in the tempera-
ture display of the automatic climate
control change automatically, see
page 102.Ice warningIf the outside temperature drops to
about 37.57/+36, then the computer
will automatically switch to a display of
the outside temperature. In addition, a
signal sounds as a warning and the dis-
play flashes for a brief period.
After giving an ice warning, the
display returns to the previous
setting.<
The ice warning does not alter the
fact that surface ice can form at
temperatures above 37.57/+36, on
bridges or shaded road surfaces, for
instance.<
Page 86 of 182
86Technology for safety and driving convenience
Park Distance Control (PDC)*The conceptPDC assists you when you back into a
parking space. Acoustic signals alert
you to the momentary distance to an
object behind your vehicle. The system
features four ultrasonic sensors
mounted in your rear bumper. The mon-
itoring range for the two corner sensors
extends outward roughly 2 ft/60 cm
behind the bumpers, while two centrally
located sensors detect objects at dis-
tances of up to approx. 5 ft/1.50 m.
PDC is a parking aid that can
identify objects if they are
approached slowly, as is generally the
case when parking. Avoid driving
towards objects rapidly; due to underly-
ing physical principles, the system may
otherwise alert you too late for you to
take evasive steps.<
The system starts to operate automati-
cally approx. one second after you shift
into Reverse or move the selector lever
into the R position with the ignition key
in position 2.
Let this short period elapse before
driving backwards.<
PDC is deactivated when you shift back
out of Reverse.
You can have a signal set to con-
firm that the PDC has been acti-
vated. The signal then sounds when
you shift into Reverse or move the
selector lever into the R position.
intervals. As the distance between vehi-
cle and object decreases, the intervals
between the tones become shorter. A
continuous tone indicates the pres-
ence of an object less than 1 ft/30 cm
away.
The warning signal is canceled after
approx. three seconds if the distance to
the object remains constant during this
time – if you are moving parallel to
a wall, for instance.
System malfunctions will be indicated
by a continuous high-pitched tone
when the system is activated the first
time. Please have the problem fixed by
your BMW center.
PDC does not remove the driver's
personal responsibility for evaluat-
ing the distance between the vehicle
and any objects. Even when sensors
are involved, there is a blind spot in
which objects cannot be detected. This
applies especially in those cases where
the system approaches the physical
limits of ultrasonic measurement, as
occurs with tow bars and trailer cou-
plings, and in the vicinity of thin or
wedge-shaped objects. Moreover, low
objects that have already been
detected – such as a curb edge – can
disappear out of the detection range of
the sensors before a continuous tone
sounds.
Loud sources of sound from outside or
inside the vehicle could drown out the
PDC signal tone.<
Keep the sensors clean and free
of ice or snow in order to ensure
that they will continue to operate effec-
tively.
Do not apply high pressure spray to the
sensors for a prolonged period of time.
Always maintain a distance of more
than 4 in/10 cm.<
Page 87 of 182
87
Dynamic Stability Control (DSC)The conceptDSC maintains vehicle stability, even in
critical driving situations.
The DSC is operational every time you
start the engine.
DSC incorporates the Dynamic Traction
Control (DTC) and Cornering Brake
Control (CBC) functions.
For information on vehicles with all-
wheel drive, refer to page 89 ff.Indicator lamps
The indicator lamp in the instru-
ment cluster goes out shortly
after the ignition has been
switched on; refer to page 19.
>The indicator lamp flashes: DSC is
actively controlling drive torque and
braking intervention
>The indicator lamp stays lit: DSC has
been switched off with the button;
DTC and DBC are operational. DTC
control intervention is not indicated.
The indicator lamp and the
brake warning lamp continu-
ously light up in yellow:
The DSC, DTC and DBC have
been switched off manually or
there is a system malfunction.
The vehicle will remain completely
operational, however, without DSC. In
the event of a fault, please consult your
BMW center.
Indicator and warning lamps for
Canadian models.
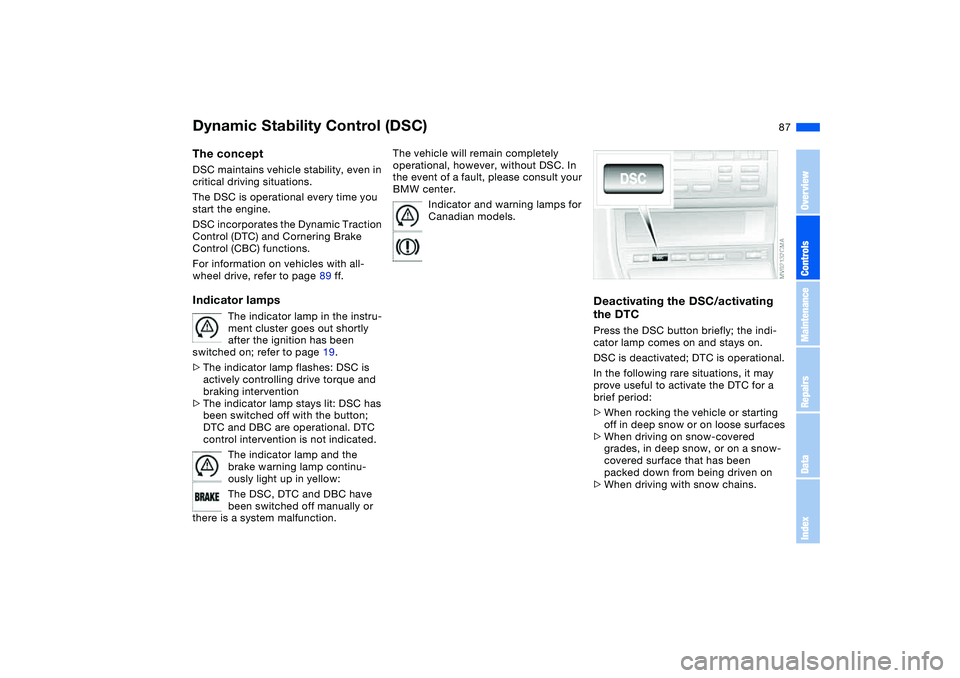
Deactivating the DSC/activating
the DTCPress the DSC button briefly; the indi-
cator lamp comes on and stays on.
DSC is deactivated; DTC is operational.
In the following rare situations, it may
prove useful to activate the DTC for a
brief period:
>When rocking the vehicle or starting
off in deep snow or on loose surfaces
>When driving on snow-covered
grades, in deep snow, or on a snow-
covered surface that has been
packed down from being driven on
>When driving with snow chains.
OverviewControlsMaintenanceRepairsDataIndex
Page 89 of 182
89
Dynamic Stability Control (DSC) – 325xi, 330xiThe conceptDSC maintains vehicle stability, even in
critical driving situations.
The DSC is operational every time you
start the engine.
DSC includes the Automatic Differential
Brake (ADB-X) and Cornering Brake
Control (CBC) functions.Indicator lamps
The indicator lamp in the instru-
ment cluster goes out shortly
after the ignition has been
switched on; refer to page 19.
>The indicator lamp flashes: DSC is
actively controlling drive torque and
braking intervention
>The indicator lamp stays lit: DSC has
been switched off with the button;
ADB-X is operational. ADB-X control
intervention is not indicated.
If the indicator lamp fails to go out
when you press the DSC button,
this indicates a malfunction in the DSC
and ADB-X systems; the system is
deactivated, and the stability enhance-
ment functions are no longer avail-
able.<
The vehicle will remain completely
operational, however, without DSC. In
the event of a fault, please consult your
BMW center.
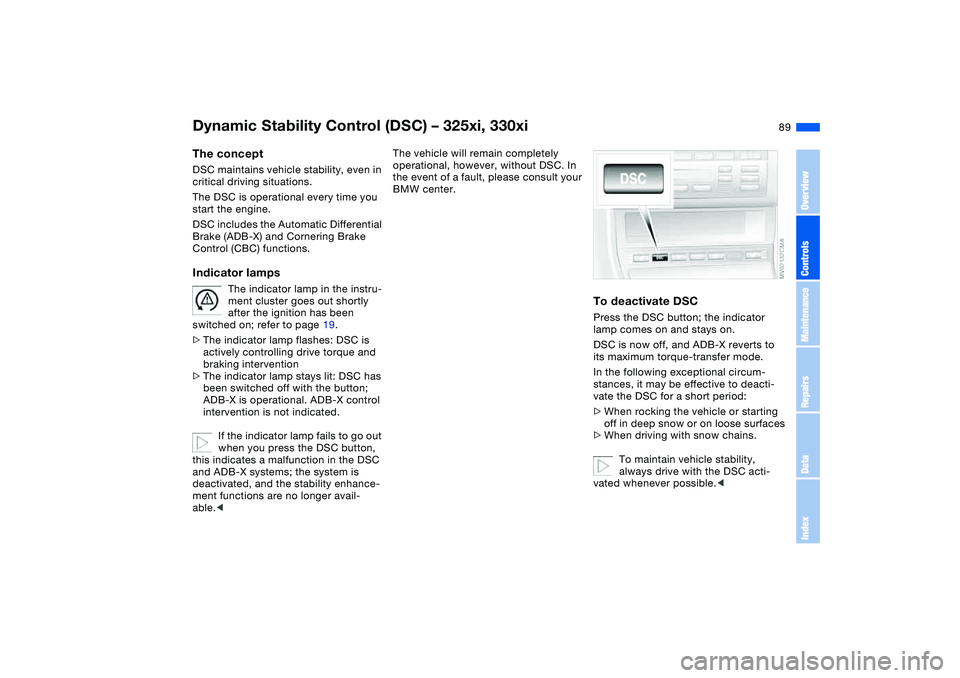
To deactivate DSCPress the DSC button; the indicator
lamp comes on and stays on.
DSC is now off, and ADB-X reverts to
its maximum torque-transfer mode.
In the following exceptional circum-
stances, it may be effective to deacti-
vate the DSC for a short period:
>When rocking the vehicle or starting
off in deep snow or on loose surfaces
>When driving with snow chains.
To maintain vehicle stability,
always drive with the DSC acti-
vated whenever possible.<
OverviewControlsMaintenanceRepairsDataIndex
Page 91 of 182
91
Hill Descent Control (HDC)*The conceptBy reducing the vehicle's speed on
steep downhill stretches, HDC main-
tains predictable vehicle handling
response to provide you with control of
your BMW during extreme descents.
The vehicle slows to a pace just slightly
faster than walking speed.
HDC is available for activation at vehi-
cle speeds below approx. 22 mph /
35 km/h. When driving down steep
hills, the vehicle reduces speed auto-
matically down to about double walking
speed – approx. 7.5 mph / 12 km/h –
and then maintains this speed at a con-
stant.
You can use the accelerator or brakes
to vary this speed within a range from
approx. 3 mph / 5 km/h to approx.
15 mph / 25 km/h.
In conjunction with the multifunction
steering wheel, you can use the +/–
button to set the cruise control to a tar-
get speed in the range from
approx. 3 mph / 5 km/h to approx.
15 mph / 25 km/h.
HDC is automatically deactivated once
vehicle speed again exceeds approx.
37 mph / 60 km/h.
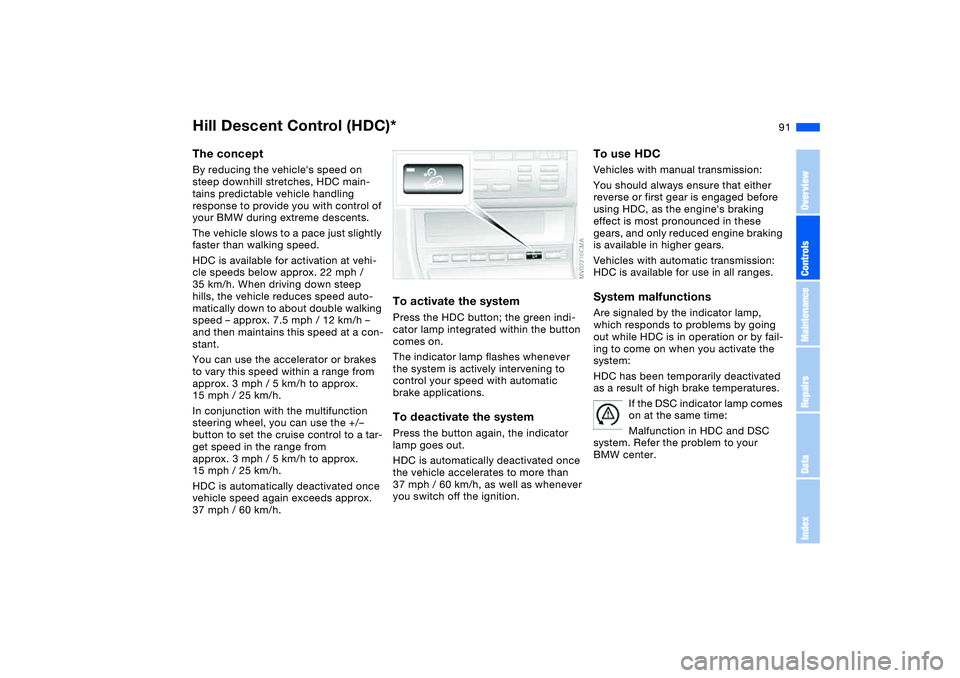
To activate the systemPress the HDC button; the green indi-
cator lamp integrated within the button
comes on.
The indicator lamp flashes whenever
the system is actively intervening to
control your speed with automatic
brake applications.To deactivate the systemPress the button again, the indicator
lamp goes out.
HDC is automatically deactivated once
the vehicle accelerates to more than
37 mph / 60 km/h, as well as whenever
you switch off the ignition.
To use HDCVehicles with manual transmission:
You should always ensure that either
reverse or first gear is engaged before
using HDC, as the engine's braking
effect is most pronounced in these
gears, and only reduced engine braking
is available in higher gears.
Vehicles with automatic transmission:
HDC is available for use in all ranges.System malfunctionsAre signaled by the indicator lamp,
which responds to problems by going
out while HDC is in operation or by fail-
ing to come on when you activate the
system:
HDC has been temporarily deactivated
as a result of high brake temperatures.
If the DSC indicator lamp comes
on at the same time:
Malfunction in HDC and DSC
system. Refer the problem to your
BMW center.
OverviewControlsMaintenanceRepairsDataIndex
Page 94 of 182
94Lamps
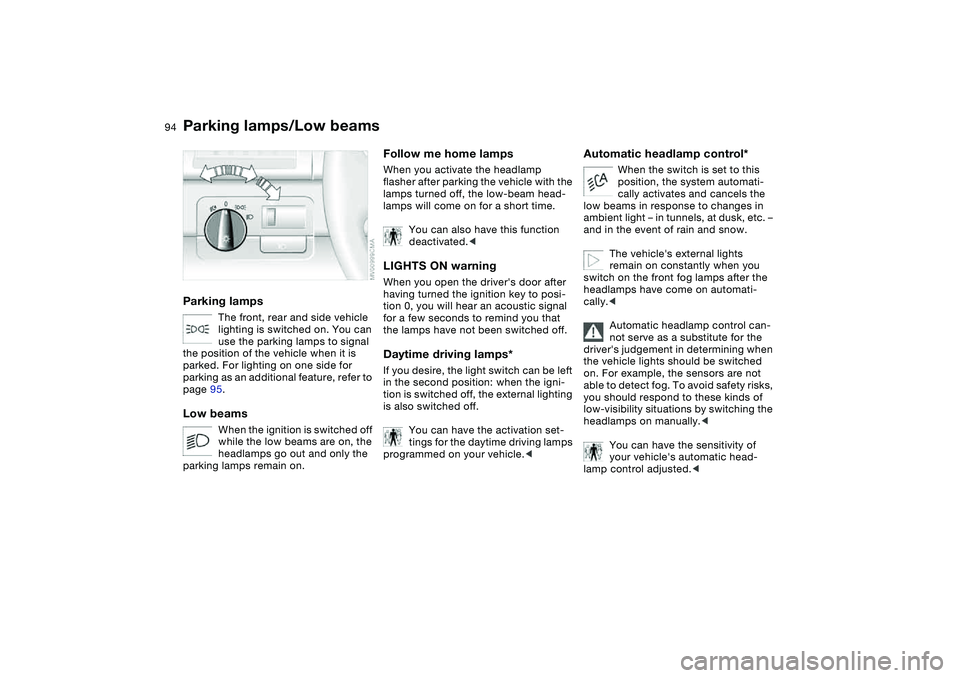
Parking lamps/Low beamsParking lamps
The front, rear and side vehicle
lighting is switched on. You can
use the parking lamps to signal
the position of the vehicle when it is
parked. For lighting on one side for
parking as an additional feature, refer to
page 95.
Low beams
When the ignition is switched off
while the low beams are on, the
headlamps go out and only the
parking lamps remain on.
Follow me home lampsWhen you activate the headlamp
flasher after parking the vehicle with the
lamps turned off, the low-beam head-
lamps will come on for a short time.
You can also have this function
deactivated.
tion 0, you will hear an acoustic signal
for a few seconds to remind you that
the lamps have not been switched off.Daytime driving lamps*If you desire, the light switch can be left
in the second position: when the igni-
tion is switched off, the external lighting
is also switched off.
You can have the activation set-
tings for the daytime driving lamps
programmed on your vehicle.<
Automatic headlamp control*
When the switch is set to this
position, the system automati-
cally activates and cancels the
low beams in response to changes in
ambient light – in tunnels, at dusk, etc. –
and in the event of rain and snow.
The vehicle's external lights
remain on constantly when you
switch on the front fog lamps after the
headlamps have come on automati-
cally.<
Automatic headlamp control can-
not serve as a substitute for the
driver's judgement in determining when
the vehicle lights should be switched
on. For example, the sensors are not
able to detect fog. To avoid safety risks,
you should respond to these kinds of
low-visibility situations by switching the
headlamps on manually.<
You can have the sensitivity of
your vehicle's automatic head-
lamp control adjusted.<
Page 95 of 182
95
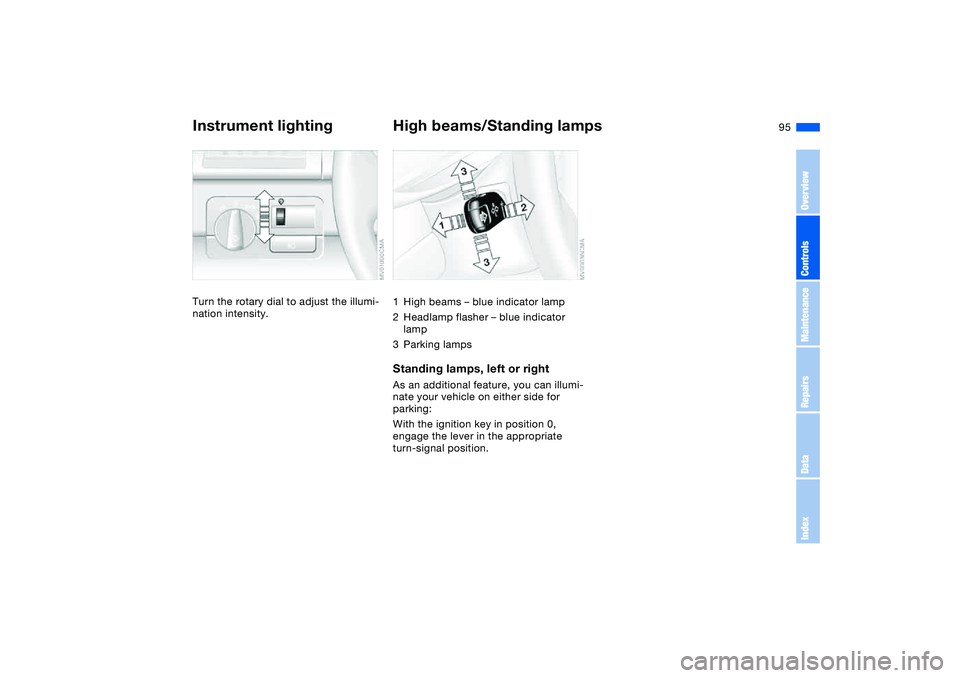
Instrument lightingTurn the rotary dial to adjust the illumi-
nation intensity.
High beams/Standing lamps1High beams – blue indicator lamp
2Headlamp flasher – blue indicator
lamp
3Parking lampsStanding lamps, left or rightAs an additional feature, you can illumi-
nate your vehicle on either side for
parking:
With the ignition key in position 0,
engage the lever in the appropriate
turn-signal position.
OverviewControlsMaintenanceRepairsDataIndex
Page 96 of 182
96
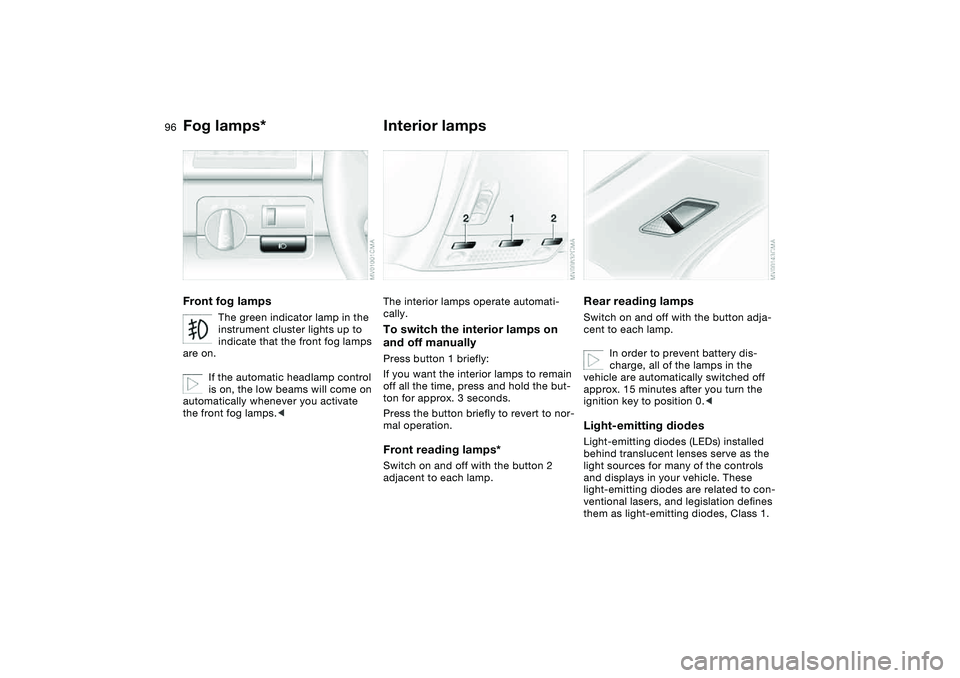
Fog lamps*Front fog lamps
The green indicator lamp in the
instrument cluster lights up to
indicate that the front fog lamps
are on.
If the automatic headlamp control
is on, the low beams will come on
automatically whenever you activate
the front fog lamps.<
Interior lampsThe interior lamps operate automati-
cally.To switch the interior lamps on
and off manuallyPress button 1 briefly:
If you want the interior lamps to remain
off all the time, press and hold the but-
ton for approx. 3 seconds.
Press the button briefly to revert to nor-
mal operation.Front reading lamps*Switch on and off with the button 2
adjacent to each lamp.
Rear reading lampsSwitch on and off with the button adja-
cent to each lamp.
In order to prevent battery dis-
charge, all of the lamps in the
vehicle are automatically switched off
approx. 15 minutes after you turn the
ignition key to position 0.
light sources for many of the controls
and displays in your vehicle. These
light-emitting diodes are related to con-
ventional lasers, and legislation defines
them as light-emitting diodes, Class 1.