spare wheel BMW 320i 2004 Owners Manual
[x] Cancel search | Manufacturer: BMW, Model Year: 2004, Model line: 320i, Model: BMW 320i 2004Pages: 182, PDF Size: 2.76 MB
Page 92 of 182
92
Flat Tire Monitor*The conceptAs you drive, the Flat Tire Monitor
keeps track of pressure levels in all four
tires. The system alerts you whenever
the inflation pressure of a tire falls sig-
nificantly below the pressure of another
tire.
The system actually detects pressure
loss by monitoring differences in the
relative speeds of the four wheels. It
interprets variations outside specified
limits as severe pressure loss, and then
responds by generating a warning.Functional requirementsIn order for the Flat Tire Monitor to learn
the correct tire inflation pressure,
please do the following:
1. Check the tire inflation pressures in
all tires
2. Compare them with the tire inflation
pressure table on page 26 and cor-
rect them, if necessary
3. Initialize the system.
System limitations
The Flat Tire Monitor cannot pro-
vide you with advance warning of
sudden and severe tire damage caused
by external factors and does not detect
the balanced and very gradual pressure
loss that takes place in all four tires
over an extended period of time.<
On the other hand, the following situa-
tions can lead to a delayed detection of
pressure loss and even to the system
not functioning:
>Driving on snow-covered or slippery
roads
>Performance-oriented driving: slip at
the drive wheels, high levels of lateral
acceleration
>When driving with snow chains, false
warnings and undetected pressure
losses may occur
>When driving with a space-saver
spare tire, the Flat Tire Monitor can-
not function.
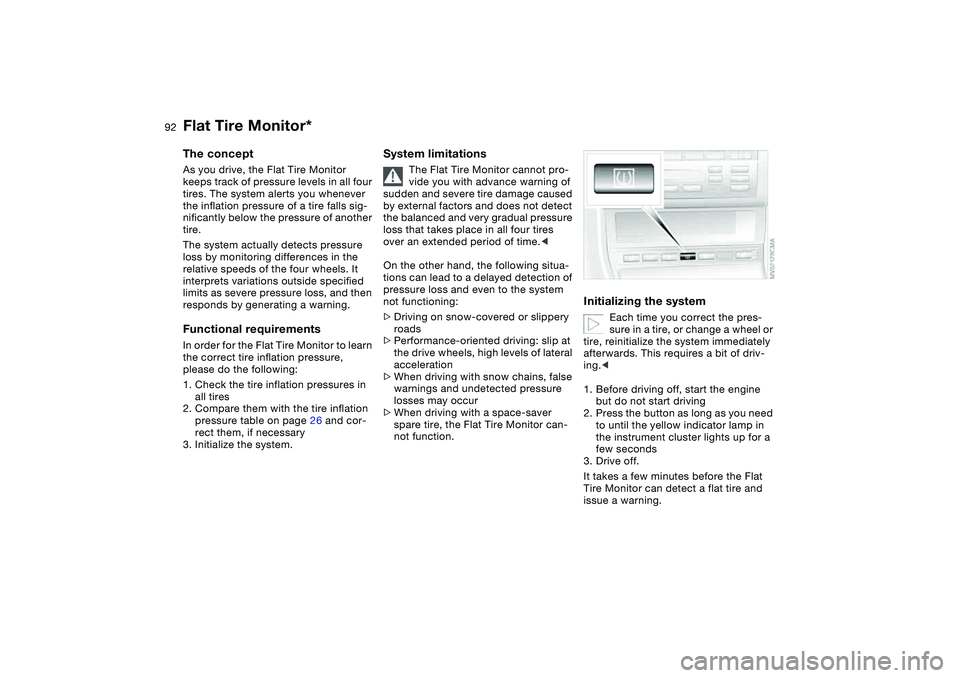
Initializing the system
Each time you correct the pres-
sure in a tire, or change a wheel or
tire, reinitialize the system immediately
afterwards. This requires a bit of driv-
ing.<
1. Before driving off, start the engine
but do not start driving
2. Press the button as long as you need
to until the yellow indicator lamp in
the instrument cluster lights up for a
few seconds
3. Drive off.
It takes a few minutes before the Flat
Tire Monitor can detect a flat tire and
issue a warning.
Page 93 of 182
93
When driving with snow chains or
a space-saver spare tire, do not
initialize the system.<
Flat tire
The indicator lamp in the instru-
ment cluster lights up red. This
visual alert is accompanied by
an acoustic warning signal.
1. Carefully reduce speed and come to
a stop. Avoid sudden braking and
steering maneuvers
2. Determine which wheel is damaged
If this cannot be determined, con-
tact your BMW center.<
3. Replace the damaged wheel, refer to
Changing a wheel on page 147.
After replacing the damaged tire, initial-
ize the system.
Vehicles with Run Flat tires:
1. Carefully reduce your speed to under
50 mph / 80 km/h. Avoid strong
braking and steering maneuvers. Do
not exceed a speed of 50 mph /
80 km/h.
Because the sides of Run Flat
tires are reinforced, a drop in infla-
tion pressure usually cannot be
detected from the outside, refer to Run
Flat tires, page 150.<
2. To continue driving, follow the
instructions under Driving with a
damaged tire on page 151.
System malfunction
The indicator lamp in the instru-
ment cluster lights up yellow.
The Flat Tire Monitor is malfunc-
tioning or out of order. Please refer the
problem to your BMW center.
Brake force displayThe brake force display indicates to the
driver of the vehicle behind you how
hard you are braking your vehicle.
The display has two levels:
>Normal braking: the brake lamps
among the rear lamps and the center
brake lamp light up
>Hard braking or use of ABS: the tail
lamps light up with the same bright-
ness as the brake lamps and thereby
intensify the visual effect of the brake
lamps.
Flat Tire Monitor*
OverviewControlsMaintenanceRepairsDataIndex
Page 124 of 182
124Wheels and tires
Tire inflation pressureInformation for your safetyThe factory-approved tires are matched
to your vehicle and have been selected
to provide optimum safety and driving
comfort when used properly.
It is not merely the tire's service life, but
also driving comfort and – above all else
– driving safety that depend on the con-
dition of the tires and the maintenance
of the specified tire inflation pressure.
Incorrect tire inflation pressure is a fre-
quent cause of tire damage. Tire pres-
sure also has a major effect on your
BMW's handling response.
Be sure to check the tire inflation
pressure, including the space-
saver spare tire or the spare tire, on a
regular basis, at least twice a month
and before every extended journey,
refer to page 25. If this is not done,
incorrect tire pressures can cause driv-
ing instability and tire damage, ulti-
mately resulting in accidents.<
Tire conditionTire tread – tire damageInspect your tires frequently for tread
wear, signs of damage and for foreign
objects lodged in the tread. Check the
tread depth.
Tread depth should not be allowed to
go below 1/8 in / 3 mm, even though
the legally specified minimum tread
depth is 1/16 in / 1.6 mm.
Below 1/8 in / 3 mm tread depth, there
is a great risk of hydroplaning, even at
relatively moderate speeds and with
only small amounts of water on the
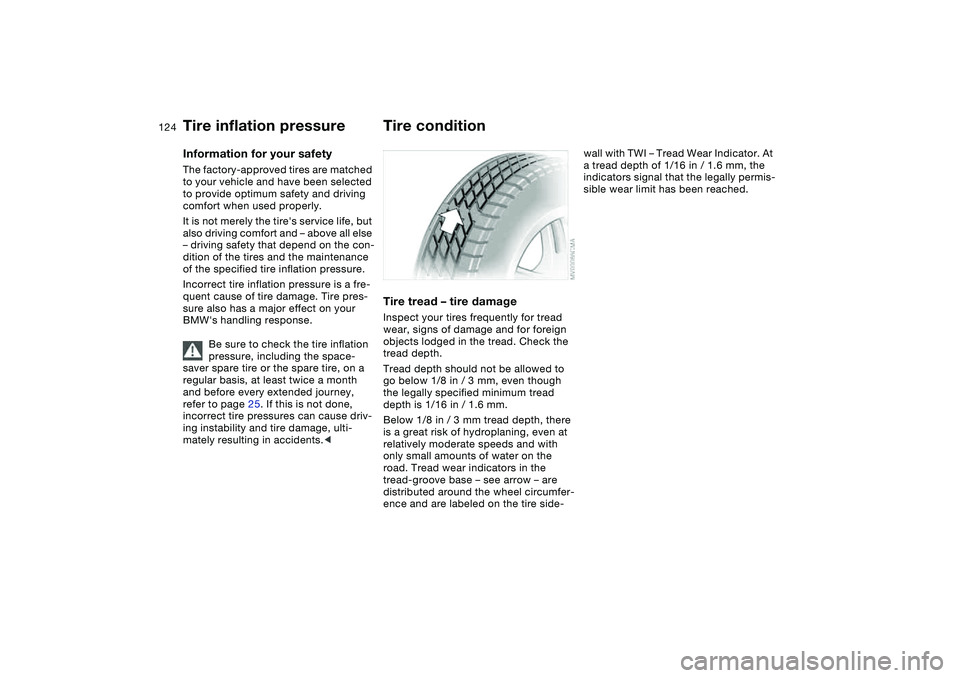
road. Tread wear indicators in the
tread-groove base – see arrow – are
distributed around the wheel circumfer-
ence and are labeled on the tire side-
wall with TWI – Tread Wear Indicator. At
a tread depth of 1/16 in / 1.6 mm, the
indicators signal that the legally permis-
sible wear limit has been reached.
Page 126 of 182
126
Sustained high temperature can cause
the material of the tire to degenerate
and reduce tire life, and excessive tem-
perature can lead to sudden tire failure.
The grade C corresponds to a level of
performance which all passenger car
tires must meet under the Federal
Motor Vehicle Safety Standard No. 109.
Grades B and A represent higher levels
of performance on the laboratory test
wheel than the minimum required by
law.
The temperature grade for this tire
is established for a tire that is
properly inflated and not overloaded.
Excessive speed, underinflation, or
excessive loading, either separately or
in combination, can cause heat buildup
and possible tire failure.
tread shoulder and maximum section
width. For example:
Tread wear 200
Traction AA
Temperature A
BMW advises against using
retreaded tires, since driving
safety may be impaired. This is due to
the possible variations in casing struc-
tures and, in some cases, to their
extreme age, which can lead to a
decrease in their durability.<
Tire ageThe date on which the tire was manu-
factured is indicated by the code on the
sidewall:
DOT... 3603 indicates that the tire was
manufactured in week 36 of the year
2003.
BMW recommends the replacement of
all tires – including the spare tire* –
when the tires are no more than 6 years
old, even if a tire life of 10 years is pos-
sible.Run Flat tires*Before purchasing tires, check if your
BMW is equipped with Run Flat tires.
These are indicated by a circular sym-
bol containing the letters RSC on the
tire sidewall, refer to Changing a wheel.
In this case, use only Run Flat tires,
since no spare wheel is available in the
event of a flat.
For more information on Run Flat tires,
refer to page 150.
Run Flat tires are available only in
combination with the Flat Tire
Monitor.<
Tire replacement
Page 128 of 182
128
the tire sidewall, refer to Changing a
wheel. In this case, use only Run Flat
winter tires, since no spare tire is pro-
vided in the event of a flat tire.Tire condition, tire pressureAt tread depths below approx. 3/16 in /
4 mm, winter tires display a perceptible
decrease in their ability to cope with
winter driving conditions, and should be
replaced in the interest of safety.
Comply with the specified tire inflation
pressures — and be sure to have the
wheel and tire assembly balanced
every time you change a tire or wheel.Snow chains*Only certain snow chains have been
tested by BMW and determined and
approved as roadworthy. Consult any
BMW center for details. BMW recom-
mends using only these approved fine-
link snow chains. Use them in pairs on
either summer or winter tires, but only
on both rear wheels.325xi, 330xi: only in an emergency – for
instance, with the vehicle stuck on one
side, or when obstructions make it
impossible to reach one tire – a chain
may also be mounted on just one tire
for the limited period needed to resolve
the problem.
Comply with all manufacturer's safety
precautions when mounting the chains.
Do not exceed a speed of 30 mph /
50 km/h when using snow chains.
You cannot mount snow chains on the
following tires:
225/50 R 16
225/45 R 17
225/40 R 18
245/40 R 17
255/35 R 18
Do not initialize the Flat Tire Moni-
tor after mounting snow chains to
the tires.
When driving with snow chains, it may
be useful to turn off the DSC for a short
time, refer to page 88 or 89.
Page 147 of 182
147
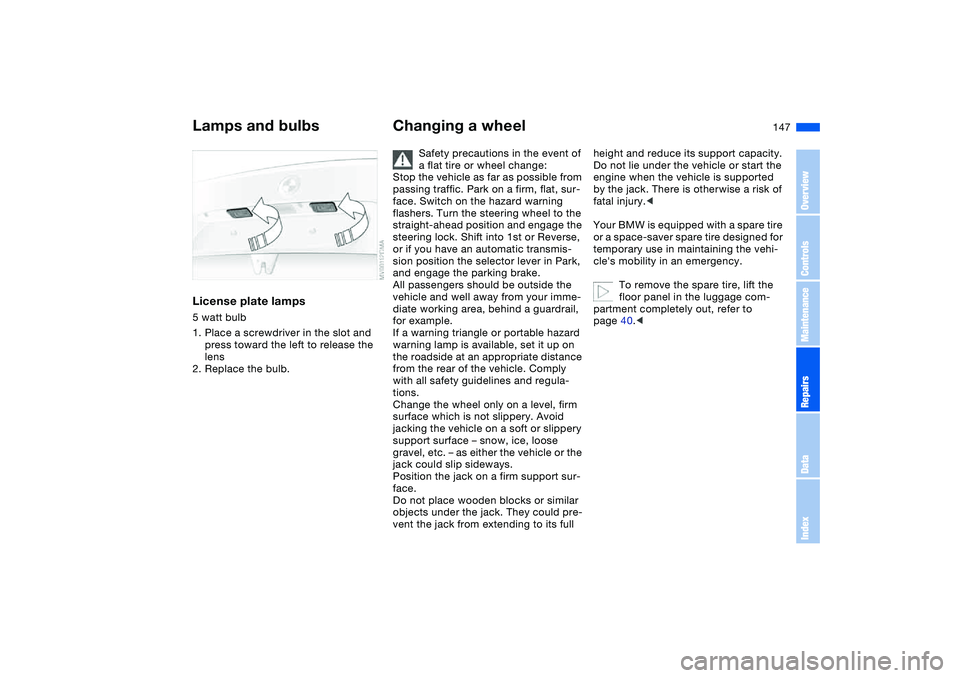
License plate lamps5 watt bulb
1. Place a screwdriver in the slot and
press toward the left to release the
lens
2. Replace the bulb.
Changing a wheel
Safety precautions in the event of
a flat tire or wheel change:
Stop the vehicle as far as possible from
passing traffic. Park on a firm, flat, sur-
face. Switch on the hazard warning
flashers. Turn the steering wheel to the
straight-ahead position and engage the
steering lock. Shift into 1st or Reverse,
or if you have an automatic transmis-
sion position the selector lever in Park,
and engage the parking brake.
All passengers should be outside the
vehicle and well away from your imme-
diate working area, behind a guardrail,
for example.
If a warning triangle or portable hazard
warning lamp is available, set it up on
the roadside at an appropriate distance
from the rear of the vehicle. Comply
with all safety guidelines and regula-
tions.
Change the wheel only on a level, firm
surface which is not slippery. Avoid
jacking the vehicle on a soft or slippery
support surface – snow, ice, loose
gravel, etc. – as either the vehicle or the
jack could slip sideways.
Position the jack on a firm support sur-
face.
Do not place wooden blocks or similar
objects under the jack. They could pre-
vent the jack from extending to its full
height and reduce its support capacity.
Do not lie under the vehicle or start the
engine when the vehicle is supported
by the jack. There is otherwise a risk of
fatal injury.<
Your BMW is equipped with a spare tire
or a space-saver spare tire designed for
temporary use in maintaining the vehi-
cle's mobility in an emergency.
To remove the spare tire, lift the
floor panel in the luggage com-
partment completely out, refer to
page 40.<
Lamps and bulbs
OverviewControlsMaintenanceRepairsDataIndex
Page 148 of 182
148
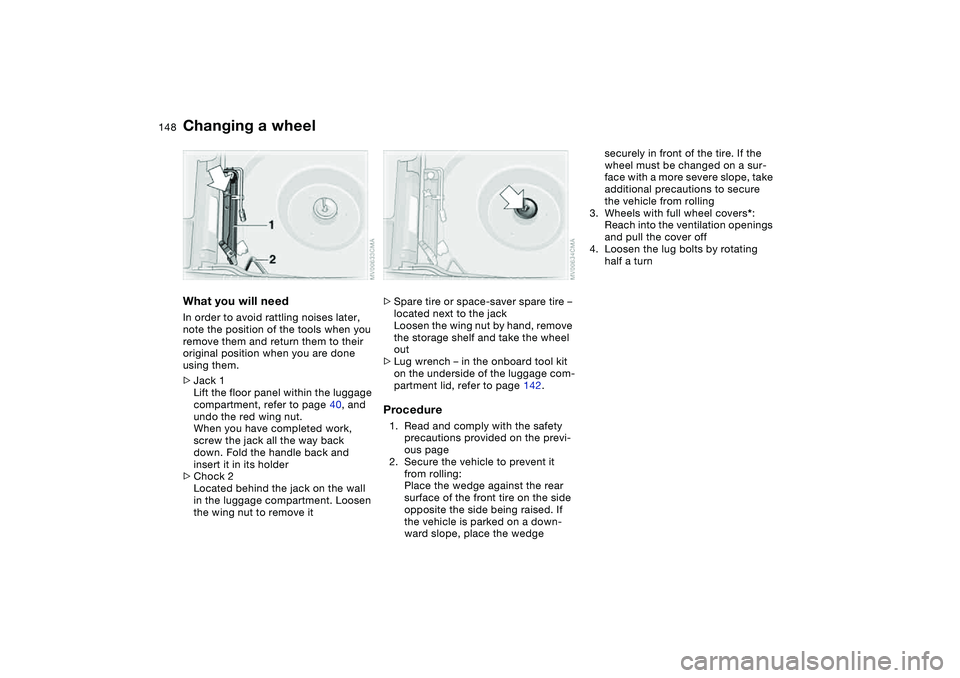
What you will needIn order to avoid rattling noises later,
note the position of the tools when you
remove them and return them to their
original position when you are done
using them.
>Jack 1
Lift the floor panel within the luggage
compartment, refer to page 40, and
undo the red wing nut.
When you have completed work,
screw the jack all the way back
down. Fold the handle back and
insert it in its holder
>Chock 2
Located behind the jack on the wall
in the luggage compartment. Loosen
the wing nut to remove it
>Spare tire or space-saver spare tire –
located next to the jack
Loosen the wing nut by hand, remove
the storage shelf and take the wheel
out
>Lug wrench – in the onboard tool kit
on the underside of the luggage com-
partment lid, refer to page 142.Procedure1. Read and comply with the safety
precautions provided on the previ-
ous page
2. Secure the vehicle to prevent it
from rolling:
Place the wedge against the rear
surface of the front tire on the side
opposite the side being raised. If
the vehicle is parked on a down-
ward slope, place the wedge
securely in front of the tire. If the
wheel must be changed on a sur-
face with a more severe slope, take
additional precautions to secure
the vehicle from rolling
3. Wheels with full wheel covers*:
Reach into the ventilation openings
and pull the cover off
4. Loosen the lug bolts by rotating
half a turn
Changing a wheel
Page 149 of 182
149
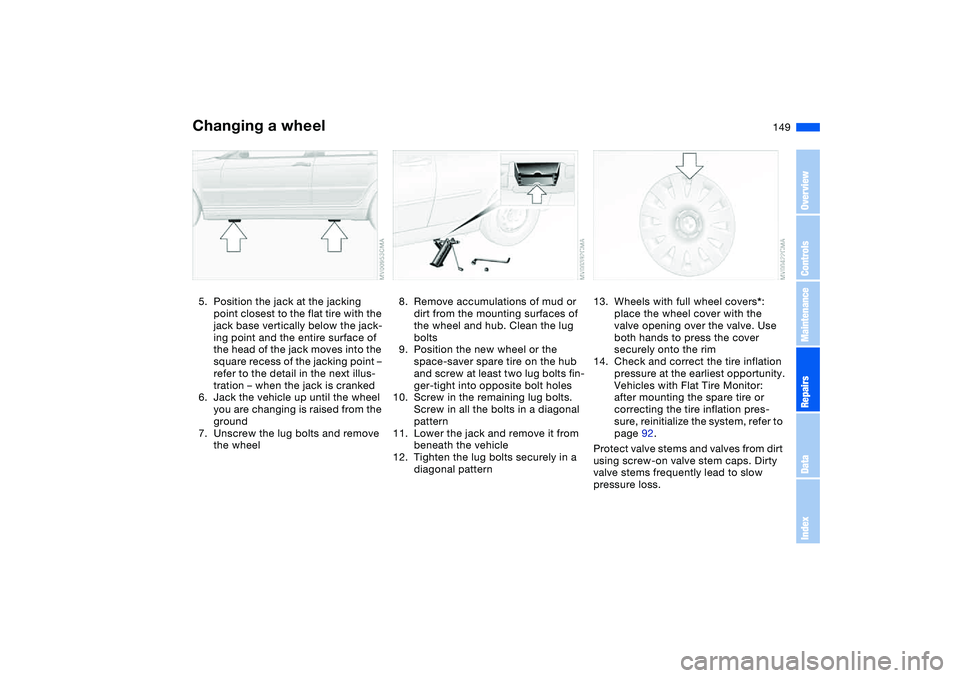
5. Position the jack at the jacking
point closest to the flat tire with the
jack base vertically below the jack-
ing point and the entire surface of
the head of the jack moves into the
square recess of the jacking point –
refer to the detail in the next illus-
tration – when the jack is cranked
6. Jack the vehicle up until the wheel
you are changing is raised from the
ground
7. Unscrew the lug bolts and remove
the wheel
8. Remove accumulations of mud or
dirt from the mounting surfaces of
the wheel and hub. Clean the lug
bolts
9. Position the new wheel or the
space-saver spare tire on the hub
and screw at least two lug bolts fin-
ger-tight into opposite bolt holes
10. Screw in the remaining lug bolts.
Screw in all the bolts in a diagonal
pattern
11. Lower the jack and remove it from
beneath the vehicle
12. Tighten the lug bolts securely in a
diagonal pattern
13. Wheels with full wheel covers*:
place the wheel cover with the
valve opening over the valve. Use
both hands to press the cover
securely onto the rim
14. Check and correct the tire inflation
pressure at the earliest opportunity.
Vehicles with Flat Tire Monitor:
after mounting the spare tire or
correcting the tire inflation pres-
sure, reinitialize the system, refer to
page 92.
Protect valve stems and valves from dirt
using screw-on valve stem caps. Dirty
valve stems frequently lead to slow
pressure loss.
Changing a wheel
OverviewControlsMaintenanceRepairsDataIndex
Page 150 of 182
150
Do not attempt to install the full
wheel cover on the space-saver
spare tire, since this could damage the
cover.<
The vehicle jack is designed for
changing wheels only. Do not
attempt to raise another vehicle model
with it or to raise any other type of load.
To do so could cause accidents and
personal injury.
To ensure continued safety, have the
tightness of the torque bolts checked
with a calibrated lug wrench – torque
specification: 88.5 lb ft/120 Nm – at the
earliest opportunity.<
When storing a wheel in the spare tire
recess, take care to avoid bending the
threaded rod.
If light-alloy wheels other than original
BMW light-alloy wheels have been
mounted, it may be necessary to use
different lug bolts for those wheels.
Replace the defective tire as soon as
possible and have the new wheel/tire
balanced.
Driving with the space-saver
spare tireDrive cautiously. Do not exceed a
speed of 50 mph / 80 km/h.
Be aware that vehicle handling may be
altered. Anticipate, e.g., reduced track-
ing during braking, longer braking dis-
tances, and changed steering charac-
teristics when approaching limit
conditions. These handling characteris-
tics will be even more pronounced if
winter tires are mounted.
Only one space-saver spare tire
may be mounted at one time.
Mount a wheel and tire of the original
size at the earliest possible opportu-
nity.
tions, the size of the spare tire will
differ from that of the remaining tires.
The spare tire is fully functional at all
loads and speeds. However, the spare
tire should be replaced at the earliest
possible opportunity in order to achieve
the original operating conditions.<
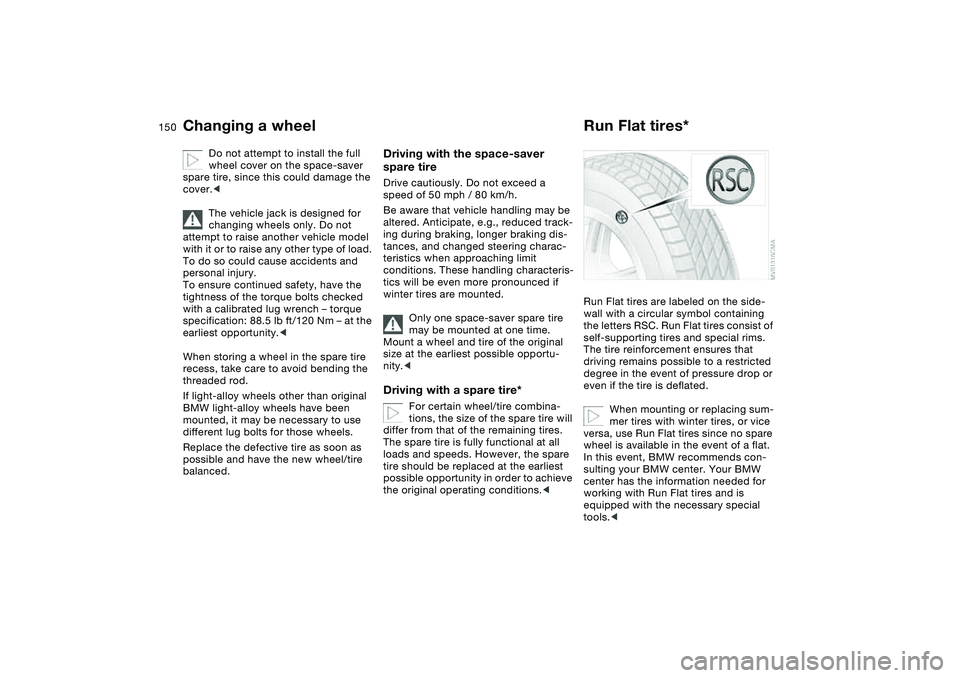
Run Flat tires*Run Flat tires are labeled on the side-
wall with a circular symbol containing
the letters RSC. Run Flat tires consist of
self-supporting tires and special rims.
The tire reinforcement ensures that
driving remains possible to a restricted
degree in the event of pressure drop or
even if the tire is deflated.
When mounting or replacing sum-
mer tires with winter tires, or vice
versa, use Run Flat tires since no spare
wheel is available in the event of a flat.
In this event, BMW recommends con-
sulting your BMW center. Your BMW
center has the information needed for
working with Run Flat tires and is
equipped with the necessary special
tools.<
Changing a wheel
Page 174 of 182

Everything from A to ZReverse
automatic transmission
with Steptronic 73
SMG gearbox 70
Reverse gear
manual transmission 68
Roller sun blind 106
Roof load capacity 162
Roof-mounted luggage
rack 117
Run Flat tires 126, 150
S
Safe seating position 47
Safety belt height adjust-
ment 52
Safety belts 51
sitting safely 47
warning lamp 18
Safety feature
glass sunroof 45
Safety precautions 5
Safety switch for rear win-
dows 44
Safety systems, refer to
Antilock Brake
System 121
Dynamic Stability Control
(DSC) 87
Screwdriver, refer to
Onboard tool kit 142Seat adjustment 48
BMW sports seat 49
mechanical 48
power 50
Seat belt tensioner, refer to
Safety belts 51
Seat heating 54
Seat memory, refer to Seat
and mirror memory 53
Seat positions, storing 53
Seats 48
Securing cargo 116
Securing the vehicle
from inside 37
from outside 33, 36
Selector lever
automatic transmission 73
sequential manual gear-
box SMG 69
Selector lever lock, refer to
Shiftlock 69, 73
Selector lever positions
automatic transmission 73
sequential manual gear-
box SMG 69
Sequential manual gearbox
SMG 69
indicator lamp 19
Service and Warranty Infor-
mation Booklet 136
SERVICE ENGINE SOON
warning lamp 19Service interval display
82, 136
Shift paddles 70
Shifting gears
automatic transmission
with Steptronic 73
sequential manual gear-
box SMG 70
Shiftlock 69
Shiftlock, refer to Range
selection 73
Side airbags 57
Side turn signal indicators
bulb replacement 145
Sitting safely
with airbags 47
with safety belts 47
Size 161
Ski bag 113
Sliding/tilt sunroof, refer to
Electric glass sunroof 44
SMG sequential manual
gearbox 69
indicator lamp 19
Smokers' package, refer to
Ashtray 110
Snow chains 128
Socket, refer to Cigarette
lighter socket 110
SOS, refer to Emergency
call 152Space-saver spare tire
changing a wheel 147
Spare key 32
Spare tire 147
Spare wheel 150
Speed gauge, refer to
Speedometer 16
Speedometer 16
SPORT button 72
Sport program
automatic transmission
with Steptronic 74
Sports seat 49
Stability control, refer to
Dynamic Stability Control
(DSC) 87
Standing lamps 95
Starting difficulties
jump-starting 153
temperature 65
Starting help DSC 87
Starting the engine 65
Starting, refer to Starting the
engine 65
Status of the Owner's Man-
ual 5
Steering wheel lock 65
Steering wheel, adjusting 55
Steptronic, refer to Manual
operation 74
Storage compartments 108
Storage nets 108