navigation system BMW 320I XDRIVE 2014 User Guide
[x] Cancel search | Manufacturer: BMW, Model Year: 2014, Model line: 320I XDRIVE, Model: BMW 320I XDRIVE 2014Pages: 242, PDF Size: 7.25 MB
Page 83 of 242
▷When signs are concealed by objects.▷When driving very close to the vehicle in
front of you.▷When driving toward bright lights.▷When the windshield behind the interior
rearview mirror is fogged over, dirty or cov‐
ered by a sticker, etc.▷In the event of incorrect detection by the
camera.▷If the speed limits stored in the navigation
system are incorrect.▷In areas not covered by the navigation sys‐
tem.▷When roads differ from the navigation,
such as due to changes in the road net‐
work.▷When passing buses or trucks with a
speed sticker.▷If the traffic signs are non-conforming.▷During calibration of the camera immedi‐
ately after vehicle shipment.
Selection lists in the
instrument cluster
The concept Depending on the equipment version, the fol‐
lowing can be displayed or operated using the
buttons and the thumbwheel on the steering
wheel and the displays in the instrument clus‐
ter and the Head-up Display:
▷Current audio source.▷Redial on telephone.▷Activation of the voice activation system.
In addition, programs of the Driving Dynamics
Control are displayed.
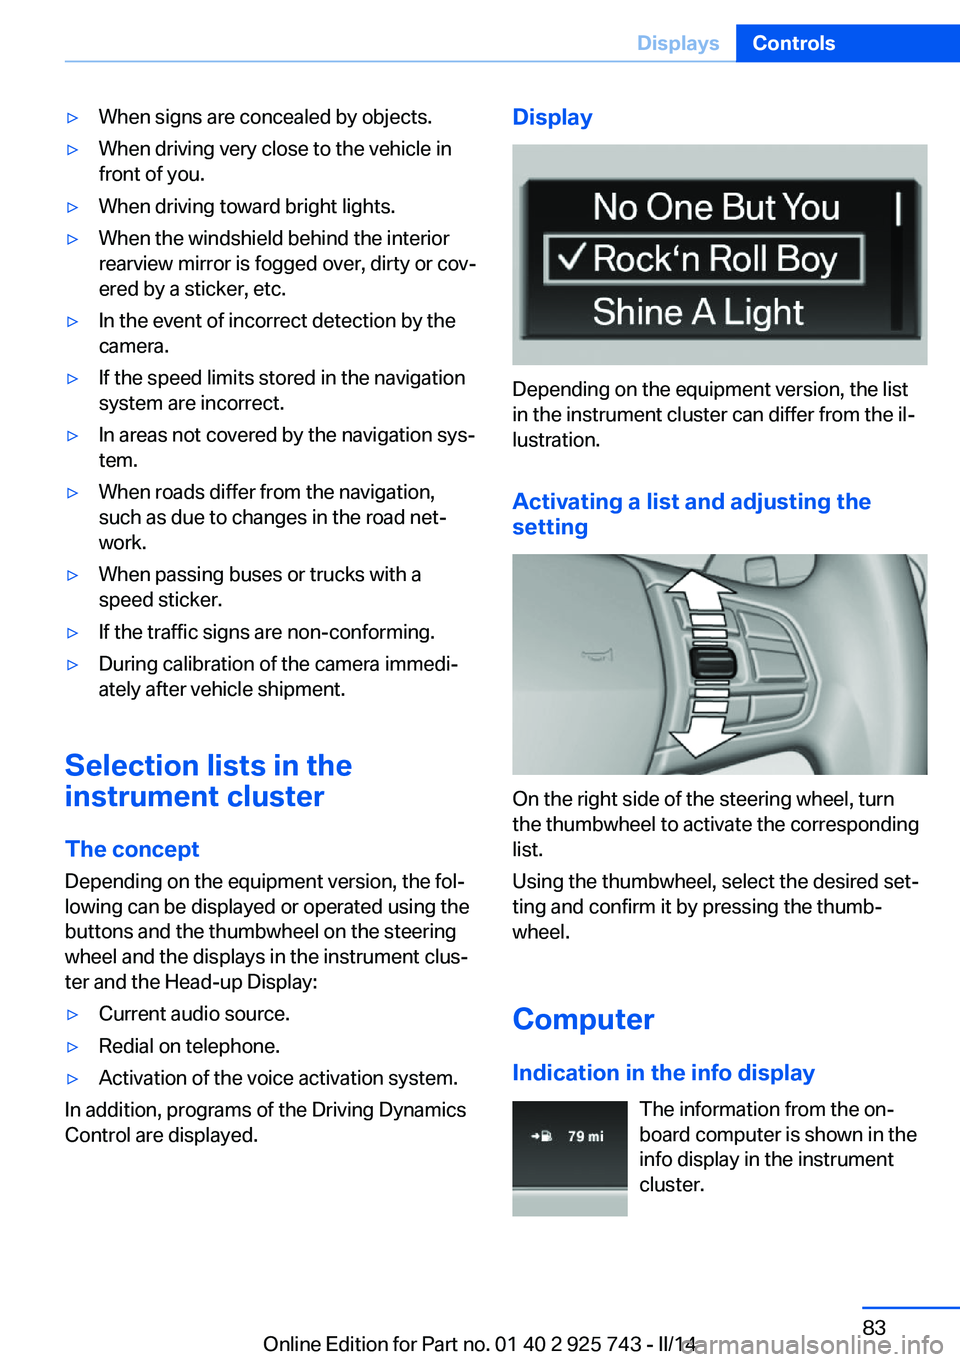
Display
Depending on the equipment version, the list
in the instrument cluster can differ from the il‐
lustration.
Activating a list and adjusting the
setting
On the right side of the steering wheel, turn
the thumbwheel to activate the corresponding
list.
Using the thumbwheel, select the desired set‐
ting and confirm it by pressing the thumb‐
wheel.
Computer
Indication in the info display The information from the on‐
board computer is shown in the
info display in the instrument
cluster.
Seite 83DisplaysControls83
Online Edition for Part no. 01 40 2 925 743 - II/14
Page 84 of 242
Calling up information on the info
display
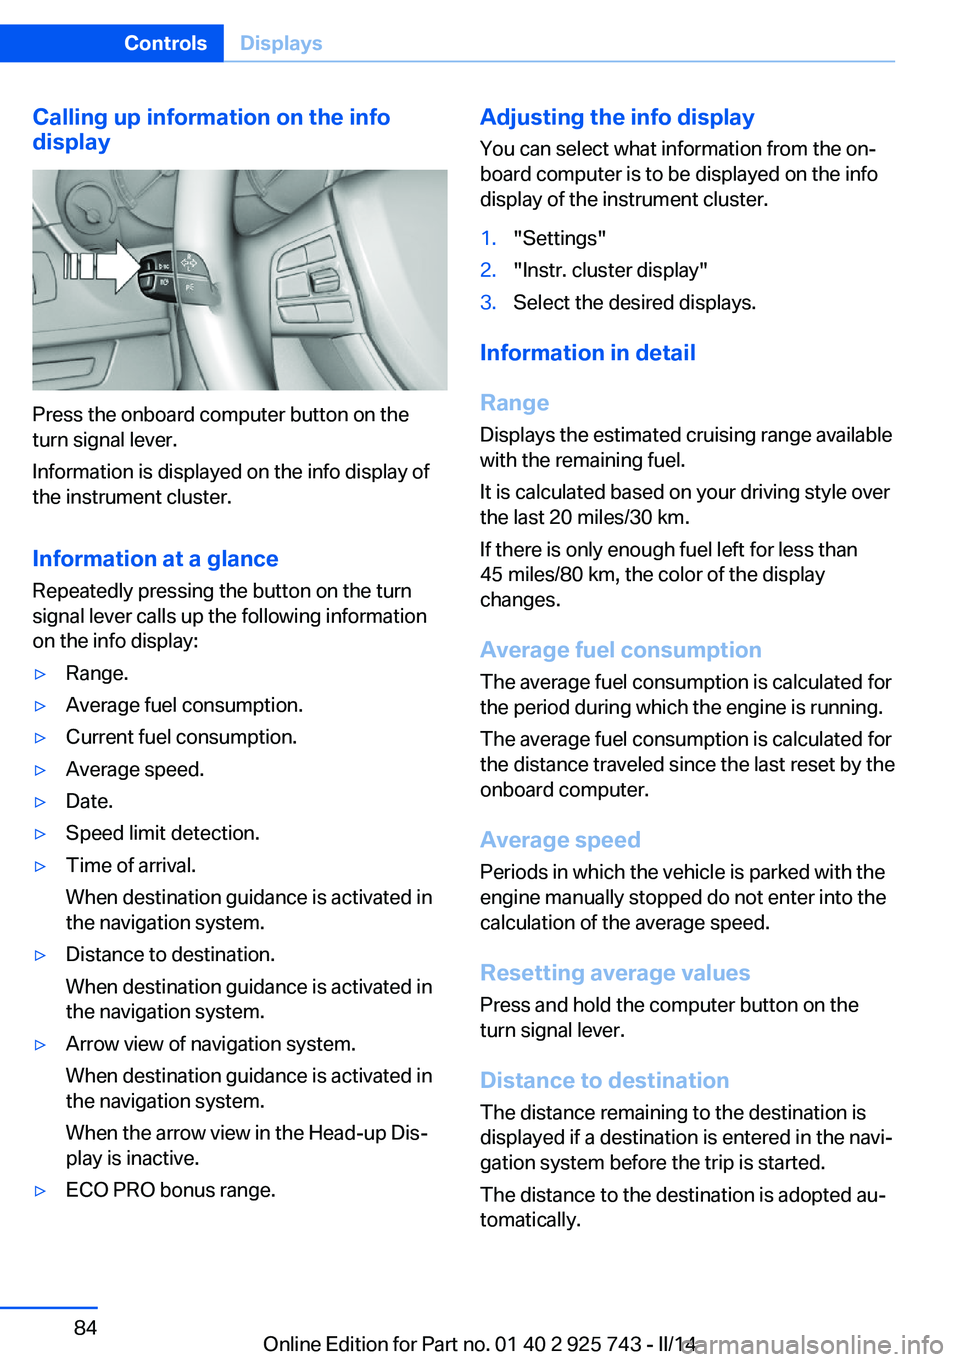
Press the onboard computer button on the
turn signal lever.
Information is displayed on the info display of
the instrument cluster.
Information at a glance
Repeatedly pressing the button on the turn
signal lever calls up the following information
on the info display:
▷Range.▷Average fuel consumption.▷Current fuel consumption.▷Average speed.▷Date.▷Speed limit detection.▷Time of arrival.
When destination guidance is activated in
the navigation system.▷Distance to destination.
When destination guidance is activated in
the navigation system.▷Arrow view of navigation system.
When destination guidance is activated in
the navigation system.
When the arrow view in the Head-up Dis‐
play is inactive.▷ECO PRO bonus range.Adjusting the info display
You can select what information from the on‐
board computer is to be displayed on the info
display of the instrument cluster.1."Settings"2."Instr. cluster display"3.Select the desired displays.
Information in detail
Range
Displays the estimated cruising range available
with the remaining fuel.
It is calculated based on your driving style over
the last 20 miles/30 km.
If there is only enough fuel left for less than
45 miles/80 km, the color of the display
changes.
Average fuel consumption
The average fuel consumption is calculated for
the period during which the engine is running.
The average fuel consumption is calculated for
the distance traveled since the last reset by the
onboard computer.
Average speed
Periods in which the vehicle is parked with the
engine manually stopped do not enter into the
calculation of the average speed.
Resetting average values Press and hold the computer button on the
turn signal lever.
Distance to destination The distance remaining to the destination is
displayed if a destination is entered in the navi‐
gation system before the trip is started.
The distance to the destination is adopted au‐
tomatically.
Seite 84ControlsDisplays84
Online Edition for Part no. 01 40 2 925 743 - II/14
Page 85 of 242
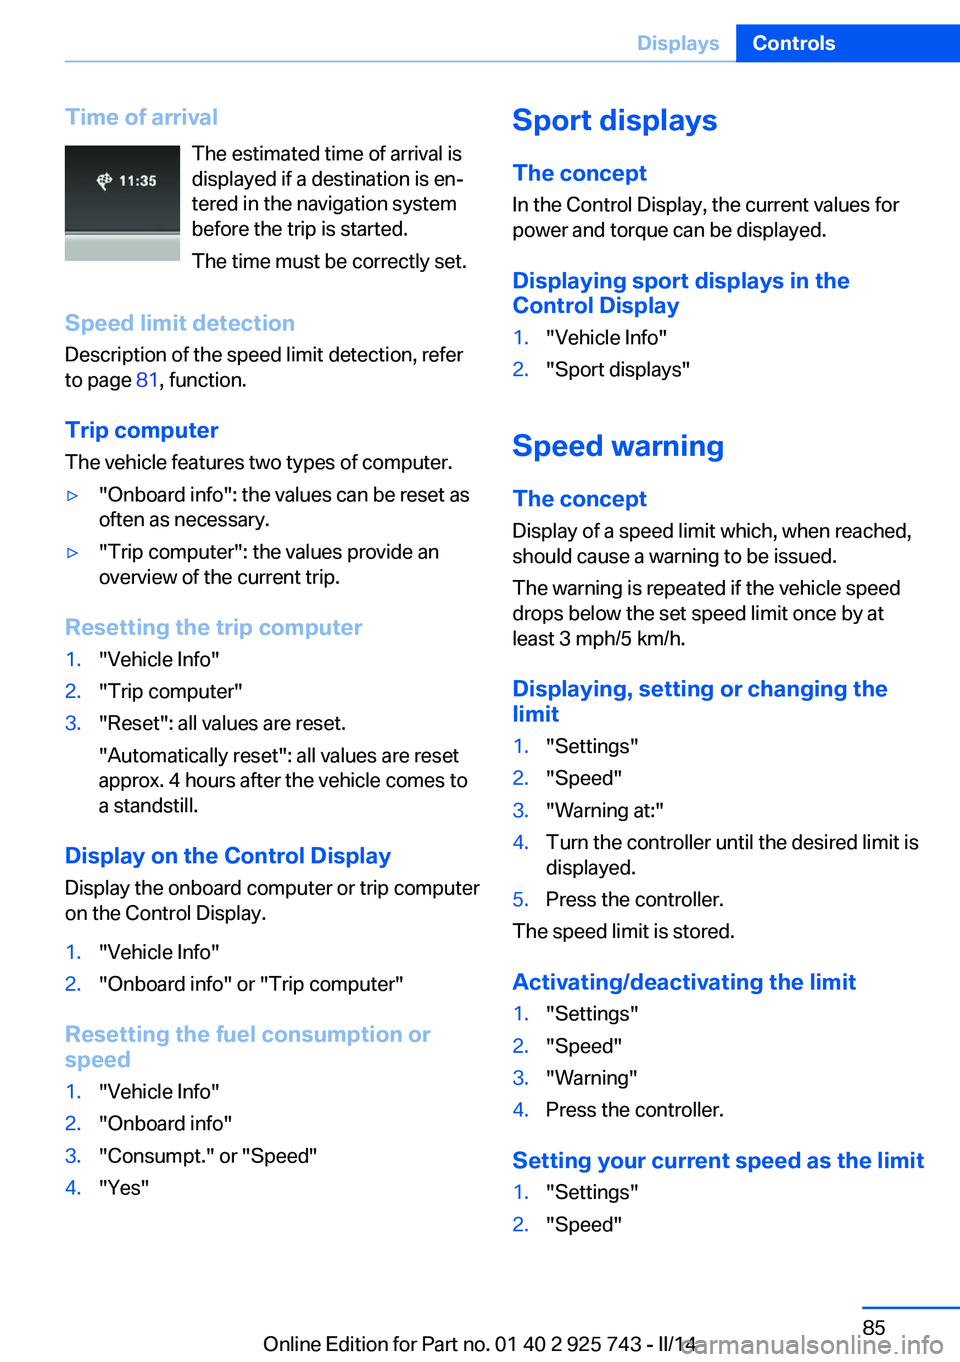
Time of arrivalThe estimated time of arrival is
displayed if a destination is en‐
tered in the navigation system
before the trip is started.
The time must be correctly set.
Speed limit detection
Description of the speed limit detection, refer
to page 81, function.
Trip computer
The vehicle features two types of computer.▷"Onboard info": the values can be reset as
often as necessary.▷"Trip computer": the values provide an
overview of the current trip.
Resetting the trip computer
1."Vehicle Info"2."Trip computer"3."Reset": all values are reset.
"Automatically reset": all values are reset
approx. 4 hours after the vehicle comes to
a standstill.
Display on the Control Display
Display the onboard computer or trip computer
on the Control Display.
1."Vehicle Info"2."Onboard info" or "Trip computer"
Resetting the fuel consumption or
speed
1."Vehicle Info"2."Onboard info"3."Consumpt." or "Speed"4."Yes"Sport displays
The concept
In the Control Display, the current values for
power and torque can be displayed.
Displaying sport displays in the
Control Display1."Vehicle Info"2."Sport displays"
Speed warning
The concept Display of a speed limit which, when reached,
should cause a warning to be issued.
The warning is repeated if the vehicle speed
drops below the set speed limit once by at
least 3 mph/5 km/h.
Displaying, setting or changing the
limit
1."Settings"2."Speed"3."Warning at:"4.Turn the controller until the desired limit is
displayed.5.Press the controller.
The speed limit is stored.
Activating/deactivating the limit
1."Settings"2."Speed"3."Warning"4.Press the controller.
Setting your current speed as the limit
1."Settings"2."Speed"Seite 85DisplaysControls85
Online Edition for Part no. 01 40 2 925 743 - II/14
Page 87 of 242
Setting the voice dialog
Voice dialog for the voice activation system,
refer to page 25.
Units of measure
Setting the units of measure To set the units for fuel consumption, route/
distance and temperature:1."Settings"2."Language/Units"3.Select the desired menu item.4.Select the desired unit.
The setting is stored for the remote control
currently in use.
Brightness
Setting the brightness
To set the brightness of the Control Display:
1."Settings"2."Control display"3."Brightness"4.Turn the controller until the desired bright‐
ness is set.5.Press the controller.
The setting is stored for the remote control
currently in use.
Depending on the light conditions, the bright‐
ness control may not be clearly visible.
Assist system information
Display on the Control Display Information on the Assist system can be dis‐
played by activating Assist on the Control Dis‐
play.
1."Settings"2."Control display"3."Driver assistance info"Head-up Display
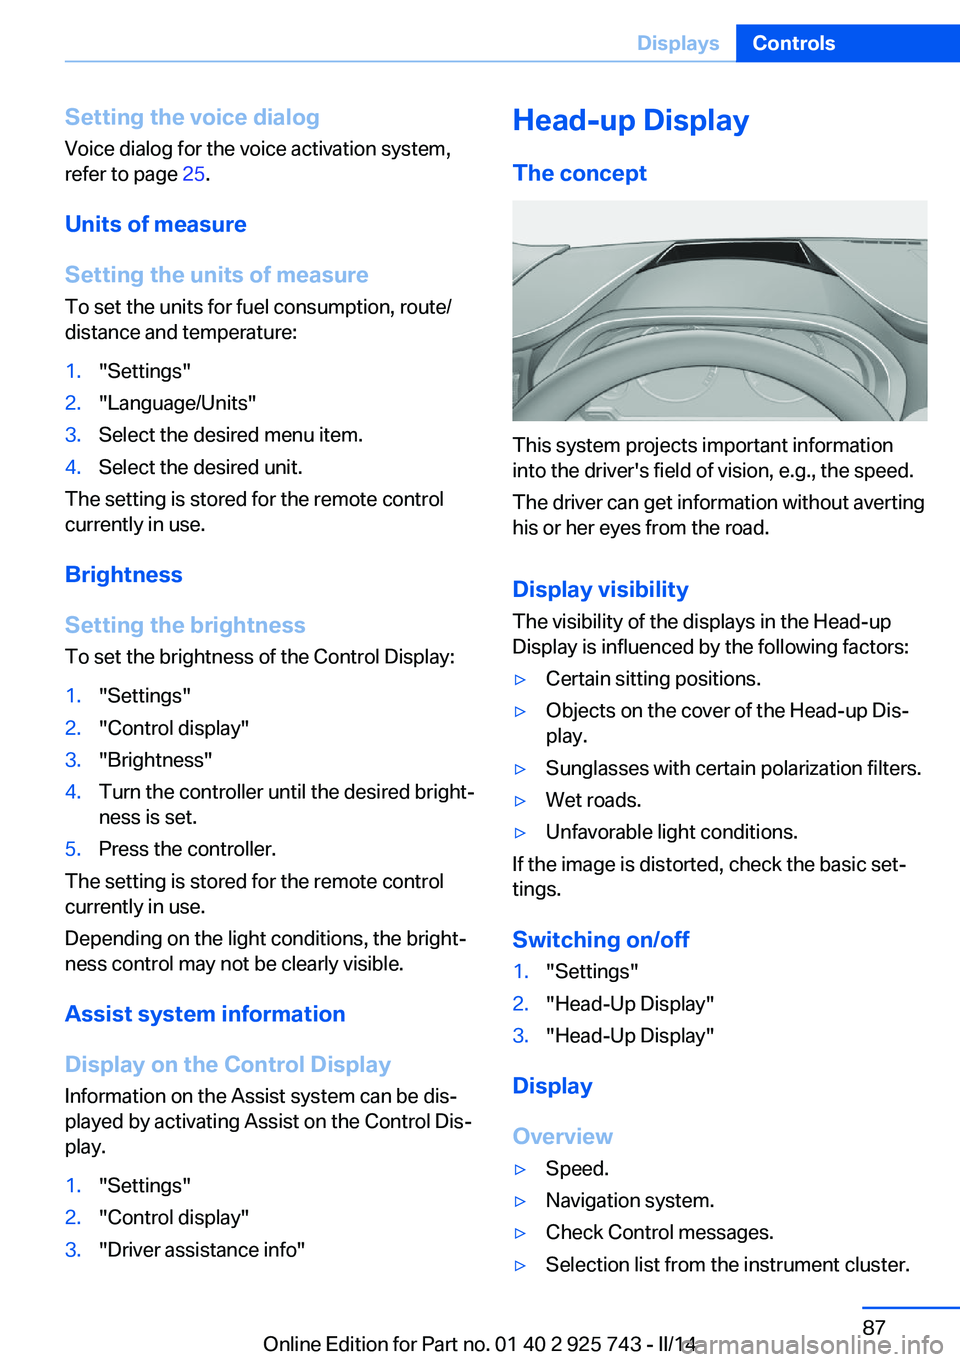
The concept
This system projects important information
into the driver's field of vision, e.g., the speed.
The driver can get information without averting
his or her eyes from the road.
Display visibility The visibility of the displays in the Head-up
Display is influenced by the following factors:
▷Certain sitting positions.▷Objects on the cover of the Head-up Dis‐
play.▷Sunglasses with certain polarization filters.▷Wet roads.▷Unfavorable light conditions.
If the image is distorted, check the basic set‐
tings.
Switching on/off
1."Settings"2."Head-Up Display"3."Head-Up Display"
Display
Overview
▷Speed.▷Navigation system.▷Check Control messages.▷Selection list from the instrument cluster.Seite 87DisplaysControls87
Online Edition for Part no. 01 40 2 925 743 - II/14
Page 95 of 242
Protective action
Airbags are not triggered in every impact situa‐
tion, e.g., in less severe accidents or rear-end
collisions.
Information on how to ensure the optimal
protective effect of the airbags▷Keep at a distance from the airbags.▷Always grasp the steering wheel on the
steering wheel rim, holding your hands at
the 3 o'clock and 9 o'clock positions, to
keep the danger of injury to your hands or
arms as low as possible if the airbag is trig‐
gered.▷There should be no people, animals, or ob‐
jects between an airbag and a person.▷Do not use the cover of the front airbag on
the front passenger side as a storage area.▷Keep the dashboard and window on the
front passenger side clear, i.e. do not cover
with adhesive labels or coverings, and do
not attach holders such as for navigation
instruments and mobile phones.▷Make sure that the front passenger is sit‐
ting correctly, i.e., keeps his or her feet and
legs in the footwell; otherwise, leg injuries
can occur if the front airbag is triggered.▷Do not place slip covers, seat cushions or
other objects on the front passenger seat
that are not approved specifically for seats
with integrated side airbags.▷Do not hang pieces of clothing, such as
jackets, over the backrests.▷Make sure that occupants keep their heads
away from the side airbag and do not rest
against the head airbag; otherwise, injuries
can occur if the airbags are triggered.▷Do not remove the airbag restraint system.▷Do not remove the steering wheel.▷Do not apply adhesive materials to the air‐
bag cover panels, cover them or modify
them in any way.▷Never modify either the individual compo‐
nents or the wiring in the airbag system.
This also applies to steering wheel covers,
the dashboard, the seats, the roof pillars
and the sides of the headliner.◀
Even when all instructions are followed closely,
injury from contact with the airbags cannot be
ruled out in certain situations.
The ignition and inflation noise may lead to
short-term and, in most cases, temporary
hearing impairment in sensitive individuals.
In the case of a malfunction, deactivation
and after triggering of the airbags
Do not touch the individual components imme‐
diately after the system has been triggered;
otherwise, there is the danger of burns.
Only have the airbags checked, repaired or dis‐
mantled and the airbag generator scrapped by
the service center or a workshop that has the
necessary authorization for handling explo‐
sives.
Non-professional attempts to service the sys‐
tem could lead to failure in an emergency or
undesired triggering of the airbag, either of
which could result in injury.◀
Warnings and information on the airbags are
also found on the sun visors.
Functional readiness of the airbag
system
When the ignition is switched on, the
warning lamp in the instrument cluster
lights up briefly and thereby indicates
the operational readiness of the entire airbag
system and the belt tensioner.
Airbag system malfunctioning
▷Warning lamp does not come on when the
ignition is turned on.▷The warning lamp lights up continuously.Seite 95SafetyControls95
Online Edition for Part no. 01 40 2 925 743 - II/14
Page 213 of 242
After a battery replacement, have the battery
registered on the vehicle by your service cen‐
ter to ensure that all comfort functions are fully
available and that any Check Control mes‐
sages of these comfort functions are no longer
displayed.
Charging the battery
Note Do not connect charging devices to the12 volt socket in the vehicle
Do not connect battery chargers to the fac‐
tory-installed 12 volt sockets in the vehicle as
this may damage the vehicle battery due to an
increased power consumption.◀
General information Make sure that the battery is always suffi‐
ciently charged to guarantee that the battery
remains usable for its full service life.
The battery may need to be charged in the fol‐
lowing cases:▷When making frequent short-distance
drives.▷If the vehicle is not used for prolonged pe‐
riods, longer than a month.
Starting aid terminals
In the vehicle, only charge the battery via the
starting aid terminals, refer to page 217, in the
engine compartment with the engine off.
Power failure After a temporary power loss, some equipment
needs to be reinitialized.
Individual settings need to be reprogrammed:
▷Seat and mirror memory: store the posi‐
tions again.▷Time: update.▷Date: update.▷Navigation system: wait for the operability
of the navigation.
Disposing of old batteries
Have old batteries disposed of by your
service center or bring them to a recy‐
cling center.
Maintain the battery in an upright position for
transport and storage. Secure the battery so
that it does not tip over during transport.
Fuses Hints Replacing fuses
Never attempt to repair a blown fuse and
do not replace a defective fuse with a substi‐
tute of another color or amperage rating; this
could lead to a circuit overload, ultimately re‐
sulting in a fire in the vehicle.◀
Plastic tweezers and information on the fuse
types and locations are stored in the fuse box
in the cargo area.
In the engine compartment
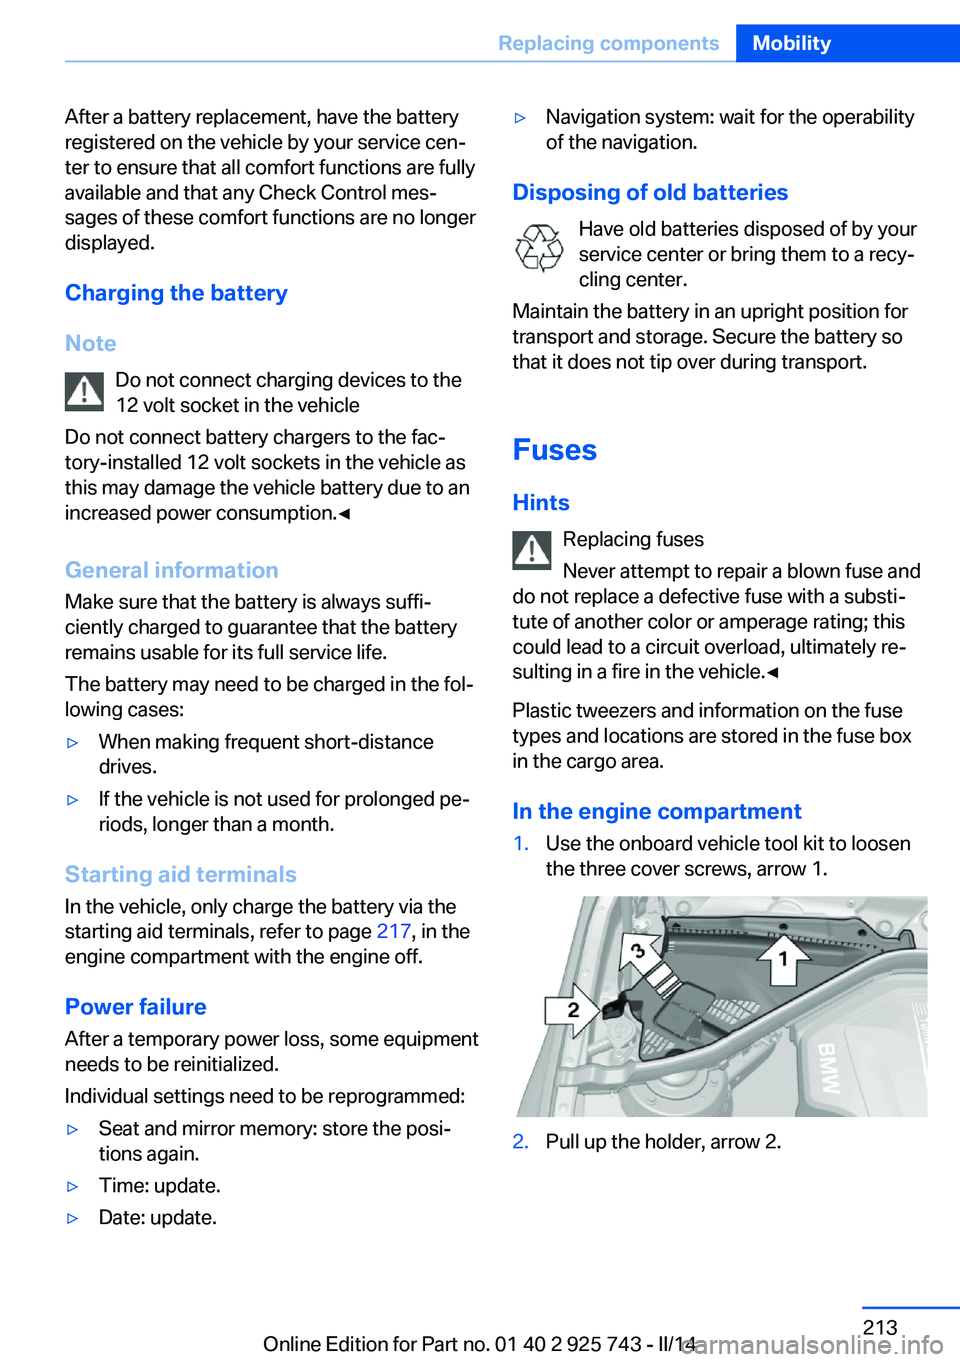
1.Use the onboard vehicle tool kit to loosen
the three cover screws, arrow 1.2.Pull up the holder, arrow 2.Seite 213Replacing componentsMobility213
Online Edition for Part no. 01 40 2 925 743 - II/14
Page 232 of 242
Everything from A to Z
IndexA ABS, Antilock Brake Sys‐ tem 114
ACC, Active Cruise Control with Stop & Go 119
Acceleration Assistant, refer to Launch Control 72
Accessories and parts 7
Activated-charcoal filter 146
Active Blind Spot Detec‐ tion 111
Active Cruise Control with Stop & Go, ACC 119
Adaptive brake lights, refer to Brake force display 113
Adaptive Light Control 90
Additives, oil 199
Adjustments, seats/head re‐ straints 47
After washing vehicle 222
Airbags 94
Airbags, indicator/warning light 95
Air circulation, refer to Recir‐ culated-air mode 142, 145
Air, dehumidifying, refer to Cooling function 142, 145
Air distribution, manual 142, 146
Air flow, air conditioner 142
Air flow, automatic climate control 146
Air pressure, tires 185
Air vents, refer to Ventila‐ tion 146
Alarm system 41
Alarm, unintentional 43
All around the center con‐ sole 14
All around the headliner 15 All around the steering
wheel 12
All-season tires, refer to Win‐ ter tires 194
All-wheel-drive 115
Alternating-code hand-held transmitter 149
Alternative oil types 200
Antifreeze, washer fluid 68
Antilock Brake System, ABS 114
Anti-slip control, refer to DSC 114
Approved axle load 228
Approved engine oils 200
Arrival time 85
Ash tray 152
Assistance, Roadside Assis‐ tance 216
Assistance when driving off 118
Assist system information, on Control Display 87
AUTO intensity 145
Automatic car wash 221
Automatic climate con‐ trol 141
Automatic climate control with enhanced features 144
Automatic Cruise Control with Stop & Go 119
Automatic Curb Monitor 55
Automatic deactivation, front passenger airbags 96
Automatic headlamp con‐ trol 90
Automatic locking 41
Automatic recirculated-air control 145
Automatic transmission with Steptronic 69 AUTO program, automatic cli‐
mate control 144
AUTO program, climate con‐ trol 142
AUTO program, intensity 145
Auto Start/Stop function 63
Average fuel consumption 84
Average speed 84
Axle loads, weights 228
B Backrest curvature, refer to Lumbar support 49
Backrest, width 49
Band-aids, refer to First aid kit 216
Bar for tow-starting/ towing 219
Battery replacement, vehicle battery 212
Battery replacement, vehicle remote control 33
Battery, vehicle 212
Belts, safety belts 50
Beverage holder, cu‐ pholder 158
Blinds, sun protection 44
BMW Advanced Diesel 181
BMW Assist, see user's manual for Navigation, En‐
tertainment and Communi‐
cation
BMW Homepage 6
BMW Internet page 6
BMW maintenance sys‐ tem 202
Bonus range, ECO PRO 170
Bottle holder, refer to Cu‐ pholder 158
Brake assistant 114 Seite 232ReferenceEverything from A to Z232
Online Edition for Part no. 01 40 2 925 743 - II/14
Page 233 of 242
Brake discs, breaking in 162
Brake force display 113
Brake lamps, brake force dis‐ play 113
Brake lights, adaptive 113
Brake pads, breaking in 162
Braking, hints 163
Breakdown assis‐ tance 215, 216
Breaking in 162
Brightness of Control Dis‐ play 87
Bulb replacement 204
Bulb replacement, front 205
Bulb replacement, halogen headlamps 205
Bulb replacement, rear 210
Bulb replacement, xenon headlamps 208
Bulbs and lamps 204
Button, RES 122
Button, Start/Stop 61
Bypassing, refer to Jump- starting 216
C
California Proposition 65 Warning 7
Camera, care 224
Camera, rearview cam‐ era 131
Camera, Side View 133
Camera, Top View 135
Can holder, refer to Cu‐ pholder 158
Car battery 212
Car care products 222
Care, displays 224
Care, vehicle 222
Cargo 165
Cargo area, enlarging 154
Cargo area, storage compart‐ ments 159
Cargo, securing 166 Cargo straps, securing
cargo 166
Car key, refer to Remote con‐ trol 32
Carpet, care 224
Car wash 221
Catalytic converter, refer to Hot exhaust system 163
CBS Condition Based Serv‐ ice 202
CD/Multimedia, see user's manual for Navigation, En‐
tertainment and Communi‐
cation
Center armrest 157
Center console 14
Central locking system 37
Central screen, refer to Con‐ trol Display 16
Changes, technical, refer to Safety 7
Changing parts 204
Changing wheels 212
Changing wheels/tires 193
Check Control 76
Checking the oil level elec‐ tronically 198
Children, seating position 57
Children, transporting safely 57
Child restraint fixing sys‐ tem 57
Child restraint fixing system LATCH 58
Child restraint fixing systems, mounting 57
Child safety locks 60
Child seat, mounting 57
Child seats 57
Chrome parts, care 223
Cigarette lighter 152
Cleaning, displays 224
Climate control 141, 144
Clock 79
Closing/opening via door lock 37 Closing/opening with remote
control 35
Clothes hooks 158
Coasting 172
Coasting with engine decou‐ pled, coasting 172
Coasting with idling en‐ gine 172
Cockpit 12
Cold starting, refer to Starting the engine 62
Collision warning with braking function 106
Collision warning with City Braking function 103
Combination switch, refer to Turn signals 65
Combination switch, refer to Wiper system 66
Comfort Access 39
COMFORT program, Dy‐ namic Driving Control 117
Compartments in the doors 157
Compass 150
Computer 83
Condensation on win‐ dows 146
Condensation under the vehi‐ cle 164
Condition Based Service CBS 202
Configuring drive pro‐ gram 117
Confirmation signal 41
ConnectedDrive, see user's manual for Navigation, En‐
tertainment and Communi‐
cation
ConnectedDrive Services
Connecting electrical devi‐ ces 152
Control Display 16
Control Display, settings 86
Controller 16, 17 Seite 233Everything from A to ZReference233
Online Edition for Part no. 01 40 2 925 743 - II/14
Page 237 of 242
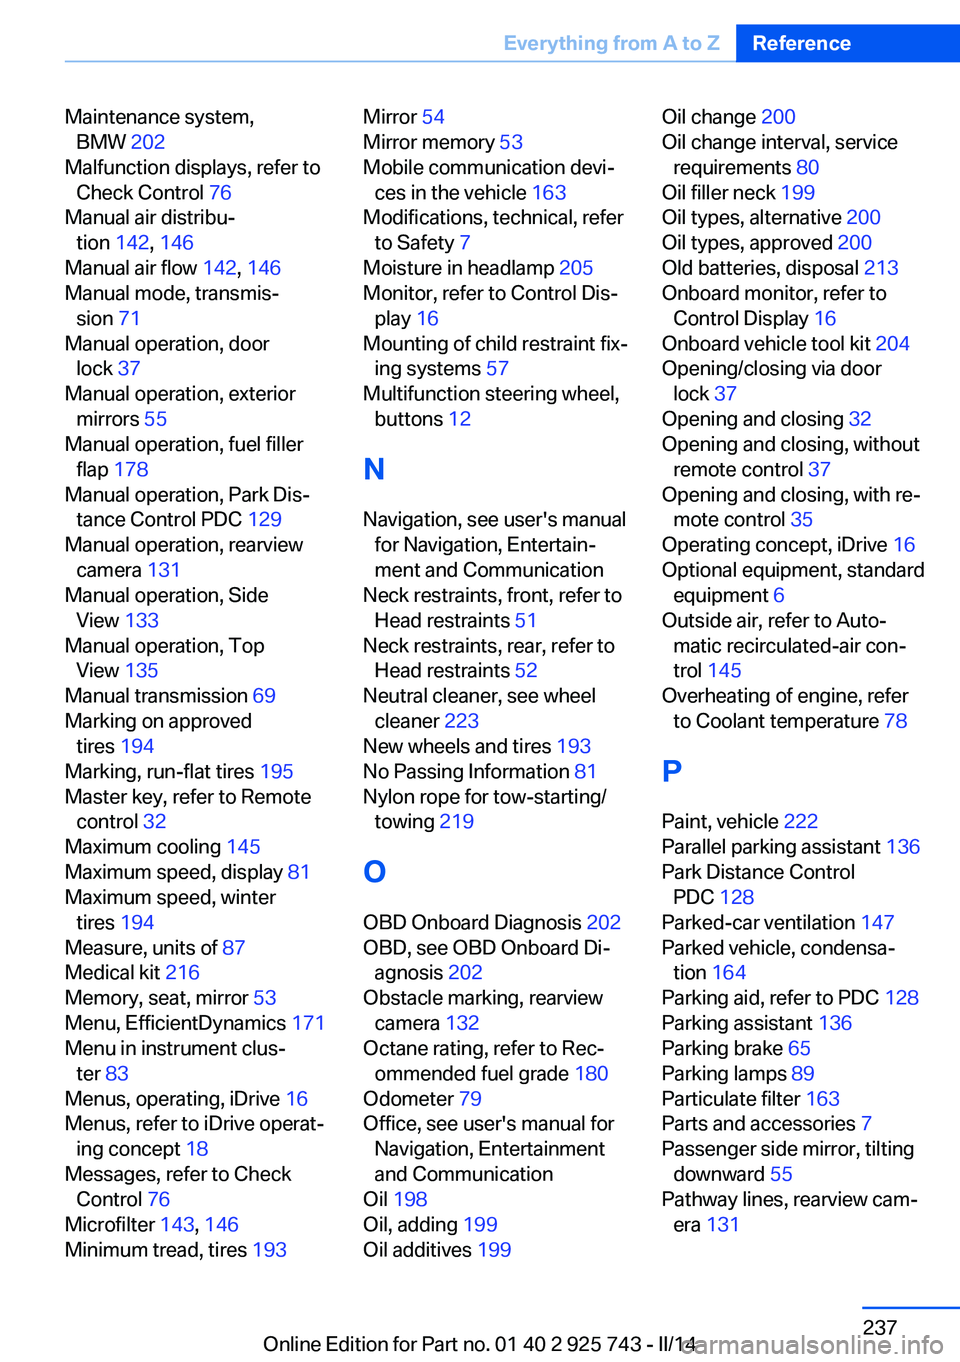
Maintenance system,BMW 202
Malfunction displays, refer to Check Control 76
Manual air distribu‐ tion 142, 146
Manual air flow 142, 146
Manual mode, transmis‐ sion 71
Manual operation, door lock 37
Manual operation, exterior mirrors 55
Manual operation, fuel filler flap 178
Manual operation, Park Dis‐ tance Control PDC 129
Manual operation, rearview camera 131
Manual operation, Side View 133
Manual operation, Top View 135
Manual transmission 69
Marking on approved tires 194
Marking, run-flat tires 195
Master key, refer to Remote control 32
Maximum cooling 145
Maximum speed, display 81
Maximum speed, winter tires 194
Measure, units of 87
Medical kit 216
Memory, seat, mirror 53
Menu, EfficientDynamics 171
Menu in instrument clus‐ ter 83
Menus, operating, iDrive 16
Menus, refer to iDrive operat‐ ing concept 18
Messages, refer to Check Control 76
Microfilter 143, 146
Minimum tread, tires 193 Mirror 54
Mirror memory 53
Mobile communication devi‐ ces in the vehicle 163
Modifications, technical, refer to Safety 7
Moisture in headlamp 205
Monitor, refer to Control Dis‐ play 16
Mounting of child restraint fix‐ ing systems 57
Multifunction steering wheel, buttons 12
N Navigation, see user's manual for Navigation, Entertain‐
ment and Communication
Neck restraints, front, refer to Head restraints 51
Neck restraints, rear, refer to Head restraints 52
Neutral cleaner, see wheel cleaner 223
New wheels and tires 193
No Passing Information 81
Nylon rope for tow-starting/ towing 219
O OBD Onboard Diagnosis 202
OBD, see OBD Onboard Di‐ agnosis 202
Obstacle marking, rearview camera 132
Octane rating, refer to Rec‐ ommended fuel grade 180
Odometer 79
Office, see user's manual for Navigation, Entertainment
and Communication
Oil 198
Oil, adding 199
Oil additives 199 Oil change 200
Oil change interval, service requirements 80
Oil filler neck 199
Oil types, alternative 200
Oil types, approved 200
Old batteries, disposal 213
Onboard monitor, refer to Control Display 16
Onboard vehicle tool kit 204
Opening/closing via door lock 37
Opening and closing 32
Opening and closing, without remote control 37
Opening and closing, with re‐ mote control 35
Operating concept, iDrive 16
Optional equipment, standard equipment 6
Outside air, refer to Auto‐ matic recirculated-air con‐
trol 145
Overheating of engine, refer to Coolant temperature 78
P Paint, vehicle 222
Parallel parking assistant 136
Park Distance Control PDC 128
Parked-car ventilation 147
Parked vehicle, condensa‐ tion 164
Parking aid, refer to PDC 128
Parking assistant 136
Parking brake 65
Parking lamps 89
Particulate filter 163
Parts and accessories 7
Passenger side mirror, tilting downward 55
Pathway lines, rearview cam‐ era 131 Seite 237Everything from A to ZReference237
Online Edition for Part no. 01 40 2 925 743 - II/14
Page 238 of 242
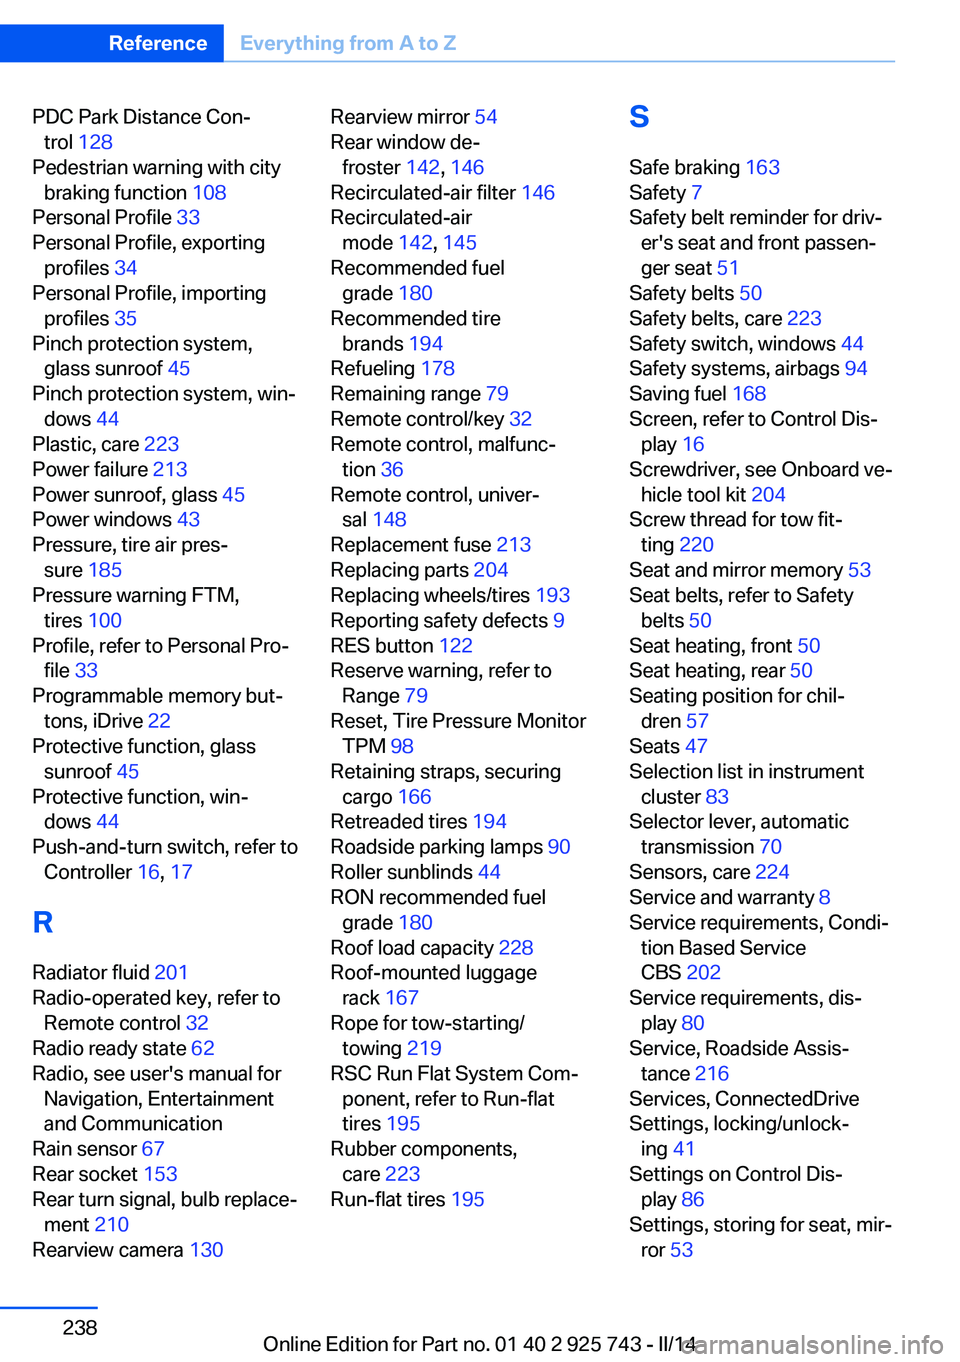
PDC Park Distance Con‐trol 128
Pedestrian warning with city braking function 108
Personal Profile 33
Personal Profile, exporting profiles 34
Personal Profile, importing profiles 35
Pinch protection system, glass sunroof 45
Pinch protection system, win‐ dows 44
Plastic, care 223
Power failure 213
Power sunroof, glass 45
Power windows 43
Pressure, tire air pres‐ sure 185
Pressure warning FTM, tires 100
Profile, refer to Personal Pro‐ file 33
Programmable memory but‐ tons, iDrive 22
Protective function, glass sunroof 45
Protective function, win‐ dows 44
Push-and-turn switch, refer to Controller 16, 17
R Radiator fluid 201
Radio-operated key, refer to Remote control 32
Radio ready state 62
Radio, see user's manual for Navigation, Entertainment
and Communication
Rain sensor 67
Rear socket 153
Rear turn signal, bulb replace‐ ment 210
Rearview camera 130 Rearview mirror 54
Rear window de‐ froster 142, 146
Recirculated-air filter 146
Recirculated-air mode 142, 145
Recommended fuel grade 180
Recommended tire brands 194
Refueling 178
Remaining range 79
Remote control/key 32
Remote control, malfunc‐ tion 36
Remote control, univer‐ sal 148
Replacement fuse 213
Replacing parts 204
Replacing wheels/tires 193
Reporting safety defects 9
RES button 122
Reserve warning, refer to Range 79
Reset, Tire Pressure Monitor TPM 98
Retaining straps, securing cargo 166
Retreaded tires 194
Roadside parking lamps 90
Roller sunblinds 44
RON recommended fuel grade 180
Roof load capacity 228
Roof-mounted luggage rack 167
Rope for tow-starting/ towing 219
RSC Run Flat System Com‐ ponent, refer to Run-flat
tires 195
Rubber components, care 223
Run-flat tires 195 S
Safe braking 163
Safety 7
Safety belt reminder for driv‐ er's seat and front passen‐
ger seat 51
Safety belts 50
Safety belts, care 223
Safety switch, windows 44
Safety systems, airbags 94
Saving fuel 168
Screen, refer to Control Dis‐ play 16
Screwdriver, see Onboard ve‐ hicle tool kit 204
Screw thread for tow fit‐ ting 220
Seat and mirror memory 53
Seat belts, refer to Safety belts 50
Seat heating, front 50
Seat heating, rear 50
Seating position for chil‐ dren 57
Seats 47
Selection list in instrument cluster 83
Selector lever, automatic transmission 70
Sensors, care 224
Service and warranty 8
Service requirements, Condi‐ tion Based Service
CBS 202
Service requirements, dis‐ play 80
Service, Roadside Assis‐ tance 216
Services, ConnectedDrive
Settings, locking/unlock‐ ing 41
Settings on Control Dis‐ play 86
Settings, storing for seat, mir‐ ror 53 Seite 238ReferenceEverything from A to Z238
Online Edition for Part no. 01 40 2 925 743 - II/14