remote control BMW 323Ci CONVERTIBLE 2000 E46 Owner's Manual
[x] Cancel search | Manufacturer: BMW, Model Year: 2000, Model line: 323Ci CONVERTIBLE, Model: BMW 323Ci CONVERTIBLE 2000 E46Pages: 199, PDF Size: 1.77 MB
Page 32 of 199
32n
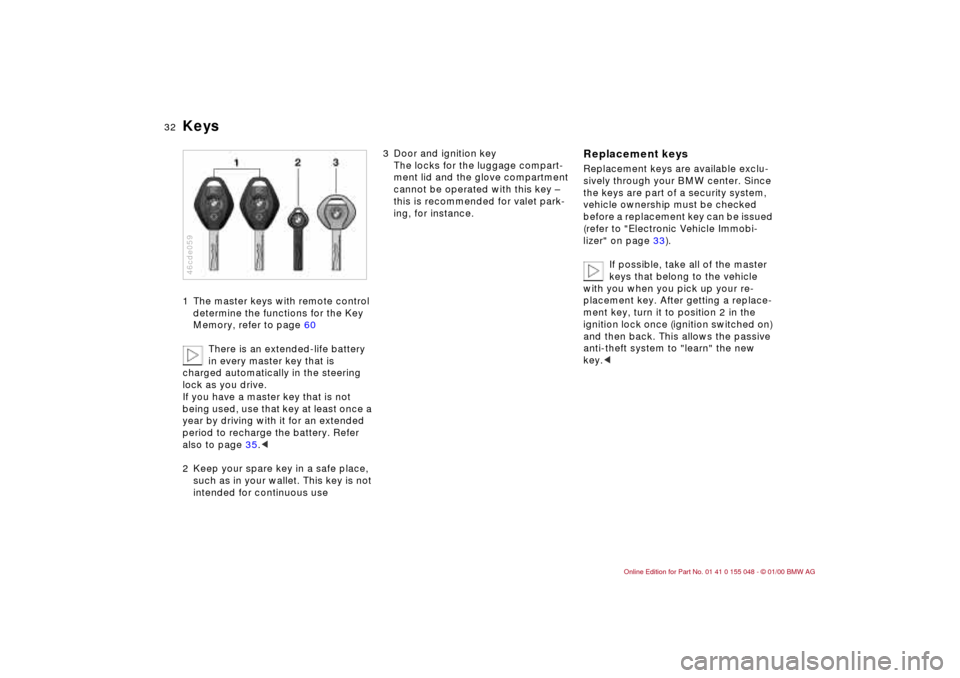
Keys1 The master keys with remote control
determine the functions for the Key
Memory, refer to page 60
There is an extended-life battery
in every master key that is
charged automatically in the steering
lock as you drive.
If you have a master key that is not
being used, use that key at least once a
year by driving with it for an extended
period to recharge the battery. Refer
also to page 35.<
2 Keep your spare key in a safe place,
such as in your wallet. This key is not
intended for continuous use 46cde059
3 Door and ignition key
The locks for the luggage compart-
ment lid and the glove compartment
cannot be operated with this key –
this is recommended for valet park-
ing, for instance.
Replacement keysReplacement keys are available exclu-
sively through your BMW center. Since
the keys are part of a security system,
vehicle ownership must be checked
before a replacement key can be issued
(refer to "Electronic Vehicle Immobi-
lizer" on page 33).
If possible, take all of the master
keys that belong to the vehicle
with you when you pick up your re-
placement key. After getting a replace-
ment key, turn it to position 2 in the
ignition lock once (ignition switched on)
and then back. This allows the passive
anti-theft system to "learn" the new
key.<
Page 34 of 199
34n
Central locking system Opening and closing – from outside The conceptThe central locking system is ready for
operation whenever the driver's door is
closed. The system engages and re-
leases the locks on the
>doors
>luggage compartment lid
>fuel filler door
>glove compartment.
The central locking system can be
operated
>from outside via the door lock and
using the remote control
>from inside by pressing a button.
Activating the central locking system
from inside does not lock the fuel filler
door (refer to page 38). Operating it
from the outside simultaneously acti-
vates the anti-theft protection. Both the
door locks and release handles remain
locked. The alarm system
* is also
armed or disarmed.
In the event of an accident, the central
locking system unlocks automatically
(only those doors that were not locked
separately with the safety lock buttons).
Refer to page 38. In addition, the ha-
zard warning flashers and interior lamps
come on.
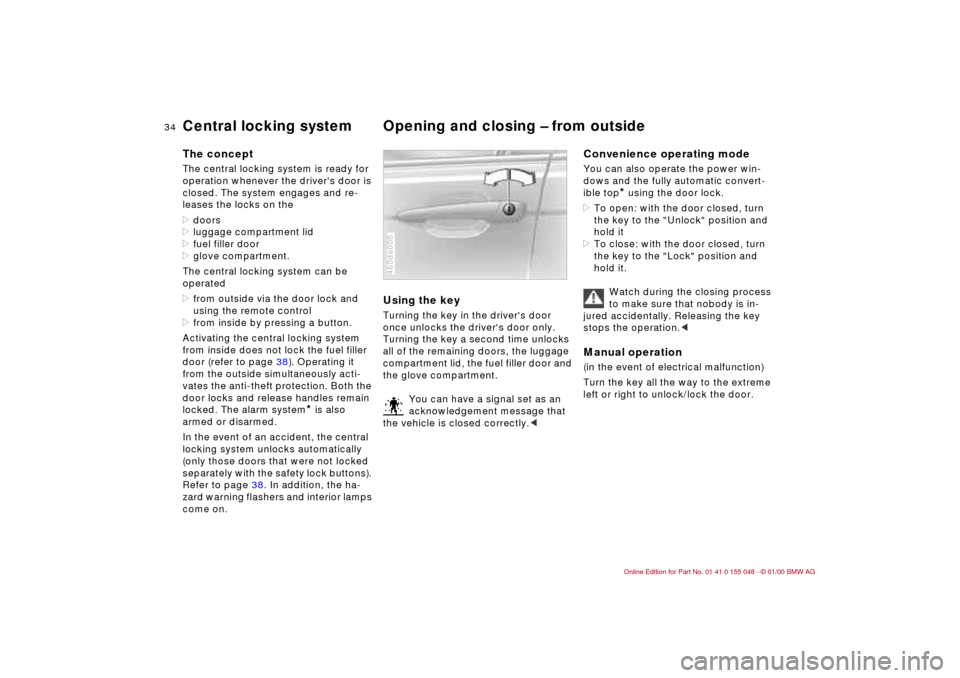
Using the keyTurning the key in the driver's door
once unlocks the driver's door only.
Turning the key a second time unlocks
all of the remaining doors, the luggage
compartment lid, the fuel filler door and
the glove compartment.
You can have a signal set as an
acknowledgement message that
the vehicle is closed correctly.<460de006
Convenience operating modeYou can also operate the power win-
dows and the fully automatic convert-
ible top
* using the door lock.
>To open: with the door closed, turn
the key to the "Unlock" position and
hold it
>To close: with the door closed, turn
the key to the "Lock" position and
hold it.
Watch during the closing process
to make sure that nobody is in-
jured accidentally. Releasing the key
stops the operation.<
Manual operation (in the event of electrical malfunction)
Turn the key all the way to the extreme
left or right to unlock/lock the door.
Page 35 of 199
35n
IndexDataTechnologyRepairsCar careControlsOverview
Opening and closing – from outsideUsing the remote control The remote control gives you an excep-
tionally convenient method for unlock-
ing and locking your vehicle. Further-
more, it provides two additional func-
tions that only the remote control can
execute:
>Switching on the interior lamps
Using this function, you can also
"search" for your vehicle e. g. when-
ever it is parked in an underground
garage
>Opening the luggage compartment
lid
It will open slightly, regardless of
whether it was previously locked
or unlocked.
When you unlock the vehicle, the anti-
theft system is deactivated, the alarm
system
* is disarmed, and the interior
lamps are turned on. When you lock the
vehicle, the systems are activated and
armed, and the lamps go off.
You can have a signal set as an
acknowledgement message that
the vehicle is closed correctly.<
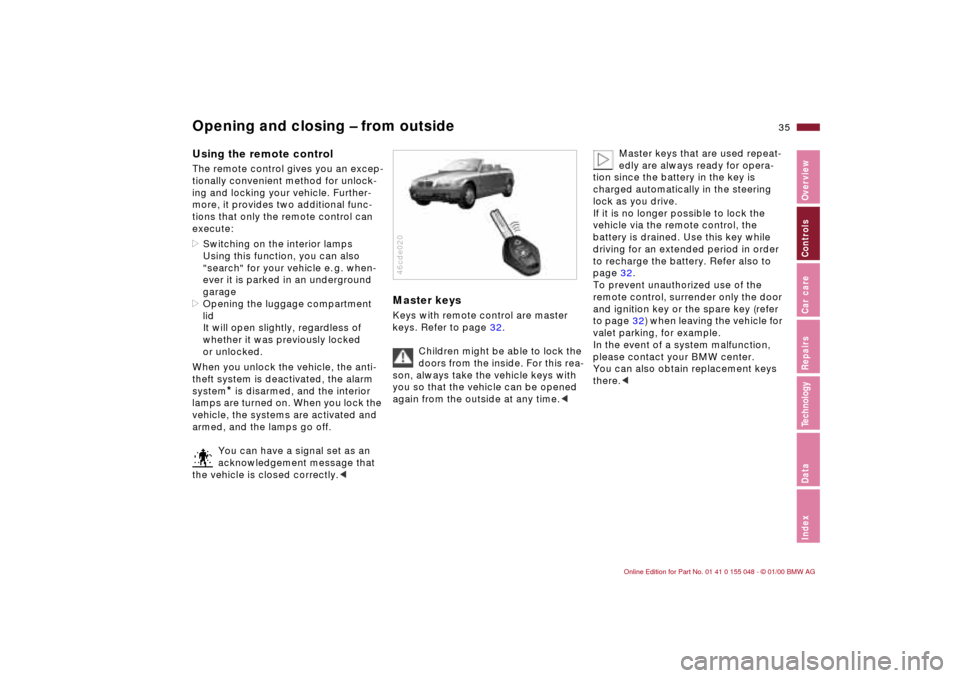
Master keysKeys with remote control are master
keys. Refer to page 32.
Children might be able to lock the
doors from the inside. For this rea-
son, always take the vehicle keys with
you so that the vehicle can be opened
again from the outside at any time.<46cde020
Master keys that are used repeat-
edly are always ready for opera-
tion since the battery in the key is
charged automatically in the steering
lock as you drive.
If it is no longer possible to lock the
vehicle via the remote control, the
battery is drained. Use this key while
driving for an extended period in order
to recharge the battery. Refer also to
page 32.
To prevent unauthorized use of the
remote control, surrender only the door
and ignition key or the spare key (refer
to page 32) when leaving the vehicle for
valet parking, for example.
In the event of a system malfunction,
please contact your BMW center.
You can also obtain replacement keys
there.<
Page 37 of 199
37n
IndexDataTechnologyRepairsCar careControlsOverview
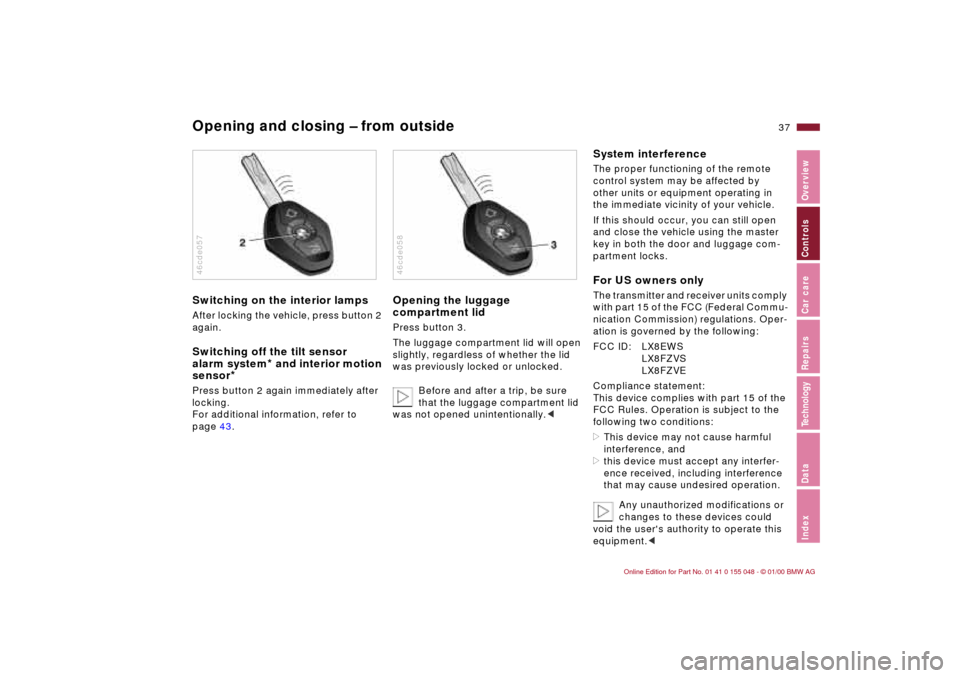
Opening and closing – from outsideSwitching on the interior lampsAfter locking the vehicle, press button 2
again.Switching off the tilt sensor
alarm system
* and interior motion
sensor
*
Press button 2 again immediately after
locking.
For additional information, refer to
page 43.46cde057
Opening the luggage
compartment lid Press button 3.
The luggage compartment lid will open
slightly, regardless of whether the lid
was previously locked or unlocked.
Before and after a trip, be sure
that the luggage compartment lid
was not opened unintentionally.<46cde058
System interferenceThe proper functioning of the remote
control system may be affected by
other units or equipment operating in
the immediate vicinity of your vehicle.
If this should occur, you can still open
and close the vehicle using the master
key in both the door and luggage com-
partment locks.For US owners onlyThe transmitter and receiver units comply
with part 15 of the FCC (Federal Commu-
nication Commission) regulations. Oper-
ation is governed by the following:
FCC ID: LX8EWS
LX8FZVS
LX8FZVE
Compliance statement:
This device complies with part 15 of the
FCC Rules. Operation is subject to the
following two conditions:
>This device may not cause harmful
interference, and
>this device must accept any interfer-
ence received, including interference
that may cause undesired operation.
Any unauthorized modifications or
changes to these devices could
void the user's authority to operate this
equipment.<
Page 42 of 199
42n
Alarm system
*
The conceptThe vehicle alarm system responds:
>When a door, the hood or the lug-
gage compartment lid is opened
>Movements inside the vehicle
>To a change in the vehicle's tilt –
if someone attempts to steal the
wheels or tow the vehicle without
authorization, for example
>If there is an interruption of battery
voltage.
The system responds to unauthorized
vehicle entry and attempted theft by
simultaneously activating the following:
>Sounding an acoustical alarm for
30 seconds
>Activating the hazard warning
flashers for approx. five minutes
>Flashing the high beams on and off in
tandem with the hazard warning
flashers.
To activate and deactivate the
alarm systemWhen the vehicle is locked or unlocked
by using a key or the remote control,
the alarm system is also armed or dis-
armed at the same time.
The interior protection and tilt sensor
alarm systems are activated approx.
30 seconds after you have shut the last
door.
If the alarm system has been armed
correctly, the hazard warning flashers
flash once.
You can have one signal set as
acknowledgment when arming
and disarming.<
You can also open the luggage com-
partment lid when the system is armed
by pressing button 3 of the remote con-
trol (refer to page 37). When it is closed,
the lid is once again secured.
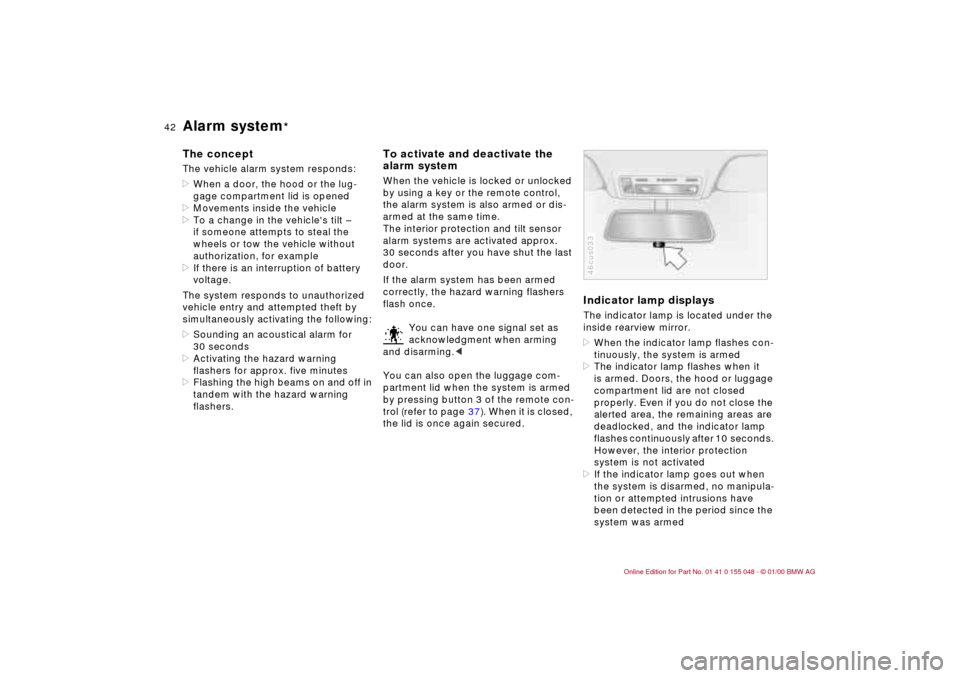
Indicator lamp displaysThe indicator lamp is located under the
inside rearview mirror.
>When the indicator lamp flashes con-
tinuously, the system is armed>The indicator lamp flashes when it
is armed. Doors, the hood or luggage
compartment lid are not closed
properly. Even if you do not close the
alerted area, the remaining areas are
deadlocked, and the indicator lamp
flashes continuously after 10 seconds.
However, the interior protection
system is not activated>If the indicator lamp goes out when
the system is disarmed, no manipula-
tion or attempted intrusions have
been detected in the period since the
system was armed46cus033
Page 43 of 199
43n
IndexDataTechnologyRepairsCar careControlsOverview
Alarm system
*
>If the indicator lamp flashes for
10 seconds when the system is dis-
armed, an attempted entry has been
detected in the period since the sys-
tem was armed.
Following triggering of an alarm, the
indicator lamp will flash continuously.Avoiding an unintentional alarm The tilt sensor alarm system and interior
protection system can be deactivated.
Doing this prevents a false alarm from
being triggered (in garages with eleva-
tor ramps, for instance), or when the
vehicle is transported by trailer or train:
Lock the vehicle twice (= arm the sys-
tem). Press button 2 on the remote
control twice in succession or lock the
vehicle twice with the key (refer to
page 34).
The indicator lamp lights up briefly and
then flashes continuously. The tilt sen-
sor alarm system and interior protection
system are deactivated until canceled.
Re-arm the anti-theft alarm system to
re-activate the tilt sensor alarm system
and interior protection system.
Interior protection systemThe transmitter and receiver of the inte-
rior protection system are located in the
front area of the center console, hidden
from the driver, and in the rear area of
the center console under a cap.
However, deactivate the interior protec-
tion system (see previous column) when
children or animals are to remain in the
vehicle.
For US owners onlyThe transmitter and receiver units com-
ply with part 15 of the FCC (Federal
Communication Commission) regula-
tions. Operation is governed by the
following:
FCC ID: LTQSDR2G5
Compliance statement:
This device complies with part 15 of the
FCC Rules. Operation is subject to the
following two conditions:
>This device may not cause harmful
interference, and
>this device must accept any interfer-
ence received, including interference
that may cause undesired operation.
Any unauthorized modifications to
these devices could void the
user's authority to operate the equip-
ment.c
Page 57 of 199
57n
IndexDataTechnologyRepairsCar careControlsOverview
Seat and mirror memory
*
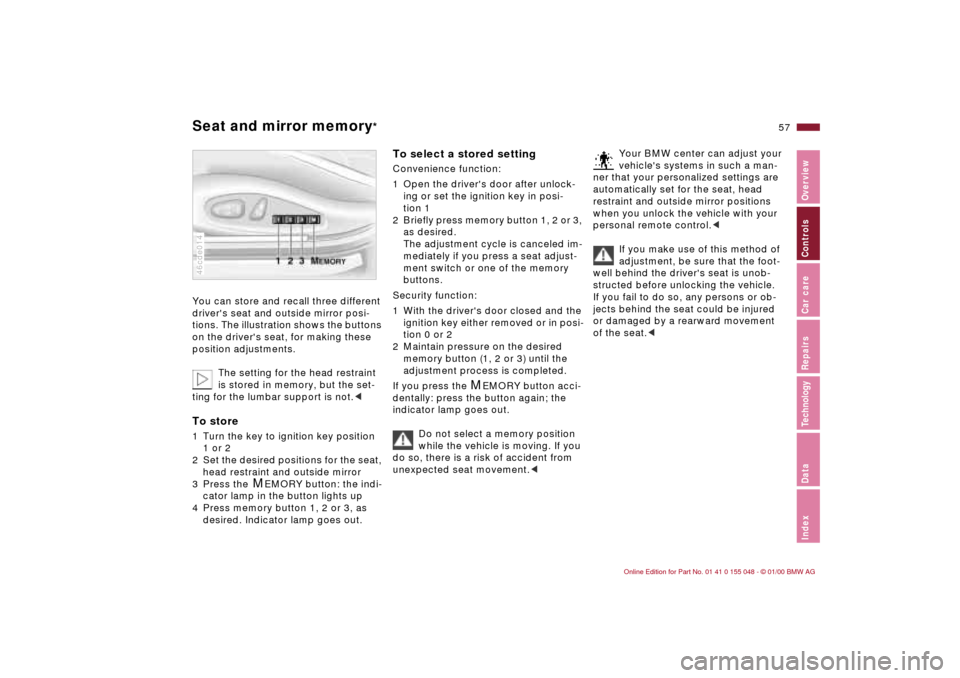
You can store and recall three different
driver's seat and outside mirror posi-
tions. The illustration shows the buttons
on the driver's seat, for making these
position adjustments.
The setting for the head restraint
is stored in memory, but the set-
ting for the lumbar support is not.
2 Set the desired positions for the seat,
head restraint and outside mirror
3 Press the
M
EMORY button: the indi-
cator lamp in the button lights up
4 Press memory button 1, 2 or 3, as
desired. Indicator lamp goes out.
46cde014
To select a stored setting Convenience function:
1 Open the driver's door after unlock-
ing or set the ignition key in posi-
tion 1
2 Briefly press memory button 1, 2 or 3,
as desired.
The adjustment cycle is canceled im-
mediately if you press a seat adjust-
ment switch or one of the memory
buttons.
Security function:
1 With the driver's door closed and the
ignition key either removed or in posi-
tion 0 or 2
2 Maintain pressure on the desired
memory button (1, 2 or 3) until the
adjustment process is completed.
If you press the
M
EMORY button acci-
dentally: press the button again; the
indicator lamp goes out.
Do not select a memory position
while the vehicle is moving. If you
do so, there is a risk of accident from
unexpected seat movement.<
Your BMW center can adjust your
vehicle's systems in such a man-
ner that your personalized settings are
automatically set for the seat, head
restraint and outside mirror positions
when you unlock the vehicle with your
personal remote control.<
If you make use of this method of
adjustment, be sure that the foot-
well behind the driver's seat is unob-
structed before unlocking the vehicle.
If you fail to do so, any persons or ob-
jects behind the seat could be injured
or damaged by a rearward movement
of the seat.<
Page 60 of 199
60n
Car Memory, Key Memory How the system functionsYou have probably frequently wished
that you could configure individual
functions of your vehicles to reflect
your own personal requirements. In
engineering your vehicle, BMW has in-
cluded several user-defined functions
in the vehicle's design. Your BMW cen-
ter can make these settings for you in
accordance with your wishes.
There are settings related to the vehicle
("Car Memory") and settings related to
individuals ("Key Memory"). You can
have up to four different basic settings
adjusted for four different persons. The
only requirement is that each person
uses his or her own remote control key. 463de029
When your vehicle is unlocked with the
remote control, the vehicle recognizes
the individual user by means of a data
exchange with the key, and makes ad-
justments accordingly.
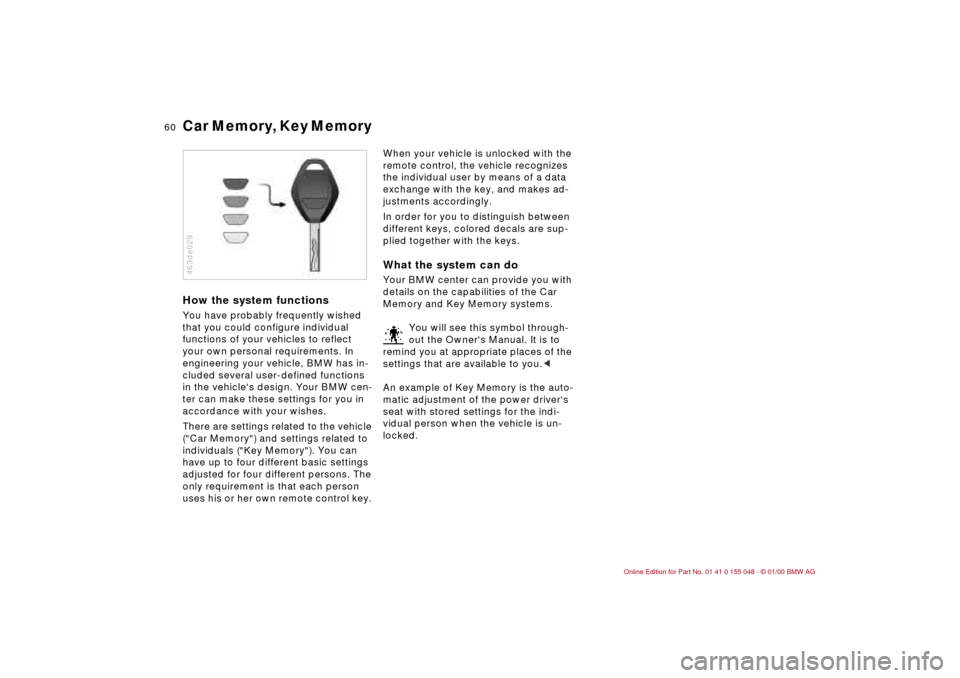
In order for you to distinguish between
different keys, colored decals are sup-
plied together with the keys.What the system can doYour BMW center can provide you with
details on the capabilities of the Car
Memory and Key Memory systems.
You will see this symbol through-
out the Owner's Manual. It is to
remind you at appropriate places of the
settings that are available to you.<
An example of Key Memory is the auto-
matic adjustment of the power driver's
seat with stored settings for the indi-
vidual person when the vehicle is un-
locked.
Page 96 of 199
96n
Automatic climate controlTips for pleasant drivingUse the automatic system (switch on
AUTO button 7). Select an interior tem-
perature that is comfortable for you –
we recommend 72 7 (+22 6). When
the outside temperature is above 41 7
(+5 6), you can also use the air condi-
tioner 12. This will dry the air as well as
preventing condensation on the win-
dow surfaces – if there are passengers
with damp clothing, for example. Set
the outlets 2 so that the air flows past
you and is not directed straight at you.
Set the rotary dial between the air out-
lets 2 for the upper body to a medium
position, since air that is somewhat
cooler promotes driving without fatigue.
Detailed setting options are described
for you in the following section.
When you unlock the vehicle
using your personalized remote
control key, your vehicle is set up so
that it will retrieve and initiate your
customized setting for the automatic
climate control.<
Automatic air distribution
The AUTO program assumes
the adjustment of the air distri-
bution and the air supply for you and
adapts the temperature to external influ-
ences (summer, winter) to meet prefer-
ences you can specify. This program
maintains a comfortable in-car climate
regardless of the season. Select an inte-
rior temperature that is comfortable for
you – we recommend 72 7 (+22 6).
The temperature selected and AUTO
for the air flow appear in the display 10
(refer to the overview on page 94). Open
the air outlets for the upper body area.
Switch on the air conditioner in warm
weather. The maximum cooling capac-
ity is achieved when you set rotary dial 3
(refer to page 98) to cold.
Individual air distribution
You can cancel the AUTO pro-
gram by selecting specific dis-
tribution patterns to suit your
own individual requirements.
You can direct air to flow onto the win-
dows toward the upper body , and
into the footwell .
Temperature
The figures in the display pro-
vide a general indication of inte-
rior temperature. We recommend 72 7
(+22 6) as a comfortable setting,
whether the air conditioner is operating
or not. When you start the vehicle, the
system ensures that the selected tem-
perature is reached as quickly as possi-
ble. The system then maintains this
temperature, regardless of the season.
Set rotary dial 3 (refer to "Draft-free
ventilation" on page 98) to a medium
setting, since air that is somewhat
cooler promotes driving without fatigue.
You can use this setting for mixing air to
make minor comfort modifications.
You can set uncontrolled heater
output up to 90 7 (+32 6).
At 60 7 (+16 6), full cooling output
is available from an activated air
conditioner.<
Page 101 of 199
101n
IndexDataTechnologyRepairsCar careControlsOverview
BMW Universal Transmitter
*
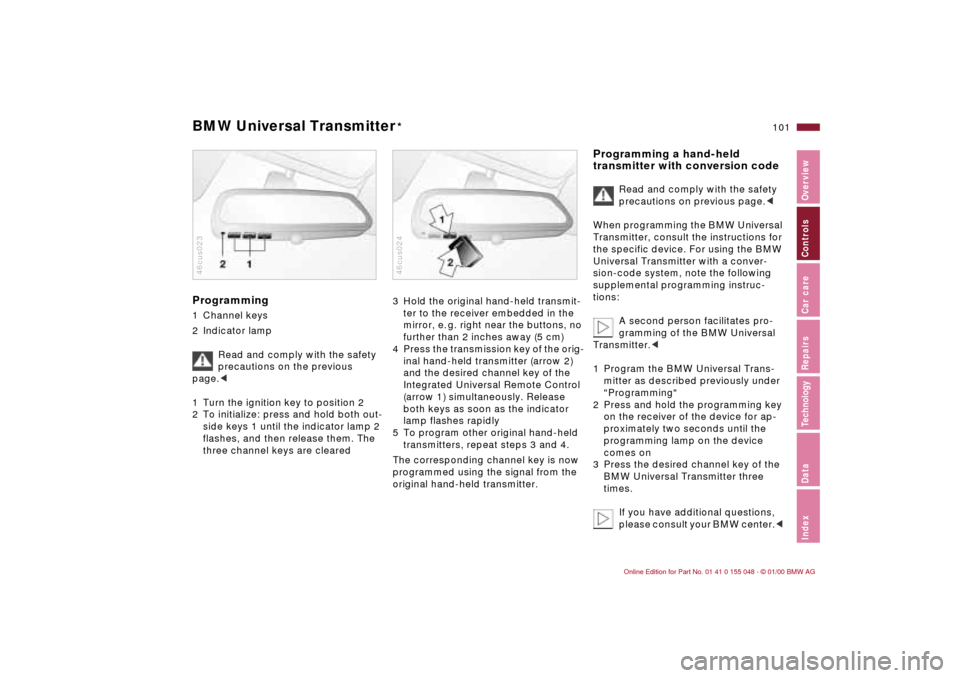
Programming 1 Channel keys
2 Indicator lamp
Read and comply with the safety
precautions on the previous
page.<
1 Turn the ignition key to position 2
2 To initialize: press and hold both out-
side keys 1 until the indicator lamp 2
flashes, and then release them. The
three channel keys are cleared46cus023
3 Hold the original hand-held transmit-
ter to the receiver embedded in the
mirror, e. g. right near the buttons, no
further than 2 inches away (5 cm)
4 Press the transmission key of the orig-
inal hand-held transmitter (arrow 2)
and the desired channel key of the
Integrated Universal Remote Control
(arrow 1) simultaneously. Release
both keys as soon as the indicator
lamp flashes rapidly
5 To program other original hand-held
transmitters, repeat steps 3 and 4.
The corresponding channel key is now
programmed using the signal from the
original hand-held transmitter. 46cus024
Programming a hand-held
transmitter with conversion code
Read and comply with the safety
precautions on previous page.<
When programming the BMW Universal
Transmitter, consult the instructions for
the specific device. For using the BMW
Universal Transmitter with a conver-
sion-code system, note the following
supplemental programming instruc-
tions:
A second person facilitates pro-
gramming of the BMW Universal
Transmitter.<
1 Program the BMW Universal Trans-
mitter as described previously under
"Programming"
2 Press and hold the programming key
on the receiver of the device for ap-
proximately two seconds until the
programming lamp on the device
comes on
3 Press the desired channel key of the
BMW Universal Transmitter three
times.
If you have additional questions,
please consult your BMW center.<