rear BMW 323i 2007 Owner's Guide
[x] Cancel search | Manufacturer: BMW, Model Year: 2007, Model line: 323i, Model: BMW 323i 2007Pages: 268, PDF Size: 8.8 MB
Page 106 of 268
Climate
104
Via the button* on the steering wheel
You can switch quickly between the recircu-
lated-air mode and the previous mode using an
individually programmable button
on the steer-
ing wheel, refer to page11.
Residual heat
The heat stored in the engine is
used to heat the passenger com-
partment, e.g. while stopped at a
school to pick up a child.
The function can be switched on when the fol-
lowing conditions are met:
>Up to 15 minutes after the engine has been
switched off
>While the engine is at operating tempera-
ture
>As long as battery voltage is sufficient
>At an outside temperature below 777/
256
The LED is lit when the function is on.
As of radio readiness, you can set the interior
temperature, the air flow rate and the air distri-
bution.
Defrosting windows and removing
condensation
Quickly removes ice and conden-
sation from the windshield and
front side windows.
Switching cooling function on/off
The cooling function cools and
dehumidifies the incoming air
before also reheating it as
required, according to the temperature setting.
Depending on the weather, the windshield may
fog over briefly when the engine is started.
The cooling function is automatically switched
on along with the AUTO program. The passen-
ger compartment can only be cooled while the
engine is running.
Rear window defroster
The defroster switches off auto-
matically after a certain time.
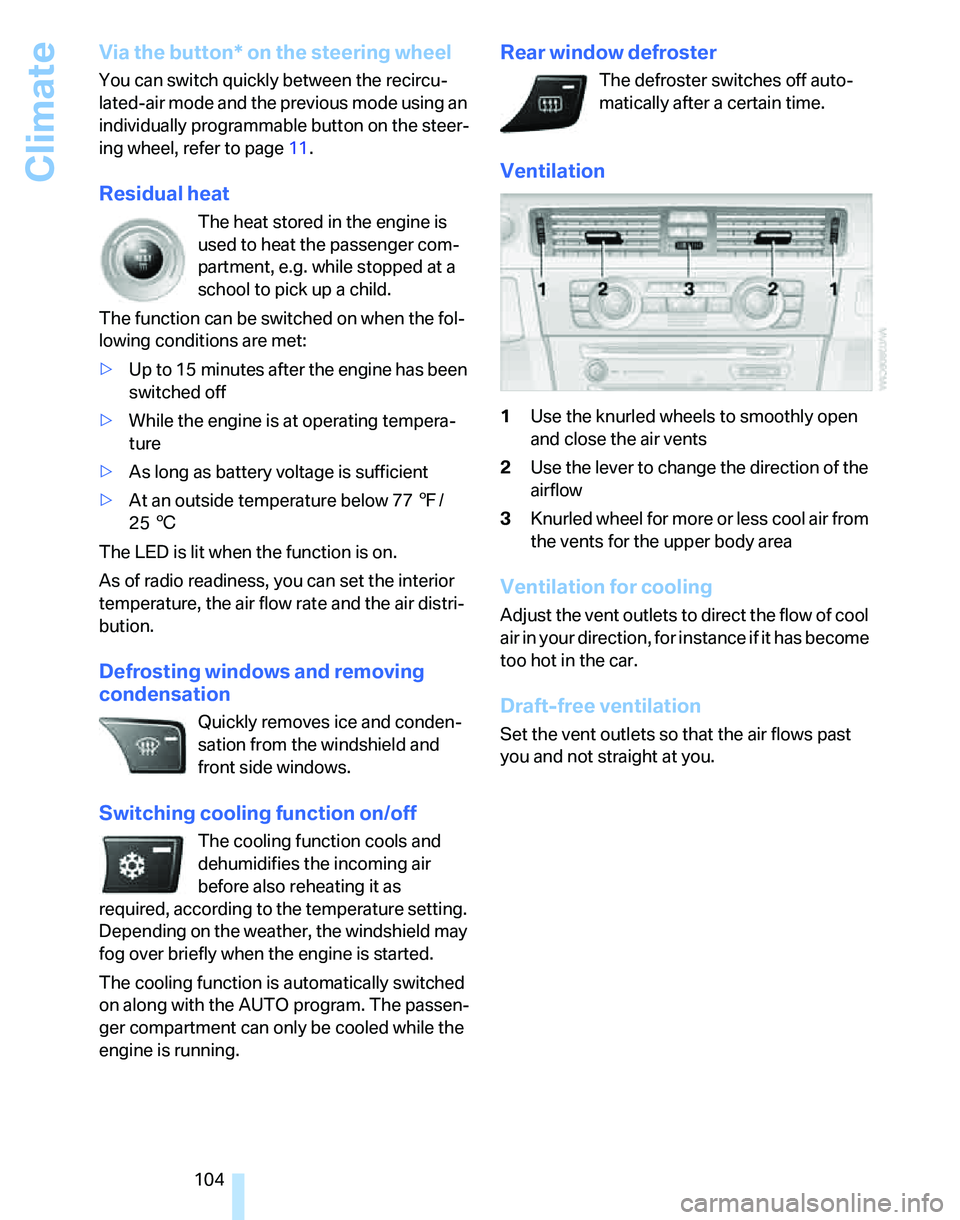
Ventilation
1Use the knurled wheels to smoothly open
and close the air vents
2Use the lever to change the direction of the
airflow
3Knurled wheel for more or less cool air from
the vents for the upper body area
Ventilation for cooling
Adjust the vent outlets to direct the flow of cool
air in your direction, for instance if it has become
too hot in the car.
Draft-free ventilation
Set the vent outlets so that the air flows past
you and not straight at you.
Page 107 of 268

Controls
105Reference
At a glance
Driving tips
Communications
Navigation
Entertainment
Mobility
Ventilation in the rear
1Use the knurled wheel to smoothly open
and close the air vents
2Use the knurled wheel to adjust the temper-
ature:
>Turn toward blue: colder
>Turn toward red: warmer
3Use the lever to change the direction of the
airflow
Microfilter/activated-charcoal filter
The microfilter traps dust and pollen in the
incoming air. The activated-charcoal filter pro-
vides additional protection by filtering gaseous
pollutants from the outside air. Your BMW cen-
ter replaces this combined filter during routine
maintenance.
You can call up further information in the service
requirements display, refer to page77.
Parked car ventilation
The concept
The parked car ventilation/heating provides
ventilation to the passenger compartment and
lowers its temperature, if necessary. It is ready
for use at any outside temperature, as of radio
readiness.
The parked car ventilation/heating remains
switched on for 30 minutes. Two different
switch-on times can be preselected. The sys-
tem can also be switched on and off directly.
Due to its high power consumption, it should
not be switched on twice in a row without driv-
ing in between to allow the battery to recharge.The air emerges from the air vents for the upper
body area in the instrument panel. The air vents
must therefore be open.
The parked car ventilation system is operated
via iDrive.
Switching on/off directly
iDrive, for operating principle refer to page16.
1.Open the start menu.
2.Move the controller to the left to call up "Cli-
mate".
3.Select "Parked car operation" and press the
controller.
4.Select "Automatic ventilation" and press
the controller.
5.Select "Parked car ventilation" and press
the controller.
The parked car ventilation/heating is
switched on.
The symbol on the automatic climate control
display flashes.
Preselecting switch-on times
iDrive, for operating principle refer to page16.
1.Open the start menu.
2.Move the controller to the left to call up "Cli-
mate".
3.Select "Parked car operation" and press the
controller.
4.Select "Activation time" and press the con-
troller.
Page 112 of 268

Practical interior accessories
110
Roller sun blinds*
Rear window blind
Tap the button in the center console to raise or
lower the roller sun blind.
Roller sun blinds for rear side windows
Pull loop of roller sun blind and hook onto
bracket.
Glove compartment
Opening
Pull the handle.
The light in the glove compartment switches
on.
To prevent injury in the event of an acci-
dent while the vehicle is being driven,
close the glove compartment immediately after
use.<
Closing
Fold cover up.
Locking
To lock the glove compartment, use the inte-
grated key of the remote control, refer to
page28.
Rechargeable flashlight
It is on the left-hand side of the glove compart-
ment. The flashlight can remain plugged in.
Whenever required, pull the flashlight out of its
socket.
Only insert the flashlight back into the
socket when it is switched off, otherwise
there is a risk of damage.<
Center armrest
Storage compartment
The center armrest between the front seats
contains either a compartment or the cover for
the snap-in adapter
*, depending on the equip-
ment version. For more information about this
mobile phone bracket refer to the separate
Owner's Manual.
Opening
Press the button, see arrow.
Page 113 of 268
Controls
111Reference
At a glance
Driving tips
Communications
Navigation
Entertainment
Mobility
Ventilated storage compartment
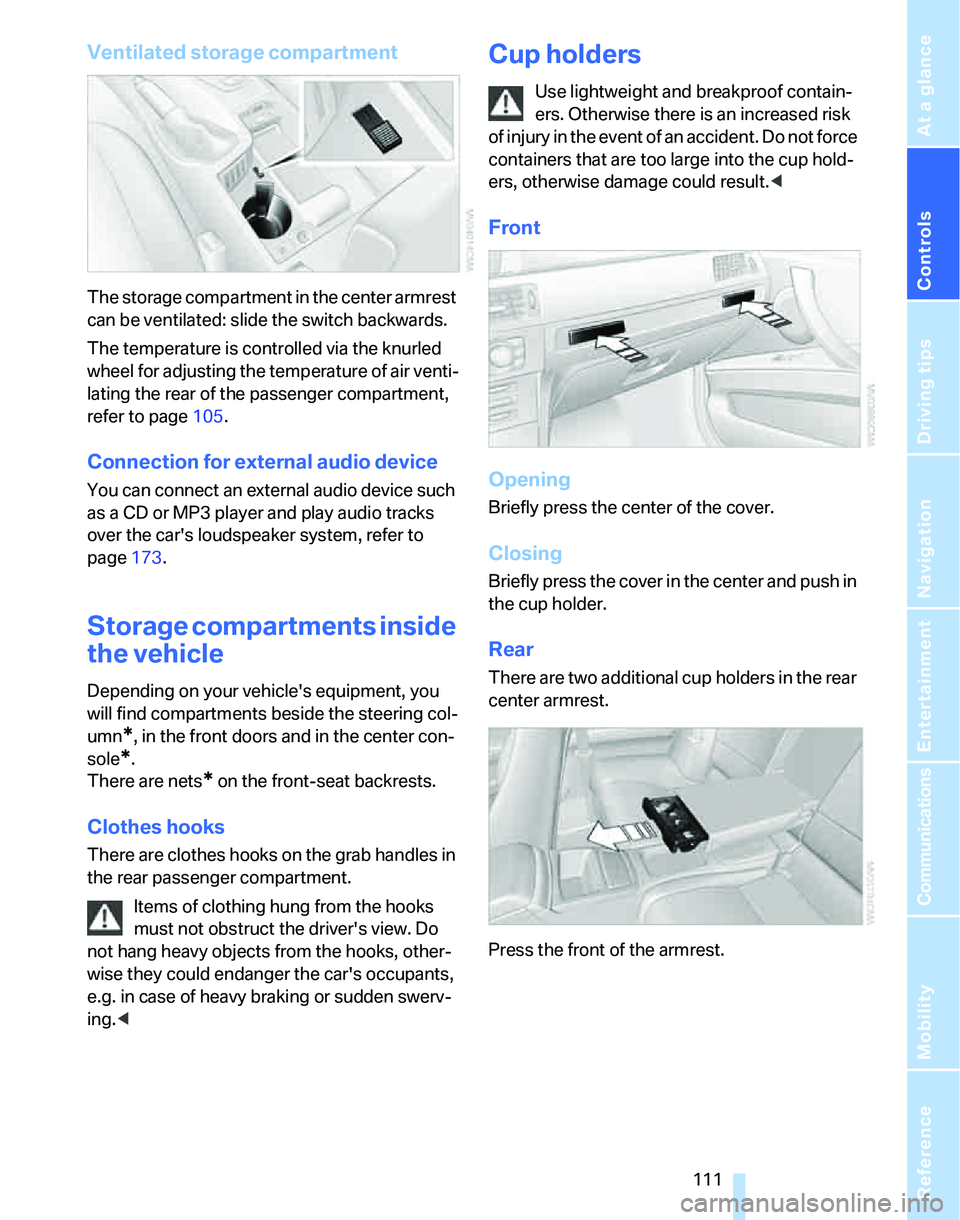
The storage compartment in the center armrest
can be ventilated: slide the switch backwards.
The temperature is controlled via the knurled
wheel for adjusting the temperature of air venti-
lating the rear of the passenger compartment,
refer to page105.
Connection for external audio device
You can connect an external audio device such
as a CD or MP3 player and play audio tracks
over the car's loudspeaker system, refer to
page173.
Storage compartments inside
the vehicle
Depending on your vehicle's equipment, you
will find compartments beside the steering col-
umn
*, in the front doors and in the center con-
sole
*.
There are nets
* on the front-seat backrests.
Clothes hooks
There are clothes hooks on the grab handles in
the rear passenger compartment.
Items of clothing hung from the hooks
must not obstruct the driver's view. Do
not hang heavy objects from the hooks, other-
wise they could endanger the car's occupants,
e.g. in case of heavy braking or sudden swerv-
ing.<
Cup holders
Use lightweight and breakproof contain-
ers. Otherwise there is an increased risk
of injury in the event of an accident. Do not force
containers that are too large into the cup hold-
ers, otherwise damage could result.<
Front
Opening
Briefly press the center of the cover.
Closing
Briefly press the cover in the center and push in
the cup holder.
Rear
There are two additional cup holders in the rear
center armrest.
Press the front of the armrest.
Page 114 of 268

Practical interior accessories
112
Ashtray, front
Opening
Push the ridge on the cover.
Emptying
Lift out the insert.
Lighter
With the engine running or the ignition switched
on, press in the cigarette lighter.
The lighter can be pulled out as soon as it pops
back out.
Hold or touch the hot cigarette lighter by
the knob only. Holding or touching it in
other areas could result in burns.
When leaving the car, always remove the remote control so that children cannot operate
the cigarette lighter and burn themselves.<
Ashtray, rear
Opening
Push the ridge on the cover.
Emptying
Lift out the insert.
Connecting electrical
appliances
In your BMW, you can use electrical devices
such as a flashlight, car vacuum cleaner, etc., up
to approx. 200 watts at 12 volts, as long as one
of the following sockets is available. Avoid dam-
aging the sockets by attempting to insert plugs
of unsuitable shape or size.
Cigarette lighter socket*
To access the socket: take the cigarette lighter
out of the socket.
Socket in the center armrest
External audio device, refer to page111.
Page 115 of 268

Controls
113Reference
At a glance
Driving tips
Communications
Navigation
Entertainment
Mobility
Sockets in the rear center console*
Remove corresponding cover.
Socket in the cargo bay*
Sedan
Sports Wagon
Open the cap.
Sedan:
Through-loading system*
Opening
1.Open the belt lock of the rear center safety
belt. To do so, press the button, see arrow,
and release the latch plate.
2.Insert the latch plate at the end of the belt
into the specially designated fixture on the
rear window shelf.
3.Push the corresponding head restraint
down as far as it will go, refer to page47.
4.To release the rear seat backrest, pull the
corresponding lever in the cargo bay.
Page 116 of 268

Practical interior accessories
114 5.The unlocked rear seat backrest moves for-
ward slightly. Fold the backrest forward by
the head restraint.
Closing
1.Return the rear seat backrest to its upright
position and engage it.
When returning the backrest into its
seating position, make sure that the
seat's locking mechanism engages prop-
erly. Otherwise, cargo could be thrown
around in the event of sharp braking or
swerving and endanger the occupants.<
2.Release the latch plate from the fixture on
the rear window shelf and insert it into the
belt lock of the center safety belt. Make sure
you hear the latch plate engage in the belt
buckle.The lashing eyes in the cargo bay provide you
with a way to attach cargo-bay nets
* or draw
straps for securing suitcases and luggage, refer
to page125.
Sports Wagon:
Cargo bay
Ma ke sure tha t no fluids are leaking in the
cargo bay; otherwise the vehicle could be
damaged.<
Roll-up cover
Pull out the cover and hook it into the retaining
fixtures.
Do not place objects on the cover, other-
wise they could endanger the car's occu-
pants, e.g. in the case of braking or sudden
swerving.
Do not let the cover retract, otherwise it could
be damaged.<
The roll-up cover is raised when the rear
window or tailgate is opened
*. Before
closing the rear window or tailgate, press the
roll-up cover downward until it engages.<
Page 117 of 268

Controls
115Reference
At a glance
Driving tips
Communications
Navigation
Entertainment
Mobility
Expanding the cargo bay
The rear seat backrest is divided. You can fold
down either division in order to expand the
cargo bay.
Reach into the recess and pull forwards.
When folding the backrest back up, make
sure that the catch engages properly. If
you cannot see a red warning area in the recess,
the catch is properly engaged. Otherwise,
cargo can be thrown around inside the passen-
ger compartment and endanger the car's occu-
pants, e.g. in the case of braking or sudden
swerving.<
Observe the instructions concerning the
safety belt on page44 to ensure the best
possible personal protection.<
Partition net
Do not let the partition net retract, other-
wise there is a risk of danger and the par-
tition net could be damaged.<
Use the loop strap to pull the partition net out of
the casing. Grip the bar on both ends and insert
it into the retaining fixtures, arrow 1. This can
best be done from the rear seat.
When you no longer require the partition net,
grip both ends of the bar and take it out of the retaining fixtures, arrow 2. Let the partition net
slide into the casing slowly.
With cargo bay expanded
1.Fold down both rear seat backrests, refer to
Expanding the cargo bay.
2.Use the buttons to unlatch the casing on
both sides, arrow 1.
3.Pull the casing out backwards, arrow 2,
without tilting it.
4.Slide the casing into the guides on the
backs of the seat backrests.
5.Carefully pull out the partition net and insert
it into the front retaining fixtures, refer to
Partition net above. This can best be done
from the front seat.
Follow the same steps in reverse order to return
the partition net and seats to their original posi-
tions. Finally, slide the casing into both retaining
fixtures on the sides until it engages. Tug on the
casing to check if it is properly locked in place.
Page 118 of 268

Practical interior accessories
116
Storage compartments inside
the cargo bay
Sedan
Depending on your vehicle's equipment, the
following storage spaces can be found in the
cargo bay:
>Left storage compartment, e.g. for storing a
box of cleaning tissues or up to 12 CD jack-
ets, depending on vehicle equipment ver-
sion
>Net
* for securing smaller objects, to be
attached to the fixtures on the floor panel
>Hooks for hanging up, e.g., shopping bags
or tote bags
>Rubber strap on the left trim panel for
securing small objects such as a folding
umbrella
>Net for small objects on the right trim panel
of the cargo bay
>Retaining straps next to the rear lashing
eyes, e.g. for securing an umbrella
>Folding, removable box
* under the floor
panel, e.g. for wet or dirty items
>Storage compartment under the floor panel
>Insertable dividers
* and removable storage
tray for the storage compartment under the
floor panel
>Drawer for storing small items. Pull the han-
dle firmly to release the drawer. If neces-
sary, you can pull out the drawer entirely,
refer to the information below
Do not drive or close the luggage com-
partment lid while the drawer is pulled
out.
On uphill gradients, release the drawer with
caution, otherwise it could slide out on its own
and cause injury.
Do not exceed a maximum load of 11 lbs/5 kg
for the drawer, otherwise damage could
result.<
Removing the drawer
1.Push the drawer all the way in.
2.Turn the catches on the left and right all the
way out.
3.Remove the drawer by pulling it down and
backwards.
Reinserting the drawer
1.Hook the guides of the drawer into the front
of the yellow guide aids on the bottom of the
cargo bay.
2.Insert the catches into the mounts on the
bottom of the cargo bay.
3.Turn the catches on the left and right all the
way in.
Sports Wagon
The following storage spaces can be found in
the cargo bay:
>Umbrella holder on the bottom of the parti-
tion net casing
>Rubber strap on the left and right trim panel
for securing small objects such as a folding
umbrella
Page 120 of 268

Practical interior accessories
118 The zip fastener makes objects in the ski
bag easier to reach.
4.Insert the latch plate of the ski bag's retain-
ing strap in the center belt buckle.
Only place clean skis in the ski bag. Wrap sharp
edges to prevent damage.
Securing cargo
After loading, secure the ski bag and its con-
tents. Tighten the retaining strap on the ten-
sioning buckle for this purpose.
Secure the ski bag in the manner
described, otherwise it could endanger
the car's occupants, e.g. in case of heavy brak-
ing or sudden swerving.<
To store the ski bag, perform the steps
described for loading in reverse order.
Removing the ski bag
The ski bag can be completely removed, e.g. for
faster drying or to allow you to use other inserts.1.Fold down the center panel in the rear seat
backrest.
2.Pull the handle, arrow1.
3.Pull out the insert, arrow 2.
For more information on the various
inserts available, contact your BMW cen-
ter.<