heating BMW 325I SEDAN 2006 E90 Owner's Manual
[x] Cancel search | Manufacturer: BMW, Model Year: 2006, Model line: 325I SEDAN, Model: BMW 325I SEDAN 2006 E90Pages: 245, PDF Size: 8.24 MB
Page 45 of 245
Controls
43Reference
At a glance
Driving tips
Communications
Navigation
Entertainment
Mobility
Front seats
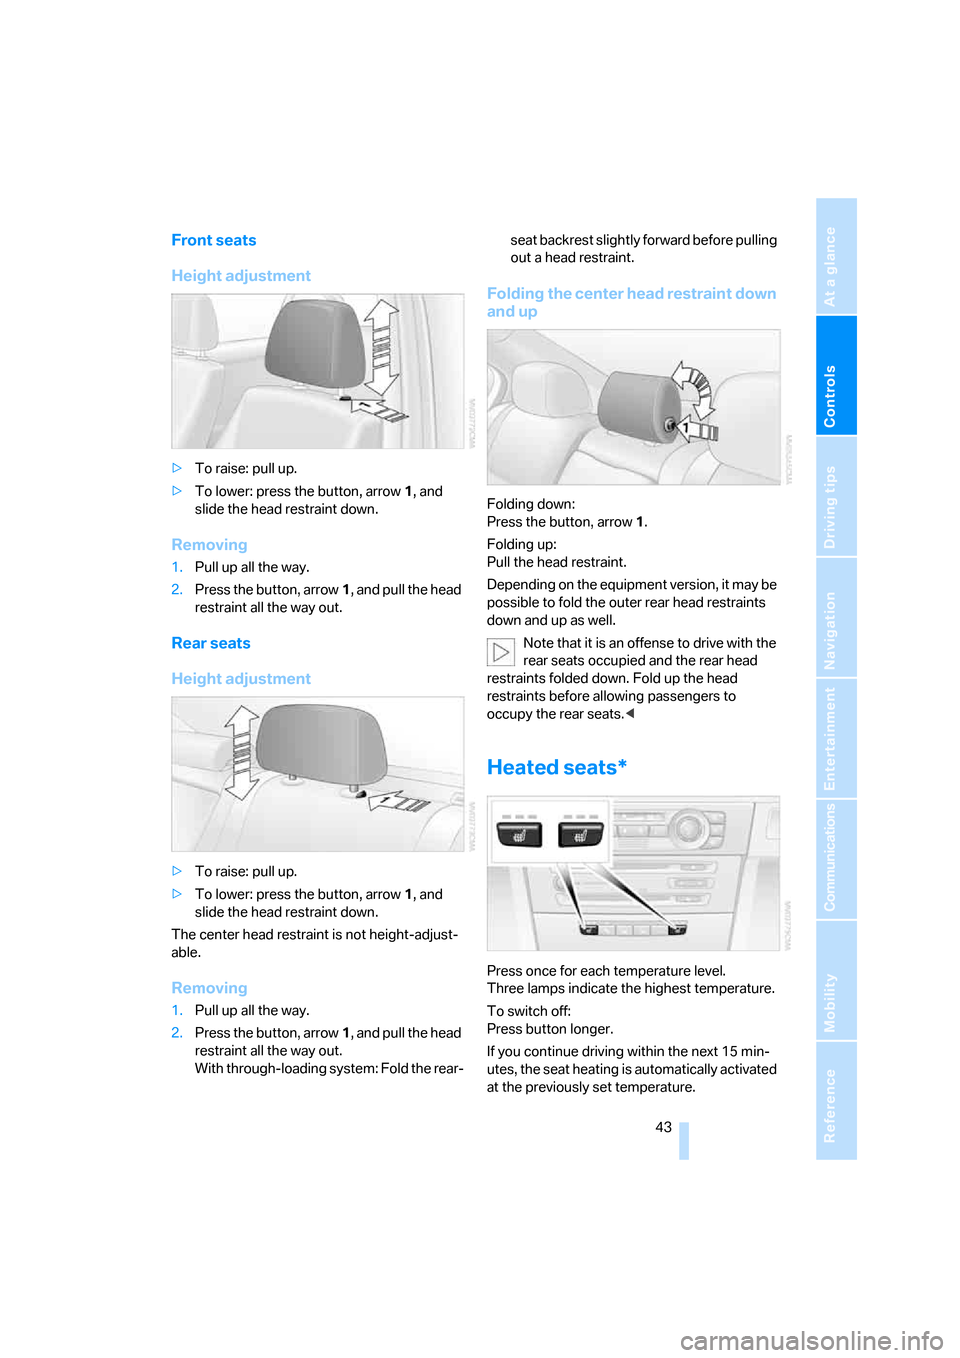
Height adjustment
>To raise: pull up.
>To lower: press the button, arrow1, and
slide the head restraint down.
Removing
1.Pull up all the way.
2.Press the button, arrow1, and pull the head
restraint all the way out.
Rear seats
Height adjustment
>To raise: pull up.
>To lower: press the button, arrow1, and
slide the head restraint down.
The center head restraint is not height-adjust-
able.
Removing
1.Pull up all the way.
2.Press the button, arrow1, and pull the head
restraint all the way out.
With through-loading system: Fold the rear-seat backrest slightly forward before pulling
out a head restraint.
Folding the center head restraint down
and up
Folding down:
Press the button, arrow1.
Folding up:
Pull the head restraint.
Depending on the equipment version, it may be
possible to fold the outer rear head restraints
down and up as well.
Note that it is an offense to drive with the
rear seats occupied and the rear head
restraints folded down. Fold up the head
restraints before allowing passengers to
occupy the rear seats.<
Heated seats*
Press once for each temperature level.
Three lamps indicate the highest temperature.
To switch off:
Press button longer.
If you continue driving within the next 15 min-
utes, the seat heating is automatically activated
at the previously set temperature.
Page 48 of 245
Adjustments
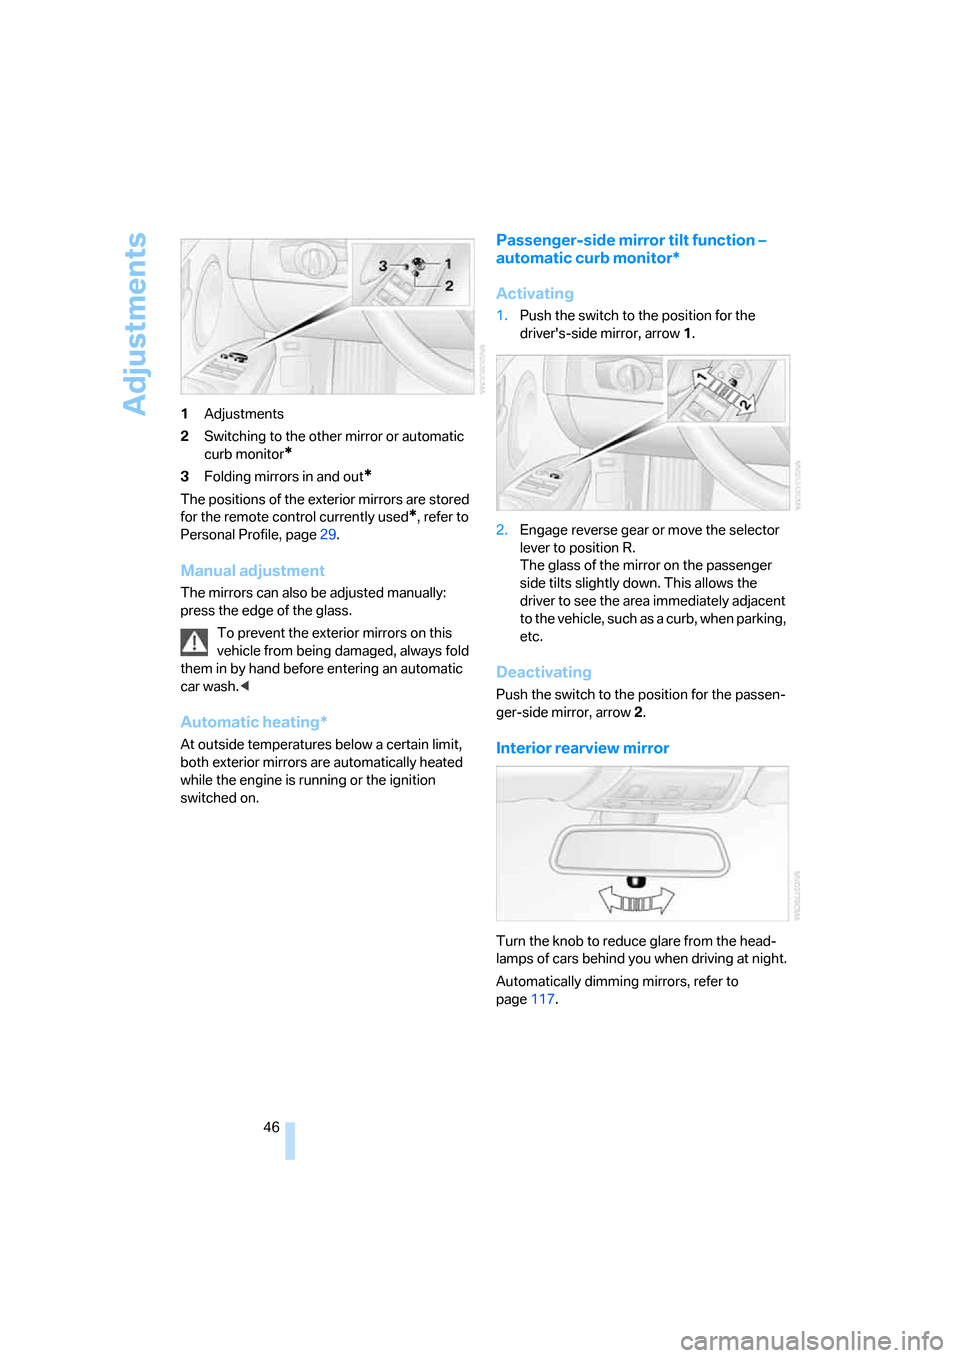
46 1Adjustments
2Switching to the other mirror or automatic
curb monitor
*
3Folding mirrors in and out*
The positions of the exterior mirrors are stored
for the remote control currently used
*, refer to
Personal Profile, page29.
Manual adjustment
The mirrors can also be adjusted manually:
press the edge of the glass.
To prevent the exterior mirrors on this
vehicle from being damaged, always fold
them in by hand before entering an automatic
car wash.<
Automatic heating*
At outside temperatures below a certain limit,
both exterior mirrors are automatically heated
while the engine is running or the ignition
switched on.
Passenger-side mirror tilt function –
automatic curb monitor*
Activating
1.Push the switch to the position for the
driver's-side mirror, arrow 1.
2.Engage reverse gear or move the selector
lever to position R.
The glass of the mirror on the passenger
side tilts slightly down. This allows the
driver to see the area immediately adjacent
to the vehicle, such as a curb, when parking,
etc.
Deactivating
Push the switch to the position for the passen-
ger-side mirror, arrow 2.
Interior rearview mirror
Turn the knob to reduce glare from the head-
lamps of cars behind you when driving at night.
Automatically dimming mirrors, refer to
page117.
Page 55 of 245
Controls
53Reference
At a glance
Driving tips
Communications
Navigation
Entertainment
Mobility
Starting the engine
Do not run the engine in closed rooms,
otherwise the inhaling of toxic exhaust
gases can cause unconsciousness and death.
The exhaust gases contain carbon monoxide,
an odorless and colorless, but highly toxic gas.
Never leave an unattended vehicle with the
engine running, otherwise such a vehicle repre-
sents a potential safety hazard.
Before leaving the car with the engine running,
place the transmission in idle or move the
selector lever to position P and apply the hand-
brake to prevent the car from moving.<
When starting the engine, do not press the
accelerator pedal.
Do not allow the engine to warm up by leaving it
running while the vehicle remains stationary.
Instead, begin to drive immediately at a moder-
ate engine speed.
Do not depress either the brake or the
clutch until you are ready to start the
engine. The engine is started immediately
when you briefly touch the start/stop button
and depress the brake if the car has automatic
transmission, or the clutch if the car has manual
transmission.<
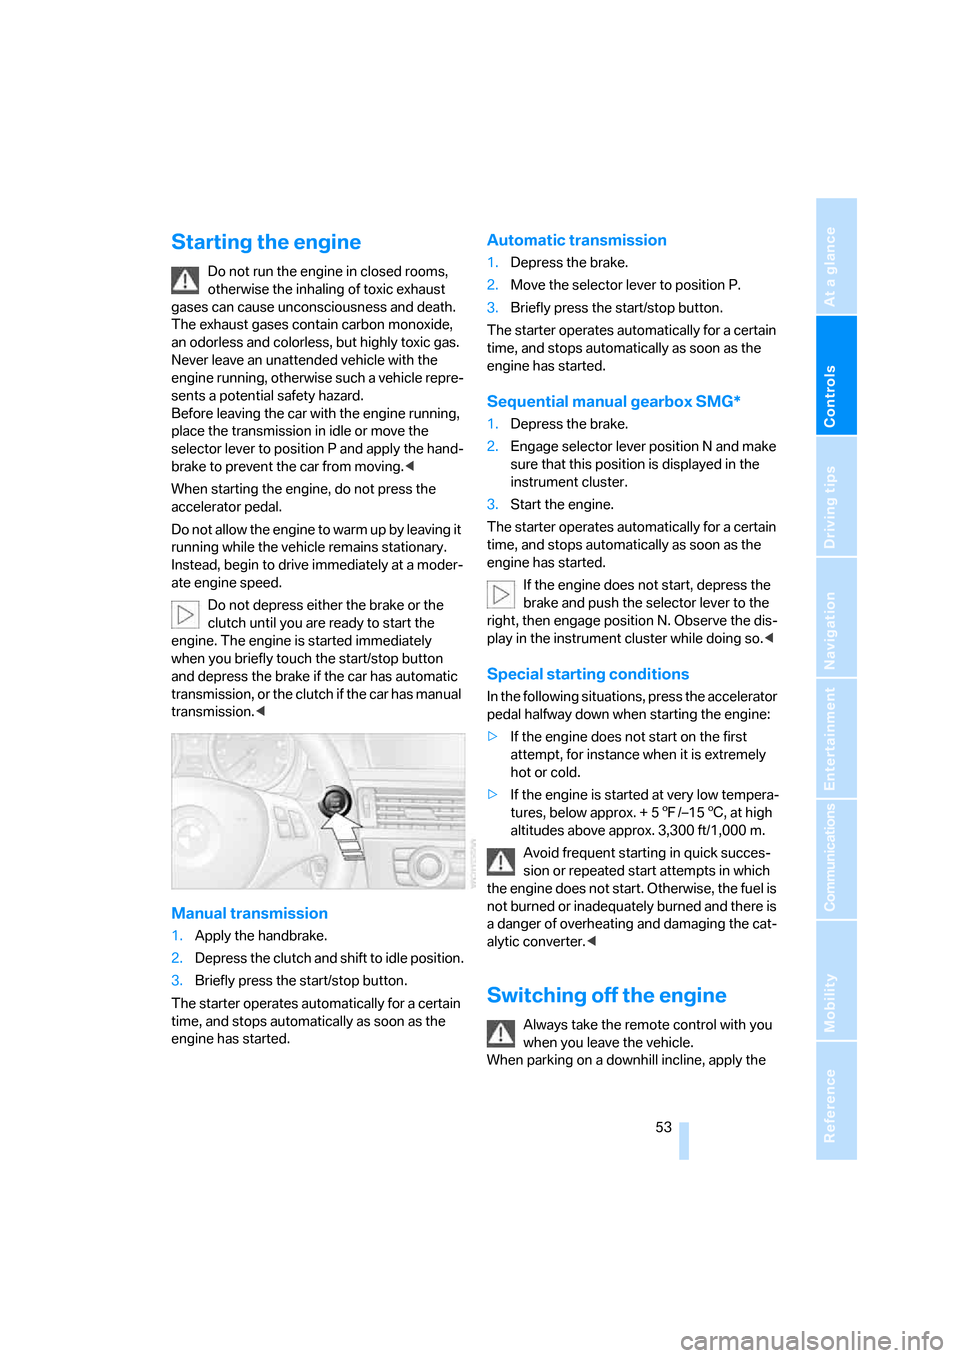
Manual transmission
1.Apply the handbrake.
2.Depress the clutch and shift to idle position.
3.Briefly press the start/stop button.
The starter operates automatically for a certain
time, and stops automatically as soon as the
engine has started.
Automatic transmission
1.Depress the brake.
2.Move the selector lever to position P.
3.Briefly press the start/stop button.
The starter operates automatically for a certain
time, and stops automatically as soon as the
engine has started.
Sequential manual gearbox SMG*
1.Depress the brake.
2.Engage selector lever position N and make
sure that this position is displayed in the
instrument cluster.
3.Start the engine.
The starter operates automatically for a certain
time, and stops automatically as soon as the
engine has started.
If the engine does not start, depress the
brake and push the selector lever to the
right, then engage position N. Observe the dis-
play in the instrument cluster while doing so.<
Special starting conditions
In the following situations, press the accelerator
pedal halfway down when starting the engine:
>If the engine does not start on the first
attempt, for instance when it is extremely
hot or cold.
>If the engine is started at very low tempera-
tures, below approx. + 57/–156, at high
altitudes above approx. 3,300 ft/1,000 m.
Avoid frequent starting in quick succes-
sion or repeated start attempts in which
the engine does not start. Otherwise, the fuel is
not burned or inadequately burned and there is
a danger of overheating and damaging the cat-
alytic converter.<
Switching off the engine
Always take the remote control with you
when you leave the vehicle.
When parking on a downhill incline, apply the
Page 100 of 245
Climate
98
Automatic climate control
Comfortable interior climate
AUTO program7 offers the ideal air distribution
and air flow rate for almost all conditions, refer
to AUTO program below. All you need to do is
select an interior temperature which is comfort-
able for you.
The following sections inform you in detail
about how to adjust the settings.
Most settings are stored for the remote control
currently in use, refer also to Personal Profile
settings on page29.
Switching manual air distribution on/
off
The emerging air is directed to the
windows, to the upper body area or
to the footwell.
You can switch the automatic air
distribution back on by pressing the AUTO but-
ton.
Fine adjustments to manual air
distribution
You can set the rate of incoming airflow for
manual air distribution.
iDrive concept, refer to page16.
1.Press the button.
This opens the start menu.
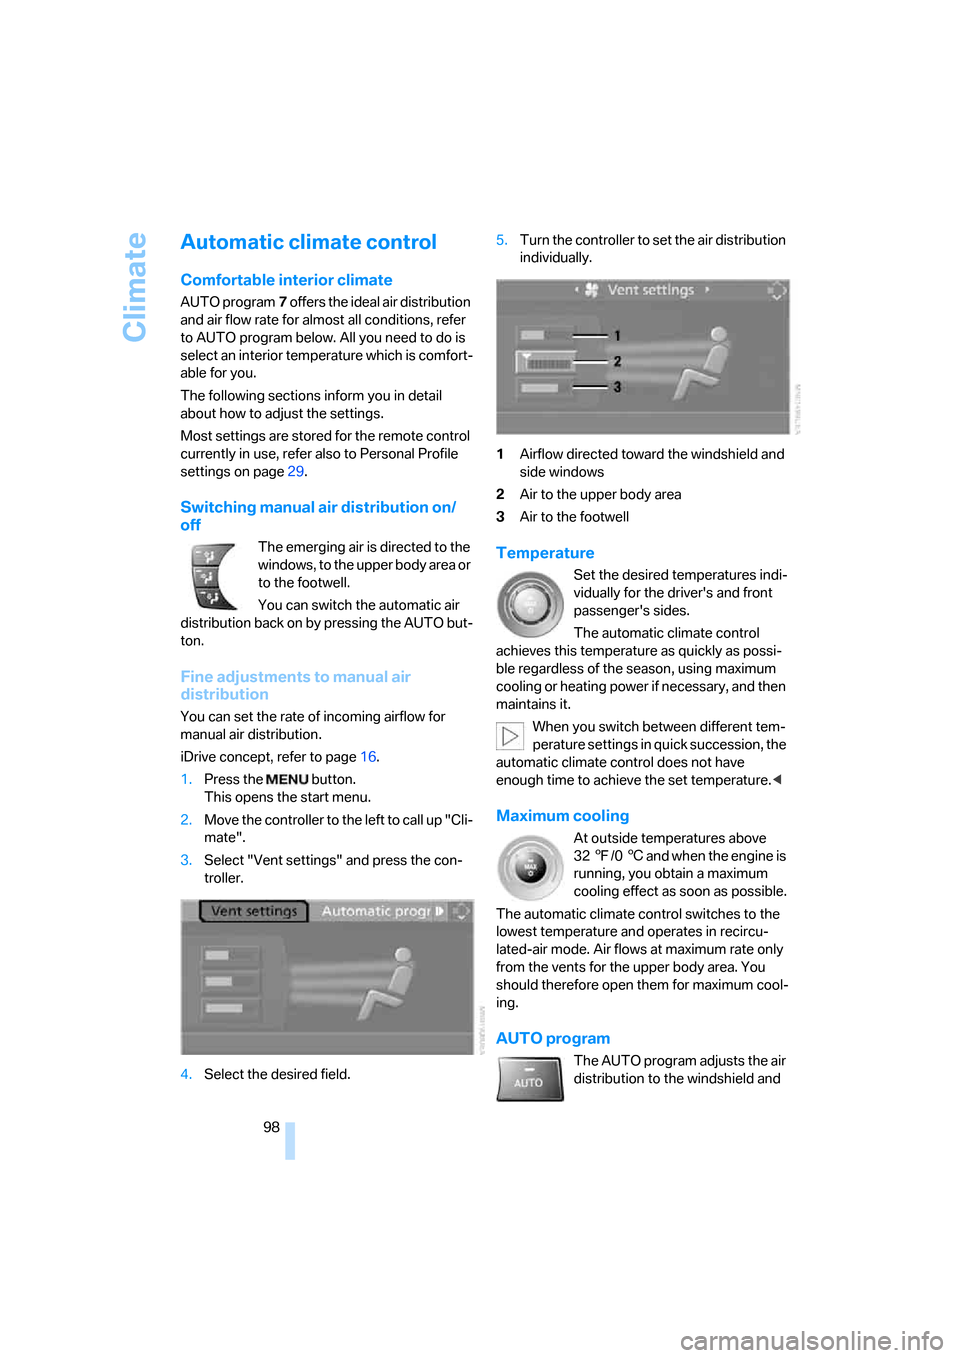
2.Move the controller to the left to call up "Cli-
mate".
3.Select "Vent settings" and press the con-
troller.
4.Select the desired field.5.Turn the controller to set the air distribution
individually.
1Airflow directed toward the windshield and
side windows
2Air to the upper body area
3Air to the footwell
Temperature
Set the desired temperatures indi-
vidually for the driver's and front
passenger's sides.
The automatic climate control
achieves this temperature as quickly as possi-
ble regardless of the season, using maximum
cooling or heating power if necessary, and then
maintains it.
When you switch between different tem-
perature settings in quick succession, the
automatic climate control does not have
enough time to achieve the set temperature.<
Maximum cooling
At outside temperatures above
327/06 and when the engine is
running, you obtain a maximum
cooling effect as soon as possible.
The automatic climate control switches to the
lowest temperature and operates in recircu-
lated-air mode. Air flows at maximum rate only
from the vents for the upper body area. You
should therefore open them for maximum cool-
ing.
AUTO program
The AUTO program adjusts the air
distribution to the windshield and
Page 102 of 245
Climate
100 The function can be switched on when the fol-
lowing conditions are met:
>Up to 15 minutes after the engine has been
switched off
>While the engine is at operating tempera-
ture
>As long as battery voltage is sufficient
>At an outside temperature below 777/
256
The LED is lit when the function is on.
As of radio readiness, you can set the interior
temperature, the air flow rate and the air distri-
bution.
Defrosting windows and removing
condensation
Quickly removes ice and conden-
sation from the windshield and
front side windows.
Switching cooling function on/off
The cooling function cools and
dehumidifies the incoming air
before also reheating it as
required, according to the temperature setting.
Depending on the weather, the windshield may
fog over briefly when the engine is started.
The cooling function is automatically switched
on along with the AUTO program. The passen-
ger compartment can only be cooled while the
engine is running.
Rear window defroster
The defroster switches off auto-
matically after a certain time.
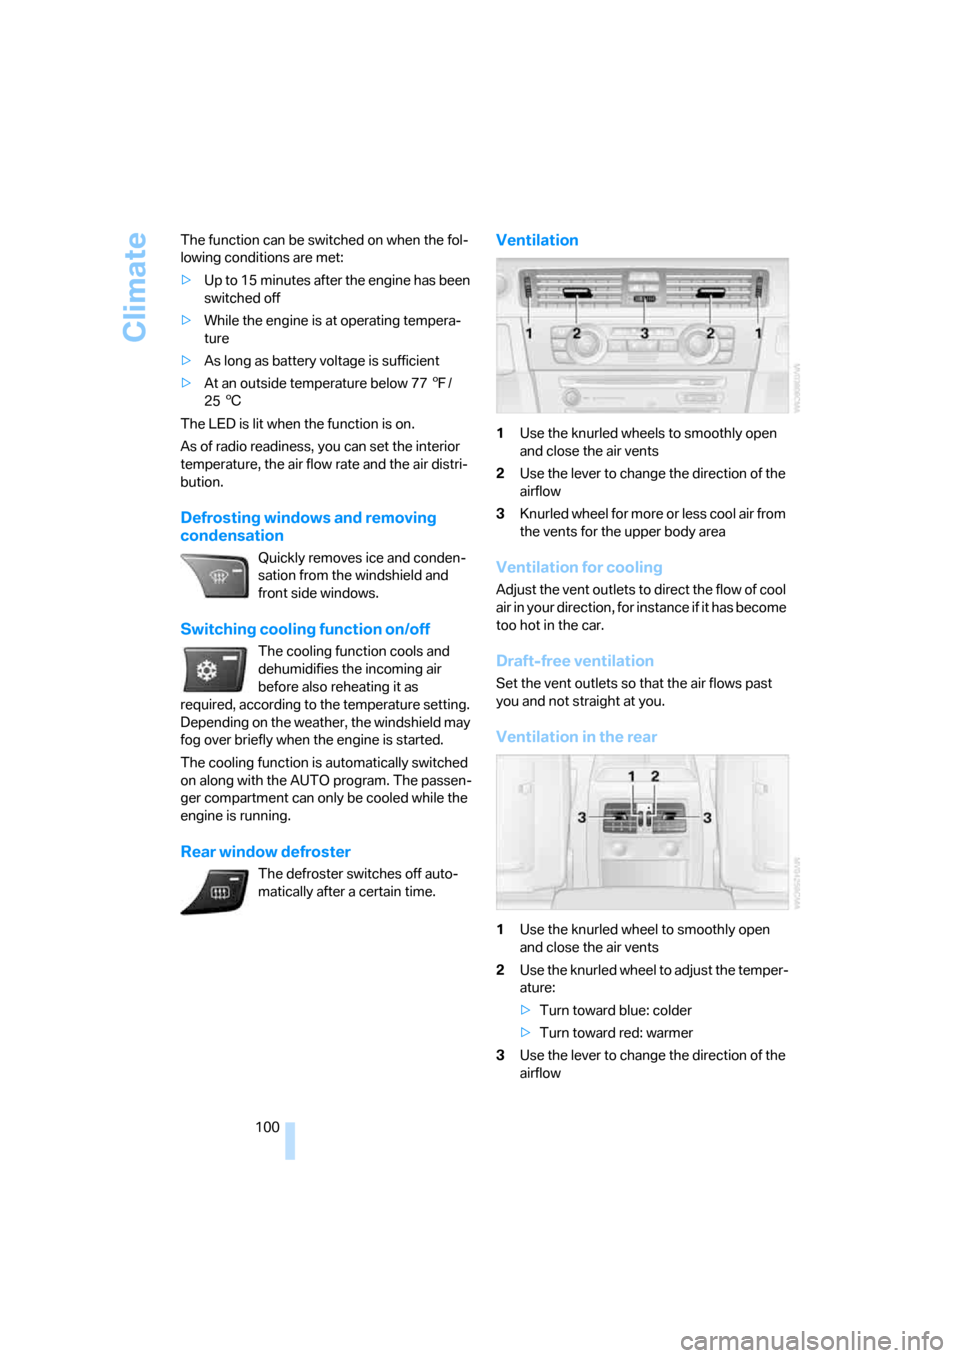
Ventilation
1Use the knurled wheels to smoothly open
and close the air vents
2Use the lever to change the direction of the
airflow
3Knurled wheel for more or less cool air from
the vents for the upper body area
Ventilation for cooling
Adjust the vent outlets to direct the flow of cool
air in your direction, for instance if it has become
too hot in the car.
Draft-free ventilation
Set the vent outlets so that the air flows past
you and not straight at you.
Ventilation in the rear
1Use the knurled wheel to smoothly open
and close the air vents
2Use the knurled wheel to adjust the temper-
ature:
>Turn toward blue: colder
>Turn toward red: warmer
3Use the lever to change the direction of the
airflow
Page 103 of 245
Controls
101Reference
At a glance
Driving tips
Communications
Navigation
Entertainment
Mobility
Microfilter/activated-charcoal filter
The microfilter traps dust and pollen in the
incoming air. The activated-charcoal filter pro-
vides additional protection by filtering gaseous
pollutants from the outside air. Your BMW Cen-
ter replaces this combined filter during routine
maintenance.
You can call up further information in the service
requirements display, refer to page74.
Parked car ventilation
Concept
The parked car ventilation/heating provides
ventilation to the passenger compartment and
lowers its temperature, if necessary. It is ready
for use at any outside temperature, as of radio
readiness.
The parked car ventilation/heating remains
switched on for 30 minutes. Two different
switch-on times can be preselected. The sys-
tem can also be switched on and off directly.
Due to its high power consumption, it should
not be switched on twice in a row without driv-
ing in between to allow the battery to recharge.
The air emerges from the air vents for the upper
body area in the instrument panel. The air vents
must therefore be open.
The parked car ventilation system is operated
via iDrive.
Switching on/off directly
iDrive concept, refer to page16.
1.Open the start menu.
2.Move the controller to the left to call up "Cli-
mate".
3.Select "Parked car operation" and press the
controller.
4.Select "Automatic ventilation" and press
the controller.5.Select "Parked car ventilation" and press
the controller.
The parked car ventilation/heating is
switched on.
The symbol on the automatic climate control
display flashes.
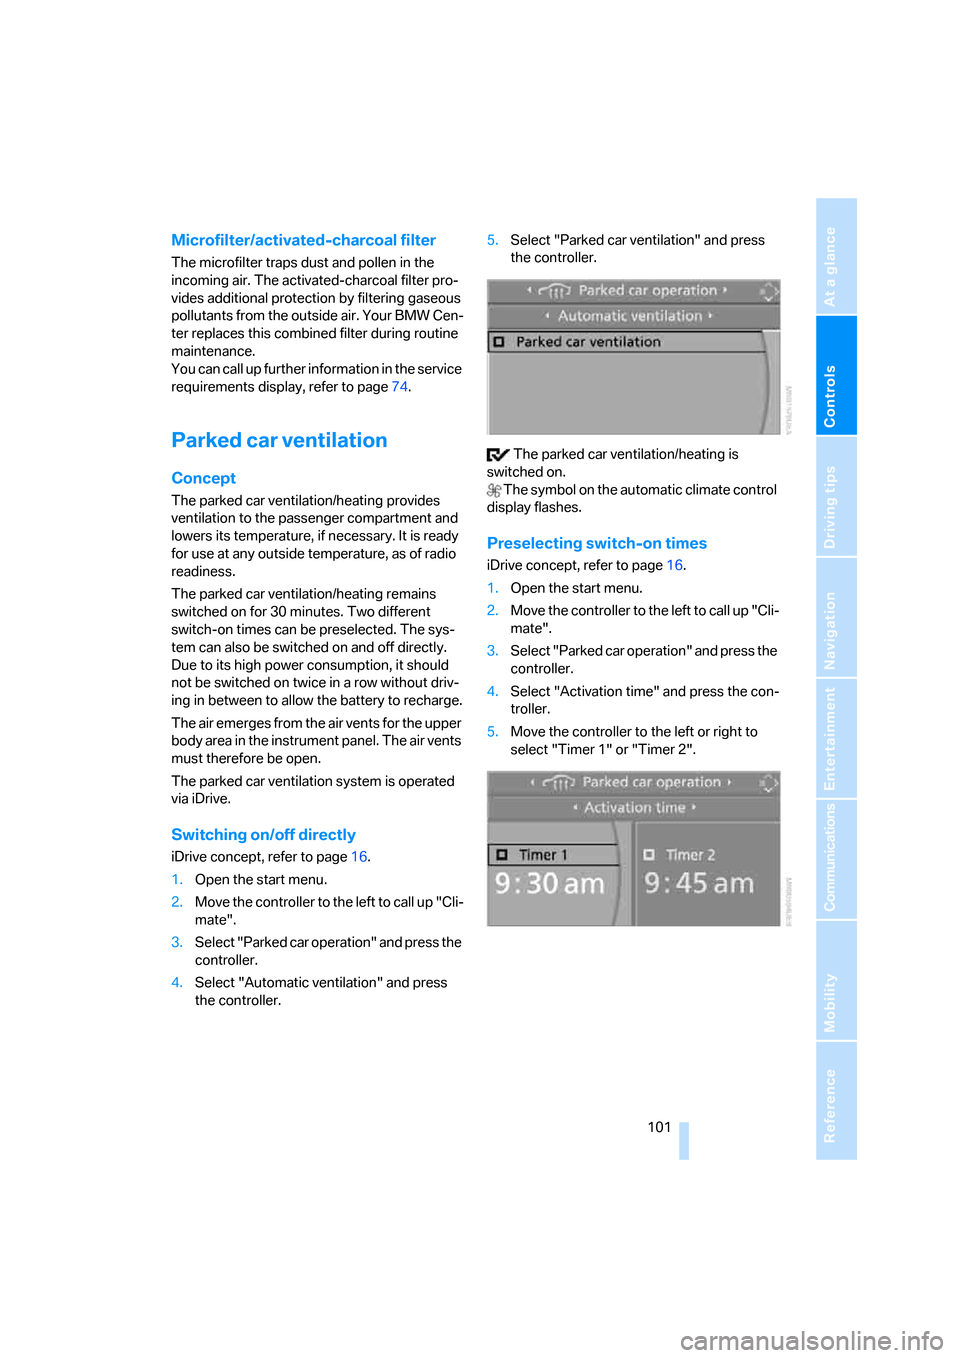
Preselecting switch-on times
iDrive concept, refer to page16.
1.Open the start menu.
2.Move the controller to the left to call up "Cli-
mate".
3.Select "Parked car operation" and press the
controller.
4.Select "Activation time" and press the con-
troller.
5.Move the controller to the left or right to
select "Timer 1" or "Timer 2".
Page 119 of 245
Driving tips
117Reference
At a glance
Controls
Communications
Navigation
Entertainment
Mobility
nection to an outside antenna. Otherwise, the
vehicle electronics and mobile communication
device can influence one another. In addition,
there is no assurance that the radiation which
results from transmission will be dissipated
from the vehicle interior.<
Interior and exterior mirrors, automatic
dimming feature*
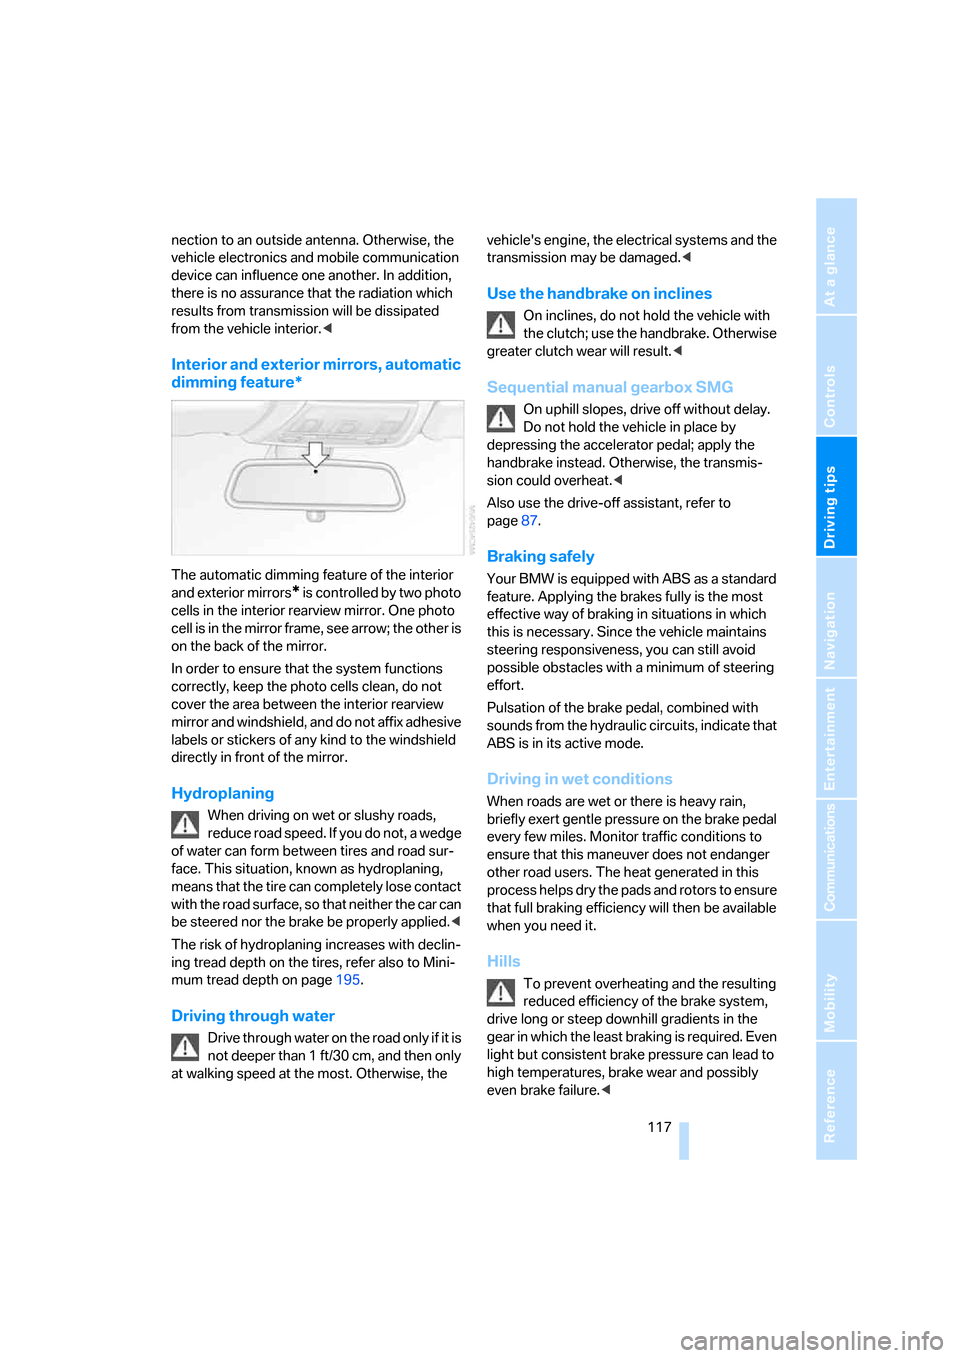
The automatic dimming feature of the interior
and exterior mirrors
* is controlled by two photo
cells in the interior rearview mirror. One photo
cell is in the mirror frame, see arrow; the other is
on the back of the mirror.
In order to ensure that the system functions
correctly, keep the photo cells clean, do not
cover the area between the interior rearview
mirror and windshield, and do not affix adhesive
labels or stickers of any kind to the windshield
directly in front of the mirror.
Hydroplaning
When driving on wet or slushy roads,
reduce road speed. If you do not, a wedge
of water can form between tires and road sur-
face. This situation, known as hydroplaning,
means that the tire can completely lose contact
with the road surface, so that neither the car can
be steered nor the brake be properly applied.<
The risk of hydroplaning increases with declin-
ing tread depth on the tires, refer also to Mini-
mum tread depth on page195.
Driving through water
Drive through water on the road only if it is
not deeper than 1 ft/30 cm, and then only
at walking speed at the most. Otherwise, the vehicle's engine, the electrical systems and the
transmission may be damaged.<
Use the handbrake on inclines
On inclines, do not hold the vehicle with
the clutch; use the handbrake. Otherwise
greater clutch wear will result.<
Sequential manual gearbox SMG
On uphill slopes, drive off without delay.
Do not hold the vehicle in place by
depressing the accelerator pedal; apply the
handbrake instead. Otherwise, the transmis-
sion could overheat.<
Also use the drive-off assistant, refer to
page87.
Braking safely
Your BMW is equipped with ABS as a standard
feature. Applying the brakes fully is the most
effective way of braking in situations in which
this is necessary. Since the vehicle maintains
steering responsiveness, you can still avoid
possible obstacles with a minimum of steering
effort.
Pulsation of the brake pedal, combined with
sounds from the hydraulic circuits, indicate that
ABS is in its active mode.
Driving in wet conditions
When roads are wet or there is heavy rain,
briefly exert gentle pressure on the brake pedal
every few miles. Monitor traffic conditions to
ensure that this maneuver does not endanger
other road users. The heat generated in this
process helps dry the pads and rotors to ensure
that full braking efficiency will then be available
when you need it.
Hills
To prevent overheating and the resulting
reduced efficiency of the brake system,
drive long or steep downhill gradients in the
gear in which the least braking is required. Even
light but consistent brake pressure can lead to
high temperatures, brake wear and possibly
even brake failure.<
Page 120 of 245
Things to remember when driving
118 You can increase the engine's braking effect by
shifting down, all the way to first gear if neces-
sary. This strategy helps you avoid placing
excessive loads on the brake system. Down-
shifting in manual mode of the automatic trans-
mission, refer to page58.
Never drive with the clutch held down,
with the transmission in idle or with the
engine switched off; otherwise, engine braking
action will not be present or there will be no
power assistance to the brakes or steering.
Never allow floor mats, carpets or any other
objects to protrude into the area around the
pedals, otherwise pedal function could be
impaired.<
Corrosion on brake rotors
When the vehicle is driven only occasionally,
during extended periods when the vehicle is not
used at all, and in operating conditions where
brake applications are less frequent, there is an
increased tendency for corrosion to form on
rotors, while contaminants accumulate on the
brake pads. This occurs because the minimum
pressure which must be exerted by the pads
during brake applications to clean the rotors is
not reached.
Should corrosion form on the brake rotors, the
brakes will tend to respond with a pulsating
effect that even extended application will fail to
cure.
When the vehicle is parked
Condensation forms while the automatic cli-
mate control is in operation, and then exits
under the vehicle. Traces of condensed water
under the vehicle are therefore normal.
Before driving into a car wash
For general information about taking care of
your BMW, refer to the Caring for your vehicle
brochure.
With convenient access and automatic
transmission
Insert the remote control into the ignition
switch.The engine can be switched off when the selec-
tor lever is in position N. Refer also to page36.
Cargo loading
To avoid loading the tires beyond their
approved carrying capacity, never over-
load the vehicle. Overloading can lead to over-
heating and increases the rate at which damage
develops inside the tires. The ultimate result
can assume the form of a sudden blow-out.<
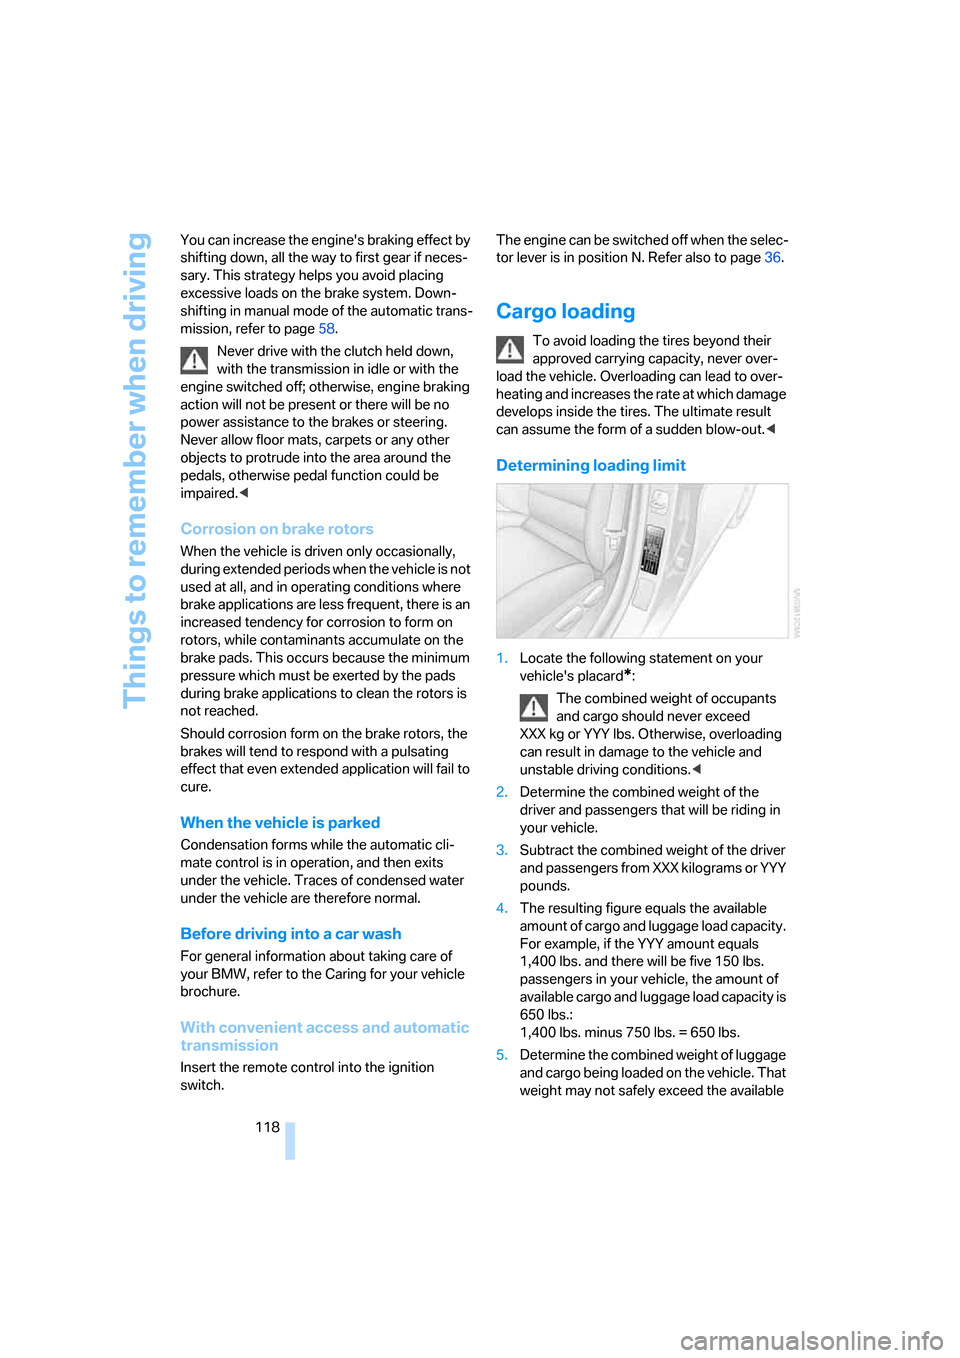
Determining loading limit
1.Locate the following statement on your
vehicle's placard
*:
The combined weight of occupants
and cargo should never exceed
XXX kg or YYY lbs. Otherwise, overloading
can result in damage to the vehicle and
unstable driving conditions.<
2.Determine the combined weight of the
driver and passengers that will be riding in
your vehicle.
3.Subtract the combined weight of the driver
and passengers from XXX kilograms or YYY
pounds.
4.The resulting figure equals the available
amount of cargo and luggage load capacity.
For example, if the YYY amount equals
1,400 lbs. and there will be five 150 lbs.
passengers in your vehicle, the amount of
available cargo and luggage load capacity is
650 lbs.:
1,400 lbs. minus 750 lbs. = 650 lbs.
5.Determine the combined weight of luggage
and cargo being loaded on the vehicle. That
weight may not safely exceed the available
Page 233 of 245
Reference 231
At a glance
Controls
Driving tips
Communications
Navigation
Entertainment
Mobility
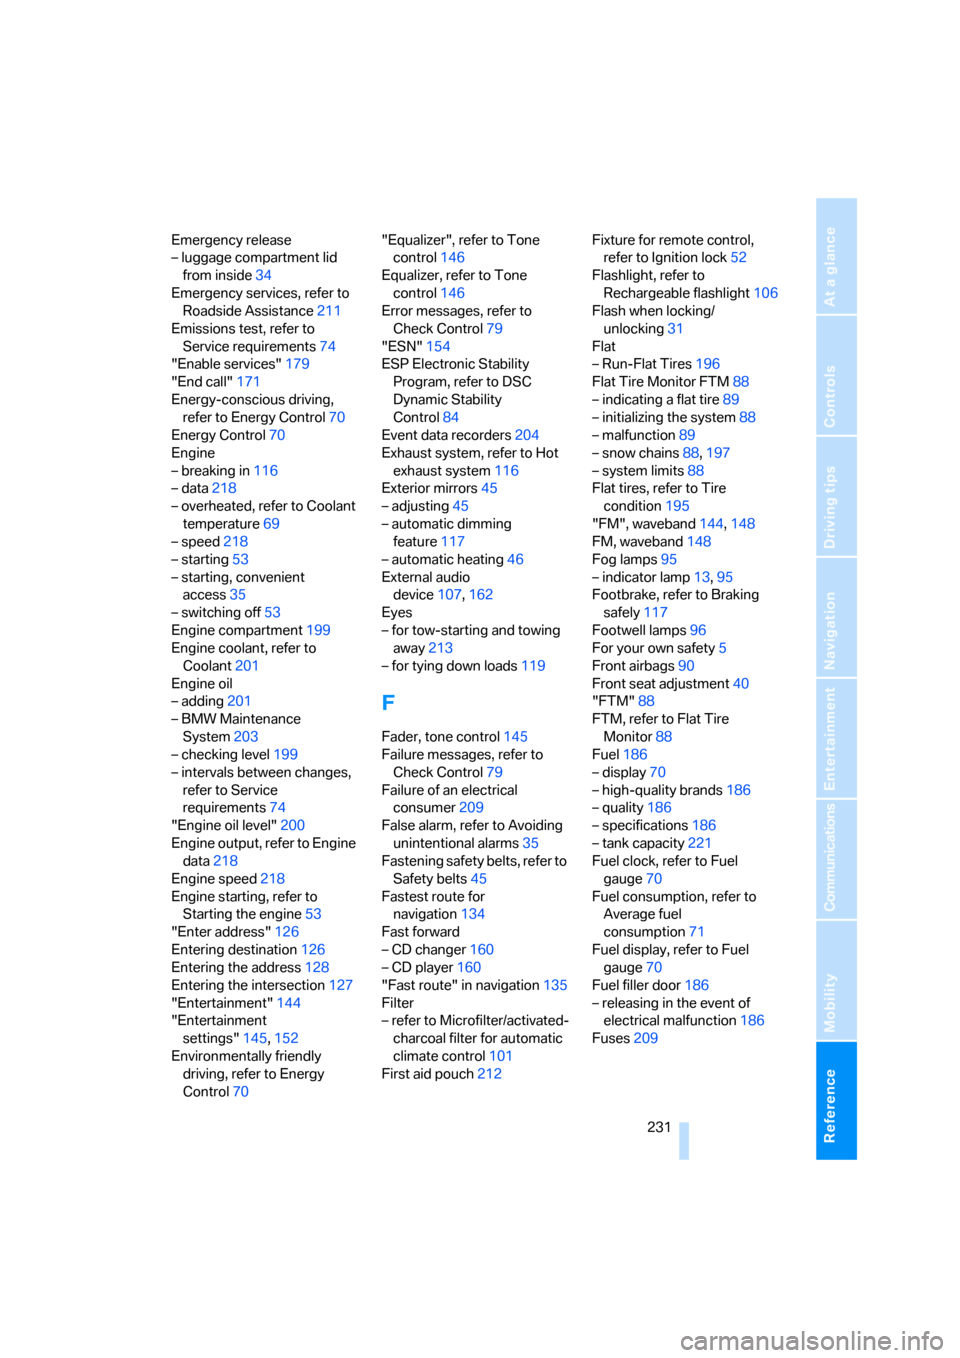
Emergency release
– luggage compartment lid
from inside34
Emergency services, refer to
Roadside Assistance211
Emissions test, refer to
Service requirements74
"Enable services"179
"End call"171
Energy-conscious driving,
refer to Energy Control70
Energy Control70
Engine
– breaking in116
– data218
– overheated, refer to Coolant
temperature69
– speed218
– starting53
– starting, convenient
access35
– switching off53
Engine compartment199
Engine coolant, refer to
Coolant201
Engine oil
– adding201
– BMW Maintenance
System203
– checking level199
– intervals between changes,
refer to Service
requirements74
"Engine oil level"200
Engine output, refer to Engine
data218
Engine speed218
Engine starting, refer to
Starting the engine53
"Enter address"126
Entering destination126
Entering the address128
Entering the intersection127
"Entertainment"144
"Entertainment
settings"145,152
Environmentally friendly
driving, refer to Energy
Control70"Equalizer", refer to Tone
control146
Equalizer, refer to Tone
control146
Error messages, refer to
Check Control79
"ESN"154
ESP Electronic Stability
Program, refer to DSC
Dynamic Stability
Control84
Event data recorders204
Exhaust system, refer to Hot
exhaust system
116
Exterior mirrors45
– adjusting45
– automatic dimming
feature117
– automatic heating46
External audio
device107,162
Eyes
– for tow-starting and towing
away213
– for tying down loads119
F
Fader, tone control145
Failure messages, refer to
Check Control79
Failure of an electrical
consumer209
False alarm, refer to Avoiding
unintentional alarms35
Fastening safety belts, refer to
Safety belts45
Fastest route for
navigation134
Fast forward
– CD changer160
– CD player160
"Fast route" in navigation135
Filter
– refer to Microfilter/activated-
charcoal filter for automatic
climate control101
First aid pouch212Fixture for remote control,
refer to Ignition lock52
Flashlight, refer to
Rechargeable flashlight106
Flash when locking/
unlocking31
Flat
– Run-Flat Tires196
Flat Tire Monitor FTM88
– indicating a flat tire89
– initializing the system88
– malfunction89
– snow chains88,197
– system limits88
Flat tires, refer to Tire
condition195
"FM", waveband144,148
FM, waveband148
Fog lamps95
– indicator lamp13,95
Footbrake, refer to Braking
safely117
Footwell lamps96
For your own safety5
Front airbags90
Front seat adjustment40
"FTM"88
FTM, refer to Flat Tire
Monitor88
Fuel186
– display70
– high-quality brands186
– quality186
– specifications186
– tank capacity221
Fuel clock, refer to Fuel
gauge
70
Fuel consumption, refer to
Average fuel
consumption71
Fuel display, refer to Fuel
gauge70
Fuel filler door186
– releasing in the event of
electrical malfunction186
Fuses209
Page 234 of 245
Everything from A - Z
232
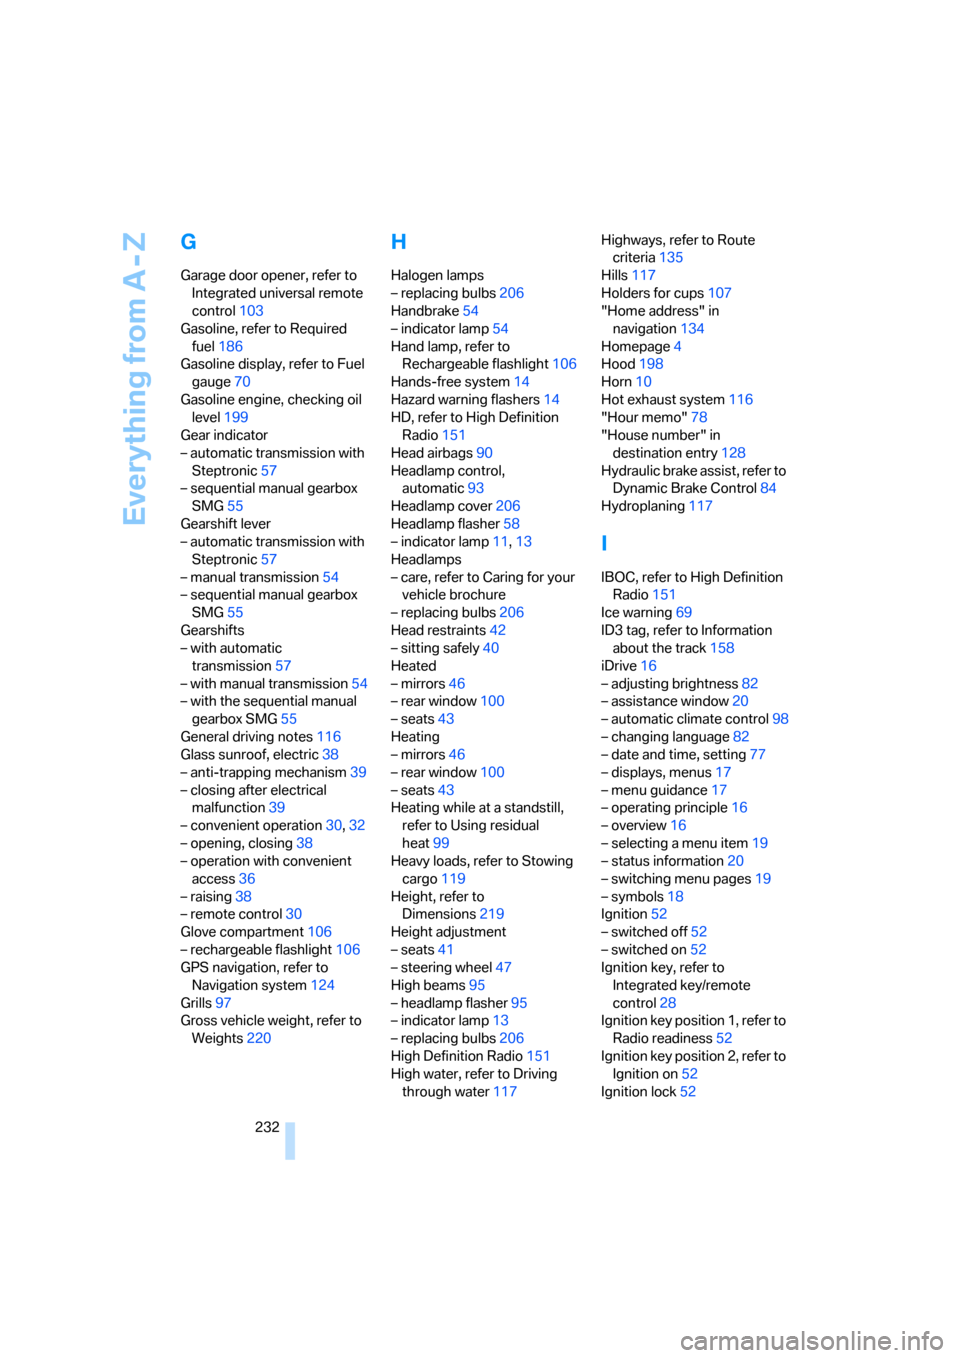
G
Garage door opener, refer to
Integrated universal remote
control103
Gasoline, refer to Required
fuel186
Gasoline display, refer to Fuel
gauge70
Gasoline engine, checking oil
level199
Gear indicator
– automatic transmission with
Steptronic57
– sequential manual gearbox
SMG55
Gearshift lever
– automatic transmission with
Steptronic57
– manual transmission54
– sequential manual gearbox
SMG55
Gearshifts
– with automatic
transmission57
– with manual transmission54
– with the sequential manual
gearbox SMG55
General driving notes116
Glass sunroof, electric38
– anti-trapping mechanism39
– closing after electrical
malfunction39
– convenient operation30,32
– opening, closing38
– operation with convenient
access36
– raising38
– remote control30
Glove compartment106
– rechargeable flashlight106
GPS navigation, refer to
Navigation system124
Grills97
Gross vehicle weight, refer to
Weights220
H
Halogen lamps
– replacing bulbs206
Handbrake54
– indicator lamp54
Hand lamp, refer to
Rechargeable flashlight106
Hands-free system14
Hazard warning flashers14
HD, refer to High Definition
Radio151
Head airbags90
Headlamp control,
automatic93
Headlamp cover206
Headlamp flasher58
– indicator lamp11,13
Headlamps
– care, refer to Caring for your
vehicle brochure
– replacing bulbs206
Head restraints42
– sitting safely40
Heated
– mirrors46
– rear window100
– seats43
Heating
– mirrors46
– rear window100
– seats43
Heating while at a standstill,
refer to Using residual
heat99
Heavy loads, refer to Stowing
cargo119
Height, refer to
Dimensions219
Height adjustment
– seats41
– steering wheel47
High beams95
– headlamp flasher95
– indicator lamp13
– replacing bulbs206
High Definition Radio151
High water, refer to Driving
through water117Highways, refer to Route
criteria135
Hills117
Holders for cups107
"Home address" in
navigation134
Homepage4
Hood198
Horn10
Hot exhaust system116
"Hour memo"78
"House number" in
destination entry128
Hydraulic brake assist, refer to
Dynamic Brake Control84
Hydroplaning117
I
IBOC, refer to High Definition
Radio151
Ice warning69
ID3 tag, refer to Information
about the track158
iDrive16
– adjusting brightness82
– assistance window20
– automatic climate control98
– changing language82
– date and time, setting77
– displays, menus17
– menu guidance17
– operating principle16
– overview16
– selecting a menu item19
– status information20
– switching menu pages19
– symbols18
Ignition52
– switched off52
– switched on52
Ignition key, refer to
Integrated key/remote
control28
Ignition key position 1, refer to
Radio readiness52
Ignition key position 2, refer to
Ignition on52
Ignition lock52