BMW 325I SPORT WAGON 2005 Manual PDF
Manufacturer: BMW, Model Year: 2005, Model line: 325I SPORT WAGON, Model: BMW 325I SPORT WAGON 2005Pages: 178, PDF Size: 2.69 MB
Page 71 of 178
71
Automatic transmission with Steptronic*You can drive as with a normal auto-
matic transmission. In addition, you can
also shift manually.
When you move the selector lever from
the D position to the left into the M/S
range, the performance-oriented shift
programs of the automatic transmission
are engaged. Steptronic enters the
manual selection mode and executes
the desired shift whenever you tap the
selector lever in the direction indicated
by + or –. Whenever you want to use
automatic again, just move the selector
lever toward the right to position D.
Under normal operating conditions, fuel
consumption is lowest when driving in
position D.
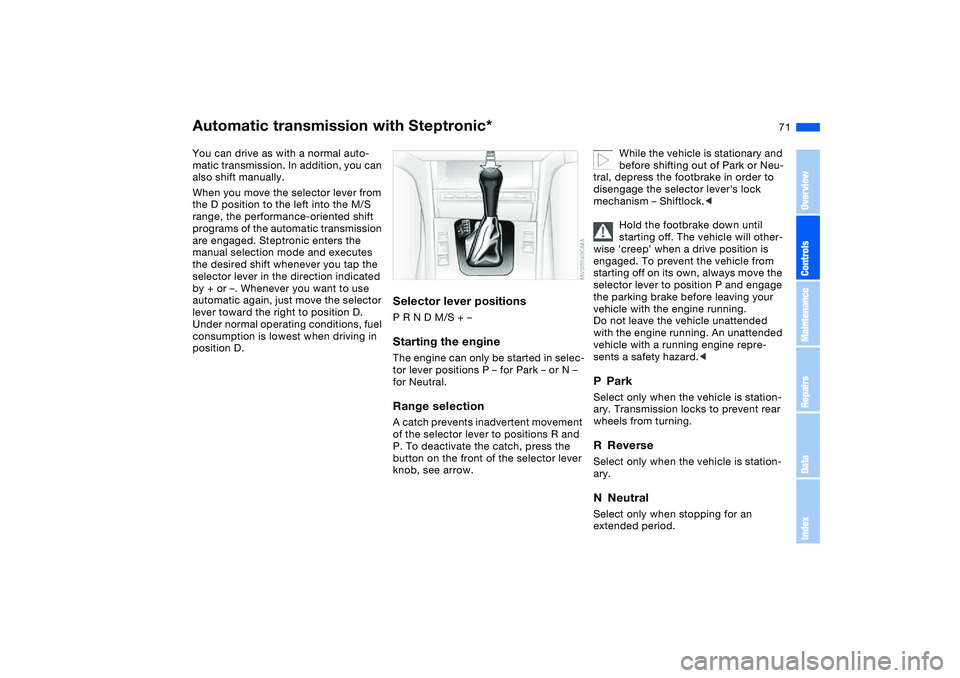
Selector lever positionsP R N D M/S + –Starting the engineThe engine can only be started in selec-
tor lever positions P – for Park – or N –
for Neutral.Range selectionA catch prevents inadvertent movement
of the selector lever to positions R and
P. To deactivate the catch, press the
button on the front of the selector lever
knob, see arrow.
While the vehicle is stationary and
before shifting out of Park or Neu-
tral, depress the footbrake in order to
disengage the selector lever's lock
mechanism – Shiftlock.<
Hold the footbrake down until
starting off. The vehicle will other-
wise 'creep' when a drive position is
engaged. To prevent the vehicle from
starting off on its own, always move the
selector lever to position P and engage
the parking brake before leaving your
vehicle with the engine running.
Do not leave the vehicle unattended
with the engine running. An unattended
vehicle with a running engine repre-
sents a safety hazard.<
PParkSelect only when the vehicle is station-
ary. Transmission locks to prevent rear
wheels from turning.RReverseSelect only when the vehicle is station-
ary.NNeutralSelect only when stopping for an
extended period.
OverviewControlsMaintenanceRepairsDataIndex
Page 72 of 178
72
DDrive – automatic shift programThis position is designed for driving
under all normal operating conditions.
All forward gears are available.KickdownIn the kickdown mode, you achieve
maximum acceleration and top speed
in position D.
Depress the accelerator pedal past the
increased resistance point at the full-
throttle position.
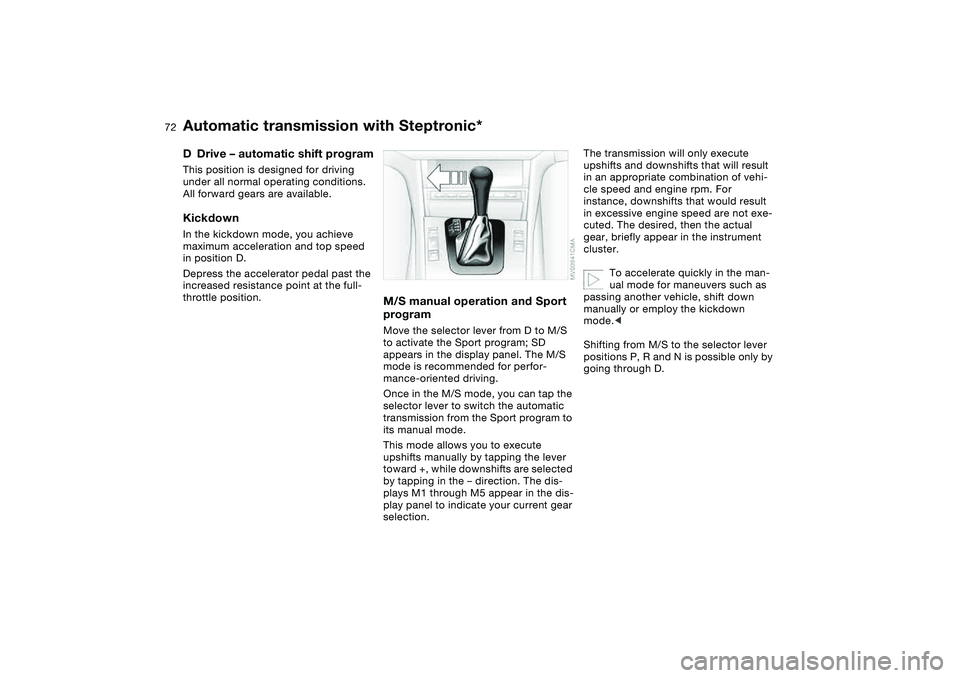
M/S manual operation and Sport
programMove the selector lever from D to M/S
to activate the Sport program; SD
appears in the display panel. The M/S
mode is recommended for perfor-
mance-oriented driving.
Once in the M/S mode, you can tap the
selector lever to switch the automatic
transmission from the Sport program to
its manual mode.
This mode allows you to execute
upshifts manually by tapping the lever
toward +, while downshifts are selected
by tapping in the – direction. The dis-
plays M1 through M5 appear in the dis-
play panel to indicate your current gear
selection.
The transmission will only execute
upshifts and downshifts that will result
in an appropriate combination of vehi-
cle speed and engine rpm. For
instance, downshifts that would result
in excessive engine speed are not exe-
cuted. The desired, then the actual
gear, briefly appear in the instrument
cluster.
To accelerate quickly in the man-
ual mode for maneuvers such as
passing another vehicle, shift down
manually or employ the kickdown
mode.<
Shifting from M/S to the selector lever
positions P, R and N is possible only by
going through D.
Automatic transmission with Steptronic*
Page 73 of 178
73
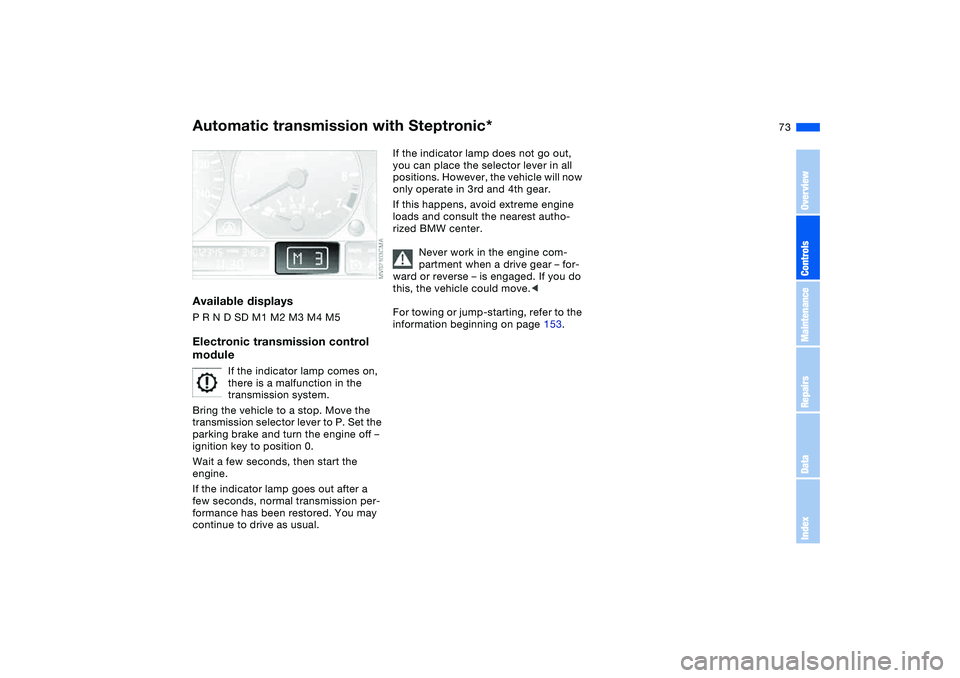
Available displaysP R N D SD M1 M2 M3 M4 M5Electronic transmission control
module
If the indicator lamp comes on,
there is a malfunction in the
transmission system.
Bring the vehicle to a stop. Move the
transmission selector lever to P. Set the
parking brake and turn the engine off –
ignition key to position 0.
Wait a few seconds, then start the
engine.
If the indicator lamp goes out after a
few seconds, normal transmission per-
formance has been restored. You may
continue to drive as usual.
If the indicator lamp does not go out,
you can place the selector lever in all
positions. However, the vehicle will now
only operate in 3rd and 4th gear.
If this happens, avoid extreme engine
loads and consult the nearest autho-
rized BMW center.
Never work in the engine com-
partment when a drive gear – for-
ward or reverse – is engaged. If you do
this, the vehicle could move.<
For towing or jump-starting, refer to the
information beginning on page 153.
Automatic transmission with Steptronic*
OverviewControlsMaintenanceRepairsDataIndex
Page 74 of 178
74
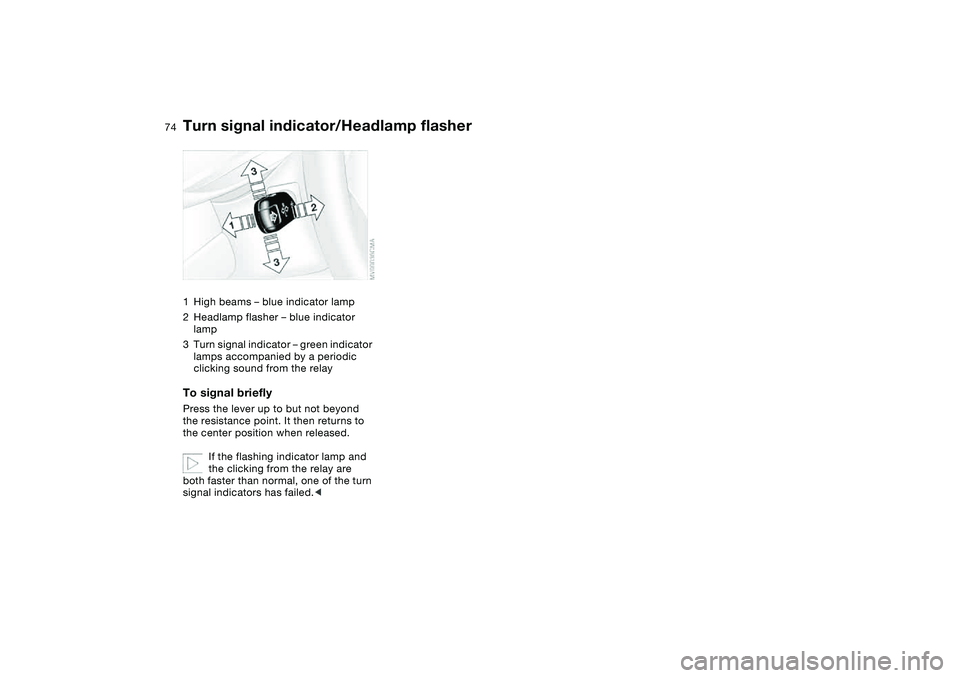
Turn signal indicator/Headlamp flasher1High beams – blue indicator lamp
2Headlamp flasher – blue indicator
lamp
3Turn signal indicator – green indicator
lamps accompanied by a periodic
clicking sound from the relayTo signal brieflyPress the lever up to but not beyond
the resistance point. It then returns to
the center position when released.
If the flashing indicator lamp and
the clicking from the relay are
both faster than normal, one of the turn
signal indicators has failed.<
Page 75 of 178
75
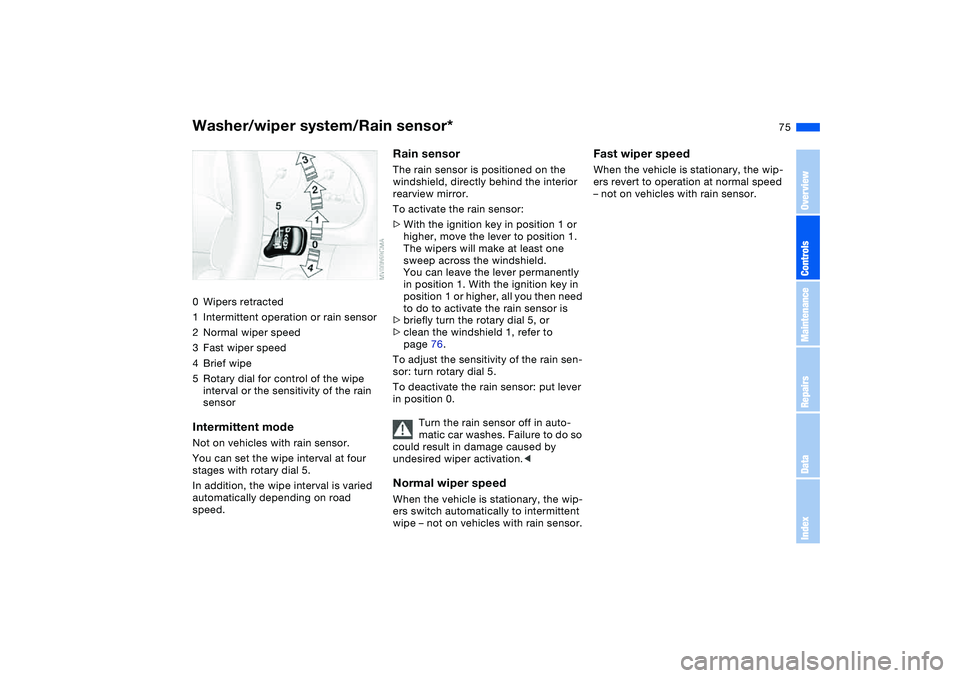
Washer/wiper system/Rain sensor*0Wipers retracted
1Intermittent operation or rain sensor
2Normal wiper speed
3Fast wiper speed
4Brief wipe
5Rotary dial for control of the wipe
interval or the sensitivity of the rain
sensorIntermittent modeNot on vehicles with rain sensor.
You can set the wipe interval at four
stages with rotary dial 5.
In addition, the wipe interval is varied
automatically depending on road
speed.
Rain sensorThe rain sensor is positioned on the
windshield, directly behind the interior
rearview mirror.
To activate the rain sensor:
>With the ignition key in position 1 or
higher, move the lever to position 1.
The wipers will make at least one
sweep across the windshield.
You can leave the lever permanently
in position 1. With the ignition key in
position 1 or higher, all you then need
to do to activate the rain sensor is
>briefly turn the rotary dial 5, or
>clean the windshield 1, refer to
page 76.
To adjust the sensitivity of the rain sen-
sor: turn rotary dial 5.
To deactivate the rain sensor: put lever
in position 0.
Turn the rain sensor off in auto-
matic car washes. Failure to do so
could result in damage caused by
undesired wiper activation.
wipe – not on vehicles with rain sensor.
Fast wiper speedWhen the vehicle is stationary, the wip-
ers revert to operation at normal speed
– not on vehicles with rain sensor.
OverviewControlsMaintenanceRepairsDataIndex
Page 76 of 178
76
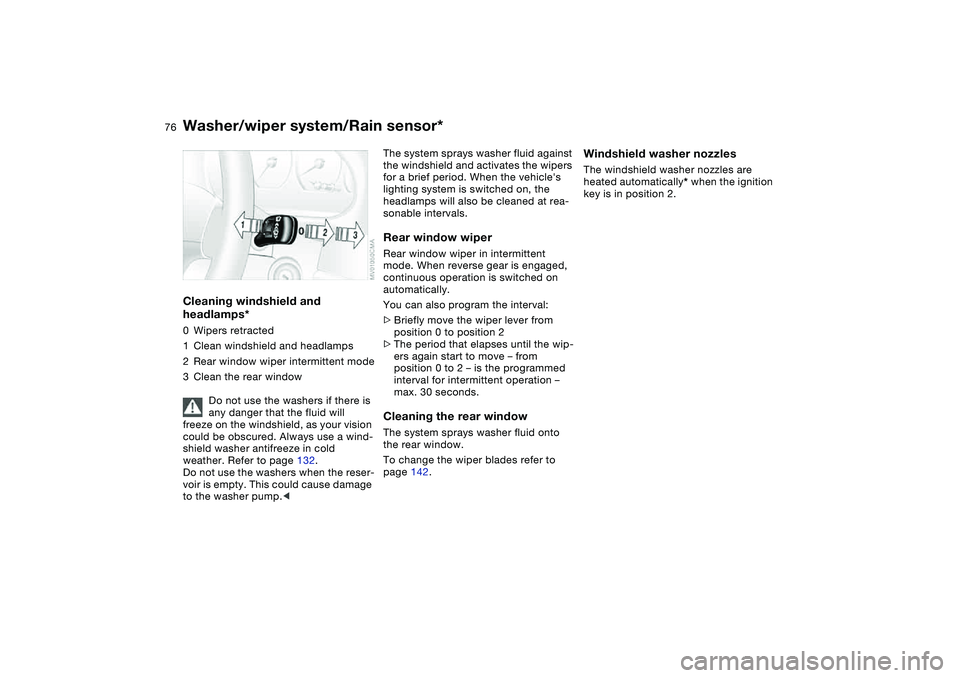
Cleaning windshield and
headlamps*0Wipers retracted
1Clean windshield and headlamps
2Rear window wiper intermittent mode
3Clean the rear window
Do not use the washers if there is
any danger that the fluid will
freeze on the windshield, as your vision
could be obscured. Always use a wind-
shield washer antifreeze in cold
weather. Refer to page 132.
Do not use the washers when the reser-
voir is empty. This could cause damage
to the washer pump.<
The system sprays washer fluid against
the windshield and activates the wipers
for a brief period. When the vehicle's
lighting system is switched on, the
headlamps will also be cleaned at rea-
sonable intervals.Rear window wiperRear window wiper in intermittent
mode. When reverse gear is engaged,
continuous operation is switched on
automatically.
You can also program the interval:
>Briefly move the wiper lever from
position 0 to position 2
>The period that elapses until the wip-
ers again start to move – from
position 0 to 2 – is the programmed
interval for intermittent operation –
max. 30 seconds.Cleaning the rear windowThe system sprays washer fluid onto
the rear window.
To change the wiper blades refer to
page 142.
Windshield washer nozzlesThe windshield washer nozzles are
heated automatically* when the ignition
key is in position 2.
Washer/wiper system/Rain sensor*
Page 77 of 178
77
Cruise control*Starting at about 20 mph / 30 km/h, you
can maintain and store any vehicle
speed that you specify.
The cruise control is operational when-
ever the engine is running and the sys-
tem has been activated.To activate the systemIn ignition key position 2: press the but-
ton in the steering wheel. The indicator
lamp in the instrument cluster comes
on, refer to page 20. You can now use
the cruise control.
Do not use cruise control on twist-
ing roads, when high traffic den-
sity prevents driving at a constant
speed, or when the road surface is slick
– snow, rain, ice – or loose – rocks or
gravel, sand.
ment cluster goes out.
Cruise control is also deactivated when
the ignition key is in position 0.
The speed stored in memory is deleted.To store and maintain speed or to
acceleratePress button + briefly:
The system stores and maintains the
current vehicle speed. Every time you
tap the button, the speed increases by
approx. 0.6 mph / 1 km/h.
Press and hold button +:
The vehicle accelerates without pres-
sure on the accelerator pedal. When
you release the button, the system
stores and maintains the current speed.
If on a downhill gradient the
engine braking effect is not suffi-
cient, the controlled speed can be
exceeded. Speed can drop on uphill
grades if the engine output is insuffi-
cient.
of the button reduces the speed by
approx. 0.6 mph / 1 km/h.
Press and hold button –:
With the cruise control active, the sys-
tem automatically reduces the throttle
opening to slow the vehicle. When you
release the button, the system stores
and maintains the current speed.To interrupt the cruise controlWhen the system is activated, press the
button. The indicator lamp stays on.
You can use the cruise control again
whenever you want by calling up the
speed that was stored last.
In addition, cruise control is interrupted
automatically:
>When the brakes are applied
>When you apply pressure to the
clutch pedal, or when you move the
automatic transmission selector lever
from D to N
>If you exceed or fall below the preset
speed for an extended period – by
depressing the accelerator, for exam-
ple.
OverviewControlsMaintenanceRepairsDataIndex
Page 78 of 178
78
To recall the stored settingPress button:
The vehicle accelerates to and main-
tains the last speed stored.Cruise control*
Page 79 of 178
79 Everything under control
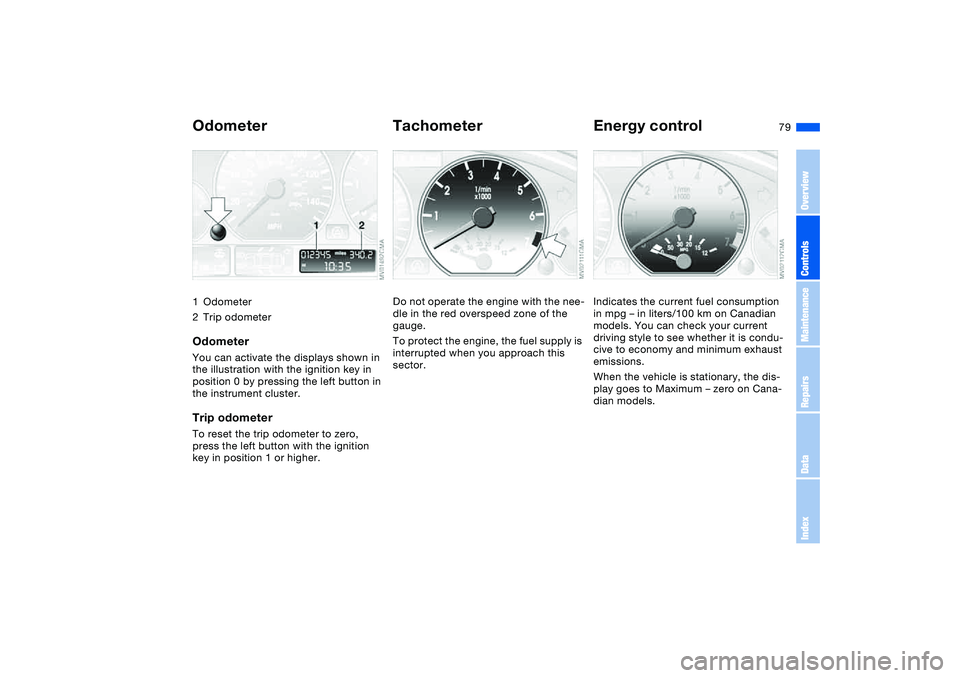
Odometer1Odometer
2Trip odometerOdometerYou can activate the displays shown in
the illustration with the ignition key in
position 0 by pressing the left button in
the instrument cluster.Trip odometerTo reset the trip odometer to zero,
press the left button with the ignition
key in position 1 or higher.
TachometerDo not operate the engine with the nee-
dle in the red overspeed zone of the
gauge.
To protect the engine, the fuel supply is
interrupted when you approach this
sector.
Energy controlIndicates the current fuel consumption
in mpg – in liters/100 km on Canadian
models. You can check your current
driving style to see whether it is condu-
cive to economy and minimum exhaust
emissions.
When the vehicle is stationary, the dis-
play goes to Maximum – zero on Cana-
dian models.
OverviewControlsMaintenanceRepairsDataIndex
Page 80 of 178
80
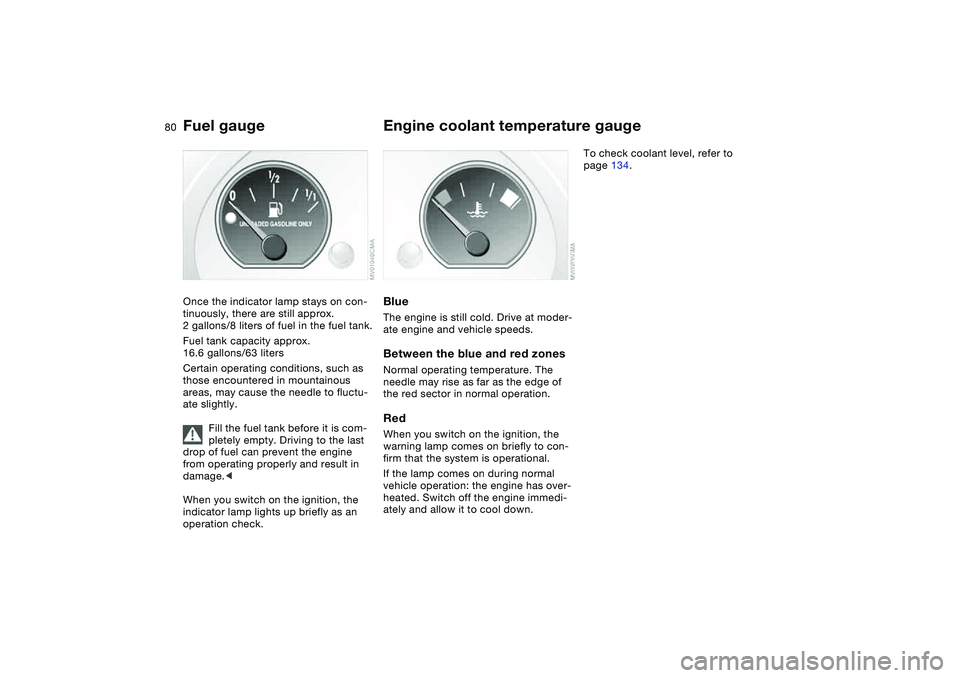
Fuel gaugeOnce the indicator lamp stays on con-
tinuously, there are still approx.
2 gallons/8 liters of fuel in the fuel tank.
Fuel tank capacity approx.
16.6 gallons/63 liters
Certain operating conditions, such as
those encountered in mountainous
areas, may cause the needle to fluctu-
ate slightly.
Fill the fuel tank before it is com-
pletely empty. Driving to the last
drop of fuel can prevent the engine
from operating properly and result in
damage.<
When you switch on the ignition, the
indicator lamp lights up briefly as an
operation check.
Engine coolant temperature gaugeBlueThe engine is still cold. Drive at moder-
ate engine and vehicle speeds.Between the blue and red zonesNormal operating temperature. The
needle may rise as far as the edge of
the red sector in normal operation.RedWhen you switch on the ignition, the
warning lamp comes on briefly to con-
firm that the system is operational.
If the lamp comes on during normal
vehicle operation: the engine has over-
heated. Switch off the engine immedi-
ately and allow it to cool down.
To check coolant level, refer to
page 134.