Back window BMW 325i TOURING 2003 E46 Owner's Manual
[x] Cancel search | Manufacturer: BMW, Model Year: 2003, Model line: 325i TOURING, Model: BMW 325i TOURING 2003 E46Pages: 166, PDF Size: 4.29 MB
Page 35 of 166
35
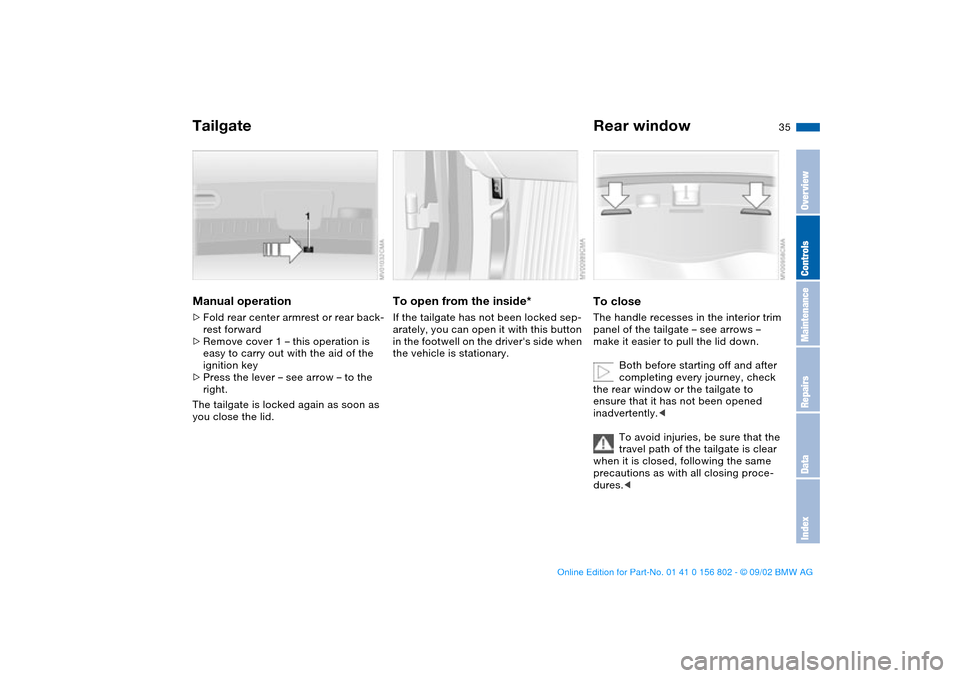
Manual operation>Fold rear center armrest or rear back-
rest forward
>Remove cover 1 – this operation is
easy to carry out with the aid of the
ignition key
>Press the lever – see arrow – to the
right.
The tailgate is locked again as soon as
you close the lid.
To open from the inside*If the tailgate has not been locked sep-
arately, you can open it with this button
in the footwell on the driver's side when
the vehicle is stationary.
Rear windowTo closeThe handle recesses in the interior trim
panel of the tailgate – see arrows –
make it easier to pull the lid down.
Both before starting off and after
completing every journey, check
the rear window or the tailgate to
ensure that it has not been opened
inadvertently.<
To avoid injuries, be sure that the
travel path of the tailgate is clear
when it is closed, following the same
precautions as with all closing proce-
dures.<
Tailgate
OverviewControlsMaintenanceRepairsDataIndex
handbook.book Page 35 Saturday, July 27, 2002 1:36 PM
Page 98 of 166
98
Tips for pleasant drivingUse the automatic mode by pressing
AUTO button 7. Select an interior tem-
perature that is comfortable for you.
Detailed setting options are described
for you in the following section.
You can make the settings of your
vehicle in such a manner that
when you unlock the vehicle with the
remote control of your personal key,
your own personalized setting for the
automatic climate control is initiated.
The AUTO program adjusts the
air distribution and the air sup-
ply for you and in addition adapts the
temperature to external influences –
summer, winter – to meet preferences
you can specify.
Individual air distribution
You can cancel the AUTO pro-
gram by selecting specific dis-
tribution patterns to suit your
own individual requirements.
While the AUTO program is then deacti-
vated, the automatic airflow control
remains in operation. Air flows onto
windows , toward the upper body
, and into the footwell . You can
switch the automatic distribution of air
back on by selecting the AUTO button.Temperature
The interior temperature that
appears in the display panel is a
general figure intended for reference
purposes. We recommend 727/+226
as a comfortable setting, even if the air
conditioning is on. When you start the
vehicle, the system ensures that the
selected temperature is achieved as
quickly as possible regardless of the
season. It then maintains this tempera-
ture.
To select the units of measure 6/7 of
the display, refer to 75.
Air supply/Blower
Press the left or right half of the
button to regulate the air supply.
This deactivates the automatic control
of the air supply, AUTO disappears
from the display panel. Nevertheless,
the automatic air distribution remains
unchanged. You can reactivate the
automatic air distribution mode by
selecting the AUTO button.
When the lowest blower speed is set
and you press the left half of the button,
all of the displays are canceled: the
blower, heating and air conditioning are
switched off. The outside air supply is
blocked. You can reactivate the system
by pressing any button for the auto-
matic climate control.To defrost windows and remove
condensation
This program quickly removes
ice and condensation from the
windshield and the side windows.
Air conditioning
The air is cooled and dehumidi-
fied and – depending on the
temperature setting – rewarmed.
Depending on the weather, the wind-
shield may fog over briefly when the
engine is started. Air conditioning helps
prevent the windows from fogging up.
Condensation forms during opera-
tion of the air conditioning system,
which then exits under the vehicle. It is
thus not unusual for a small puddle to
form under the car while the system is
running.<
Automatic climate control*
handbook.book Page 98 Saturday, July 27, 2002 1:36 PM
Page 99 of 166
99
Outside air/Automatic
recirculated-air control (AUC)/
Recirculated air
You can respond to unpleasant
external odors or pollutants by
temporarily stopping the flow of outside
air. The system then recirculates the air
currently within the vehicle.
Press the button repeatedly to select
one of three different operating modes.
>Indicator lamps off: outside air supply
is on
>Left indicator lamp on – AUC mode:
the system recognizes pollutants in
the outside air and blocks the flow of
air when necessary. The system then
recirculates the air currently within
the vehicle. Depending on the air
quality, the automatic system then
switches back and forth between
outside air supply and recirculation of
the air within the vehicle
>Right indicator lamp on: the flow of
external air into the vehicle is perma-
nently blocked. The system then
recirculates the air currently within
the vehicle.
If the windows should fog over in
the recirculated-air mode, switch
this mode off and increase the air sup-
ply as required.<
Rear window defroster
When the rear window defroster
is activated, the indicator lamp
comes on. The rear window defroster
switches off automatically.
You can have your vehicle pro-
grammed in such a way that the
rear window defroster switches on
automatically. This occurs within 5 min-
utes after starting the engine when out-
side temperatures are below approx.
397/+46.<
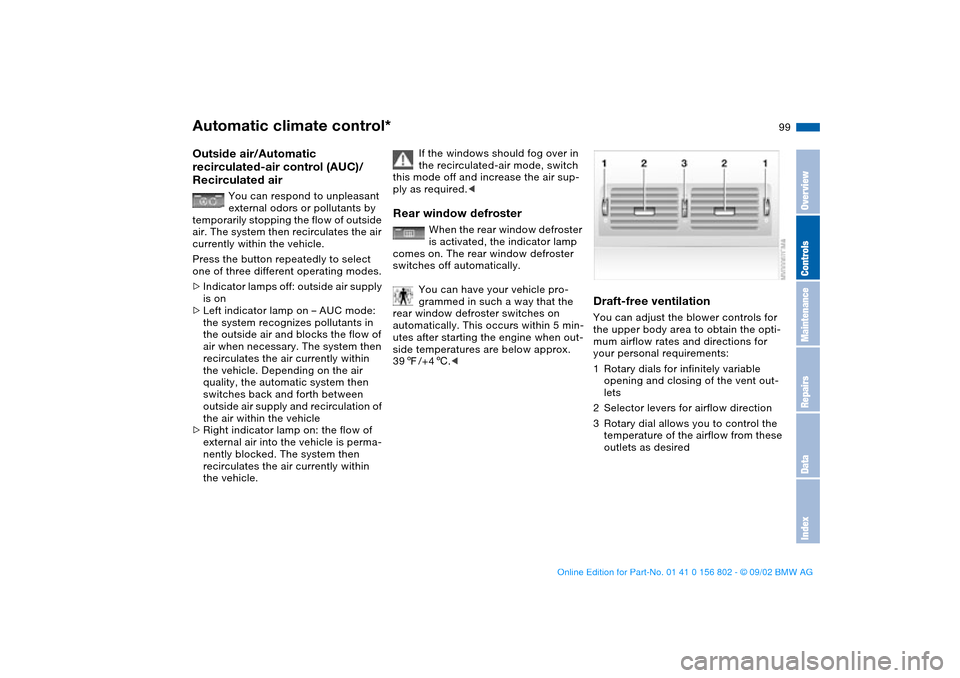
Draft-free ventilationYou can adjust the blower controls for
the upper body area to obtain the opti-
mum airflow rates and directions for
your personal requirements:
1Rotary dials for infinitely variable
opening and closing of the vent out-
lets
2Selector levers for airflow direction
3Rotary dial allows you to control the
temperature of the airflow from these
outlets as desired
Automatic climate control*
OverviewControlsMaintenanceRepairsDataIndex
handbook.book Page 99 Saturday, July 27, 2002 1:36 PM
Page 140 of 166
140
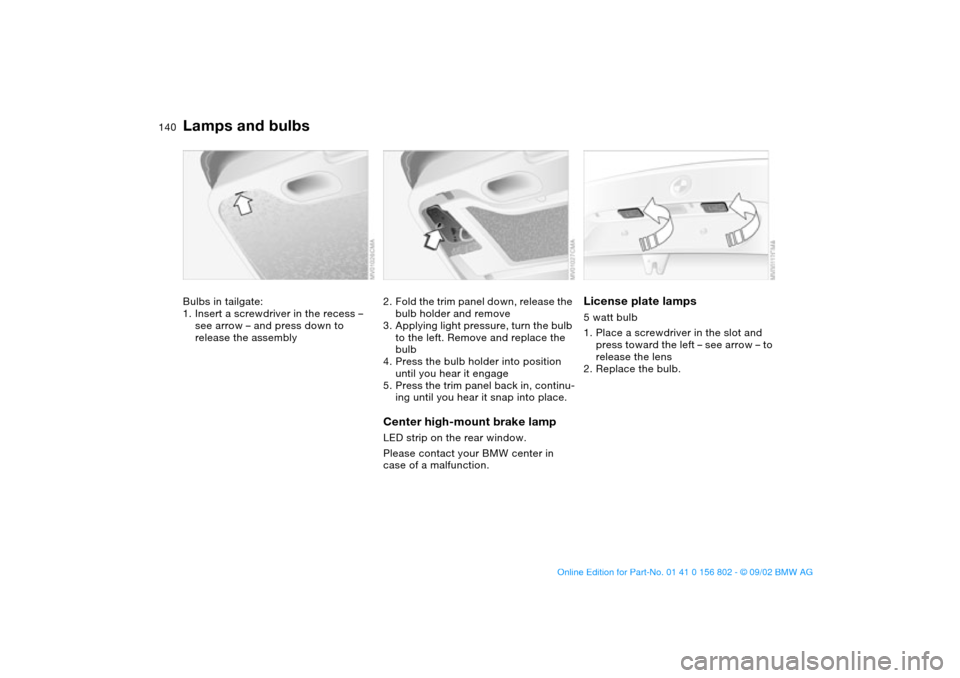
Bulbs in tailgate:
1. Insert a screwdriver in the recess –
see arrow – and press down to
release the assembly
2. Fold the trim panel down, release the
bulb holder and remove
3. Applying light pressure, turn the bulb
to the left. Remove and replace the
bulb
4. Press the bulb holder into position
until you hear it engage
5. Press the trim panel back in, continu-
ing until you hear it snap into place.Center high-mount brake lampLED strip on the rear window.
Please contact your BMW center in
case of a malfunction.
License plate lamps5 watt bulb
1. Place a screwdriver in the slot and
press toward the left – see arrow – to
release the lens
2. Replace the bulb.
Lamps and bulbs
handbook.book Page 140 Saturday, July 27, 2002 1:36 PM
Page 159 of 166
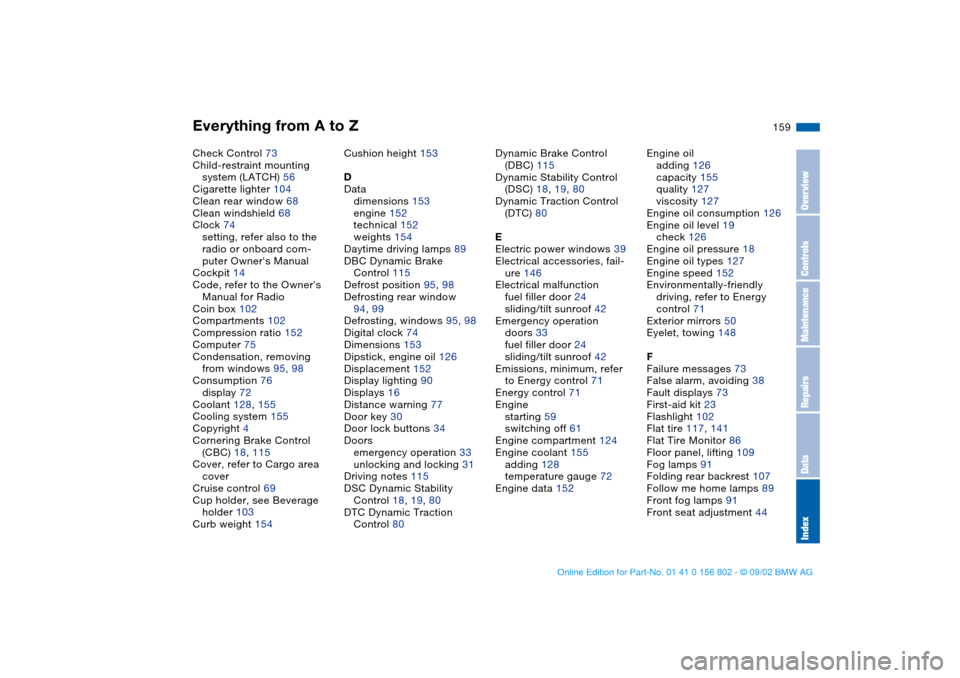
Everything from A to Z
159
Check Control 73
Child-restraint mounting
system (LATCH) 56
Cigarette lighter 104
Clean rear window 68
Clean windshield 68
Clock 74
setting, refer also to the
radio or onboard com-
puter Owner's Manual
Cockpit 14
Code, refer to the Owner's
Manual for Radio
Coin box 102
Compartments 102
Compression ratio 152
Computer 75
Condensation, removing
from windows 95, 98
Consumption 76
display 72
Coolant 128, 155
Cooling system 155
Copyright 4
Cornering Brake Control
(CBC) 18, 115
Cover, refer to Cargo area
cover
Cruise control 69
Cup holder, see Beverage
holder 103
Curb weight 154Cushion height 153
D
Data
dimensions 153
engine 152
technical 152
weights 154
Daytime driving lamps 89
DBC Dynamic Brake
Control 115
Defrost position 95, 98
Defrosting rear window
94, 99
Defrosting, windows 95, 98
Digital clock 74
Dimensions 153
Dipstick, engine oil 126
Displacement 152
Display lighting 90
Displays 16
Distance warning 77
Door key 30
Door lock buttons 34
Doors
emergency operation 33
unlocking and locking 31
Driving notes 115
DSC Dynamic Stability
Control 18, 19, 80
DTC Dynamic Traction
Control 80Dynamic Brake Control
(DBC) 115
Dynamic Stability Control
(DSC) 18, 19, 80
Dynamic Traction Control
(DTC) 80
E
Electric power windows 39
Electrical accessories, fail-
ure 146
Electrical malfunction
fuel filler door 24
sliding/tilt sunroof 42
Emergency operation
doors 33
fuel filler door 24
sliding/tilt sunroof 42
Emissions, minimum, refer
to Energy control 71
Energy control 71
Engine
starting 59
switching off 61
Engine compartment 124
Engine coolant 155
adding 128
temperature gauge 72
Engine data 152Engine oil
adding 126
capacity 155
quality 127
viscosity 127
Engine oil consumption 126
Engine oil level 19
check 126
Engine oil pressure 18
Engine oil types 127
Engine speed 152
Environmentally-friendly
driving, refer to Energy
control 71
Exterior mirrors 50
Eyelet, towing 148
F
Failure messages 73
False alarm, avoiding 38
Fault displays 73
First-aid kit 23
Flashlight 102
Flat tire 117, 141
Flat Tire Monitor 86
Floor panel, lifting 109
Fog lamps 91
Folding rear backrest 107
Follow me home lamps 89
Front fog lamps 91
Front seat adjustment 44
OverviewControlsMaintenanceRepairsDataIndex
handbook.book Page 159 Saturday, July 27, 2002 1:36 PM