air condition BMW 325XI SEDAN 2005 User Guide
[x] Cancel search | Manufacturer: BMW, Model Year: 2005, Model line: 325XI SEDAN, Model: BMW 325XI SEDAN 2005Pages: 178, PDF Size: 2.69 MB
Page 101 of 178
101
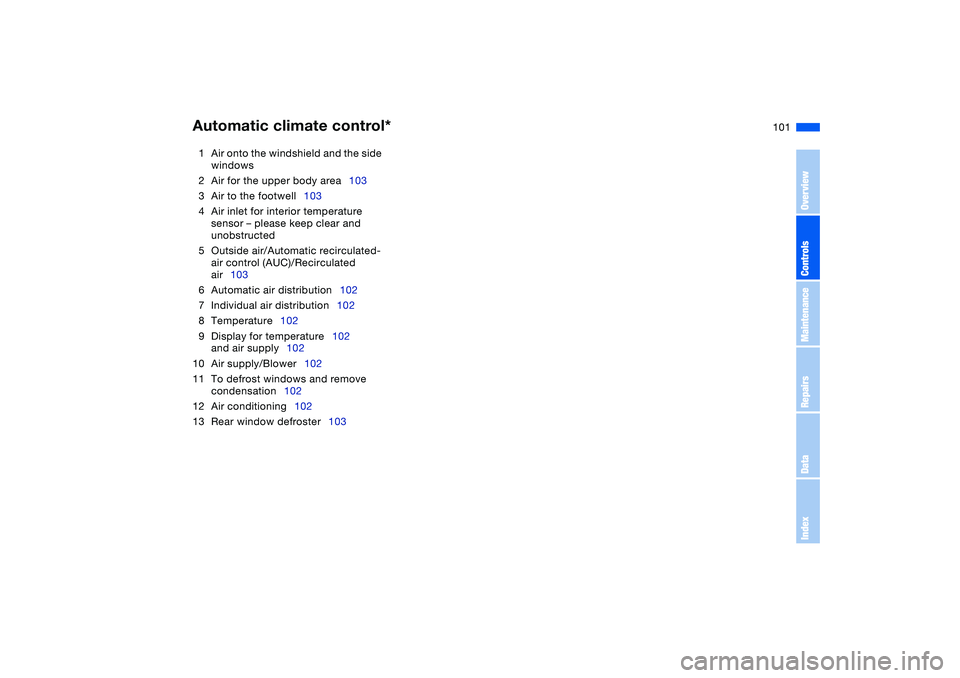
1Air onto the windshield and the side
windows
2Air for the upper body area103
3Air to the footwell103
4Air inlet for interior temperature
sensor – please keep clear and
unobstructed
5Outside air/Automatic recirculated-
air control (AUC)/Recirculated
air103
6Automatic air distribution102
7Individual air distribution102
8Temperature102
9Display for temperature102
and air supply102
10 Air supply/Blower102
11 To defrost windows and remove
condensation102
12 Air conditioning102
13 Rear window defroster103Automatic climate control*
OverviewControlsMaintenanceRepairsDataIndex
Page 102 of 178
102
Tips for pleasant drivingUse the automatic mode by pressing
AUTO button 6. Select an interior tem-
perature that is comfortable for you.
Detailed setting options are described
for you in the following section.
You can make the settings of your
vehicle in such a manner that
when you unlock the vehicle with the
remote control of your personal key,
your own personalized setting for the
automatic climate control is initiated.
The AUTO program adjusts the
air distribution and the air sup-
ply for you and in addition adapts the
temperature to external influences –
summer, winter – to meet preferences
you can specify.
Individual air distribution
You can cancel the AUTO pro-
gram by selecting specific dis-
tribution patterns to suit your
own individual requirements.
While the AUTO program is then deacti-
vated, the automatic airflow control
remains in operation. Air flows onto
windows , toward the upper body
, and into the footwell . You can
switch the automatic distribution of air
back on by selecting the AUTO button.Temperature
The interior temperature that
appears in the display panel is a
general figure intended for refer-
ence purposes. We recommend
727/+226 as a comfortable setting,
even if the air conditioning is on. When
you start the vehicle, the system
ensures that the selected temperature
is achieved as quickly as possible
regardless of the season. It then main-
tains this temperature.
To select the units of measure 6/7 of
the display, refer to page 83.
Air supply/Blower
By pressing the upper or lower
button, you can vary the air sup-
ply. This deactivates the auto-
matic control of the air supply, AUTO
disappears from the display panel. Nev-
ertheless, the automatic air distribution
remains unchanged. You can reactivate
the automatic air distribution mode by
selecting the AUTO button.
When the lowest blower speed is set
and you press the lower button, all of
the displays are canceled: the blower,
heating and air conditioning are
switched off. The outside air supply is
blocked. You can reactivate the system
by pressing any button for the auto-
matic climate control.To defrost windows and remove
condensation
This program quickly removes
ice and condensation from the
windshield and the side windows.
Air conditioning
The air is cooled and dehumidi-
fied and – depending on the
temperature setting – rewarmed.
Depending on the weather, the wind-
shield may fog over briefly when the
engine is started. Air conditioning helps
prevent the windows from fogging up.
Condensation forms during opera-
tion of the air conditioning system,
which then exits under the vehicle. It is
thus not unusual for a small puddle to
form under the car while the system is
running.<
Automatic climate control*
Page 105 of 178
105 Interior conveniences
Premium sound system*Harman Kardon premium sound
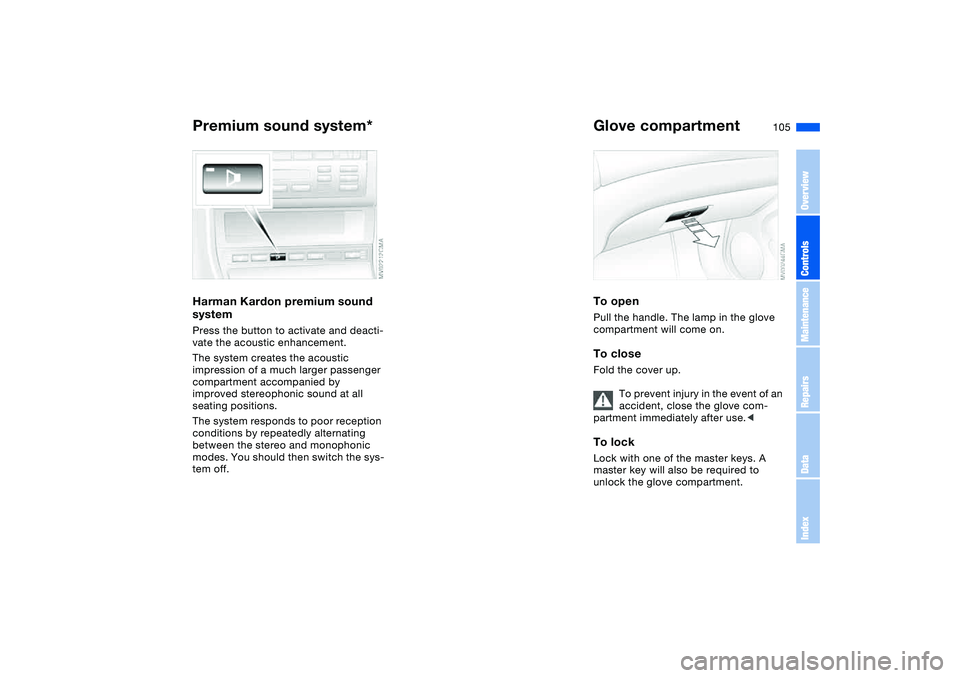
systemPress the button to activate and deacti-
vate the acoustic enhancement.
The system creates the acoustic
impression of a much larger passenger
compartment accompanied by
improved stereophonic sound at all
seating positions.
The system responds to poor reception
conditions by repeatedly alternating
between the stereo and monophonic
modes. You should then switch the sys-
tem off.
Glove compartmentTo openPull the handle. The lamp in the glove
compartment will come on.To closeFold the cover up.
To prevent injury in the event of an
accident, close the glove com-
partment immediately after use.
unlock the glove compartment.
OverviewControlsMaintenanceRepairsDataIndex
Page 125 of 178
125
Do not drive on a deflated – flat –
tire unless your vehicle is
equipped with Run Flat tires. A flat tire
greatly impairs steering and braking
response, and can lead to complete
loss of control over the vehicle.
Avoid overloading the vehicle so that
the permitted load on the tires is not
exceeded. Overloading can lead to
overheating and internal tire damage.
The ultimate result can assume the
form of a sudden air loss.
Unusual vibrations encountered during
normal vehicle operation can indicate a
damaged tire or some other vehicle
malfunction. This type of problem can
be caused by contact with curbs, etc.
This is also true for irregularities in the
vehicle's handling characteristics, such
as a pronounced tendency to pull to the
left or right. Should this occur, respond
by immediately reducing your speed.
Proceed carefully to the nearest BMW
center or professional tire center, or
have the vehicle towed in to have it, its
wheels or its tires inspected.
Tire damage, up to and including sud-
den and complete air loss, can endan-
ger the lives of both the vehicle occu-
pants and other road users.<
Tire replacementTo maintain good handling and vehicle
response, use only tires of a single
tread configuration from a single manu-
facturer.
Comply with the specified tire inflation
pressures — and be sure to have the
wheel and tire assembly balanced
every time you change a tire or wheel.DOT quality gradesTread wear
Traction AA A B C
Temperature A B C
All passenger car tires must con-
form to Federal Safety Require-
ments in addition to these grades.
when tested under controlled condi-
tions on a specified government test
course.
For example, a tire graded 150 would
wear one and one-half – 1
1/2 – times as
well on the government course as a tire
graded 100. The relative performance
of tires depends upon the actual condi-
tions of their use, however, and may
depart significantly from the norm due
to variations in driving habits, service
practices and differences in road char-
acteristics and climate.TractionThe traction grades, from highest to
lowest, are AA, A, B, and C.
Those grades represent the tire's ability
to stop on wet pavement as measured
under controlled conditions on speci-
fied government test surfaces of
asphalt and concrete. A tire marked C
may have poor traction performance.
The traction grade assigned to
this tire is based on straight-
ahead braking traction tests, and does
not include acceleration, cornering,
hydroplaning, or peak traction charac-
teristics.
tire's resistance to the generation of
heat and its ability to dissipate heat
when tested under controlled condi-
tions on a specified indoor laboratory
test wheel.
Tire condition
OverviewControlsMaintenanceRepairsDataIndex
Page 127 of 178
127
Wheel and tire combinationsThe right choice
BMW recommends using only
wheels and tires that have been
approved by BMW for your particular
vehicle model, as otherwise body con-
tact and serious accidents can result
despite the use of the same nominal
size, e.g. due to manufacturing toler-
ances. BMW cannot evaluate all tires
and wheels on the market, and is thus
unable to guarantee that the vehicle will
continue to perform safely if unap-
proved tires and/or wheels are
mounted.<
For each tire size, BMW has assessed
the safe performance of specific tire
brands and approved them for use.
Consult any BMW center for details.
Comply with any local/national regula-
tions, for example by recording the tire
type in the vehicle documents.
The correct wheel-tire combina-
tion affects different systems such
as ABS, DSC and ADB-X/DBC. The
function of these systems is impaired if
improper wheel-tire combinations are
used. For this reason, use only tires of
the same manufacture and tread con-
figuration. In the event of a flat tire, for
example, remount the approved wheel
and tire combination as soon as possi-
ble.<
StorageAlways store tires in a cool, dry place.
Store them away from light whenever
possible. Protect the tires against con-
tact with oil, grease and fuel.
Do not exceed the maximum tire infla-
tion pressures specified on the tire
sidewall.
Winter tiresChoosing the right tireBMW recommends the use of winter
tires for operation under winter road
conditions. While all-season tires – with
M+S designation – provide better winter
traction than the corresponding sum-
mer tires, they generally do not achieve
the performance of winter tires.
In the interest of safe tracking and
steering response, install winter tires
made by the same manufacturer and
having the same tread configuration on
all four wheels.
Never exceed the maximum
speed for which the winter tires
are rated.
Unprofessional attempts by laymen to
service tires can lead to damage and
accidents.
Have this work performed by trained
professionals only. Any BMW center
has the required technical knowledge
and the proper equipment and will be
happy to assist you.
tires. These are indicated by a circular
symbol containing the letters RSC on
OverviewControlsMaintenanceRepairsDataIndex
Page 128 of 178
128
the tire sidewall, refer to Changing a
wheel. In this case, use only Run Flat
winter tires, since no spare tire is pro-
vided in the event of a flat tire.Tire condition, tire pressureAt tread depths below approx. 3/16 in /
4 mm, winter tires display a perceptible
decrease in their ability to cope with
winter driving conditions, and should be
replaced in the interest of safety.
Comply with the specified tire inflation
pressures — and be sure to have the
wheel and tire assembly balanced
every time you change a tire or wheel.Snow chains*Only certain snow chains have been
tested by BMW and determined and
approved as roadworthy. Consult any
BMW center for details. BMW recom-
mends using only these approved fine-
link snow chains. Use them in pairs on
either summer or winter tires, but only
on both rear wheels.325xi: in an extreme emergency – for
instance, with the vehicle stuck on one
side, or when obstructions make it
impossible to reach one tire – a chain
may also be mounted on just one tire
for the limited period needed to resolve
the problem.
Comply with all manufacturer's safety
precautions when mounting the chains.
Do not exceed a speed of 30 mph /
50 km/h when using snow chains.
You cannot mount snow chains on the
following tires:
225/50 R 16
225/45 R 17
245/40 R 17
225/40 R 18
255/35 R 18
Do not initialize the Flat Tire Moni-
tor after mounting snow chains to
the tires.
When driving with snow chains, it may
be useful to turn off the DSC for a short
time, refer to page 87 or 88.
Page 166 of 178
Everything from A to ZA
ABS Antilock Brake
System 121
indicator lamp 18
Acceleration assistant 70
Accessories, refer to For
your own safety 5
Accident, refer to Emer-
gency call 152
Activated-charcoal filter 104
ADB-X Automatic Differen-
tial Brake, all-wheel 88
Adding brake fluid 135
Additional sources of infor-
mation 4
Air conditioning 96
Air conditioning mode 98
automatic climate
control 102
Air distribution
air conditioning 98
automatic climate
control 102
Air distribution,
individual 102
Air outlets, refer to Ventila-
tion 96, 100
Air pressure, refer to Tire
inflation pressure 25, 124
Air recirculation, refer to
Recirculated-air mode
98, 103Air supply
air conditioning 98
automatic climate
control 102
Air, drying, refer to Air con-
ditioning mode 98, 102
Airbags 54
indicator lamp 18, 56
sitting safely 44
Airing out, refer to Ventila-
tion 96, 100
Alarm system 38
avoiding unintentional
alarms 39
All-season tires, refer to
Winter tires 127
Antifreeze 134
coolant 134
washer fluid 132
Antilock Brake System
(ABS) 121
indicator lamp 18
Anti-theft system 30
Anti-theft warning system,
refer to Alarm system 38
Approved axle loads, refer
to Weights 162
Approved gross weight,
refer to Weights 162
Armrest
front 106
rear 107Artificial leather, refer to the
Caring for your vehicle
brochure
Ashtray
front 108
rear 108
AUC Automatic recircu-
lated-air control 103
AUTO program, refer
to Automatic air distribu-
tion 102
Automatic
air distribution 102
air supply 102
cruise control 77
headlamp control 93
Automatic car wash, refer to
the Caring for your vehicle
brochure
Automatic climate
control 100
Automatic curb monitor 51
Automatic Differential Brake,
all wheel ADB-X 88
Automatic dimming, interior
rearview mirror 53
Automatic recirculated-air
control (AUC) 103Automatic transmission with
Steptronic 71
indicator lamp 19, 73
interlock 63
selector lever lock 71
shiftlock 71
Automatic windshield
washer, refer to Rain sen-
sor 75
Average fuel
consumption 84
Average speed 84
Avoiding unintentional
alarms 39
Axle loads, refer to
Weights 162
B
Backrest, adjusting 46
Backrest, refer to Seat
adjustment 45, 47
Backup lamps 66
bulb replacement 145
Bandages, refer to First-aid
kit 23
Battery 151
charge 151
disposal 151
indicator lamp 18
jump-starting 153
remote control 30, 31
Battery charge current 18
Page 167 of 178
Everything from A to Z
167
Belts, refer to Safety
belts 48
Beverage holders 106, 107
Blower
air conditioning 98
automatic climate
control 102
BMW High Performance
Synthetic Oils 133
BMW Maintenance
System 136
BMW sports seat 46
Bore, refer to Engine
data 160
Bottle holders, see Bever-
age holders 106, 107
Brake fluid 135
indicator lamp 18, 135
level 135
Brake force display 92
Brake hydraulic system 122
Brake lamps
bulb replacement 145
indicator lamp, defective
lamp 81
Brake lights
brake force display 92
Brake pads
brake fluid level
18, 122, 135
breaking in 120
disc brakes 122Brake rotors
brake system 122
breaking in 120
Brake system
brake pads, indicator
lamp 19
Brake wear warning
indicator lamp 19
Brakes
ABS 121
brake fluid 135
breaking in 120
indicator/warning lamp
18, 19
parking brake 65
Break-in procedures 120
Bulb replacement, refer to
Lamps and bulbs 143
Bulb, replacing 143
Buttons in steering wheel 22
C
California Proposition 65
warning 138
Can holders, see Beverage
holders 106, 107
Capacities 163
Car battery 151
Car care, refer to the Caring
for your vehicle brochure
Car keys, refer to Keys 30Car radio, refer to Owner's
Manual for Radio/Onboard
Computer
Car telephone
preparation 107
Car telephone, refer to the
separate Owner's Manual
Car vacuum cleaner, con-
necting 108
Car wash, refer to the Caring
for your vehicle brochure
Cargo area 37, 111
cover 111
emergency release, refer
to Manual operation 36
floor panel 113
lamps 35
lid, refer to Tailgate 35
opening, remote
control 32
volume 162
Cargo, securing 115
Carpet care, refer to the
Caring for your vehicle
brochure
Cassette operation, refer to
the Owner's Manual for
Radio/Onboard Computer
CBC Cornering Brake Con-
trol 121
warning lamp 18CD changer, refer to the
Owner's Manual for
Radio/Onboard Computer
CD operation, refer to the
Owner's Manual for
Radio/Onboard Computer
Cellular phone 107
Center high-mount brake
lamp
bulb replacement 146
Central locking system 30
button 35
passenger
compartment 35
Charge indicator lamp 18
Check Control 81
Check Gas Cap
indicator lamp 19
Child safety locks 60
Child seats 57
Child-restraint mounting
system (LATCH) 59
Child-restraint systems 57
Chock 148
Cigarette lighter 108
Cigarette lighter socket 108
Clean rear window 76
Cleaning chrome parts, refer
to the Caring for your vehi-
cle brochure
OverviewControlsMaintenanceRepairsDataIndex
Page 168 of 178
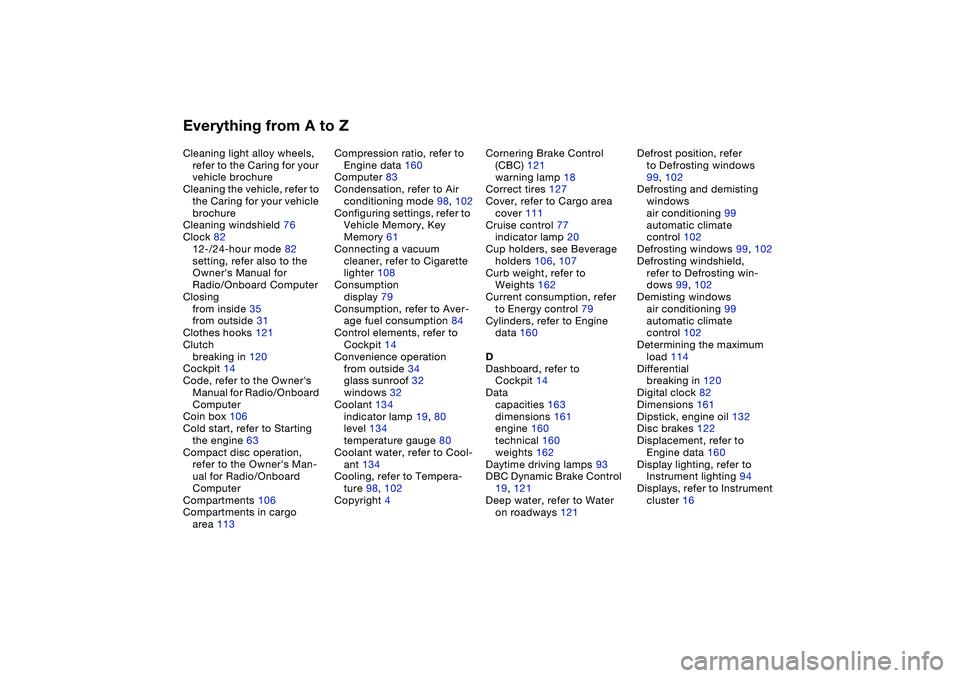
Everything from A to ZCleaning light alloy wheels,
refer to the Caring for your
vehicle brochure
Cleaning the vehicle, refer to
the Caring for your vehicle
brochure
Cleaning windshield 76
Clock 82
12-/24-hour mode 82
setting, refer also to the
Owner's Manual for
Radio/Onboard Computer
Closing
from inside 35
from outside 31
Clothes hooks 121
Clutch
breaking in 120
Cockpit 14
Code, refer to the Owner's
Manual for Radio/Onboard
Computer
Coin box 106
Cold start, refer to Starting
the engine 63
Compact disc operation,
refer to the Owner's Man-
ual for Radio/Onboard
Computer
Compartments 106
Compartments in cargo
area 113Compression ratio, refer to
Engine data 160
Computer 83
Condensation, refer to Air
conditioning mode 98, 102
Configuring settings, refer to
Vehicle Memory, Key
Memory 61
Connecting a vacuum
cleaner, refer to Cigarette
lighter 108
Consumption
display 79
Consumption, refer to Aver-
age fuel consumption 84
Control elements, refer to
Cockpit 14
Convenience operation
from outside 34
glass sunroof 32
windows 32
Coolant 134
indicator lamp 19, 80
level 134
temperature gauge 80
Coolant water, refer to Cool-
ant 134
Cooling, refer to Tempera-
ture 98, 102
Copyright 4Cornering Brake Control
(CBC) 121
warning lamp 18
Correct tires 127
Cover, refer to Cargo area
cover 111
Cruise control 77
indicator lamp 20
Cup holders, see Beverage
holders 106, 107
Curb weight, refer to
Weights 162
Current consumption, refer
to Energy control 79
Cylinders, refer to Engine
data 160
D
Dashboard, refer to
Cockpit 14
Data
capacities 163
dimensions 161
engine 160
technical 160
weights 162
Daytime driving lamps 93
DBC Dynamic Brake Control
19, 121
Deep water, refer to Water
on roadways 121Defrost position, refer
to Defrosting windows
99, 102
Defrosting and demisting
windows
air conditioning 99
automatic climate
control 102
Defrosting windows 99, 102
Defrosting windshield,
refer to Defrosting win-
dows 99, 102
Demisting windows
air conditioning 99
automatic climate
control 102
Determining the maximum
load 114
Differential
breaking in 120
Digital clock 82
Dimensions 161
Dipstick, engine oil 132
Disc brakes 122
Displacement, refer to
Engine data 160
Display lighting, refer to
Instrument lighting 94
Displays, refer to Instrument
cluster 16
Page 170 of 178
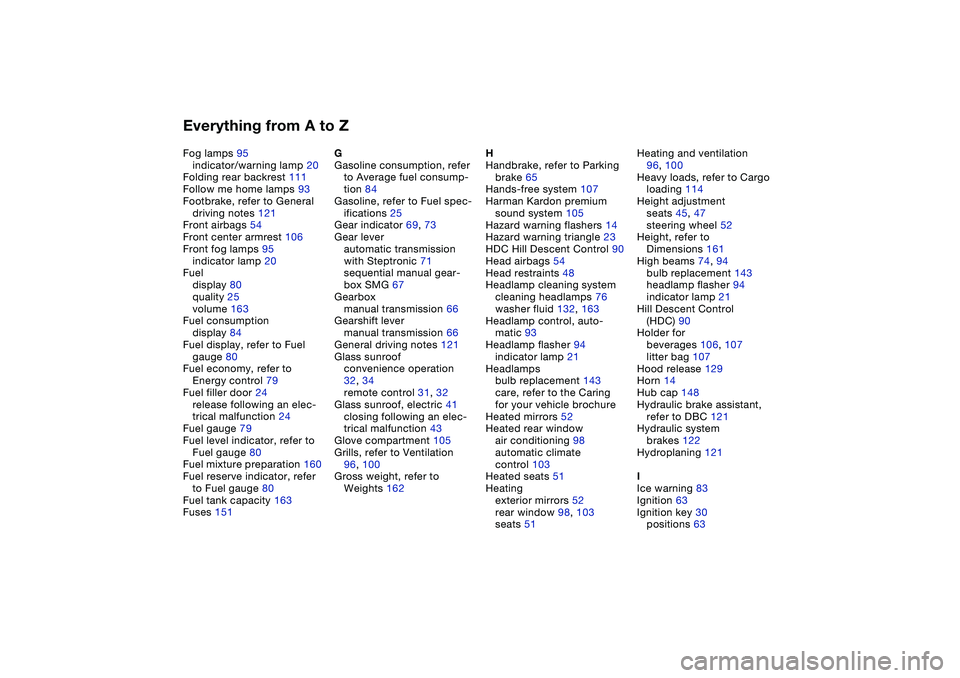
Everything from A to ZFog lamps 95
indicator/warning lamp 20
Folding rear backrest 111
Follow me home lamps 93
Footbrake, refer to General
driving notes 121
Front airbags 54
Front center armrest 106
Front fog lamps 95
indicator lamp 20
Fuel
display 80
quality 25
volume 163
Fuel consumption
display 84
Fuel display, refer to Fuel
gauge 80
Fuel economy, refer to
Energy control 79
Fuel filler door 24
release following an elec-
trical malfunction 24
Fuel gauge 79
Fuel level indicator, refer to
Fuel gauge 80
Fuel mixture preparation 160
Fuel reserve indicator, refer
to Fuel gauge 80
Fuel tank capacity 163
Fuses 151G
Gasoline consumption, refer
to Average fuel consump-
tion 84
Gasoline, refer to Fuel spec-
ifications 25
Gear indicator 69, 73
Gear lever
automatic transmission
with Steptronic 71
sequential manual gear-
box SMG 67
Gearbox
manual transmission 66
Gearshift lever
manual transmission 66
General driving notes 121
Glass sunroof
convenience operation
32, 34
remote control 31, 32
Glass sunroof, electric 41
closing following an elec-
trical malfunction 43
Glove compartment 105
Grills, refer to Ventilation
96, 100
Gross weight, refer to
Weights 162H
Handbrake, refer to Parking
brake 65
Hands-free system 107
Harman Kardon premium
sound system 105
Hazard warning flashers 14
Hazard warning triangle 23
HDC Hill Descent Control 90
Head airbags 54
Head restraints 48
Headlamp cleaning system
cleaning headlamps 76
washer fluid 132, 163
Headlamp control, auto-
matic 93
Headlamp flasher 94
indicator lamp 21
Headlamps
bulb replacement 143
care, refer to the Caring
for your vehicle brochure
Heated mirrors 52
Heated rear window
air conditioning 98
automatic climate
control 103
Heated seats 51
Heating
exterior mirrors 52
rear window 98, 103
seats 51Heating and ventilation
96, 100
Heavy loads, refer to Cargo
loading 114
Height adjustment
seats 45, 47
steering wheel 52
Height, refer to
Dimensions 161
High beams 74, 94
bulb replacement 143
headlamp flasher 94
indicator lamp 21
Hill Descent Control
(HDC) 90
Holder for
beverages 106, 107
litter bag 107
Hood release 129
Horn 14
Hub cap 148
Hydraulic brake assistant,
refer to DBC 121
Hydraulic system
brakes 122
Hydroplaning 121
I
Ice warning 83
Ignition 63
Ignition key 30
positions 63