maintenance BMW 325XI SEDAN 2005 Owner's Manual
[x] Cancel search | Manufacturer: BMW, Model Year: 2005, Model line: 325XI SEDAN, Model: BMW 325XI SEDAN 2005Pages: 178, PDF Size: 2.69 MB
Page 45 of 178
45
SeatsWhen adjusting your seat, always
observe the following precautions
Never try to adjust your seat while
operating the vehicle. The seat
could respond with unexpected move-
ment, and the ensuing loss of vehicle
control could lead to an accident. Never
ride with the backrest reclined to an
extreme horizontal angle. This is espe-
cially important for front passengers to
remember. Keep the backrest relatively
upright to minimize the risk of sliding
under the safety belt and sustaining
injury in an accident.<
Seat adjustment>Manual seat adjustment, refer to
page 45
>Power seat adjustment, refer to
page 47
>Head restraint, refer to page 48.
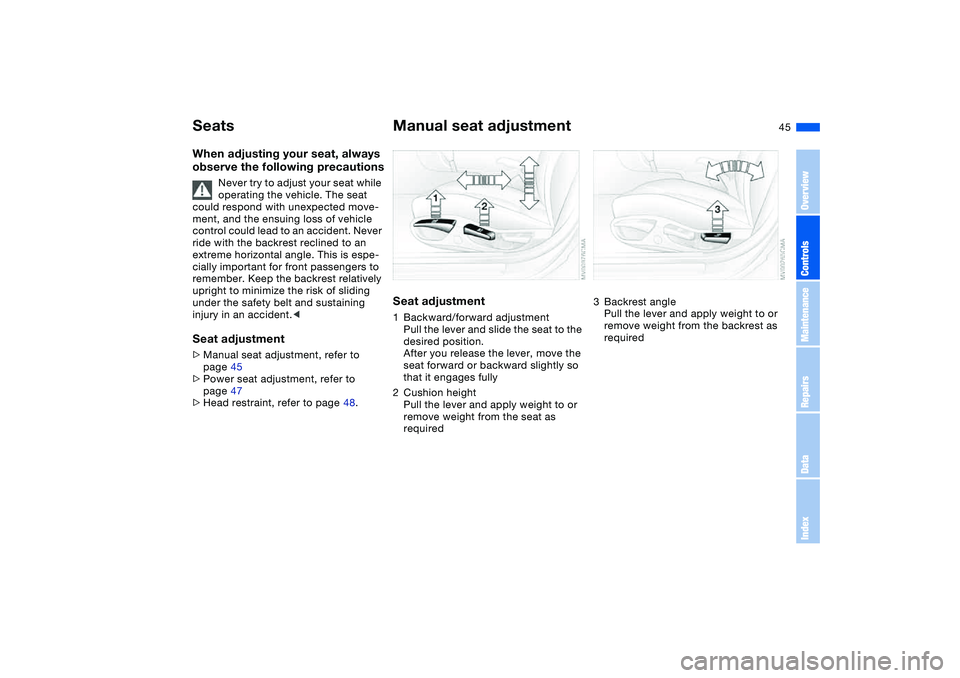
Manual seat adjustmentSeat adjustment1Backward/forward adjustment
Pull the lever and slide the seat to the
desired position.
After you release the lever, move the
seat forward or backward slightly so
that it engages fully
2Cushion height
Pull the lever and apply weight to or
remove weight from the seat as
required
3Backrest angle
Pull the lever and apply weight to or
remove weight from the backrest as
required
OverviewControlsMaintenanceRepairsDataIndex
Page 47 of 178
47
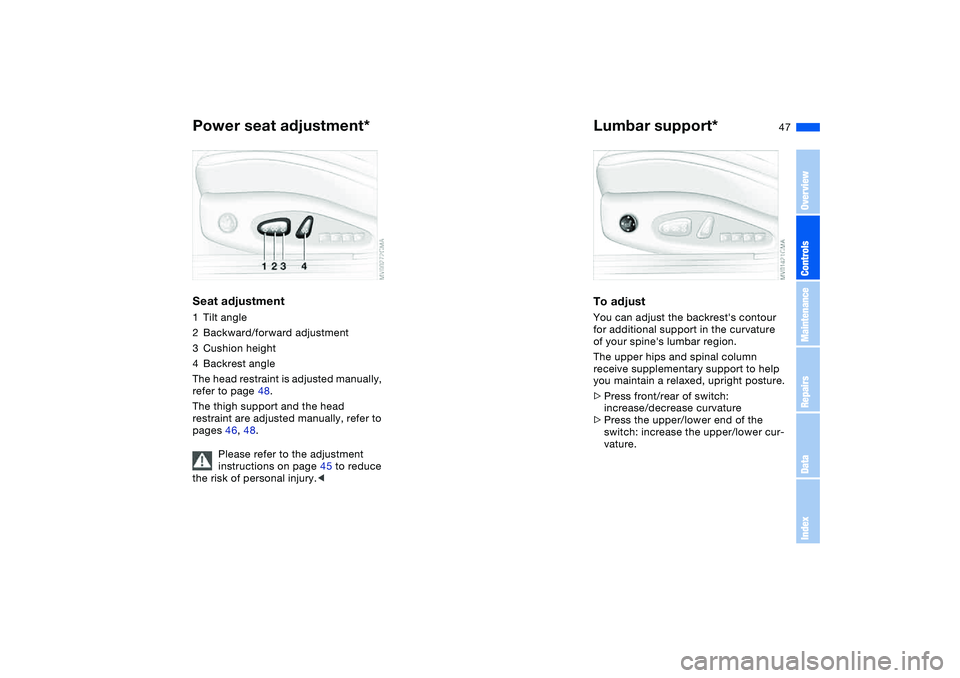
Power seat adjustment*Seat adjustment1Tilt angle
2Backward/forward adjustment
3Cushion height
4Backrest angle
The head restraint is adjusted manually,
refer to page 48.
The thigh support and the head
restraint are adjusted manually, refer to
pages 46, 48.
Please refer to the adjustment
instructions on page 45 to reduce
the risk of personal injury.<
Lumbar support*To adjustYou can adjust the backrest's contour
for additional support in the curvature
of your spine's lumbar region.
The upper hips and spinal column
receive supplementary support to help
you maintain a relaxed, upright posture.
>Press front/rear of switch:
increase/decrease curvature
>Press the upper/lower end of the
switch: increase the upper/lower cur-
vature.
OverviewControlsMaintenanceRepairsDataIndex
Page 49 of 178
49
The rear belt buckle with the word
CENTER is intended exclusively
for the passenger sitting in the mid-
dle.<
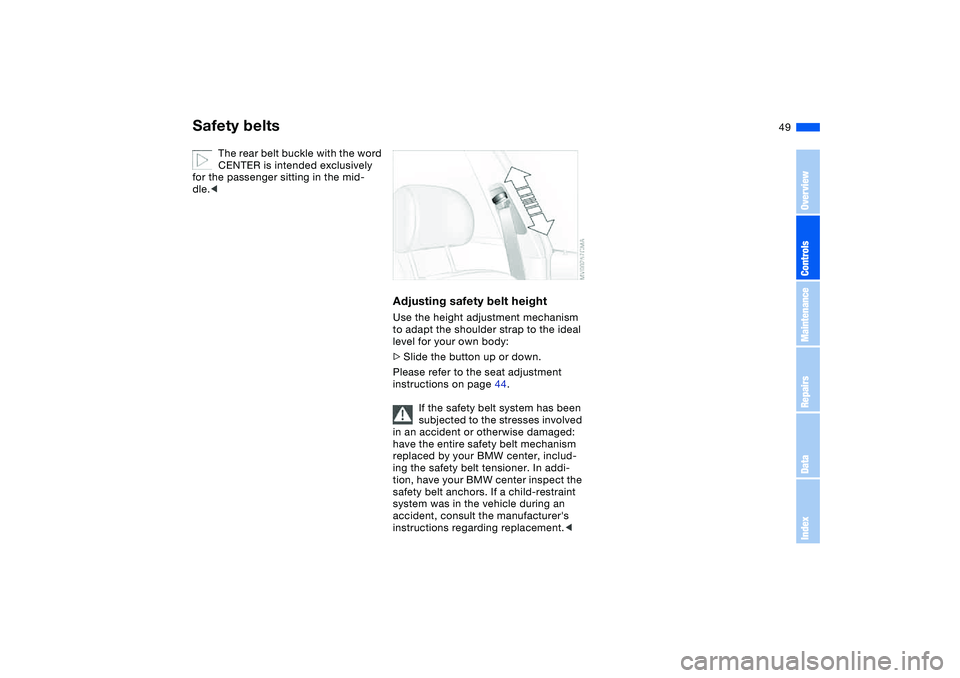
Adjusting safety belt heightUse the height adjustment mechanism
to adapt the shoulder strap to the ideal
level for your own body:
>Slide the button up or down.
Please refer to the seat adjustment
instructions on page 44.
If the safety belt system has been
subjected to the stresses involved
in an accident or otherwise damaged:
have the entire safety belt mechanism
replaced by your BMW center, includ-
ing the safety belt tensioner. In addi-
tion, have your BMW center inspect the
safety belt anchors. If a child-restraint
system was in the vehicle during an
accident, consult the manufacturer's
instructions regarding replacement.<
Safety belts
OverviewControlsMaintenanceRepairsDataIndex
Page 51 of 178
51
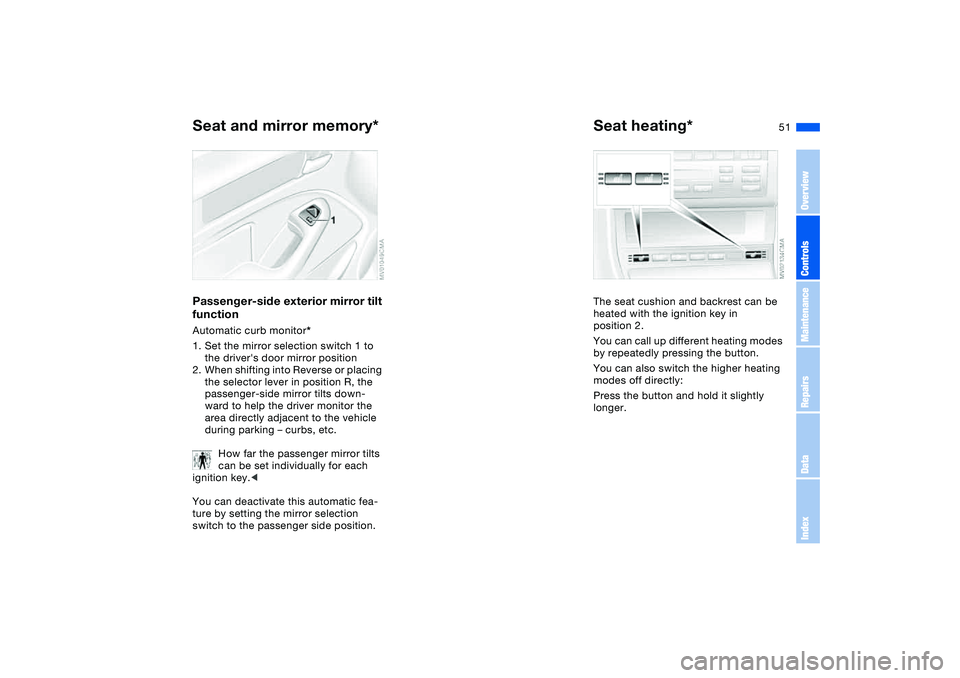
Passenger-side exterior mirror tilt
functionAutomatic curb monitor*
1. Set the mirror selection switch 1 to
the driver's door mirror position
2. When shifting into Reverse or placing
the selector lever in position R, the
passenger-side mirror tilts down-
ward to help the driver monitor the
area directly adjacent to the vehicle
during parking – curbs, etc.
How far the passenger mirror tilts
can be set individually for each
ignition key.<
You can deactivate this automatic fea-
ture by setting the mirror selection
switch to the passenger side position.
Seat heating*The seat cushion and backrest can be
heated with the ignition key in
position 2.
You can call up different heating modes
by repeatedly pressing the button.
You can also switch the higher heating
modes off directly:
Press the button and hold it slightly
longer.
Seat and mirror memory*
OverviewControlsMaintenanceRepairsDataIndex
Page 53 of 178
53
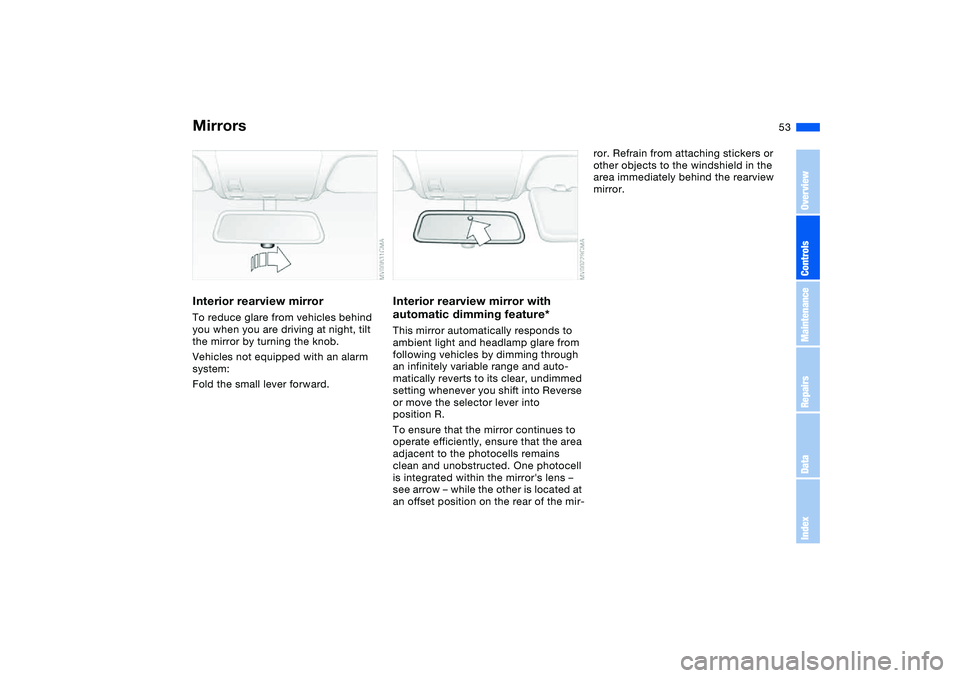
Interior rearview mirrorTo reduce glare from vehicles behind
you when you are driving at night, tilt
the mirror by turning the knob.
Vehicles not equipped with an alarm
system:
Fold the small lever forward.
Interior rearview mirror with
automatic dimming feature*This mirror automatically responds to
ambient light and headlamp glare from
following vehicles by dimming through
an infinitely variable range and auto-
matically reverts to its clear, undimmed
setting whenever you shift into Reverse
or move the selector lever into
position R.
To ensure that the mirror continues to
operate efficiently, ensure that the area
adjacent to the photocells remains
clean and unobstructed. One photocell
is integrated within the mirror's lens –
see arrow – while the other is located at
an offset position on the rear of the mir-
ror. Refrain from attaching stickers or
other objects to the windshield in the
area immediately behind the rearview
mirror.
Mirrors
OverviewControlsMaintenanceRepairsDataIndex
Page 55 of 178
55
At all times, occupants should sit
upright and be properly restrained
– infants and small children in appropri-
ate child-restraint systems; larger chil-
dren and adults using the safety belts.
Never let an occupant's head rest near
or on a side airbag because the inflating
airbag could cause a serious or fatal
injury. Please note that the word Airbag
imprinted on the door trim panel indi-
cates the airbag's location.
Accident research shows that the saf-
est place for children in an automobile
is in the rear seat. However, a child sit-
ting in the rear seat and not properly
restrained may place his or her head on
or near the airbag, if so equipped. For
example, a child — even though belted
in — may fall asleep with his or her head
against the side airbag. It may be diffi-
cult for a driver to ensure that children
in the rear seat will remain properly
positioned at all times and not place
their heads on or near the side airbag.
Therefore, we recommend that the rear
seat side airbags, if installed in the
vehicle, be deactivated if children will
travel in the rear seat.
The rear seat side airbags may already
have been deactivated by a BMW cen-
ter. If you are uncertain of their status,
or wish to have the airbags activated or
deactivated, please contact your BMW
center.<
Even when all these guidelines are fol-
lowed, there is still a small residual risk
of injuries to the face, hands and arms
occurring from airbag deployment in
isolated instances.
In sensitive individuals, the ignition and
inflation noise may induce a mild hear-
ing loss that is temporary in most
cases.
Corresponding airbag warning labels
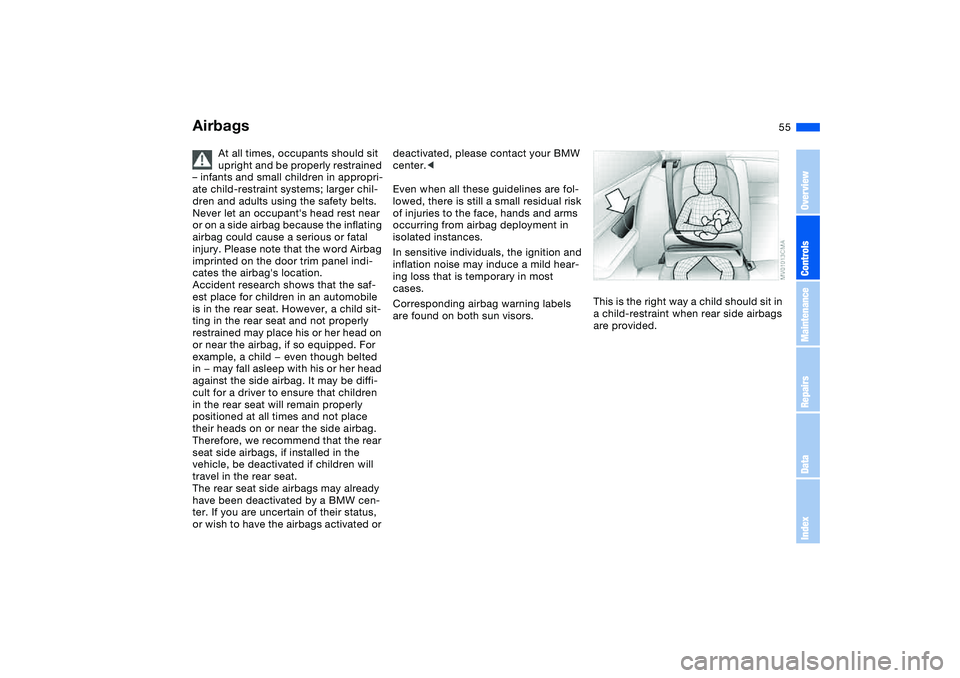
are found on both sun visors.This is the right way a child should sit in
a child-restraint when rear side airbags
are provided.
Airbags
OverviewControlsMaintenanceRepairsDataIndex
Page 57 of 178
57
Transporting children safelyCommercially available child-restraint
systems are designed to be secured
with a lap belt or with the lap belt por-
tion of a combination lap/shoulder belt.
Improperly or inadequately installed
restraint systems can increase the risk
of injury to children. Always read and
follow the instructions that come with
the system.Correct location for installingIn your BMW, all seats equipped with a
three-point safety belt – except for the
driver's seat – are suitable for installing
universal child-restraint systems of all
age classes and which have been
approved for the age group in question.
Child-restraint system with
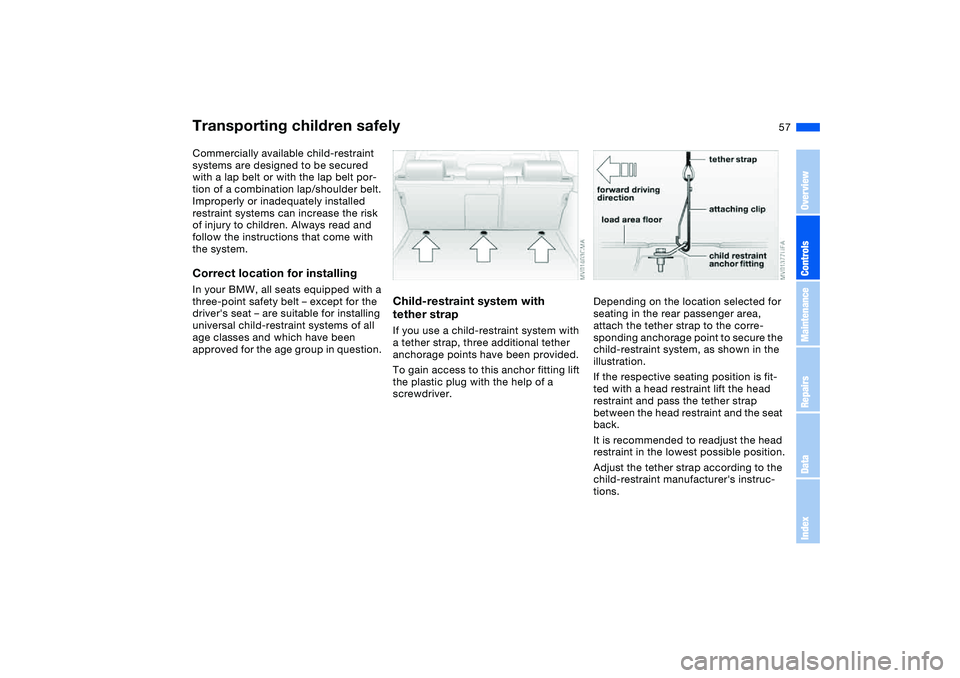
tether strapIf you use a child-restraint system with
a tether strap, three additional tether
anchorage points have been provided.
To gain access to this anchor fitting lift
the plastic plug with the help of a
screwdriver.
Depending on the location selected for
seating in the rear passenger area,
attach the tether strap to the corre-
sponding anchorage point to secure the
child-restraint system, as shown in the
illustration.
If the respective seating position is fit-
ted with a head restraint lift the head
restraint and pass the tether strap
between the head restraint and the seat
back.
It is recommended to readjust the head
restraint in the lowest possible position.
Adjust the tether strap according to the
child-restraint manufacturer's instruc-
tions.
OverviewControlsMaintenanceRepairsDataIndex
Page 59 of 178
59
The belt cannot be extracted further.
Always observe the installation instruc-
tions provided by the manufacturer of
the child-restraint system.To unlock the safety beltRelease the safety belt, remove the
child seat and retract the safety belt to
its end position on the belt retractor.
LATCH child-restraint mounting
systemLATCH: Lower Anchors and Tethers for
CHildren
The left and right rear seats are both
equipped with a LATCH child-restraint
mounting system.
Canadian models only:
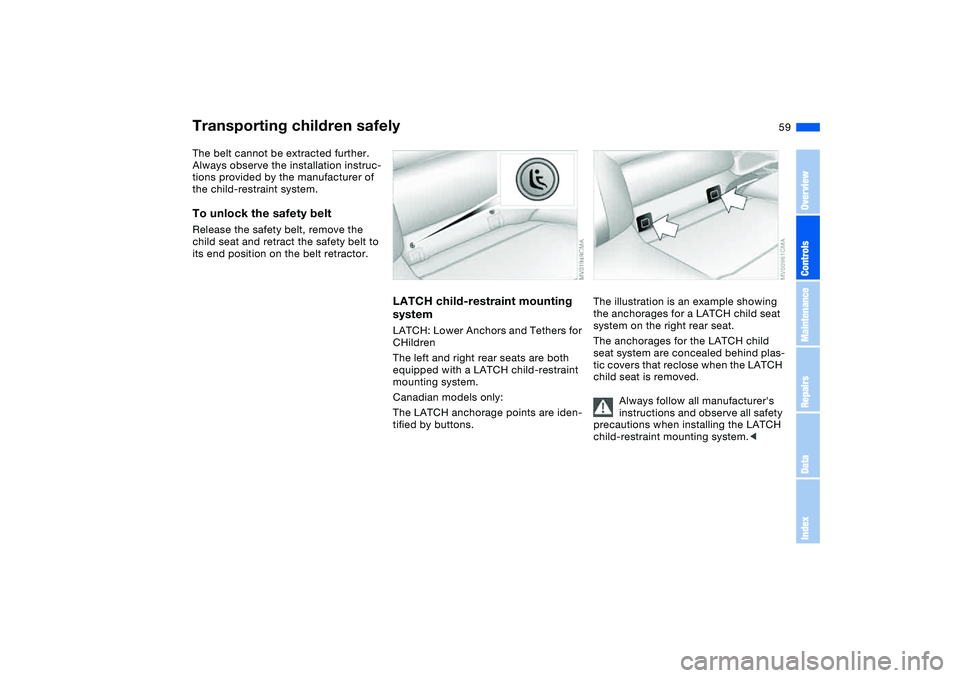
The LATCH anchorage points are iden-
tified by buttons.
The illustration is an example showing
the anchorages for a LATCH child seat
system on the right rear seat.
The anchorages for the LATCH child
seat system are concealed behind plas-
tic covers that reclose when the LATCH
child seat is removed.
Always follow all manufacturer's
instructions and observe all safety
precautions when installing the LATCH
child-restraint mounting system.<
Transporting children safely
OverviewControlsMaintenanceRepairsDataIndex
Page 61 of 178
61
Vehicle Memory, Key MemoryHow the system functionsNo doubt you have often reflected on
how great it would be if you could per-
manently configure your vehicle's vari-
ous features and adjustments to mirror
your own personal preferences. In engi-
neering your vehicle, BMW has
included a number of options for stor-
ing personal adjustment data. These
can be programmed at your BMW cen-
ter.
The available configuration data fall into
two categories, according to whether
their primary orientation is the vehicle –
Vehicle Memory – or the individual –
Key Memory. Provided that each per-
son has a separate remote-control key,
you can have your BMW center enter
basic adjustment data for up to four
individuals in the system.
The system relies on a bilateral data
exchange to identify the individual user
and executes the selected settings
whenever the remote control unit is
used to disengage the locks.
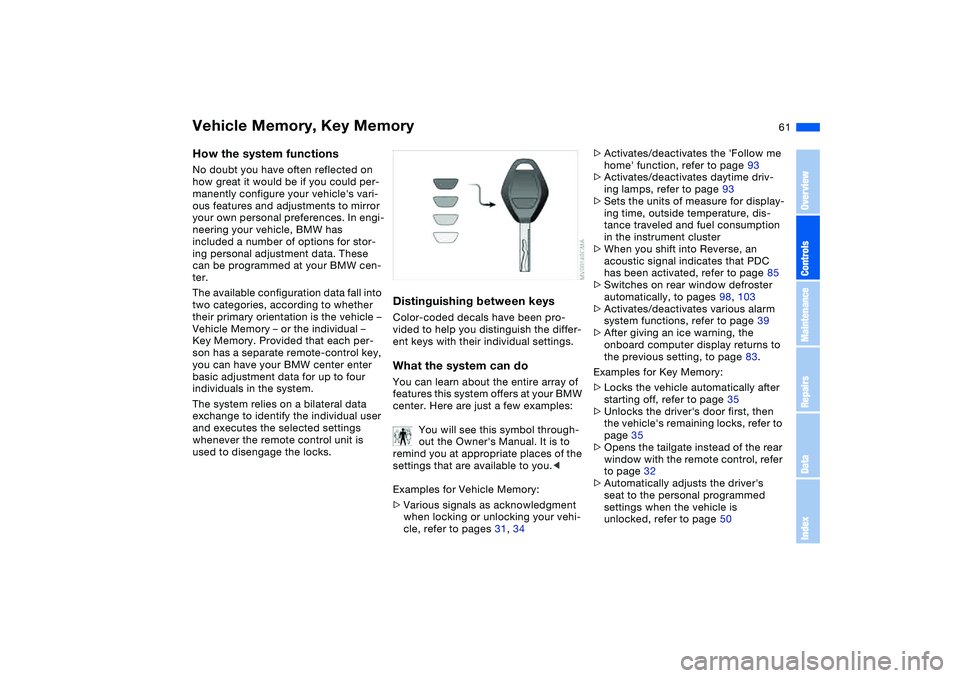
Distinguishing between keysColor-coded decals have been pro-
vided to help you distinguish the differ-
ent keys with their individual settings.What the system can doYou can learn about the entire array of
features this system offers at your BMW
center. Here are just a few examples:
You will see this symbol through-
out the Owner's Manual. It is to
remind you at appropriate places of the
settings that are available to you.<
Examples for Vehicle Memory:
>Various signals as acknowledgment
when locking or unlocking your vehi-
cle, refer to pages 31, 34
>Activates/deactivates the 'Follow me
home' function, refer to page 93
>Activates/deactivates daytime driv-
ing lamps, refer to page 93
>Sets the units of measure for display-
ing time, outside temperature, dis-
tance traveled and fuel consumption
in the instrument cluster
>When you shift into Reverse, an
acoustic signal indicates that PDC
has been activated, refer to page 85
>Switches on rear window defroster
automatically, to pages 98, 103
>Activates/deactivates various alarm
system functions, refer to page 39
>After giving an ice warning, the
onboard computer display returns to
the previous setting, to page 83.
Examples for Key Memory:
>Locks the vehicle automatically after
starting off, refer to page 35
>Unlocks the driver's door first, then
the vehicle's remaining locks, refer to
page 35
>Opens the tailgate instead of the rear
window with the remote control, refer
to page 32
>Automatically adjusts the driver's
seat to the personal programmed
settings when the vehicle is
unlocked, refer to page 50
OverviewControlsMaintenanceRepairsDataIndex
Page 63 of 178
63 Driving
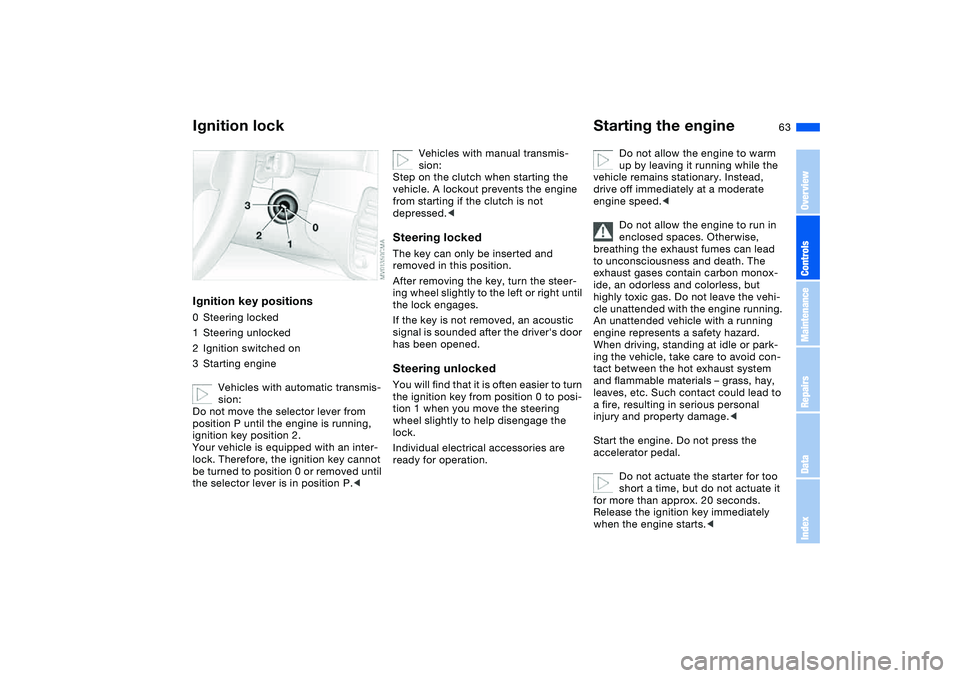
Ignition lockIgnition key positions0Steering locked
1Steering unlocked
2Ignition switched on
3Starting engine
Vehicles with automatic transmis-
sion:
Do not move the selector lever from
position P until the engine is running,
ignition key position 2.
Your vehicle is equipped with an inter-
lock. Therefore, the ignition key cannot
be turned to position 0 or removed until
the selector lever is in position P.<
Vehicles with manual transmis-
sion:
Step on the clutch when starting the
vehicle. A lockout prevents the engine
from starting if the clutch is not
depressed.<
Steering lockedThe key can only be inserted and
removed in this position.
After removing the key, turn the steer-
ing wheel slightly to the left or right until
the lock engages.
If the key is not removed, an acoustic
signal is sounded after the driver's door
has been opened.Steering unlockedYou will find that it is often easier to turn
the ignition key from position 0 to posi-
tion 1 when you move the steering
wheel slightly to help disengage the
lock.
Individual electrical accessories are
ready for operation.
Starting the engine
Do not allow the engine to warm
up by leaving it running while the
vehicle remains stationary. Instead,
drive off immediately at a moderate
engine speed.<
Do not allow the engine to run in
enclosed spaces. Otherwise,
breathing the exhaust fumes can lead
to unconsciousness and death. The
exhaust gases contain carbon monox-
ide, an odorless and colorless, but
highly toxic gas. Do not leave the vehi-
cle unattended with the engine running.
An unattended vehicle with a running
engine represents a safety hazard.
When driving, standing at idle or park-
ing the vehicle, take care to avoid con-
tact between the hot exhaust system
and flammable materials – grass, hay,
leaves, etc. Such contact could lead to
a fire, resulting in serious personal
injury and property damage.<
Start the engine. Do not press the
accelerator pedal.
Do not actuate the starter for too
short a time, but do not actuate it
for more than approx. 20 seconds.
Release the ignition key immediately
when the engine starts.<
OverviewControlsMaintenanceRepairsDataIndex