child seat BMW 325XI SPORTS WAGON 2006 Owners Manual
[x] Cancel search | Manufacturer: BMW, Model Year: 2006, Model line: 325XI SPORTS WAGON, Model: BMW 325XI SPORTS WAGON 2006Pages: 236, PDF Size: 8.56 MB
Page 38 of 236
Controls
37Reference
At a glance
Driving tips
Communications
Navigation
Entertainment
Mobility
Malfunction
Convenient access may malfunction due to
local radio waves. If this happens, open or close
the vehicle via the buttons on the remote con-
trol or using the integrated key. To start the
engine afterward, insert the remote control into
the ignition switch.
Warning lamps
The warning lamp in the instrument
cluster lights up when you attempt to
start the engine: the engine cannot
be started. The remote control is not inside the
vehicle or is malfunctioning. Take the remote
control with you inside the vehicle or have it
checked. If necessary, insert another remote
control into the ignition switch.
The warning lamp in the instrument
cluster lights up while the engine is
running: the remote control is no
longer inside the vehicle. After the engine is
switched off, the engine can only be restarted
within approx. 10 seconds.
The indicator lamp in the instrument
cluster comes on and a message
appears on the Control Display:
replace the battery in the remote control.
Replacing the battery
The remote control for convenient access con-
tains a battery that will need to be replaced from
time to time.
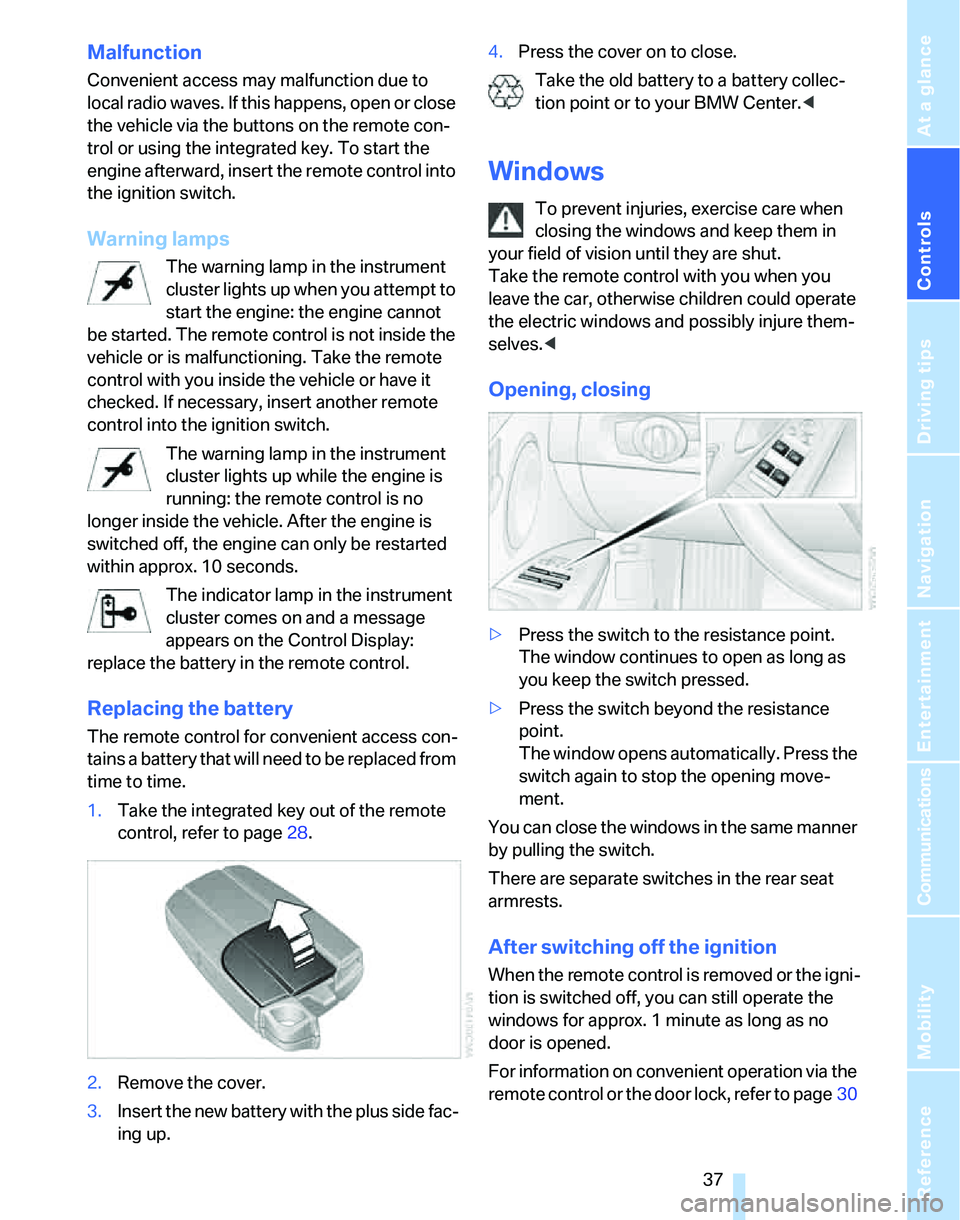
1.Take the integrated key out of the remote
control, refer to page28.
2.Remove the cover.
3.Insert the new battery with the plus side fac-
ing up.4.Press the cover on to close.
Take the old battery to a battery collec-
tion point or to your BMW Center.<
Windows
To prevent injuries, exercise care when
closing the windows and keep them in
your field of vision until they are shut.
Take the remote control with you when you
leave the car, otherwise children could operate
the electric windows and possibly injure them-
selves.<
Opening, closing
>Press the switch to the resistance point.
The window continues to open as long as
you keep the switch pressed.
>Press the switch beyond the resistance
point.
The window opens automatically. Press the
switch again to stop the opening move-
ment.
You can close the windows in the same manner
by pulling the switch.
There are separate switches in the rear seat
armrests.
After switching off the ignition
When the remote control is removed or the igni-
tion is switched off, you can still operate the
windows for approx. 1 minute as long as no
door is opened.
For information on convenient operation via the
remote control or the door lock, refer to page30
Page 42 of 236
Controls
41Reference
At a glance
Driving tips
Communications
Navigation
Entertainment
Mobility
Adjustments
Sitting safely
The ideal sitting position can make a vital con-
tribution to relaxed, fatigue-free driving. In con-
junction with the safety belts, the head
restraints and the airbags, the seated position
has a major influence on your safety in the event
of an accident. To ensure that the safety sys-
tems operate with optimal efficiency, we
strongly urge you to observe the instructions
contained in the following section.
For additional information on transporting chil-
dren safely, refer to page50.
Airbags
Always maintain an adequate distance
between yourself and the airbags. Always
grip the steering wheel on the rim, with your
hands in the 3 o'clock and 9 o'clock positions,
to minimize the risk of injury to the hands or
arms in the event of the airbag being triggered
off.
No one and nothing is to come between the air-
bags and the seat occupant.
Do not use the cover of the front airbag on the
front passenger side as a storage area. Make
sure that the front passenger is sitting correctly,
e.g. not resting feet or legs on the instrument
panel, otherwise leg injuries can occur if the
front airbag is triggered.
Make sure that passengers do not lean their
heads against the side or head airbags, other-
wise serious injuries could result if the side air-
bags suddenly deployed.<
Even if you follow all the instructions, injuries
resulting from contact with airbags cannot be
fully excluded, depending on the circum-
stances. The ignition and inflation noise may
provoke a mild hearing loss in extremely sensi-
tive individuals. This effect is usually only tem-
porary.
For airbag locations and additional information
on airbags, refer to page88.
Head restraint
A correctly adjusted head restraint reduces the
risk of neck injury in the event of an accident.
Adjust the head restraint in such a way
that its center is at approx. ear level. Oth-
erwise, there is an increased risk of injury in the
event of an accident.<
Head restraints, refer to page43.
Safety belt
Before every drive, make sure that all occupants
wear their safety belts. Airbags complement the
safety belt as an additional safety device, but
they do not represent a substitute.
Never allow more than one person to
wear a single safety belt. Never allow
infants or small children to ride in a passenger's
lap.
Expectant mothers should also wear the safety
belt, making sure that the strap in the pelvic
area is well down on the hips and does not press
against the abdominal region of the body.
Do not route the belt across your neck, or run it
across sharp edges. Be sure that the belt does
not become caught or jammed. The safety belt
should not be twisted and must be positioned
firmly over the pelvis and shoulder, as close to
the body as possible. It should not pass over
hard or fragile objects, otherwise the belt in the
pelvic area could slide over the hips in the event
of a head-on collision and injure the lower abdo-
men. Avoid wearing bulky clothing and regularly
pull the belt in the upper-body area taut, other-
wise its restraining effect could be impaired.<
Safety belts, refer to page46.
Seats
Note before adjusting
Never attempt to adjust your seat while
the vehicle is moving. The seat could
respond with unexpected movement, and the
Page 51 of 236
Transporting children safely
50
Transporting children safely
The right place for children
Do not leave children unattended in the
vehicle, otherwise they could endanger
themselves and/or other persons by opening
the doors, for example.<
The rear center seat is not suitable for installing
universal child-restraint systems for all age
groups, approved for the age group in question.
Children always in the rear
Accident research has shown that the safest
place for children is on the rear seats.
Children under the age of 13 or smaller
than 5 ft/150 cm may be transported only
in the rear in suitable child-restraint systems
appropriate for their age, weight and size. Oth-
erwise there is an increased risk of injury in the
event of an accident.<
Children 13 years of age or older must be buck-
led in with a safety belt as soon as there no
longer is any child-restraint system that is
appropriate for their age, size and weight.
All rear seats in your vehicle meet the recom-
mendations of the SAE J1819 standard for
safely mounting child-restraint systems in
motor vehicles.
Exception for front passenger seat
Should it be necessary to use a child-
restraint system on the front passenger
seat, the front and side airbags must be deacti-
vated. Otherwise, a child traveling on that seat
will be at an increased risk of injury if the airbags
are triggered off, even with a child-restraint sys-
tem. Your BMW Center will be glad to advise
you.<
For more information on automatic deactivation
of the front passenger airbags refer to page88.
Installing child-restraint
systems
Observe the child-restraint system man-
ufacturer's instructions for selecting,
installing and using child-restraint systems.
Otherwise the protective effect may be dimin-
ished.<
Standard child-restraint systems are designed
to be secured with a lap belt or with the lap-belt
section of a lap-and-shoulder belt. Incorrectly
or improperly installed child-restraint systems
can increase the risk of injury to children.
Always follow the installation instructions for
the system with the greatest care.
On the front passenger's seat
Before installing a child-restraint system
on the front passenger's seat, make sure
that the front and side airbags for the front pas-
senger are deactivated, otherwise there is an
increased risk of injury if the airbags deploy.<
Seat height
Before installing a universal child-restraint sys-
tem, move the front passenger's seat up as far
as it will go to ensure that the safety belt will be
ideally positioned. Do not change the seat
height afterward.
Backrest width
The backrest width of the front passenger
seat must be adjusted to its widest set-
ting, otherwise the stability of the child seat on
the front passenger seat is limited.<
1.Adjust the backrest width to its widest set-
ting, refer to page43.
2.Install the child seat.
Page 52 of 236
Controls
51Reference
At a glance
Driving tips
Communications
Navigation
Entertainment
Mobility
Child seat security
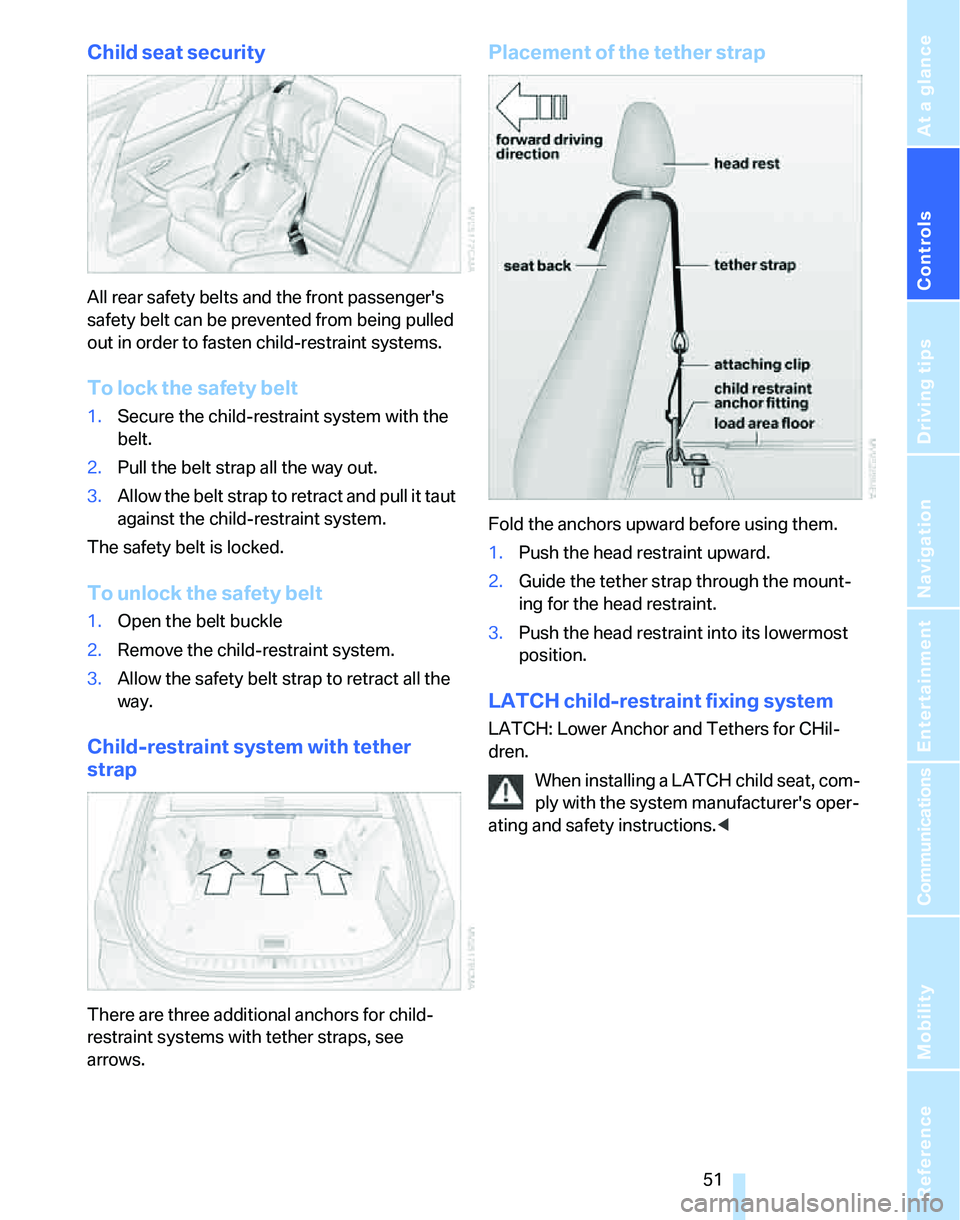
All rear safety belts and the front passenger's
safety belt can be prevented from being pulled
out in order to fasten child-restraint systems.
To lock the safety belt
1.Secure the child-restraint system with the
belt.
2.Pull the belt strap all the way out.
3.Allow the belt strap to retract and pull it taut
against the child-restraint system.
The safety belt is locked.
To unlock the safety belt
1.Open the belt buckle
2.Remove the child-restraint system.
3.Allow the safety belt strap to retract all the
way.
Child-restraint system with tether
strap
There are three additional anchors for child-
restraint systems with tether straps, see
arrows.
Placement of the tether strap
Fold the anchors upward before using them.
1.Push the head restraint upward.
2.Guide the tether strap through the mount-
ing for the head restraint.
3.Push the head restraint into its lowermost
position.
LATCH child-restraint fixing system
LATCH: Lower Anchor and Tethers for CHil-
dren.
When installing a LATCH child seat, com-
ply with the system manufacturer's oper-
ating and safety instructions.<
Page 53 of 236
Transporting children safely
52
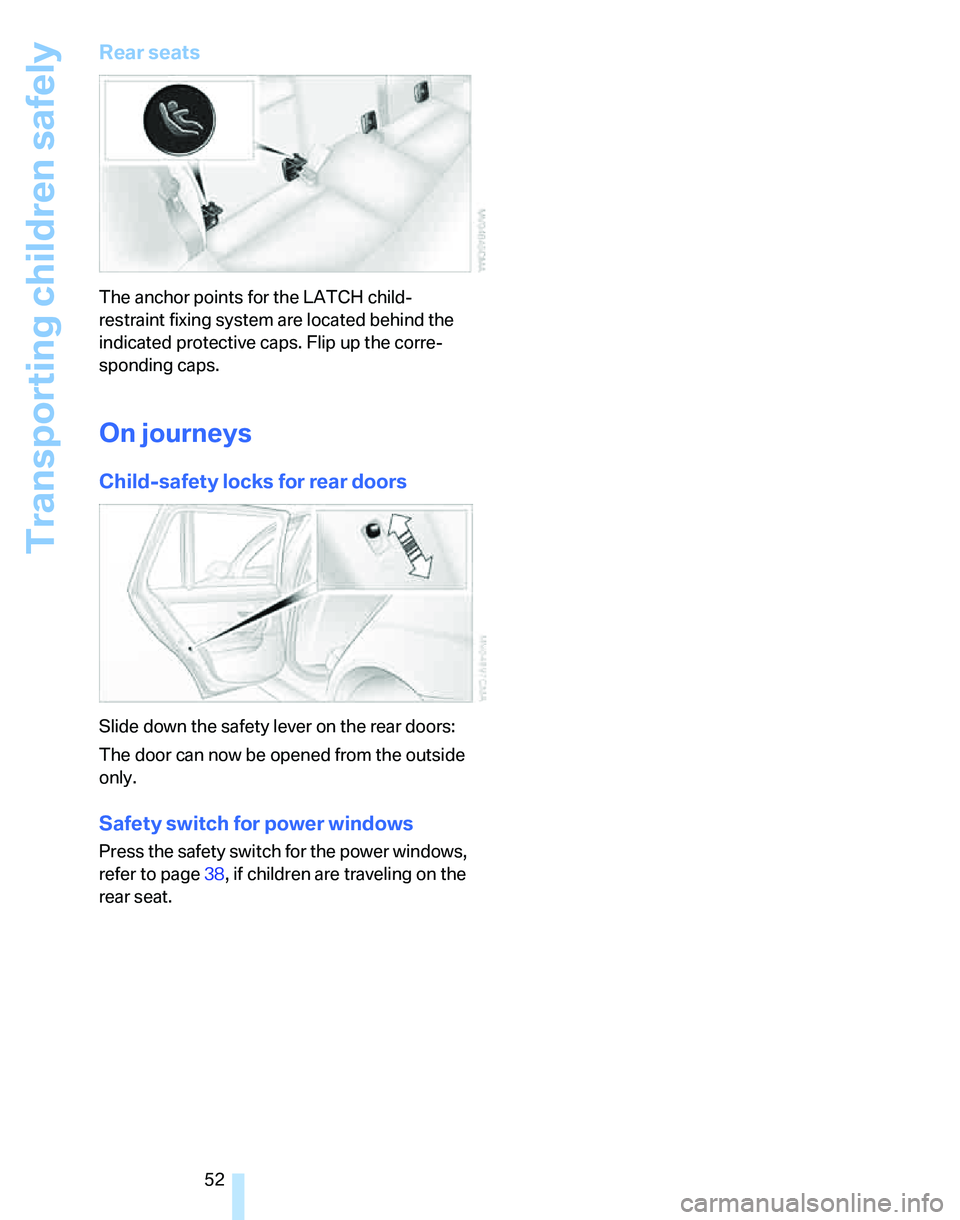
Rear seats
The anchor points for the LATCH child-
restraint fixing system are located behind the
indicated protective caps. Flip up the corre-
sponding caps.
On journeys
Child-safety locks for rear doors
Slide down the safety lever on the rear doors:
The door can now be opened from the outside
only.
Safety switch for power windows
Press the safety switch for the power windows,
refer to page38, if children are traveling on the
rear seat.
Page 89 of 236
Technology for driving comfort and safety
88
Airbags
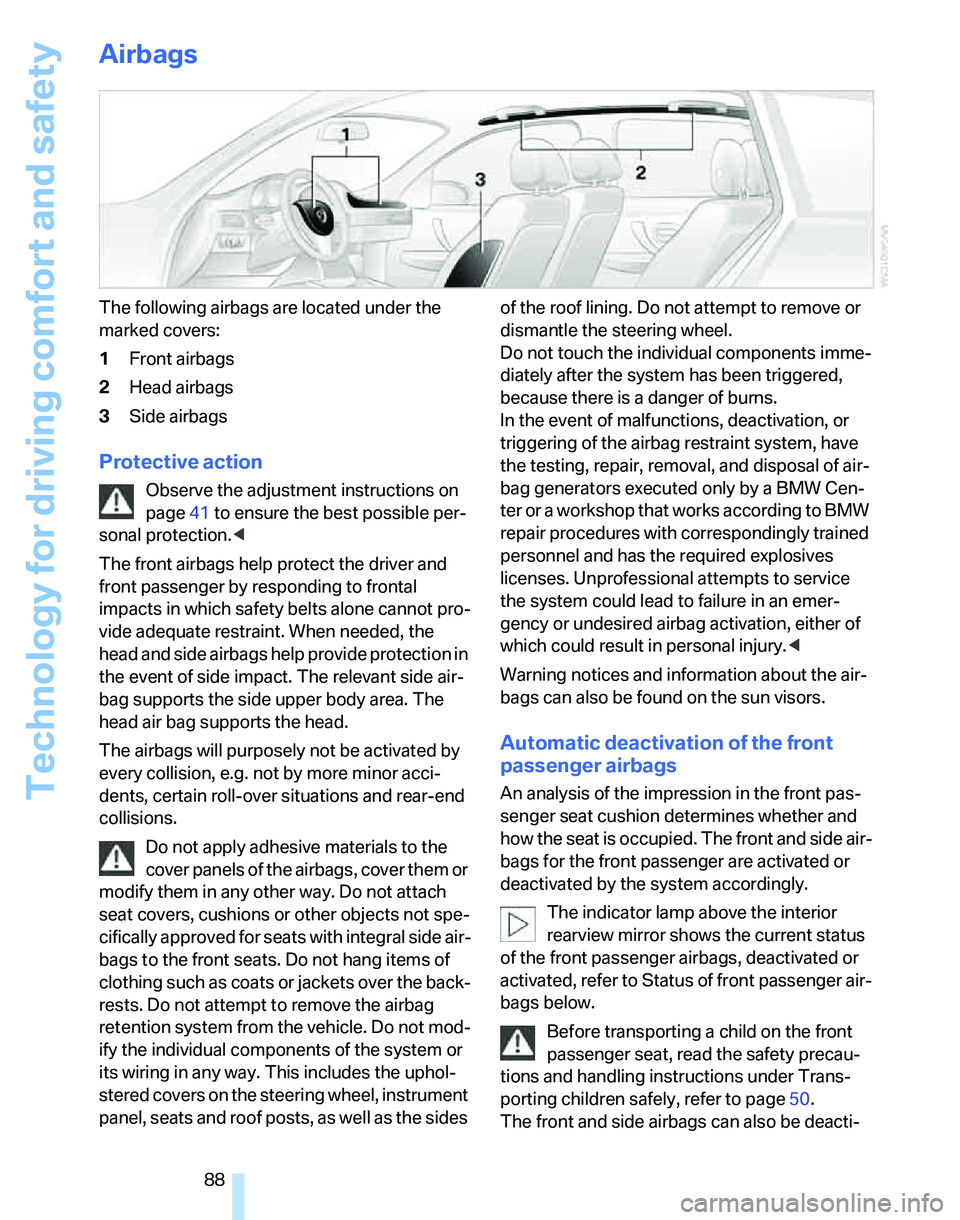
The following airbags are located under the
marked covers:
1Front airbags
2Head airbags
3Side airbags
Protective action
Observe the adjustment instructions on
page41 to ensure the best possible per-
sonal protection.<
The front airbags help protect the driver and
front passenger by responding to frontal
impacts in which safety belts alone cannot pro-
vide adequate restraint. When needed, the
head and side airbags help provide protection in
the event of side impact. The relevant side air-
bag supports the side upper body area. The
head air bag supports the head.
The airbags will purposely not be activated by
every collision, e.g. not by more minor acci-
dents, certain roll-over situations and rear-end
collisions.
Do not apply adhesive materials to the
cover panels of the airbags, cover them or
modify them in any other way. Do not attach
seat covers, cushions or other objects not spe-
cifically approved for seats with integral side air-
bags to the front seats. Do not hang items of
clothing such as coats or jackets over the back-
rests. Do not attempt to remove the airbag
retention system from the vehicle. Do not mod-
ify the individual components of the system or
its wiring in any way. This includes the uphol-
stered covers on the steering wheel, instrument
panel, seats and roof posts, as well as the sides of the roof lining. Do not attempt to remove or
dismantle the steering wheel.
Do not touch the individual components imme-
diately after the system has been triggered,
because there is a danger of burns.
In the event of malfunctions, deactivation, or
triggering of the airbag restraint system, have
the testing, repair, removal, and disposal of air-
bag generators executed only by a BMW Cen-
ter or a workshop that works according to BMW
repair procedures with correspondingly trained
personnel and has the required explosives
licenses. Unprofessional attempts to service
the system could lead to failure in an emer-
gency or undesired airbag activation, either of
which could result in personal injury.<
Warning notices and information about the air-
bags can also be found on the sun visors.
Automatic deactivation of the front
passenger airbags
An analysis of the impression in the front pas-
senger seat cushion determines whether and
how the seat is occupied. The front and side air-
bags for the front passenger are activated or
deactivated by the system accordingly.
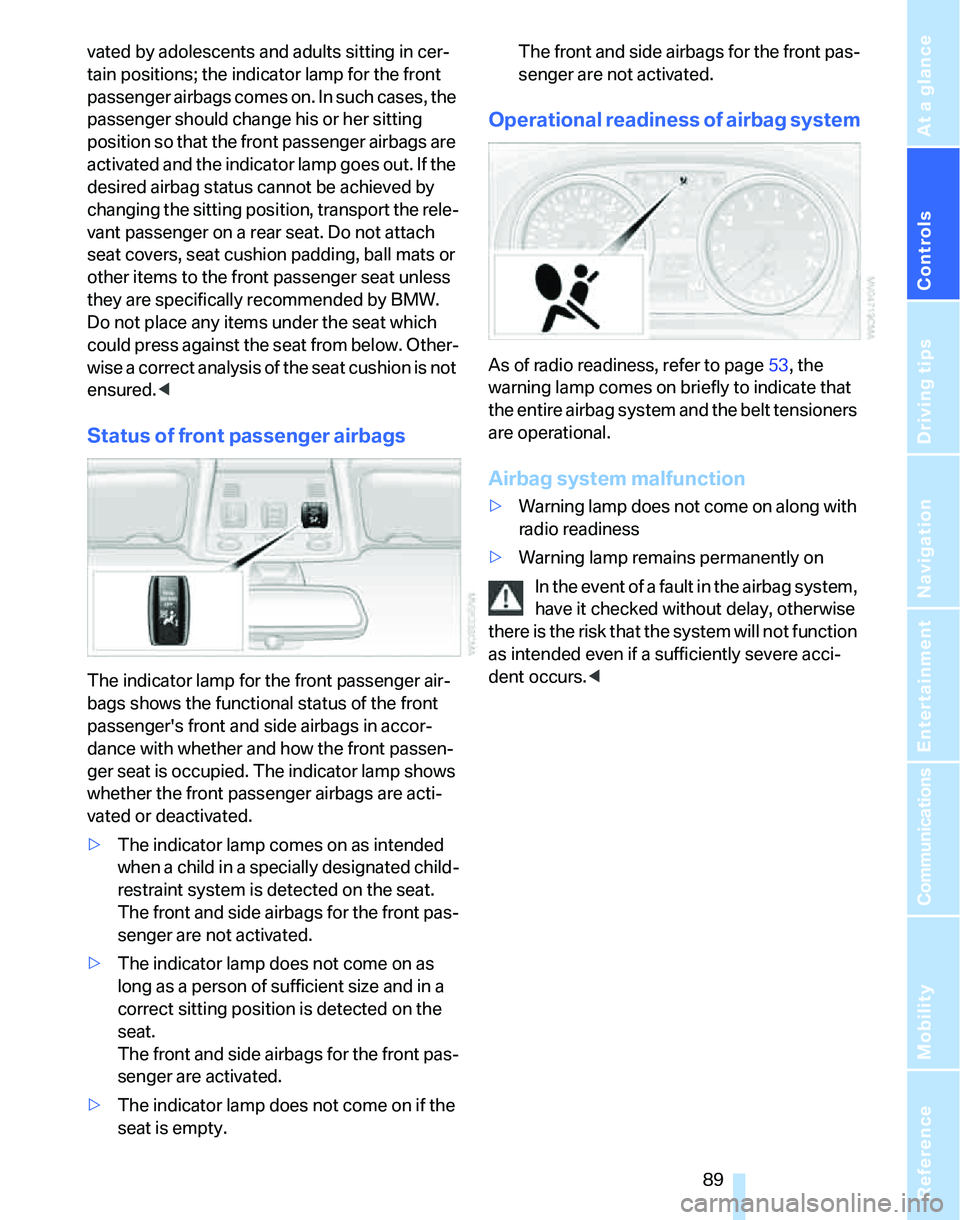
The indicator lamp above the interior
rearview mirror shows the current status
of the front passenger airbags, deactivated or
activated, refer to Status of front passenger air-
bags below.
Before transporting a child on the front
passenger seat, read the safety precau-
tions and handling instructions under Trans-
porting children safely, refer to page50.
The front and side airbags can also be deacti-
Page 90 of 236
Controls
89Reference
At a glance
Driving tips
Communications
Navigation
Entertainment
Mobility
vated by adolescents and adults sitting in cer-
tain positions; the indicator lamp for the front
passenger airbags comes on. In such cases, the
passenger should change his or her sitting
position so that the front passenger airbags are
activated and the indicator lamp goes out. If the
desired airbag status cannot be achieved by
changing the sitting position, transport the rele-
vant passenger on a rear seat. Do not attach
seat covers, seat cushion padding, ball mats or
other items to the front passenger seat unless
they are specifically recommended by BMW.
Do not place any items under the seat which
could press against the seat from below. Other-
wise a correct analysis of the seat cushion is not
ensured.<
Status of front passenger airbags
The indicator lamp for the front passenger air-
bags shows the functional status of the front
passenger's front and side airbags in accor-
dance with whether and how the front passen-
ger seat is occupied. The indicator lamp shows
whether the front passenger airbags are acti-
vated or deactivated.
>The indicator lamp comes on as intended
when a child in a specially designated child-
restraint system is detected on the seat.
The front and side airbags for the front pas-
senger are not activated.
>The indicator lamp does not come on as
long as a person of sufficient size and in a
correct sitting position is detected on the
seat.
The front and side airbags for the front pas-
senger are activated.
>The indicator lamp does not come on if the
seat is empty.The front and side airbags for the front pas-
senger are not activated.
Operational readiness of airbag system
As of radio readiness, refer to page53, the
warning lamp comes on briefly to indicate that
the entire airbag system and the belt tensioners
are operational.
Airbag system malfunction
>Warning lamp does not come on along with
radio readiness
>Warning lamp remains permanently on
In the event of a fault in the airbag system,
have it checked without delay, otherwise
there is the risk that the system will not function
as intended even if a sufficiently severe acci-
dent occurs.<
Page 105 of 236
Practical interior accessories
104
Storage compartments inside
the vehicle
Depending on your vehicle's equipment, you
will find compartments beside the steering col-
umn
*, in the front doors and in the center con-
sole
*.
There are nets
* on the front-seat backrests.
Clothes hooks
There are clothes hooks on the grab handles in
the rear passenger compartment.
Items of clothing hung from the hooks
must not obstruct the driver's view. Do
not hang heavy objects from the hooks, other-
wise they could endanger the car's occupants,
e.g. in case of heavy braking or sudden swerv-
ing.<
Cup holders
Do not place glassware in a cup holder;
otherwise there is an increased risk of
injury in the event of an accident.<
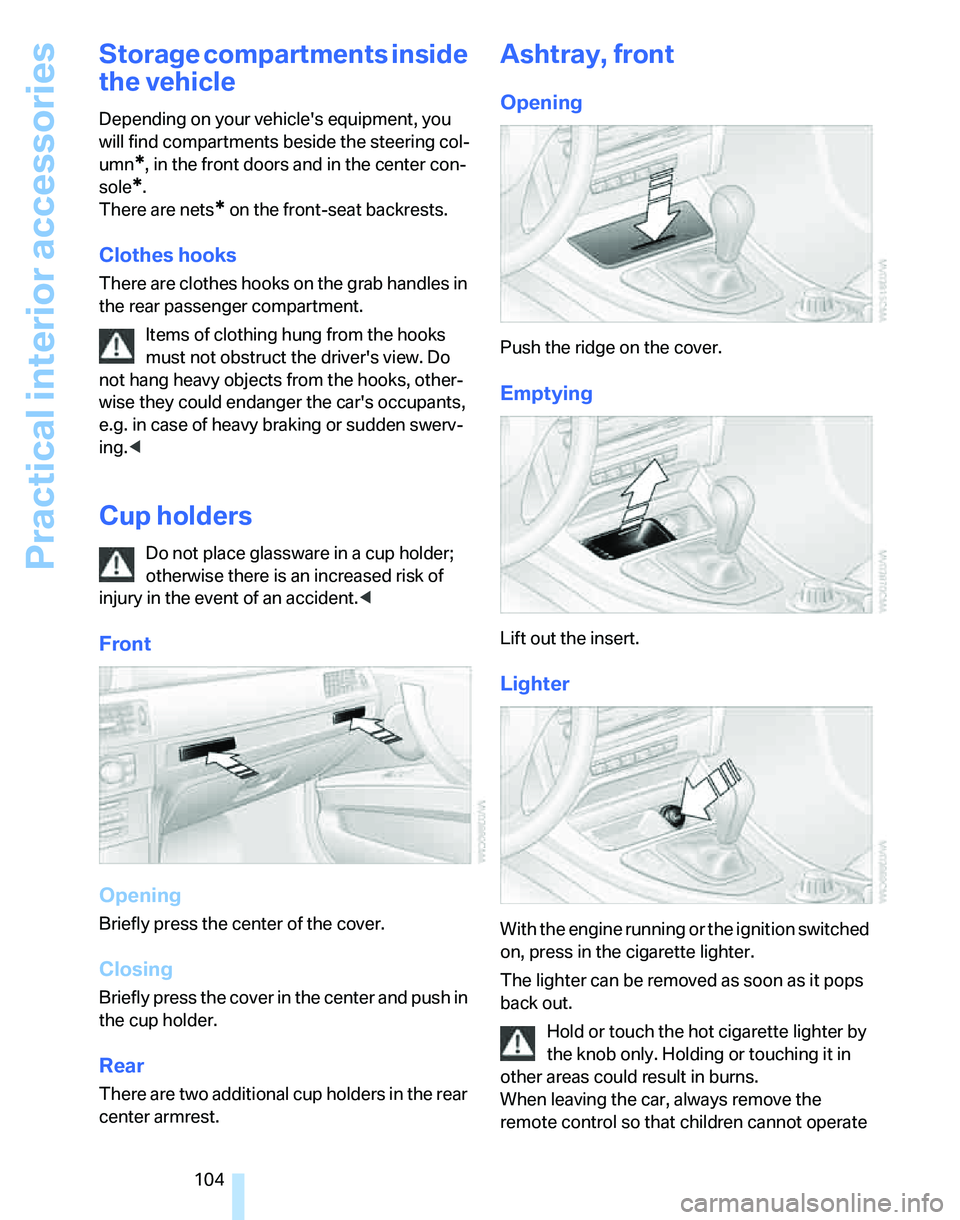
Front
Opening
Briefly press the center of the cover.
Closing
Briefly press the cover in the center and push in
the cup holder.
Rear
There are two additional cup holders in the rear
center armrest.
Ashtray, front
Opening
Push the ridge on the cover.
Emptying
Lift out the insert.
Lighter
With the engine running or the ignition switched
on, press in the cigarette lighter.
The lighter can be removed as soon as it pops
back out.
Hold or touch the hot cigarette lighter by
the knob only. Holding or touching it in
other areas could result in burns.
When leaving the car, always remove the
remote control so that children cannot operate
Page 222 of 236
Reference 221
At a glance
Controls
Driving tips
Communications
Navigation
Entertainment
Mobility
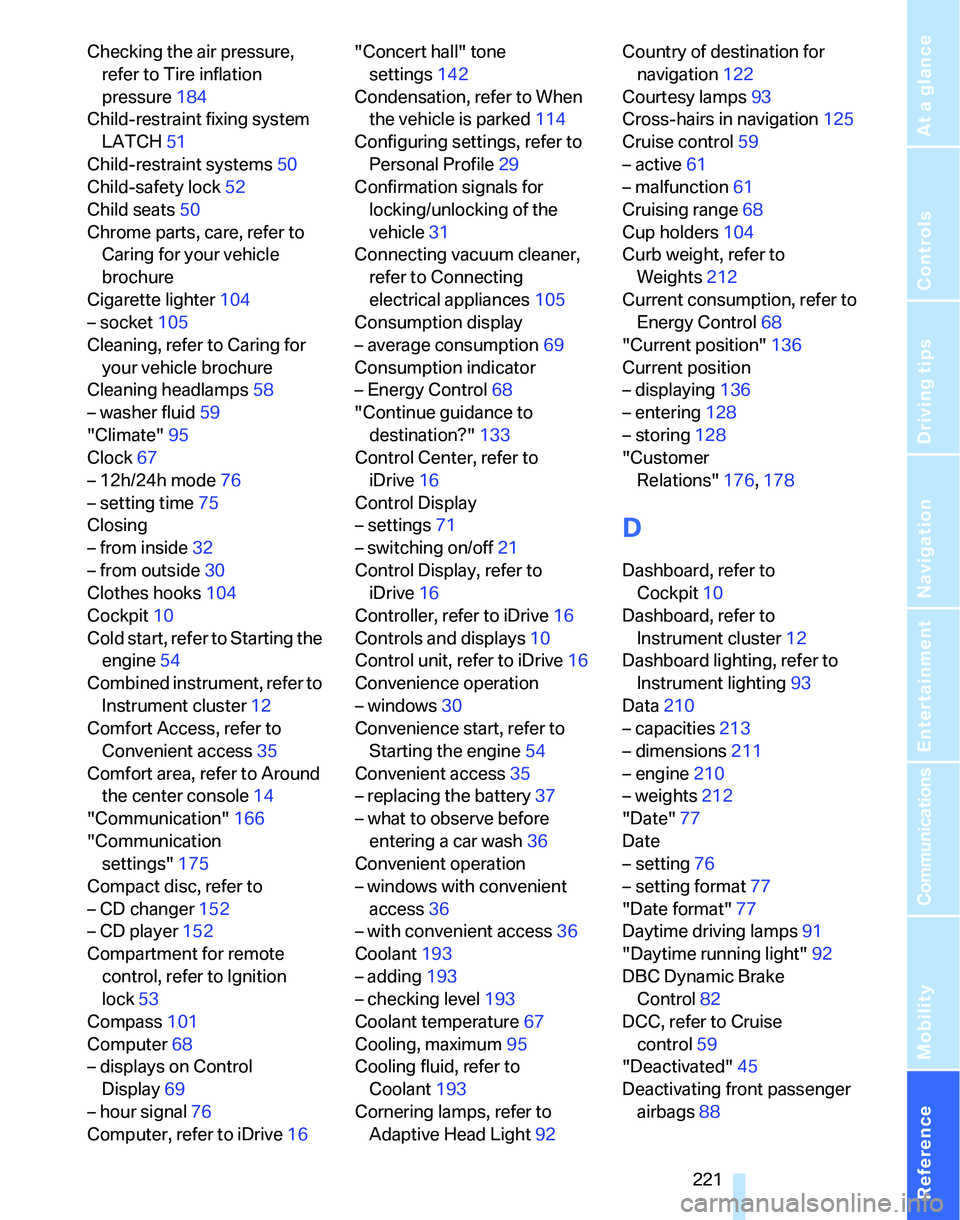
Checking the air pressure,
refer to Tire inflation
pressure184
Child-restraint fixing system
LATCH51
Child-restraint systems50
Child-safety lock52
Child seats50
Chrome parts, care, refer to
Caring for your vehicle
brochure
Cigarette lighter104
– socket105
Cleaning, refer to Caring for
your vehicle brochure
Cleaning headlamps58
– washer fluid59
"Climate"95
Clock67
– 12h/24h mode76
– setting time75
Closing
– from inside32
– from outside30
Clothes hooks104
Cockpit10
Cold start, refer to Starting the
engine54
Combined instrument, refer to
Instrument cluster12
Comfort Access, refer to
Convenient access35
Comfort area, refer to Around
the center console14
"Communication"166
"Communication
settings"175
Compact disc, refer to
– CD changer152
– CD player152
Compartment for remote
control, refer to Ignition
lock53
Compass101
Computer68
– displays on Control
Display69
– hour signal76
Computer, refer to iDrive16"Concert hall" tone
settings142
Condensation, refer to When
the vehicle is parked114
Configuring settings, refer to
Personal Profile29
Confirmation signals for
locking/unlocking of the
vehicle31
Connecting vacuum cleaner,
refer to Connecting
electrical appliances105
Consumption display
– average consumption69
Consumption indicator
– Energy Control68
"Continue guidance to
destination?"
133
Control Center, refer to
iDrive16
Control Display
– settings71
– switching on/off21
Control Display, refer to
iDrive16
Controller, refer to iDrive16
Controls and displays10
Control unit, refer to iDrive16
Convenience operation
– windows30
Convenience start, refer to
Starting the engine54
Convenient access35
– replacing the battery37
– what to observe before
entering a car wash36
Convenient operation
– windows with convenient
access36
– with convenient access36
Coolant193
– adding193
– checking level193
Coolant temperature67
Cooling, maximum95
Cooling fluid, refer to
Coolant193
Cornering lamps, refer to
Adaptive Head Light92Country of destination for
navigation122
Courtesy lamps93
Cross-hairs in navigation125
Cruise control59
– active61
– malfunction61
Cruising range68
Cup holders104
Curb weight, refer to
Weights212
Current consumption, refer to
Energy Control68
"Current position"136
Current position
– displaying136
– entering128
– storing128
"Customer
Relations"176,178
D
Dashboard, refer to
Cockpit10
Dashboard, refer to
Instrument cluster12
Dashboard lighting, refer to
Instrument lighting93
Data210
– capacities213
– dimensions211
– engine210
– weights212
"Date"77
Date
– setting76
– setting format77
"Date format"77
Daytime driving lamps91
"Daytime running light"92
DBC Dynamic Brake
Control82
DCC, refer to Cruise
control59
"Deactivated"45
Deactivating front passenger
airbags88
Page 226 of 236
Reference 225
At a glance
Controls
Driving tips
Communications
Navigation
Entertainment
Mobility
iDrive16
– adjusting brightness80
– assistance window20
– automatic climate control95
– changing language80
– date and time, setting75
– displays, menus17
– menu guidance17
– operating principle16
– overview16
– selecting a menu item19
– status information20
– switching menu pages19
– symbols18
Ignition53
– switched off53
– switched on53
Ignition key, refer to
Integrated key/remote
control28
Ignition key position 1, refer to
Radio readiness53
Ignition key position 2, refer to
Ignition on53
Ignition lock53
Indicator and warning
lamps13
Individual air distribution95
Individually programmable
buttons on steering
wheel48
Individual settings, refer to
Personal Profile29
Information
– on another location126
– on country126
– on current position126
– on destination location126
"Information" in
navigation127
"Information on
destination"128
Initializing
– compass, refer to
Calibrating102
– Flat Tire Monitor FTM86
– panorama glass roof39
"Input map"126Installation location
– CD changer156
Instructions for navigation
system, refer to Voice
instructions135
Instrument cluster12
Instrument lighting93
Instrument panel, refer to
Cockpit10
Integrated key28
Integrated universal remote
control
100
Interesting destination for
navigation126
"Interim time"80
Interior lamps93
– remote control30
Interior motion sensor35
Interior rearview mirror47
– automatic dimming
feature113
Interior rearview mirror with
digital compass101
Interlock56
Intermittent mode of the
wipers58
J
Jacking points201
Joystick, refer to iDrive16
Jumpering, refer to Jump
starting204
Jump starting204
K
Key, refer to Integrated key/
remote control28
Keyless Go, refer to
Convenient access35
Keyless opening and closing,
refer to Convenient
access35
Key Memory, refer to Personal
Profile29
"Keypad"169Kick-down56
– automatic transmission with
Steptronic56
Knock control183
L
Lamps, refer to Parking lamps/
low beams90
Lamps and bulbs, replacing
bulbs197
"Languages" in
navigation135
"Languages"on the control
display80
Lap-and-shoulder safety
belt46
Lashing eyes, refer to
Securing cargo115
Last destinations, refer to
Destination list127
"Last seat pos."45
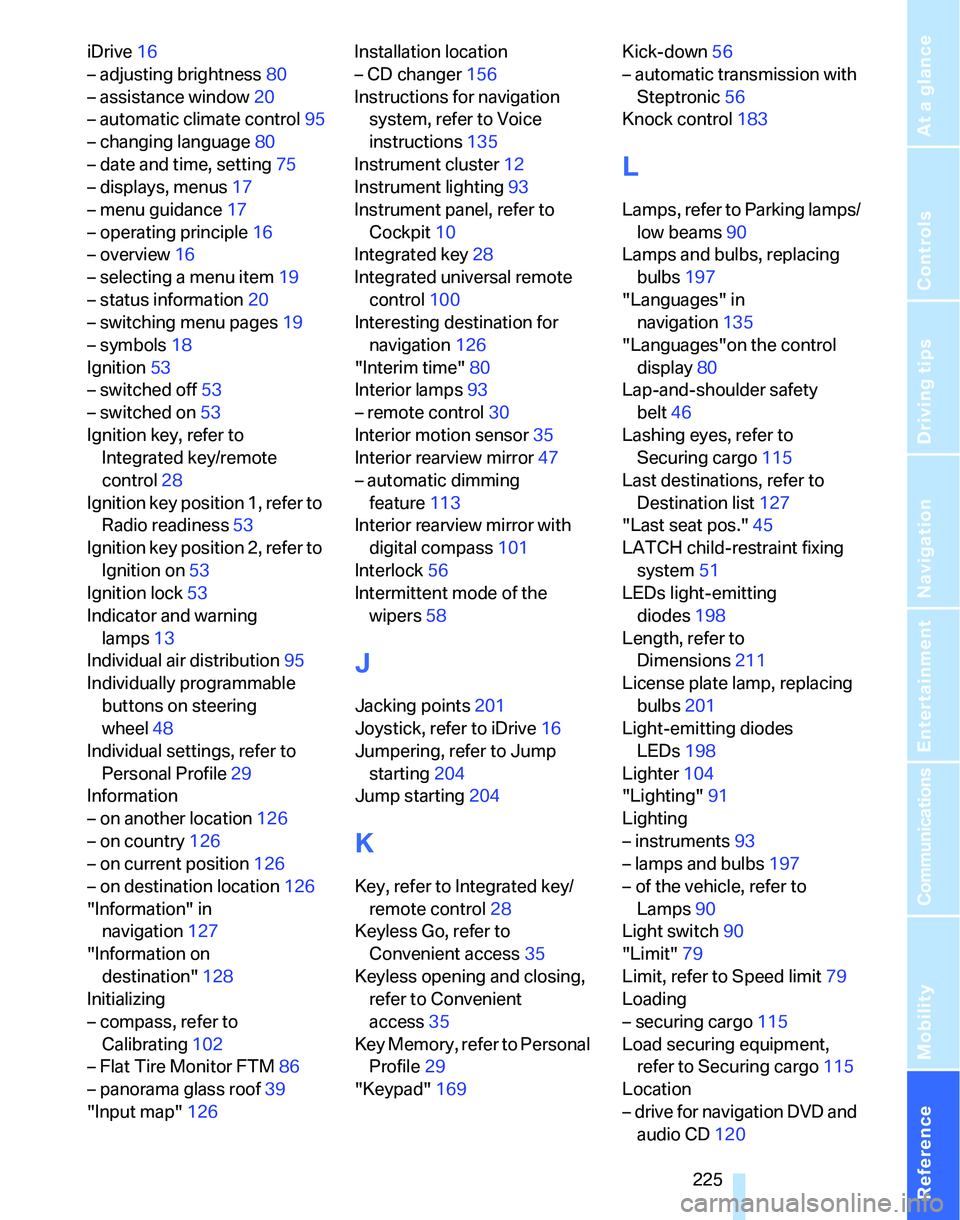
LATCH child-restraint fixing
system51
LEDs light-emitting
diodes198
Length, refer to
Dimensions211
License plate lamp, replacing
bulbs201
Light-emitting diodes
LEDs198
Lighter104
"Lighting"91
Lighting
– instruments93
– lamps and bulbs197
– of the vehicle, refer to
Lamps90
Light switch90
"Limit"79
Limit, refer to Speed limit79
Loading
– securing cargo115
Load securing equipment,
refer to Securing cargo115
Location
– drive for navigation DVD and
audio CD120