mirror controls BMW 325XI SPORTS WAGON 2006 Owners Manual
[x] Cancel search | Manufacturer: BMW, Model Year: 2006, Model line: 325XI SPORTS WAGON, Model: BMW 325XI SPORTS WAGON 2006Pages: 236, PDF Size: 8.56 MB
Page 11 of 236
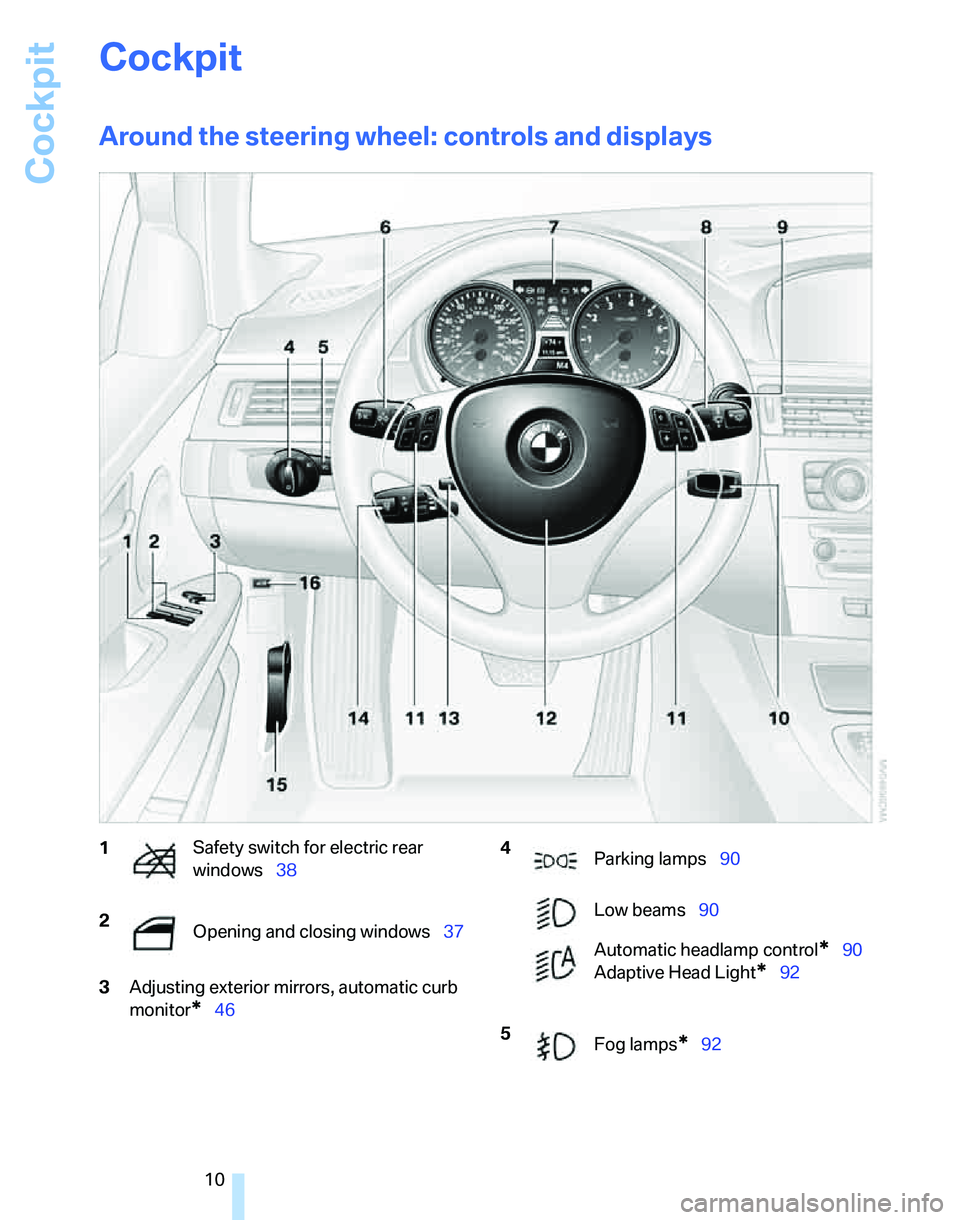
Cockpit
10
Cockpit
Around the steering wheel: controls and displays
3Adjusting exterior mirrors, automatic curb
monitor
*46
1Safety switch for electric rear
windows38
2
Opening and closing windows37 4
Parking lamps90
Low beams90
Automatic headlamp control
*90
Adaptive Head Light
*92
5
Fog lamps
*92
Page 30 of 236
Controls
29Reference
At a glance
Driving tips
Communications
Navigation
Entertainment
Mobility
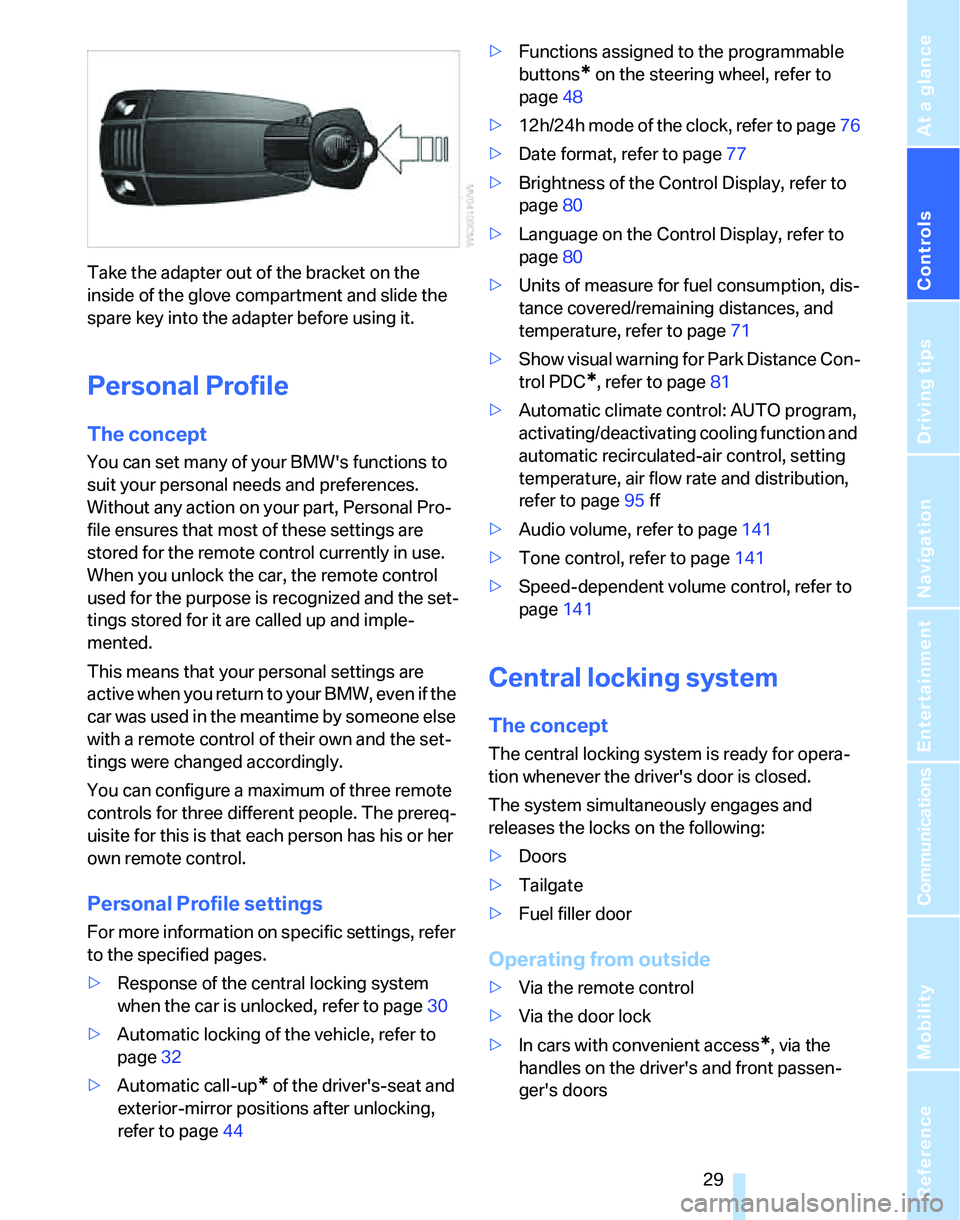
Take the adapter out of the bracket on the
inside of the glove compartment and slide the
spare key into the adapter before using it.
Personal Profile
The concept
You can set many of your BMW's functions to
suit your personal needs and preferences.
Without any action on your part, Personal Pro-
file ensures that most of these settings are
stored for the remote control currently in use.
When you unlock the car, the remote control
used for the purpose is recognized and the set-
tings stored for it are called up and imple-
mented.
This means that your personal settings are
active when you return to your BMW, even if the
car was used in the meantime by someone else
with a remote control of their own and the set-
tings were changed accordingly.
You can configure a maximum of three remote
controls for three different people. The prereq-
uisite for this is that each person has his or her
own remote control.
Personal Profile settings
For more information on specific settings, refer
to the specified pages.
>Response of the central locking system
when the car is unlocked, refer to page30
>Automatic locking of the vehicle, refer to
page32
>Automatic call-up
* of the driver's-seat and
exterior-mirror positions after unlocking,
refer to page44>Functions assigned to the programmable
buttons
* on the steering wheel, refer to
page48
>12h/24h mode of the clock, refer to page76
>Date format, refer to page77
>Brightness of the Control Display, refer to
page80
>Language on the Control Display, refer to
page80
>Units of measure for fuel consumption, dis-
tance covered/remaining distances, and
temperature, refer to page71
>Show visual warning for Park Distance Con-
trol PDC
*, refer to page81
>Automatic climate control: AUTO program,
activating/deactivating cooling function and
automatic recirculated-air control, setting
temperature, air flow rate and distribution,
refer to page95 ff
>Audio volume, refer to page141
>Tone control, refer to page141
>Speed-dependent volume control, refer to
page141
Central locking system
The concept
The central locking system is ready for opera-
tion whenever the driver's door is closed.
The system simultaneously engages and
releases the locks on the following:
>Doors
>Tailgate
>Fuel filler door
Operating from outside
>Via the remote control
>Via the door lock
>In cars with convenient access
*, via the
handles on the driver's and front passen-
ger's doors
Page 36 of 236
Controls
35Reference
At a glance
Driving tips
Communications
Navigation
Entertainment
Mobility
>An acoustic alarm
>Switching on the hazard warning flashers
>Flashing the high beams
Arming and disarming
When you lock or unlock the vehicle, either with
the remote control or at the door lock, the alarm
system is armed or disarmed at the same time.
Even when the alarm system is armed, you can
open the tailgate by means of the button on
the remote control, refer to page31. When you
subsequently close the tailgate it is again
locked and monitored.
Switching off an alarm
>Unlock the car with the remote control, refer
to page30, or
>insert the remote control all the way into the
ignition lock.
Indicator lamp displays
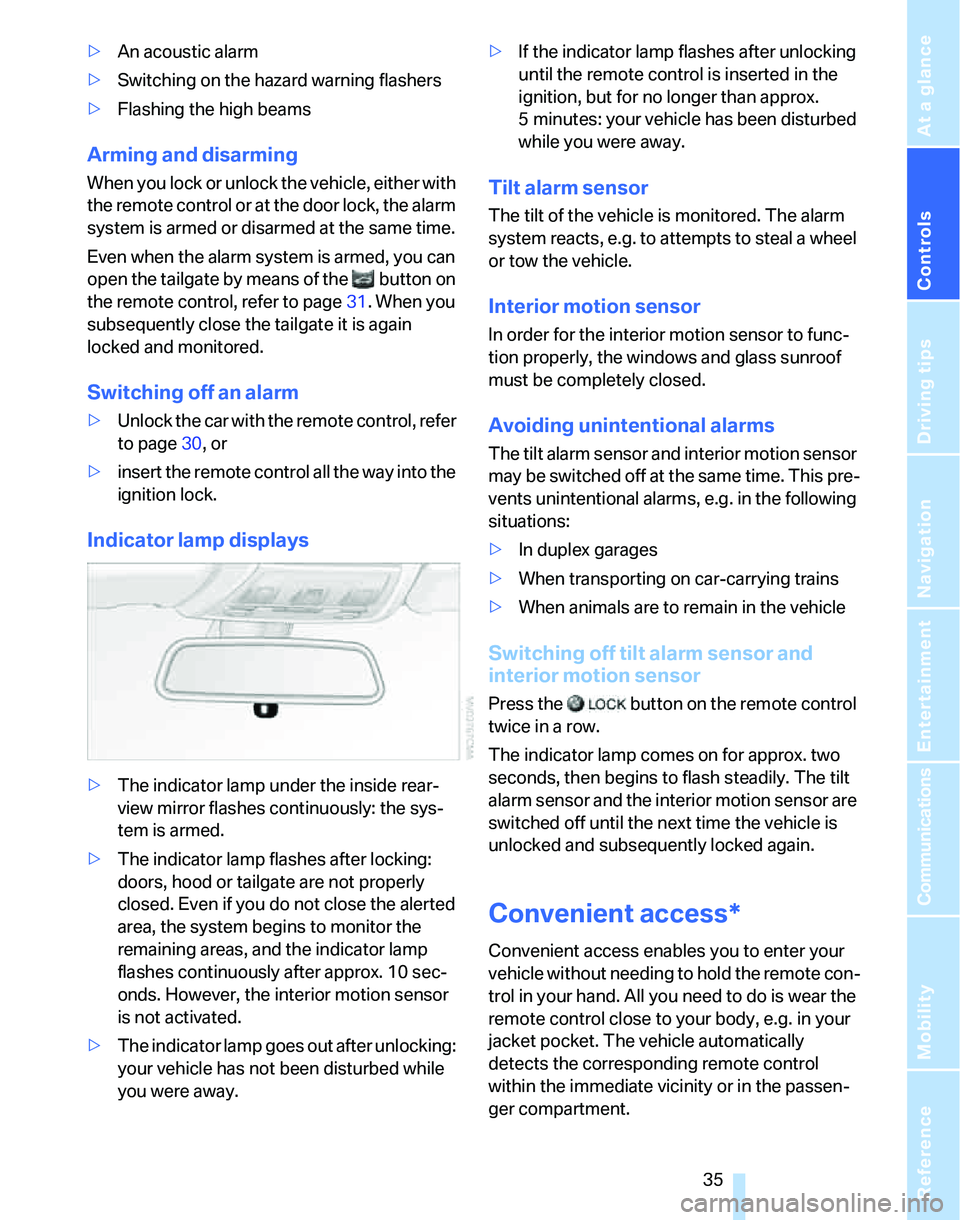
>The indicator lamp under the inside rear-
view mirror flashes continuously: the sys-
tem is armed.
>The indicator lamp flashes after locking:
doors, hood or tailgate are not properly
closed. Even if you do not close the alerted
area, the system begins to monitor the
remaining areas, and the indicator lamp
flashes continuously after approx. 10 sec-
onds. However, the interior motion sensor
is not activated.
>The indicator lamp goes out after unlocking:
your vehicle has not been disturbed while
you were away.>If the indicator lamp flashes after unlocking
until the remote control is inserted in the
ignition, but for no longer than approx.
5 minutes: your vehicle has been disturbed
while you were away.
Tilt alarm sensor
The tilt of the vehicle is monitored. The alarm
system reacts, e.g. to attempts to steal a wheel
or tow the vehicle.
Interior motion sensor
In order for the interior motion sensor to func-
tion properly, the windows and glass sunroof
must be completely closed.
Avoiding unintentional alarms
The tilt alarm sensor and interior motion sensor
may be switched off at the same time. This pre-
vents unintentional alarms, e.g. in the following
situations:
>In duplex garages
>When transporting on car-carrying trains
>When animals are to remain in the vehicle
Switching off tilt alarm sensor and
interior motion sensor
Press the button on the remote control
twice in a row.
The indicator lamp comes on for approx. two
seconds, then begins to flash steadily. The tilt
alarm sensor and the interior motion sensor are
switched off until the next time the vehicle is
unlocked and subsequently locked again.
Convenient access*
Convenient access enables you to enter your
vehicle without needing to hold the remote con-
trol in your hand. All you need to do is wear the
remote control close to your body, e.g. in your
jacket pocket. The vehicle automatically
detects the corresponding remote control
within the immediate vicinity or in the passen-
ger compartment.
Page 46 of 236
Controls
45Reference
At a glance
Driving tips
Communications
Navigation
Entertainment
Mobility
Settings for the seat back width and lumbar
support are not stored in memory.
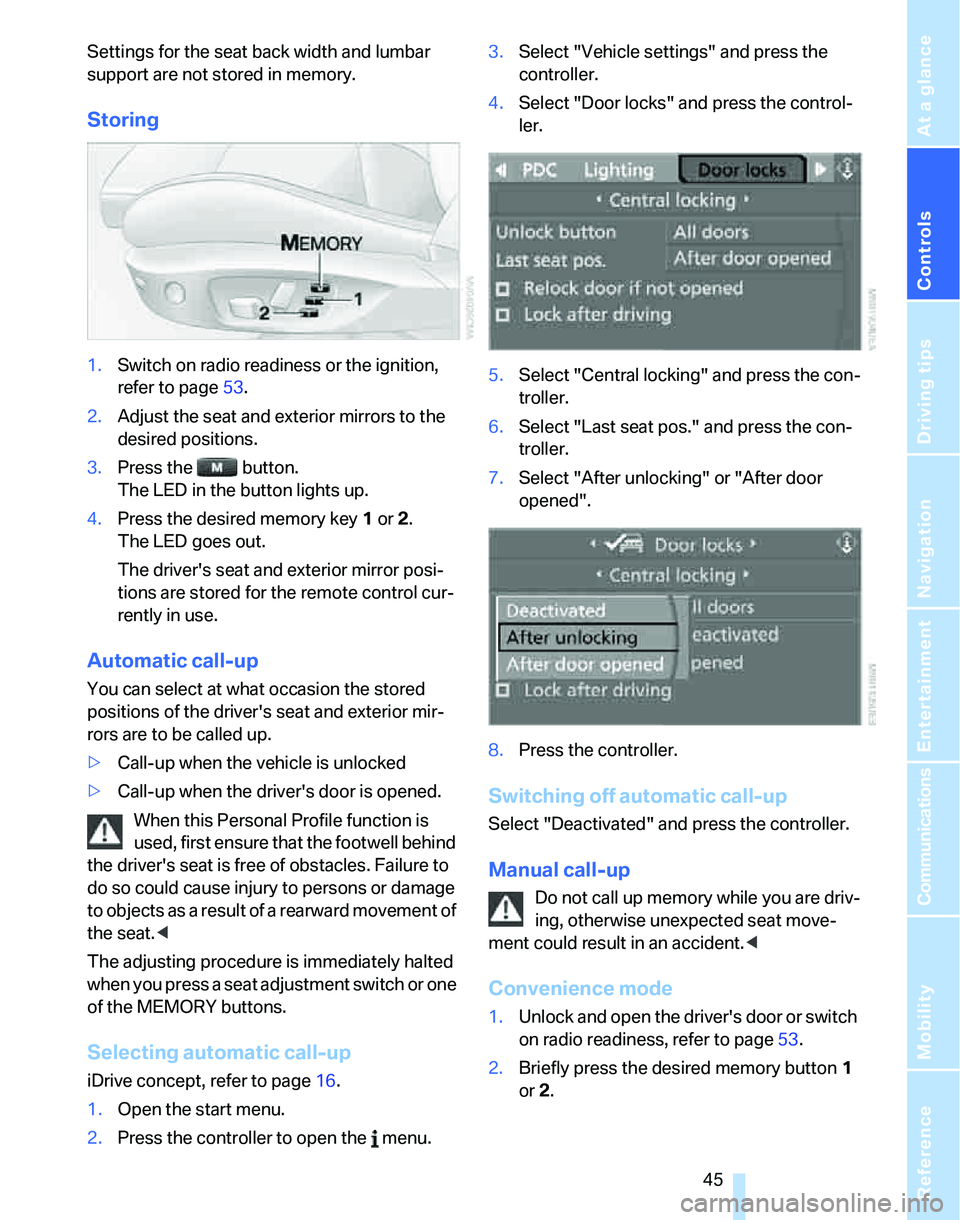
Storing
1.Switch on radio readiness or the ignition,
refer to page53.
2.Adjust the seat and exterior mirrors to the
desired positions.
3.Press the button.
The LED in the button lights up.
4.Press the desired memory key 1 or 2.
The LED goes out.
The driver's seat and exterior mirror posi-
tions are stored for the remote control cur-
rently in use.
Automatic call-up
You can select at what occasion the stored
positions of the driver's seat and exterior mir-
rors are to be called up.
>Call-up when the vehicle is unlocked
>Call-up when the driver's door is opened.
When this Personal Profile function is
used, first ensure that the footwell behind
the driver's seat is free of obstacles. Failure to
do so could cause injury to persons or damage
to objects as a result of a rearward movement of
the seat.<
The adjusting procedure is immediately halted
when you press a seat adjustment switch or one
of the MEMORY buttons.
Selecting automatic call-up
iDrive concept, refer to page16.
1.Open the start menu.
2.Press the controller to open the menu.3.Select "Vehicle settings" and press the
controller.
4.Select "Door locks" and press the control-
ler.
5.Select "Central locking" and press the con-
troller.
6.Select "Last seat pos." and press the con-
troller.
7.Select "After unlocking" or "After door
opened".
8.Press the controller.
Switching off automatic call-up
Select "Deactivated" and press the controller.
Manual call-up
Do not call up memory while you are driv-
ing, otherwise unexpected seat move-
ment could result in an accident.<
Convenience mode
1.Unlock and open the driver's door or switch
on radio readiness, refer to page53.
2.Briefly press the desired memory button1
or 2.
Page 48 of 236
Controls
47Reference
At a glance
Driving tips
Communications
Navigation
Entertainment
Mobility
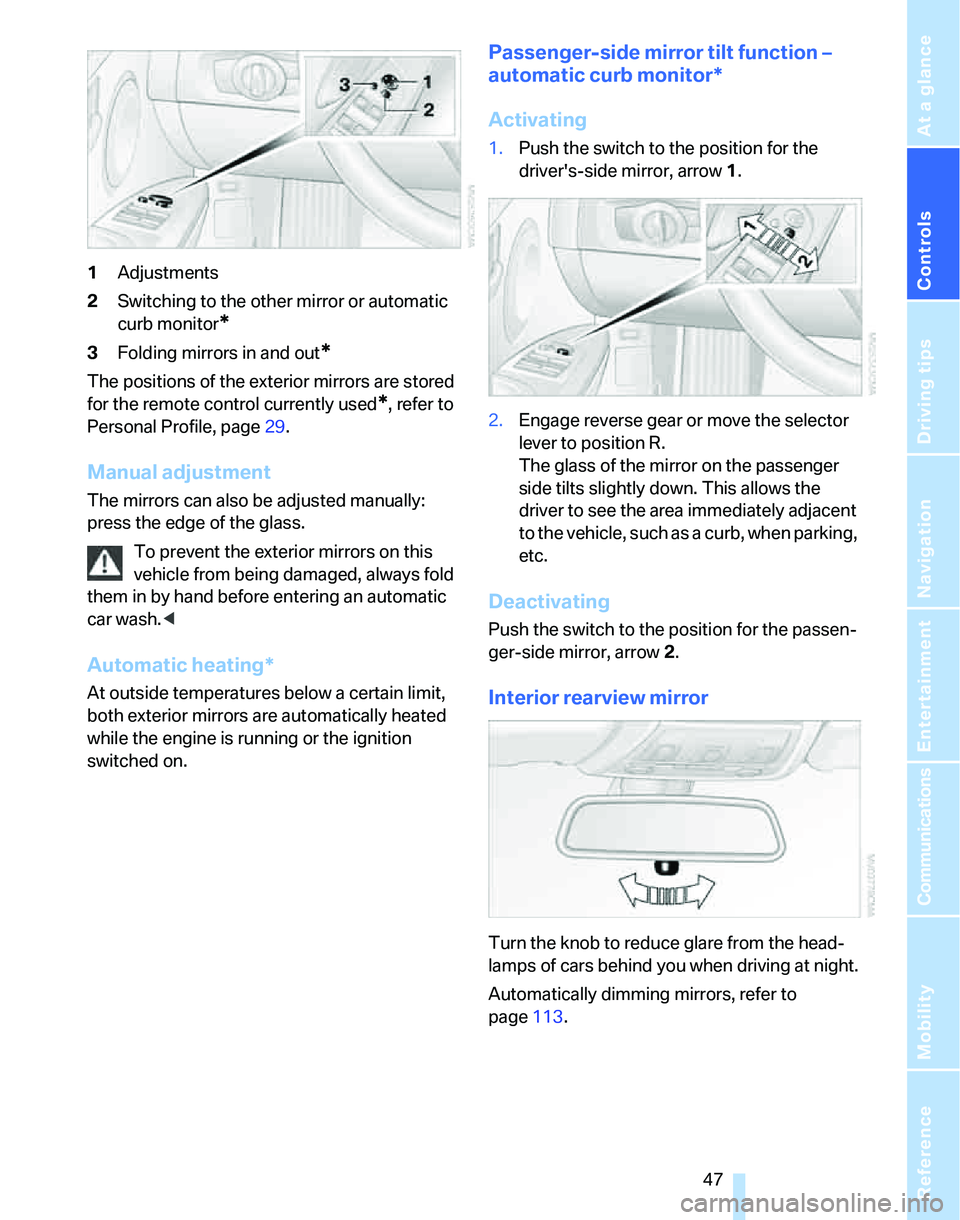
1Adjustments
2Switching to the other mirror or automatic
curb monitor
*
3Folding mirrors in and out*
The positions of the exterior mirrors are stored
for the remote control currently used
*, refer to
Personal Profile, page29.
Manual adjustment
The mirrors can also be adjusted manually:
press the edge of the glass.
To prevent the exterior mirrors on this
vehicle from being damaged, always fold
them in by hand before entering an automatic
car wash.<
Automatic heating*
At outside temperatures below a certain limit,
both exterior mirrors are automatically heated
while the engine is running or the ignition
switched on.
Passenger-side mirror tilt function –
automatic curb monitor*
Activating
1.Push the switch to the position for the
driver's-side mirror, arrow 1.
2.Engage reverse gear or move the selector
lever to position R.
The glass of the mirror on the passenger
side tilts slightly down. This allows the
driver to see the area immediately adjacent
to the vehicle, such as a curb, when parking,
etc.
Deactivating
Push the switch to the position for the passen-
ger-side mirror, arrow 2.
Interior rearview mirror
Turn the knob to reduce glare from the head-
lamps of cars behind you when driving at night.
Automatically dimming mirrors, refer to
page113.
Page 102 of 236
Controls
101Reference
At a glance
Driving tips
Communications
Navigation
Entertainment
Mobility
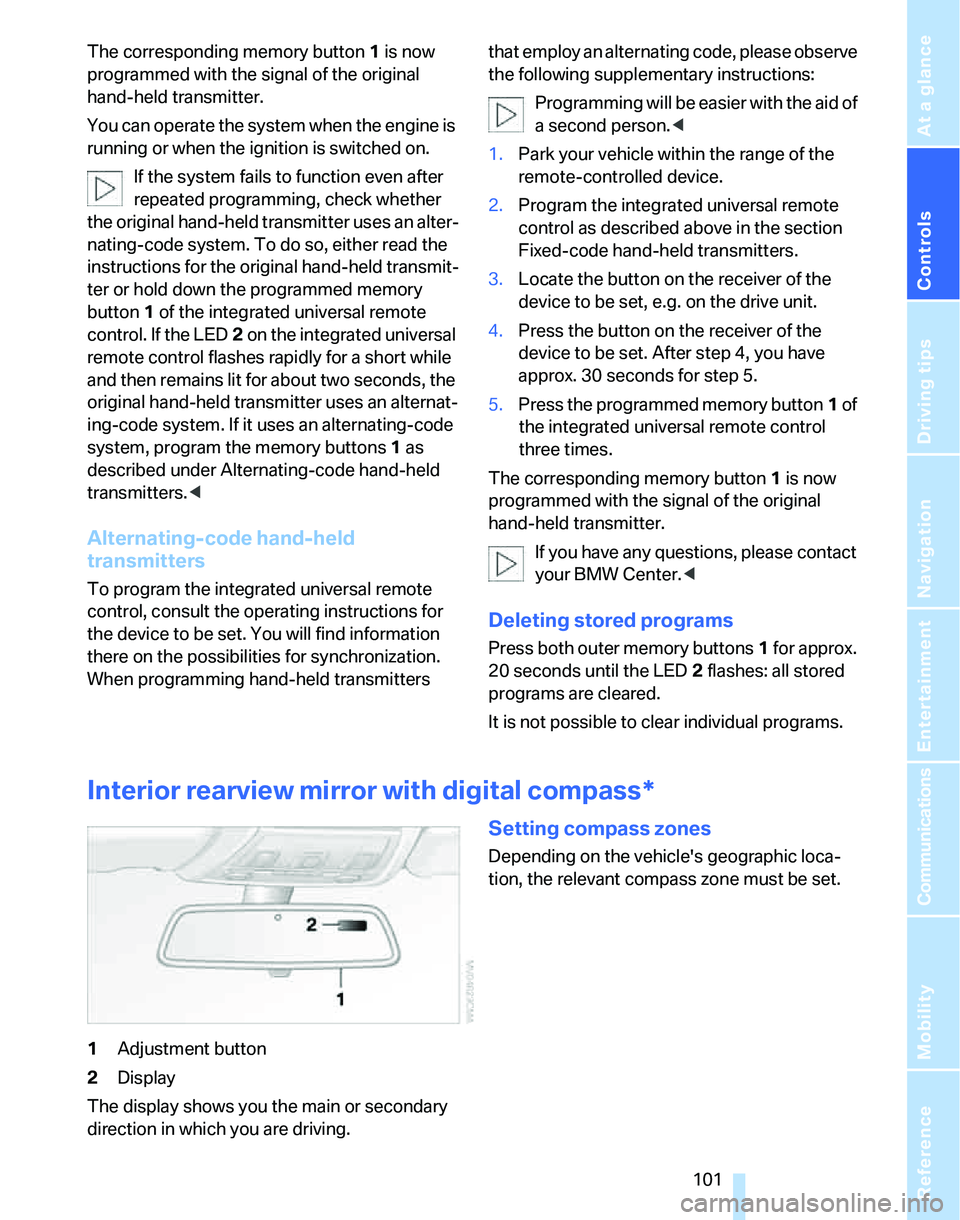
The corresponding memory button 1 is now
programmed with the signal of the original
hand-held transmitter.
You can operate the system when the engine is
running or when the ignition is switched on.
If the system fails to function even after
repeated programming, check whether
the original hand-held transmitter uses an alter-
nating-code system. To do so, either read the
instructions for the original hand-held transmit-
ter or hold down the programmed memory
button1 of the integrated universal remote
control. If the LED2 on the integrated universal
remote control flashes rapidly for a short while
and then remains lit for about two seconds, the
original hand-held transmitter uses an alternat-
ing-code system. If it uses an alternating-code
system, program the memory buttons1 as
described under Alternating-code hand-held
transmitters.<
Alternating-code hand-held
transmitters
To program the integrated universal remote
control, consult the operating instructions for
the device to be set. You will find information
there on the possibilities for synchronization.
When programming hand-held transmitters that employ an alternating code, please observe
the following supplementary instructions:
P r o g ra m m in g w i ll b e ea s i er w it h t h e a i d o f
a second person.<
1.Park your vehicle within the range of the
remote-controlled device.
2.Program the integrated universal remote
control as described above in the section
Fixed-code hand-held transmitters.
3.Locate the button on the receiver of the
device to be set, e.g. on the drive unit.
4.Press the button on the receiver of the
device to be set. After step 4, you have
approx. 30 seconds for step 5.
5.Press the programmed memory button1 of
the integrated universal remote control
three times.
The corresponding memory button 1 is now
programmed with the signal of the original
hand-held transmitter.
If you have any questions, please contact
your BMW Center.<
Deleting stored programs
Press both outer memory buttons1 for approx.
20 seconds until the LED2 flashes: all stored
programs are cleared.
It is not possible to clear individual programs.
Interior rearview mirror with digital compass*
1Adjustment button
2Display
The display shows you the main or secondary
direction in which you are driving.
Setting compass zones
Depending on the vehicle's geographic loca-
tion, the relevant compass zone must be set.
Page 114 of 236
Driving tips
113Reference
At a glance
Controls
Communications
Navigation
Entertainment
Mobility
there is no assurance that the radiation which
results from transmission will be dissipated
from the vehicle interior.<
Interior and exterior mirrors, automatic
dimming feature*
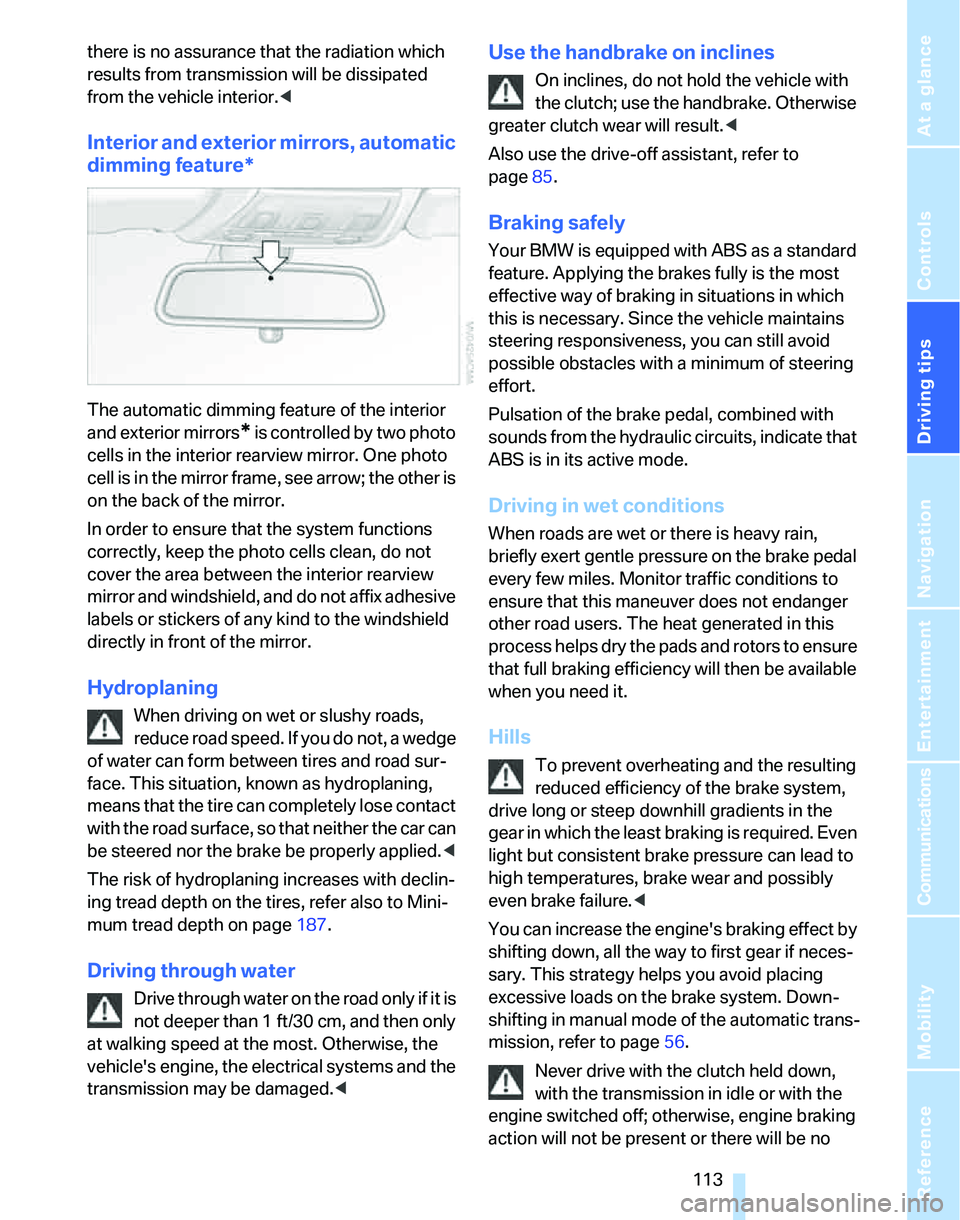
The automatic dimming feature of the interior
and exterior mirrors
* is controlled by two photo
cells in the interior rearview mirror. One photo
cell is in the mirror frame, see arrow; the other is
on the back of the mirror.
In order to ensure that the system functions
correctly, keep the photo cells clean, do not
cover the area between the interior rearview
mirror and windshield, and do not affix adhesive
labels or stickers of any kind to the windshield
directly in front of the mirror.
Hydroplaning
When driving on wet or slushy roads,
reduce road speed. If you do not, a wedge
of water can form between tires and road sur-
face. This situation, known as hydroplaning,
means that the tire can completely lose contact
with the road surface, so that neither the car can
be steered nor the brake be properly applied.<
The risk of hydroplaning increases with declin-
ing tread depth on the tires, refer also to Mini-
mum tread depth on page187.
Driving through water
Drive through water on the road only if it is
not deeper than 1 ft/30 cm, and then only
at walking speed at the most. Otherwise, the
vehicle's engine, the electrical systems and the
transmission may be damaged.<
Use the handbrake on inclines
On inclines, do not hold the vehicle with
the clutch; use the handbrake. Otherwise
greater clutch wear will result.<
Also use the drive-off assistant, refer to
page85.
Braking safely
Your BMW is equipped with ABS as a standard
feature. Applying the brakes fully is the most
effective way of braking in situations in which
this is necessary. Since the vehicle maintains
steering responsiveness, you can still avoid
possible obstacles with a minimum of steering
effort.
Pulsation of the brake pedal, combined with
sounds from the hydraulic circuits, indicate that
ABS is in its active mode.
Driving in wet conditions
When roads are wet or there is heavy rain,
briefly exert gentle pressure on the brake pedal
every few miles. Monitor traffic conditions to
ensure that this maneuver does not endanger
other road users. The heat generated in this
process helps dry the pads and rotors to ensure
that full braking efficiency will then be available
when you need it.
Hills
To prevent overheating and the resulting
reduced efficiency of the brake system,
drive long or steep downhill gradients in the
gear in which the least braking is required. Even
light but consistent brake pressure can lead to
high temperatures, brake wear and possibly
even brake failure.<
You can increase the engine's braking effect by
shifting down, all the way to first gear if neces-
sary. This strategy helps you avoid placing
excessive loads on the brake system. Down-
shifting in manual mode of the automatic trans-
mission, refer to page56.
Never drive with the clutch held down,
with the transmission in idle or with the
engine switched off; otherwise, engine braking
action will not be present or there will be no
Page 224 of 236
Reference 223
At a glance
Controls
Driving tips
Communications
Navigation
Entertainment
Mobility
Eject button, refer to Buttons
on the CD player140
Electrical malfunction
– door lock32
– fuel filler door182
– glass sunroof39
– panorama glass roof39
Electric seat adjustment42
Electronic brake-force
distribution82
Electronic oil level check191
Emergency call203
Emergency operation, refer to
Closing manually
– glass sunroof39
– panorama glass roof39
Emergency operation, refer to
Manual operation
– door lock32
– fuel filler door182
– transmission lock, automatic
transmission57
Emergency services, refer to
Roadside Assistance203
Emissions test, refer to
Service requirements72
"Enable services"175
"End call"167
Energy-conscious driving,
refer to Energy Control68
Energy Control68
Engine
– breaking in112
– data210
– overheated, refer to Coolant
temperature67
– speed210
– starting54
– starting, convenient
access35
– switching off54
Engine compartment191
Engine coolant, refer to
Coolant193Engine oil
– adding193
– BMW Maintenance
System195
– checking level191
– intervals between changes,
refer to Service
requirements72
"Engine oil level"192
Engine output, refer to Engine
data210
Engine speed210
Engine starting, refer to
Starting the engine54
"Enter address"122
Entering destination122
Entering the address124
Entering the intersection
123
"Entertainment"140
"Entertainment
settings"141,148
Environmentally friendly
driving, refer to Energy
Control68
"Equalizer", refer to Tone
control142
Equalizer, refer to Tone
control142
Error messages, refer to
Check Control77
"ESN"150
ESP Electronic Stability
Program, refer to DSC
Dynamic Stability
Control82
Event data recorders196
Exhaust system, refer to Hot
exhaust system112
Expanding the cargo area106
Exterior mirrors46
– adjusting46
– automatic dimming
feature113
– automatic heating47
External audio
device103,158Eyes
– for tow-starting and towing
away205
– for tying down loads115
F
Fader, tone control141
Failure messages, refer to
Check Control77
Failure of an electrical
consumer202
False alarm, refer to Avoiding
unintentional alarms35
Fastening safety belts, refer to
Safety belts46
Fastest route for
navigation130
Fast forward
– CD changer156
– CD player156
"Fast route" in navigation131
Filter
– refer to Microfilter/activated-
charcoal filter for automatic
climate control98
First aid pouch203
Fixture for remote control,
refer to Ignition lock53
Flashlight, refer to
Rechargeable flashlight103
Flash when locking/
unlocking31
Flat
– Run-Flat Tires188
Flat Tire Monitor FTM85
– indicating a flat tire86
– initializing the system86
– malfunction87
– snow chains85,189
– system limits85
Flat tires, refer to Tire
condition187
"FM", waveband140,144
FM, waveband144
Fog lamps92
– indicator lamp13,92
Folding rear seat back106
Page 226 of 236
Reference 225
At a glance
Controls
Driving tips
Communications
Navigation
Entertainment
Mobility
iDrive16
– adjusting brightness80
– assistance window20
– automatic climate control95
– changing language80
– date and time, setting75
– displays, menus17
– menu guidance17
– operating principle16
– overview16
– selecting a menu item19
– status information20
– switching menu pages19
– symbols18
Ignition53
– switched off53
– switched on53
Ignition key, refer to
Integrated key/remote
control28
Ignition key position 1, refer to
Radio readiness53
Ignition key position 2, refer to
Ignition on53
Ignition lock53
Indicator and warning
lamps13
Individual air distribution95
Individually programmable
buttons on steering
wheel48
Individual settings, refer to
Personal Profile29
Information
– on another location126
– on country126
– on current position126
– on destination location126
"Information" in
navigation127
"Information on
destination"128
Initializing
– compass, refer to
Calibrating102
– Flat Tire Monitor FTM86
– panorama glass roof39
"Input map"126Installation location
– CD changer156
Instructions for navigation
system, refer to Voice
instructions135
Instrument cluster12
Instrument lighting93
Instrument panel, refer to
Cockpit10
Integrated key28
Integrated universal remote
control
100
Interesting destination for
navigation126
"Interim time"80
Interior lamps93
– remote control30
Interior motion sensor35
Interior rearview mirror47
– automatic dimming
feature113
Interior rearview mirror with
digital compass101
Interlock56
Intermittent mode of the
wipers58
J
Jacking points201
Joystick, refer to iDrive16
Jumpering, refer to Jump
starting204
Jump starting204
K
Key, refer to Integrated key/
remote control28
Keyless Go, refer to
Convenient access35
Keyless opening and closing,
refer to Convenient
access35
Key Memory, refer to Personal
Profile29
"Keypad"169Kick-down56
– automatic transmission with
Steptronic56
Knock control183
L
Lamps, refer to Parking lamps/
low beams90
Lamps and bulbs, replacing
bulbs197
"Languages" in
navigation135
"Languages"on the control
display80
Lap-and-shoulder safety
belt46
Lashing eyes, refer to
Securing cargo115
Last destinations, refer to
Destination list127
"Last seat pos."45
LATCH child-restraint fixing
system51
LEDs light-emitting
diodes198
Length, refer to
Dimensions211
License plate lamp, replacing
bulbs201
Light-emitting diodes
LEDs198
Lighter104
"Lighting"91
Lighting
– instruments93
– lamps and bulbs197
– of the vehicle, refer to
Lamps90
Light switch90
"Limit"79
Limit, refer to Speed limit79
Loading
– securing cargo115
Load securing equipment,
refer to Securing cargo115
Location
– drive for navigation DVD and
audio CD120
Page 227 of 236
Everything from A - Z
226 Lock buttons in the doors,
refer to Locking33
Locking
– adjusting confirmation
signal31
– from inside33
– from outside30
– without remote control, refer
to Convenient access35
Locking and unlocking doors
– from inside32
– from outside30
"LOGIC7", refer to Tone
control142
Low beams90
– automatic90
– replacing bulbs198
Lower back support, refer to
Lumbar support42
Luggage compartment
– capacity212
– opening from inside33
Luggage compartment, refer
to Cargo area33
Luggage compartment net,
refer to Cargo area net106
Luggage compartment net,
refer to Securing cargo115
Luggage rack, refer to Roof-
mounted luggage rack115
Lumbar support42
M
M+S tires, refer to Winter
tires189
Maintenance, refer to Service
Booklet
Maintenance system195
Malfunction warnings, refer to
Check Control77
Manual mode
– automatic transmission with
Steptronic56
"Manual" on the radio145Manual operation
– door lock32
– glass sunroof39
– panorama glass roof39
– tailgate33
– transmission lock, automatic
transmission57
Manual release
– fuel filler door182
Manual transmission55
Map
– changing scale134
– destination entry125
"Map direction of travel"134
"Map facing north"134
Master key, refer to Integrated
key/remote control28
Maximum cooling95
Maximum speed
– with winter tires189
Memory, refer to Seat and
mirror memory44
MENU button16
Menus, refer to iDrive16
Microfilter
– BMW Maintenance
System195
– for automatic climate
control98
Microfilter/activated-charcoal
filter
– BMW Maintenance
System195
Microphone for telephone14
Mirror dimming feature113
Mirrors46
– automatic curb monitor47
– exterior mirrors46
– heating47
– interior rearview mirror47
"Missed calls"168
Missed calls168Mobile phone
– accepted calls168
– adjusting volume166
– calling167
– ending call167
– installation location, refer to
Center armrest103
– missed calls168
– operation via iDrive166
– redialing168
– refer to separate Owner's
Manual
– Top 8168
– touch tone dialing169
Mobile phone, installation
location, refer to Center
armrest103
Mobile phone, refer to the
separate Owner's Manual
Mobile phone in the
vehicle112
Mobile phones, use inside the
car, refer to Mobile phone in
the vehicle112
Modifications, technical, refer
to For your own safety5
Monitor, refer to iDrive
controls16
Monitoring system for tire
pressures, refer to Flat Tire
Monitor85
"Monitor on / off"48
Most recent mobile phone
numbers168
MP3, refer to Compressed
audio files152
Multifunctional steering
wheel, refer to Buttons on
the steering wheel11
Multifunction switch
– refer to Turn signals/
headlamp flasher57
– refer to Wiper system58
Music track
– finding154
"Mute on / off"48
Muting the TV140