wheel BMW 325XI TOURING 2006 E91 Owner's Manual
[x] Cancel search | Manufacturer: BMW, Model Year: 2006, Model line: 325XI TOURING, Model: BMW 325XI TOURING 2006 E91Pages: 160, PDF Size: 4.86 MB
Page 5 of 160
Reference
At a glance
Controls
Driving tips
Mobility
Contents
The fastest way to find information on a partic-
ular topic or item is by using the index, refer to
page146.
Using this Owner's Manual
4Notes
6Reporting safety defects
At a glance
10Cockpit
Controls
18Opening and closing
31Adjustments
39Transporting children safely
42Driving
57Everything under control
65Technology for driving comfort and
safety
74Lamps
78Climate
84Practical interior accessories
Driving tips
96Things to remember when driving
Mobility
104Refueling
106Wheels and tires
112Under the hood
117Maintenance
119Replacing components
125Giving and receiving assistance
130Indicator and warning lamps
Reference
142Technical data
146Everything from A to Z
Page 7 of 160
Reference
At a glance
Controls
Driving tips
Mobility
5
The individual vehicle
When you ordered your BMW, you chose vari-
ous items of equipment. This Owner's Manual
describes the entire array of options and equip-
ment available with a specific BMW model.
Please bear in mind that the manual may con-
tain information on accessories and equipment
that you have not specified for your own vehicle.
Sections describing options and special equip-
ment are marked by asterisks
* to assist you in
identifying possible differences between the
descriptions in this manual and your own vehi-
cle's equipment.
If equipment in your BMW is not described in
this Owner's Manual, please refer to the accom-
panying Supplementary Owner's Manuals.
Editorial notice
BMW pursues a policy of continuous, ongoing
development that is conceived to ensure that
our vehicles continue to embody the highest
quality and safety standards combined with
advanced, state-of-the-art technology. For this
reason, it is possible in exceptional cases that
features described in this Owner's Manual
could differ from those on your vehicle.
For your own safety
Maintenance and repair
Advanced technology, e.g. the use of
modern materials and powerful electron-
ics, requires specially adapted maintenance
and repair methods. You should therefore have
the corresponding work on your vehicle per-
formed only by your BMW Center or at a work-
shop that works according to BMW repair pro-
cedures with correspondingly trained
personnel. If this work is not carried out prop-
erly, there is a danger of subsequent damage
and related safety hazards.<
Parts and accessories
For your own safety, use genuine parts
and accessories approved by BMW.
When you purchase accessories tested and
approved by BMW and Original BMW Parts, you
simultaneously acquire the assurance that they
have been thoroughly tested by BMW to ensure
optimum performance when installed on your
vehicle.
BMW warrants these parts to be free from
defects in material and workmanship.
BMW will not accept any liability for damage
resulting from installation of parts and accesso-
ries not approved by BMW.
BMW cannot test every product made by other
manufacturers to verify if it can be used on a
BMW safely and without risk to either the vehi-
cle, its operation, or its occupants.
Original BMW Parts, BMW Accessories and
other products approved by BMW, together
with professional advice on using these items,
are available from all BMW Centers.
Installation and operation of non-BMW
approved accessories such as alarms, radios,
amplifiers, radar detectors, wheels, suspension
components, brake dust shields, telephones,
including operation of any mobile phone from
within the vehicle without using an externally
mounted antenna, or transceiver equipment, for
instance, CBs, walkie-talkies, ham radio or sim-
ilar accessories, may cause extensive damage
Page 12 of 160
Cockpit
10
Cockpit
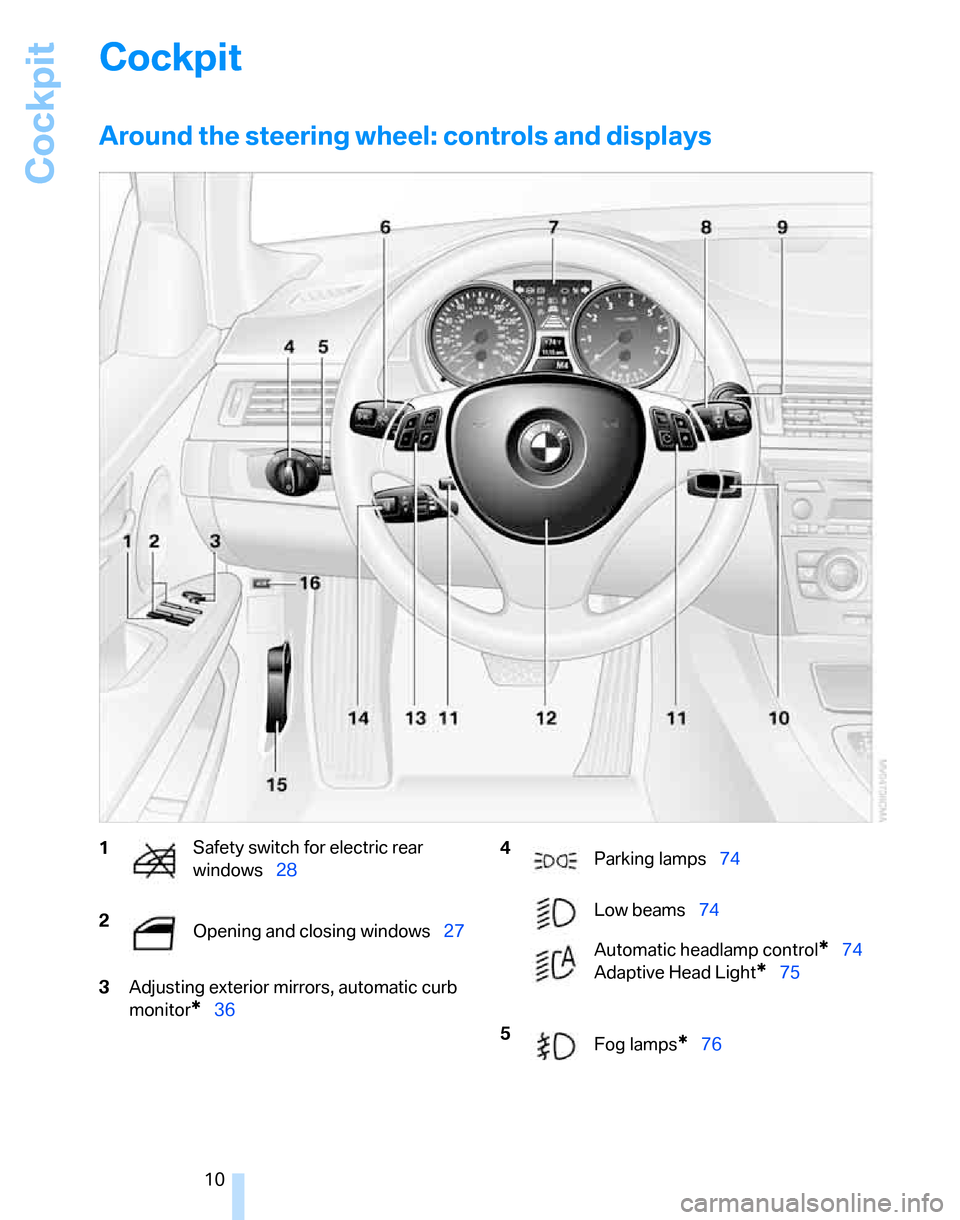
Around the steering wheel: controls and displays
3Adjusting exterior mirrors, automatic curb
monitor
*36
1Safety switch for electric rear
windows28
2
Opening and closing windows27 4
Parking lamps74
Low beams74
Automatic headlamp control
*74
Adaptive Head Light
*75
5
Fog lamps
*76
Page 13 of 160
At a glance
Controls
Driving tips
Mobility Reference
11
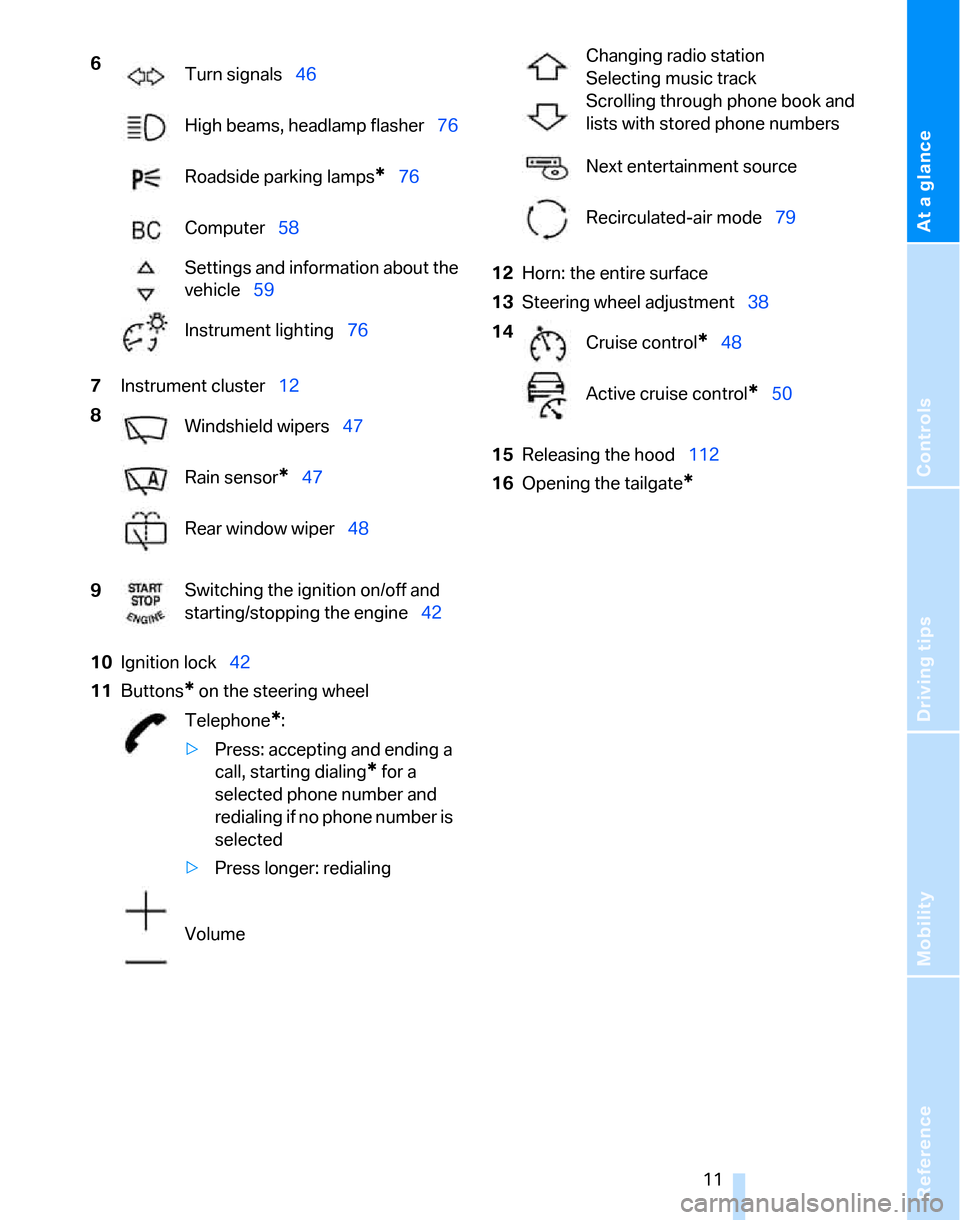
7Instrument cluster12
10Ignition lock42
11Buttons
* on the steering wheel12Horn: the entire surface
13Steering wheel adjustment38
15Releasing the hood112
16Opening the tailgate
*
6
Turn signals46
High beams, headlamp flasher76
Roadside parking lamps
*76
Computer58
Settings and information about the
vehicle59
Instrument lighting76
8
Windshield wipers47
Rain sensor
*47
Rear window wiper48
9Switching the ignition on/off and
starting/stopping the engine42
Telephone
*:
>Press: accepting and ending a
call, starting dialing
* for a
selected phone number and
redialing if no phone number is
selected
>Press longer: redialing
Volume
Changing radio station
Selecting music track
Scrolling through phone book and
lists with stored phone numbers
Next entertainment source
Recirculated-air mode79
14
Cruise control
*48
Active cruise control
*50
Page 27 of 160
Reference
At a glance
Controls
Driving tips
Mobility
25
Alarm system*
The concept
The vehicle alarm system responds:
>When a door, the hood or the tailgate is
opened
>To movements inside the vehicle: Interior
motion sensor, refer to the information fur-
ther below
>When the car's inclination changes, for
instance if an attempt is made to jack it up
and steal the wheels or to raise it prior to
towing away
>When there is an interruption in the power
supply from the battery
The alarm system signals unauthorized entry
attempts for a short time by means of:
>An acoustic alarm
>Switching on the hazard warning flashers
>Flashing the high beams
Arming and disarming
When you lock or unlock the vehicle, either with
the remote control or at the door lock, the alarm
system is armed or disarmed at the same time.
Even when the alarm system is armed, you can
open the tailgate by means of the button on
the remote control, refer to page21. When you
subsequently close the tailgate it is again
locked and monitored.
Switching off an alarm
>Unlock the car with the remote control, refer
to page20, or
>insert the remote control all the way into the
ignition lock.
Indicator lamp displays
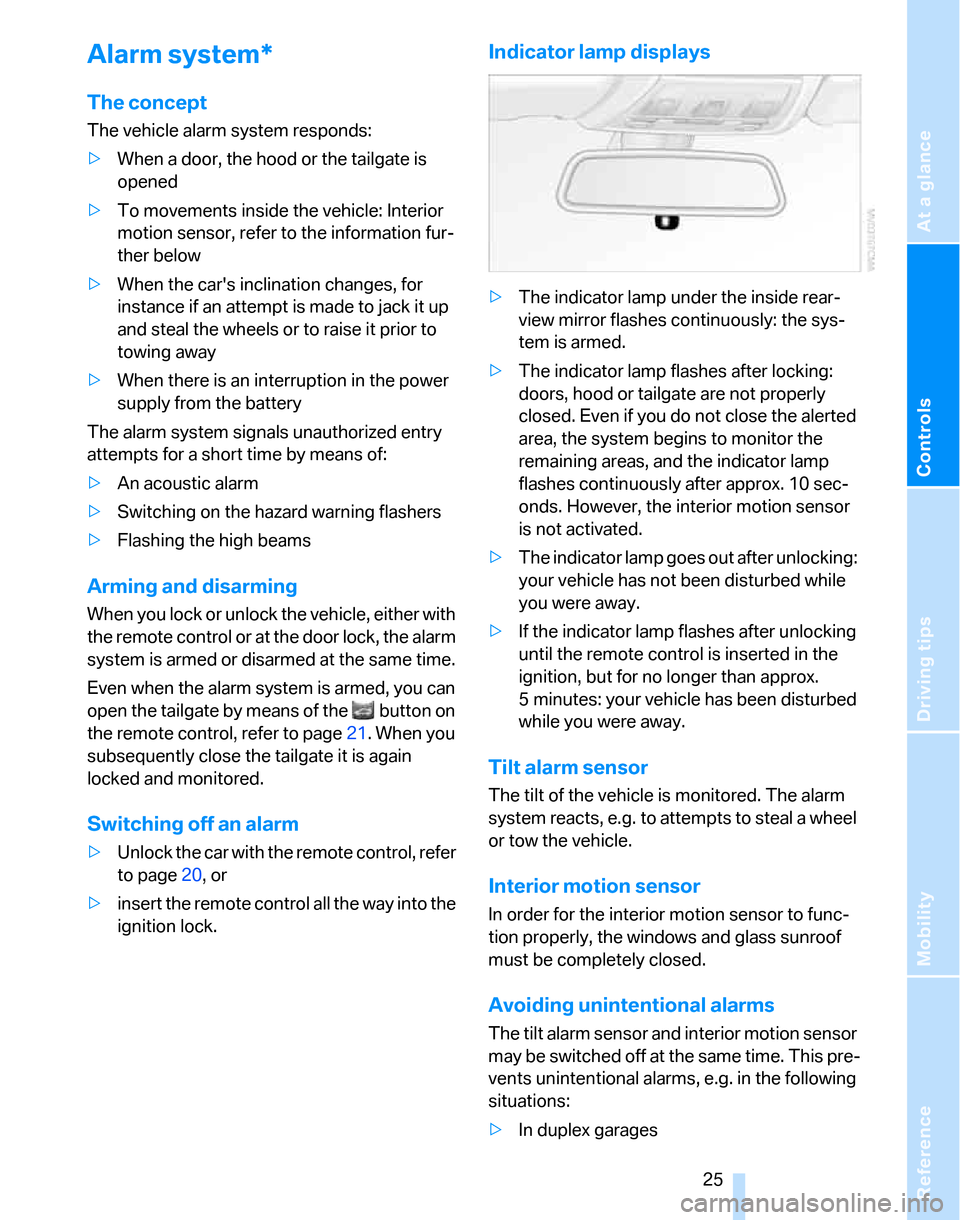
>The indicator lamp under the inside rear-
view mirror flashes continuously: the sys-
tem is armed.
>The indicator lamp flashes after locking:
doors, hood or tailgate are not properly
closed. Even if you do not close the alerted
area, the system begins to monitor the
remaining areas, and the indicator lamp
flashes continuously after approx. 10 sec-
onds. However, the interior motion sensor
is not activated.
>The indicator lamp goes out after unlocking:
your vehicle has not been disturbed while
you were away.
>If the indicator lamp flashes after unlocking
until the remote control is inserted in the
ignition, but for no longer than approx.
5 minutes: your vehicle has been disturbed
while you were away.
Tilt alarm sensor
The tilt of the vehicle is monitored. The alarm
system reacts, e.g. to attempts to steal a wheel
or tow the vehicle.
Interior motion sensor
In order for the interior motion sensor to func-
tion properly, the windows and glass sunroof
must be completely closed.
Avoiding unintentional alarms
The tilt alarm sensor and interior motion sensor
may be switched off at the same time. This pre-
vents unintentional alarms, e.g. in the following
situations:
>In duplex garages
Page 28 of 160
Opening and closing
26 >When transporting on car-carrying trains
>When animals are to remain in the vehicle
Switching off tilt alarm sensor and
interior motion sensor
Press the button on the remote control
twice in a row.
The indicator lamp comes on for approx. two
seconds, then begins to flash steadily. The tilt
alarm sensor and the interior motion sensor are
switched off until the next time the vehicle is
unlocked and subsequently locked again.
Convenient access*
Convenient access enables you to enter your
vehicle without needing to hold the remote con-
trol in your hand. All you need to do is wear the
remote control close to your body, e.g. in your
jacket pocket. The vehicle automatically
detects the corresponding remote control
within the immediate vicinity or in the passen-
ger compartment.
Convenient access supports the following
functions:
>Unlocking/locking the vehicle
>Unlocking the tailgate separately
>Engine starting
>Convenient closure
Functional requirement
>The vehicle or the tailgate can only be
locked when the vehicle detects that the
remote control currently in use is outside of
the vehicle.
>The vehicle cannot be locked or unlocked
again until after approx. 2 seconds.
>The engine can only be started when the
vehicle detects that the remote control cur-
rently in use is inside the vehicle.
Special features in comparison to
conventional remote controls
In general, there is no difference between using
convenient access or pressing the buttons on the remote control to carry out the functions
mentioned above. You should therefore first
familiarize yourself with the instructions on
opening and closing starting on page18.
Special features regarding the use of conve-
nient access are described below.
Unlocking
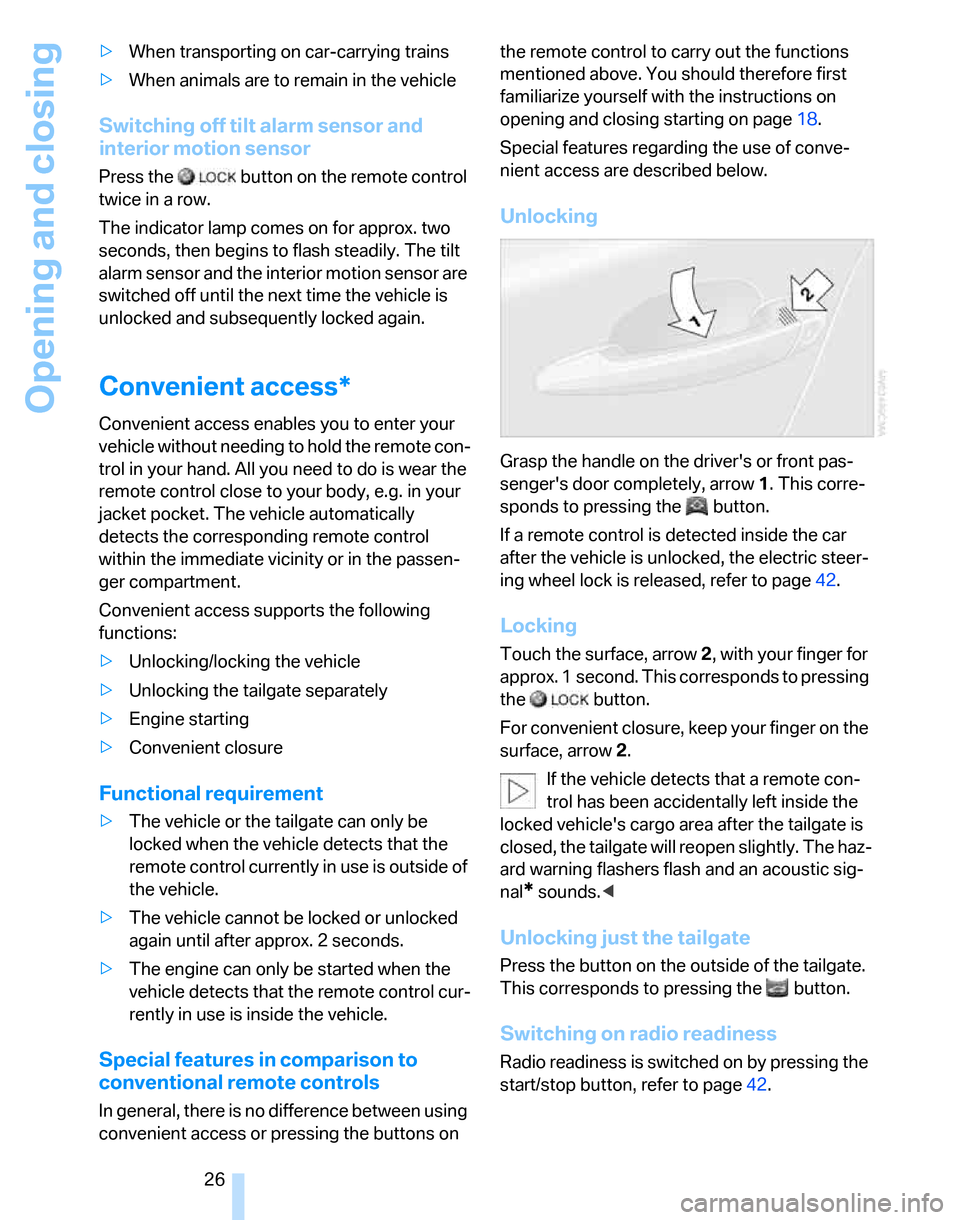
Grasp the handle on the driver's or front pas-
senger's door completely, arrow 1. This corre-
sponds to pressing the button.
If a remote control is detected inside the car
after the vehicle is unlocked, the electric steer-
ing wheel lock is released, refer to page42.
Locking
Touch the surface, arrow 2, with your finger for
approx. 1 second. This corresponds to pressing
the button.
For convenient closure, keep your finger on the
surface, arrow 2.
If the vehicle detects that a remote con-
trol has been accidentally left inside the
locked vehicle's cargo area after the tailgate is
closed, the tailgate will reopen slightly. The haz-
ard warning flashers flash and an acoustic sig-
nal
* sounds.<
Unlocking just the tailgate
Press the button on the outside of the tailgate.
This corresponds to pressing the button.
Switching on radio readiness
Radio readiness is switched on by pressing the
start/stop button, refer to page42.
Page 33 of 160
Reference
At a glance
Controls
Driving tips
Mobility
31
Adjustments
Sitting safely
The ideal sitting position can make a vital con-
tribution to relaxed, fatigue-free driving. In con-
junction with the safety belts, the head
restraints and the airbags, the seated position
has a major influence on your safety in the event
of an accident. To ensure that the safety sys-
tems operate with optimal efficiency, we
strongly urge you to observe the instructions
contained in the following section.
For additional information on transporting chil-
dren safely, refer to page39.
Airbags
Always maintain an adequate distance
between yourself and the airbags. Always
grip the steering wheel on the rim, with your
hands in the 3 o'clock and 9 o'clock positions,
to minimize the risk of injury to the hands or
arms in the event of the airbag being triggered
off.
No one and nothing is to come between the air-
bags and the seat occupant.
Do not use the cover of the front airbag on the
front passenger side as a storage area. Make
sure that the front passenger is sitting correctly,
e.g. not resting feet or legs on the instrument
panel, otherwise leg injuries can occur if the
front airbag is triggered.
Make sure that passengers do not lean their
heads against the side or head airbags, other-
wise serious injuries could result if the side air-
bags suddenly deployed.<
Even if you follow all the instructions, injuries
resulting from contact with airbags cannot be
fully excluded, depending on the circum-
stances. The ignition and inflation noise may
provoke a mild hearing loss in extremely sensi-
tive individuals. This effect is usually only tem-
porary.
For airbag locations and additional information
on airbags, refer to page71.
Head restraint
A correctly adjusted head restraint reduces the
risk of neck injury in the event of an accident.
Adjust the head restraint in such a way
that its center is at approx. ear level. Oth-
erwise, there is an increased risk of injury in the
event of an accident.<
Head restraints, refer to page33.
Safety belt
Before every drive, make sure that all occupants
wear their safety belts. Airbags complement the
safety belt as an additional safety device, but
they do not represent a substitute.
Never allow more than one person to
wear a single safety belt. Never allow
infants or small children to ride in a passenger's
lap.
Expectant mothers should also wear the safety
belt, making sure that the strap in the pelvic
area is well down on the hips and does not press
against the abdominal region of the body.
Do not route the belt across your neck, or run it
across sharp edges. Be sure that the belt does
not become caught or jammed. The safety belt
should not be twisted and must be positioned
firmly over the pelvis and shoulder, as close to
the body as possible. It should not pass over
hard or fragile objects, otherwise the belt in the
pelvic area could slide over the hips in the event
of a head-on collision and injure the lower abdo-
men. Avoid wearing bulky clothing and regularly
pull the belt in the upper-body area taut, other-
wise its restraining effect could be impaired.<
Safety belts, refer to page36.
Seats
Note before adjusting
Never attempt to adjust your seat while
the vehicle is moving. The seat could
respond with unexpected movement, and the
Page 40 of 160
Adjustments
38
Steering wheel
Adjustments
Do not adjust the steering wheel position
while the car is in motion, or an accident
may result from any unexpected movement.<
1.Fold the lever down.
2.Move the steering wheel to the preferred
height and angle to suit your seated posi-
tion.
3.Swing the lever back up.
Do not use force to swing the lever
back up, otherwise the mechanism
will be damaged.<
Electric steering wheel lock
The steering wheel locks or unlocks automati-
cally when the remote control is removed or
inserted, refer to page42.
Page 44 of 160
Driving
42
Driving
Ignition lock
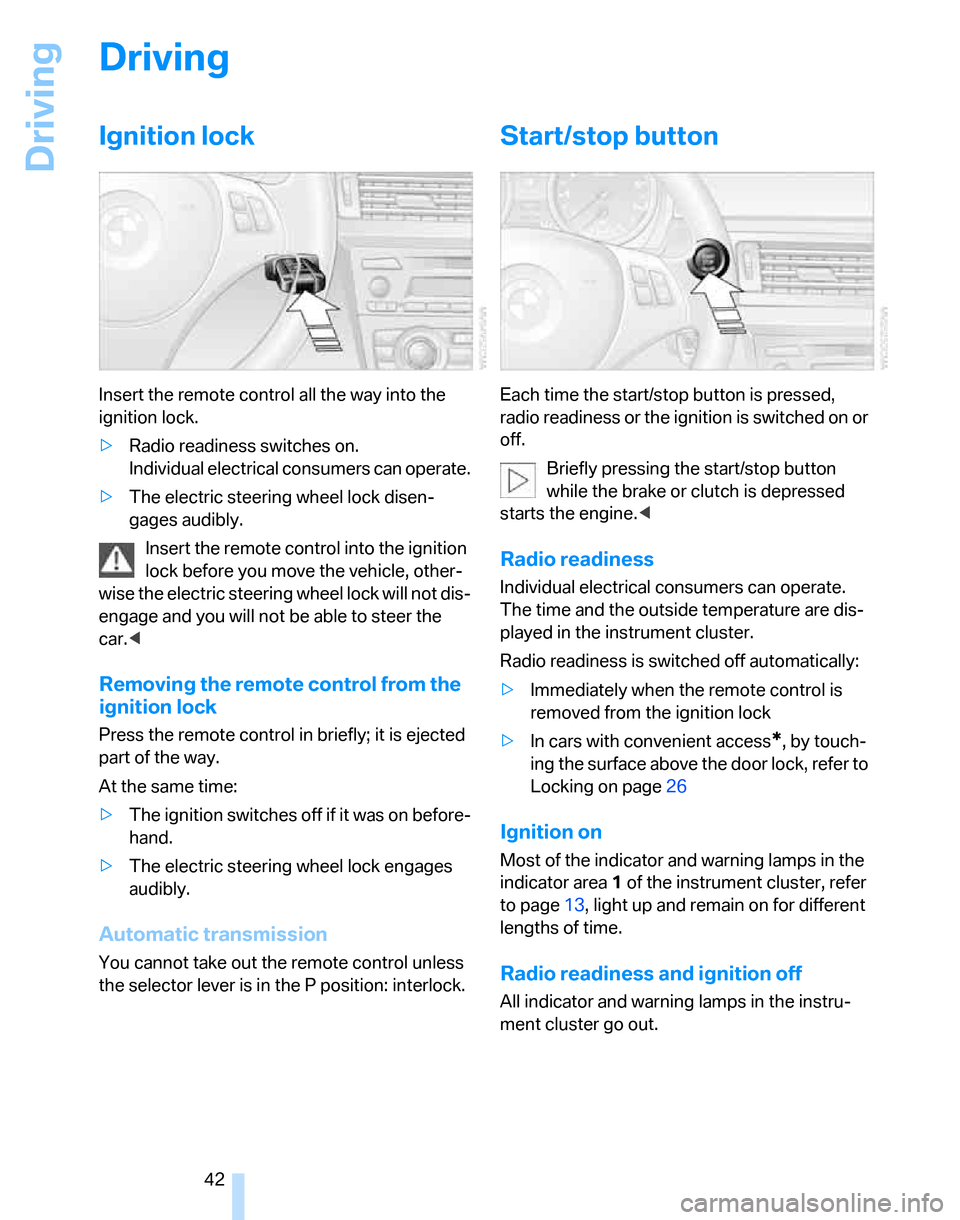
Insert the remote control all the way into the
ignition lock.
>Radio readiness switches on.
Individual electrical consumers can operate.
>The electric steering wheel lock disen-
gages audibly.
Insert the remote control into the ignition
lock before you move the vehicle, other-
wise the electric steering wheel lock will not dis-
engage and you will not be able to steer the
car.<
Removing the remote control from the
ignition lock
Press the remote control in briefly; it is ejected
part of the way.
At the same time:
>The ignition switches off if it was on before-
hand.
>The electric steering wheel lock engages
audibly.
Automatic transmission
You cannot take out the remote control unless
the selector lever is in the P position: interlock.
Start/stop button
Each time the start/stop button is pressed,
radio readiness or the ignition is switched on or
off.
Briefly pressing the start/stop button
while the brake or clutch is depressed
starts the engine.<
Radio readiness
Individual electrical consumers can operate.
The time and the outside temperature are dis-
played in the instrument cluster.
Radio readiness is switched off automatically:
>Immediately when the remote control is
removed from the ignition lock
>In cars with convenient access
*, by touch-
ing the surface above the door lock, refer to
Locking on page26
Ignition on
Most of the indicator and warning lamps in the
indicator area1 of the instrument cluster, refer
to page13, light up and remain on for different
lengths of time.
Radio readiness and ignition off
All indicator and warning lamps in the instru-
ment cluster go out.
Page 46 of 160
Driving
44
Handbrake
The handbrake is primarily intended to prevent
the vehicle from rolling while parked; it brakes
the rear wheels.
Indicator lamp
The indicator lamp is lit, and when you
drive off an acoustic signal sounds in
addition. The handbrake is still applied.
Indicator lamp for Canadian models.
Applying
The lever locks in position automatically.
Releasing
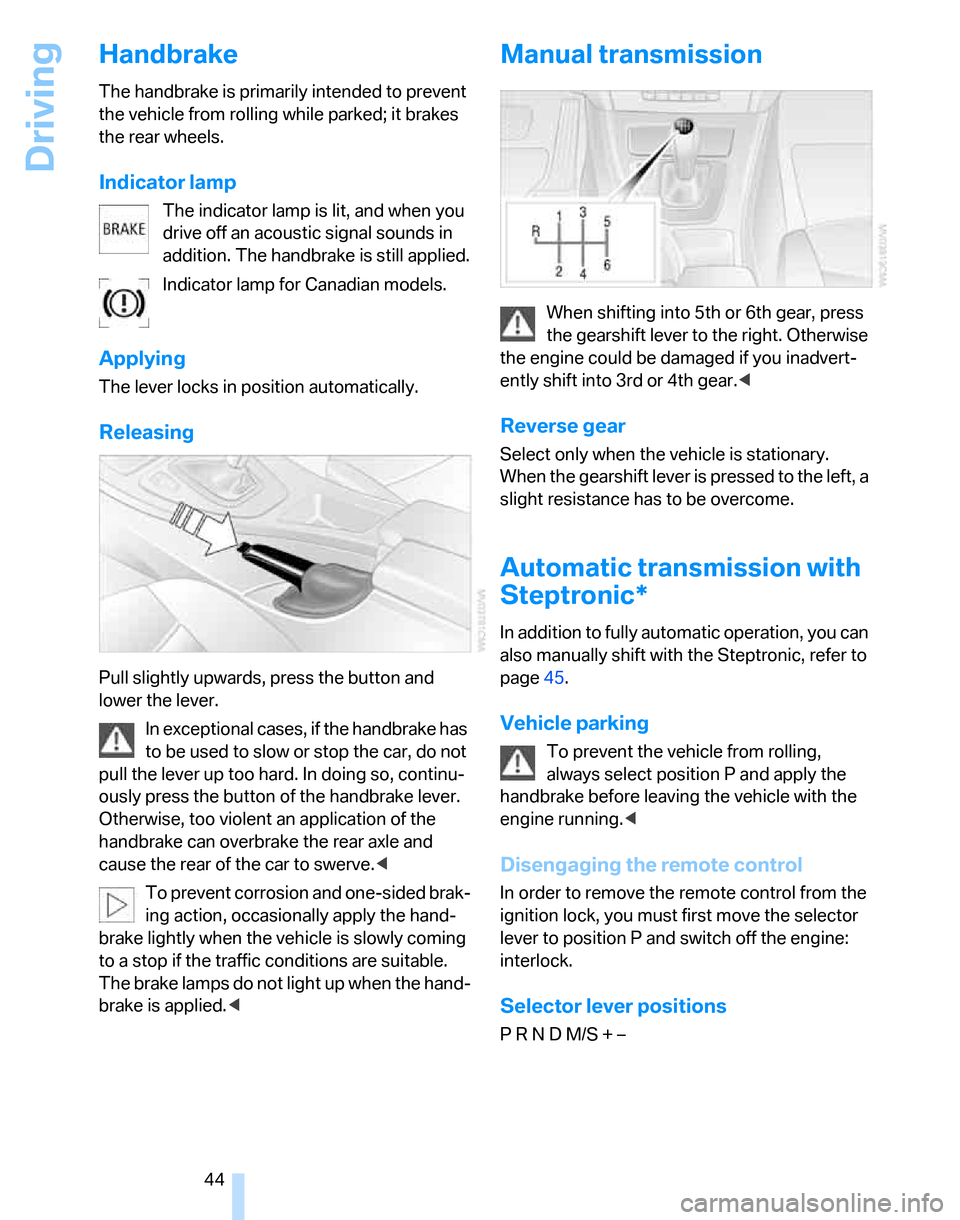
Pull slightly upwards, press the button and
lower the lever.
In exceptional cases, if the handbrake has
to be used to slow or stop the car, do not
pull the lever up too hard. In doing so, continu-
ously press the button of the handbrake lever.
Otherwise, too violent an application of the
handbrake can overbrake the rear axle and
cause the rear of the car to swerve.<
To prevent corrosion and one-sided brak-
ing action, occasionally apply the hand-
brake lightly when the vehicle is slowly coming
to a stop if the traffic conditions are suitable.
The brake lamps do not light up when the hand-
brake is applied.<
Manual transmission
When shifting into 5th or 6th gear, press
the gearshift lever to the right. Otherwise
the engine could be damaged if you inadvert-
ently shift into 3rd or 4th gear.<
Reverse gear
Select only when the vehicle is stationary.
When the gearshift lever is pressed to the left, a
slight resistance has to be overcome.
Automatic transmission with
Steptronic*
In addition to fully automatic operation, you can
also manually shift with the Steptronic, refer to
page45.
Vehicle parking
To prevent the vehicle from rolling,
always select position P and apply the
handbrake before leaving the vehicle with the
engine running.<
Disengaging the remote control
In order to remove the remote control from the
ignition lock, you must first move the selector
lever to position P and switch off the engine:
interlock.
Selector lever positions
P R N D M/S + –