hood open BMW 328D XDRIVE 2014 Owners Manual
[x] Cancel search | Manufacturer: BMW, Model Year: 2014, Model line: 328D XDRIVE, Model: BMW 328D XDRIVE 2014Pages: 242, PDF Size: 7.25 MB
Page 41 of 242

Adjusting
Unlocking The setting is stored for the remote control
currently in use.1."Settings"2."Doors/key"3. Select symbol or "Unlock button:"4.Select the desired function:âˇ"Driver's door only"
Only the driver's door and the fuel filler
flap are unlocked. Pressing again unâ
locks the entire vehicle.âˇ"All doors"
The entire vehicle is unlocked.
Depending on how the vehicle is equipped or
the country-specific variant, you can set
whether the doors are also unlocked with the
button on the remote control.
Confirmation signals from the vehicle
The setting is stored for the remote control
currently in use.
1."Settings"2."Doors/key"3.Deactivate or activate the desired confirâ
mation signals.âˇ"Acoustic sig. lock/unlock"âˇ"Flash when lock/unlock"
Automatic locking
The setting is stored for the remote control
currently in use.
1."Settings"2."Doors/key"3.Select the desired function:âˇ"Lock if no door is opened"The vehicle locks automatically after a
short period of time if a door is not
opened.âˇ"Lock after start driving"
The vehicle locks automatically after
you drive away.
Retrieving the seat and mirror settings
The driver's seat and exterior mirror positions
used last are stored for the remote control curâ
rently in use.
When the vehicle is unlocked, these positions
are automatically retrieved if this function was
activated.
Pinch hazard when moving back the seat
If this function is used, first make sure
that the footwell behind the driver's seat is
empty. Otherwise, people can be injured or obâ
jects damaged when the seat is moved back.â
The adjustment procedure is interrupted:
âˇWhen a seat position switch is pressed.âˇWhen a button of the seat and mirror memâ
ory is pressed.
Activating the setting
1."Settings"2."Doors/key"3."Last seat position autom."
Alarm system
The conceptThe vehicle alarm system responds to:
âˇOpening of a door, the hood or the trunk
lid.âˇMovements in the vehicle.âˇChanges in the vehicle tilt, e.g., during atâ
tempts to steal a wheel or when towing the
car.âˇInterruptions in battery voltage.Seite 41Opening and closingControls41
Online Edition for Part no. 01 40 2 925 743 - II/14
Page 42 of 242
The alarm system briefly indicates tampering:âˇBy sounding an acoustic alarm.âˇBy switching on the hazard warning sysâ
tem.âˇBy flashing the daytime running lights.
Arming and disarming the alarm
system
General information
When you lock or unlock the vehicle, either
with the remote control or via the Comfort Acâ
cess at the door lock, the alarm system is
armed or disarmed at the same time.
Door lock and armed alarm systemThe alarm system is triggered when the door is
opened, if the vehicle is unlocked via the door
lock.
In order to terminate this alarm, unlock vehicle
with the remote control or switch on the igniâ
tion, if necessary, by emergency detection of
the remote control.
Trunk lid and armed alarm systemThe trunk lid can be opened even when the
alarm system is armed.
After the trunk lid is closed, it is locked and
monitored again if the doors are locked. The
hazard warning system flashes once.
Panic mode You can trigger the alarm system if you find
yourself in a dangerous situation.
Press the button on the remote conâ
trol for at least 3 seconds.
To switch off the alarm: press any button.
Switching off the alarm To terminate the alarm:
âˇUnlock the vehicle using the remote conâ
trol.âˇWith Comfort Access: If you are carrying
the remote control with you, grasp the
driver side or front passenger side door
handle completely.
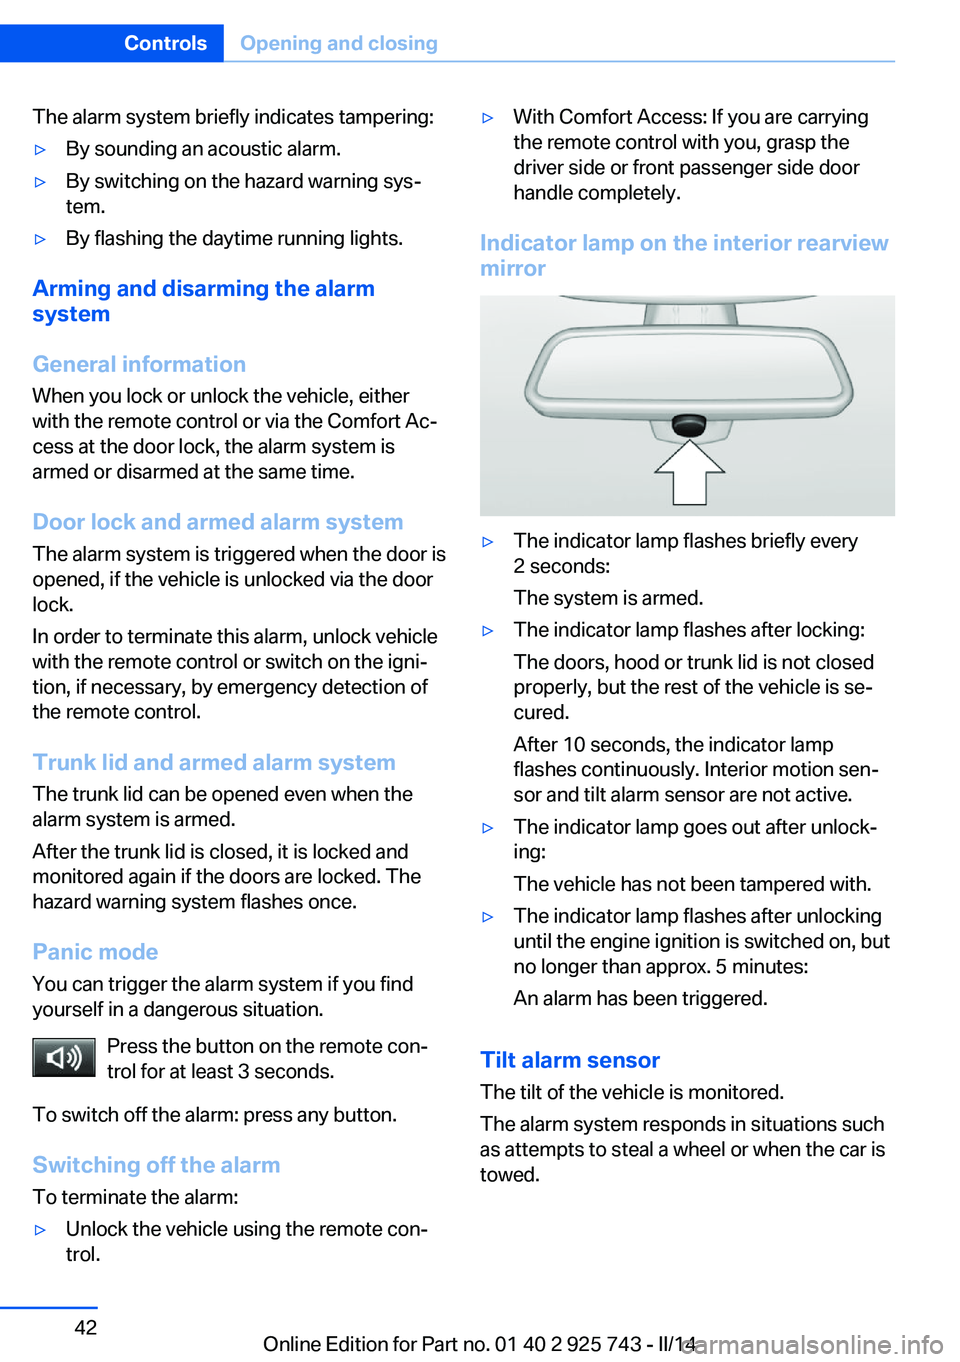
Indicator lamp on the interior rearview
mirror
âˇThe indicator lamp flashes briefly every
2 seconds:
The system is armed.âˇThe indicator lamp flashes after locking:
The doors, hood or trunk lid is not closed
properly, but the rest of the vehicle is seâ
cured.
After 10 seconds, the indicator lamp
flashes continuously. Interior motion senâ
sor and tilt alarm sensor are not active.âˇThe indicator lamp goes out after unlockâ
ing:
The vehicle has not been tampered with.âˇThe indicator lamp flashes after unlocking
until the engine ignition is switched on, but
no longer than approx. 5 minutes:
An alarm has been triggered.
Tilt alarm sensor The tilt of the vehicle is monitored.
The alarm system responds in situations such
as attempts to steal a wheel or when the car is
towed.
Seite 42ControlsOpening and closing42
Online Edition for Part no. 01 40 2 925 743 - II/14
Page 64 of 242
âˇThe external temperature is high and autoâ
matic climate control is running.âˇThe passenger compartment has not yet
been heated or cooled to the required
level.âˇThe engine is not yet at operating temperâ
ature.âˇThe wheels are at a sharp angle or the
steering wheel is being turned.âˇAfter driving in reverse.âˇFogging of the windows when the autoâ
matic climate control is switched on.âˇVehicle battery is heavily discharged.âˇThe engine compartment lid is unlocked.âˇThe parking assistant is activated.âˇStop-and-go traffic.âˇThe selector lever is in position N or M/S.âˇUse of fuel with high ethanol content.
Starting the engine
The engine starts automatically under the folâ
lowing conditions:
âˇAutomatic transmission:
By releasing the brake pedal.âˇManual transmission:
The clutch pedal is pressed.
After the engine starts, accelerate as usual.
Safety mode
After the engine switches off automatically, it
will not start again automatically if any one of
the following conditions are met.
âˇThe driver's safety belt is unbuckled and
the driver's door is open.âˇThe hood was unlocked.
Some indicator lamps light up for varying
lengths of time.
The engine can only be started via the Start/
Stop button.
Note
Even if driving away was not intended, the deâ
activated engine starts up automatically in the
following situations:âˇExcessive warming of the passenger comâ
partment when the cooling function is
switched on.âˇThe steering wheel is turned.âˇAutomatic transmission: change from seâ
lector lever position D to N, R or M/S.âˇAutomatic transmission: change from seâ
lector lever position P to N, D, R or M/S.âˇThe vehicle begins rolling.âˇFogging of the windows when the autoâ
matic climate control is switched on.âˇVehicle battery is heavily discharged.âˇExcessive cooling of the passenger comâ
partment when the heating is switched on.âˇLow brake vacuum pressure; this can ocâ
cur, for example, if the brake pedal is deâ
pressed a number of times in succession.
Activating/deactivating the system
manually
Using the button
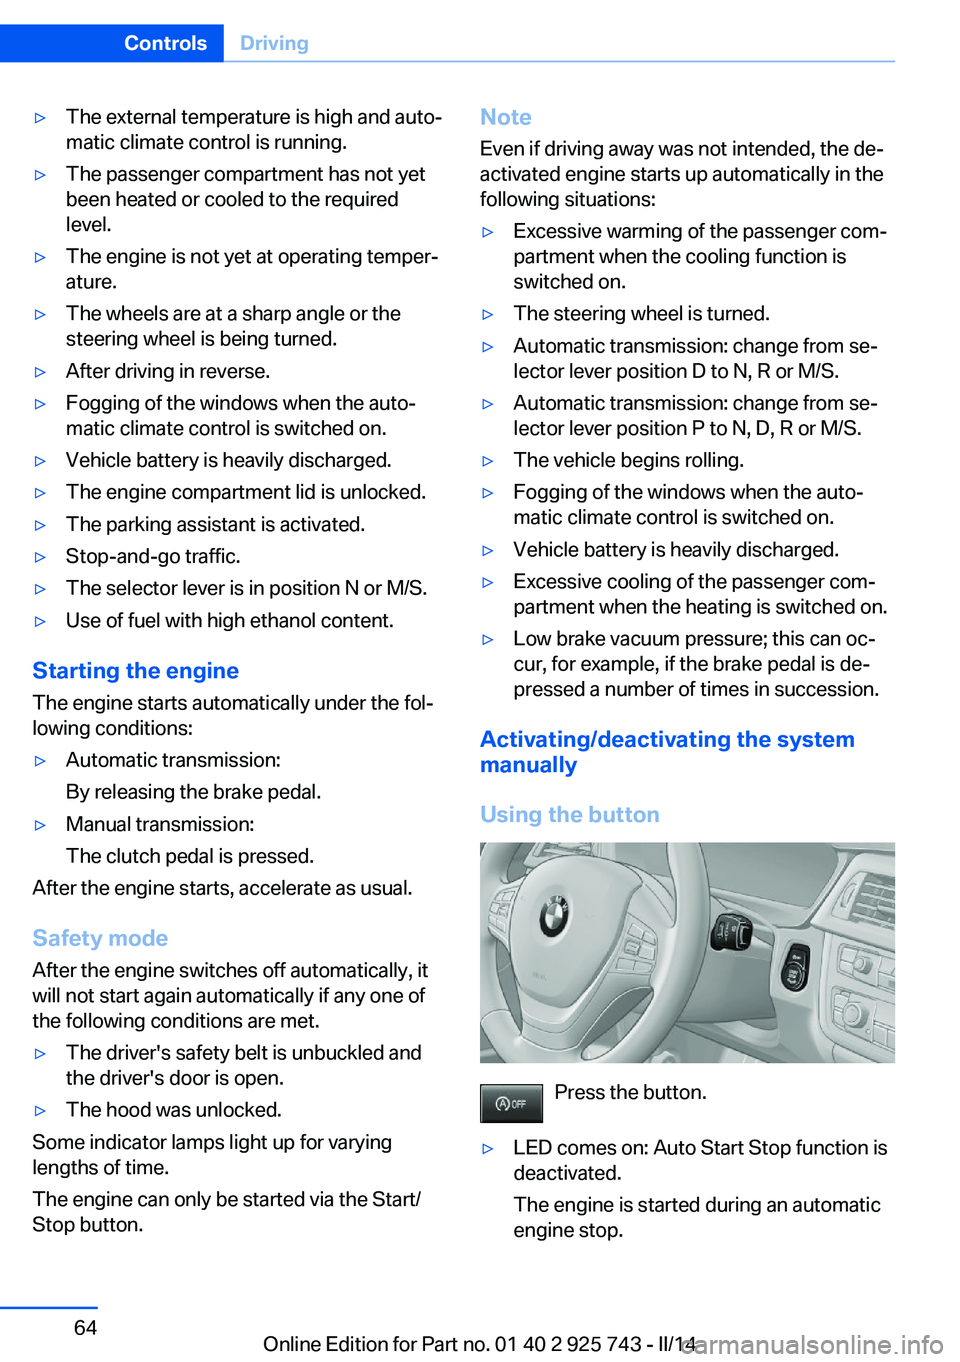
Press the button.
âˇLED comes on: Auto Start Stop function is
deactivated.
The engine is started during an automatic
engine stop.Seite 64ControlsDriving64
Online Edition for Part no. 01 40 2 925 743 - II/14
Page 197 of 242
Hood
Hints Working in the engine compartment
Never attempt to perform any service or
repair operations on your vehicle without the
necessary professional technical training.
If you are unfamiliar with the statutory guideâ
lines, have any work on the vehicle performed
only by a service center.
If this work is not carried out properly, there is
the danger of subsequent damage and related
safety hazards.â
Never reach into the engine compartâ
ment
Never reach into the intermediate spaces or
gaps in the engine compartment. Otherwise,
there is risk of injury, e.g., from rotating or hot
parts.â
Fold down wiper arm
Before opening the hood, ensure that the
wiper arms are against the windshield, or this
may result in damage.â
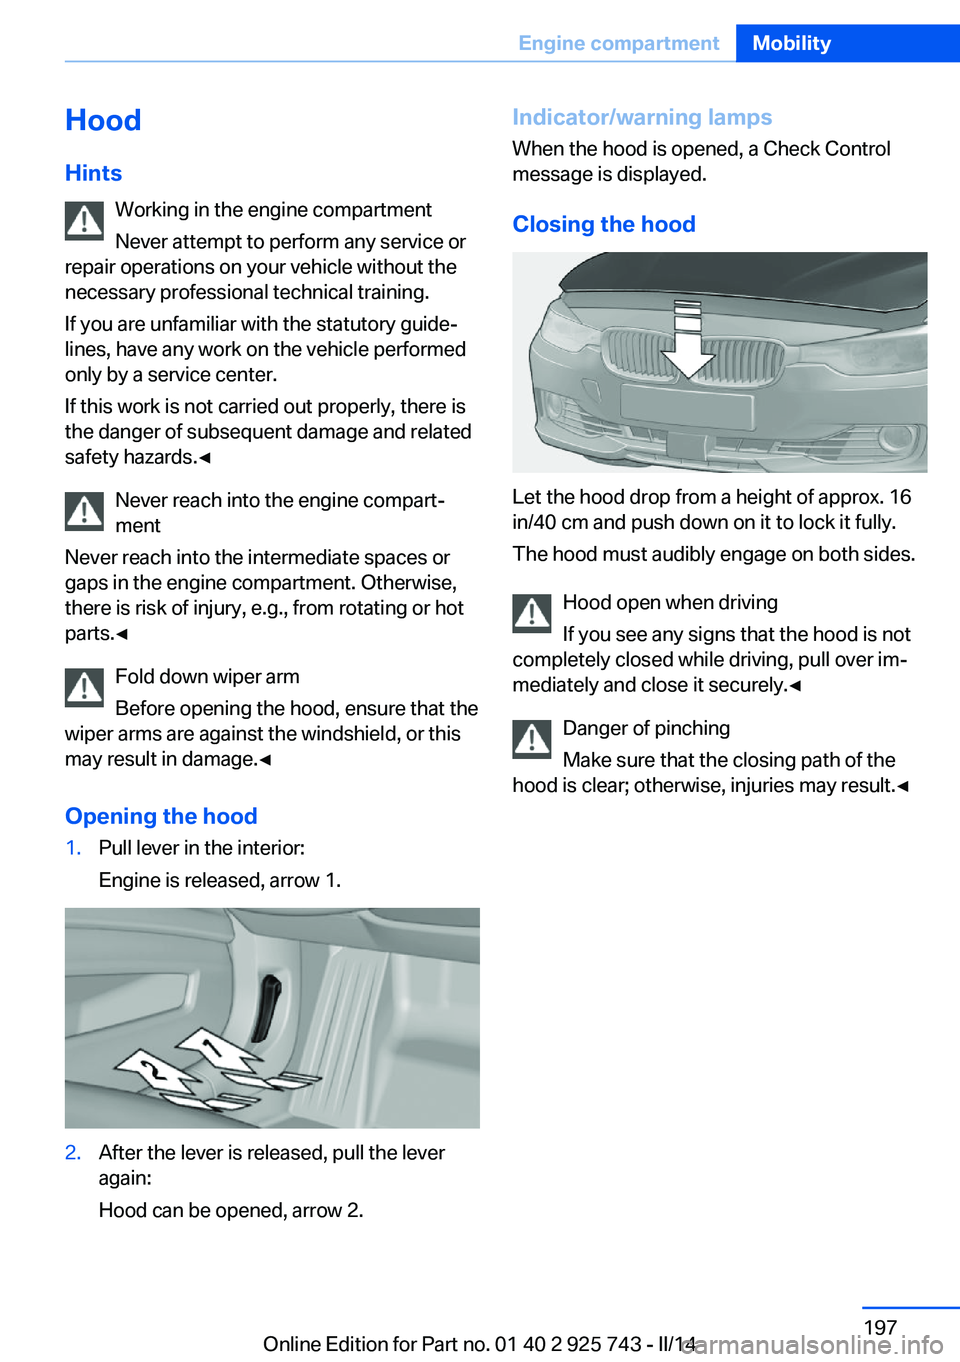
Opening the hood1.Pull lever in the interior:
Engine is released, arrow 1.2.After the lever is released, pull the lever
again:
Hood can be opened, arrow 2.Indicator/warning lamps
When the hood is opened, a Check Control
message is displayed.
Closing the hood
Let the hood drop from a height of approx. 16
in/40 cm and push down on it to lock it fully.
The hood must audibly engage on both sides.
Hood open when driving
If you see any signs that the hood is not
completely closed while driving, pull over imâ
mediately and close it securely.â
Danger of pinching
Make sure that the closing path of the
hood is clear; otherwise, injuries may result.â
Seite 197Engine compartmentMobility197
Online Edition for Part no. 01 40 2 925 743 - II/14
Page 204 of 242
Replacing componentsVehicle equipmentAll standard, country-specific and optional
equipment that is offered in the model series is
described in this chapter. Therefore, equipâ
ment is also described that is not available in a
vehicle, e. g., because of the selected optional
equipment or country variant. This also applies
for safety-related functions and systems.
Onboard vehicle tool kit
The onboard vehicle tool kit is located on the
right side in the cargo area in a storage comâ
partment. Open the cover.
Wiper blade replacement Note Do not fold down the wipers without
wiper blades
Do not fold down the wipers if wiper blades
have not been installed; this may damage the
windshield.â
Replacing the wiper blades
1.To change the wiper blades, fold up, refer
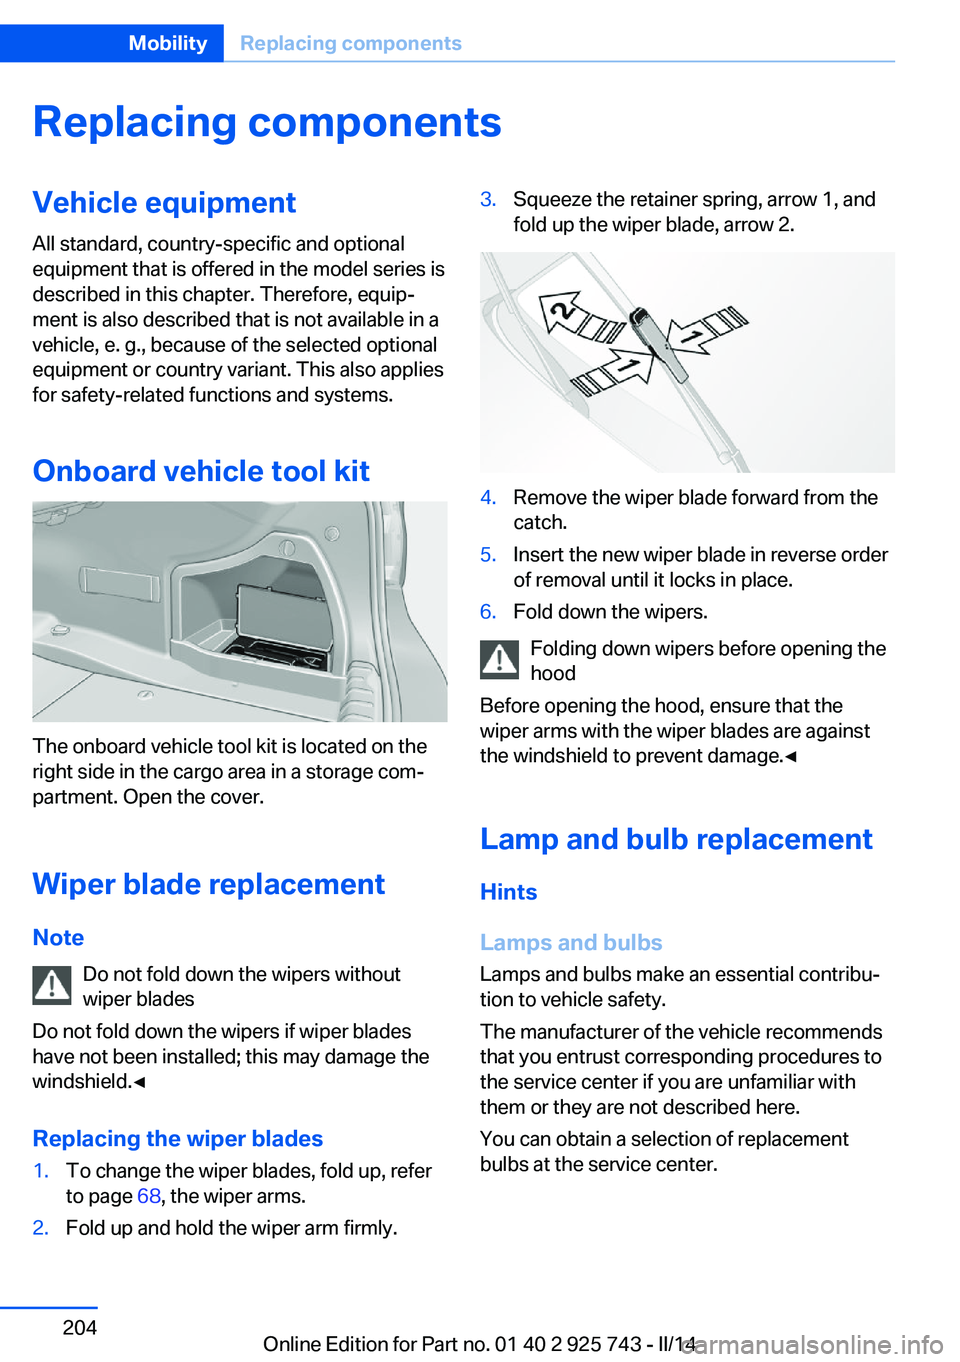
to page 68, the wiper arms.2.Fold up and hold the wiper arm firmly.3.Squeeze the retainer spring, arrow 1, and
fold up the wiper blade, arrow 2.4.Remove the wiper blade forward from the
catch.5.Insert the new wiper blade in reverse order
of removal until it locks in place.6.Fold down the wipers.
Folding down wipers before opening the hood
Before opening the hood, ensure that the
wiper arms with the wiper blades are against
the windshield to prevent damage.â
Lamp and bulb replacement
Hints
Lamps and bulbs Lamps and bulbs make an essential contribuâ
tion to vehicle safety.
The manufacturer of the vehicle recommends
that you entrust corresponding procedures to
the service center if you are unfamiliar with
them or they are not described here.
You can obtain a selection of replacement
bulbs at the service center.
Seite 204MobilityReplacing components204
Online Edition for Part no. 01 40 2 925 743 - II/14
Page 207 of 242
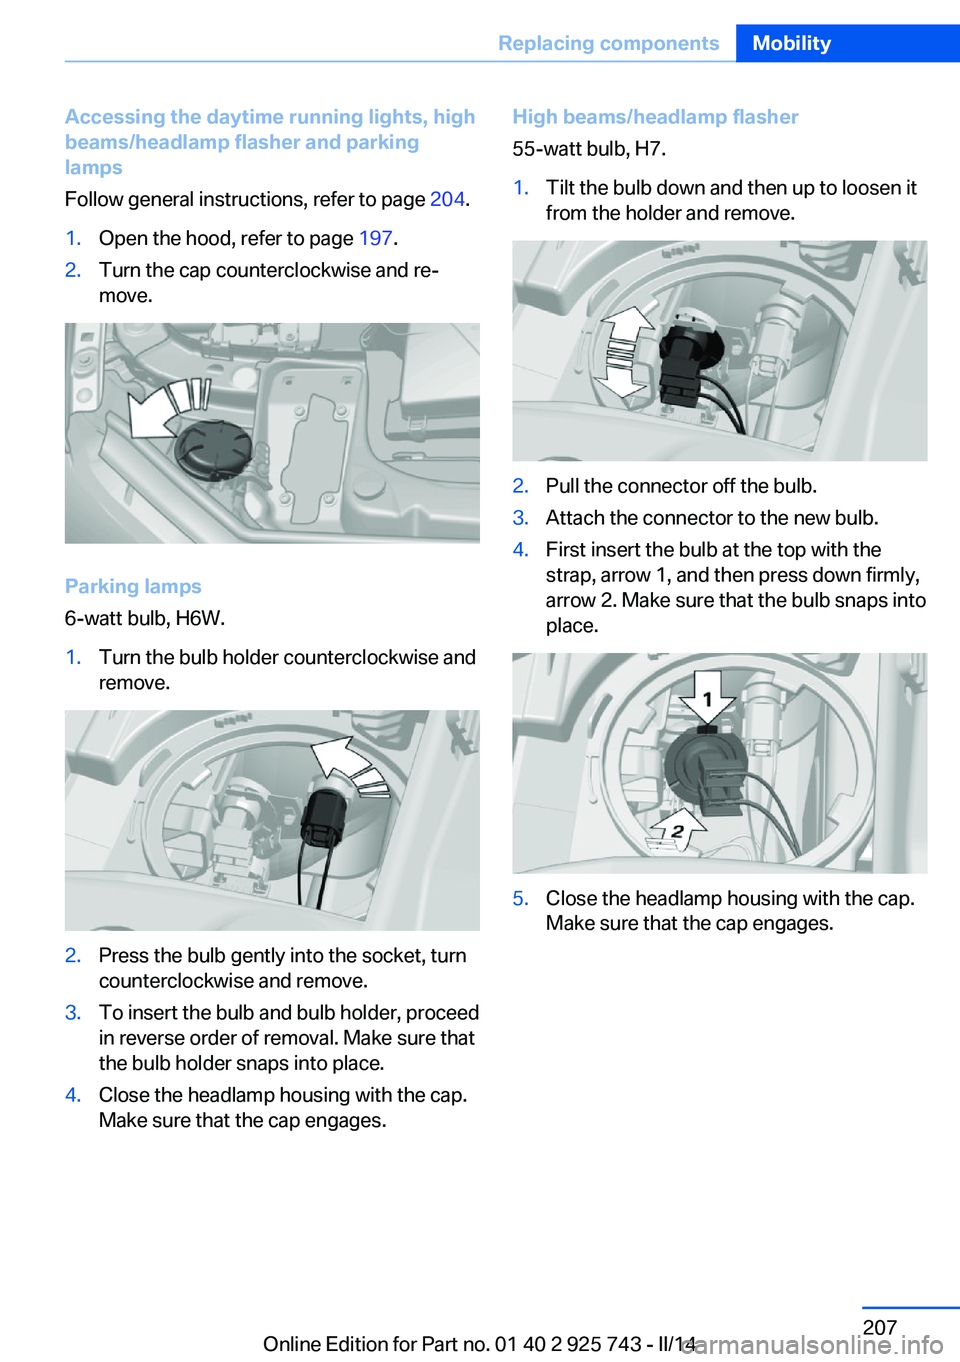
Accessing the daytime running lights, high
beams/headlamp flasher and parking
lamps
Follow general instructions, refer to page 204.1.Open the hood, refer to page 197.2.Turn the cap counterclockwise and reâ
move.
Parking lamps
6-watt bulb, H6W.
1.Turn the bulb holder counterclockwise and
remove.2.Press the bulb gently into the socket, turn
counterclockwise and remove.3.To insert the bulb and bulb holder, proceed
in reverse order of removal. Make sure that
the bulb holder snaps into place.4.Close the headlamp housing with the cap.
Make sure that the cap engages.High beams/headlamp flasher
55-watt bulb, H7.1.Tilt the bulb down and then up to loosen it
from the holder and remove.2.Pull the connector off the bulb.3.Attach the connector to the new bulb.4.First insert the bulb at the top with the
strap, arrow 1, and then press down firmly,
arrow 2. Make sure that the bulb snaps into
place.5.Close the headlamp housing with the cap.
Make sure that the cap engages.Seite 207Replacing componentsMobility207
Online Edition for Part no. 01 40 2 925 743 - II/14
Page 235 of 242
Engine oil types, alternaâtive 200
Engine oil types, apâ proved 200
Engine start during malfuncâ tion 33
Engine start, jump-startâ ing 216
Engine start, refer to Starting the engine 62
Engine stop 62
Engine temperature 78
Entering a car wash 221
Equipment, interior 148
ESP Electronic Stability Proâ gram, refer to DSC 114
Exchanging wheels/tires 193
Exhaust system 163
Exterior mirror, automatic dimming feature 55
Exterior mirrors 54
External start 216
External temperature disâ play 79
External temperature warnâ ing 79
Eyes for securing cargo 166
F
Failure message, refer to Check Control 76
False alarm, refer to Unintenâ tional alarm 43
Fan, refer to Air flow 142, 146
Fault displays, refer to Check Control 76
Filler neck for engine oil 199
Fine wood, care 223
First aid kit 216
Fitting for towing, refer to Tow fitting 219
Flat tire, changing wheels 212
Flat Tire Monitor FTM 100 Flat tire, Tire Pressure Moniâ
tor TPM 97
Flat tire, warning lamp 98, 101
Flooding 163
Floor carpet, care 224
Floor mats, care 224
Fogged up windows 142
Fold down the rear seat backâ rest, see Though-loading
system 154
Fold-out position, windshield wipers 68
Foot brake 163
Front airbags 94
Front fog lamps 92
Front fog lamps, bulb replaceâ ment 209
Front lamps 205
Front passenger airbags, auâ tomatic deactivation 96
Front passenger airbags, indiâ cator lamp 96
FTM Flat Tire Monitor 100
Fuel 180
Fuel cap 178
Fuel consumption, current 80
Fuel consumption, refer to Average fuel consumpâ
tion 84
Fuel filler flap 178
Fuel gauge 78
Fuel quality 180
Fuel recommendation 180
Fuel, tank capacity 231
Fuse 213
G
Garage door opener, refer to Universal garage door
opener 148
Gasoline 180
Gear change, automatic transmission 70
Gear shift indicator 81 General driving notes 162
Glass sunroof, powered 45
Glove compartment 156
Gross vehicle weight, apâ proved 228
H
Handbrake, refer to parking brake 65
Hand-held transmitter, alterâ nating code 149
Hazard warning flashers 215
Head airbags 94
Headlamp control, autoâ matic 90
Headlamp courtesy delay feaâ ture 89
Headlamp flasher 66
Headlamp glass 205
Headlamps 205
Headlamps, care 222
Headlamp washer system 66
Headliner 15
Head restraints 47
Head restraints, front 51
Head restraints, rear 52
Head-up Display 87
Head-up Display, care 224
Heavy cargo, stowing 166
Height, vehicle 228
High-beam Assistant 91
High beams 66
High beams/low beams, refer to High-beam Assistant 91
Hills 164
Hill start assistant, refer to Drive-off assistant 118
Hints 6
Holder for beverages 158
Homepage 6
Hood 197
Horn 12
Hotel function, trunk lid 38
Hot exhaust system 163
HUD Head-up Display 87 Seite 235Everything from A to ZReference235
Online Edition for Part no. 01 40 2 925 743 - II/14