sensor BMW 328I 2000 Owners Manual
[x] Cancel search | Manufacturer: BMW, Model Year: 2000, Model line: 328I, Model: BMW 328I 2000Pages: 189, PDF Size: 1.81 MB
Page 10 of 189
Contents
Overview
Controls and features
Cockpit16
Instrument cluster18
Indicator and warning lamps20
Multifunction steering wheel
(MFL)24
Hazard warning flashers25
Warning triangle25
First-aid kit25
Refueling26
Fuel specifications26
Tire inflation pressure27
Locks and security systems:
Keys32
Electronic vehicle
immobilizer33
Central locking system34
Opening and closing Ð from
outside34
Opening and closing Ð from
inside38
Luggage compartment lid39
Luggage compartment41
Alarm system42
Electric power windows44
Sliding/Tilt sunroof45
Adjustments:
Seats47
Seat and mirror memory50
Steering wheel51
Mirrors52
Car Memory, Key Memory53
Passenger safety systems:
Safety belts54
Child restraint systems55
Child-safety locks56
Airbags56
Child restraints59
Installing a child restraint
system60
Driving:
Steering/Ignition lock61
Starting the engine61
Switching off the engine62
Parking brake63
Manual transmission64
Automatic transmission with
Steptronic65
Turn signal indicator/Headlamp
flasher68
Wiper/Washer system/Rain
sensor68
Rear window defroster70
Cruise control71
Everything under control:
Odometer73
Tachometer73
Energy Control73
Fuel gauge74
Temperature gauge74
Service Interval Display74
Check Control75
Clock75
Onboard computer76
Technology for safety and
convenience:
Park Distance Control (PDC)78
Dynamic Stability Control
(DSC)79
Tire Pressure Control (RDC)80
Contents
Page 12 of 189
Contents
Owner service procedures
Advanced technology
Technical data
Replacement procedures:
Onboard tool kit142
Windshield wiper blades142
Lamps and bulbs142
Changing a wheel149
Battery152
Fuses154
Microfilter155
In case of electrical
malfunction:
Fuel filler door156
Sliding/Tilt sunroof156
Assistance, giving and
receiving:
Jump-starting157
Towing the vehicle158Adaptive Transmission Control
(ATC)162
Airbags163
Dynamic Stability Control
(DSC)163
Radio reception164
Safety belt tensioner164
Interior rearview mirror with
automatic dimming
feature165
Rain sensor166
Tire Pressure Control (RDC)167
Self-diagnostics168
Xenon lamps169Engine data172
Dimensions173
Weights174
Capacities175
Electrical system176
Ribbed V-belt176
Page 26 of 189
26n
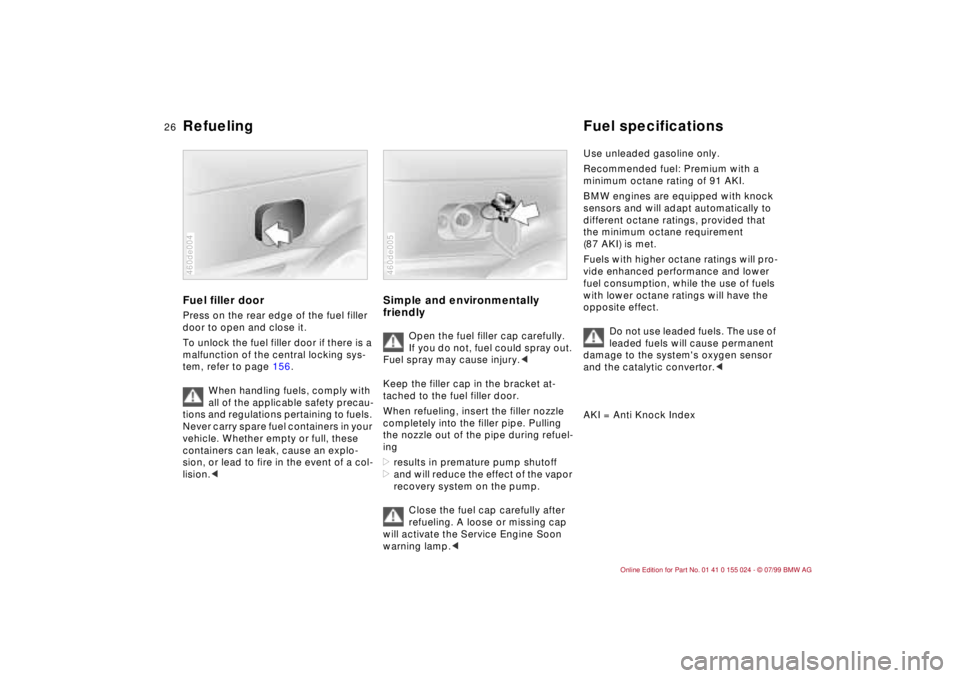
Refueling Fuel specificationsFuel filler doorPress on the rear edge of the fuel filler
door to open and close it.
To unlock the fuel filler door if there is a
malfunction of the central locking sys-
tem, refer to page 156.
When handling fuels, comply with
all of the applicable safety precau-
tions and regulations pertaining to fuels.
Never carry spare fuel containers in your
vehicle. Whether empty or full, these
containers can leak, cause an explo-
sion, or lead to fire in the event of a col-
lision.< 460de004
Simple and environmentally
friendly
Open the fuel filler cap carefully.
If you do not, fuel could spray out.
Fuel spray may cause injury.<
Keep the filler cap in the bracket at-
tached to the fuel filler door.
When refueling, insert the filler nozzle
completely into the filler pipe. Pulling
the nozzle out of the pipe during refuel-
ing
>results in premature pump shutoff
>and will reduce the effect of the vapor
recovery system on the pump.
Close the fuel cap carefully after
refueling. A loose or missing cap
will activate the Service Engine Soon
warning lamp.<
460de005
Use unleaded gasoline only.
Recommended fuel: Premium with a
minimum octane rating of 91 AKI.
BMW engines are equipped with knock
sensors and will adapt automatically to
different octane ratings, provided that
the minimum octane requirement
(87 AKI) is met.
Fuels with higher octane ratings will pro-
vide enhanced performance and lower
fuel consumption, while the use of fuels
with lower octane ratings will have the
opposite effect.
Do not use leaded fuels. The use of
leaded fuels will cause permanent
damage to the system's oxygen sensor
and the catalytic convertor.<
AKI = Anti Knock Index
Page 31 of 189
Overview
Controls and features
Operation, care
and maintenance
Owner service procedures
Technical data
Index Advanced technology
31n
IndexDataTechnologyRepairsCar careControlsOverview
Driving:
Steering/Ignition lock61
Starting the engine61
Switching off the engine62
Parking brake63
Manual transmission64
Automatic transmission with
Steptronic65
Turn signal indicator/Headlamp
flasher68
Wiper/Washer system/Rain
sensor68
Rear window defroster70
Cruise control71
Everything under control:
Odometer73
Tachometer73
Energy Control73
Fuel gauge74
Temperature gauge74
Service Interval Display74
Check Control75
Clock75
Onboard computer76
Technology for safety and
convenience:
Park Distance Control (PDC)78
Dynamic Stability Control
(DSC)79
Tire Pressure Control (RDC)80Lamps:
Parking lamps/Headlamps82
Dash lighting82
High beams/Parking lamps83
Fog lamps83
Interior lamps83
Reading lamps84
Controlling the climate for
pleasant driving:
Automatic climate control86
Seat heating91
Roller sun blind91
Interior conveniences:
HiFi system92
Glove compartment92
Storage compartments93
Cellular phones95
Ashtray, front95
Cigarette lighter96
Ashtray, rear96
Loading and transporting:
Through-loading system97
Ski bag98
Cargo loading99
Roof-mounted luggage rack100
Page 36 of 189
36n
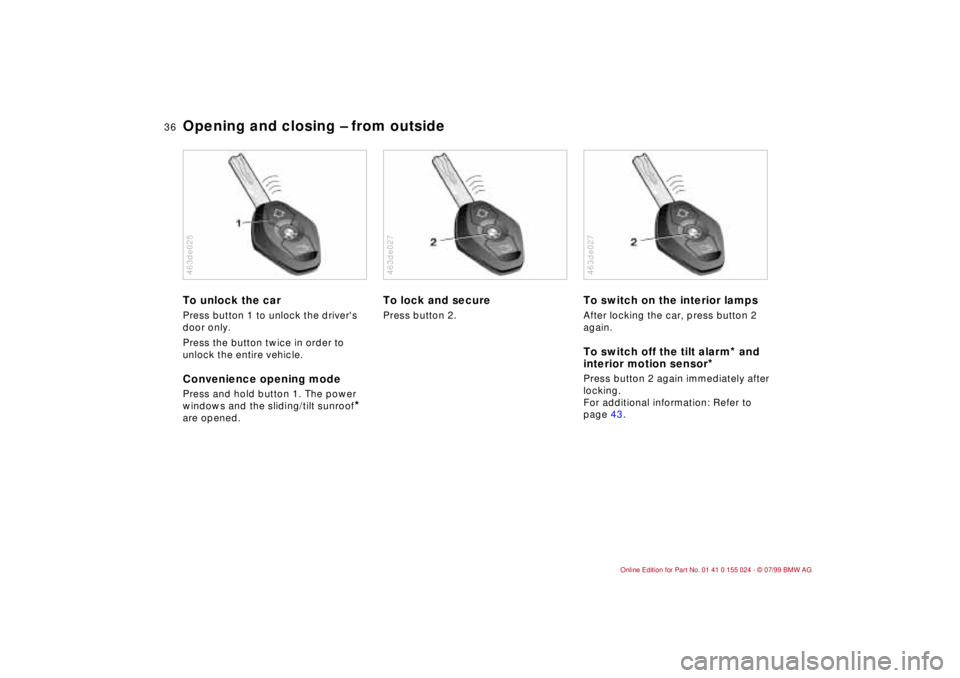
Opening and closing Ð from outsideTo unlock the carPress button 1 to unlock the driver's
door only.
Press the button twice in order to
unlock the entire vehicle. Convenience opening modePress and hold button 1. The power
windows and the sliding/tilt sunroof
*
are opened.
463de025
To lock and securePress button 2.463de027
To switch on the interior lampsAfter locking the car, press button 2
again.To switch off the tilt alarm
* and
interior motion sensor
*
Press button 2 again immediately after
locking.
For additional information: Refer to
page 43.463de027
Page 42 of 189
42n
Alarm system
*
The conceptThe vehicle's alarm system responds:
>When a door, the hood or the lug-
gage compartment lid is opened
>To movement inside the vehicle
(interior motion sensor)
>To a change of the vehicle's tilt Ð if
someone attempts to steal the wheels
or tow the vehicle without authoriza-
tion, for example
>If there is an interruption of battery
voltage.
The alarm system signals unauthorized
access to the vehicle or an attempted
theft in different ways:
>Sounding an acoustical alarm for
30 seconds
>The hazard warning flashers are acti-
vated for approx. five minutes.
To activate and deactivate the
alarm systemWhen the vehicle is locked or unlocked
by using a key or with the remote con-
trol, the alarm system is also simulta-
neously armed or disarmed.
The interior motion sensor is activated
approx. 30 seconds after you have fin-
ished locking the car.
If the alarm system has been armed
correctly, the hazard warning flashers
flash once. An acoustic warning signal
sounds at the same time.
You can have different acknow-
ledgment messages set to confirm
arming and disarming.<
You can also open the luggage com-
partment lid when the system is armed
by pressing button 3 of the remote con-
trol (refer to page 37). When it is closed,
the lid is once again secured.
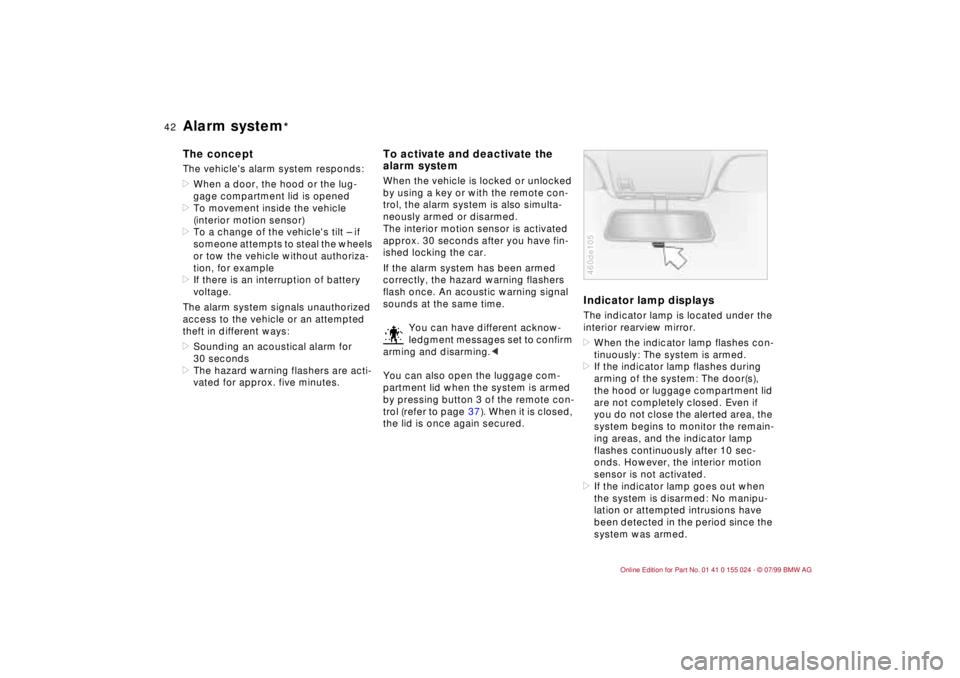
Indicator lamp displaysThe indicator lamp is located under the
interior rearview mirror.
>When the indicator lamp flashes con-
tinuously: The system is armed.
>If the indicator lamp flashes during
arming of the system: The door(s),
the hood or luggage compartment lid
are not completely closed. Even if
you do not close the alerted area, the
system begins to monitor the remain-
ing areas, and the indicator lamp
flashes continuously after 10 sec-
onds. However, the interior motion
sensor is not activated.
>If the indicator lamp goes out when
the system is disarmed: No manipu-
lation or attempted intrusions have
been detected in the period since the
system was armed.460de105
Page 43 of 189
43n
IndexDataTechnologyRepairsCar careControlsOverview
Alarm system
*
>If the indicator lamp flashes for
10 seconds when the system is dis-
armed: An attempted entry has been
detected in the period since the sys-
tem was armed.
Following triggering of an alarm, the in-
dicator lamp will flash continuously.Avoiding an unintentional alarmThe tilt alarm sensor and interior motion
sensor may be switched off at the same
time. You can do this to prevent a false
alarm from being triggered (in garages
with elevator ramps, for instance), or
when the vehicle is transported by
trailer or train:
Lock the vehicle twice (= arm the sys-
tem). Press button 2 on the remote con-
trol twice in succession or lock the
vehicle twice with the key (refer to
page 36).
The indicator lamp lights up briefly and
then flashes continuously. The tilt alarm
sensor and the interior motion sensor
are deactivated as long as the system is
armed.
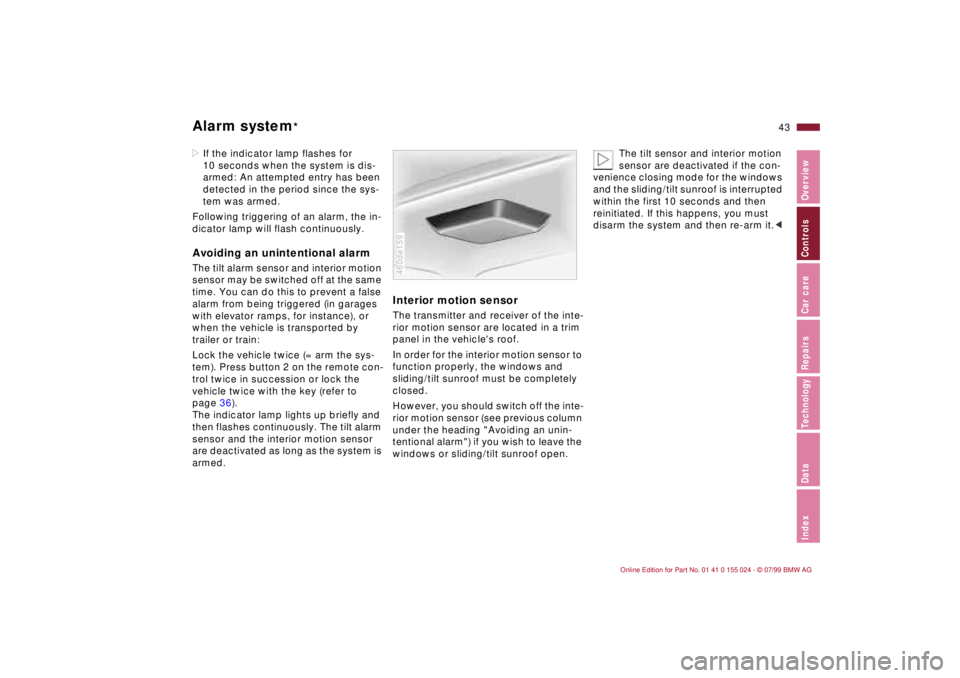
Interior motion sensorThe transmitter and receiver of the inte-
rior motion sensor are located in a trim
panel in the vehicle's roof.
In order for the interior motion sensor to
function properly, the windows and
sliding/tilt sunroof must be completely
closed.
However, you should switch off the inte-
rior motion sensor (see previous column
under the heading "Avoiding an unin-
tentional alarm") if you wish to leave the
windows or sliding/tilt sunroof open.460de159
The tilt sensor and interior motion
sensor are deactivated if the con-
venience closing mode for the windows
and the sliding/tilt sunroof is interrupted
within the first 10 seconds and then
reinitiated. If this happens, you must
disarm the system and then re-arm it.<
Page 68 of 189
68n
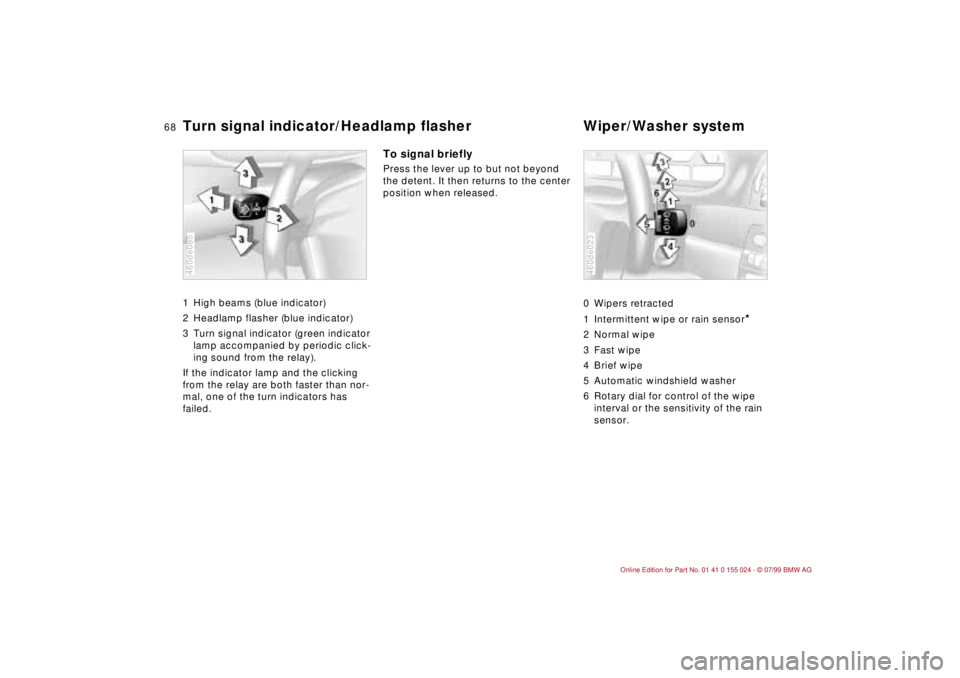
Turn signal indicator/Headlamp flasher Wiper/Washer system 1 High beams (blue indicator)
2 Headlamp flasher (blue indicator)
3 Turn signal indicator (green indicator
lamp accompanied by periodic click-
ing sound from the relay).
If the indicator lamp and the clicking
from the relay are both faster than nor-
mal, one of the turn indicators has
failed. 460de085
To signal brieflyPress the lever up to but not beyond
the detent. It then returns to the center
position when released.
0 Wipers retracted
1 Intermittent wipe or rain sensor
*
2 Normal wipe
3 Fast wipe
4 Brief wipe
5 Automatic windshield washer
6 Rotary dial for control of the wipe
interval or the sensitivity of the rain
sensor.460de023
Page 69 of 189
69n
IndexDataTechnologyRepairsCar careControlsOverview
Wiper/Washer system1 Intermittent wipe or rain
sensor
*
Intermittent wipe:
You can use rotary dial 6 to select from
four wipe intervals.
In addition, the wipe interval automati-
cally adapts to variations in road speed.
Rain sensor:
The rain sensor is positioned on the
windshield, directly ahead of the inte-
rior rearview mirror. When the rain sen-
sor is activated, the windshield wiper is
controlled automatically, depending on
the degree of wetness of the windshield
(in both snow and rain). You do not
have to be concerned with switching
the windshield wiper on or off or adjust-
ing the wipe interval between intermit-
tent and full wipe. Instead, you can
concentrate fully on the traffic condi-
tions. This is especially important under
adverse weather conditions.
To activate the rain sensor:
In ignition key positions 1 or 2, move
the lever to position 1. The wipers travel
once across the windshield, regardless
of the weather.You can leave the lever permanently in
position 1, and then activate the rain
sensor in ignition key positions 1 or 2.
To do this,
>turn rotary dial 6 briefly or
>use the automatic windshield
washer 5.
To modify the sensitivity of the rain
sensor:
Turn rotary dial 6.
Turn the rain sensor off when
passing through an automatic car
wash. Failure to do so could result in
damage caused by undesired wiper
activation.<
2 Normal wiper speedWhen the vehicle is stationary, the wip-
ers switch automatically to intermittent
wipe (not on vehicles with rain sensor).3 Fast wiper speedWhen the vehicle is stationary, the wip-
ers operate at normal speed (not on
vehicles with rain sensor).5 Automatic windshield washer The system sprays washer fluid against
the windshield and activates the wipers
for a brief period.
If you pull the lever only briefly, the sys-
tem sprays washer fluid onto the wind-
shield without activating the wipers.
Page 78 of 189
78n
The PDC assists you when you back
into a parking space. A signal warns
you of the distance to an obstacle. To
do this, four ultrasonic sensors in the
rear bumper measure the distance to
the nearest object. The monitoring
range of the two corner sensors ex-
tends to approx. 2 feet (60 cm) behind
the bumper. The two center sensors
cover a distance of approx. 4.9 feet
(1.50 meters).
The system starts to operate automati-
cally about one second after you select
reverse with the ignition key in position 2.
PDC is deactivated when you shift back
out of reverse.
Acoustical signalsThe distance to the nearest object is in-
dicated by a tone sounding at various
intervals. As the distance between vehi-
cle and object decreases, the intervals
between the tones become shorter.
A continuous warning tone sounds if
the distance to a recognized object is
less than 1 foot (30 cm).
The warning signal is canceled after
approx. three seconds if the distance to
the obstacle remains constant during
this time (if you are moving parallel to
a wall, for instance).
System malfunctions will be indicated
by a continuous high-pitched tone
when the system is activated the first
time. Please refer the problem to your
BMW center.The PDC does not remove the
driver's personal responsibility for
evaluating the distance between the
vehicle and any obstacles. Even when
sensors are involved, there is a blind
spot in which objects cannot be de-
tected. This applies especially in those
cases where the system approaches
the physical limits of ultrasonic mea-
surement, as occurs with tow bars and
trailer couplings, and in the vicinity of
thin and painted objects.
Certain sources of sound, such as a
loud radio, could drown the PDC signal
tone.<
Keep the sensors clean and free
of ice or snow in order to ensure
that they continue to operate effec-
tively.
Do not apply high-pressure spray to the
sensors for a prolonged period of time.
Maintain an adequate distance of more
than approx. 4 inches (10 cm).<
Park Distance Control (PDC)
*