radio BMW 328I 2009 User Guide
[x] Cancel search | Manufacturer: BMW, Model Year: 2009, Model line: 328I, Model: BMW 328I 2009Pages: 268, PDF Size: 11.52 MB
Page 47 of 268
Controls
45Reference
At a glance
Driving tips
Communications
Navigation
Entertainment
Mobility
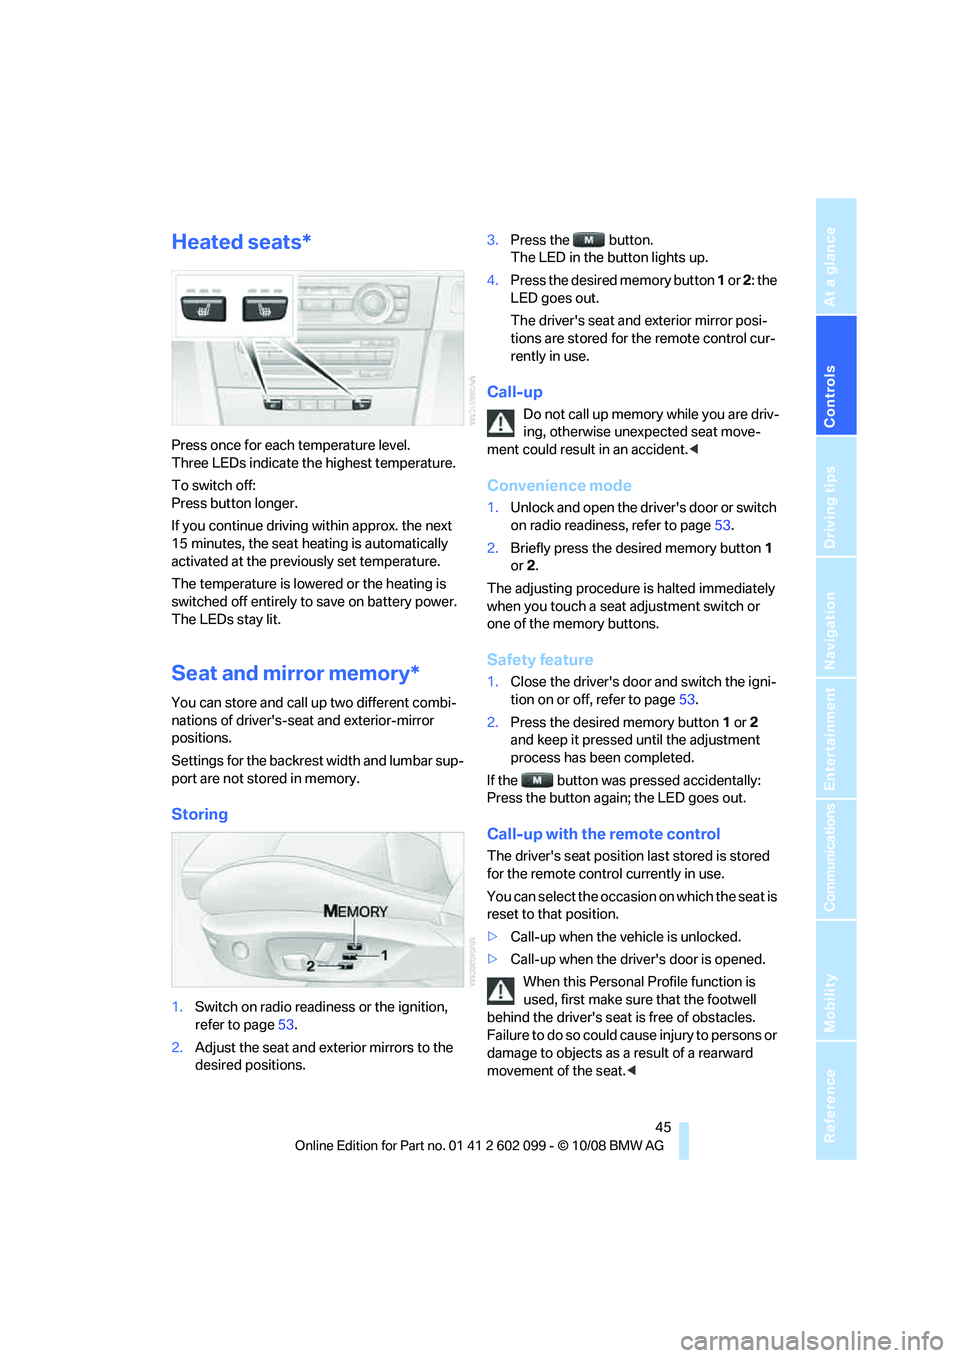
Heated seats*
Press once for each temperature level.
Three LEDs indicate the highest temperature.
To switch off:
Press button longer.
If you continue driving within approx. the next
15 minutes, the seat he ating is automatically
activated at the previously set temperature.
The temperature is lowered or the heating is
switched off entirely to save on battery power.
The LEDs stay lit.
Seat and mirror memory*
You can store and call up two different combi-
nations of driver's-seat and exterior-mirror
positions.
Settings for the backrest width and lumbar sup-
port are not stored in memory.
Storing
1. Switch on radio readiness or the ignition,
refer to page 53.
2. Adjust the seat and ex terior mirrors to the
desired positions. 3.
Press the button.
The LED in the button lights up.
4. Press the desired memory button 1 or 2: the
LED goes out.
The driver's seat and exterior mirror posi-
tions are stored for the remote control cur-
rently in use.
Call-up
Do not call up memory while you are driv-
ing, otherwise unexpected seat move-
ment could result in an accident. <
Convenience mode
1.Unlock and open the driver's door or switch
on radio readiness, refer to page 53.
2. Briefly press the de sired memory button 1
or 2.
The adjusting procedure is halted immediately
when you touch a seat adjustment switch or
one of the memory buttons.
Safety feature
1. Close the driver's door and switch the igni-
tion on or off, refer to page 53.
2. Press the desired memory button 1 or 2
and keep it pressed until the adjustment
process has been completed.
If the button was pr essed accidentally:
Press the button again; the LED goes out.
Call-up with the remote control
The driver's seat position last stored is stored
for the remote contro l currently in use.
You can select the occasion on which the seat is
reset to that position.
> Call-up when the vehicle is unlocked.
> Call-up when the driver's door is opened.
When this Personal Profile function is
used, first make sure that the footwell
behind the driver's seat is free of obstacles.
Failure to do so could cause injury to persons or
damage to objects as a result of a rearward
movement of the seat. <
ba8_E9091_cic.book Seite 45 Mittwoch, 29. Oktober 2008 2:59 14
Page 55 of 268
Controls
53Reference
At a glance
Driving tips
Communications
Navigation
Entertainment
Mobility
Driving
Ignition lock
Insert the remote control into the
ignition lock
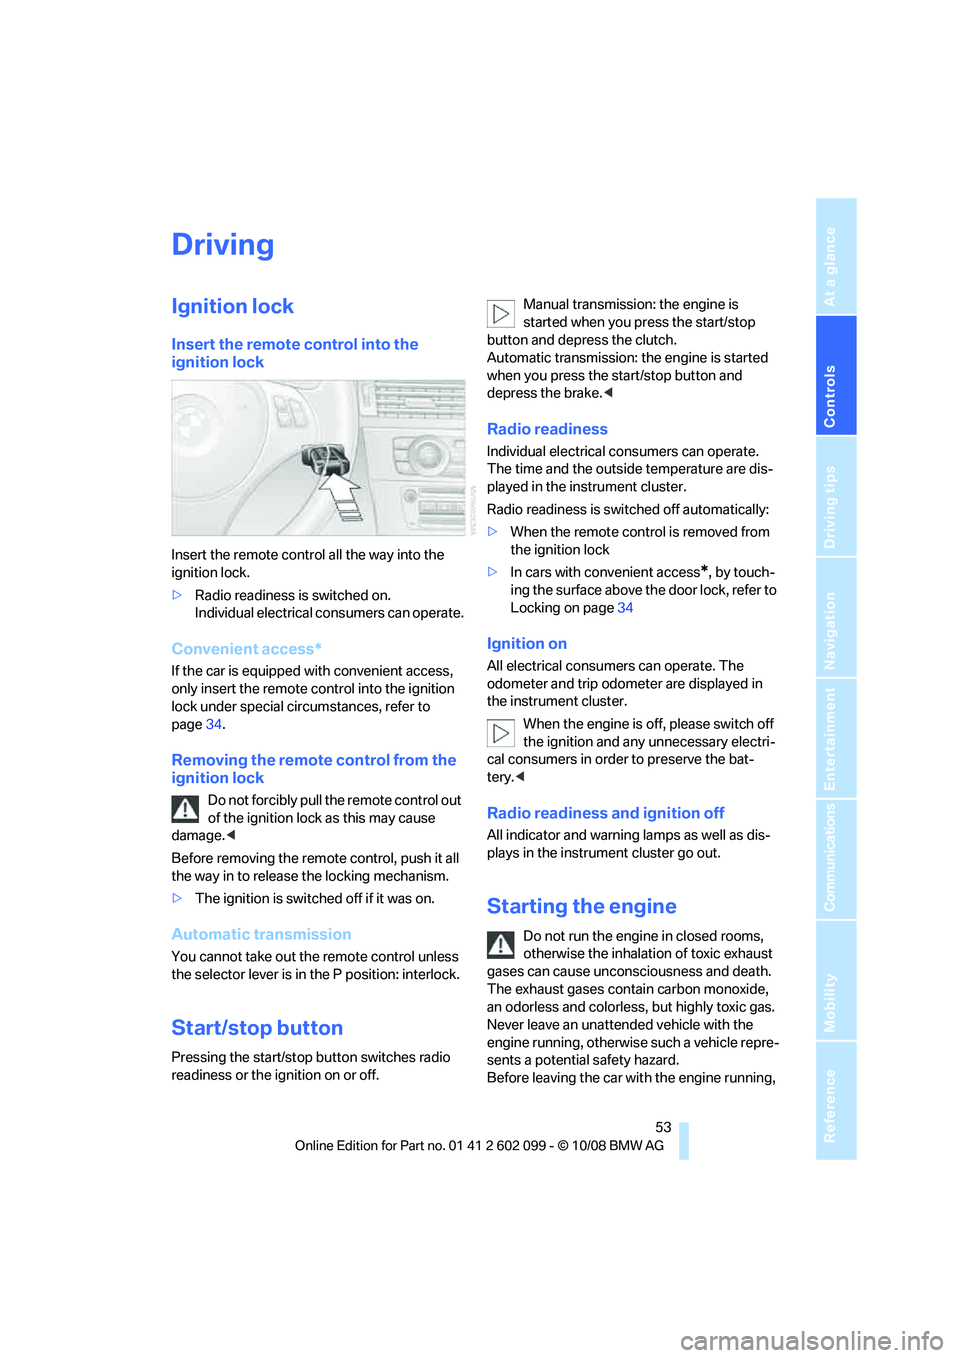
Insert the remote control all the way into the
ignition lock.
>Radio readiness is switched on.
Individual electrical consumers can operate.
Convenient access*
If the car is equipped with convenient access,
only insert the remote control into the ignition
lock under special circ umstances, refer to
page 34.
Removing the remote control from the
ignition lock
Do not forcibly pull the remote control out
of the ignition lock as this may cause
damage. <
Before removing the remote control, push it all
the way in to release the locking mechanism.
> The ignition is switched off if it was on.
Automatic transmission
You cannot take out th e remote control unless
the selector lever is in the P position: interlock.
Start/stop button
Pressing the start/stop button switches radio
readiness or the ignition on or off. Manual transmission: the engine is
started when you press the start/stop
button and depress the clutch.
Automatic transmission: the engine is started
when you press the start/stop button and
depress the brake. <
Radio readiness
Individual electrical consumers can operate.
The time and the outside temperature are dis-
played in the instrument cluster.
Radio readiness is swit ched off automatically:
> When the remote control is removed from
the ignition lock
> In cars with convenient access
*, by touch-
ing the surface above the door lock, refer to
Locking on page 34
Ignition on
All electrical consumers can operate. The
odometer and trip odometer are displayed in
the instrument cluster.
When the engine is off, please switch off
the ignition and any unnecessary electri-
cal consumers in order to preserve the bat-
tery. <
Radio readiness and ignition off
All indicator and warnin g lamps as well as dis-
plays in the instrument cluster go out.
Starting the engine
Do not run the engine in closed rooms,
otherwise the inhalation of toxic exhaust
gases can cause unconsciousness and death.
The exhaust gases contain carbon monoxide,
an odorless and colorless, but highly toxic gas.
Never leave an unattended vehicle with the
engine running, otherwise such a vehicle repre-
sents a potential safety hazard.
Before leaving the car wi th the engine running,
ba8_E9091_cic.book Seite 53 Mittwoch, 29. Oktober 2008 2:59 14
Page 87 of 268
Controls
85Reference
At a glance
Driving tips
Communications
Navigation
Entertainment
Mobility
Functional requirement
In order to assure the reliable reporting of a flat
tire, the system must be reset while all tire infla-
tion pressures are correct.
Always use wheels with TPM electronics. Oth-
erwise, the system may malfunction.Each time a tire inflation pressure has
been corrected or a wheel or tire has been
changed, reset the system. <
System limitations
TPM cannot warn you in advance of sud-
den severe tire damage caused by out-
side influences. <
The system does not work correctly if it has not
been reset; for example, a flat tire may be indi-
cated even though the ti re inflation pressures
are correct.
The system is inactive and cannot indicate a flat
tire if a wheel without TPM electronics, such as
a compact spare wheel, has been mounted, or if
TPM is temporarily malfun ctioning due to other
systems or devices using the same radio fre-
quency.
Status indicator on the Control Display
The color of the tires represents the status of
the tires and the system.
TPM takes into account that tire pressures
change while the vehicle is being driven. The
tire pressures do not need to be corrected
unless the TPM instructs you to do so by means
of color indicators.
Green
The tire inflation pressure corresponds to the
established target value.
"TPM active" appears on the Control Display.
One wheel yellow
There is a flat tire or su bstantial loss of tire pres-
sure in the indicated tire. A message appears on
the Control Display.
All wheels yellow
There is a flat tire or substantial loss of tire pres-
sure in several tires. A message appears on the
Control Display.
Gray
The system cannot detect a puncture.
Possible reasons for this:
> TPM is being reset
> Temporary malfunction caused by systems
or devices using the same radio frequency
> Malfunction
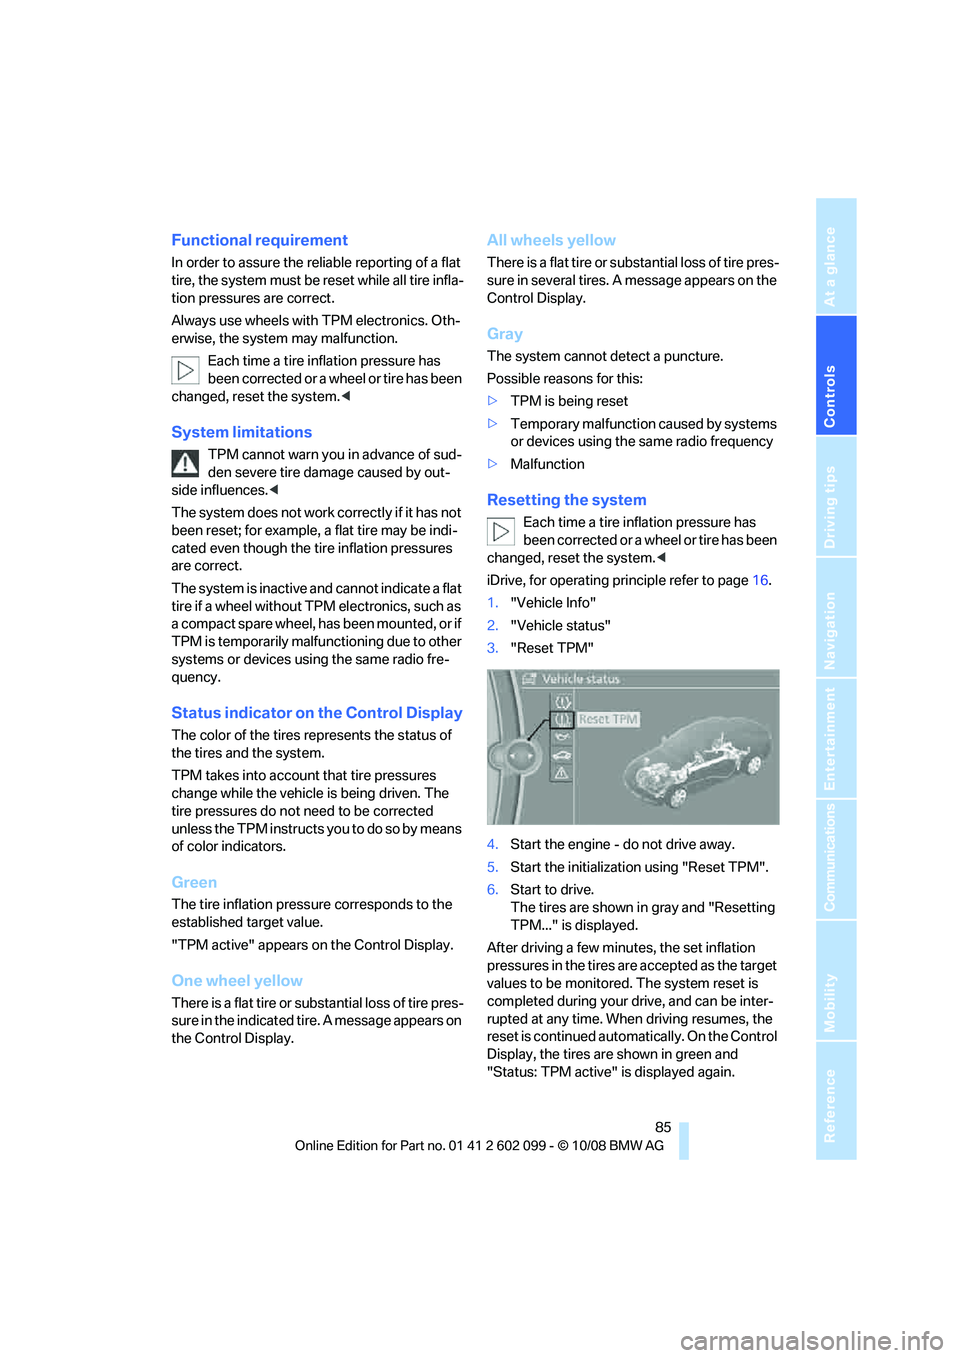
Resetting the system
Each time a tire inflation pressure has
been corrected or a wheel or tire has been
changed, reset the system. <
iDrive, for operating pr inciple refer to page16.
1. "Vehicle Info"
2. "Vehicle status"
3. "Reset TPM"
4. Start the engine - do not drive away.
5. Start the initialization using "Reset TPM".
6. Start to drive.
The tires are shown in gray and "Resetting
TPM..." is displayed.
After driving a few minutes, the set inflation
pressures in the tires are accepted as the target
values to be monitored. The system reset is
completed during your drive, and can be inter-
rupted at any time. When driving resumes, the
reset is continued automatically. On the Control
Display, the tires are shown in green and
"Status: TPM active" is displayed again.
ba8_E9091_cic.book Seite 85 Mittwoch, 29. Oktober 2008 2:59 14
Page 88 of 268
Technology for driving comfort and safety
86
If a flat tire is detect
ed while the system is
resetting and determining the inflation
pressures, all tires on the Control Display are
displayed in yellow. The message "Tire low!" is
shown. <
Message for low tire inflation pressure
The warning lamps come on in yellow
and red. A message appears on the
Control Display. In addition, a signal
sounds. There is a flat tire or substan-
tial loss of tire pressure.
1. Cautiously reduce sp eed to below 50 mph/
80 km/h. Avoid sudden braking and steer-
ing maneuvers. Do not exceed a speed of
50 mph/80 km/h.
If the car is not equipped with Run-
Flat Tires, refer to page 209, the stan-
dard equipment by design, do not continue
driving. Otherwise a se vere accident could
result after a tire punc ture if you continue
driving. <
2. In the event of complete pressure loss,
0 psi/0 kPa, you can estimate the possible
distance for continued driving on the basis
of the following guidelines:
>With a light load:
1 to 2 persons without luggage:
approx. 155 miles/250 km
> With a medium load:
2 persons, cargo bay full, or 4 persons
without luggage:
approx. 95 miles/150 km
> With a full load:
4 or more persons, cargo bay full:
approx. 30 miles/50 km
Drive cautiously and do not exceed a
speed of 50 mph/80 km/h. In the event of
pressure loss, vehicle handling changes. This
includes reduced tracking stability in braking,
extended braking distance and altered natural
steering characteristics.
If unusual vibration or lo ud noises occur during
the journey, this may be an indication that the
damaged tire has finally failed. Reduce your
speed and pull over as soon as possible at a
suitable location. Otherw ise parts of the tire could come loose, resulting in an accident. Do
not continue driving. Instead, contact your
BMW center.
<
Malfunction
The small warning lamp flashes in
yellow and then lights up continu-
ously; the larger warning lamp comes
on in yellow. On the Control Display,
the tires are shown in gray and a message
appears. No punctures can be detected.
his type of message is shown in the following
situations:
> If there is a malfunction
Have the system checked.
> If a wheel without TPM electronics has
been mounted
> If TPM is temporarily malfunctioning due to
other systems or devices using the same
radio frequency.
Message for unsuccessful system
reset
The warning lamp lights up yellow. A
message will appear on the Control
Display. The system is not reset after
a tire has been changed, for example.
Check the tire inflation pressure and reset the
system, refer to page 85.
Declaration according to NHTSA/
FMVSS 138
Tire Pressure Monitoring Systems
Each tire should be checked monthly when cold
and inflated to the inflation pressure recom-
mended by the vehicle manufacturer on the
vehicle placard or tire infl ation pressure label. If
your vehicle has tires of a different size than the
size indicated on the vehicle placard or tire infla-
tion pressure label, yo u should determine the
proper tire inflation pressure for those tires. As
an added safety feature, your vehicle has been
equipped with a tire pressure monitoring sys-
tem, TPMS, that illuminates a low tire pressure
telltale when one or more of your tires are signif-
icantly under-inflated. Accordingly, when the
low tire pressure telltale illuminates, you should
ba8_E9091_cic.book Seite 86 Mittwoch, 29. Oktober 2008 2:59 14
Page 91 of 268
Controls
89Reference
At a glance
Driving tips
Communications
Navigation
Entertainment
Mobility
activated, refer to Status of front passenger air-
bags below. <
Before transporting a child on the front
passenger seat, read the safety precau-
tions and handling instructions under Trans-
porting children safely, refer to page 49.
The front and side airbags can also be deacti-
vated by adolescents and adults sitting in cer-
tain positions; the indi cator lamp for the front
passenger airbags comes on. In such cases, the
passenger should change his or her sitting
position so that the front passenger airbags are
activated and the indicator lamp goes out. If the
desired airbag status cannot be achieved by
changing the sitting position, transport the rele-
vant passenger on a rear seat. Do not attach
seat covers, seat cushio n padding, ball mats or
other items to the front passenger seat unless
they are specifically recommended by BMW.
Do not place any items under the seat which
could press against the seat from below. Other-
wise a correct analysis of the seat cushion is not
ensured. <
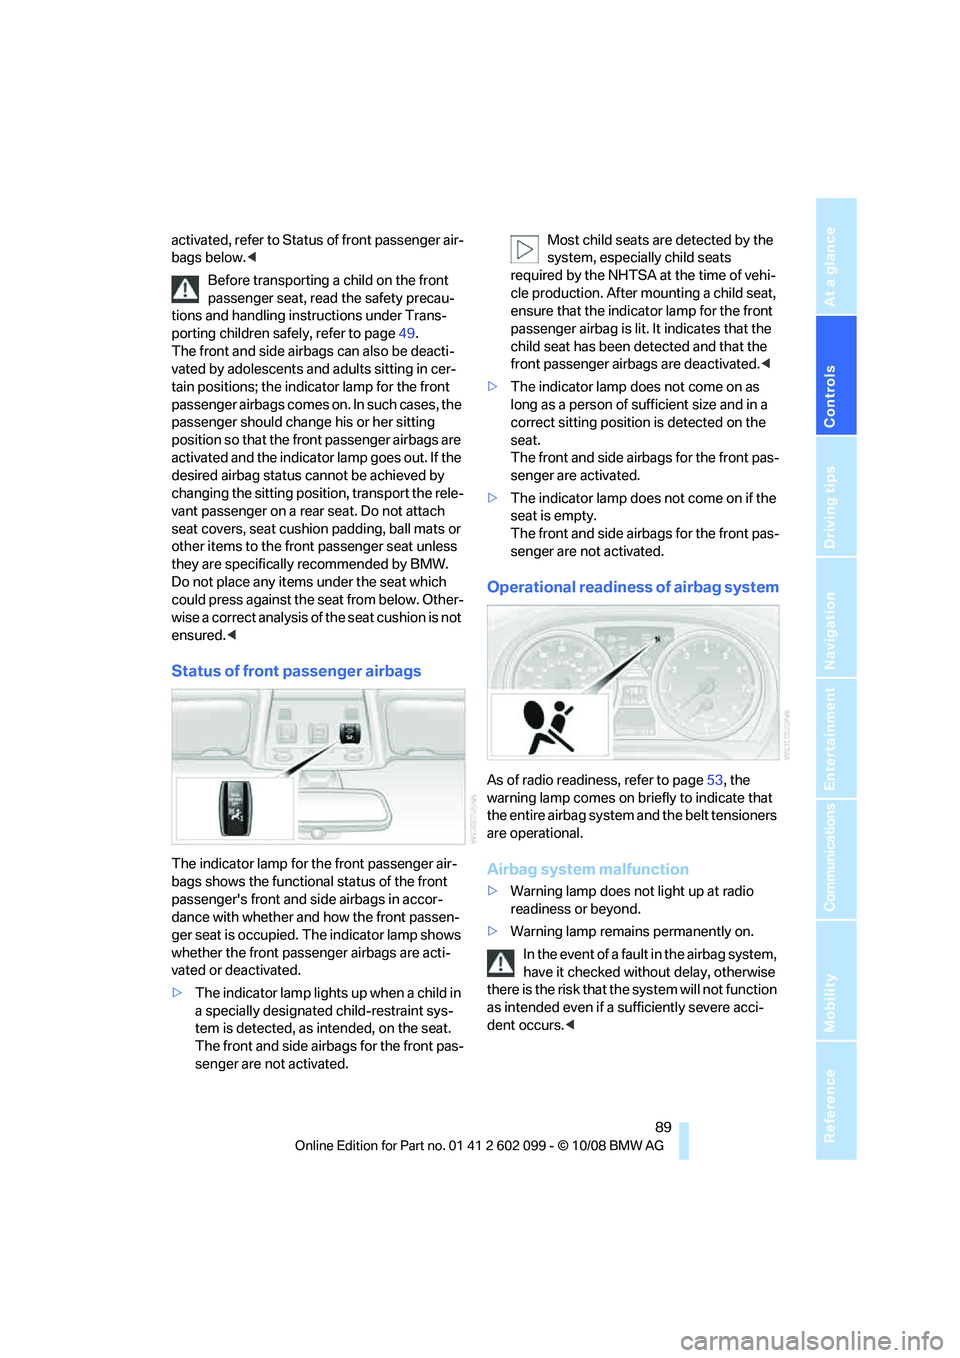
Status of front passenger airbags
The indicator lamp for the front passenger air-
bags shows the functional status of the front
passenger's front and side airbags in accor-
dance with whether and how the front passen-
ger seat is occupied. Th e indicator lamp shows
whether the front passenger airbags are acti-
vated or deactivated.
> The indicator lamp lights up when a child in
a specially designated child-restraint sys-
tem is detected, as intended, on the seat.
The front and side airbags for the front pas-
senger are not activated. Most child seats are detected by the
system, especially child seats
required by the NHTSA at the time of vehi-
cle production. After mounting a child seat,
ensure that the indica tor lamp for the front
passenger airbag is lit. It indicates that the
child seat has been detected and that the
front passenger airbags are deactivated. <
> The indicator lamp does not come on as
long as a person of sufficient size and in a
correct sitting position is detected on the
seat.
The front and side airbags for the front pas-
senger are activated.
> The indicator lamp does not come on if the
seat is empty.
The front and side airbags for the front pas-
senger are not activated.
Operational readine ss of airbag system
As of radio readiness, refer to page 53, the
warning lamp comes on br iefly to indicate that
the entire airbag system and the belt tensioners
are operational.
Airbag system malfunction
> Warning lamp does not light up at radio
readiness or beyond.
> Warning lamp remains permanently on.
In the event of a fault in the airbag system,
have it checked without delay, otherwise
there is the risk that th e system will not function
as intended even if a sufficiently severe acci-
dent occurs. <
ba8_E9091_cic.book Seite 89 Mittwoch, 29. Oktober 2008 2:59 14
Page 98 of 268
Climate
96
You can reactivate the
automatic mode for the
air flow rate with the AUTO button.
The air flow rate may be reduced or the blower
may be switched off entire ly to save on battery
power. The display remains the same.
Switching the system on/off
With the blower at its lowest setting, press the
left side of the button to switch off the auto-
matic climate control. All displays are cleared
except for the rear window defroster if it is
switched on.
Press any button except REST or rear window
defroster to reactivate the automatic climate
control.
The recirculated-air mo de is switched on
when you switch off the automatic cli-
mate control. If the air qu ality deteriorates or the
window fogs over, switch the system back on
and increase the air volume.<
Automatic recirculated-air control
AUC/Recirculated-air mode
Switch on the desired operating
mode by pressing this button
repeatedly:
> LED off: outside air flows in continuously.
> Left-hand LED on, AUC mode: a sensor
detects pollutants in the outside air. If nec-
essary, the system blocks the supply of out-
side air and recirculates the inside air. As
soon as the concentration of pollutants in
the outside air has decreased sufficiently,
the system automatically switches back to
outside air supply.
> Right-hand LED on, recirculated-air mode:
the supply of outside air is permanently
shut off. The system then recirculates the
air currently within the vehicle.
If condensation star ts to form on the
inside window surfaces during operation
in the recirculated-air mode, you should switch
it off while also increasi ng the air flow rate as
required.
The recirculated-air mode should not be used
over an extended period of time, otherwise the air quality inside the ca
r will deteriorate contin-
uously. <
Residual heat
The heat stored in the engine is
used to heat the passenger com-
partment, e.g. while stopped at a
school to pick up a child.
The function can be switched on when the fol-
lowing conditions are met:
> Up to 15 minutes after the engine has been
switched off
> While the engine is at operating tempera-
ture
> As long as battery voltage is sufficient
> At an outside temperature below 77 7/
25 6
The LED is lit when the function is on.
As of radio readiness, you can set the interior
temperature, the air flow rate and the air distri-
bution.
Defrosting window s and removing
condensation
Quickly removes ice and conden-
sation from the windshield and
front side windows.
Switch on the cooling function as well.
Switching cooling function on/off
The cooling function cools and
dehumidifies the incoming air
before reheating it as required,
according to the temp erature setting. This
function is only availa ble while the engine is
running.
The cooling function helps prevent condensa-
tion on the windows or removes it quickly.
Depending on the weathe r, the windshield may
fog over briefly when the engine is started.
Pressing the AUTO button automatically
switches on the cooling function.
ba8_E9091_cic.book Seite 96 Mittwoch, 29. Oktober 2008 2:59 14
Page 99 of 268
Controls
97Reference
At a glance
Driving tips
Communications
Navigation
Entertainment
Mobility
Rear window defroster
The defroster is switched off auto-
matically after a certain time.
Depending on your vehicle's
equipment, the upper wires serve as an antenna
and are not part of the rear window defroster.
Ventilation
1 Use the knurled wheels to smoothly open
and close the air vents
2 Use the lever to change the direction of the
airflow
3 Knurled wheel for more or less cool air from
the vents for the upper body area
Ventilation for cooling
Adjust the vent outlets to direct the flow of cool
air in your direction, for instance if it has become
too hot in the car.
Draft-free ventilation
Set the vent outlets so that the air flows past
you and not straight at you.
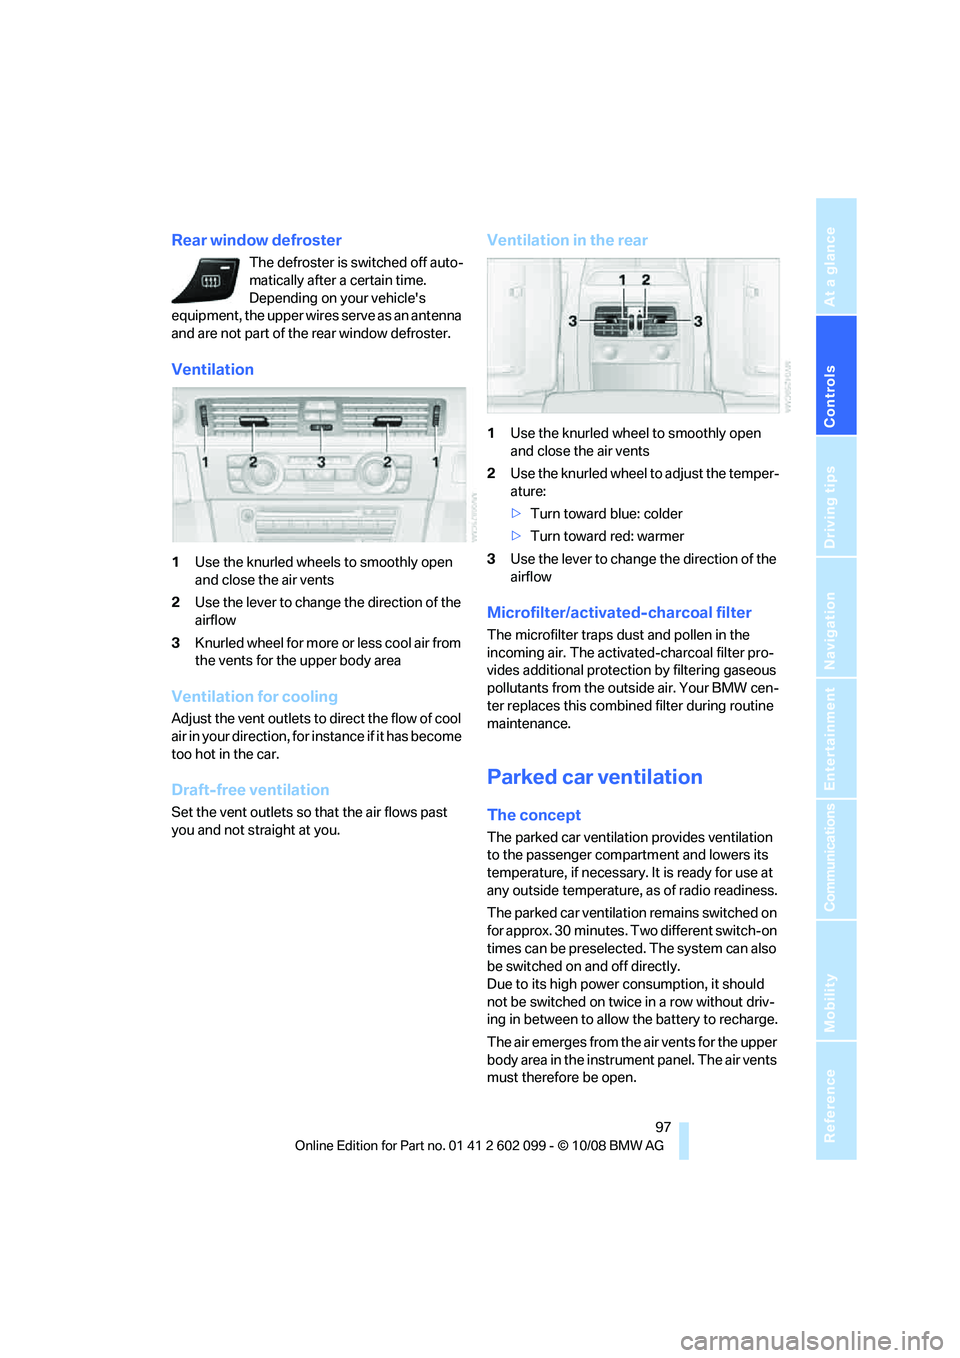
Ventilation in the rear
1Use the knurled wheel to smoothly open
and close the air vents
2 Use the knurled wheel to adjust the temper-
ature:
>Turn toward blue: colder
> Turn toward red: warmer
3 Use the lever to change the direction of the
airflow
Microfilter/activated-charcoal filter
The microfilter traps dust and pollen in the
incoming air. The activated-charcoal filter pro-
vides additional protection by filtering gaseous
pollutants from the outs ide air. Your BMW cen-
ter replaces this combined filter during routine
maintenance.
Parked car ventilation
The concept
The parked car ventilation provides ventilation
to the passenger compartment and lowers its
temperature, if necessary. It is ready for use at
any outside temperature, as of radio readiness.
The parked car ventilation remains switched on
for approx. 30 minutes. Two different switch-on
times can be preselected. The system can also
be switched on and off directly.
Due to its high power consumption, it should
not be switched on twice in a row without driv-
ing in between to allow the battery to recharge.
The air emerges from the air vents for the upper
body area in the instrume nt panel. The air vents
must therefore be open.
ba8_E9091_cic.book Seite 97 Mittwoch, 29. Oktober 2008 2:59 14
Page 101 of 268
Controls
99Reference
At a glance
Driving tips
Communications
Navigation
Entertainment
Mobility
Practical interior accessories
Integrated universal remote
control*
The concept
The integrated universal remote control can
replace as many as three hand-held transmit-
ters for various remote -controlled devices,
such as garage doors and gates or lighting sys-
tems. The integrated universal remote control
registers and stores sign als from the original
hand-held transmitters.
The signal of an original hand-held transmitter
can be programmed on one of the three mem-
ory buttons 1. After this, the programmed
memory button 1 will operate the system in
question. The LED 2 flashes to confirm trans-
mission of the signal.
Should you sell your vehicl e one day, be sure to
delete the stored progra ms beforehand for your
safety, refer to page 100.
To prevent possible damage or injury,
before programming or using the inte-
grated universal remote control, always inspect
the immediate area to make certain that no peo-
ple, animals or objects are within the pivoting or
travel range of the device being operated. Com-
ply also with the safety instructions supplied
with the original hand-held transmitter. <
Checking compatibility
If this symbol appears on the package
or in the instructions supplied with the
original hand-held transmitter, you can
assume that the radio remote control device will
be compatible with the integrated universal
remote control.
For additional information, please contact your
BMW center or call: 1-800-355-3515.
You can also obtain information on the Internet
at:
www.bmwusa.com or
www.homelink.com. HomeLink is a registered trademark of Johnson
Controls, Inc.
<
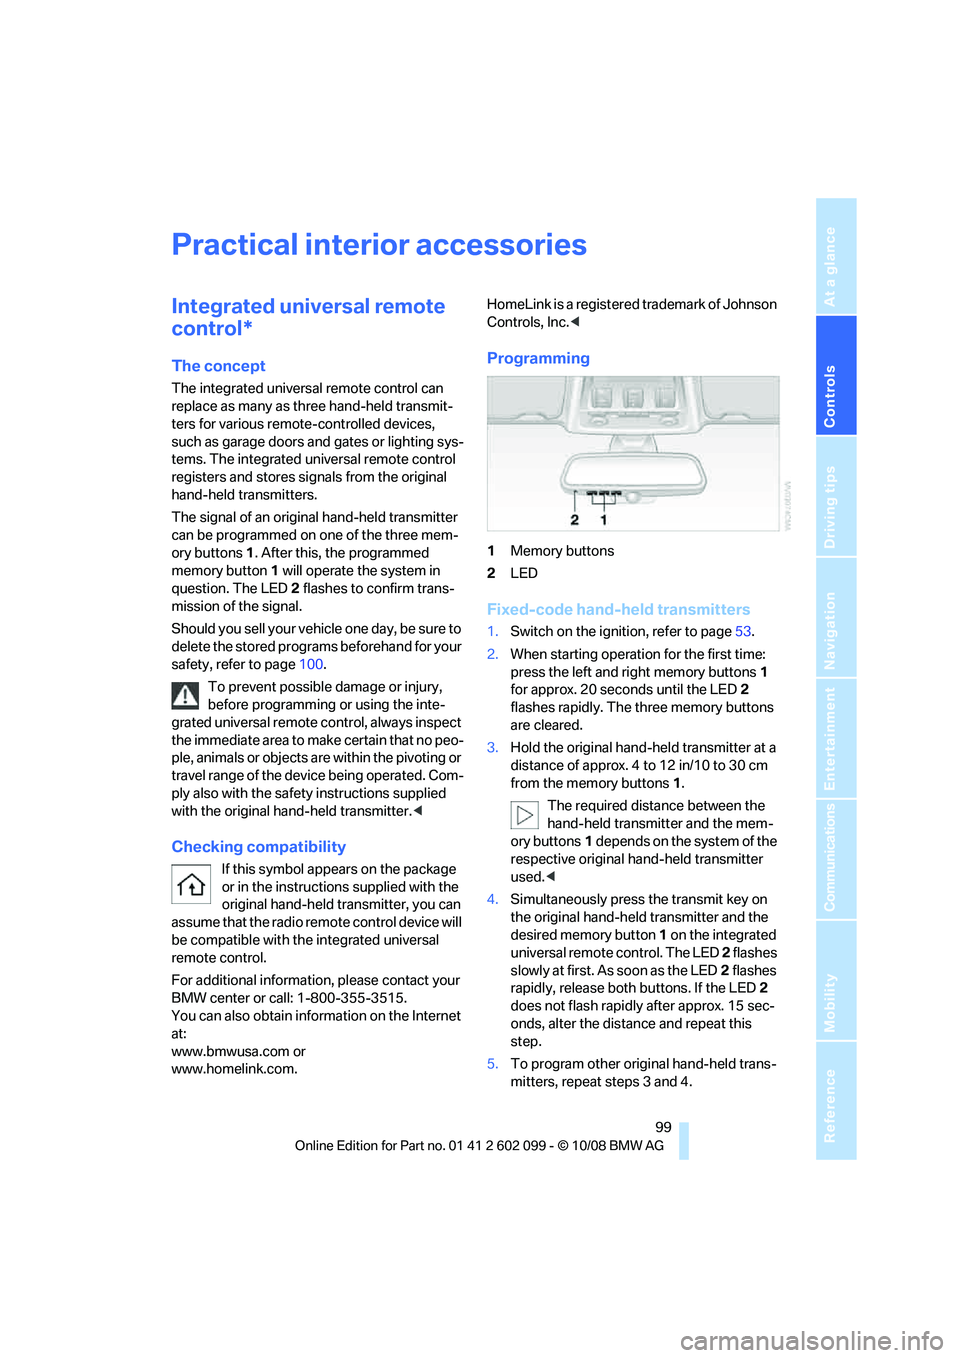
Programming
1Memory buttons
2 LED
Fixed-code hand-held transmitters
1.Switch on the ignition, refer to page 53.
2. When starting operation for the first time:
press the left and right memory buttons 1
for approx. 20 seconds until the LED 2
flashes rapidly. The three memory buttons
are cleared.
3. Hold the original hand-held transmitter at a
distance of approx. 4 to 12 in/10 to 30 cm
from the memory buttons 1.
The required distance between the
hand-held transmitter and the mem-
ory buttons 1 depends on the system of the
respective original hand-held transmitter
used. <
4. Simultaneously press the transmit key on
the original hand-held transmitter and the
desired memory button 1 on the integrated
universal remote control. The LED 2 flashes
slowly at first. As soon as the LED 2 flashes
rapidly, release both buttons. If the LED 2
does not flash rapidly after approx. 15 sec-
onds, alter the distance and repeat this
step.
5. To program other original hand-held trans-
mitters, repeat steps 3 and 4.
ba8_E9091_cic.book Seite 99 Mittwoch, 29. Oktober 2008 2:59 14
Page 138 of 268
Destination guidance
136
Automatic scaling of the map
In the map display facing north, turn the control-
ler in any direction until AUTO is displayed as
the map scale.
The map shows the entire range from your loca-
tion to the destination.
Settings for the map display
1. "Navigation"
2. "Map"
3. Open "Options".
4. "Settings"
>Optimized view "Night mode"
> Optimized view with spatial display:
"Perspective view in 3D" prominent
areas are shown in the map.
Split screen settings
The map settings for the split screen can be
created separately fr om the main screen.
1. Open "Options".
2. "Split screen"
3. Move the controller to the right until the
split screen is selected.
4. Press the controller.
5. Select the settings:
>"View facing north"
> "View in direction of travel"
> "Perspective view"
6. To change the scale:
>Move the controller: change the scale.
Traffic bulletins*
You can display the traffi c bulletins from radio
stations that broadcast the TMC (Traffic Mes-
sage Channel) of a traffic information service.
This information from the traffic information
service is continuously updated on the basis of
measurement data from traffic control centers
and information on traffic congestion.
During destination guid ance, traffic bulletins
that are relevant to areas along the route are automatically displayed
and taken into account
in the route planning. You can open all traffic
bulletins manually via iDrive.
The traffic bulletins are shown in the map dis-
play.
Activating/deactivating reception
1. "Navigation"
2. Open "Options".
3. "Receive Traffic Info"
In many metropolitan areas you can receive
traffic information broadcast by radio stations.
The traffic conditions ar e monitored by traffic
control centers and the traffic information is
updated periodically.
During destination guid ance, the traffic bulle-
tins relevant to your planned route are automat-
ically shown. Whether de stination guidance is
active or not, you can ha ve the traffic bulletins
displayed in the map view or in the traffic bulle-
tin list.
Traffic bulletins in a list
A list of the traffic bulle tins can be opened via
the menu or map display.
Opening the traffic bulletins
1. "Navigation"
2. "Traffic Info"
First, the traffic bulle tins on the planned
route are displayed. The traffic bulletins are
sorted in the order of their distance from the
current vehicle position.
3. Select a traffic bulletin.
Additional information can be displayed for
some traffic bulletins:
1. Select the symbol.
2. Additional information is displayed.
ba8_E9091_cic.book Seite 136 Mittwoch, 29. Oktober 2008 2:59 14
Page 143 of 268
Entertainment
Operation of the radio, CD equipment and
external audio devices as well as their tone settings are described in this chapter.
Entertainment
ba8_E9091_cic.book Seite 141 Mittwoch, 29. Oktober 2008 2:59 14