radio BMW 328I SEDAN 2011 User Guide
[x] Cancel search | Manufacturer: BMW, Model Year: 2011, Model line: 328I SEDAN, Model: BMW 328I SEDAN 2011Pages: 286, PDF Size: 8.25 MB
Page 37 of 286
Controls
35Reference
At a glance
Driving tips
Communications
Navigation
Entertainment
Mobility
Functional requirement
>The vehicle or the trunk lid/tailgate can only
be locked when the vehicle detects that the
remote control currently in use is outside of
the vehicle.
>The vehicle cannot be locked or unlocked
again until after approx. 2 seconds.
>The engine can only be started when the
vehicle detects that the remote control cur-
rently in use is inside the vehicle.
Comparison to the standard remote
control
In general, there is no difference between using
Comfort Access or pressing the buttons on the
remote control to carry out the functions men-
tioned above. You should therefore first famil-
iarize yourself with the instructions on opening
and closing starting on page26.
Special features regarding the use of Comfort
Access are described below.
If you notice a brief delay while opening or
closing windows or the glass roof/pan-
orama glass roof, the system is checking
whether a remote control is inside the vehicle.
Please repeat the opening or closing proce-
dure, if necessary.<
Unlocking
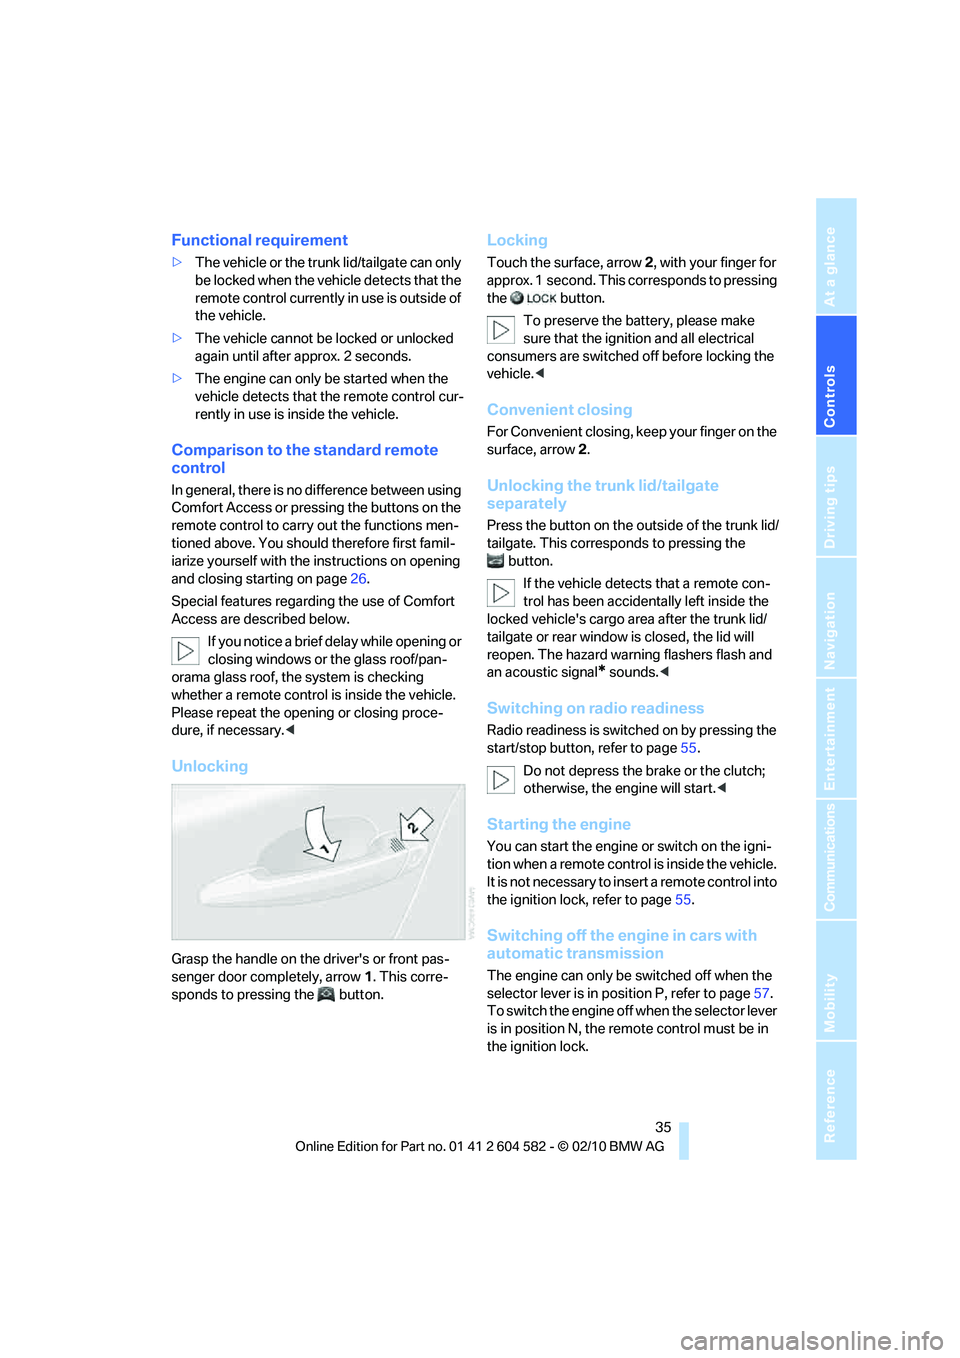
Grasp the handle on the driver's or front pas-
senger door completely, arrow 1. This corre-
sponds to pressing the button.
Locking
Touch the surface, arrow 2, with your finger for
approx. 1 second. This corresponds to pressing
the button.
To preserve the battery, please make
sure that the ignition and all electrical
consumers are switched off before locking the
vehicle.<
Convenient closing
For Convenient closing, keep your finger on the
surface, arrow 2.
Unlocking the trunk lid/tailgate
separately
Press the button on the outside of the trunk lid/
tailgate. This corresponds to pressing the
button.
If the vehicle detects that a remote con-
trol has been accidentally left inside the
locked vehicle's cargo area after the trunk lid/
tailgate or rear window is closed, the lid will
reopen. The hazard warning flashers flash and
an acoustic signal
* sounds.<
Switching on radio readiness
Radio readiness is switched on by pressing the
start/stop button, refer to page55.
Do not depress the brake or the clutch;
otherwise, the engine will start.<
Starting the engine
You can start the engine or switch on the igni-
tion when a remote control is inside the vehicle.
It is not necessary to insert a remote control into
the ignition lock, refer to page55.
Switching off the engine in cars with
automatic transmission
The engine can only be switched off when the
selector lever is in position P, refer to page57.
To switch the engine off when the selector lever
is in position N, the remote control must be in
the ignition lock.
Page 38 of 286
Opening and closing
36
Malfunction
Comfort Access may malfunction due to local
radio waves. If this happens, open or close the
vehicle via the buttons on the remote control or
using the integrated key. To start the engine
afterward, insert the remote control into the
ignition lock.
Warning lamps
The warning lamp in the instrument
cluster lights up when you attempt to
start the engine: the engine cannot
be started. The remote control is not inside the
vehicle or is malfunctioning.
Take the remote control with you inside the
vehicle or have it checked. If necessary, insert
another remote control into the ignition lock.
The warning lamp in the instrument
cluster lights up while the engine is
running: the remote control is no
longer inside the vehicle. After the engine is
switched off, the engine can only be restarted
within approx. 10 seconds.
The indicator lamp in the instrument
cluster comes on and a message
appears on the Control Display:
replace the battery in the remote control.
Replacing the battery
The remote control for Comfort Access con-
tains a battery that will need to be replaced from
time to time.
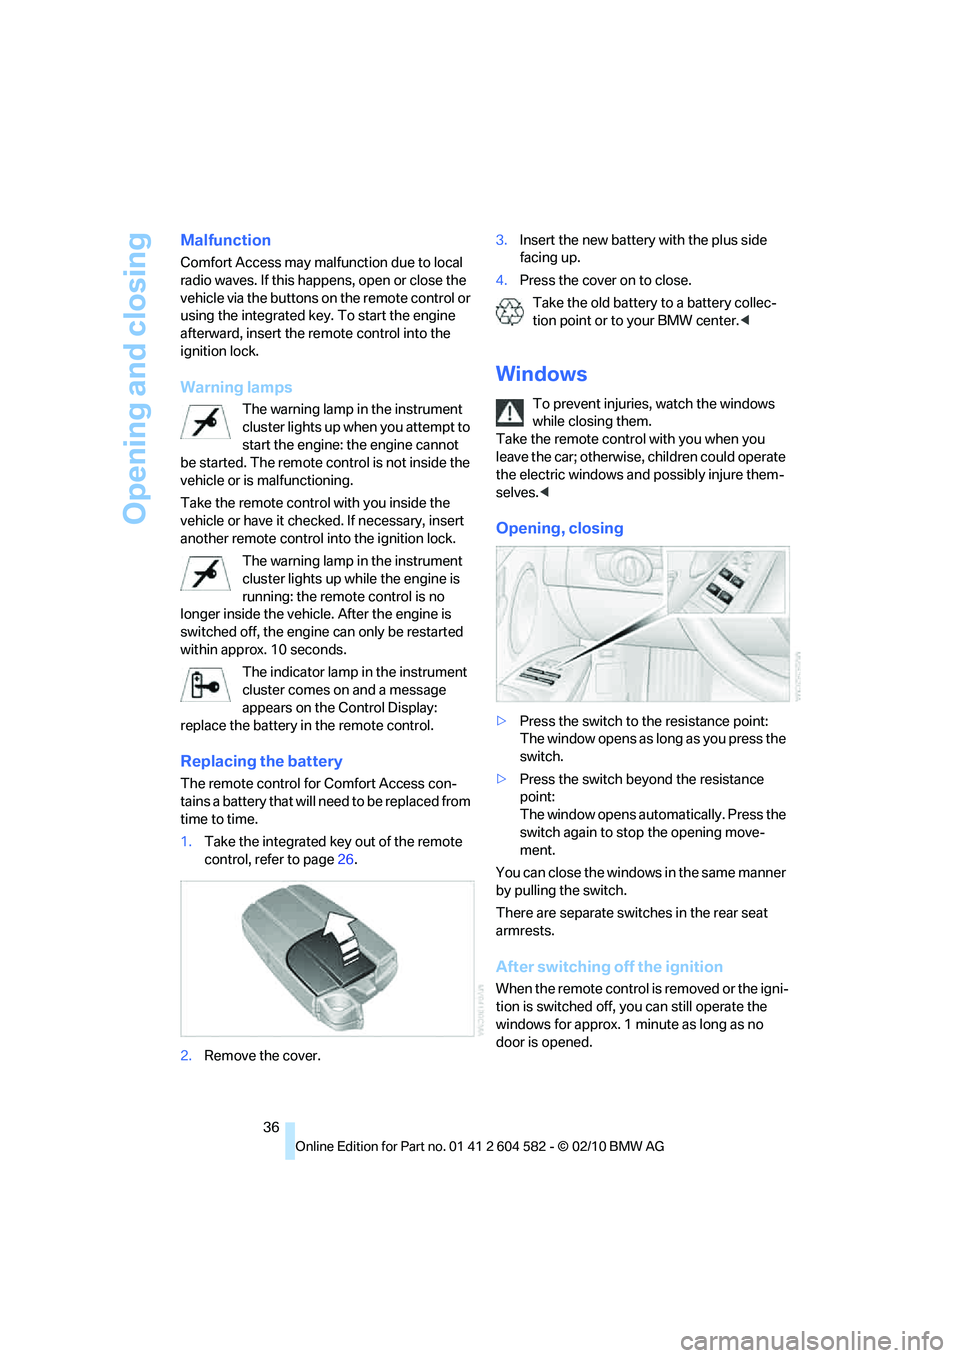
1.Take the integrated key out of the remote
control, refer to page26.
2.Remove the cover.3.Insert the new battery with the plus side
facing up.
4.Press the cover on to close.
Take the old battery to a battery collec-
tion point or to your BMW center.<
Windows
To prevent injuries, watch the windows
while closing them.
Take the remote control with you when you
leave the car; otherwise, children could operate
the electric windows and possibly injure them-
selves.<
Opening, closing
>Press the switch to the resistance point:
The window opens as long as you press the
switch.
>Press the switch beyond the resistance
point:
The window opens automatically. Press the
switch again to stop the opening move-
ment.
You can close the windows in the same manner
by pulling the switch.
There are separate switches in the rear seat
armrests.
After switching off the ignition
When the remote control is removed or the igni-
tion is switched off, you can still operate the
windows for approx. 1 minute as long as no
door is opened.
Page 48 of 286
Adjustments
46 Depending on the equipment version, it may be
possible to fold down the outer rear head
restraints as well.
Only fold the head restraints down if no
passengers will be sitting in the rear. Fold
up the head restraints before transporting pas-
sengers in the rear.<
Heated seats*
Press the button once per temperature level.
Three LEDs indicate the highest temperature.
To switch off:
Press button longer.
If you continue driving within approx. the next
15 minutes, the seat heating is automatically
activated at the previously set temperature.
The temperature is lowered or the heating is
switched off entirely to save on battery power.
The LEDs stay lit.
Seat and mirror memory*
You can store and call up two different combi-
nations of driver's seat and exterior mirror posi-
tions.
Settings for the backrest width and lumbar sup-
port are not stored in memory.
Storing
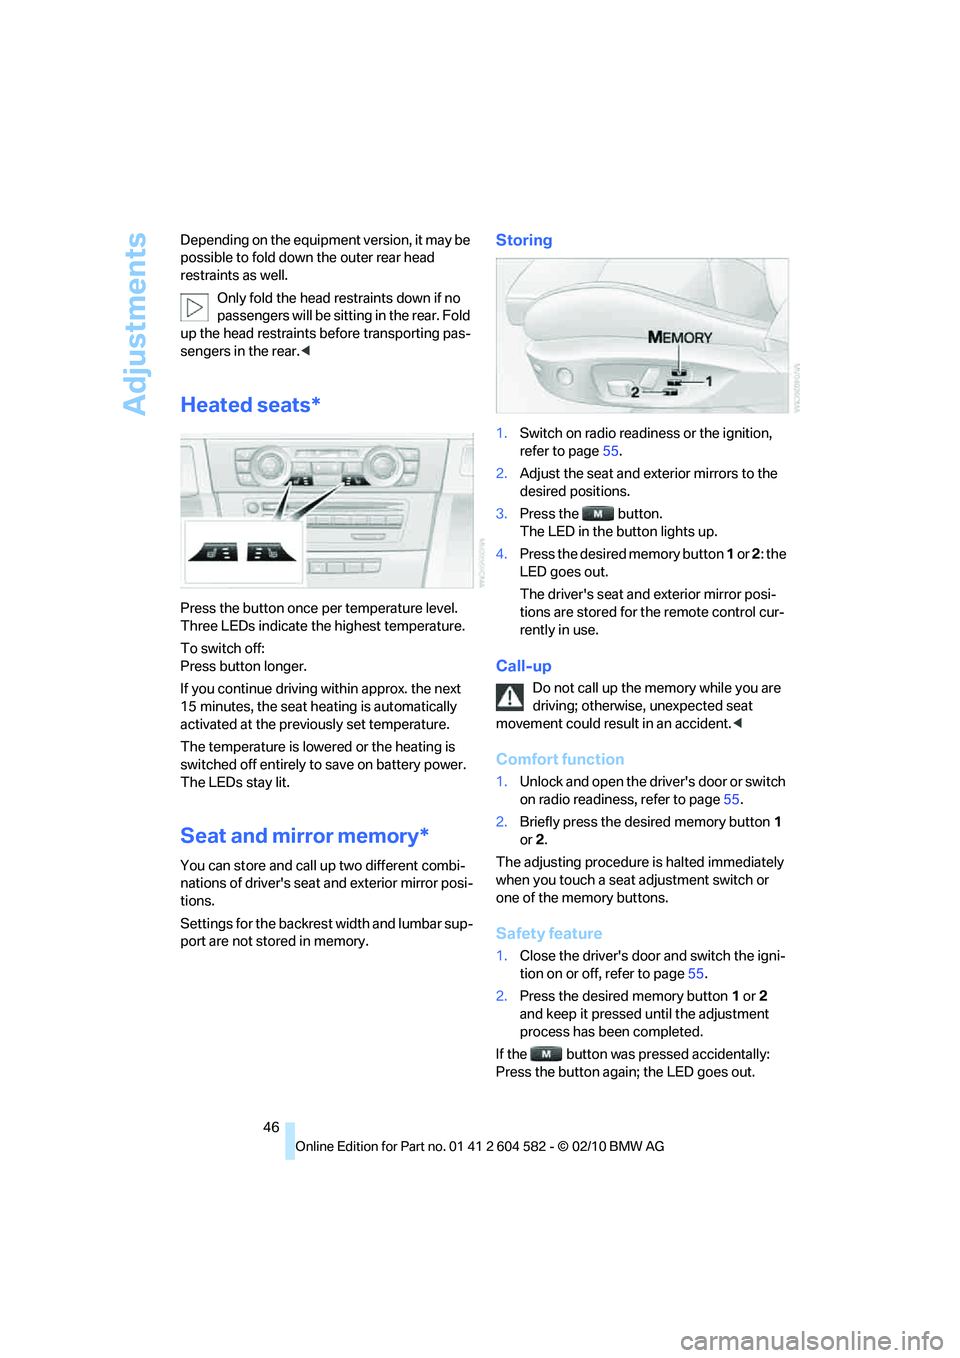
1.Switch on radio readiness or the ignition,
refer to page55.
2.Adjust the seat and exterior mirrors to the
desired positions.
3.Press the button.
The LED in the button lights up.
4.Press the desired memory button 1 or 2: the
LED goes out.
The driver's seat and exterior mirror posi-
tions are stored for the remote control cur-
rently in use.
Call-up
Do not call up the memory while you are
driving; otherwise, unexpected seat
movement could result in an accident.<
Comfort function
1.Unlock and open the driver's door or switch
on radio readiness, refer to page55.
2.Briefly press the desired memory button1
or 2.
The adjusting procedure is halted immediately
when you touch a seat adjustment switch or
one of the memory buttons.
Safety feature
1.Close the driver's door and switch the igni-
tion on or off, refer to page55.
2.Press the desired memory button1 or2
and keep it pressed until the adjustment
process has been completed.
If the button was pressed accidentally:
Press the button again; the LED goes out.
Page 57 of 286
Controls
55Reference
At a glance
Driving tips
Communications
Navigation
Entertainment
Mobility
Driving
Ignition lock
Insert the remote control into the
ignition lock
Insert the remote control all the way into the
ignition lock.
>Radio readiness is switched on.
Individual electrical consumers can operate.
Comfort Access*
If the car is equipped with Comfort Access, only
insert the remote control into the ignition lock
under special circumstances, refer to page34.
Removing the remote control from the
ignition lock
Do not forcibly pull the remote control out
of the ignition lock as this may cause
damage.<
Before removing the remote control, push it all
the way in to release the locking mechanism.
>The ignition is switched off if it was on.
Automatic transmission
You cannot take out the remote control unless
the selector lever is in the P position: interlock.
Start/stop button
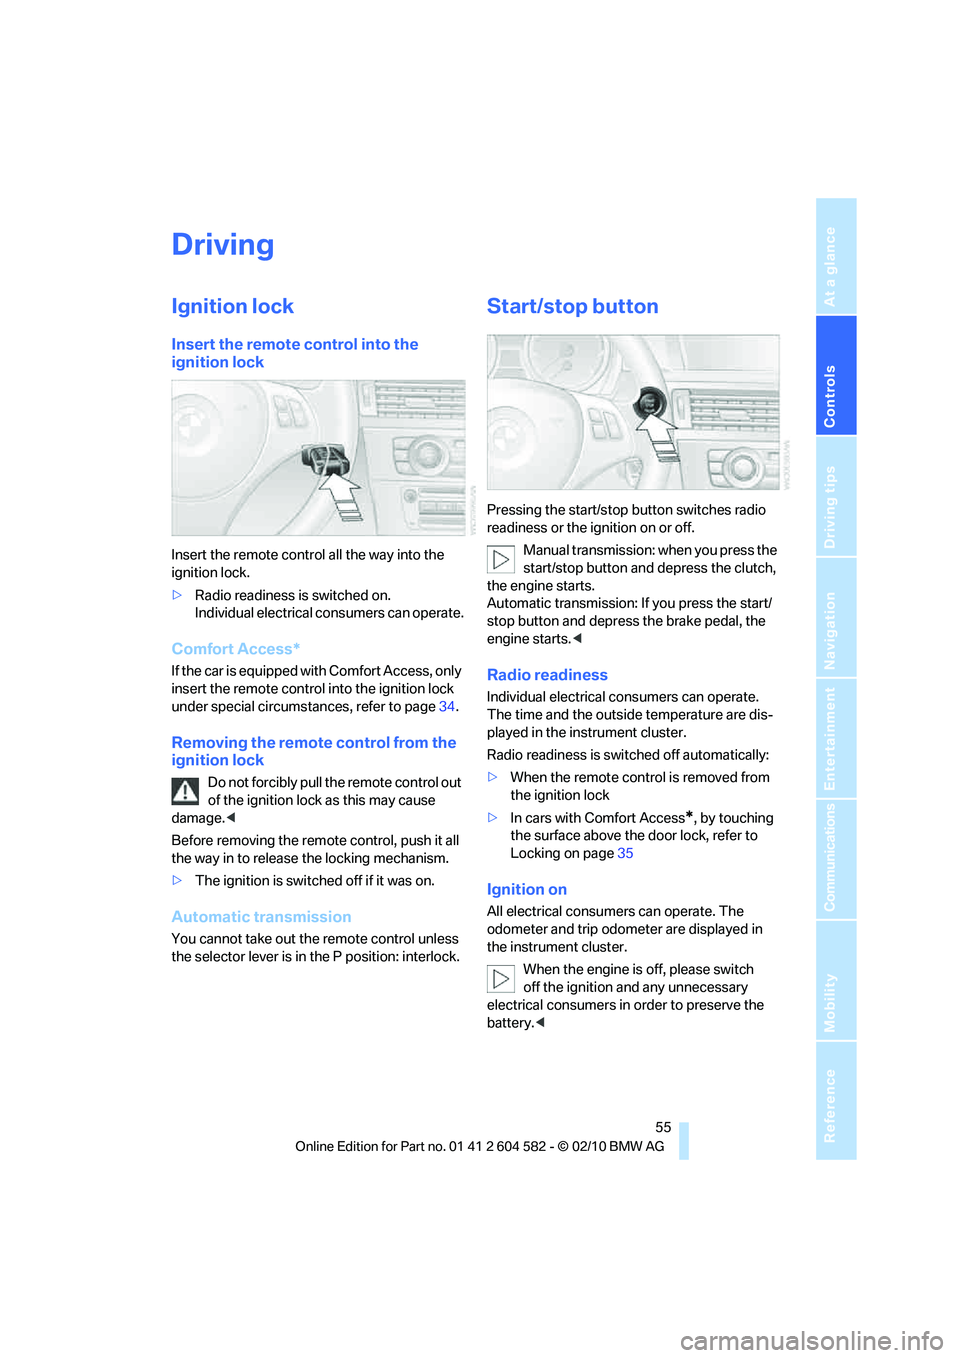
Pressing the start/stop button switches radio
readiness or the ignition on or off.
Manual transmission: when you press the
start/stop button and depress the clutch,
the engine starts.
Automatic transmission: If you press the start/
stop button and depress the brake pedal, the
engine starts.<
Radio readiness
Individual electrical consumers can operate.
The time and the outside temperature are dis-
played in the instrument cluster.
Radio readiness is switched off automatically:
>When the remote control is removed from
the ignition lock
>In cars with Comfort Access
*, by touching
the surface above the door lock, refer to
Locking on page35
Ignition on
All electrical consumers can operate. The
odometer and trip odometer are displayed in
the instrument cluster.
When the engine is off, please switch
off the ignition and any unnecessary
electrical consumers in order to preserve the
battery.<
Page 58 of 286
Driving
56
Radio readiness and ignition off
All indicator and warning lamps as well as dis-
plays in the instrument cluster go out.
Starting the engine
Do not run the engine in enclosed areas;
otherwise, the inhalation of toxic exhaust
gases can cause loss of consciousness and
death. The exhaust gases contain carbon mon-
oxide, an odorless and colorless, but highly
toxic gas. Never leave an unattended vehicle
with the engine running; otherwise, such a vehi-
cle represents a potential safety hazard.
Before leaving the vehicle with the engine run-
ning, always shift into neutral or selector
position P and apply the parking brake force-
fully to prevent the vehicle from rolling.<
Avoid frequent starting in quick succes-
sion as well as repeated start attempts in
which the engine does not start. Otherwise, the
fuel is not burned or incompletely burned and
there is a danger of overheating and damaging
the catalytic converter.<
Do not wait for the engine to warm up while the
vehicle remains stationary. Start driving right
away, but at moderate engine speeds.
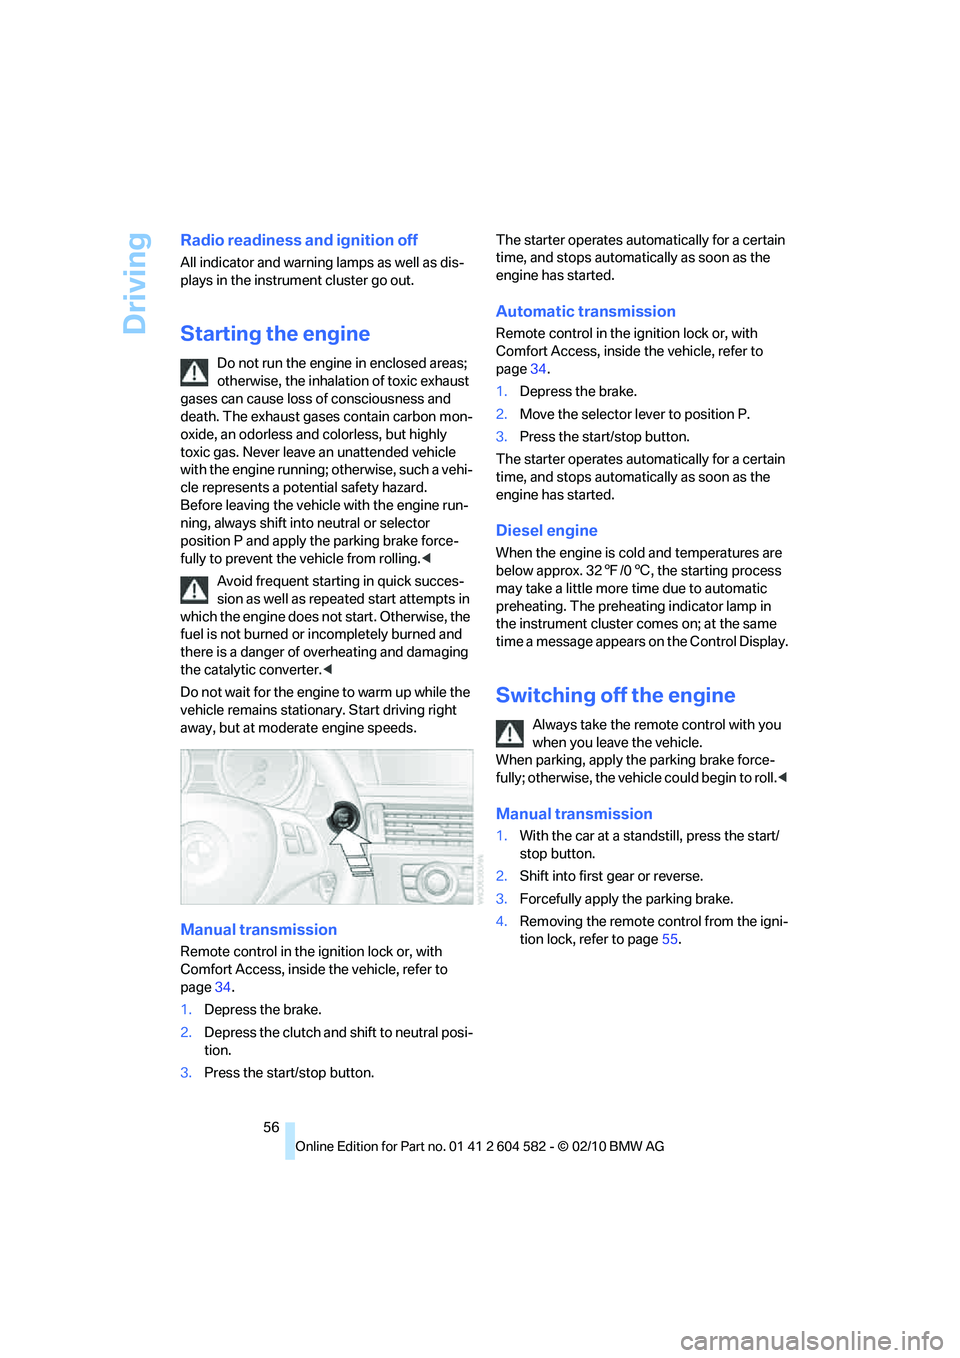
Manual transmission
Remote control in the ignition lock or, with
Comfort Access, inside the vehicle, refer to
page34.
1.Depress the brake.
2.Depress the clutch and shift to neutral posi-
tion.
3.Press the start/stop button.The starter operates automatically for a certain
time, and stops automatically as soon as the
engine has started.
Automatic transmission
Remote control in the ignition lock or, with
Comfort Access, inside the vehicle, refer to
page34.
1.Depress the brake.
2.Move the selector lever to position P.
3.Press the start/stop button.
The starter operates automatically for a certain
time, and stops automatically as soon as the
engine has started.
Diesel engine
When the engine is cold and temperatures are
below approx. 327/06, the starting process
may take a little more time due to automatic
preheating. The preheating indicator lamp in
the instrument cluster comes on; at the same
time a message appears on the Control Display.
Switching off the engine
Always take the remote control with you
when you leave the vehicle.
When parking, apply the parking brake force-
fully; otherwise, the vehicle could begin to roll.<
Manual transmission
1.With the car at a standstill, press the start/
stop button.
2.Shift into first gear or reverse.
3.Forcefully apply the parking brake.
4.Removing the remote control from the igni-
tion lock, refer to page55.
Page 91 of 286
Controls
89Reference
At a glance
Driving tips
Communications
Navigation
Entertainment
Mobility
Indication of a flat tire
The warning lamps come on in yellow
and red. A message appears on the
Control Display. In addition, an
acoustic signal sounds. There is a flat
tire or substantial loss of tire pressure.
What to do in case of a flat tire
Run-flat tires
With a damaged tire, is possible to continue
driving at speeds of up to 50 mph/80 km/h.
Do not continue driving if the vehicle is
not equipped with run-flat tires, refer to
page223; continued driving could result in a
severe accident.<
When continuing to drive with a damaged tire:
1.Avoid sudden braking and steering maneu-
vers.
2.Do not exceed a speed of 50 mph/80 km/h.
3.At the next opportunity, check the air pres-
sure in all four tires.
If all four tires are inflated to the cor-
rect pressures, the Flat Tire Monitor
might not have been initialized. The system
must then be initialized.<
Possible travel distance with complete tire
pressure loss:
>With a light load:
1 to 2 persons without luggage:
Approx. 155 miles/250 km
>With a medium load:
2 persons, cargo area full, or 4 persons
without luggage:
Approx. 94 miles/150 km
>With a full load:
4 or more persons, cargo area full:
Approx. 30 miles/50 km
Drive cautiously and do not exceed a
speed of 50 mph/80 km/h.
When there is a tire pressure loss, the handling
characteristics change, e.g. there will be
reduced directional stability during braking,
braking distances will be longer, and self-steer-
ing response will change.
Reduce your speed and bring the vehicle to a
stop; otherwise, tire components may become
detached, which could result in an accident.
Do not continue driving; instead, contact your
BMW center.<
Tire Pressure Monitor TPM*
The concept
Check the inflation pressure in the four installed
tires. The system notifies you if there is a signif-
icant loss of pressure in one or more tires.
Functional requirement
The system has to have been reset at the cor-
rect inflation pressure; otherwise, a reliable
reporting of a flat tire is not assured.
Always use wheels with TPM electronics to
assure a trouble-free function of the system.
Each time a tire inflation pressure has
been corrected or a wheel or tire has been
changed, reset the system.<
System limitations
It is impossible to provide advance warn-
ing of sudden, severe tire damage caused
by outside influences.<
The system does not function correctly if it has
not been reset. For example, a flat tire may be
indicated even though the tire inflation pres-
sures are correct.
The system is inactive and cannot indicate a flat
tire:
>when a wheel without TPM electronics is
installed.
>when other systems or devices that use the
same radio frequency interfere with TPM.
Page 92 of 286
Technology for driving comfort and safety
90
Status display
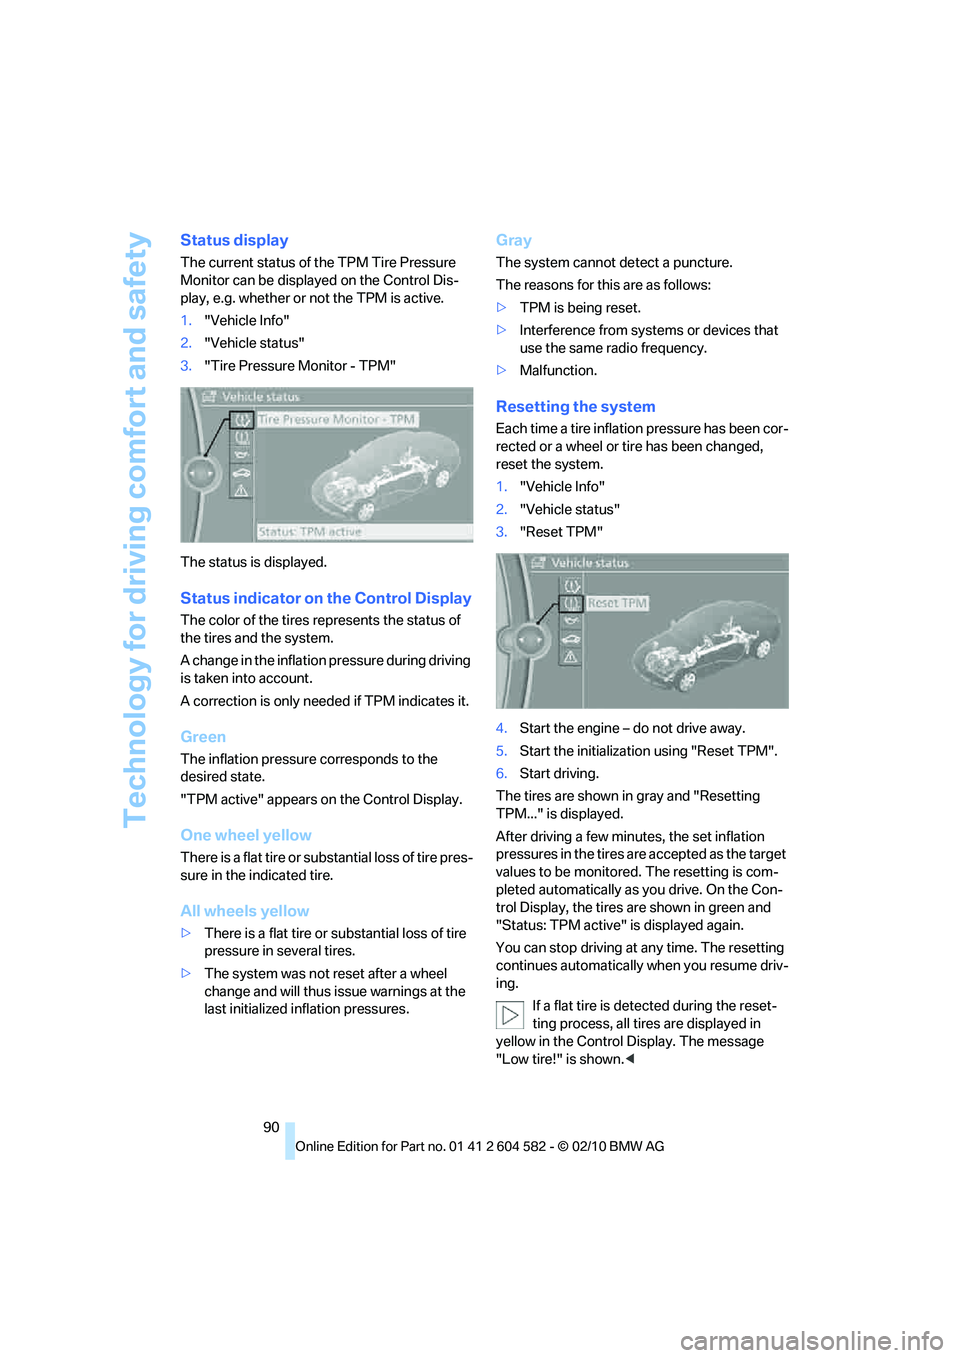
The current status of the TPM Tire Pressure
Monitor can be displayed on the Control Dis-
play, e.g. whether or not the TPM is active.
1."Vehicle Info"
2."Vehicle status"
3."Tire Pressure Monitor - TPM"
The status is displayed.
Status indicator on the Control Display
The color of the tires represents the status of
the tires and the system.
A change in the inflation pressure during driving
is taken into account.
A correction is only needed if TPM indicates it.
Green
The inflation pressure corresponds to the
desired state.
"TPM active" appears on the Control Display.
One wheel yellow
There is a flat tire or substantial loss of tire pres-
sure in the indicated tire.
All wheels yellow
>There is a flat tire or substantial loss of tire
pressure in several tires.
>The system was not reset after a wheel
change and will thus issue warnings at the
last initialized inflation pressures.
Gray
The system cannot detect a puncture.
The reasons for this are as follows:
>TPM is being reset.
>Interference from systems or devices that
use the same radio frequency.
>Malfunction.
Resetting the system
Each time a tire inflation pressure has been cor-
rected or a wheel or tire has been changed,
reset the system.
1."Vehicle Info"
2."Vehicle status"
3."Reset TPM"
4.Start the engine – do not drive away.
5.Start the initialization using "Reset TPM".
6.Start driving.
The tires are shown in gray and "Resetting
TPM..." is displayed.
After driving a few minutes, the set inflation
pressures in the tires are accepted as the target
values to be monitored. The resetting is com-
pleted automatically as you drive. On the Con-
trol Display, the tires are shown in green and
"Status: TPM active" is displayed again.
You can stop driving at any time. The resetting
continues automatically when you resume driv-
ing.
If a flat tire is detected during the reset-
ting process, all tires are displayed in
yellow in the Control Display. The message
"Low tire!" is shown.<
Page 93 of 286
Controls
91Reference
At a glance
Driving tips
Communications
Navigation
Entertainment
Mobility
Message for low tire inflation pressure
The warning lamps come on in yellow
and red. A message appears on the
Control Display. In addition, a signal
sounds.
>There is a flat tire or substantial loss of tire
pressure.
>The system was not reset after a wheel
change and will thus issue warnings at the
last initialized inflation pressures.
Cautiously reduce speed to below 50 mph/
80 km/h. Avoid sudden braking and steering
maneuvers. Do not exceed a speed of 50 mph/
80 km/h.
Do not continue driving if the vehicle is
not equipped with run-flat tires, refer to
page223; continued driving could result in a
severe accident.<
Continuing to drive with a flat tire
Possible travel distance with complete tire
pressure loss:
>With a light load:
1 to 2 persons without luggage:
Approx. 155 miles/250 km
>With a medium load:
2 persons, cargo area full, or 4 persons
without luggage:
Approx. 95 miles/150 km
>With a full load:
4 or more persons, cargo area full:
Approx. 30 miles/50 km
Drive cautiously and do not exceed a
speed of 50 mph/80 km/h.
When there is a tire pressure loss, the handling
characteristics change, e.g. there will be
reduced directional stability during braking,
braking distances will be longer, and self-steer-
ing response will change.<
Vibrations or loud noises during driving
may indicate the final failure of the tire.
Reduce your speed and bring the vehicle to a
stop; otherwise, tire components may become
detached, which could result in an accident. Do
not continue driving; instead, contact your
BMW center.<
Message for unsuccessful
system reset
Yellow warning lamp comes on.
A message appears on the
Control Display.
The system is not reset, e.g. after a wheel
change.
Check the tire inflation pressure and reset the
system, refer to page90.
Malfunction
The small warning lamp flashes in
yellow and then lights up continu-
ously; the large warning lamp comes
on in yellow. The tires appear in gray
in the Control Display. No punctures can be
detected.
Display in the following situations:
>Malfunction
Have the system checked.
>A wheel without TPM electronics has been
installed:
Have it checked by your BMW center.
>Interference from systems or devices that
use the same radio frequency:
The system automatically becomes active
again when the vehicle moves out of the
interference zone.
Declaration according to NHTSA/
FMVSS 138
Tire Pressure Monitoring Systems
Each tire should be checked monthly when cold
and inflated to the inflation pressure recom-
mended by the vehicle manufacturer on the
vehicle placard or tire inflation pressure label. If
your vehicle has tires of a different size than the
size indicated on the vehicle placard or tire infla-
tion pressure label, you should determine the
proper tire inflation pressure for those tires. As
an added safety feature, your vehicle has been
equipped with a tire pressure monitoring sys-
tem, TPMS, that illuminates a low tire pressure
telltale when one or more of your tires are signif-
icantly underinflated. Accordingly, when the
low tire pressure telltale illuminates, you should
Page 98 of 286
Technology for driving comfort and safety
96
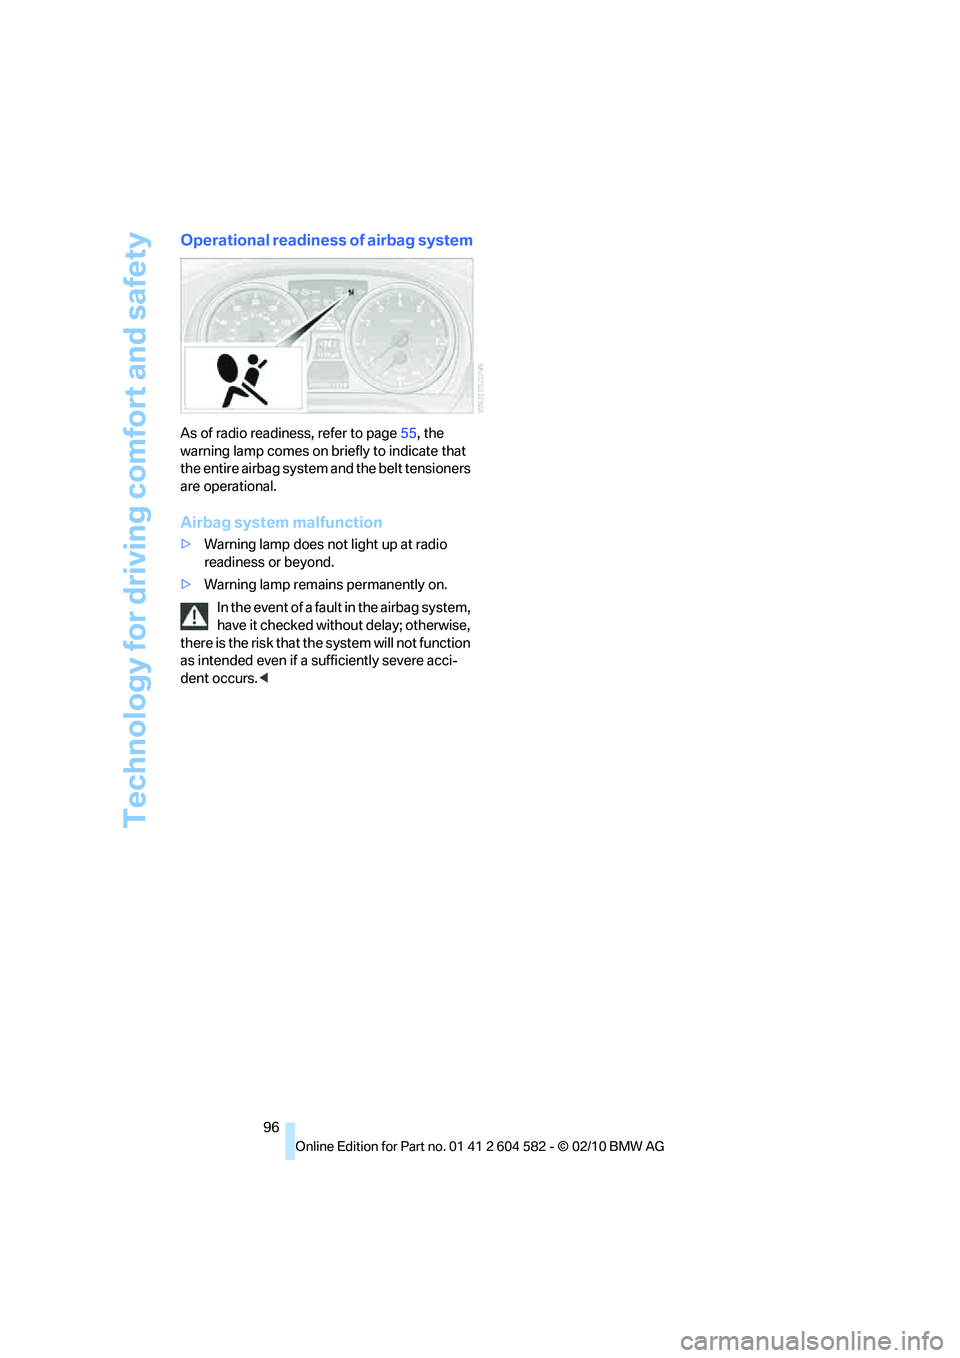
Operational readiness of airbag system
As of radio readiness, refer to page55, the
warning lamp comes on briefly to indicate that
the entire airbag system and the belt tensioners
are operational.
Airbag system malfunction
>Warning lamp does not light up at radio
readiness or beyond.
>Warning lamp remains permanently on.
In the event of a fault in the airbag system,
have it checked without delay; otherwise,
there is the risk that the system will not function
as intended even if a sufficiently severe acci-
dent occurs.<
Page 108 of 286
Climate
106
Parked car ventilation
The concept
The parked car ventilation provides ventilation
to the passenger compartment and lowers its
temperature, if necessary. It is ready for use at
any outside temperature, as of radio readiness.
The parked car ventilation remains switched on
for approx. 30 minutes. Two different switch-on
times can be preselected. The system can also
be switched on and off directly.
Due to its high power consumption, it should
not be switched on twice in a row without driv-
ing in between to allow the battery to recharge.
The air emerges from the air vents for the upper
body area in the instrument panel. The air vents
must therefore be open.
The parked car ventilation system is operated
via iDrive.
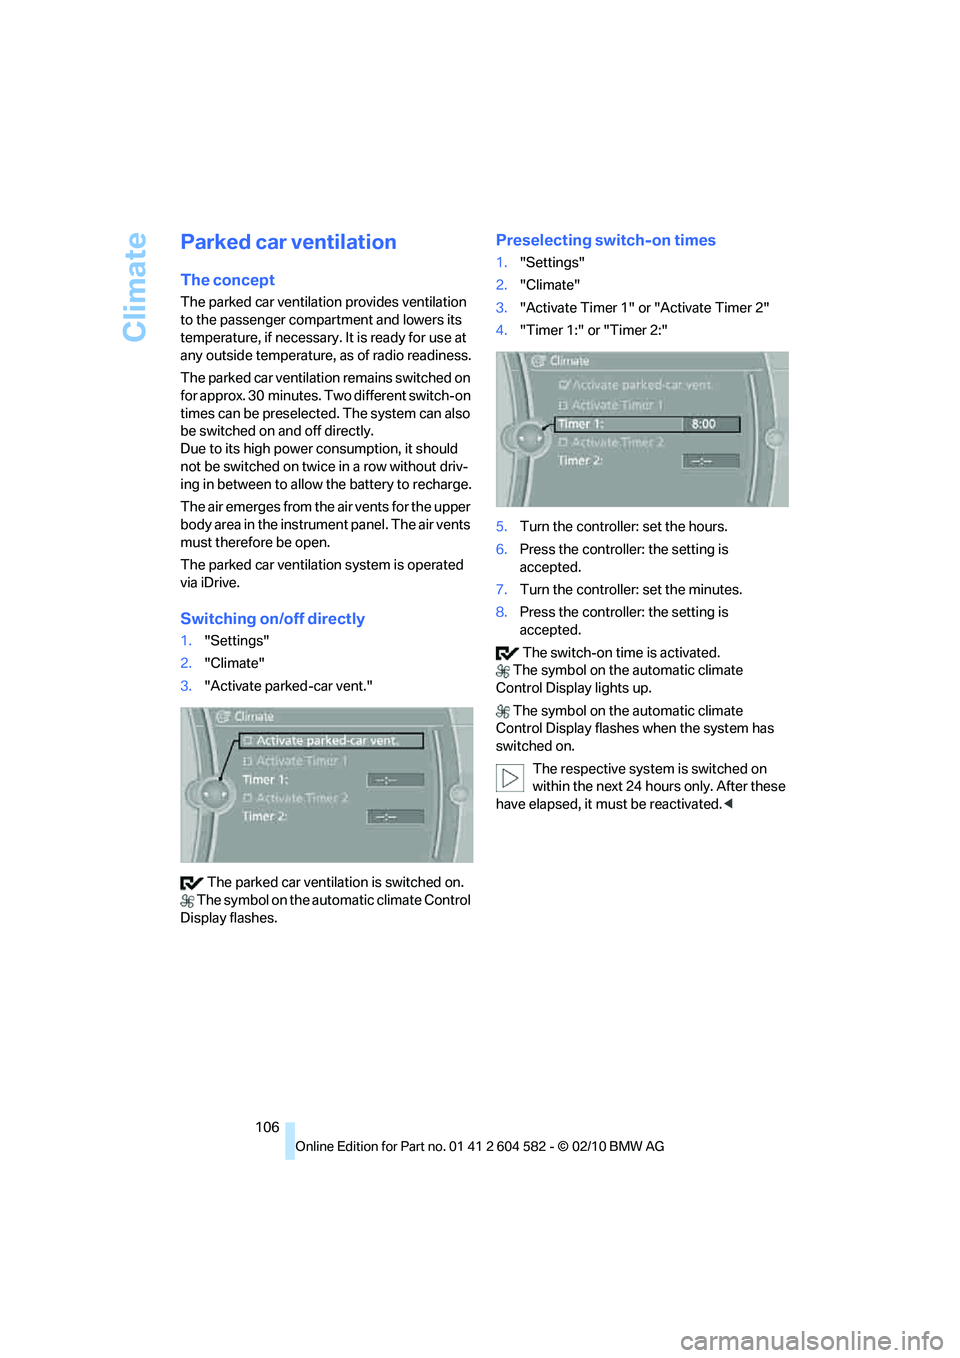
Switching on/off directly
1."Settings"
2."Climate"
3."Activate parked-car vent."
The parked car ventilation is switched on.
The symbol on the automatic climate Control
Display flashes.
Preselecting switch-on times
1."Settings"
2."Climate"
3."Activate Timer 1" or "Activate Timer 2"
4."Timer 1:" or "Timer 2:"
5.Turn the controller: set the hours.
6.Press the controller: the setting is
accepted.
7.Turn the controller: set the minutes.
8.Press the controller: the setting is
accepted.
The switch-on time is activated.
The symbol on the automatic climate
Control Display lights up.
The symbol on the automatic climate
Control Display flashes when the system has
switched on.
The respective system is switched on
within the next 24 hours only. After these
have elapsed, it must be reactivated.<