park assist BMW 328I XDRIVE 2014 User Guide
[x] Cancel search | Manufacturer: BMW, Model Year: 2014, Model line: 328I XDRIVE, Model: BMW 328I XDRIVE 2014Pages: 242, PDF Size: 7.25 MB
Page 136 of 242
track line is continuously adjusted for the
steering wheel movement.
"Parking aid lines"
Turning circle and pathway lines are displayed.
System limits
Top View cannot be used in the following sit‐
uations:
▷With a door open.▷With the trunk lid open.▷With an exterior mirror folded in.▷In poor light.
A Check Control message is displayed in some
of these situations.
Parking assistant The concept
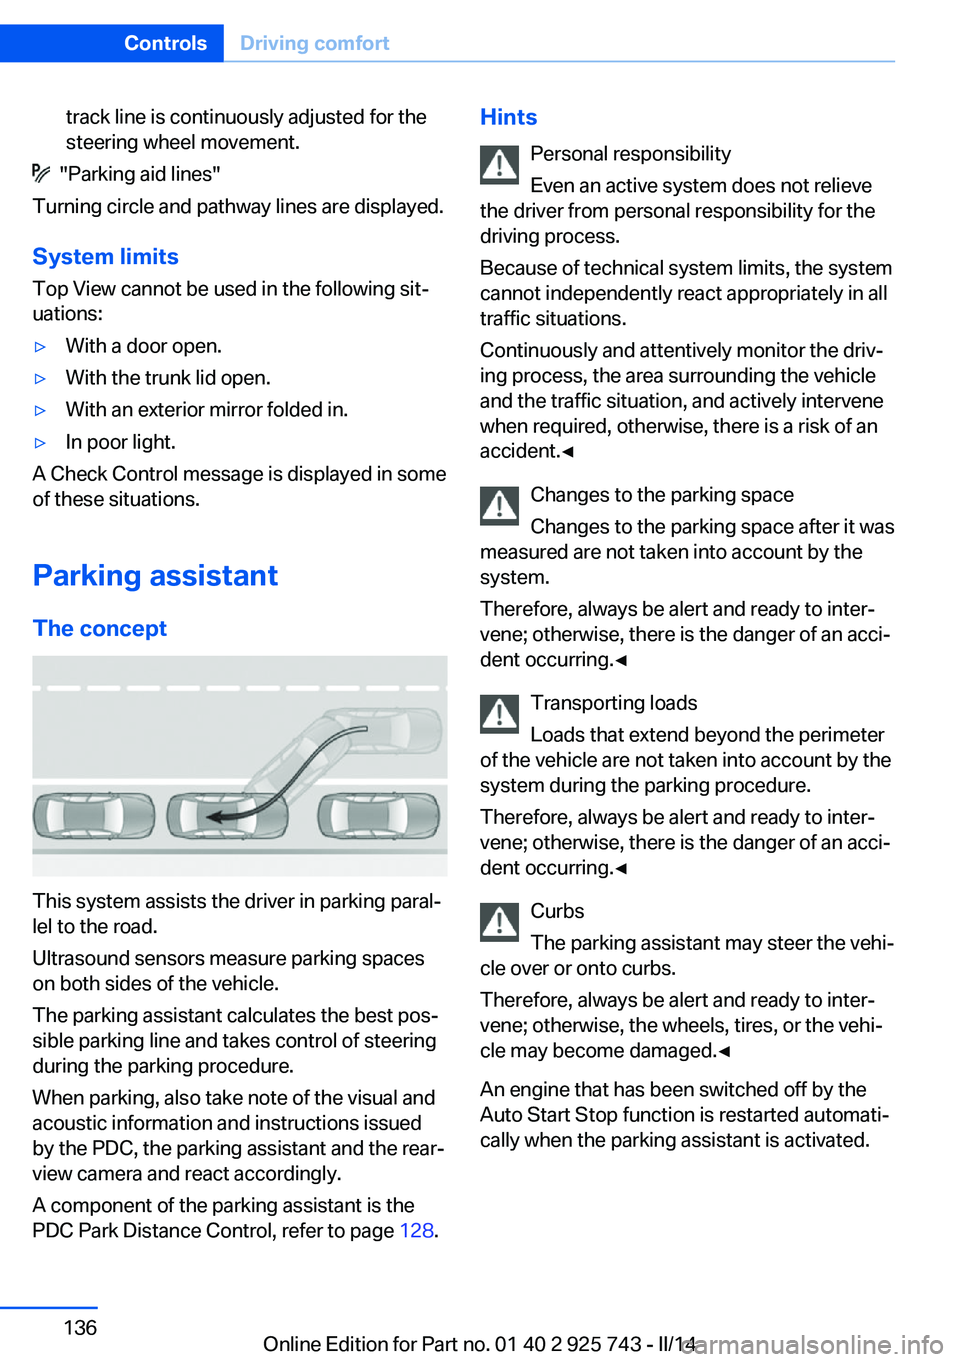
This system assists the driver in parking paral‐
lel to the road.
Ultrasound sensors measure parking spaces
on both sides of the vehicle.
The parking assistant calculates the best pos‐
sible parking line and takes control of steering
during the parking procedure.
When parking, also take note of the visual and
acoustic information and instructions issued
by the PDC, the parking assistant and the rear‐
view camera and react accordingly.
A component of the parking assistant is the
PDC Park Distance Control, refer to page 128.
Hints
Personal responsibility
Even an active system does not relieve
the driver from personal responsibility for the
driving process.
Because of technical system limits, the system
cannot independently react appropriately in all
traffic situations.
Continuously and attentively monitor the driv‐
ing process, the area surrounding the vehicle
and the traffic situation, and actively intervene
when required, otherwise, there is a risk of an
accident.◀
Changes to the parking space
Changes to the parking space after it was
measured are not taken into account by the system.
Therefore, always be alert and ready to inter‐
vene; otherwise, there is the danger of an acci‐
dent occurring.◀
Transporting loads
Loads that extend beyond the perimeter
of the vehicle are not taken into account by the
system during the parking procedure.
Therefore, always be alert and ready to inter‐
vene; otherwise, there is the danger of an acci‐
dent occurring.◀
Curbs
The parking assistant may steer the vehi‐
cle over or onto curbs.
Therefore, always be alert and ready to inter‐
vene; otherwise, the wheels, tires, or the vehi‐
cle may become damaged.◀
An engine that has been switched off by the
Auto Start Stop function is restarted automati‐
cally when the parking assistant is activated.Seite 136ControlsDriving comfort136
Online Edition for Part no. 01 40 2 925 743 - II/14
Page 137 of 242
Requirements
For measuring parking spaces▷Maximum speed while driving forward ap‐
prox. 22 mph/35 km/h.▷Maximum distance to row of parked vehi‐
cles: 5 ft/1.5 m.
Suitable parking space
▷Gap between two objects with a minimum
length of approx. 5 ft/1.5 m.▷Min. length of gap between two objects:
your vehicle's length plus approx.
4 ft/1.2 m.▷Minimum depth: approx. 5 ft/1.5 m.
For parking procedure
▷Doors and trunk lid closed.▷Parking brake released.▷When parking in parking spaces on the
driver's side, the corresponding turn signal
must be set where applicable.
At a glance
Button in the vehicle
Parking assistant
Ultrasound sensors
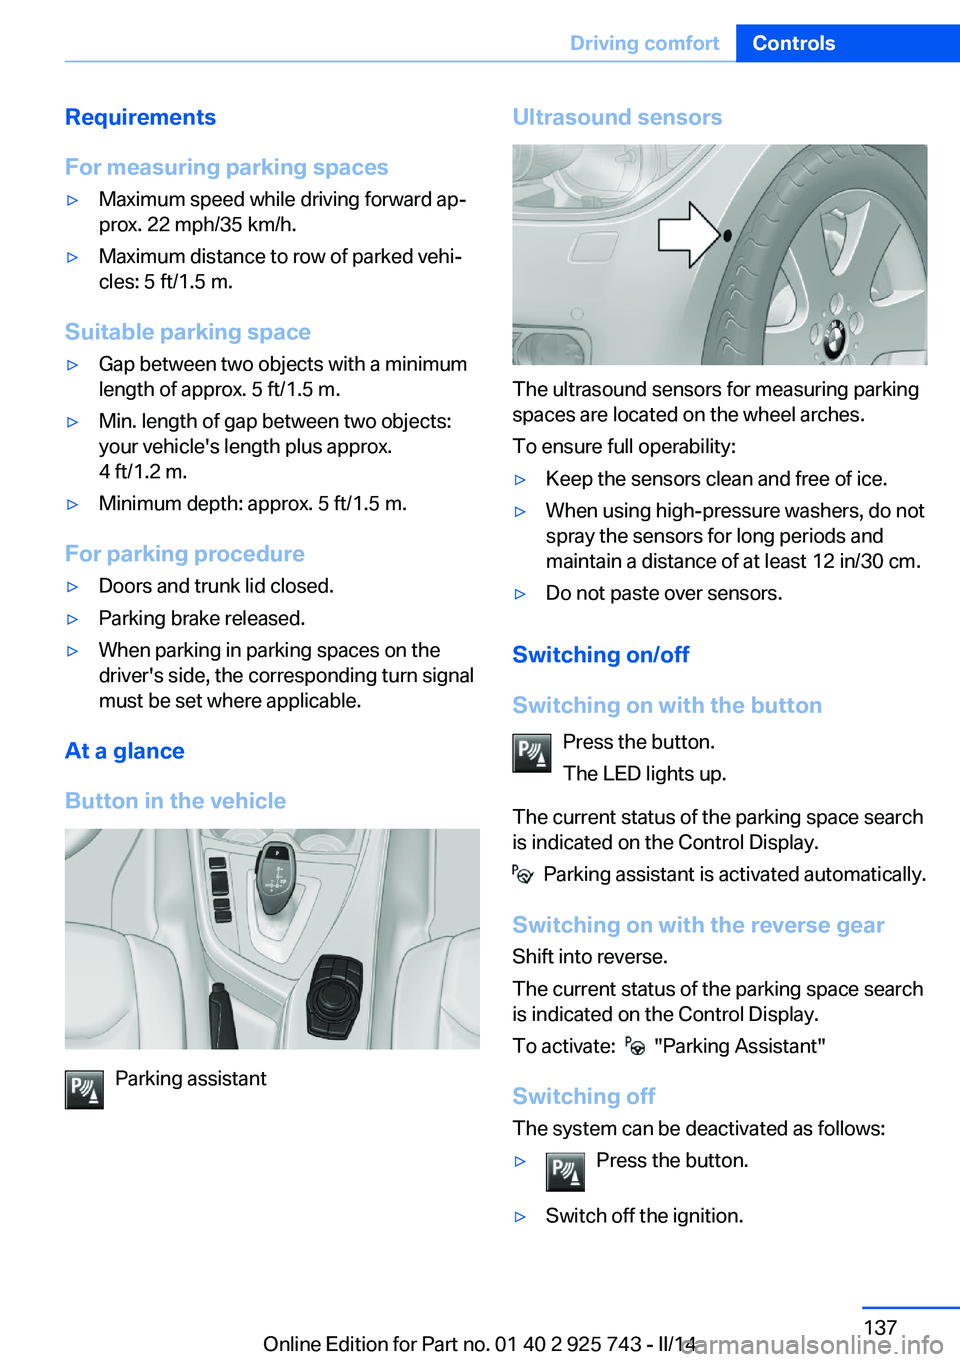
The ultrasound sensors for measuring parking
spaces are located on the wheel arches.
To ensure full operability:
▷Keep the sensors clean and free of ice.▷When using high-pressure washers, do not
spray the sensors for long periods and
maintain a distance of at least 12 in/30 cm.▷Do not paste over sensors.
Switching on/off
Switching on with the button Press the button.
The LED lights up.
The current status of the parking space search
is indicated on the Control Display.
Parking assistant is activated automatically.
Switching on with the reverse gear
Shift into reverse.
The current status of the parking space search
is indicated on the Control Display.
To activate:
"Parking Assistant"
Switching off The system can be deactivated as follows:
▷Press the button.▷Switch off the ignition.Seite 137Driving comfortControls137
Online Edition for Part no. 01 40 2 925 743 - II/14
Page 138 of 242
Display on the Control Display
System activated/deactivatedSymbolMeaning Gray: the system is not available.
White: the system is available but
not activated. The system is activated.
Status display
Depending on the appointment version, differ‐
ent views of the status display are shown and
are described below as View 1, refer to
page 138, or View 2, refer to page 138.
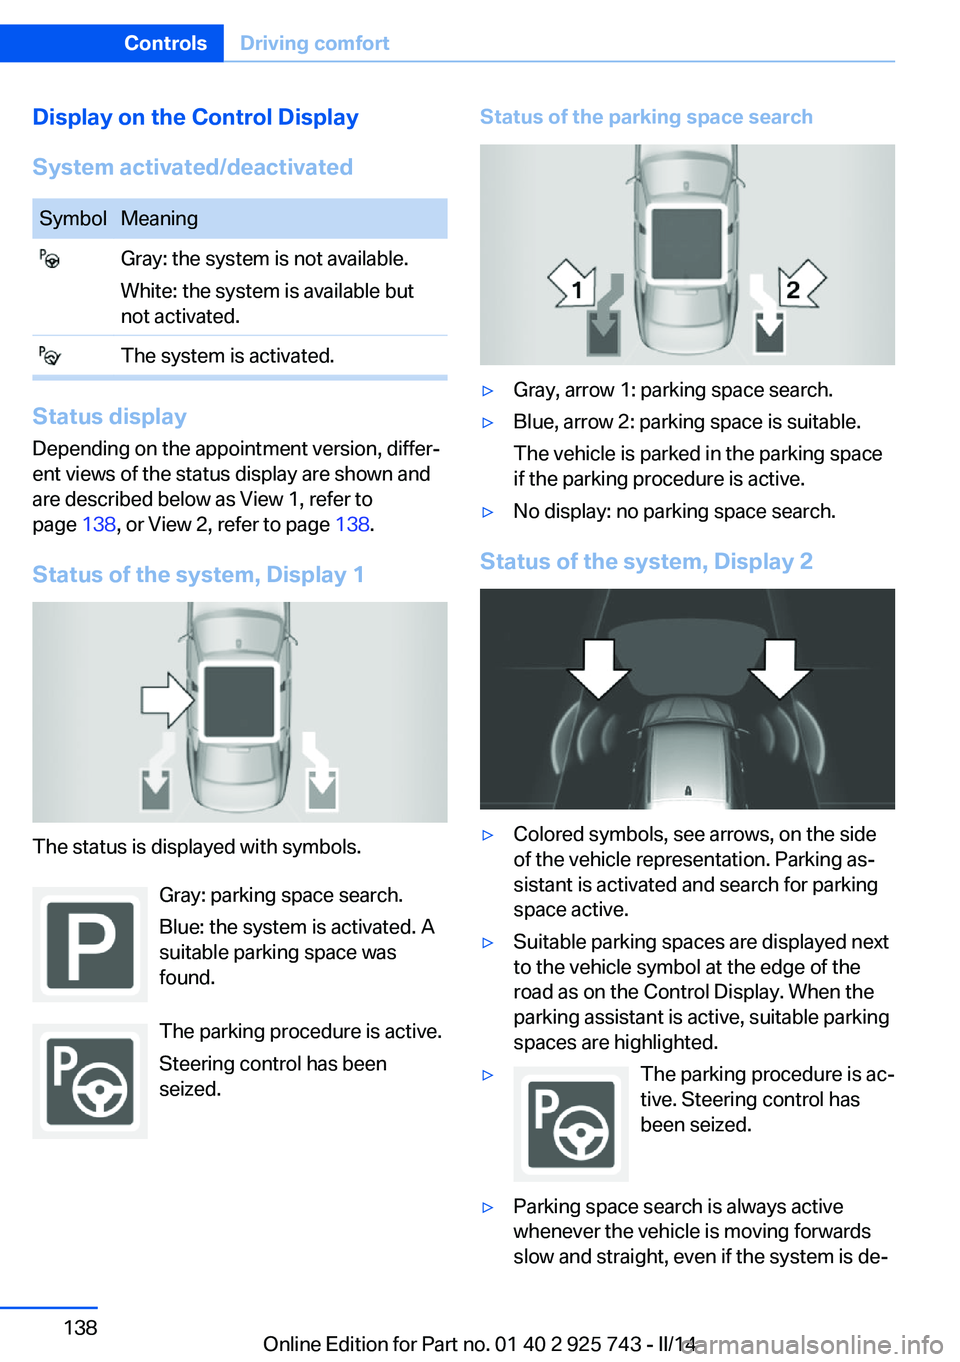
Status of the system, Display 1
The status is displayed with symbols. Gray: parking space search.
Blue: the system is activated. A
suitable parking space was
found.
The parking procedure is active. Steering control has been
seized.
Status of the parking space search▷Gray, arrow 1: parking space search.▷Blue, arrow 2: parking space is suitable.
The vehicle is parked in the parking space
if the parking procedure is active.▷No display: no parking space search.
Status of the system, Display 2
▷Colored symbols, see arrows, on the side
of the vehicle representation. Parking as‐
sistant is activated and search for parking
space active.▷Suitable parking spaces are displayed next
to the vehicle symbol at the edge of the
road as on the Control Display. When the
parking assistant is active, suitable parking
spaces are highlighted.▷The parking procedure is ac‐
tive. Steering control has
been seized.▷Parking space search is always active
whenever the vehicle is moving forwards
slow and straight, even if the system is de‐Seite 138ControlsDriving comfort138
Online Edition for Part no. 01 40 2 925 743 - II/14
Page 139 of 242
activated. When the system is deactivated,
the displays on the Control Display are
shown in gray.
Parking using the parking assistant
Check the traffic situation as well
Loud sounds outside and within the vehi‐
cle can drown out the signal tones of the park‐
ing assistant and PDC.
Check the traffic situation around the vehicle
with your own eyes; otherwise, there is the
danger of an accident.◀
1.Switch on the parking assistant and acti‐
vate it if necessary.
The status of the parking space search is
indicated on the Control Display.2.Follow the instructions on the Control Dis‐
play.
To achieve the best possible parking posi‐
tion, wait for the automatic steering wheel
movement after the gear change when the
vehicle is stationary.
The end of the parking procedure is indi‐
cated on the Control Display.3.Adjust the parking position yourself if nec‐
essary.
Interrupting manually
The parking assistant can be interrupted at any
time:
▷ "Parking Assistant"▷Press the button.
Interrupting automatically
The system is interrupted automatically in the
following situations:
▷If the driver grasps the steering wheel or if
he takes over steering.▷If a gear is selected that does not match
the instruction on the Control Display.▷If the vehicle speed exceeds approx.
6 mph/10 km/h.▷On snow-covered or slippery road surfaces
if necessary.▷If the Park Distance Control PDC displays
clearances that are too small.▷If a maximum number of parking attempts
or the time taken for parking is exceeded.▷When switching to another function on the
Control Display.
A Check Control message is displayed.
Resume An interrupted parking procedure can be con‐
tinued if necessary.
Follow the instructions on the Control Display
to do this.
System limits
No parking assistance
The parking assistant does not offer assis‐
tance in the following situations:
▷In tight curves.
Functional limitations
The system may not be fully functional in the
following situations:
▷On bumpy road surfaces such as gravel
roads.▷On slippery ground.▷When leaves or snow has collected in the
parking space.
Limits of ultrasonic measurement
The detection of objects can reach the physi‐
cal limits of ultrasonic measurement, e.g., in
the following circumstances:
▷For small children and animals.▷For persons with certain clothing, e.g.
coats.Seite 139Driving comfortControls139
Online Edition for Part no. 01 40 2 925 743 - II/14
Page 140 of 242
▷If there is an external disturbance of the ul‐
trasound, e.g. from passing vehicles or
loud machines.▷When sensors are dirty, iced over, dam‐
aged or out of position.▷Under certain weather conditions, such as
high relative humidity, rain, snowfall ex‐
treme heat or strong wind.▷With tow bars and trailer hitches of other
vehicles.▷With thin or wedge-shaped objects.▷With moving objects.▷With elevated, protruding objects such as
ledges or cargo.▷With objects with corners and sharp edges.▷With objects with a fine surface structure,
such as fences.▷For objects with porous surfaces.
Low objects already displayed, e.g., curbs, can
move into the blind area of the sensors before
or after a continuous tone sounds.
The parking assistant may identify parking
spaces that are not suitable for parking.
Malfunction
A Check Control message is displayed.
The parking assistant failed. Have the system
checked.
Seite 140ControlsDriving comfort140
Online Edition for Part no. 01 40 2 925 743 - II/14
Page 164 of 242
Objects within the range of movement
of the pedals
No objects in the area around the pedals
Keep floor mats, carpets, and any other
objects out of the area of motion of the pedals;
otherwise, the function of the pedals could be
impeded while driving and create the risk of an
accident.
Do not place additional floor mats over existing
mats or other objects.
Only use floor mats that have been approved
for the vehicle and can be properly fixed in
place.
Ensure that the floor mats are securely fas‐
tened again after they were removed for clean‐
ing, for example.◀
Driving in wet conditions When roads are wet coated with road salt or
there is heavy rain, briefly exert gentle pres‐
sure on the brake pedal every few miles.
Ensure that this action does not endanger
other road users.
The heat generated in this process helps dry
the brake discs and pads.
In this way braking efficiency will be available
when you need it.
Hills
Drive long or steep downhill gradients in the
gear in which the least braking is required.
Otherwise, the brake system may overheat, re‐
sulting in a reduction in the brake system effi‐
ciency.
You can increase the engine's braking effect
by shifting down, going all the way to first gear,
if necessary.
Avoid load on the brakes
Avoid placing excessive load on the
brake system. Light but consistent brake pres‐
sure can lead to high temperatures, brake wear
and possibly even brake failure.◀Do not drive in neutral
Do not drive in neutral or with the engine
stopped, as doing so disables engine braking.
In addition, steering and brake assist are un‐
available with the engine stopped.◀
Brake disc corrosion The corrosion on the brake discs and the con‐
tamination on the brake pads are furthered by:▷Low mileage.▷Extended periods when the vehicle is not
used at all.▷Infrequent use of the brakes.
Corrosion occurs when the minimum pressure
that must be exerted by the pads during brake
applications to clean the discs is not reached.
Should corrosion form on the brake discs, the
brakes will tend to respond with a pulsating ef‐
fect that generally cannot be corrected.
Condensation under the parked
vehicle
When using the automatic climate control,
condensation water develops that exits under‐
neath the vehicle.
Traces of water under the vehicle like this are
normal.
Seite 164Driving tipsThings to remember when driving164
Online Edition for Part no. 01 40 2 925 743 - II/14
Page 217 of 242
Do not touch live parts
To avoid the risk of potentially fatal in‐
jury, always avoid all contact with electrical
components while the engine is running.◀
Preparation1.Check whether the battery of the other ve‐
hicle has a voltage of 12 volts. This infor‐
mation can be found on the battery.2.Switch off the engine of the assisting vehi‐
cle.3.Switch off any electronic systems/power
consumers in both vehicles.
Bodywork contact between vehicles
Make sure that there is no contact be‐
tween the bodywork of the two vehicles; other‐
wise, there is the danger of short circuits.◀
Starting aid terminals Connecting order
Connect the jumper cables in the correct
order; otherwise, there is the danger of injury
from sparking.◀
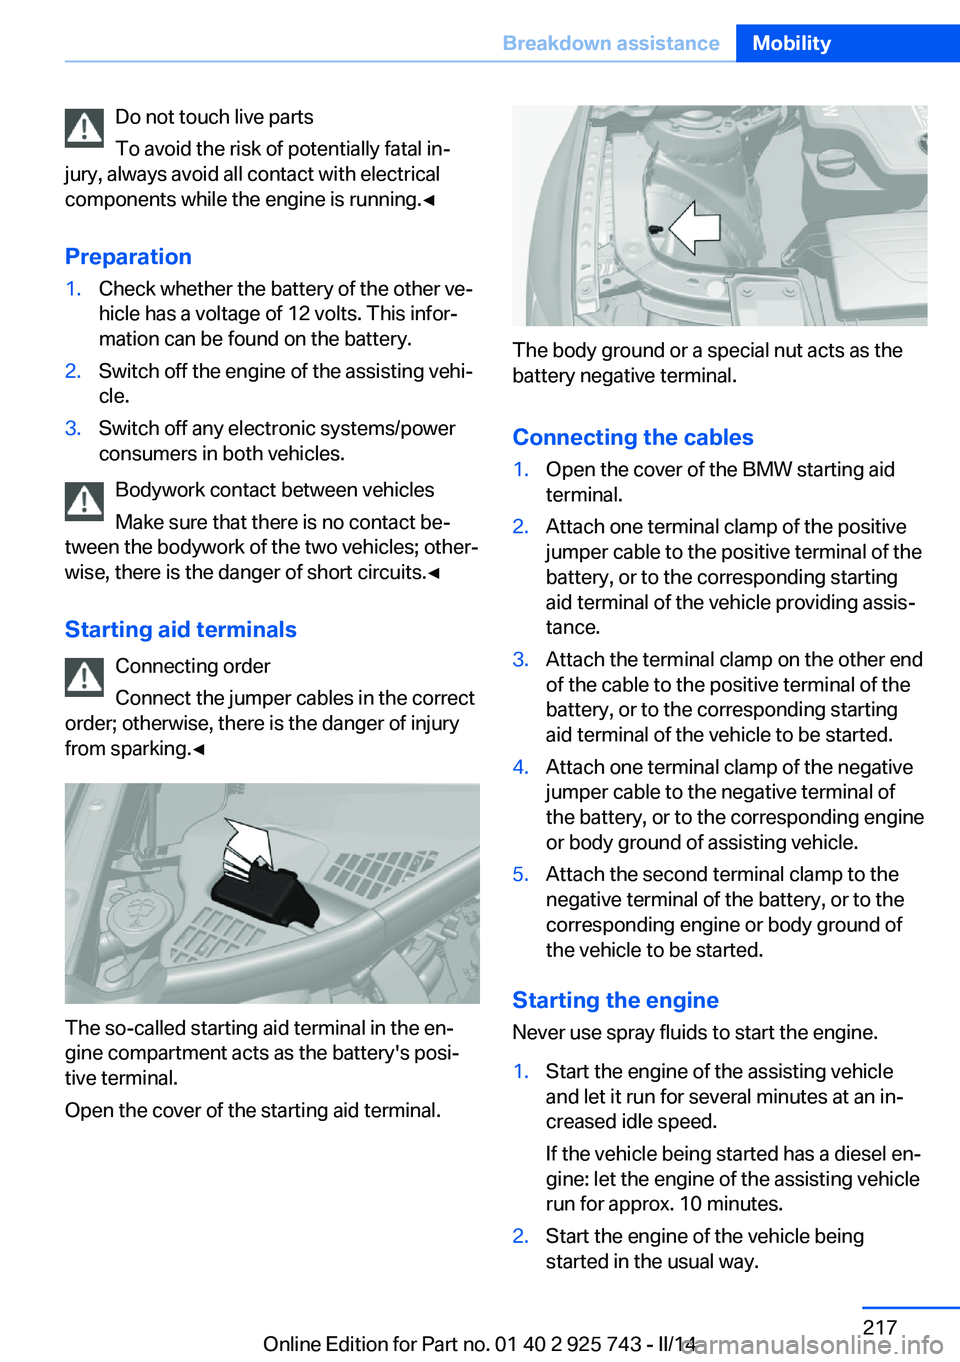
The so-called starting aid terminal in the en‐
gine compartment acts as the battery's posi‐
tive terminal.
Open the cover of the starting aid terminal.
The body ground or a special nut acts as the
battery negative terminal.
Connecting the cables
1.Open the cover of the BMW starting aid
terminal.2.Attach one terminal clamp of the positive
jumper cable to the positive terminal of the
battery, or to the corresponding starting
aid terminal of the vehicle providing assis‐
tance.3.Attach the terminal clamp on the other end
of the cable to the positive terminal of the
battery, or to the corresponding starting
aid terminal of the vehicle to be started.4.Attach one terminal clamp of the negative
jumper cable to the negative terminal of
the battery, or to the corresponding engine
or body ground of assisting vehicle.5.Attach the second terminal clamp to the
negative terminal of the battery, or to the
corresponding engine or body ground of
the vehicle to be started.
Starting the engine
Never use spray fluids to start the engine.
1.Start the engine of the assisting vehicle
and let it run for several minutes at an in‐
creased idle speed.
If the vehicle being started has a diesel en‐
gine: let the engine of the assisting vehicle
run for approx. 10 minutes.2.Start the engine of the vehicle being
started in the usual way.Seite 217Breakdown assistanceMobility217
Online Edition for Part no. 01 40 2 925 743 - II/14
Page 235 of 242
Engine oil types, alterna‐tive 200
Engine oil types, ap‐ proved 200
Engine start during malfunc‐ tion 33
Engine start, jump-start‐ ing 216
Engine start, refer to Starting the engine 62
Engine stop 62
Engine temperature 78
Entering a car wash 221
Equipment, interior 148
ESP Electronic Stability Pro‐ gram, refer to DSC 114
Exchanging wheels/tires 193
Exhaust system 163
Exterior mirror, automatic dimming feature 55
Exterior mirrors 54
External start 216
External temperature dis‐ play 79
External temperature warn‐ ing 79
Eyes for securing cargo 166
F
Failure message, refer to Check Control 76
False alarm, refer to Uninten‐ tional alarm 43
Fan, refer to Air flow 142, 146
Fault displays, refer to Check Control 76
Filler neck for engine oil 199
Fine wood, care 223
First aid kit 216
Fitting for towing, refer to Tow fitting 219
Flat tire, changing wheels 212
Flat Tire Monitor FTM 100 Flat tire, Tire Pressure Moni‐
tor TPM 97
Flat tire, warning lamp 98, 101
Flooding 163
Floor carpet, care 224
Floor mats, care 224
Fogged up windows 142
Fold down the rear seat back‐ rest, see Though-loading
system 154
Fold-out position, windshield wipers 68
Foot brake 163
Front airbags 94
Front fog lamps 92
Front fog lamps, bulb replace‐ ment 209
Front lamps 205
Front passenger airbags, au‐ tomatic deactivation 96
Front passenger airbags, indi‐ cator lamp 96
FTM Flat Tire Monitor 100
Fuel 180
Fuel cap 178
Fuel consumption, current 80
Fuel consumption, refer to Average fuel consump‐
tion 84
Fuel filler flap 178
Fuel gauge 78
Fuel quality 180
Fuel recommendation 180
Fuel, tank capacity 231
Fuse 213
G
Garage door opener, refer to Universal garage door
opener 148
Gasoline 180
Gear change, automatic transmission 70
Gear shift indicator 81 General driving notes 162
Glass sunroof, powered 45
Glove compartment 156
Gross vehicle weight, ap‐ proved 228
H
Handbrake, refer to parking brake 65
Hand-held transmitter, alter‐ nating code 149
Hazard warning flashers 215
Head airbags 94
Headlamp control, auto‐ matic 90
Headlamp courtesy delay fea‐ ture 89
Headlamp flasher 66
Headlamp glass 205
Headlamps 205
Headlamps, care 222
Headlamp washer system 66
Headliner 15
Head restraints 47
Head restraints, front 51
Head restraints, rear 52
Head-up Display 87
Head-up Display, care 224
Heavy cargo, stowing 166
Height, vehicle 228
High-beam Assistant 91
High beams 66
High beams/low beams, refer to High-beam Assistant 91
Hills 164
Hill start assistant, refer to Drive-off assistant 118
Hints 6
Holder for beverages 158
Homepage 6
Hood 197
Horn 12
Hotel function, trunk lid 38
Hot exhaust system 163
HUD Head-up Display 87 Seite 235Everything from A to ZReference235
Online Edition for Part no. 01 40 2 925 743 - II/14
Page 237 of 242
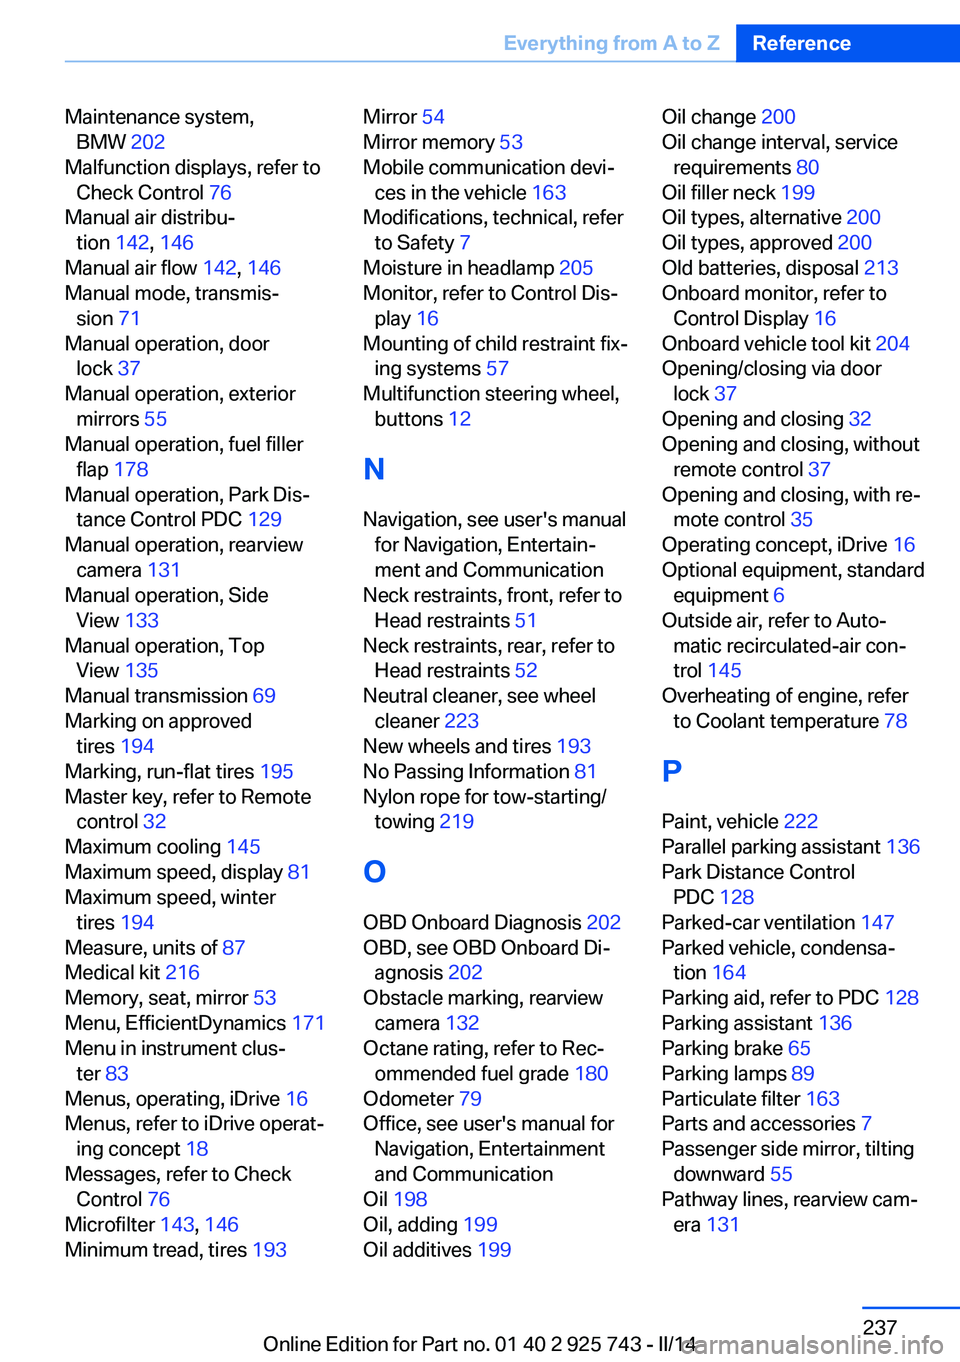
Maintenance system,BMW 202
Malfunction displays, refer to Check Control 76
Manual air distribu‐ tion 142, 146
Manual air flow 142, 146
Manual mode, transmis‐ sion 71
Manual operation, door lock 37
Manual operation, exterior mirrors 55
Manual operation, fuel filler flap 178
Manual operation, Park Dis‐ tance Control PDC 129
Manual operation, rearview camera 131
Manual operation, Side View 133
Manual operation, Top View 135
Manual transmission 69
Marking on approved tires 194
Marking, run-flat tires 195
Master key, refer to Remote control 32
Maximum cooling 145
Maximum speed, display 81
Maximum speed, winter tires 194
Measure, units of 87
Medical kit 216
Memory, seat, mirror 53
Menu, EfficientDynamics 171
Menu in instrument clus‐ ter 83
Menus, operating, iDrive 16
Menus, refer to iDrive operat‐ ing concept 18
Messages, refer to Check Control 76
Microfilter 143, 146
Minimum tread, tires 193 Mirror 54
Mirror memory 53
Mobile communication devi‐ ces in the vehicle 163
Modifications, technical, refer to Safety 7
Moisture in headlamp 205
Monitor, refer to Control Dis‐ play 16
Mounting of child restraint fix‐ ing systems 57
Multifunction steering wheel, buttons 12
N Navigation, see user's manual for Navigation, Entertain‐
ment and Communication
Neck restraints, front, refer to Head restraints 51
Neck restraints, rear, refer to Head restraints 52
Neutral cleaner, see wheel cleaner 223
New wheels and tires 193
No Passing Information 81
Nylon rope for tow-starting/ towing 219
O OBD Onboard Diagnosis 202
OBD, see OBD Onboard Di‐ agnosis 202
Obstacle marking, rearview camera 132
Octane rating, refer to Rec‐ ommended fuel grade 180
Odometer 79
Office, see user's manual for Navigation, Entertainment
and Communication
Oil 198
Oil, adding 199
Oil additives 199 Oil change 200
Oil change interval, service requirements 80
Oil filler neck 199
Oil types, alternative 200
Oil types, approved 200
Old batteries, disposal 213
Onboard monitor, refer to Control Display 16
Onboard vehicle tool kit 204
Opening/closing via door lock 37
Opening and closing 32
Opening and closing, without remote control 37
Opening and closing, with re‐ mote control 35
Operating concept, iDrive 16
Optional equipment, standard equipment 6
Outside air, refer to Auto‐ matic recirculated-air con‐
trol 145
Overheating of engine, refer to Coolant temperature 78
P Paint, vehicle 222
Parallel parking assistant 136
Park Distance Control PDC 128
Parked-car ventilation 147
Parked vehicle, condensa‐ tion 164
Parking aid, refer to PDC 128
Parking assistant 136
Parking brake 65
Parking lamps 89
Particulate filter 163
Parts and accessories 7
Passenger side mirror, tilting downward 55
Pathway lines, rearview cam‐ era 131 Seite 237Everything from A to ZReference237
Online Edition for Part no. 01 40 2 925 743 - II/14