tires BMW 330Ci CONVERTIBLE 2003 E46 Owner's Manual
[x] Cancel search | Manufacturer: BMW, Model Year: 2003, Model line: 330Ci CONVERTIBLE, Model: BMW 330Ci CONVERTIBLE 2003 E46Pages: 178, PDF Size: 4.59 MB
Page 10 of 178
Contents
Operation, maintenance
Special operating instructions:
Break-in procedures122
Driving notes123
Antilock Brake System
(ABS)123
Brake system124
Hardtop*125
Wheels and tires:
Tire inflation pressure127
Tire condition127
Tire replacement128
Wheel and tire
combinations130
Winter tires130
In the engine compartment:
Hood132
Engine compartment
essentials134
Washer fluid136
Engine oil136
Coolant138
Brake fluid139
Maintenance:
The BMW Maintenance
System140
Laws and regulations:
California Proposition 65
warning141
OBD interface socket141
Owner service procedures
Replacement procedures:
Onboard tool kit146
Windshield wiper blades146
Lamps and bulbs147
Changing a wheel151
Run Flat tires*155
Battery156
Fuses156
Giving and receiving
assistance:
Jump-starting157
Towing the vehicle158
Technical data
Engine data162
Dimensions163
Weights164
Capacities165
handbook.book Page 10 Wednesday, July 31, 2002 9:29 AM
Page 25 of 178
25
Close the fuel filler cap carefully
after refueling until a click is
heard. While closing, be sure not to
squeeze the strap which is fastened to
the cap. A loose or missing cap will
activate the CHECK FILLER CAP
lamp.<
Fuel tank capacity>Approx. 16.6 gal./63 liters, of which
>approx. 2.1 gal./8 liters are reserve
capacity.
Do not drive to the last drop of
fuel. This can prevent the engine
from operating properly and result in
damage.<
Fuel specificationsThe engine uses lead-free gasoline
only.
Required fuel:
>Premium Unleaded Gasoline,
min. 91 AKI.
AKI = Anti Knock Index
Never use leaded fuel, as it would
cause permanent and irreversible
damage to the oxygen sensor and the
catalytic converter.<
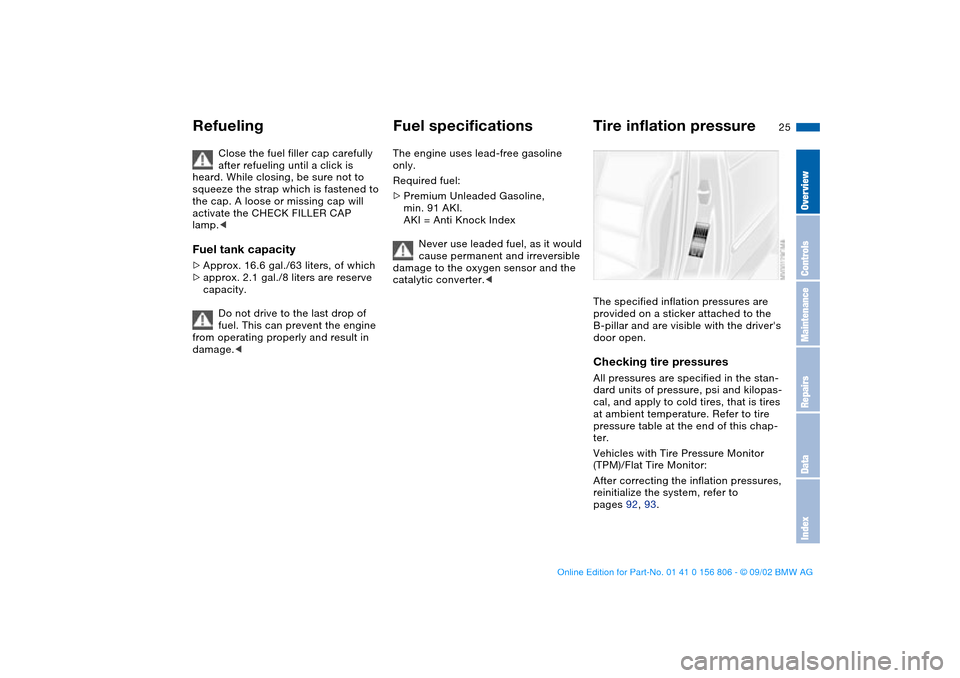
Tire inflation pressureThe specified inflation pressures are
provided on a sticker attached to the
B-pillar and are visible with the driver's
door open.Checking tire pressuresAll pressures are specified in the stan-
dard units of pressure, psi and kilopas-
cal, and apply to cold tires, that is tires
at ambient temperature. Refer to tire
pressure table at the end of this chap-
ter.
Vehicles with Tire Pressure Monitor
(TPM)/Flat Tire Monitor:
After correcting the inflation pressures,
reinitialize the system, refer to
pages 92, 93.
Refueling
OverviewControlsMaintenanceRepairsDataIndex
handbook.book Page 25 Wednesday, July 31, 2002 9:29 AM
Page 26 of 178
26
Another instruction plate regarding
inflation pressures on the door pillar
indicates which system your vehicle is
equipped with.
Check the tire pressures on a reg-
ular basis – at least twice a month
– and before every extended journey.
Otherwise, incorrect tire pressure can
lead to poor handling, to tire damage
and accidents.
Remember to check the inflation pres-
sure in the space-saver or standard
spare tire.
Inflate the spare tire to the highest infla-
tion pressure specified for your vehi-
cle.
apply to BMW approved tire sizes and
tire manufacturers. Your BMW center
can provide you with more information
about these. Higher pressures may be
required for tires made by other manu-
facturers.
Your vehicle is equipped with tires that
not only meet US standards, but also
European standards. We recommend
the exclusive use of BMW approved
tires.Tire inflation pressure
handbook.book Page 26 Wednesday, July 31, 2002 9:29 AM
Page 27 of 178
27
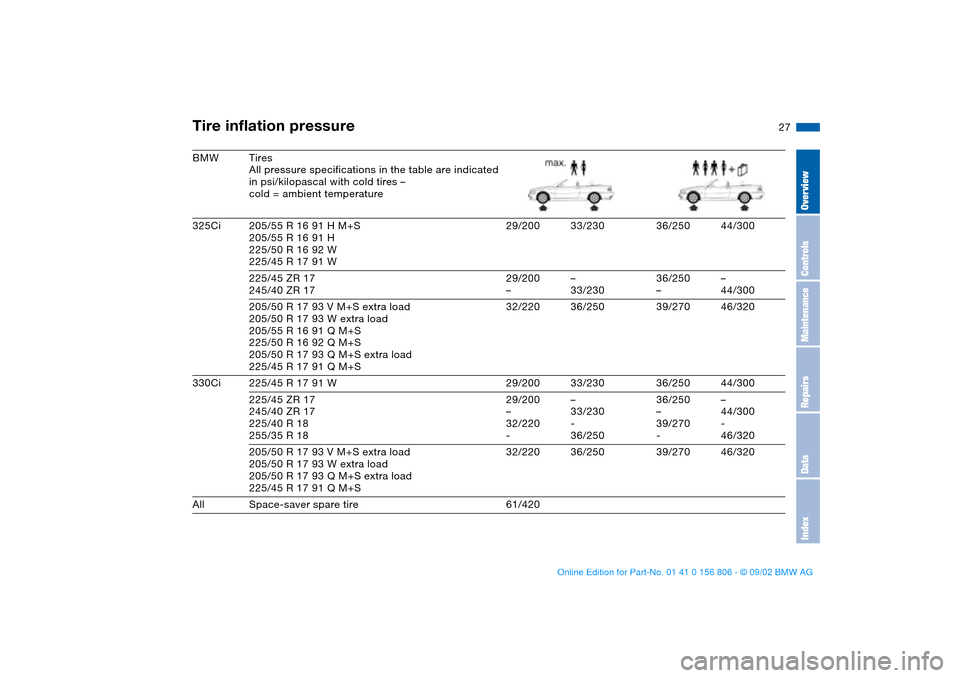
BMW Tires
All pressure specifications in the table are indicated
in psi/kilopascal with cold tires –
cold = ambient temperature
325Ci 205/55 R 16 91 H M+S
205/55 R 16 91 H
225/50 R 16 92 W
225/45 R 17 91 W29/200 33/230 36/250 44/300
225/45 ZR 17
245/40 ZR 1729/200
––
33/23036/250
––
44/300
205/50 R 17 93 V M+S extra load
205/50 R 17 93 W extra load
205/55 R 16 91 Q M+S
225/50 R 16 92 Q M+S
205/50 R 17 93 Q M+S extra load
225/45 R 17 91 Q M+S32/220 36/250 39/270 46/320
330Ci 225/45 R 17 91 W 29/200 33/230 36/250 44/300
225/45 ZR 17
245/40 ZR 17
225/40 R 18
255/35 R 1829/200
–
32/220
-–
33/230
-
36/25036/250
–
39/270
-–
44/300
-
46/320
205/50 R 17 93 V M+S extra load
205/50 R 17 93 W extra load
205/50 R 17 93 Q M+S extra load
225/45 R 17 91 Q M+S32/220 36/250 39/270 46/320
All Space-saver spare tire 61/420Tire inflation pressure
OverviewControlsMaintenanceRepairsDataIndex
handbook.book Page 27 Wednesday, July 31, 2002 9:29 AM
Page 92 of 178
92
Tire Pressure Monitor (TPM)*The conceptTPM monitors the tire pressures at all
four tires even while the vehicle is mov-
ing. The system provides an alert when-
ever the inflation pressure drops signifi-
cantly below the specified pressure in
one or more tires.
This indicator lamp in the instru-
ment cluster informs you when
the tire pressure deviates from
the target values.
Initializing the systemInitializing is necessary to familiarize the
system with the correct inflation pres-
sures.
Repeat this process after tire replace-
ment, tire rotation or any changes in tire
inflation pressure.
1. Check the tire inflation pressures in
all the tires, comparing them with the
inflation pressure chart on page 25,
and adjust them if necessary
2. Turn the ignition key to position 2, do
not start the engine
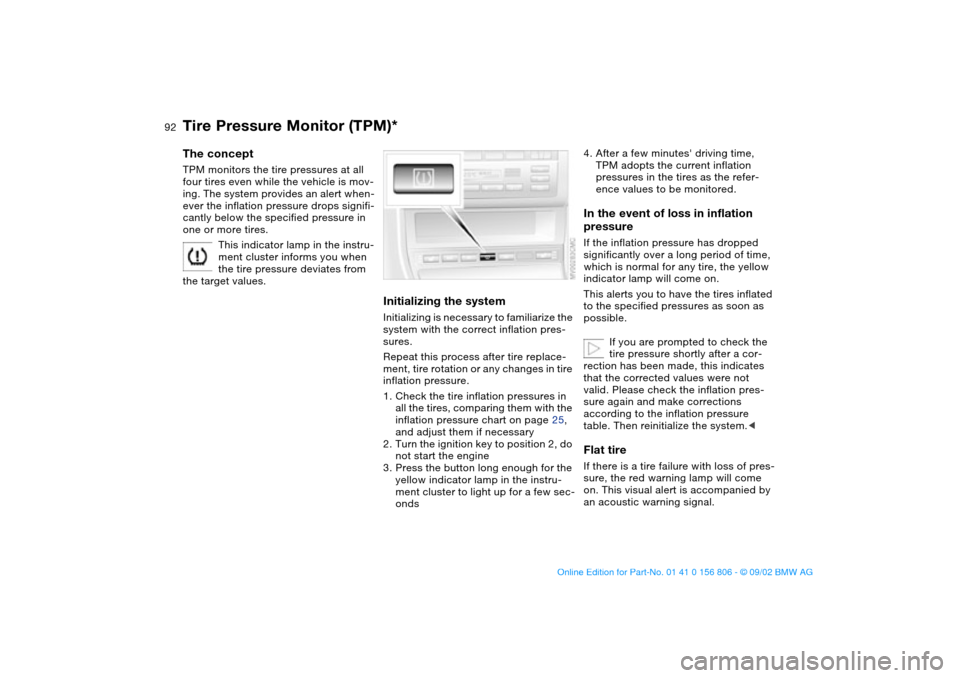
3. Press the button long enough for the
yellow indicator lamp in the instru-
ment cluster to light up for a few sec-
onds
4. After a few minutes' driving time,
TPM adopts the current inflation
pressures in the tires as the refer-
ence values to be monitored.In the event of loss in inflation
pressureIf the inflation pressure has dropped
significantly over a long period of time,
which is normal for any tire, the yellow
indicator lamp will come on.
This alerts you to have the tires inflated
to the specified pressures as soon as
possible.
If you are prompted to check the
tire pressure shortly after a cor-
rection has been made, this indicates
that the corrected values were not
valid. Please check the inflation pres-
sure again and make corrections
according to the inflation pressure
table. Then reinitialize the system.
on. This visual alert is accompanied by
an acoustic warning signal.
handbook.book Page 92 Wednesday, July 31, 2002 9:29 AM
Page 93 of 178
93
If this occurs, reduce vehicle speed
immediately and stop the vehicle in a
safe location. Avoid hard brake applica-
tions. Do not oversteer. Replace the
defective tire, refer to page 151.
The space-saver spare tire is pro-
vided for temporary use only in the
case of a tire failure. It does not have
TPM electronics and is not monitored.
The spare tire that has the same dimen-
sions as the tires already mounted on
the vehicle is equipped with the neces-
sary TPM electronics and will also be
monitored once the tire has been
mounted and the system initialized.<
The TPM cannot alert you to
severe and sudden tire damage
caused by external factors.<
Have the tires changed by your
BMW center.
Your BMW center has the information
needed for working with TPM and is
equipped with the necessary special
tools.
The yellow indicator lamp will come on
during the malfunction.
The indicator lamp also comes on
>in the event of a system fault
>if a wheel is mounted without the
appropriate TPM electronics
>if, in addition to the spare tire, addi-
tional wheels with TPM electronics
are being carried on board.
Please refer the problem to your BMW
center.
Flat Tire Monitor*The conceptAs you drive, the Flat Tire Monitor
keeps track of pressure levels in all four
tires in order to detect and warn of any
substantial pressure loss.
The system actually detects pressure
loss by monitoring differences in the
relative speeds of the four wheels. It
interprets variations outside specified
limits as severe pressure loss, and then
responds by generating a warning.
Tire Pressure Monitor (TPM)*
OverviewControlsMaintenanceRepairsDataIndex
handbook.book Page 93 Wednesday, July 31, 2002 9:29 AM
Page 94 of 178
94
Initializing the systemInitializing is necessary to familiarize the
system with the correct inflation pres-
sures.
Repeat this process after any changes
in tire inflation pressure, tire rotation or
replacement. Do not carry out further
system initialization after adjusting the
inflation pressure and letting the system
"learn" the correct pressures.
1. Check the tire inflation pressures in
all the tires, comparing them with the
inflation pressure chart on page 25
and adjusting their pressure if neces-
sary
2. Turn the ignition key to position 2
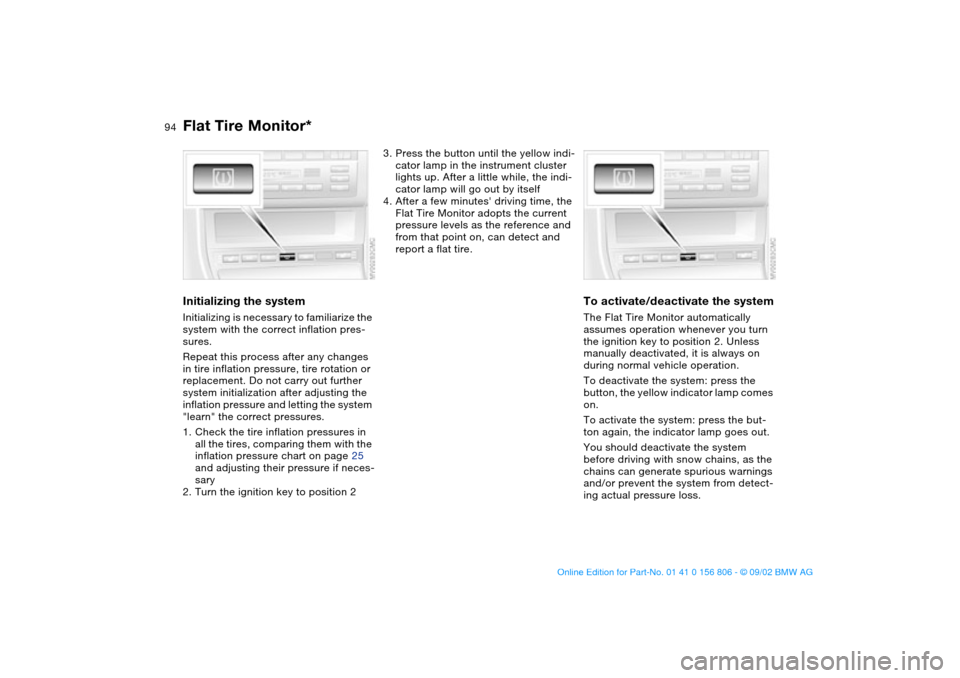
3. Press the button until the yellow indi-
cator lamp in the instrument cluster
lights up. After a little while, the indi-
cator lamp will go out by itself
4. After a few minutes' driving time, the
Flat Tire Monitor adopts the current
pressure levels as the reference and
from that point on, can detect and
report a flat tire.
To activate/deactivate the systemThe Flat Tire Monitor automatically
assumes operation whenever you turn
the ignition key to position 2. Unless
manually deactivated, it is always on
during normal vehicle operation.
To deactivate the system: press the
button, the yellow indicator lamp comes
on.
To activate the system: press the but-
ton again, the indicator lamp goes out.
You should deactivate the system
before driving with snow chains, as the
chains can generate spurious warnings
and/or prevent the system from detect-
ing actual pressure loss.
Flat Tire Monitor*
handbook.book Page 94 Wednesday, July 31, 2002 9:29 AM
Page 95 of 178
95
Flat tire
The red warning lamp in the
instrument cluster lights up to
warn of pressure loss and tire
failure. This visual alert is accompanied
by an acoustic warning signal. Reduce
your speed immediately, and steer and
brake gently as you bring the vehicle to
a stop.
To reset the warning lamp: after replac-
ing the damaged tire you will need to
reset the red warning lamp manually:
maintain pressure on the Flat Tire Moni-
tor button until the warning lamp goes
out. Then reinitialize the system.
The Flat Tire Monitor cannot pro-
vide you with advance warning of
sudden and severe tire damage caused
by external factors.
The system also does not detect the
gradual and minor loss of pressure that
all tires display over extended periods
of time.<
Check tire inflation pressures on a
regular basis, correcting them as
necessary, refer to page 25.
The system may respond to operation
on slippery or snow-covered road sur-
faces with false warnings or delays in
detecting actual pressure loss.
Performance-oriented driving, slip at
the drive wheels and high rates of lat-
eral acceleration can also increase the
time that the Flat Tire Monitor requires
to detect a flat.<
System malfunctionsThe yellow indicator lamp in the instru-
ment cluster lights up and remains on
until the problem is corrected.
Please refer the problem to your BMW
center.
Flat Tire Monitor*
OverviewControlsMaintenanceRepairsDataIndex
handbook.book Page 95 Wednesday, July 31, 2002 9:29 AM
Page 122 of 178
122Special operating instructions
Break-in proceduresTo ensure that your vehicle continues to
provide maximum economy throughout
an extended service life, we request
that you devote careful attention to the
following instructions.Engine and differentialThe first 1,250 miles/2,000 km:
Attempt to constantly vary both vehicle
and engine speeds during these initial
miles while remembering to avoid
engine speeds in excess of 4,500 rpm
and/or vehicle speeds of over
100 mph / 160 km/h:
Always obey all official speed limits.
Refrain from using full throttle and avoid
pressing the accelerator beyond the
kickdown point.
You can then proceed to increase both
engine and vehicle speeds once the ini-
tial 1,250 miles/2,000 km have elapsed.
Please remember to observe the same
break-in procedures if either the engine
or the differential should have to be
replaced later in the course of the vehi-
cle's service life.
TiresOwing to technical factors associated
with their manufacture, tires do not
achieve their full traction potential until
an initial break-in period has elapsed.
We thus ask you to drive with extra care
during the first 200 miles/300 km.
Always obey all official speed limits.
When the vehicle is operated on
wet or slushy roads, a wedge of
water may form between the tire and
the road surface. This phenomenon is
referred to as hydroplaning, and can
lead to partial or complete loss of trac-
tion, vehicle control and braking effec-
tiveness. Reduce your speed on wet
roads.
achieve the optimal pad-surface and
wear patterns required for trouble-free
operation and an extended service life
later on.
To break in the separate parking brake
drums, apply the parking brake lightly
when coasting to a standstill – at a traf-
fic signal, for instance; use caution to
avoid posing a danger to other road
users.
You can prevent corrosion in the drums
by periodically repeating this proce-
dure.
The brake lamps do not come on
when the parking brake is set.
Vacuum for the brake system servo unit
on your BMW is available only when the
engine is running. When you move the
vehicle with the engine off – when tow-
ing, for example – substantially higher
levels of pedal force will be required to
brake the vehicle.
optimum efficiency. Remember to
engage the clutch carefully during this
initial period.
handbook.book Page 122 Wednesday, July 31, 2002 9:29 AM
Page 123 of 178
123
Driving notes
Brakes: do not drive with your foot
resting on the brake pedal. Even
light but consistent pedal pressure can
lead to high temperatures, brake wear
and possibly even brake failure.
Hydroplaning: when driving on wet or
slushy roads, reduce vehicle speed. If
you do not, a wedge of water may form
between the tires and the road surface.
This phenomenon can lead to partial or
complete loss of contact between the
tires and road surface, as well as loss of
vehicle control and braking ability.
Driving through water: do not drive
through water on the road if it is deeper
than 1 ft/30 cm, and then only at walk-
ing speed. Otherwise, the vehicle's
engine, the electrical systems and the
transmission may be damaged.
Clothes hooks, with hardtop: when
hanging clothing from the hooks, be
sure that they will not obstruct the
driver's vision. Do not hang heavy
objects on the hooks. If you do so, they
could cause personal injury during
braking or evasive maneuvers.<
Antilock Brake System (ABS)The conceptABS keeps the wheels from locking
during braking, thereby enhancing
active driving safety.Braking with ABSIf you are in a situation that requires full
braking, you will exploit the full benefits
of ABS system if you apply maximum
pedal pressure – panic stop.
Since the vehicle maintains steering
responsiveness, you can avoid possible
obstacles with a minimum of steering
effort, despite the full brake application.
Pulsation at the brake pedal combined
with sounds from the hydraulic circuits
indicates to the driver that ABS is in its
active mode.Dynamic Brake Control (DBC)DBC is included in the DSC, refer to
page 90. The system responds to sud-
den, high-intensity applications of force
to the brake pedal by automatically
braking the vehicle with maximum
boost to achieve the shortest possible
braking distances during panic stops.
This system also exploits the benefits of
ABS. Do not reduce the pressure exerted against the brake pedal until
the braking maneuver has been com-
pleted. DBC is deactivated when you
release the brake pedal.
Cornering Brake Control (CBC)CBC is an advanced engineering devel-
opment of ABS. When braking during
cornering with high lateral accelera-
tion, or when braking during a lane
change, vehicle stability is improved
and the steering response is enhanced.
OverviewControlsMaintenanceRepairsDataIndex
handbook.book Page 123 Wednesday, July 31, 2002 9:29 AM