mirror BMW 330Ci COUPE 2001 E46 Owner's Manual
[x] Cancel search | Manufacturer: BMW, Model Year: 2001, Model line: 330Ci COUPE, Model: BMW 330Ci COUPE 2001 E46Pages: 203, PDF Size: 2.03 MB
Page 10 of 203

Contents
Overview
Controls and features
Cockpit16
Instrument cluster18
Indicator and warning lamps20
Multifunction steering wheel
(MFL)24
Hazard warning flashers25
Warning triangle25
First-aid kit25
Refueling26
Fuel specifications27
Tire inflation pressure28
Opening and closing:
Keys32
Electronic vehicle
immobilizer33
Central locking system34
Opening and closing Ð from the
outside34
Opening and closing Ð from the
inside38
Luggage compartment lid39
Luggage compartment41
Alarm system42
Electric power windows44
Sliding/Tilt sunroof45
Adjusting:
Seats47
Seat and mirror memory51
Steering wheel52
Mirrors52
Car Memory, Key Memory54
Passenger safety systems:
Safety belts55
Airbags57
Transporting children safely60
Driving:
Steering/Ignition lock63
Starting the engine63
Switching off the engine64
Parking brake65
Manual transmission66
Automatic transmission with
Steptronic67
Turn signal indicator/Headlamp
flasher70
Washer/Wiper system70
Rear window defroster72
Cruise control73
Everything under control:
Odometer75
Tachometer75
Energy Control75
Fuel gauge76
Temperature gauge76
Service Interval Display76
Check Control77
Computer77
Technology for driving comfort
and safety:
Park Distance Control (PDC)81
Automatic Stability Control plus
Traction (ASC+T)82
Dynamic Stability Control
(DSC)83
Tire Pressure Control (RDC)85
Contents
Page 12 of 203

Contents
Repairs
Advanced technology
Technical data
Replacement procedures:
Onboard tool kit152
Windshield wiper blades152
Lamps and bulbs152
Changing a wheel159
Battery162
Fuses166
Microfilter/Activated-charcoal
filter166
In case of electrical
malfunction:
Fuel filler door167
Sliding/tilt sunroof167
Assistance, giving and
receiving:
Jump-starting168
Towing the vehicle169Adaptive Transmission Control
(ATC)174
Airbags175
Automatic Stability Control plus
Traction (ASC+T)/Dynamic
Stability Control (DSC)175
Radio reception176
Safety belt tensioner176
Interior rearview mirror with
automatic dimming
feature177
Rain sensor178
Tire Pressure Control (RDC)179
Self-diagnostics180
Xenon lamps181Engine data184
Dimensions185
Weights186
Capacities187
Electrical system188
V-belts188
Page 30 of 203
30n
Opening and closing:
Keys32
Electronic vehicle
immobilizer33
Central locking system34
Opening and closing Ð from the
outside34
Opening and closing Ð from the
inside38
Luggage compartment lid39
Luggage compartment41
Alarm system42
Electric power windows44
Sliding/Tilt sunroof45
Adjusting:
Seats47
Seat and mirror memory51
Steering wheel52
Mirrors52
Car Memory, Key Memory54
Passenger safety systems:
Safety belts55
Airbags57
Transporting children safely60
Controls
Page 42 of 203
42n
Alarm system
*
The conceptThe vehicle alarm system responds:
>When a door, the hood or the
luggage compartment lid is opened.
>To movement inside the vehicle
(interior motion sensor).
>To a change of the vehicle's tilt Ð if
someone attempts to steal the
wheels or tow the vehicle without
authorization, for example.
>If there is an interruption in battery
voltage.
The system responds to unauthorized
vehicle entry and attempted theft by
simultaneously activating the following:
>Sounding an alarm for 30 seconds.
>The hazard warning flashers are acti-
vated for approx. five minutes.
>The high beams flash on and off in
sync with the hazard warning flashers.
To activate and deactivate the
alarm systemWhen the vehicle is locked or unlocked
by using a key or with the remote
control, the alarm system is also simul-
taneously armed or disarmed.
The interior motion sensor and the tilt
alarm sensor are activated approx.
30 seconds after you have finished
locking the vehicle.
If the alarm system has been armed
correctly, the hazard warning flashers
flash once.
You can have a signal set as
acknowledgment for both arming
and disarming the alarm system.<
You can also open the luggage
compartment lid when the system is
armed by pressing button 3 of the
remote control (refer to page 37). When
it is closed, the lid is once again
secured.
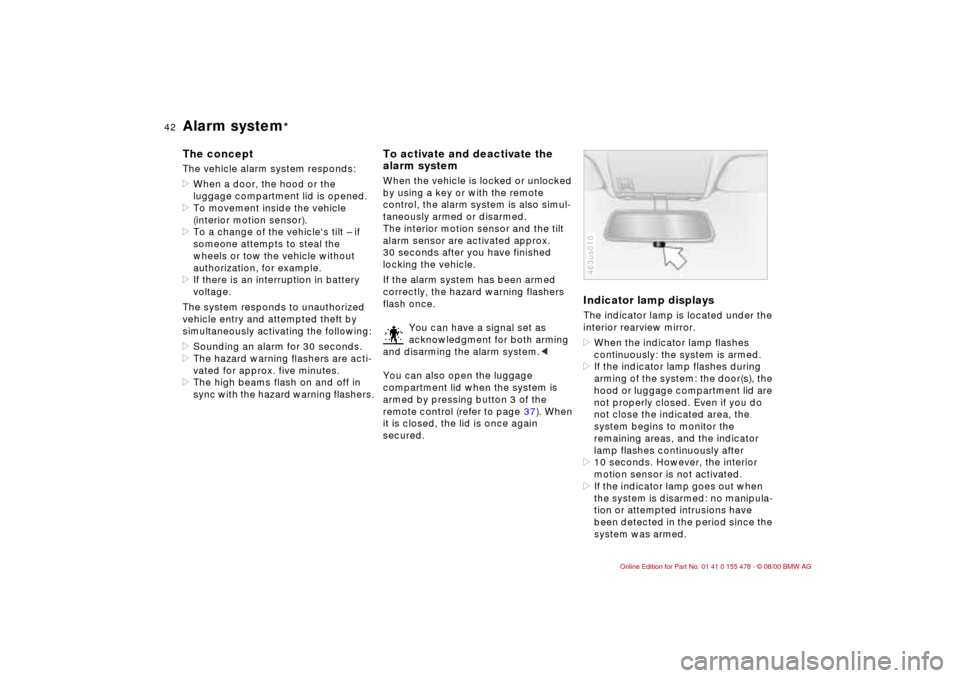
Indicator lamp displaysThe indicator lamp is located under the
interior rearview mirror.
>When the indicator lamp flashes
continuously: the system is armed.
>If the indicator lamp flashes during
arming of the system: the door(s), the
hood or luggage compartment lid are
not properly closed. Even if you do
not close the indicated area, the
system begins to monitor the
remaining areas, and the indicator
lamp flashes continuously after
>10 seconds. However, the interior
motion sensor is not activated.
>If the indicator lamp goes out when
the system is disarmed: no manipula-
tion or attempted intrusions have
been detected in the period since the
system was armed.463us010
Page 51 of 203
51n
IndexDataTechnologyRepairsCar careControlsOverview
Seat and mirror memory*
You can store and recall three different
driver's seat and outside mirror posi-
tions.
The adjustment setting of the lumbar
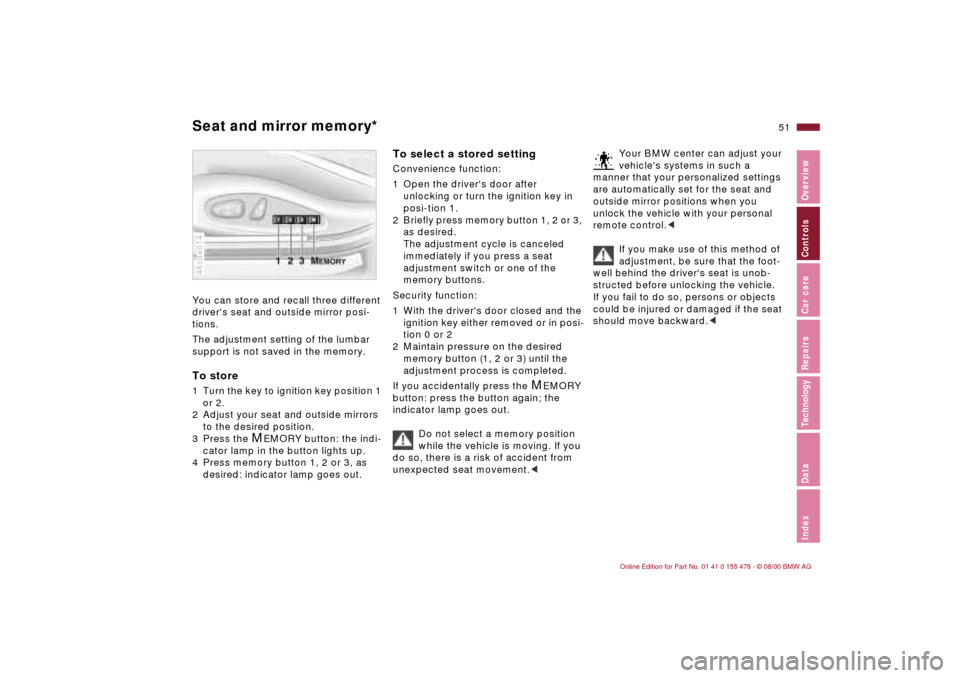
support is not saved in the memory.To store1 Turn the key to ignition key position 1
or 2.
2 Adjust your seat and outside mirrors
to the desired position.
3 Press the
M
EMORY button: the indi-
cator lamp in the button lights up.
4 Press memory button 1, 2 or 3, as
desired: indicator lamp goes out.
46cde014
To select a stored settingConvenience function:
1 Open the driver's door after
unlocking or turn the ignition key in
posi-tion 1.
2 Briefly press memory button 1, 2 or 3,
as desired.
The adjustment cycle is canceled
immediately if you press a seat
adjustment switch or one of the
memory buttons.
Security function:
1 With the driver's door closed and the
ignition key either removed or in posi-
tion 0 or 2
2 Maintain pressure on the desired
memory button (1, 2 or 3) until the
adjustment process is completed.
If you accidentally press the
M
EMORY
button: press the button again; the
indicator lamp goes out.
Do not select a memory position
while the vehicle is moving. If you
do so, there is a risk of accident from
unexpected seat movement.<
Your BMW center can adjust your
vehicle's systems in such a
manner that your personalized settings
are automatically set for the seat and
outside mirror positions when you
unlock the vehicle with your personal
remote control.<
If you make use of this method of
adjustment, be sure that the foot-
well behind the driver's seat is unob-
structed before unlocking the vehicle.
If you fail to do so, persons or objects
could be injured or damaged if the seat
should move backward.<
Page 52 of 203
52n
Seat and mirror memory* Adjusting steering wheel Mirrors Passenger side exterior mirror tilt
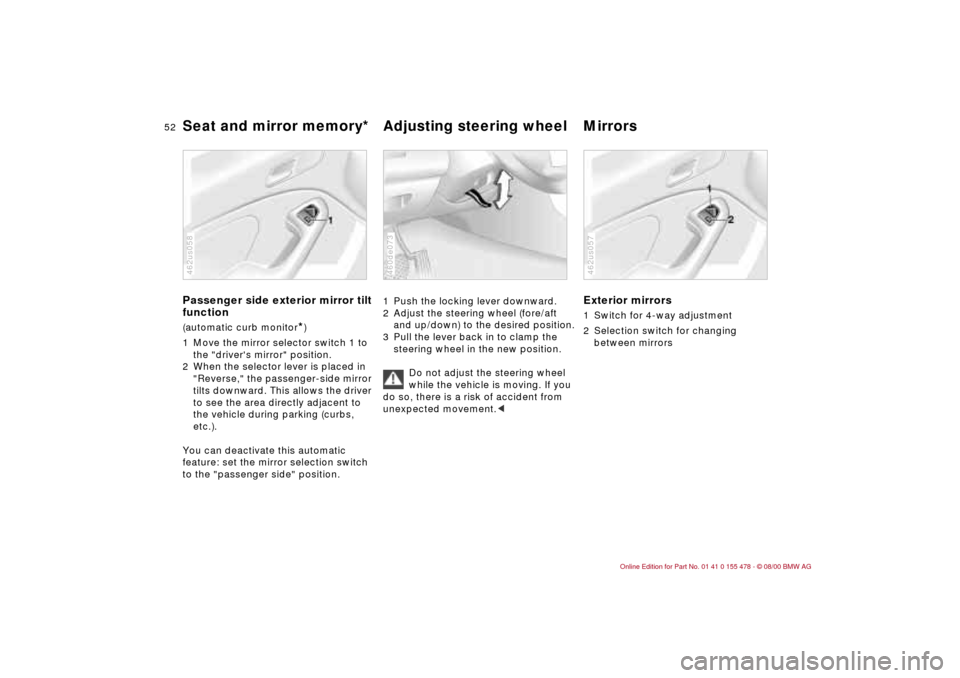
function(automatic curb monitor
*)
1 Move the mirror selector switch 1 to
the "driver's mirror" position.
2 When the selector lever is placed in
"Reverse," the passenger-side mirror
tilts downward. This allows the driver
to see the area directly adjacent to
the vehicle during parking (curbs,
etc.).
You can deactivate this automatic
feature: set the mirror selection switch
to the "passenger side" position.
462us058
1 Push the locking lever downward.
2 Adjust the steering wheel (fore/aft
and up/down) to the desired position.
3 Pull the lever back in to clamp the
steering wheel in the new position.
Do not adjust the steering wheel
while the vehicle is moving. If you
do so, there is a risk of accident from
unexpected movement.<460de073
Exterior mirrors1 Switch for 4-way adjustment
2 Selection switch for changing
between mirrors462us057
Page 53 of 203
53n
IndexDataTechnologyRepairsCar careControlsOverview
MirrorsYou can also adjust the mirrors manu-
ally by pressing against the outer edges
of their lenses.
The mirror on the passenger's
side features a lens with a more
convex surface than the mirror installed
on the driver's side. When estimating
the distance between yourself and
other traffic, bear in mind that the
objects reflected in the mirror are closer
than they appear. Estimations of the
distance to following traffic should
therefore not be regarded as precise.
position 2.
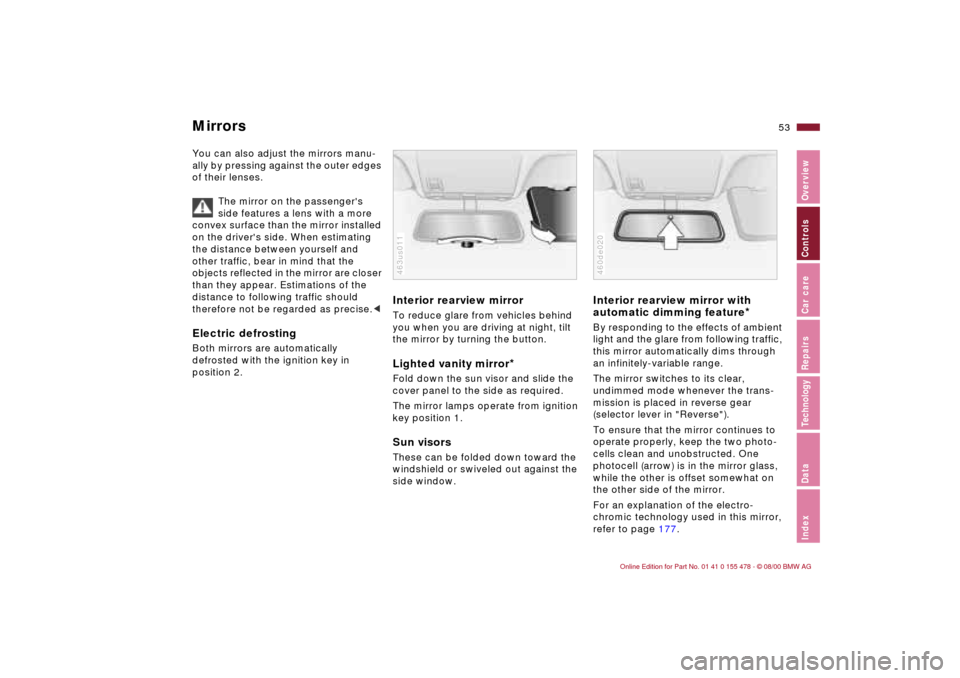
Interior rearview mirror To reduce glare from vehicles behind
you when you are driving at night, tilt
the mirror by turning the button.Lighted vanity mirror
*
Fold down the sun visor and slide the
cover panel to the side as required.
The mirror lamps operate from ignition
key position 1.Sun visorsThese can be folded down toward the
windshield or swiveled out against the
side window.463us011
Interior rearview mirror with
automatic dimming feature
*
By responding to the effects of ambient
light and the glare from following traffic,
this mirror automatically dims through
an infinitely-variable range.
The mirror switches to its clear,
undimmed mode whenever the trans-
mission is placed in reverse gear
(selector lever in "Reverse").
To ensure that the mirror continues to
operate properly, keep the two photo-
cells clean and unobstructed. One
photocell (arrow) is in the mirror glass,
while the other is offset somewhat on
the other side of the mirror.
For an explanation of the electro-
chromic technology used in this mirror,
refer to page 177.460de020
Page 71 of 203
71n
IndexDataTechnologyRepairsCar careControlsOverview
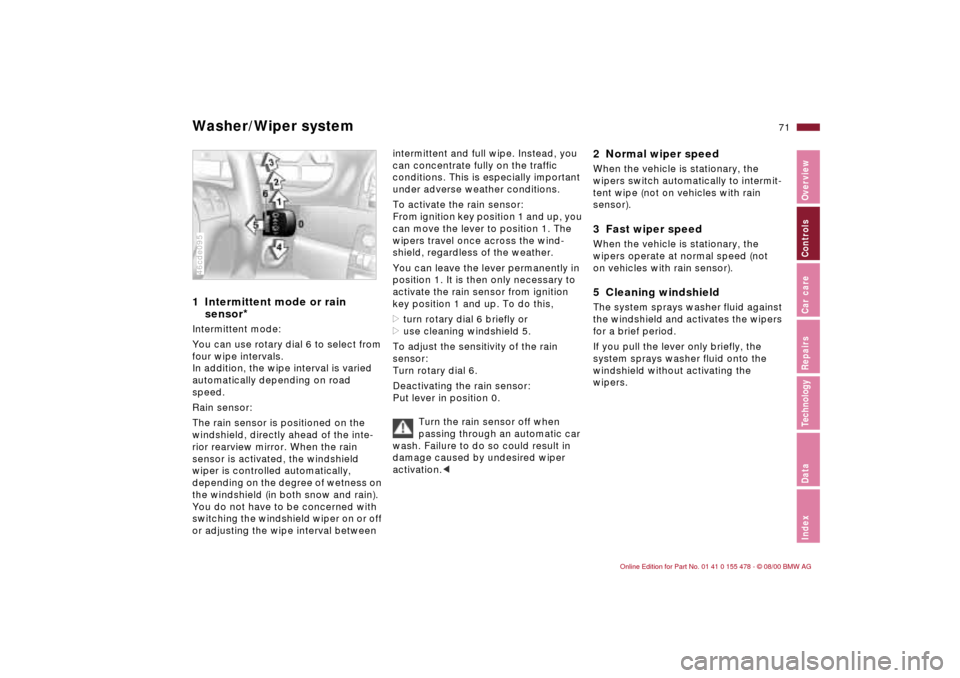
Washer/Wiper system1 Intermittent mode or rain
sensor
*
Intermittent mode:
You can use rotary dial 6 to select from
four wipe intervals.
In addition, the wipe interval is varied
automatically depending on road
speed.
Rain sensor:
The rain sensor is positioned on the
windshield, directly ahead of the inte-
rior rearview mirror. When the rain
sensor is activated, the windshield
wiper is controlled automatically,
depending on the degree of wetness on
the windshield (in both snow and rain).
You do not have to be concerned with
switching the windshield wiper on or off
or adjusting the wipe interval between 46cde095
intermittent and full wipe. Instead, you
can concentrate fully on the traffic
conditions. This is especially important
under adverse weather conditions.
To activate the rain sensor:
From ignition key position 1 and up, you
can move the lever to position 1. The
wipers travel once across the wind-
shield, regardless of the weather.
You can leave the lever permanently in
position 1. It is then only necessary to
activate the rain sensor from ignition
key position 1 and up. To do this,
>turn rotary dial 6 briefly or
>use cleaning windshield 5.
To adjust the sensitivity of the rain
sensor:
Turn rotary dial 6.
Deactivating the rain sensor:
Put lever in position 0.
Turn the rain sensor off when
passing through an automatic car
wash. Failure to do so could result in
damage caused by undesired wiper
activation.<
2 Normal wiper speedWhen the vehicle is stationary, the
wipers switch automatically to intermit-
tent wipe (not on vehicles with rain
sensor).3 Fast wiper speedWhen the vehicle is stationary, the
wipers operate at normal speed (not
on vehicles with rain sensor).5 Cleaning windshieldThe system sprays washer fluid against
the windshield and activates the wipers
for a brief period.
If you pull the lever only briefly, the
system sprays washer fluid onto the
windshield without activating the
wipers.
Page 144 of 203

144n
Caring for your vehicleWindow careYou can use window and glass cleaner
to clean inside window surfaces and
mirrors without smearing and streaking.
Never use polishing pastes or abrasive
(quartz) cleansers on mirror lenses.
Clean the wiper blades with soapy
water. The wiper blades should be
replaced twice a year Ð before and after
the winter months. This is especially
important for vehicles with a rain
sensor.
Use only wiper blades approved
by BMW.<
Caring for other vehicle
components and materials Light-alloy wheels should be treated
with alloy wheel cleaner, especially
during the winter months. However, do
not use aggressive products containing
acids, strong alkalis or abrasive
cleaning agents, nor steam cleaners
operating at temperatures above
140 7 (+60 6). (Follow the manufac-
turer's instructions.)
If your vehicle has chrome parts
*, such
as the window frames and door handles,
clean these parts carefully with ample
clean water and a shampoo supplement
if desired, especially if they have an
accumulation of road salt. Use a chrome
polish for an additional treatment.
Plastic components, vinyl upholstery,
headliners, lamp lenses, the clear cover
of the instrument panel and compo-
nents with a sprayed dull black surface
can be cleaned with water (add plastic
shampoo as required). Do not allow
moisture to soak through the seats or
headliner. Never use solvents such as
lacquer thinner, heavy-duty grease
remover, fuels, or similar substances.
Rubber components should be cleaned
with water only; a rubber treatment or
silicone spray may also be applied.Do not remove safety belts to clean
them. Clean them with mild soapy
water only. Do not use chemicals or dry
cleaners to clean safety belts, since this
could damage the belt fabric.
After cleaning, never allow the inertia
reel to retract the belts until they are
completely dry. Dirty safety belts
prevent the inertia reel mechanism from
retracting the strap properly, and thus
constitute a safety hazard.
Heavily soiled floor carpets and mats
*
can be cleaned with an interior cleaner.
The floor mats can be removed from
the vehicle for cleaning.
Use only a damp cloth to clean trim
panels made of real wood
* and other
parts constructed of real wood
*. Follow
up by drying with a soft cloth.
Use the cleaning and car-care
products available at your BMW
center.<
Page 158 of 203
158n
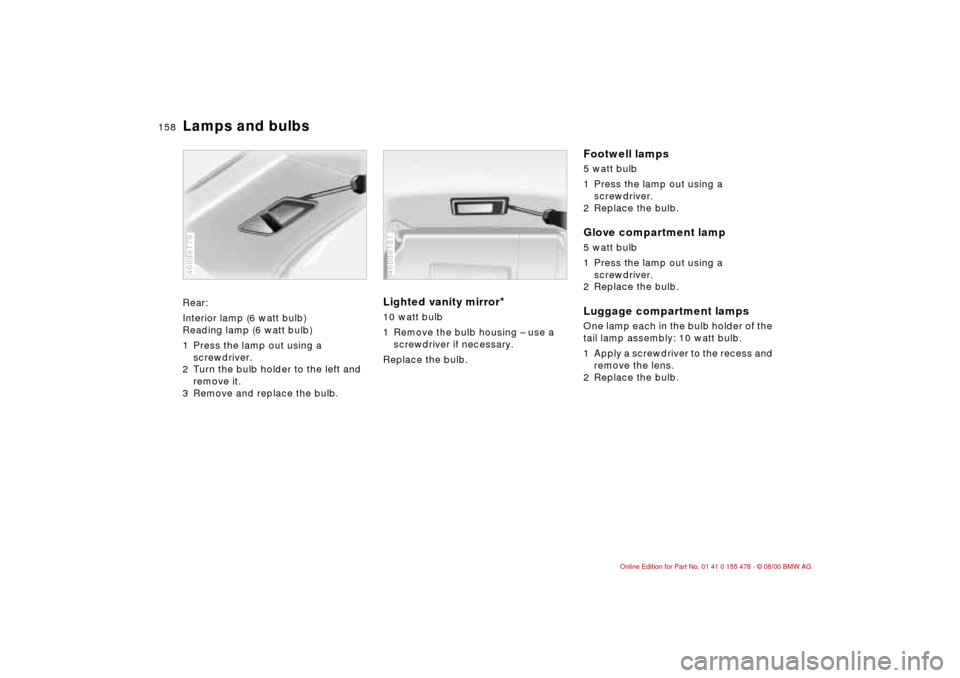
Lamps and bulbsRear:
Interior lamp (6 watt bulb)
Reading lamp (6 watt bulb)
1 Press the lamp out using a
screwdriver.
2 Turn the bulb holder to the left and
remove it.
3 Remove and replace the bulb.460de179
Lighted vanity mirror
*
10 watt bulb
1 Remove the bulb housing Ð use a
screwdriver if necessary.
Replace the bulb.460de181
Footwell lamps 5 watt bulb
1 Press the lamp out using a
screwdriver.
2 Replace the bulb.Glove compartment lamp 5 watt bulb
1 Press the lamp out using a
screwdriver.
2 Replace the bulb.Luggage compartment lamps One lamp each in the bulb holder of the
tail lamp assembly: 10 watt bulb.
1 Apply a screwdriver to the recess and
remove the lens.
2 Replace the bulb.