check engine BMW 330CI COUPE 2005 E46 User Guide
[x] Cancel search | Manufacturer: BMW, Model Year: 2005, Model line: 330CI COUPE, Model: BMW 330CI COUPE 2005 E46Pages: 190, PDF Size: 2.79 MB
Page 145 of 190
145
Brake fluidIndicator lamp
The warning lamp comes on
even though the parking brake
is released:
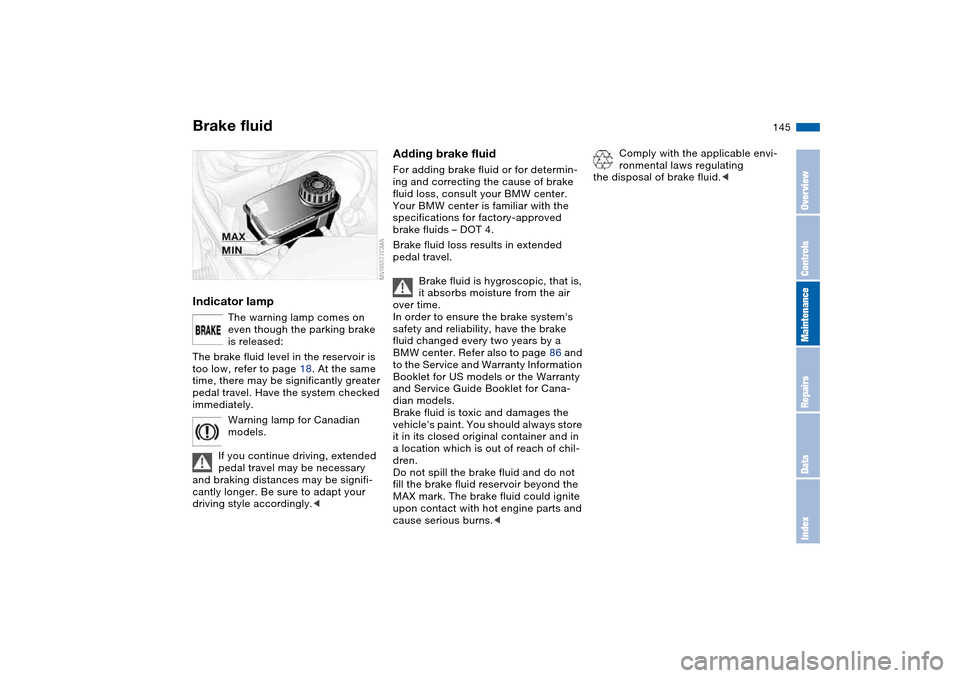
The brake fluid level in the reservoir is
too low, refer to page 18. At the same
time, there may be significantly greater
pedal travel. Have the system checked
immediately.
Warning lamp for Canadian
models.
If you continue driving, extended
pedal travel may be necessary
and braking distances may be signifi-
cantly longer. Be sure to adapt your
driving style accordingly.<
Adding brake fluidFor adding brake fluid or for determin-
ing and correcting the cause of brake
fluid loss, consult your BMW center.
Your BMW center is familiar with the
specifications for factory-approved
brake fluids – DOT 4.
Brake fluid loss results in extended
pedal travel.
Brake fluid is hygroscopic, that is,
it absorbs moisture from the air
over time.
In order to ensure the brake system's
safety and reliability, have the brake
fluid changed every two years by a
BMW center. Refer also to page 86 and
to the Service and Warranty Information
Booklet for US models or the Warranty
and Service Guide Booklet for Cana-
dian models.
Brake fluid is toxic and damages the
vehicle's paint. You should always store
it in its closed original container and in
a location which is out of reach of chil-
dren.
Do not spill the brake fluid and do not
fill the brake fluid reservoir beyond the
MAX mark. The brake fluid could ignite
upon contact with hot engine parts and
cause serious burns.<
Comply with the applicable envi-
ronmental laws regulating
the disposal of brake fluid.<
OverviewControlsMaintenanceRepairsDataIndex
Page 146 of 190
146Maintenance
BMW Maintenance SystemThe BMW Maintenance System helps
maintain your vehicle's road safety and
operational safety. Comfort-related
aspects, such as the timely change of
filters for the air inside the vehicle, are
taken into consideration. The goal is to
optimize maintenance with respect to
low total cost of ownership.
If you should sell your BMW one day,
consistent service and maintenance will
prove to your advantage.
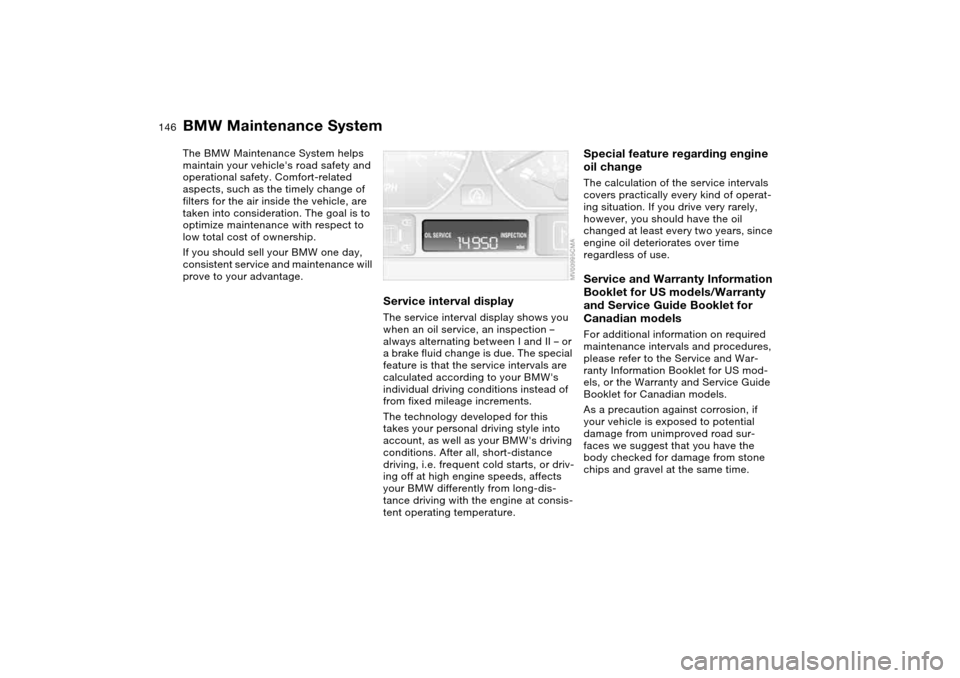
Service interval displayThe service interval display shows you
when an oil service, an inspection –
always alternating between I and II – or
a brake fluid change is due. The special
feature is that the service intervals are
calculated according to your BMW's
individual driving conditions instead of
from fixed mileage increments.
The technology developed for this
takes your personal driving style into
account, as well as your BMW's driving
conditions. After all, short-distance
driving, i.e. frequent cold starts, or driv-
ing off at high engine speeds, affects
your BMW differently from long-dis-
tance driving with the engine at consis-
tent operating temperature.
Special feature regarding engine
oil changeThe calculation of the service intervals
covers practically every kind of operat-
ing situation. If you drive very rarely,
however, you should have the oil
changed at least every two years, since
engine oil deteriorates over time
regardless of use.Service and Warranty Information
Booklet for US models/Warranty
and Service Guide Booklet for
Canadian modelsFor additional information on required
maintenance intervals and procedures,
please refer to the Service and War-
ranty Information Booklet for US mod-
els, or the Warranty and Service Guide
Booklet for Canadian models.
As a precaution against corrosion, if
your vehicle is exposed to potential
damage from unimproved road sur-
faces we suggest that you have the
body checked for damage from stone
chips and gravel at the same time.
Page 148 of 190
148Laws and regulations
California lawsProposition 65 warningCalifornia laws require us to state the
following warning:
Engine exhaust and a wide variety
of automobile components and
parts, including components found in
the interior furnishings in a vehicle, con-
tain or emit chemicals known to the
State of California to cause cancer and
birth defects and reproductive harm. In
addition, certain fluids contained in
vehicles and certain products of com-
ponent wear contain or emit chemicals
known to the State of California to
cause cancer and birth defects or other
reproductive harm.
Battery posts, terminals and related
accessories contain lead and lead com-
pounds. Wash your hands after hand-
ling.
Used engine oil contains chemicals that
have caused cancer in laboratory ani-
mals. Always protect your skin by
washing thoroughly with soap and
water.
ules or a recording device capable of
recording or transmitting certain vehicle
data or information. In addition, if you
have a Subscription Service Agreement
for the BMW Assist system, certain
vehicle information may be transmitted
or recorded in order to provide such
services.
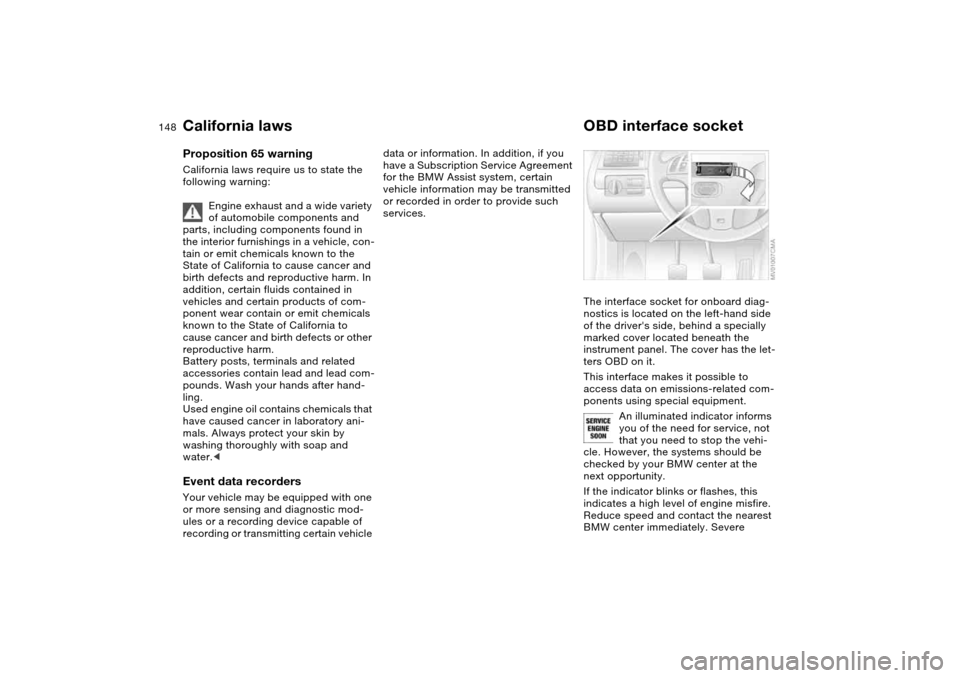
OBD interface socketThe interface socket for onboard diag-
nostics is located on the left-hand side
of the driver's side, behind a specially
marked cover located beneath the
instrument panel. The cover has the let-
ters OBD on it.
This interface makes it possible to
access data on emissions-related com-
ponents using special equipment.
An illuminated indicator informs
you of the need for service, not
that you need to stop the vehi-
cle. However, the systems should be
checked by your BMW center at the
next opportunity.
If the indicator blinks or flashes, this
indicates a high level of engine misfire.
Reduce speed and contact the nearest
BMW center immediately. Severe
Page 163 of 190
163
Mobile Service*To establish contact with the BMW
Group's Mobile Service:
Press button 2 for at least 2 seconds.
The indicator lamp above the buttons
lights up. As soon as a telephone con-
nection has been set up with the Mobile
Service, the indicator lamp flashes.
Depending on the country you are in,
your vehicle's current location will also
be transmitted if your vehicle is
equipped with an activated BMW Assist
function.
Jump-startingWhen your battery is discharged you
can use two jumper cables to start your
vehicle with power from the battery in a
second vehicle. You can also use the
same method to help start another
vehicle. Only use jumper cables with
fully insulated handles on the terminal
clamps.
Do not touch high-voltage wiring
and cables on a running engine.
Contact with components carrying high
voltage can be harmful or fatal. Care-
fully observe the following instructions
to avoid personal injury and/or damage
to one or both vehicles.
approximately the same capacity –
measured in Ah. This information is
provided on the battery
2. Stop the engine of the support vehi-
cle
3. Switch off all electrical components
in both vehicles.
Make absolutely certain that there
is no contact between the body-
work of the two vehicles, otherwise
there is a short circuit hazard.<
Connecting the jumper cables
Always adhere to this sequence
when connecting jumper cables;
failure to observe this procedure can
lead to sparks at the battery terminals
and pose an injury hazard.<
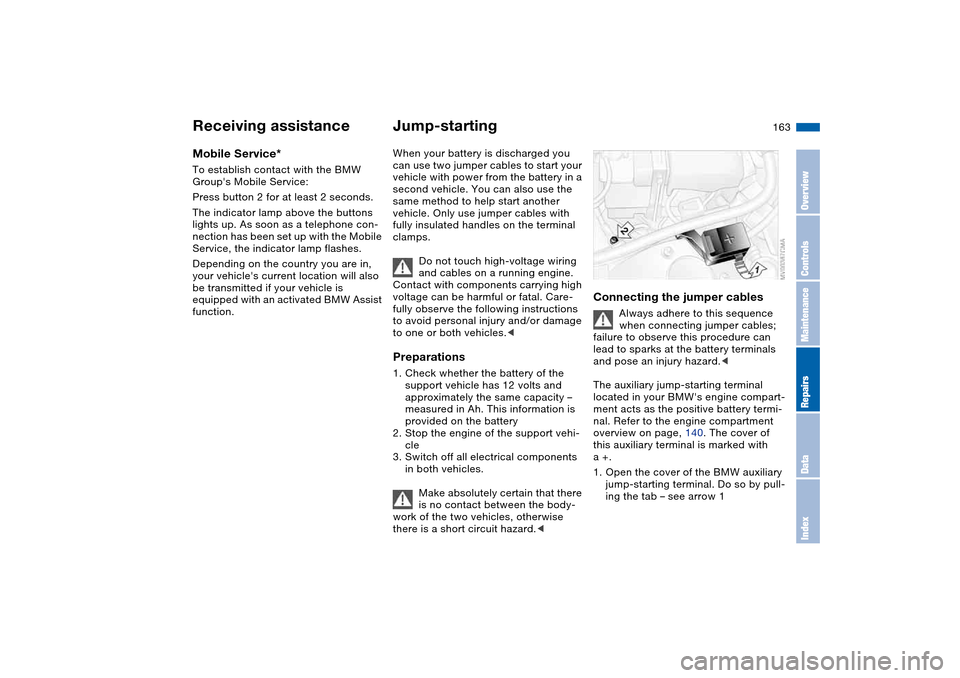
The auxiliary jump-starting terminal
located in your BMW's engine compart-
ment acts as the positive battery termi-
nal. Refer to the engine compartment
overview on page, 140. The cover of
this auxiliary terminal is marked with
a +.
1. Open the cover of the BMW auxiliary
jump-starting terminal. Do so by pull-
ing the tab – see arrow 1
Receiving assistance
OverviewControlsMaintenanceRepairsDataIndex
Page 164 of 190
164
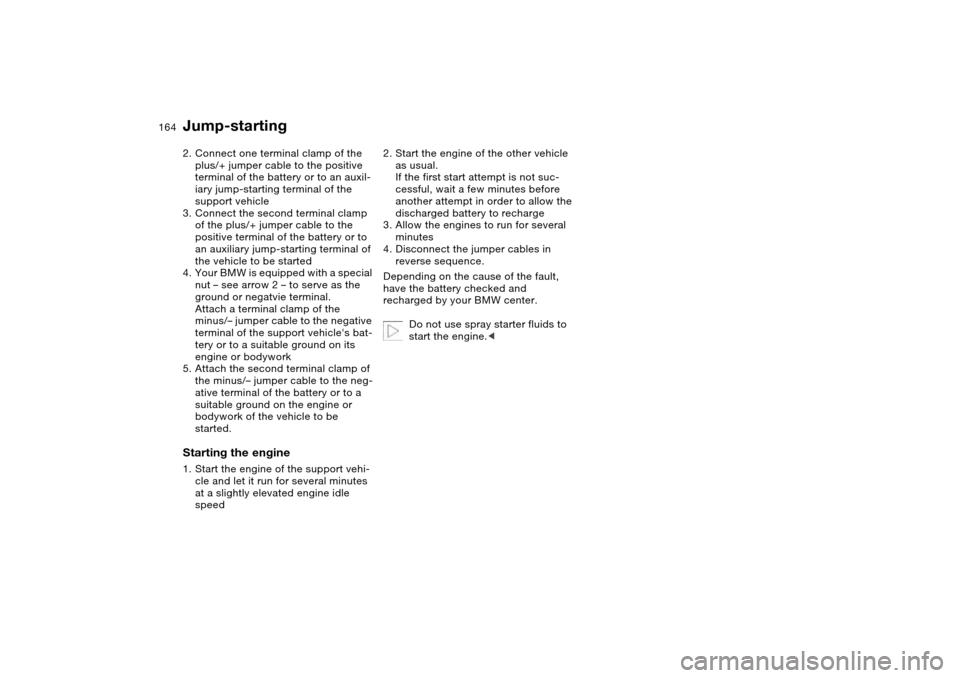
2. Connect one terminal clamp of the
plus/+ jumper cable to the positive
terminal of the battery or to an auxil-
iary jump-starting terminal of the
support vehicle
3. Connect the second terminal clamp
of the plus/+ jumper cable to the
positive terminal of the battery or to
an auxiliary jump-starting terminal of
the vehicle to be started
4. Your BMW is equipped with a special
nut – see arrow 2 – to serve as the
ground or negatvie terminal.
Attach a terminal clamp of the
minus/– jumper cable to the negative
terminal of the support vehicle's bat-
tery or to a suitable ground on its
engine or bodywork
5. Attach the second terminal clamp of
the minus/– jumper cable to the neg-
ative terminal of the battery or to a
suitable ground on the engine or
bodywork of the vehicle to be
started.Starting the engine1. Start the engine of the support vehi-
cle and let it run for several minutes
at a slightly elevated engine idle
speed2. Start the engine of the other vehicle
as usual.
If the first start attempt is not suc-
cessful, wait a few minutes before
another attempt in order to allow the
discharged battery to recharge
3. Allow the engines to run for several
minutes
4. Disconnect the jumper cables in
reverse sequence.
Depending on the cause of the fault,
have the battery checked and
recharged by your BMW center.
Do not use spray starter fluids to
start the engine.
Page 166 of 190
166
With a tow bar
The towing vehicle must not be
lighter than the vehicle being
towed; otherwise, vehicle handling can
no longer be controlled.<
The towing eyelets of both vehicles
should be on the same side.
If the tow bar can only be used in a
diagonal position, please note the fol-
lowing:
>Clearance is restricted while you are
driving around corners
>The inclination of the tow bar pro-
duces lateral force.
Only attach the tow bar to the
towing eyelets. Other parts of the
vehicles could otherwise be dam-
aged.<
With a tow ropeWhen the towing vehicle is driving off,
make sure that the tow rope is taut.
Use nylon ropes or straps for tow-
ing because they prevent sudden
jerking movements. Attach the tow rope
only to the towing eyelets. Other parts
of the vehicles could otherwise be
damaged.<
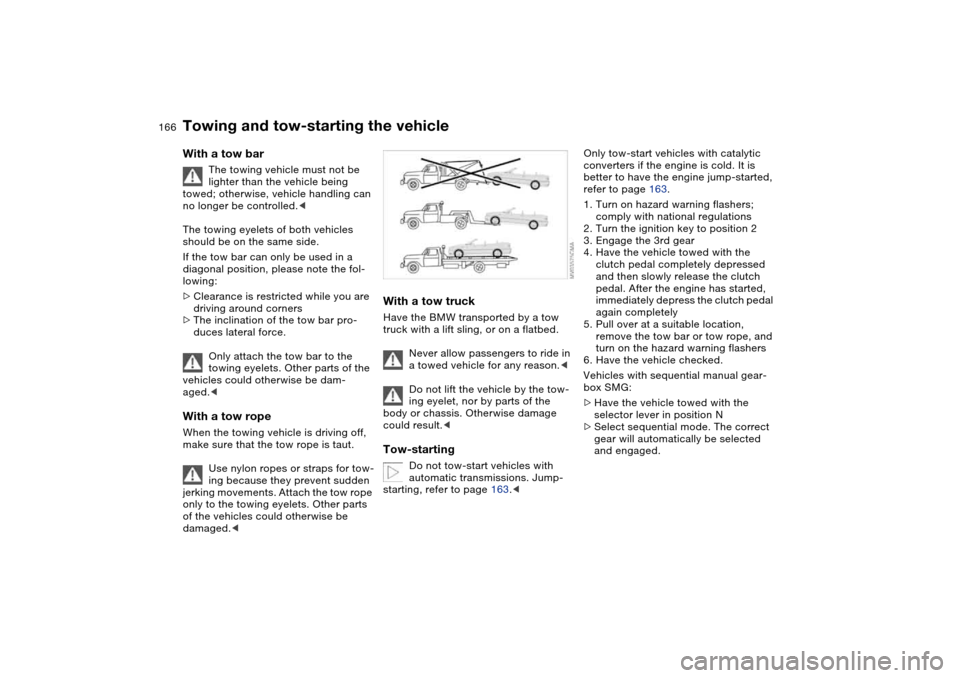
With a tow truckHave the BMW transported by a tow
truck with a lift sling, or on a flatbed.
Never allow passengers to ride in
a towed vehicle for any reason.<
Do not lift the vehicle by the tow-
ing eyelet, nor by parts of the
body or chassis. Otherwise damage
could result.
automatic transmissions. Jump-
starting, refer to page 163.<
Only tow-start vehicles with catalytic
converters if the engine is cold. It is
better to have the engine jump-started,
refer to page 163.
1. Turn on hazard warning flashers;
comply with national regulations
2. Turn the ignition key to position 2
3. Engage the 3rd gear
4. Have the vehicle towed with the
clutch pedal completely depressed
and then slowly release the clutch
pedal. After the engine has started,
immediately depress the clutch pedal
again completely
5. Pull over at a suitable location,
remove the tow bar or tow rope, and
turn on the hazard warning flashers
6. Have the vehicle checked.
Vehicles with sequential manual gear-
box SMG:
>Have the vehicle towed with the
selector lever in position N
>Select sequential mode. The correct
gear will automatically be selected
and engaged.
Towing and tow-starting the vehicle
Page 179 of 190
Everything from A to Z
179
Distance warning, refer to
Park Distance Control
(PDC) 90
Door key 28
Door lock 31
Doors
emergency operation 31
Draft-free ventilation
103, 107
Driving light, refer to Parking
lamps/Low beams 95
Driving notes 125
Driving through water, deep
water 125
Dry air, refer to Air condi-
tioning mode 102, 106
DSC Dynamic Stability Con-
trol 91
indicator lamp 19, 91
DTC Dynamic Traction Con-
trol 91
indicator lamp 19, 91
Dynamic Brake Control
(DBC) 19, 127
indicator lamp 19
Dynamic Stability Control
(DSC) 19, 91
Dynamic Traction Control
(DTC) 91
indicator lamp 19, 91E
Easy entry, refer to Entering
the rear 53
Electric power windows 38
Electrical accessories, fail-
ure 161
Electrical malfunction
automatic transmission
with Steptronic 79
door lock 31
driver's door 31
fuel filler door 23
luggage compartment
lid 33
Electronic Stability Program
(ESP), refer to Dynamic
Stability Control (DSC) 91
Emergency call 162
Emergency operation
closing the convertible
top 46
doors 31
driver's door 31
fuel filler door 23
Emergency release
luggage compartment lid
33, 34
Emissions, minimum, refer
to Energy control 84
Energy control 84Engine
breaking in 124
data 170
electronics 19
indicator lamp 19
speed 84, 170
starting 69
switching off 71
Engine compartment 140
Engine coolant 144
adding 144
Engine oil
adding 143
additives, refer to Adding
engine oil 143
capacity 173
consumption 142
indicator/warning lamp 19
quality 143
specified oils 143
viscosity 143
Engine oil level 19
check 142
indicator/warning lamp 18
Engine oil pressure
indicator/warning lamp 18
Engine oil types 143
Engine output, refer to
Engine data 170
Engine speed 84, 170
Entering the rear 53Environmentally-friendly
driving, refer to Energy
control 84
Equipment range, refer to
the Service and Warranty
Information Booklet for US
models / Warranty and
Service Guide Booklet for
Canadian models
ESP Electronic Stability Pro-
gram, refer to Dynamic
Stability Control (DSC) 91
Exterior mirrors 57
Eyelets, towing 165
F
False alarm, refer to
Avoiding unintentional
alarms 37
Fasten safety belts 54
warning lamp 18
Fault displays 86
Filling the windshield washer
reservoir 173
First aid, refer to First-aid
kit 22
First-aid kit 22
Flashlight 109
Flashlight, refer to
Rechargeable
flashlight 109
OverviewControlsMaintenanceRepairsDataIndex
Page 181 of 190
Everything from A to Z
181
Imprint 4
Indicator lamps 18
Indicator/warning lamp
airbags 18
alarm system 37
brakes 18, 19
Check Gas Cap 19
coolant 19, 85
DSC 19
Fasten safety belts 18
Flat Tire Monitor
18, 19, 93
reserve 85
rollover protection
system 19
Service Engine Soon 19
Individual air distribution 106
Individual settings, refer to
Vehicle Memory, Key
Memory 68
Inflation pressure monitor-
ing, refer to Flat Tire Moni-
tor 92
Inflation pressure, tires 130
INSPECTION 86
Instrument cluster 16
Instrument lighting 96
Instrument panel 14
Integrated universal remote
control 110
Interface socket for onboard
diagnostics (OBD) 148Interior lamps 98
remote control 30
Interior motion sensor 37
switching off 37
Interior rearview mirror 58
automatic dimming
feature 58
Interior temperature, adjust-
ment 102, 106
Interlock, refer to Steering
wheel lock 69
Intermittent mode, wipers 81
Interval display, service 86
J
Jack 157
Jacking points 158
Jump-starting 163
K
Key Memory 68
Keys 28
with remote control 28
Kickdown 74, 78
L
Lamp defect 153
Lamps and bulbs 153
Lashing down loads, refer to
Cargo loading 117
Lashing eyelets, refer to
Securing cargo 119Lashing fittings, refer to
Securing cargo 119
LATCH child-restraint
mounting system 64
Leather care, refer to the
Caring for your vehicle
brochure
Leaving the vehicle 71
LEDs light-emitting
diodes 157
Length, refer to
Dimensions 171
License plate lamp
bulb replacement 157
Light switch 95
Light-emitting diodes
(LEDs) 157
Lighter 113
LIGHTS ON warning 95
Lights, refer to Parking
lamps/Low beams 95
Load, determining the maxi-
mum 117
Load, refer to Cargo
loading 117
Loading
vehicle 117
Load-securing devices 119
Lock buttons on doors, refer
to Locking 32
Lock, steering wheel 69Locking
from inside 32
from outside 29, 31
Locking and unlocking
doors
from inside 32
from outside 29, 31
Low beams 95
automatic 95
bulb replacement 153
indicator lamp, defective
lamp 86
Lug bolts
key 158
torque 158
Luggage compartment
capacity 172
emergency operation,
refer to Manual
operation 33
enlarge volume 35
floor panel 35
lid 33
opening from outside 33
opening, remote
control 30
opening/closing, refer to
Luggage compartment
lid 33
remote control 30
volume 172
OverviewControlsMaintenanceRepairsDataIndex
Page 182 of 190
Everything from A to ZLuggage compartment lid 33
emergency operation 33
emergency release 34
indicator lamp 86
opening from inside the
vehicle 33
opening from outside 33
remote control 30
securing separately 33
unlocking manually 33
Luggage compartment light-
ing 33
Luggage rack, refer to Roof-
mounted luggage rack 120
Lumbar support 52
M
Maintenance 86, 146
Maintenance system 146
Malfunction
convertible top 46
door lock 31
fuel filler door 23
Malfunction displays 86
Manual convertible top 39
closing 42
opening 40
operation 39Manual operation
door lock 31
driver's door 31
fuel filler door 23
luggage compartment
lid 33
power convertible top 46
Manual transmission 72
Master keys 28
MC operation, refer to the
Owner's Manual for
Radio/Onboard Computer
MD operation, refer to the
Owner's Manual for
Radio/Onboard Computer
Memory, refer to Seat and
mirror memory 55
Memory, refer to Vehicle
Memory, Key Memory 68
Microfilter
air conditioning 103
automatic climate
control 108
Microphone 113
Mini disc operation, refer to
the Owner's Manual for
Radio/Onboard Computer
Mirrors 57
heated 57
memory, refer to Seat and
mirror memory 55
Mobile Service 163Modifications, technical,
refer to For your own
safety 5
Multifunction steering
wheel 21
Multifunction switch
turn signal indicator/head-
lamp flasher 80, 81
N
Navigation system, refer to
the Owner's Manual for
Radio/Onboard Computer
Neck restraints, refer to
Head restraints 52
Nets 112
Nozzles, refer to Ventilation
100, 104
Nylon rope, refer to Towing
the vehicle 165
O
OBD interface socket 148
Odometer 84
Oil
additives, refer to Adding
engine oil 143
capacity 173
dipstick 142
quality 143
specified engine oils 143
viscosity 143Oil change intervals, refer
to Service interval
display 146
Oil change intervals, refer to
the Service and Warranty
Information Booklet for US
models/Warranty and Ser-
vice Guide Booklet for
Canadian models
Oil consumption 142
Oil dipstick 142
Oil filter change 173
Oil level
checking 142
indicator lamp 18
Oil pressure
indicator lamp 18
OIL SERVICE 86
Oil types 143
Old batteries, refer to Dis-
posal 161
Onboard computer 88
Onboard computer, refer to
the Owner's Manual for
Onboard Computer
Onboard tool kit 152
Opening and closing
from outside 29
from the inside 32
via the door lock 31
via the remote control 29
Outlets, ventilation 100, 104