Reverse lights BMW 330I SEDAN 2006 E90 Owner's Manual
[x] Cancel search | Manufacturer: BMW, Model Year: 2006, Model line: 330I SEDAN, Model: BMW 330I SEDAN 2006 E90Pages: 245, PDF Size: 8.24 MB
Page 58 of 245

Driving
56
Sequential mode
After every engine start, sequential mode is
activated when you press the selector lever
towards the right while the brake is depressed.
You can shift up or down using the shift paddles
or the selector lever. You do not need to lift your
foot from the accelerator pedal while doing so.
It is also possible to start off in second gear, e.g.
on slippery surfaces.
SMG assists you in the following situations:
>Upshifts and downshifts are executed only
when they will result in a plausible combina-
tion of engine and vehicle speed; for exam-
ple, a downshift that would cause the
engine to overrev cannot be executed by
the system.
>The system shifts down into first gear auto-
matically when the vehicle comes to a stop.
>The system shifts down automatically just
before the engine speed falls below the
minimum speed required for a certain gear;
the driver does not need to intervene.
Shifting gears via selector lever
>Pull the selector lever backwards to shift up.
>Push it forward to shift down.
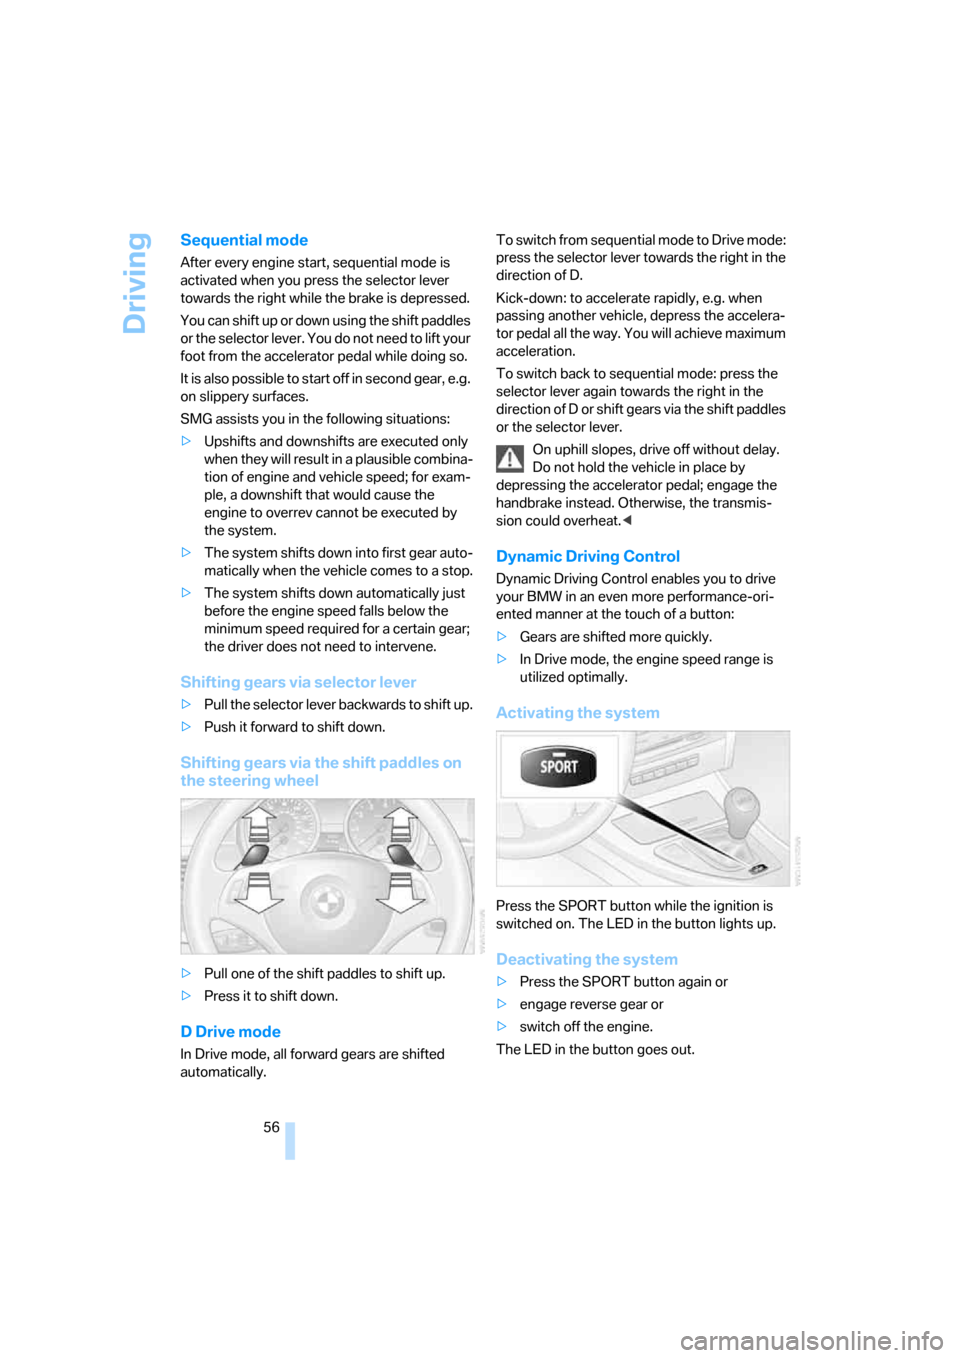
Shifting gears via the shift paddles on
the steering wheel
>Pull one of the shift paddles to shift up.
>Press it to shift down.
D Drive mode
In Drive mode, all forward gears are shifted
automatically.To switch from sequential mode to Drive mode:
press the selector lever towards the right in the
direction of D.
Kick-down: to accelerate rapidly, e.g. when
passing another vehicle, depress the accelera-
tor pedal all the way. You will achieve maximum
acceleration.
To switch back to sequential mode: press the
selector lever again towards the right in the
direction of D or shift gears via the shift paddles
or the selector lever.
On uphill slopes, drive off without delay.
Do not hold the vehicle in place by
depressing the accelerator pedal; engage the
handbrake instead. Otherwise, the transmis-
sion could overheat.<
Dynamic Driving Control
Dynamic Driving Control enables you to drive
your BMW in an even more performance-ori-
ented manner at the touch of a button:
>Gears are shifted more quickly.
>In Drive mode, the engine speed range is
utilized optimally.
Activating the system
Press the SPORT button while the ignition is
switched on. The LED in the button lights up.
Deactivating the system
>Press the SPORT button again or
>engage reverse gear or
>switch off the engine.
The LED in the button goes out.
Page 85 of 245

Controls
83Reference
At a glance
Driving tips
Communications
Navigation
Entertainment
Mobility
Technology for driving comfort and safety
PDC Park Distance Control*
The concept
The PDC assists you with maneuvering in tight
parking spaces. Acoustic signals and a visual
indicator
warn you of the presence of an object
in front of
* or behind your car. To measure the
distance, there are four ultrasonic sensors in
each bumper.
These sensors have a range of approx. 6.5 ft/
2 m. However, an acoustic warning does not
sound until an object is approx. 2 ft/60 cm from
the front sensors
* or both rear corner sensors,
or approx. 5 ft/1.50 m from the rear center sen-
sors.
PDC is a parking aid that can indicate
objects when they are approached
slowly, as is usually the case when parking.
Avoid approaching an objec t a t h i g h s p e e d , o t h -
erwise physical circumstances may lead to the
system warning being issued too late.<
Automatic mode
With the engine running or the ignition switched
on, the system is activated automatically after
approx. 1 second when you engage reverse
gear or move the automatic transmission selec-
tor lever to position R. Wait this short period
before driving.
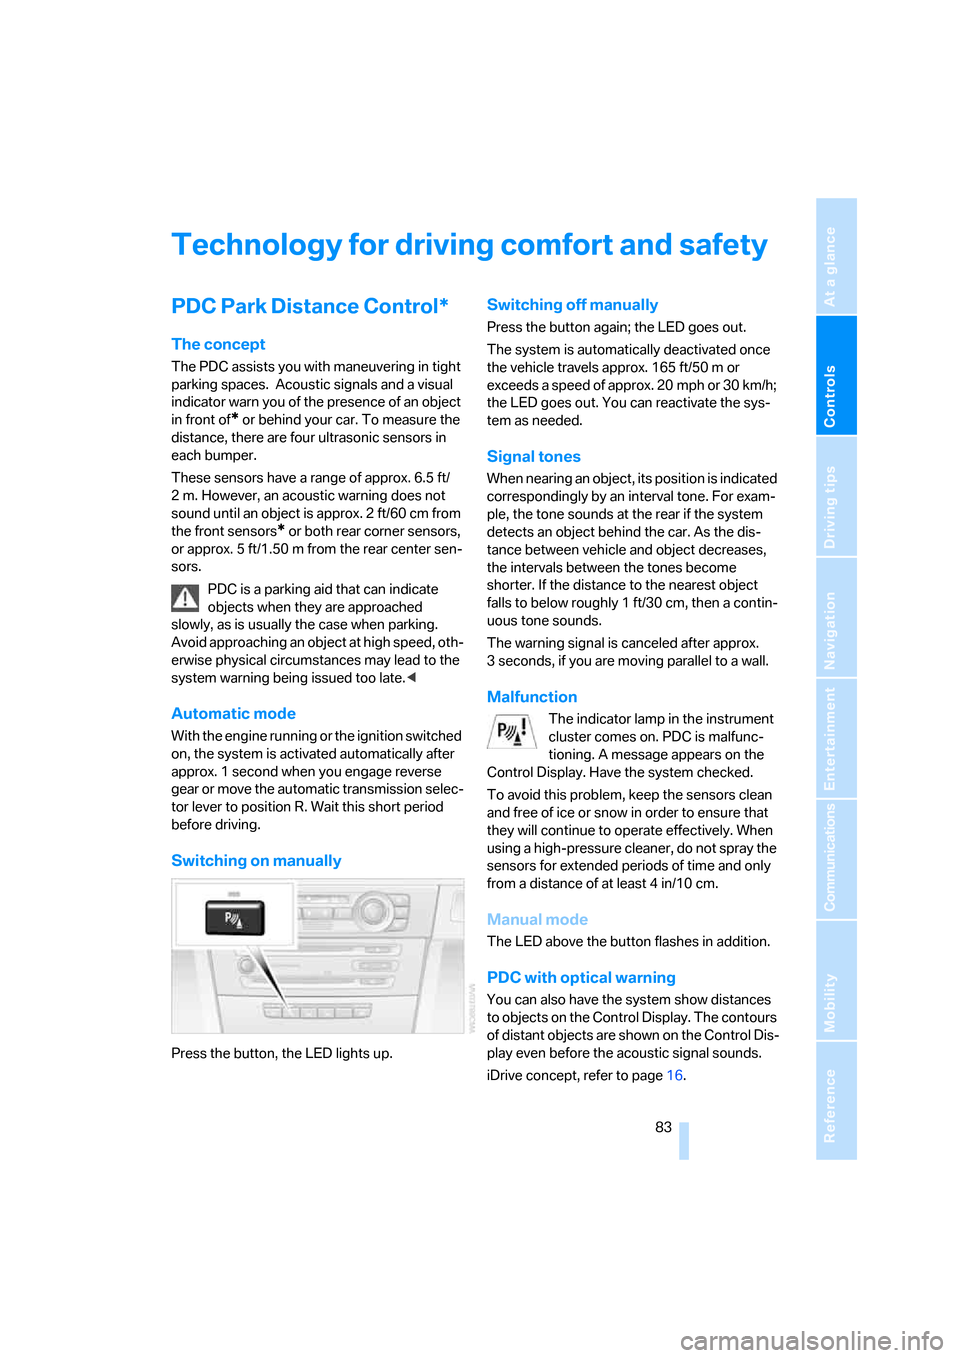
Switching on manually
Press the button, the LED lights up.
Switching off manually
Press the button again; the LED goes out.
The system is automatically deactivated once
the vehicle travels approx. 165 ft/50 m or
exceeds a speed of approx. 20 mph or 30 km/h;
the LED goes out. You can reactivate the sys-
tem as needed.
Signal tones
When nearing an object, its position is indicated
correspondingly by an interval tone. For exam-
ple, the tone sounds at the rear if the system
detects an object behind the car. As the dis-
tance between vehicle and object decreases,
the intervals between the tones become
shorter. If the distance to the nearest object
falls to below roughly 1 ft/30 cm, then a contin-
uous tone sounds.
The warning signal is canceled after approx.
3 seconds, if you are moving parallel to a wall.
Malfunction
The indicator lamp in the instrument
cluster comes on. PDC is malfunc-
tioning. A message appears on the
Control Display. Have the system checked.
To avoid this problem, keep the sensors clean
and free of ice or snow in order to ensure that
they will continue to operate effectively. When
using a high-pressure cleaner, do not spray the
sensors for extended periods of time and only
from a distance of at least 4 in/10 cm.
Manual mode
The LED above the button flashes in addition.
PDC with optical warning
You can also have the system show distances
to objects on the Control Display. The contours
of distant objects are shown on the Control Dis-
play even before the acoustic signal sounds.
iDrive concept, refer to page16.
Page 88 of 245

Technology for driving comfort and safety
86 The warning lamps come on. xDrive
has failed.
Have the system checked as soon as
possible.
The warning lamps come on. xDrive
and DSC have failed.
Have the system checked as soon as
possible.
Hill Descent Control HDC 325xi, 330xi
HDC is a downhill driving assistant that reduces
your speed on steep downhill gradients and
makes it even easier to control your BMW's
handling under these conditions. The vehicle
then moves slightly faster than double walking
speed without the driver needing to intervene.
HDC can be activated as long as you are driving
under approx. 20 mph or 35 km/h. When driving
downhill at a speed of under approx. 20 mph or
35 km/h, the vehicle's speed is automatically
reduced to slightly more than double walking
speed and maintained.
Increasing or decreasing speed
By accelerating or braking you can change the
speed within a range from approx. 3 to 15 mph,
approx. 5 to 25 km/h.
You can specify a target speed within the same
range using the cruise control stalk.
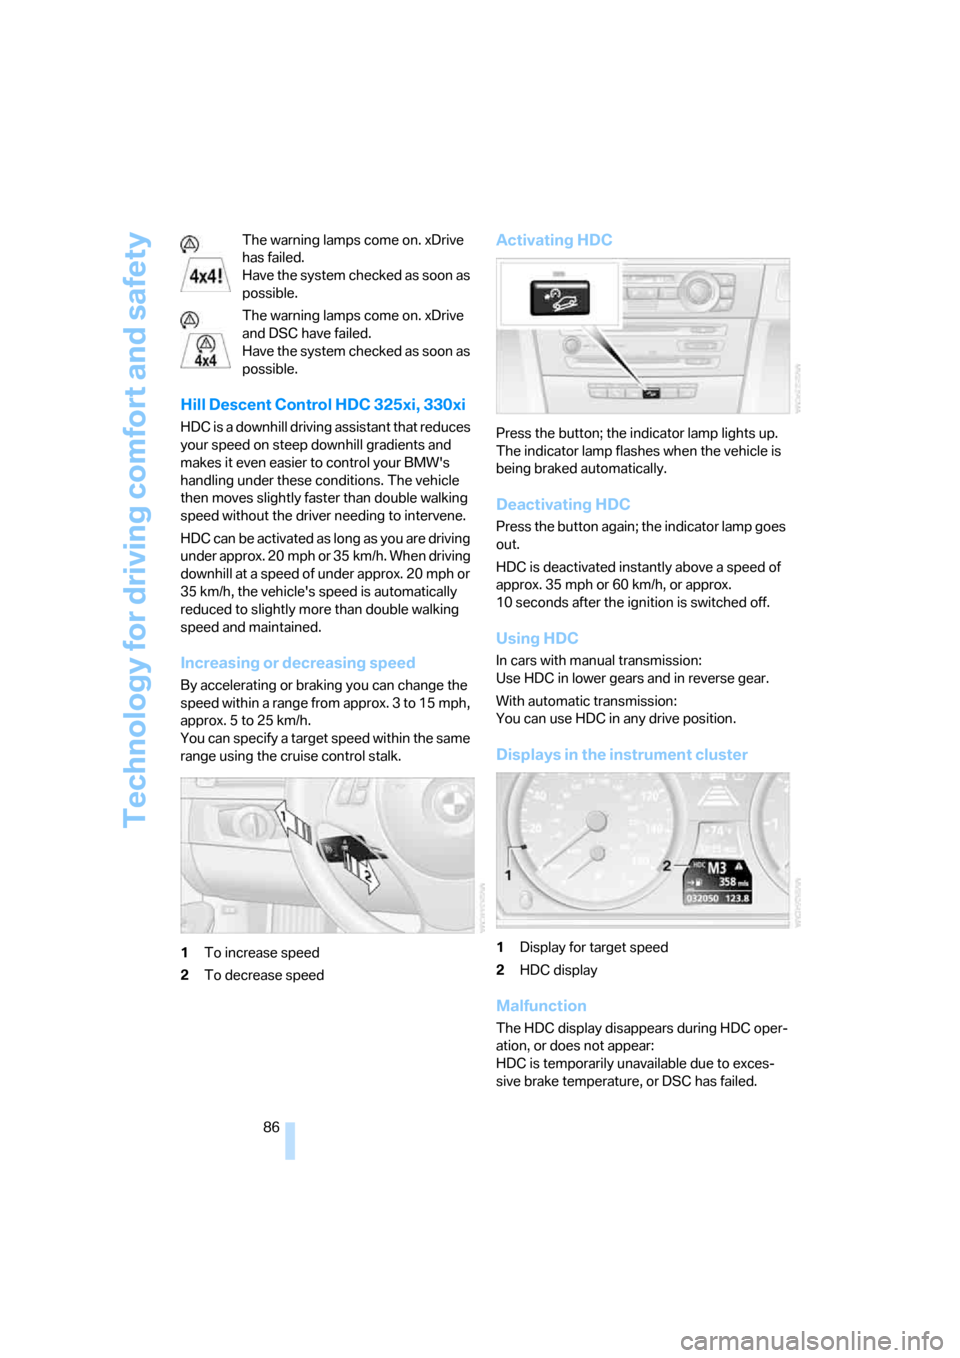
1To increase speed
2To decrease speed
Activating HDC
Press the button; the indicator lamp lights up.
The indicator lamp flashes when the vehicle is
being braked automatically.
Deactivating HDC
Press the button again; the indicator lamp goes
out.
HDC is deactivated instantly above a speed of
approx. 35 mph or 60 km/h, or approx.
10 seconds after the ignition is switched off.
Using HDC
In cars with manual transmission:
Use HDC in lower gears and in reverse gear.
With automatic transmission:
You can use HDC in any drive position.
Displays in the instrument cluster
1Display for target speed
2HDC display
Malfunction
The HDC display disappears during HDC oper-
ation, or does not appear:
HDC is temporarily unavailable due to exces-
sive brake temperature, or DSC has failed.
Page 97 of 245

Controls
95Reference
At a glance
Driving tips
Communications
Navigation
Entertainment
Mobility
5.Select "Daytime running light" and press
the controller.
The daytime driving lamps are switched
on.
Adaptive Head Light*
The concept
Adaptive Head Light is a variable headlamp
control system that enables better illumination
of the road surface. Depending on the steering
angle and other parameters, the light from the
headlamp follows the course of the road.
Activating Adaptive Head Light
With the ignition on, turn the light switch to the
automatic headlamp control position, refer to
page93.
To avoid dazzling the drivers of oncoming vehi-
cles, Adaptive Head Light is not active when the
car is driven in reverse, and directs the light to
the front passenger's side when the vehicle is at
a standstill.
Malfunction
The LED next to the symbol for automatic head-
lamp control flashes. Adaptive Head Light is
malfunctioning or has failed. Have the system
checked as soon as possible.
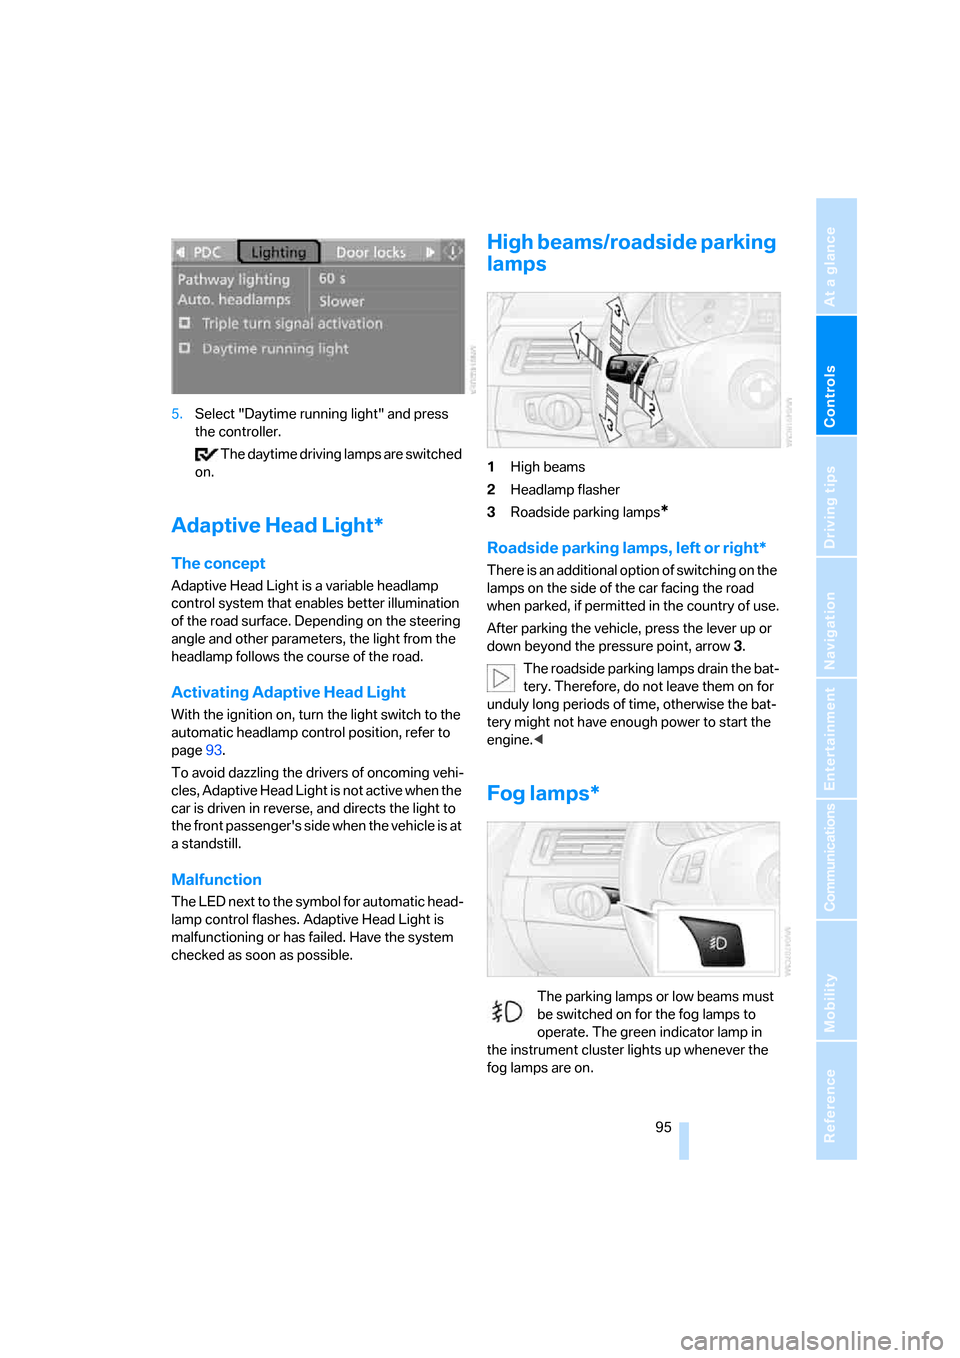
High beams/roadside parking
lamps
1High beams
2Headlamp flasher
3Roadside parking lamps
*
Roadside parking lamps, left or right*
There is an additional option of switching on the
lamps on the side of the car facing the road
when parked, if permitted in the country of use.
After parking the vehicle, press the lever up or
down beyond the pressure point, arrow 3.
The roadside parking lamps drain the bat-
tery. Therefore, do not leave them on for
unduly long periods of time, otherwise the bat-
tery might not have enough power to start the
engine.<
Fog lamps*
The parking lamps or low beams must
be switched on for the fog lamps to
operate. The green indicator lamp in
the instrument cluster lights up whenever the
fog lamps are on.