display BMW 330XI IDRIVE SEDAN 2005 User Guide
[x] Cancel search | Manufacturer: BMW, Model Year: 2005, Model line: 330XI IDRIVE SEDAN, Model: BMW 330XI IDRIVE SEDAN 2005Pages: 223, PDF Size: 7.49 MB
Page 20 of 223
At a glance
19Reference
Controls
Driving tips
Communications
Navigation
Entertainment
Mobility
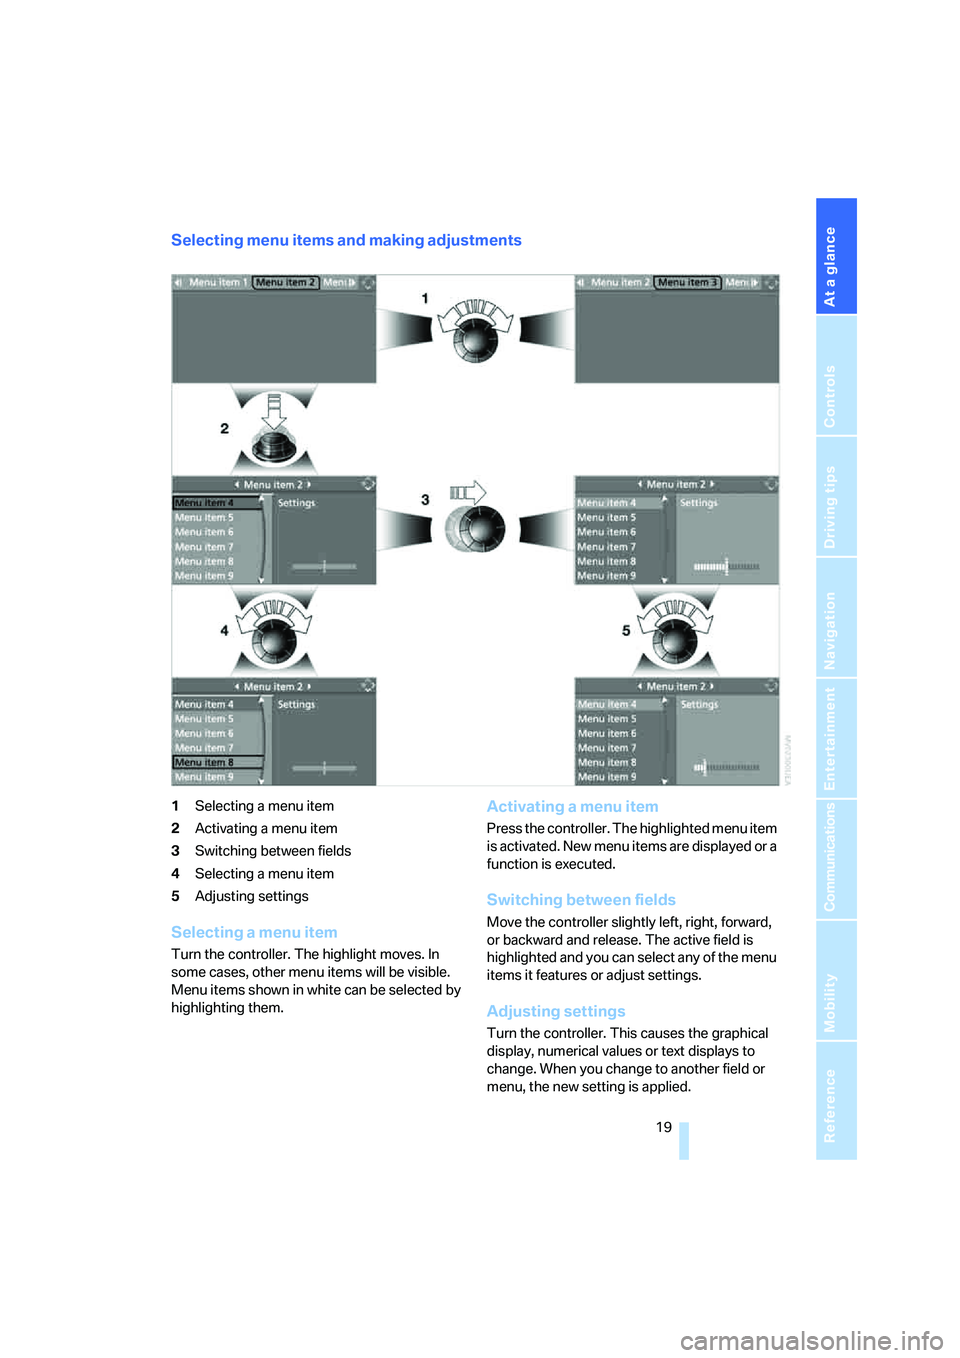
Selecting menu items and making adjustments
1Selecting a menu item
2Activating a menu item
3Switching between fields
4Selecting a menu item
5Adjusting settings
Selecting a menu item
Turn the controller. The highlight moves. In
some cases, other menu items will be visible.
Menu items shown in white can be selected by
highlighting them.
Activating a menu item
Press the controller. The highlighted menu item
is activated. New menu items are displayed or a
function is executed.
Switching between fields
Move the controller slightly left, right, forward,
or backward and release. The active field is
highlighted and you can select any of the menu
items it features or adjust settings.
Adjusting settings
Turn the controller. This causes the graphical
display, numerical values or text displays to
change. When you change to another field or
menu, the new setting is applied.
Page 21 of 223
iDrive
20
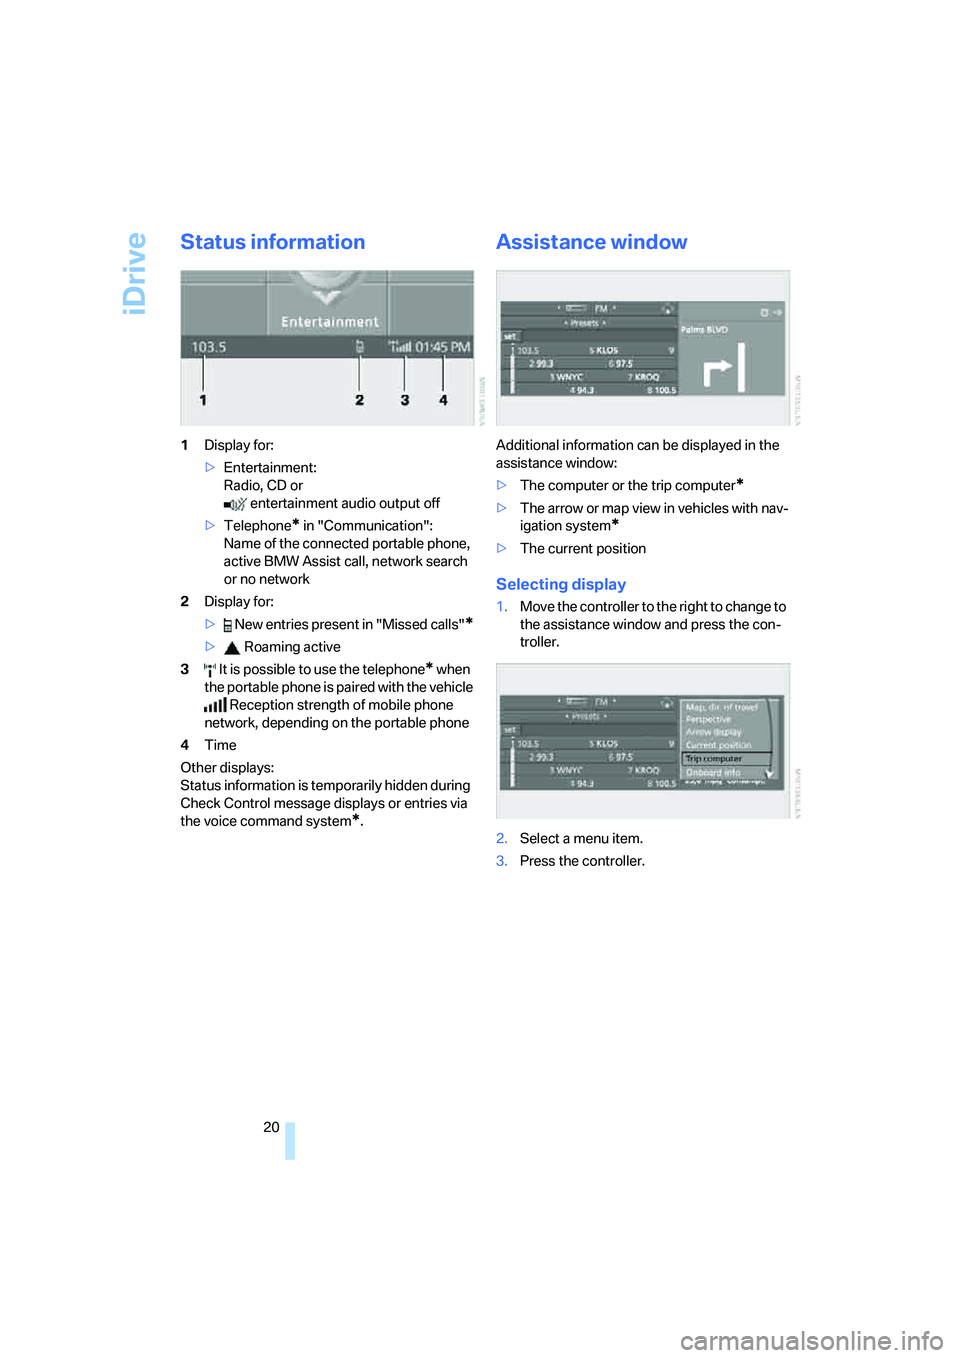
Status information
1Display for:
>Entertainment:
Radio, CD or
entertainment audio output off
>Telephone
* in "Communication":
Name of the connected portable phone,
active BMW Assist call, network search
or no network
2Display for:
> New entries present in "Missed calls"
*
> Roaming active
3 It is possible to use the telephone
* when
the portable phone is paired with the vehicle
Reception strength of mobile phone
network, depending on the portable phone
4Time
Other displays:
Status information is temporarily hidden during
Check Control message displays or entries via
the voice command system
*.
Assistance window
Additional information can be displayed in the
assistance window:
>The computer or the trip computer
*
>The arrow or map view in vehicles with nav-
igation system
*
>The current position
Selecting display
1.Move the controller to the right to change to
the assistance window and press the con-
troller.
2.Select a menu item.
3.Press the controller.
Page 22 of 223
At a glance
21Reference
Controls
Driving tips
Communications
Navigation
Entertainment
Mobility
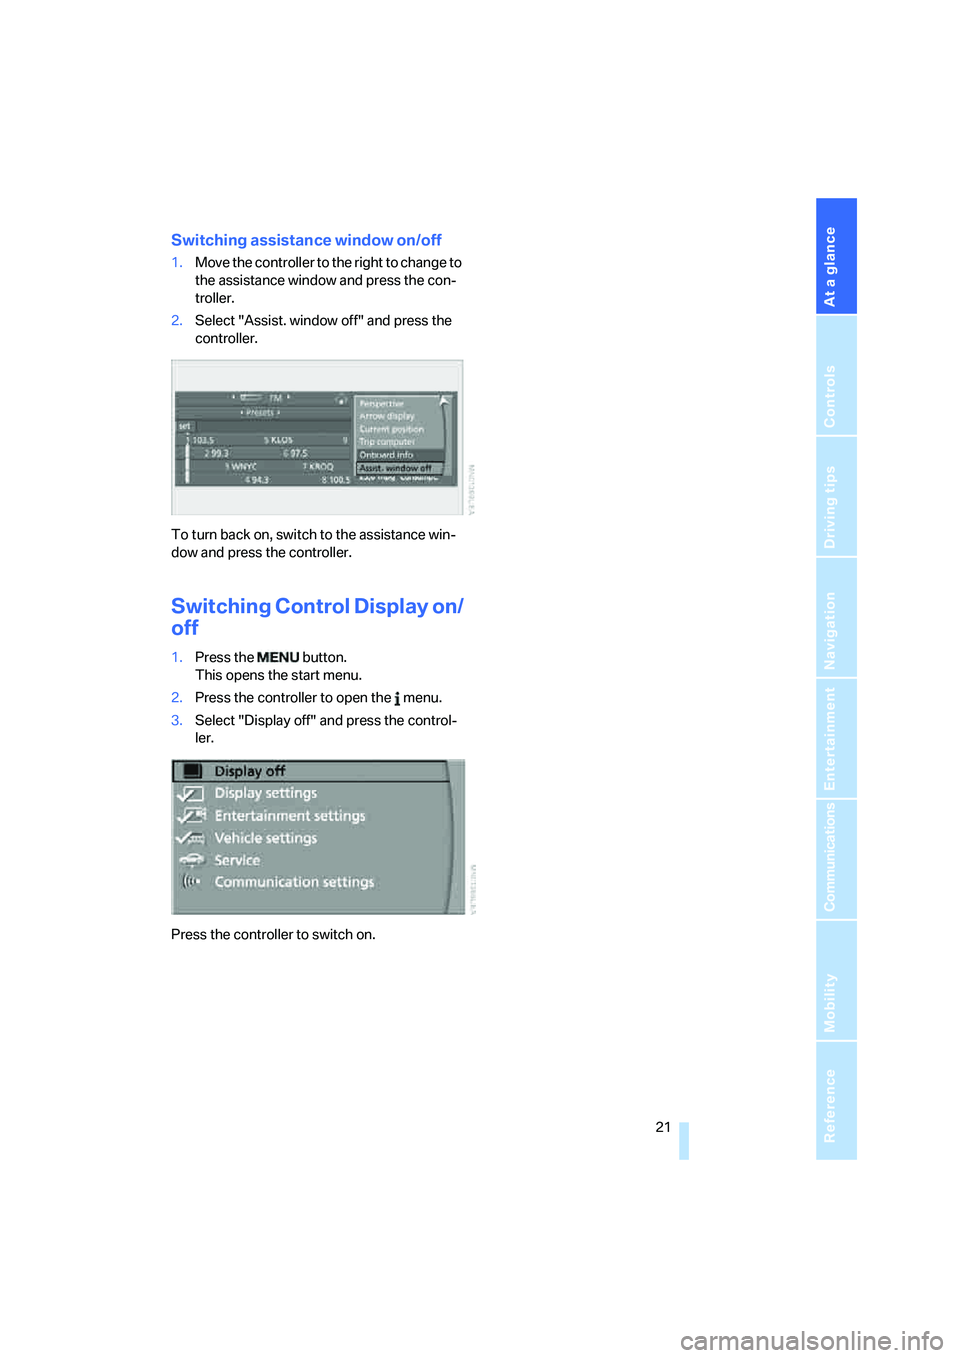
Switching assistance window on/off
1.Move the controller to the right to change to
the assistance window and press the con-
troller.
2.Select "Assist. window off" and press the
controller.
To turn back on, switch to the assistance win-
dow and press the controller.
Switching Control Display on/
off
1.Press the button.
This opens the start menu.
2.Press the controller to open the menu.
3.Select "Display off" and press the control-
ler.
Press the controller to switch on.
Page 23 of 223
Voice command system
22
Voice command system
The concept
The voice command system allows you to con-
trol operation of various vehicle systems with-
out removing your hands from the steering
wheel.
Individual menu items on the Control Display
can be spoken as commands. It is not neces-
sary to use the controller.
The voice command system transforms your
oral commands into control signals for the
selected systems and provides support in the
form of instructions or questions.
The voice command system uses a special
microphone located in the area of the interior
rearview mirror, refer to page14.
Precondition
Via iDrive, select the language in which the
voice command system is operating, so that the
spoken commands can be identified. Selecting
the language for iDrive, refer to page76.
Symbol in the Owner's Manual
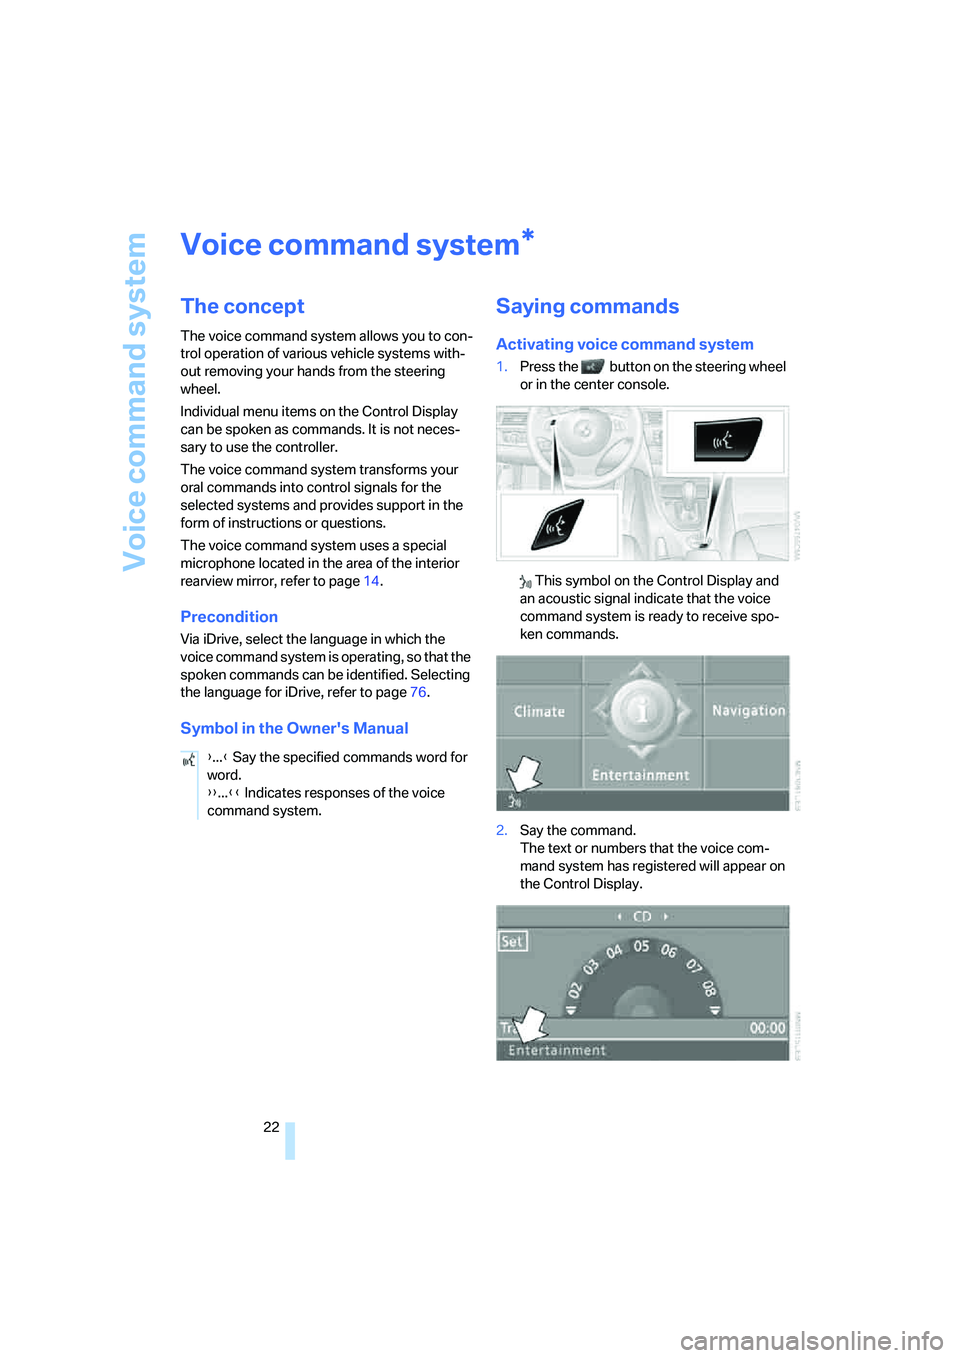
Saying commands
Activating voice command system
1.Press the button on the steering wheel
or in the center console.
This symbol on the Control Display and
an acoustic signal indicate that the voice
command system is ready to receive spo-
ken commands.
2.Say the command.
The text or numbers that the voice com-
mand system has registered will appear on
the Control Display.
*
{...} Say the specified commands word for
word.
{{...}} Indicates responses of the voice
command system.
Page 24 of 223
At a glance
23Reference
Controls
Driving tips
Communications
Navigation
Entertainment
Mobility
This symbol appears on the Control Display
when you can input additional voice com-
mands.
If no further spoken commands are possible,
continue by operating the item of equipment via
iDrive.
Terminating or canceling voice
command system
Press the button on the steering wheel or in
the center console
or
Voice commands
Having the possible voice commands
read aloud
You can have the system read aloud the possi-
ble voice commands related to the selected
menu item on the Control Display.
To have the possible voice commands read out
to you:
For instance, if you have selected "CD", the
spoken commands available for operating the
CD player and CD changer are read out.
Opening help
Using alternative voice commands
There are often a number of commands to run a
function, e.g.:
Calling up functions immediately via
short commands
Short commands enable you to perform certain
functions immediately, irrespective of which
menu item is selected, refer to page202.
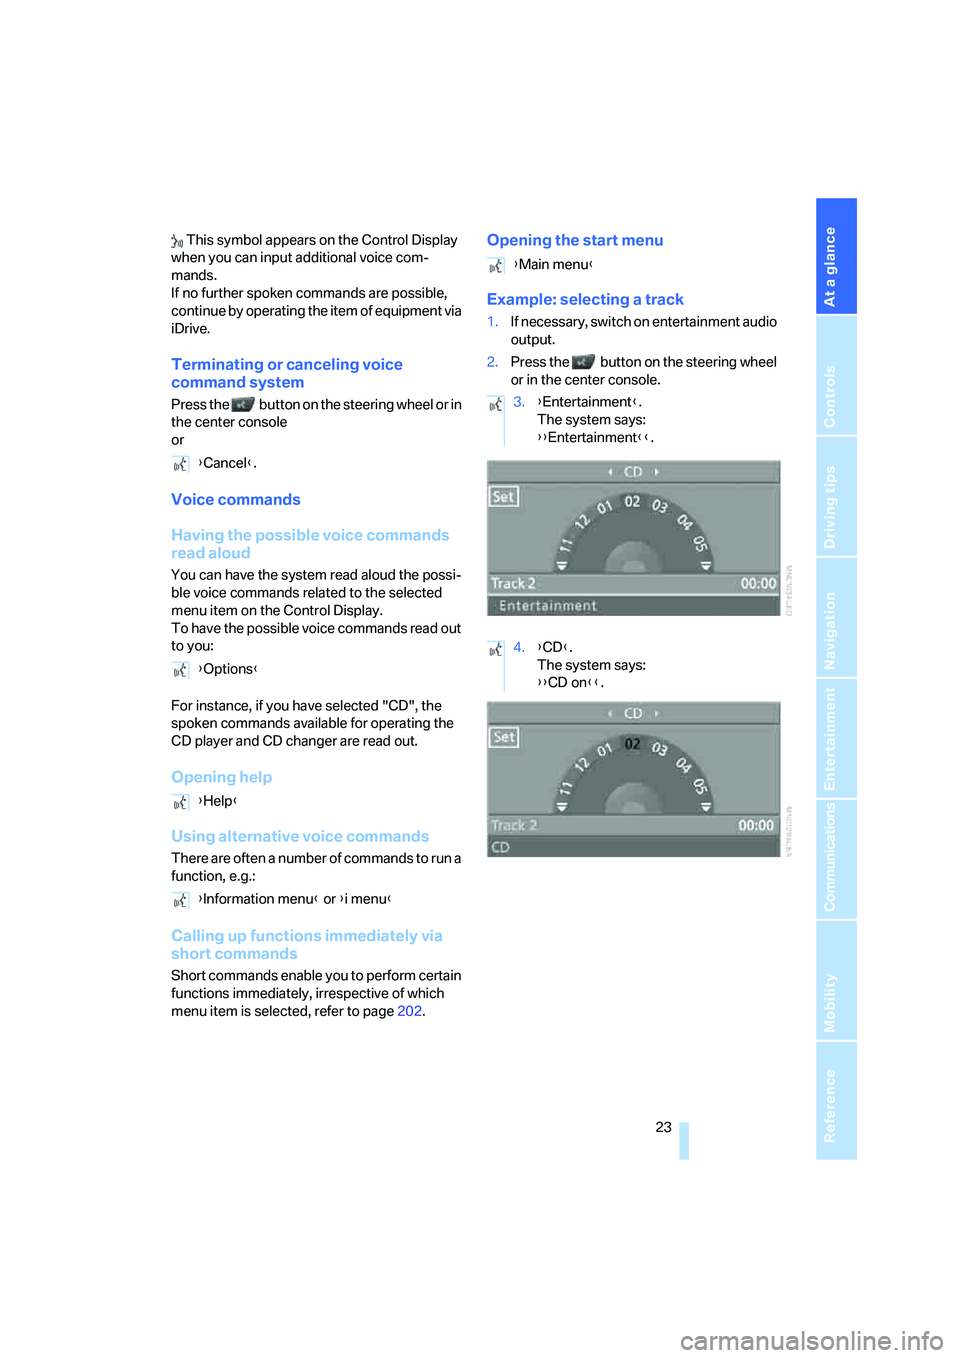
Opening the start menu
Example: selecting a track
1.If necessary, switch on entertainment audio
output.
2.Press the button on the steering wheel
or in the center console.
{Cancel}.
{Options}
{Help}
{Information menu} or {i menu}
{Main menu}
3.{Entertainment}.
The system says:
{{Entertainment}}.
4.{CD}.
The system says:
{{CD on}}.
Page 30 of 223
Controls
29Reference
At a glance
Driving tips
Communications
Navigation
Entertainment
Mobility
Personal Profile
You can set many of your BMW's functions to
suit your personal needs and preferences.
Without any action on your part, Personal Pro-
file ensures that most of these settings are
stored for the remote control currently in use.
When you unlock the car, the remote control
used for the purpose is recognized and the set-
tings stored for it are called up and imple-
mented.
This means that your personal settings are
active when you return to your BMW, even if the
car was used in the meantime by someone else
with a remote control of their own and the set-
tings were changed accordingly.
You can configure a maximum of three remote
controls for three different people. The prereq-
uisite for this is that each person has his or her
own remote control.
Personal Profile settings
For more information on specific settings, refer
to the specified pages.
>Response of the central locking system
when the car is unlocked, refer to page30
>Automatic locking of the vehicle, refer to
page32
>Automatic adjustment of the driver's seat
and the exterior mirrors after unlocking
*,
refer to page43
>Functions assigned to the programmable
buttons
* on the steering wheel, refer to
page45
>12h/24h mode of the clock, refer to page72
>Date format, refer to page73
>Brightness of the Control Display, refer to
page76
>Language on the Control Display, refer to
page76
>Units of measure for fuel consumption, dis-
tance covered/remaining distances, and
temperature, refer to page68
>Show visual warning for Park Distance Con-
trol PDC
*, refer to page77>Automatic climate control: AUTO program,
activating/deactivating cooling function and
automatic recirculated-air control, setting
temperature, air flow rate and distribution,
refer to page90 ff
>Audio volume, refer to page135
>Tone control, refer to page135
>Speed-dependent volume control, refer to
page135
Central locking system
The concept
The central locking system is ready for opera-
tion whenever the driver's door is closed.
The system simultaneously engages and
releases the locks on the following:
>Doors
>Luggage compartment lid
>Fuel filler door
Operation of the central locking system
from outside
>Via the remote control
>Via the door lock
The anti-theft system is automatically activated
whenever you operate the central locking sys-
tem from outside the vehicle. It prevents the
doors from being unlocked using the lock but-
tons or door handles. The interior lamp and the
courtesy lamps
* are also switched on or off
with the remote control. The alarm system
* is
also armed or disarmed.
For further details of the alarm system,
refer to
page34.
Operation of the central locking system
from inside
By means of the button for central locking, refer
to page32.
In the event of a sufficiently severe accident, the
central locking system unlocks automatically. In
addition, the hazard warning flashers and inte-
rior lamps come on.
Page 35 of 223
Opening and closing
34
Closing
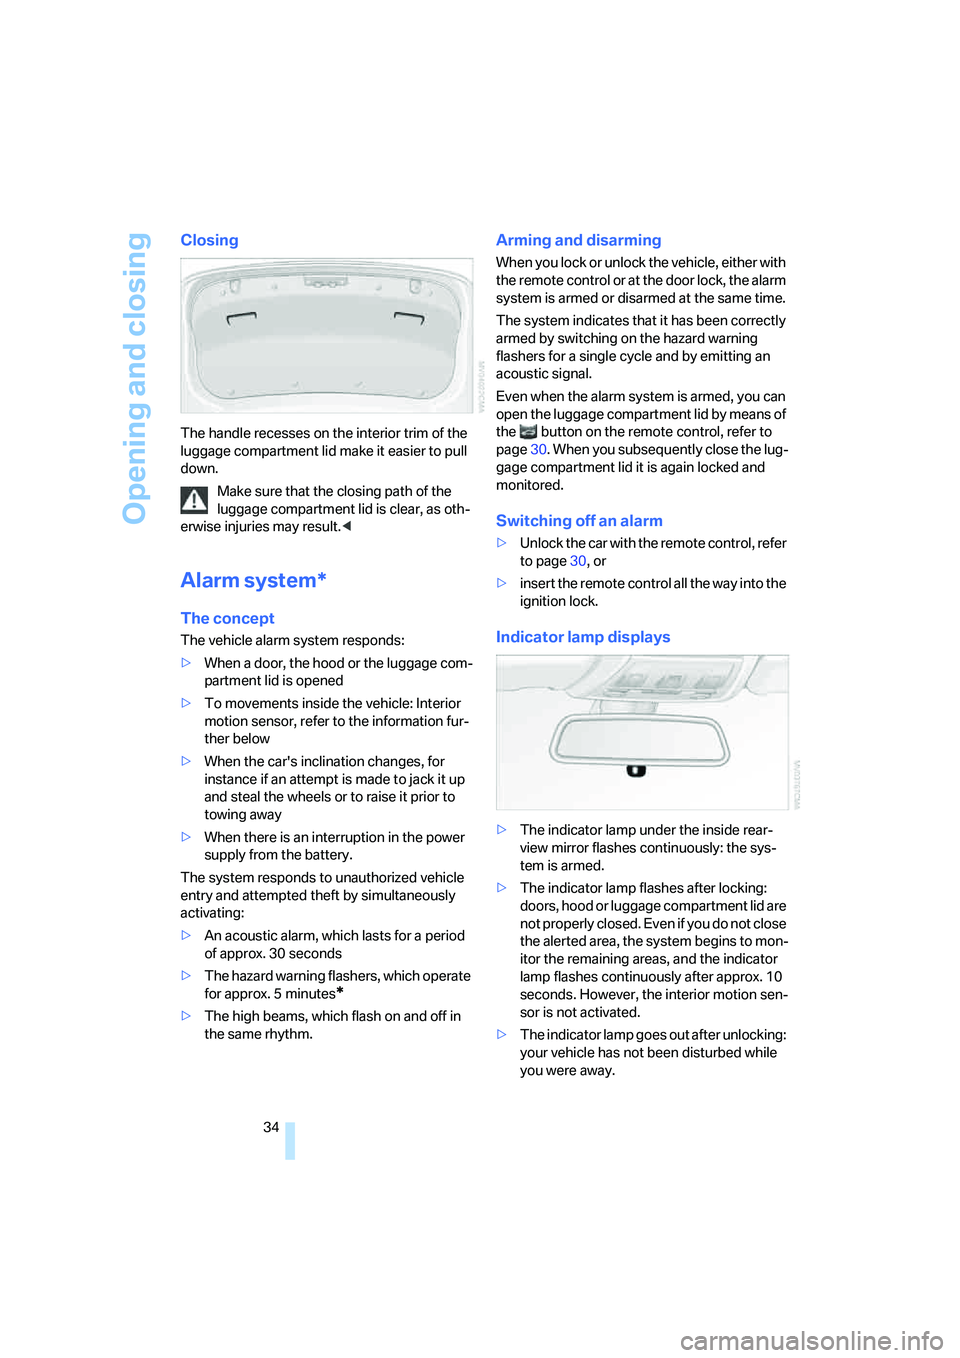
The handle recesses on the interior trim of the
luggage compartment lid make it easier to pull
down.
Make sure that the closing path of the
luggage compartment lid is clear, as oth-
erwise injuries may result.<
Alarm system*
The concept
The vehicle alarm system responds:
>When a door, the hood or the luggage com-
partment lid is opened
>To movements inside the vehicle: Interior
motion sensor, refer to the information fur-
ther below
>When the car's inclination changes, for
instance if an attempt is made to jack it up
and steal the wheels or to raise it prior to
towing away
>When there is an interruption in the power
supply from the battery.
The system responds to unauthorized vehicle
entry and attempted theft by simultaneously
activating:
>An acoustic alarm, which lasts for a period
of approx. 30 seconds
>The hazard warning flashers, which operate
for approx. 5 minutes
*
>The high beams, which flash on and off in
the same rhythm.
Arming and disarming
When you lock or unlock the vehicle, either with
the remote control or at the door lock, the alarm
system is armed or disarmed at the same time.
The system indicates that it has been correctly
armed by switching on the hazard warning
flashers for a single cycle and by emitting an
acoustic signal.
Even when the alarm system is armed, you can
open the luggage compartment lid by means of
the button on the remote control, refer to
page30. When you subsequently close the lug-
gage compartment lid it is again locked and
monitored.
Switching off an alarm
>Unlock the car with the remote control, refer
to page30, or
>insert the remote control all the way into the
ignition lock.
Indicator lamp displays
>The indicator lamp under the inside rear-
view mirror flashes continuously: the sys-
tem is armed.
>The indicator lamp flashes after locking:
doors, hood or luggage compartment lid are
not properly closed. Even if you do not close
the alerted area, the system begins to mon-
itor the remaining areas, and the indicator
lamp flashes continuously after approx. 10
seconds. However, the interior motion sen-
sor is not activated.
>The indicator lamp goes out after unlocking:
your vehicle has not been disturbed while
you were away.
Page 44 of 223
Controls
43Reference
At a glance
Driving tips
Communications
Navigation
Entertainment
Mobility
If the button was pressed accidentally:
press the button again; the LED goes out.
Safety belts
Observe the adjustment instructions on
page39 to ensure the best possible per-
sonal protection.<
Before every drive, make sure that all occupants
wear their safety belts. Airbags complement the
safety belt as an additional safety device, but
they do not represent a substitute.
On the rear seats, the center belt lock marked
with the letters CENTER is solely intended for
the center passenger.
Fastening
Make sure you hear the latch plate engage in
the belt buckle.
The upper belt anchorage is suitable for adults
of any stature as long as they are sitting cor-
rectly, refer to page39.
Opening
1.Grasp the belt firmly.
2.Press the red button in the buckle.
3.Guide the belt into its reel.
'Fasten safety belts' reminder for front
seats
The indicator lamp comes on and an
acoustic signal sounds. In addition, a
message will appear on the Control
Display. Check whether the safety
belt has been fastened correctly.The 'Fasten safety belts' reminder is issued as
long as the driver's safety belt has not been fas-
tened. The 'Fasten safety belts' reminder is also
activated at road speeds above approx. 5 mph
or 8 km/h if the front passenger's safety belt is
not fastened, if heavy objects are placed on the
front passenger seat, or if driver or front pas-
senger unfasten their safety belts.
Damage to safety belts
If the safety belts are damaged or
stretched in an accident: have the entire
belt system, including the tensioning mecha-
nisms, replaced at your BMW center or at a
workshop that works according to BMW repair
procedures with correspondingly trained per-
sonnel. Have the belt anchorage points
inspected for damage at the same time. Failure
to observe this precaution may prevent the
safety belts from effectively providing optimal
protection when needed.<
Mirrors
Exterior mirrors
The mirror on the front passenger's side
features a lens with a more convex sur-
face than the mirror installed on the driver's
side. When estimating the distance between
yourself and other traffic, bear in mind that the
objects reflected in the mirror are closer than
they appear. This means that estimations of the
distance to following traffic should not be
regarded as precise.<
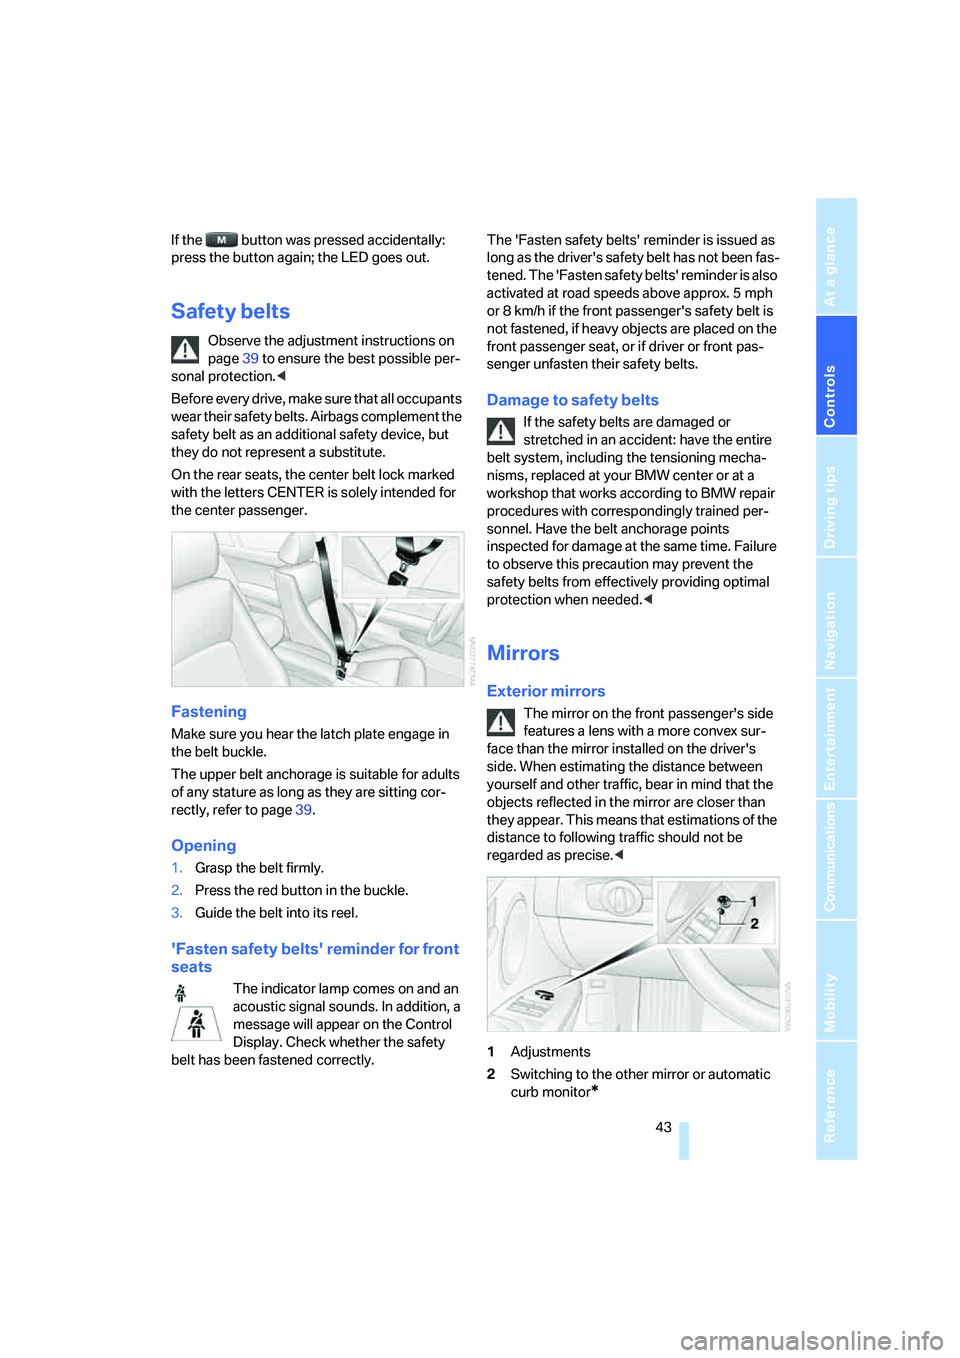
1Adjustments
2Switching to the other mirror or automatic
curb monitor
*
Page 46 of 223
Controls
45Reference
At a glance
Driving tips
Communications
Navigation
Entertainment
Mobility
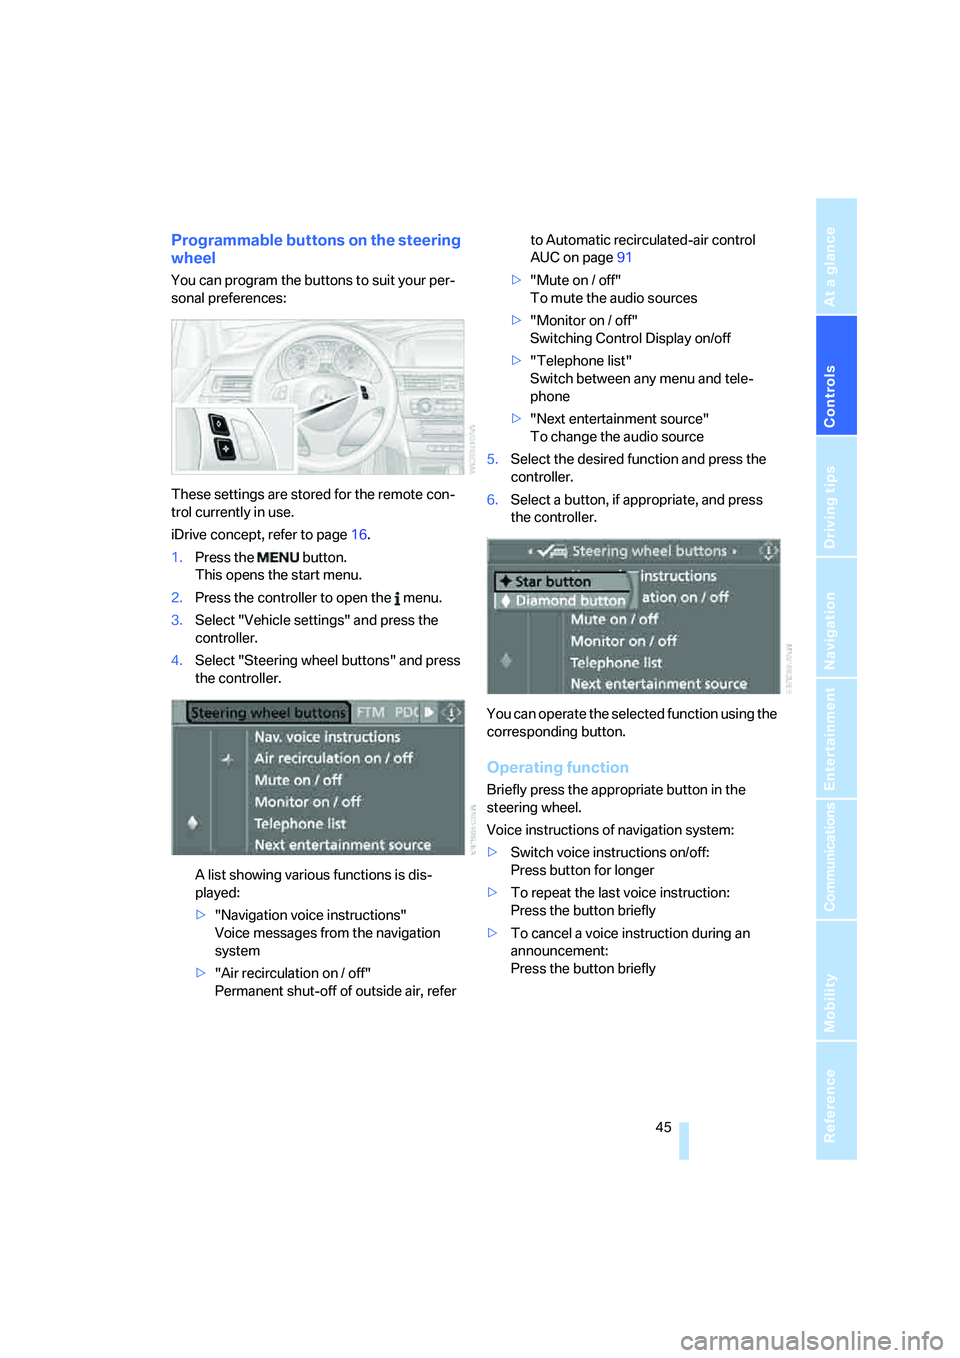
Programmable buttons on the steering
wheel
You can program the buttons to suit your per-
sonal preferences:
These settings are stored for the remote con-
trol currently in use.
iDrive concept, refer to page16.
1.Press the button.
This opens the start menu.
2.Press the controller to open the menu.
3.Select "Vehicle settings" and press the
controller.
4.Select "Steering wheel buttons" and press
the controller.
A list showing various functions is dis-
played:
>"Navigation voice instructions"
Voice messages from the navigation
system
>"Air recirculation on / off"
Permanent shut-off of outside air, refer to Automatic recirculated-air control
AUC on page91
>"Mute on / off"
To mute the audio sources
>"Monitor on / off"
Switching Control Display on/off
>"Telephone list"
Switch between any menu and tele-
phone
>"Next entertainment source"
To change the audio source
5.Select the desired function and press the
controller.
6.Select a button, if appropriate, and press
the controller.
.
You can operate the selected function using the
corresponding button.
Operating function
Briefly press the appropriate button in the
steering wheel.
Voice instructions of navigation system:
>Switch voice instructions on/off:
Press button for longer
>To repeat the last voice instruction:
Press the button briefly
>To cancel a voice instruction during an
announcement:
Press the button briefly
Page 53 of 223
Driving
52
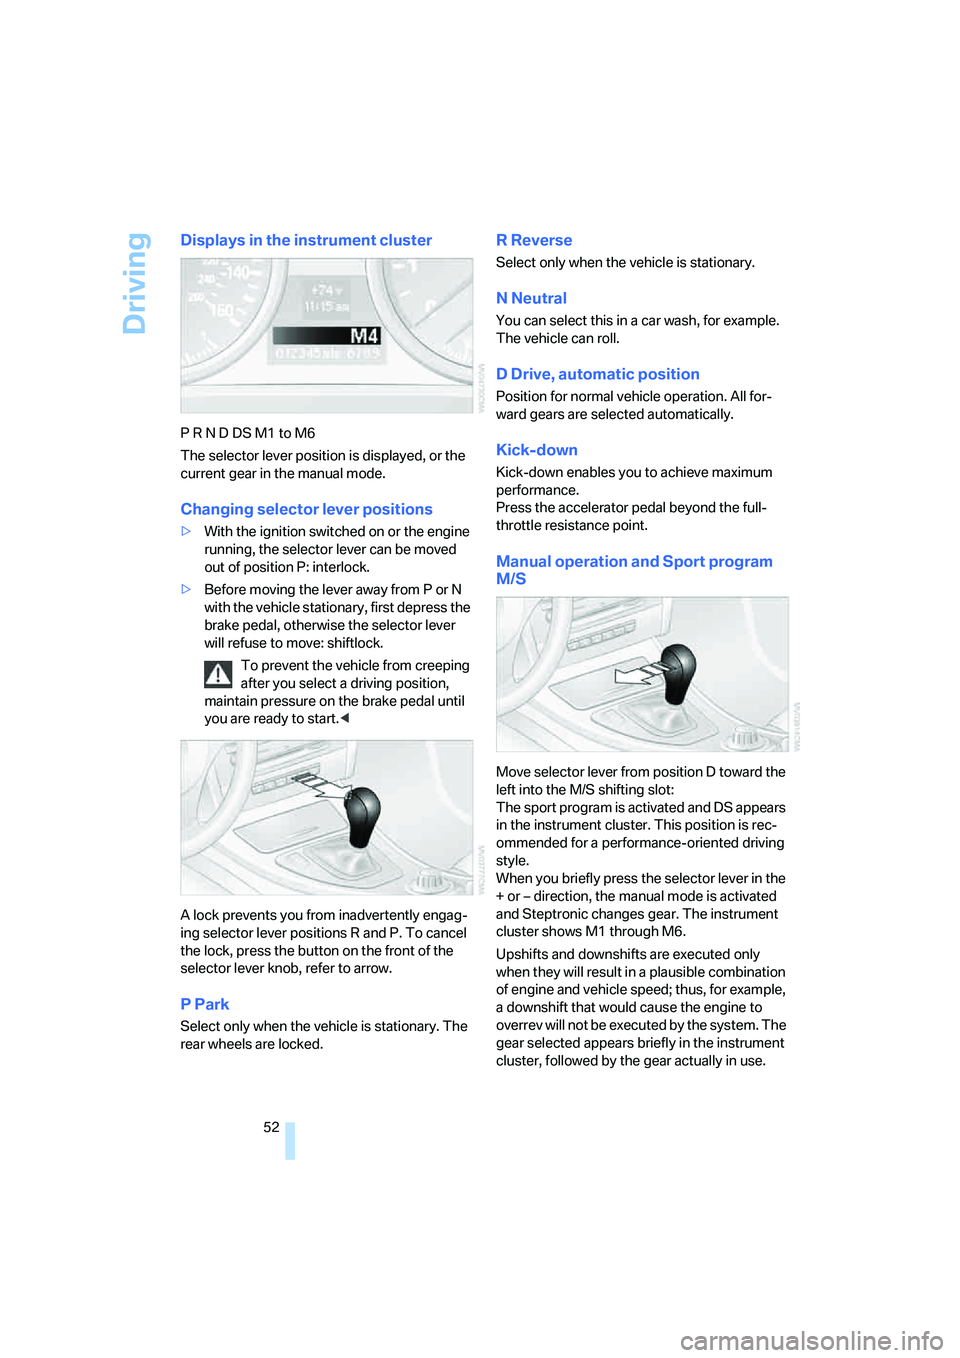
Displays in the instrument cluster
P R N D DS M1 to M6
The selector lever position is displayed, or the
current gear in the manual mode.
Changing selector lever positions
>With the ignition switched on or the engine
running, the selector lever can be moved
out of position P: interlock.
>Before moving the lever away from P or N
with the vehicle stationary, first depress the
brake pedal, otherwise the selector lever
will refuse to move: shiftlock.
To prevent the vehicle from creeping
after you select a driving position,
maintain pressure on the brake pedal until
you are ready to start.<
A lock prevents you from inadvertently engag-
ing selector lever positions R and P. To cancel
the lock, press the button on the front of the
selector lever knob, refer to arrow.
P Park
Select only when the vehicle is stationary. The
rear wheels are locked.
R Reverse
Select only when the vehicle is stationary.
N Neutral
You can select this in a car wash, for example.
The vehicle can roll.
D Drive, automatic position
Position for normal vehicle operation. All for-
ward gears are selected automatically.
Kick-down
Kick-down enables you to achieve maximum
performance.
Press the accelerator pedal beyond the full-
throttle resistance point.
Manual operation and Sport program
M/S
Move selector lever from position D toward the
left into the M/S shifting slot:
The sport program is activated and DS appears
in the instrument cluster. This position is rec-
ommended for a performance-oriented driving
style.
When you briefly press the selector lever in the
+ or – direction, the manual mode is activated
and Steptronic changes gear. The instrument
cluster shows M1 through M6.
Upshifts and downshifts are executed only
when they will result in a plausible combination
of engine and vehicle speed; thus, for example,
a downshift that would cause the engine to
overrev will not be executed by the system. The
gear selected appears briefly in the instrument
cluster, followed by the gear actually in use.