navigation system BMW 335D SEDAN 2010 E90 Workshop Manual
[x] Cancel search | Manufacturer: BMW, Model Year: 2010, Model line: 335D SEDAN, Model: BMW 335D SEDAN 2010 E90Pages: 274, PDF Size: 8.69 MB
Page 179 of 274
177
Entertainment
Reference
At a glance
Controls
Driving tips Communications
Navigation
Mobility
can be used in combination with the mobile
phone, e.g. a laptop.<
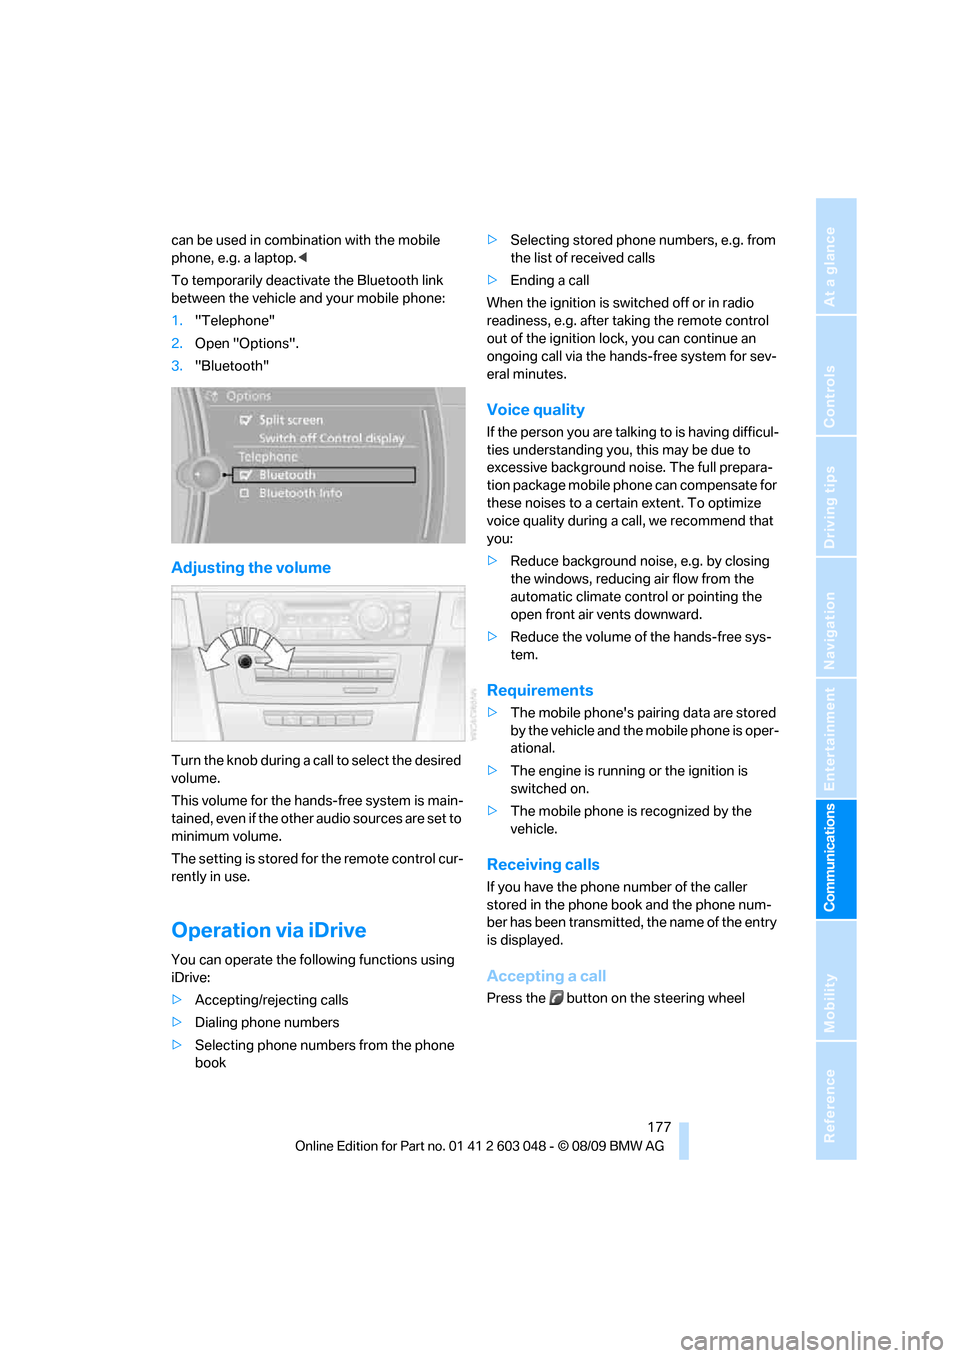
To temporarily deactivate the Bluetooth link
between the vehicle and your mobile phone:
1."Telephone"
2.Open "Options".
3."Bluetooth"
Adjusting the volume
Turn the knob during a call to select the desired
volume.
This volume for the hands-free system is main-
tained, even if the other audio sources are set to
minimum volume.
The setting is stored for the remote control cur-
rently in use.
Operation via iDrive
You can operate the following functions using
iDrive:
>Accepting/rejecting calls
>Dialing phone numbers
>Selecting phone numbers from the phone
book>Selecting stored phone numbers, e.g. from
the list of received calls
>Ending a call
When the ignition is switched off or in radio
readiness, e.g. after taking the remote control
out of the ignition lock, you can continue an
ongoing call via the hands-free system for sev-
eral minutes.
Voice quality
If the person you are talking to is having difficul-
ties understanding you, this may be due to
excessive background noise. The full prepara-
tion package mobile phone can compensate for
these noises to a certain extent. To optimize
voice quality during a call, we recommend that
you:
>Reduce background noise, e.g. by closing
the windows, reducing air flow from the
automatic climate control or pointing the
open front air vents downward.
>Reduce the volume of the hands-free sys-
tem.
Requirements
>The mobile phone's pairing data are stored
by the vehicle and the mobile phone is oper-
ational.
>The engine is running or the ignition is
switched on.
>The mobile phone is recognized by the
vehicle.
Receiving calls
If you have the phone number of the caller
stored in the phone book and the phone num-
ber has been transmitted, the name of the entry
is displayed.
Accepting a call
Press the button on the steering wheel
Page 183 of 274
181
Entertainment
Reference
At a glance
Controls
Driving tips Communications
Navigation
Mobility
My Info
To start destination guidance:
1.Select the message that contains the
desired destination.
2. "Start guidance" or "Add as another
dest.".
To dial the number in the message:
1.Select the message that contains the
desired number.
2. "Call"
Messages from the concierge service
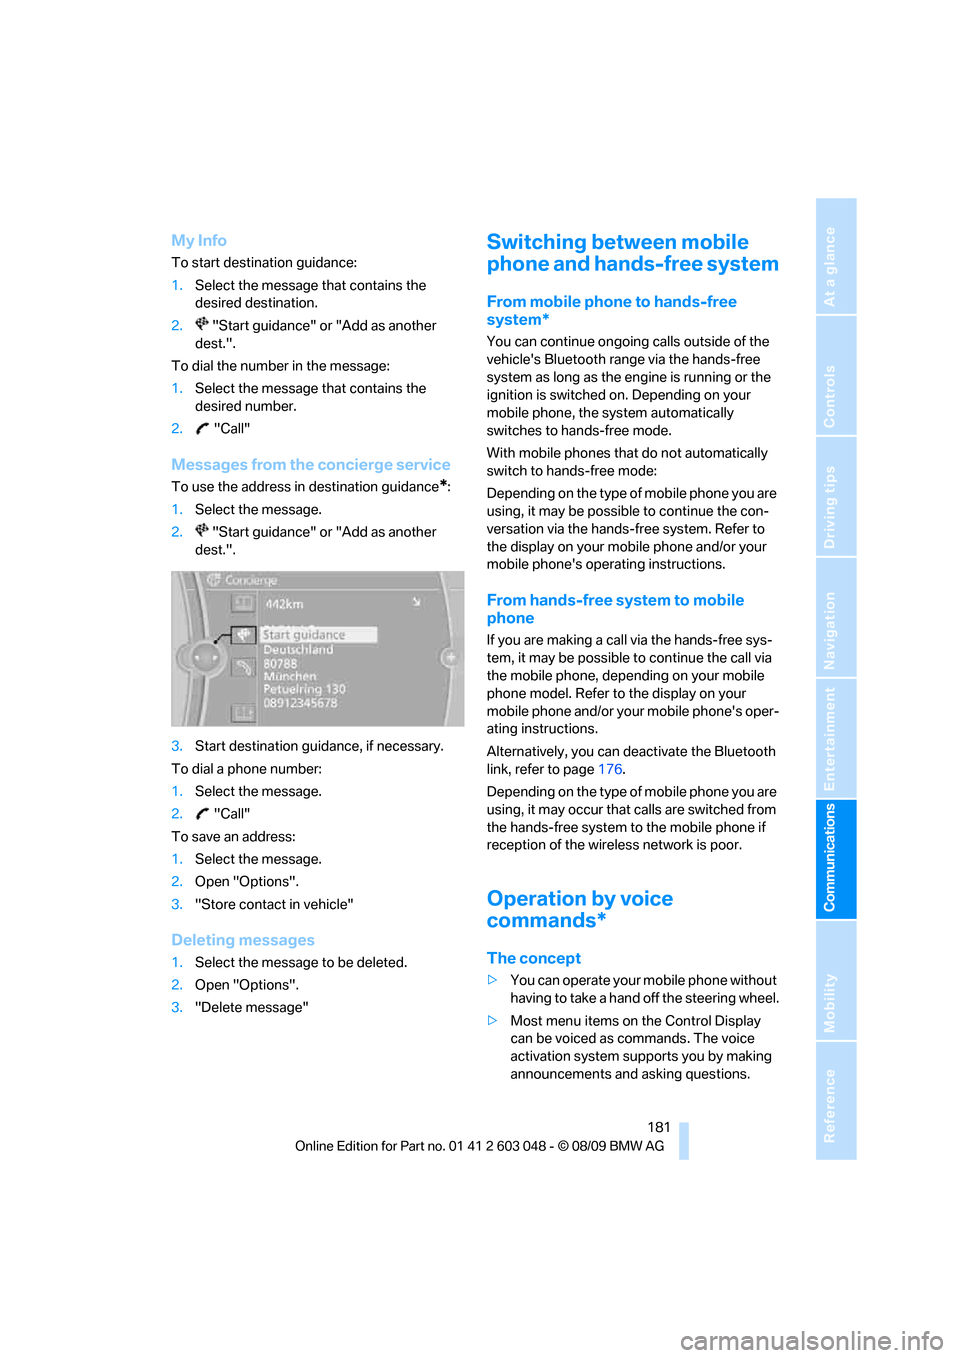
To use the address in destination guidance*:
1.Select the message.
2. "Start guidance" or "Add as another
dest.".
3.Start destination guidance, if necessary.
To dial a phone number:
1.Select the message.
2. "Call"
To save an address:
1.Select the message.
2.Open "Options".
3."Store contact in vehicle"
Deleting messages
1.Select the message to be deleted.
2.Open "Options".
3."Delete message"
Switching between mobile
phone and hands-free system
From mobile phone to hands-free
system*
You can continue ongoing calls outside of the
vehicle's Bluetooth range via the hands-free
system as long as the engine is running or the
ignition is switched on. Depending on your
mobile phone, the system automatically
switches to hands-free mode.
With mobile phones that do not automatically
switch to hands-free mode:
Depending on the type of mobile phone you are
using, it may be possible to continue the con-
versation via the hands-free system. Refer to
the display on your mobile phone and/or your
mobile phone's operating instructions.
From hands-free system to mobile
phone
If you are making a call via the hands-free sys-
tem, it may be possible to continue the call via
the mobile phone, depending on your mobile
phone model. Refer to the display on your
mobile phone and/or your mobile phone's oper-
ating instructions.
Alternatively, you can deactivate the Bluetooth
link, refer to page176.
Depending on the type of mobile phone you are
using, it may occur that calls are switched from
the hands-free system to the mobile phone if
reception of the wireless network is poor.
Operation by voice
commands*
The concept
>You can operate your mobile phone without
having to take a hand off the steering wheel.
>Most menu items on the Control Display
can be voiced as commands. The voice
activation system supports you by making
announcements and asking questions.
Page 185 of 274
183
Entertainment
Reference
At a glance
Controls
Driving tips Communications
Navigation
Mobility
Calling
Dialing phone numbers
The connection to the desired subscriber is
established.
Correcting phone numbers
After the last spoken sequence of digits has
been repeated by the system, you can delete
this sequence of digits.
The command {Correct number} can be
repeated as often as you like.
Deleting phone numbers
All digits entered up to this point are deleted.
Redialing
To redial the phone number dialed last:
Voice phone book
A separate voice phone book is needed for
operation using voice commands.
The entries must be entered using voice com-
mands and are separate from the memory in the
mobile phone. In this case, phone numbers
stored on the mobile phone cannot be called up
or saved there using voice commands. Up to 50
entries can be set up. An entry always consists
of a name and a phone number.
Creating and editing a voice phone
book
To store an entry:An entry always consists of a name and a phone
number.
To delete an entry:
You can delete any entry from the voice phone
book.
To delete all entries:
{Delete phonebook} deletes all entries in the
phone book.
To listen to and select the entries:
You can have all entries in your voice phone
book read aloud in the order in which they were
entered and select a specific entry to establish a
connection: 1.{Dial number}.
2.Say the phone number.
For telephone calls abroad, say {Plus}
and then the country code.
3.{Dial}.
{Correct number}.
The digits are deleted.
{Delete}.
{Redial}.
1.{Save name}.
2.Say the name.
Saying the name for the voice phone
book should not take longer than
approx. 2 seconds.
3.Say the phone number after being
prompted to do so by the system.
4.To save the phone number:
{Save}.
1.{Delete name}.
The dialog for deleting an entry opens.
2.Say the name when prompted.
3.Confirm the query with {Yes}.
1.{Delete phonebook}.
The dialog for deleting the phone book
opens.
2.Confirm the query with {Yes}.
3.Confirm the query again with {Yes}.
1.{Read phonebook}.
The dialog for reading the phone book
opens.
2.Say {Dial number} when the desired
entry is read.
Page 188 of 274
Contacts
186
Contacts
You can create and edit contacts. The contacts
from the mobile phone
* are displayed as well if
this function is supported by the mobile phone.
The addresses can be used as destinations for
navigation and the phone numbers can be
dialed.
New contact
1."Contacts"
2."New contact"
3.If the entry fields are still filled with the pre-
vious entries, select "Delete input fields".
4.To fill in the entry fields:
Select the symbol next to the entry field.
5.Enter the text.
If the vehicle is equipped with a navi-
gation system, it is only possible to
enter addresses that are contained in the
navigation data in the vehicle. This ensures
that destination guidance is possible for all
addresses.<
6.If applicable, "Store"
7."Store contact in vehicle"
Specifying a contact as the home
address
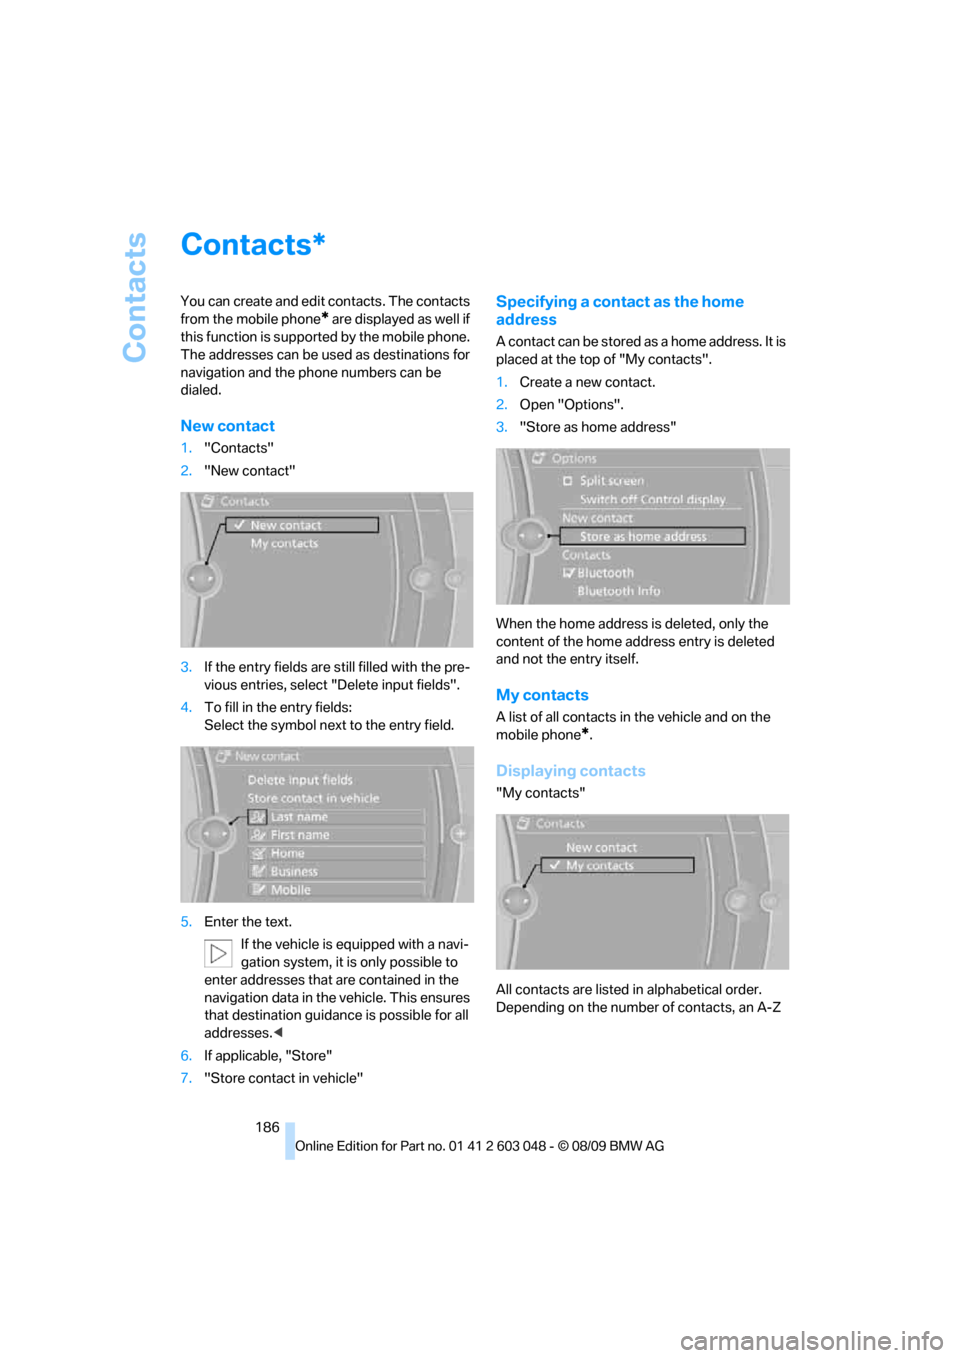
A contact can be stored as a home address. It is
placed at the top of "My contacts".
1.Create a new contact.
2.Open "Options".
3."Store as home address"
When the home address is deleted, only the
content of the home address entry is deleted
and not the entry itself.
My contacts
A list of all contacts in the vehicle and on the
mobile phone
*.
Displaying contacts
"My contacts"
All contacts are listed in alphabetical order.
Depending on the number of contacts, an A-Z
*
Page 199 of 274
Mobility
197Reference
At a glance
Controls
Driving tips
Communications
Navigation
Entertainment
Observe the following when refueling
When handling fuels, follow the safety
instructions provided at filling stations;
otherwise, there is a risk of personal injury or
property damage.<
When refueling, insert the filler nozzle com-
pletely into the filler pipe. Avoid lifting the filler
nozzle while filling the tank, as that would lead
to
>Premature pump shutoff
>Reduced efficiency of the fuel-vapor recov-
ery system.
The fuel tank is full when the filler nozzle clicks
off the first time.
Fuel tank capacity
Refuel as soon as possible once your
cruising range falls below 30 miles/
50 km; otherwise, engine functions are not
ensured and damage can occur.<
Gasoline engine
Approx. 16.1 US gallons/61 liters, including the
reserve capacity of 2.1 US gallons/8 liters.
Diesel engine
Approx. 16.1 US gallons/61 liters, including the
reserve capacity of 1.7 US gallons/6.5 liters.
Fuel specifications
Gasoline engine: required fuel
Do not refuel with leaded fuel; otherwise,
the catalytic converter will be damaged.
Do not fill the tank with E85, i.e. fuel containing
85Ξ ethanol, nor with FlexFuel. Otherwise, the
engine and fuel supply system will be dam-
aged.<
Super Premium Gasoline/AKI 91
This gasoline is highly recommended.
However, you may also use gasoline with less
AKI. The minimum AKI Rating is:
>323i, 328i/xDrive: 87>335i/xDrive: 89.
If you use gasoline with this minimum AKI Rat-
ing, the engine may produce knocking sounds
when starting at high outside temperatures.
This has no effect on the engine life.
Do not use any gasoline below the speci-
fied minimum fuel grade. Otherwise, the
engine could be damaged.<
Use high-quality brands
Field experience has indicated significant dif-
ferences in fuel quality: volatility, composition,
additives, etc., among gasolines offered for sale
in the United States and Canada. Fuels contain-
ing up to and including 10Ξ ethanol or other
oxygenates with up to 2.8Ξ oxygen by weight,
that is, 15Ξ MTBE or 3Ξ methanol plus an
equivalent amount of cosolvent, will not void the
applicable warranties with respect to defects in
materials or workmanship.
The use of poor-quality fuels may result in
drivability, starting and stalling problems
especially under certain environmental condi-
tions such as high ambient temperature and
high altitude.
Should you encounter drivability problems
which you suspect could be related to the fuel
you are using, we recommend that you respond
by switching to a recognized high-quality brand
such as gasoline that is advertised as Top Tier
Detergent Gasoline.
Failure to comply with these recommendations
may also result in unscheduled maintenance.<
BMW Advanced Diesel: required fuel
Ultra-low sulfur diesel
The engine of your BMW is designed for diesel
with low sulfur content:
Ultra-low sulfur diesel ASTM D 975-07a.
Refuel with ultra-low sulfur diesel only.
The percentage of biodiesel in the fuel
must not exceed 5 %; this type of fuel is referred
to as B5. Do not refuel with gasoline. If you have
accidentally refueled with the wrong fuel, e.g.
with gasoline, do not start the engine; other-
wise, engine damage may occur.<
Page 221 of 274
Mobility
219Reference
At a glance
Controls
Driving tips
Communications
Navigation
Entertainment
Important parts of the engine compartment
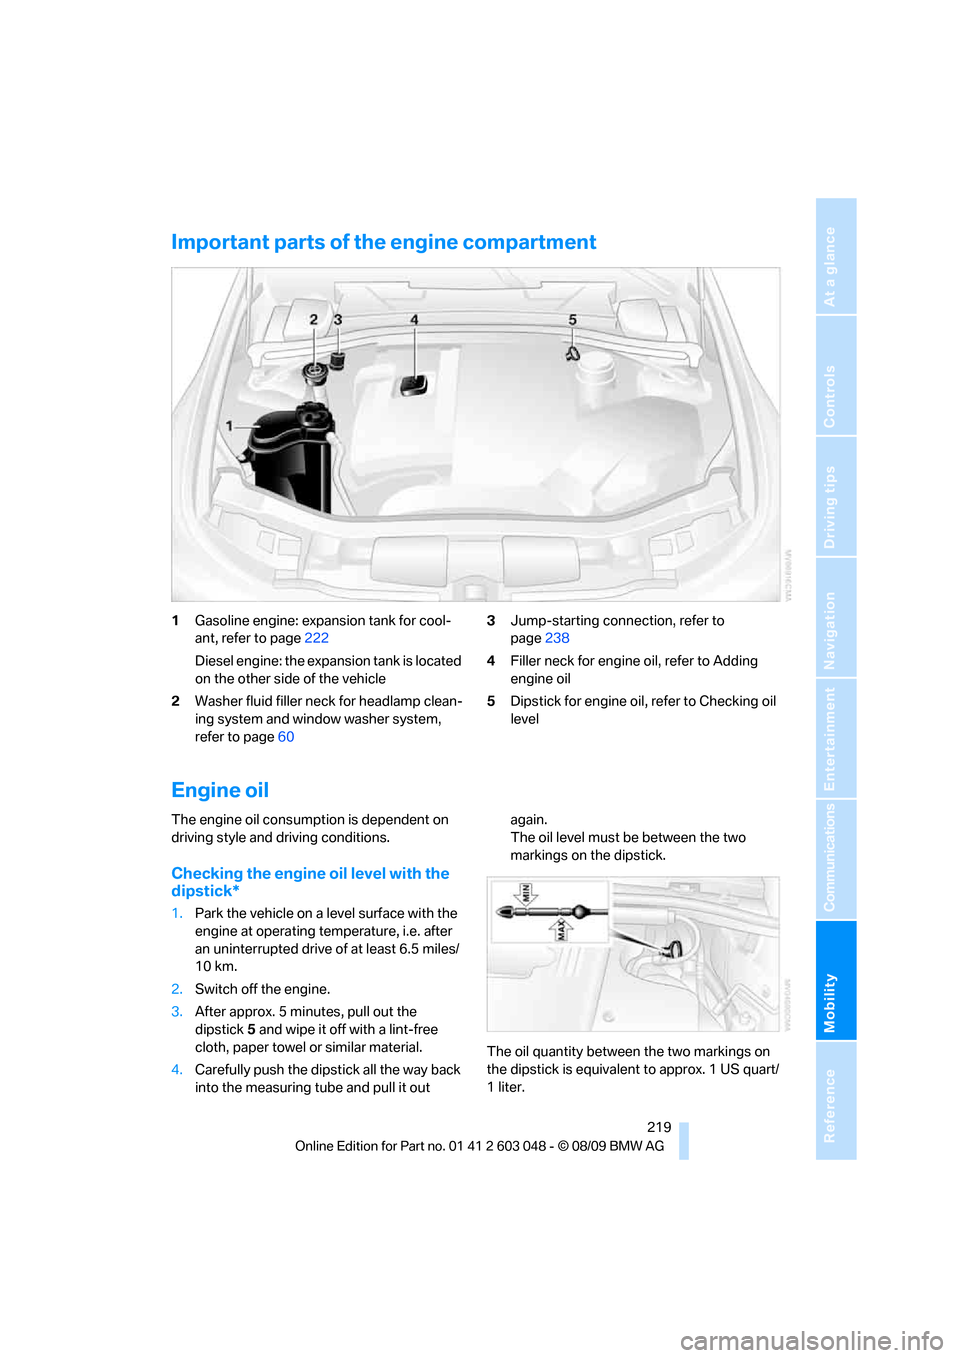
1Gasoline engine: expansion tank for cool-
ant, refer to page222
Diesel engine: the expansion tank is located
on the other side of the vehicle
2Washer fluid filler neck for headlamp clean-
ing system and window washer system,
refer to page603Jump-starting connection, refer to
page238
4Filler neck for engine oil, refer to Adding
engine oil
5Dipstick for engine oil, refer to Checking oil
level
Engine oil
The engine oil consumption is dependent on
driving style and driving conditions.
Checking the engine oil level with the
dipstick*
1.Park the vehicle on a level surface with the
engine at operating temperature, i.e. after
an uninterrupted drive of at least 6.5 miles/
10 km.
2.Switch off the engine.
3.After approx. 5 minutes, pull out the
dipstick5 and wipe it off with a lint-free
cloth, paper towel or similar material.
4.Carefully push the dipstick all the way back
into the measuring tube and pull it out again.
The oil level must be between the two
markings on the dipstick.
The oil quantity between the two markings on
the dipstick is equivalent to approx. 1 US quart/
1liter.
Page 223 of 274
Mobility
221Reference
At a glance
Controls
Driving tips
Communications
Navigation
Entertainment
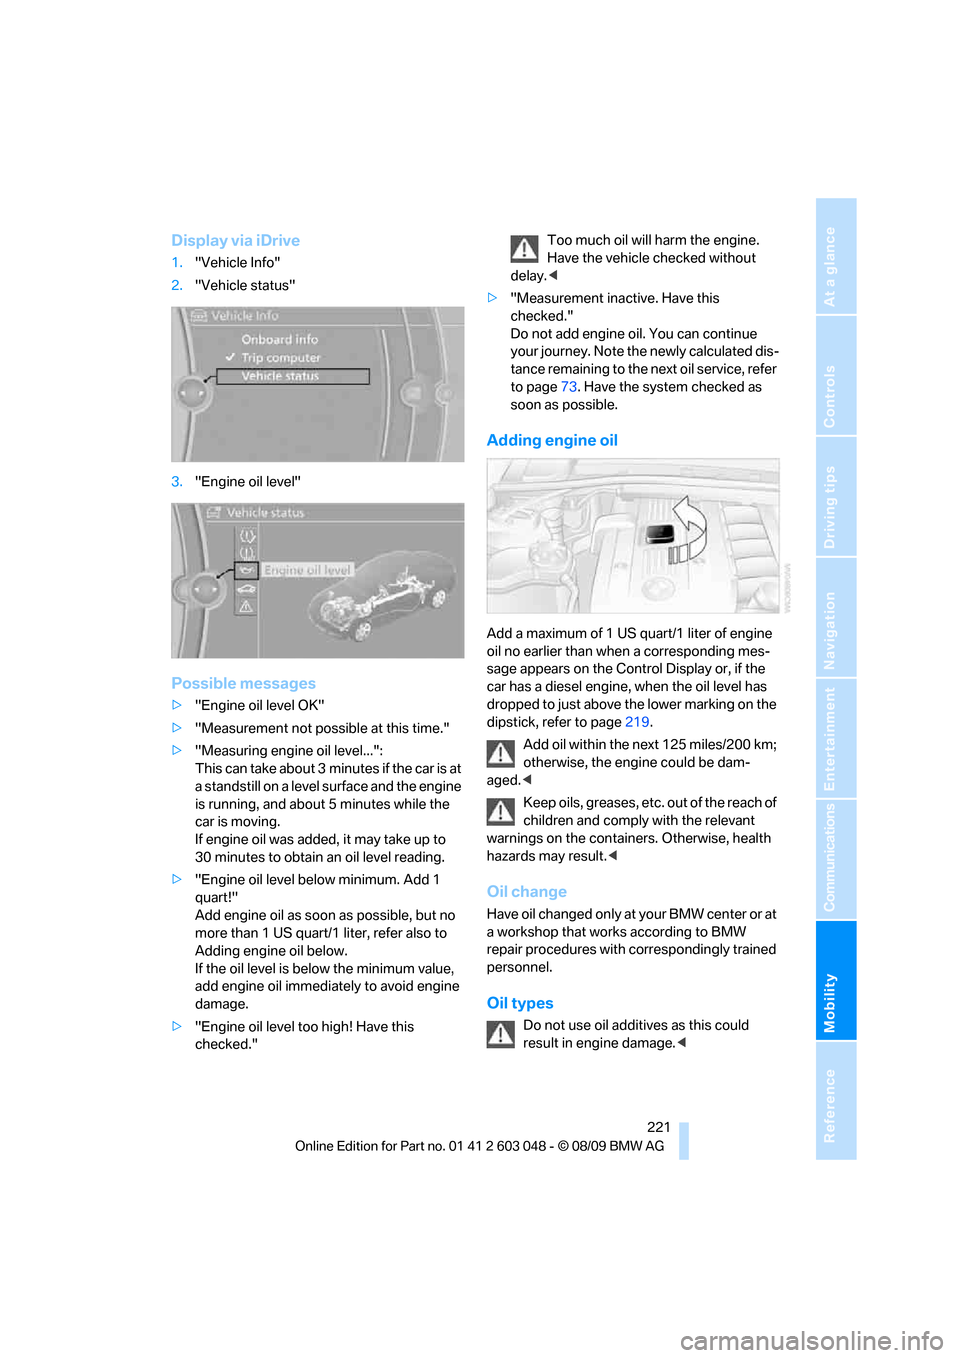
Display via iDrive
1."Vehicle Info"
2."Vehicle status"
3."Engine oil level"
Possible messages
>"Engine oil level OK"
>"Measurement not possible at this time."
>"Measuring engine oil level...":
This can take about 3 minutes if the car is at
a standstill on a level surface and the engine
is running, and about 5 minutes while the
car is moving.
If engine oil was added, it may take up to
30 minutes to obtain an oil level reading.
>"Engine oil level below minimum. Add 1
quart!"
Add engine oil as soon as possible, but no
more than 1 US quart/1 liter, refer also to
Adding engine oil below.
If the oil level is below the minimum value,
add engine oil immediately to avoid engine
damage.
>"Engine oil level too high! Have this
checked."Too much oil will harm the engine.
Have the vehicle checked without
delay.<
>"Measurement inactive. Have this
checked."
Do not add engine oil. You can continue
your journey. Note the newly calculated dis-
tance remaining to the next oil service, refer
to page73. Have the system checked as
soon as possible.
Adding engine oil
Add a maximum of 1 US quart/1 liter of engine
oil no earlier than when a corresponding mes-
sage appears on the Control Display or, if the
car has a diesel engine, when the oil level has
dropped to just above the lower marking on the
dipstick, refer to page219.
Add oil within the next 125 miles/200 km;
otherwise, the engine could be dam-
aged.<
Keep oils, greases, etc. out of the reach of
children and comply with the relevant
warnings on the containers. Otherwise, health
hazards may result.<
Oil change
Have oil changed only at your BMW center or at
a workshop that works according to BMW
repair procedures with correspondingly trained
personnel.
Oil types
Do not use oil additives as this could
result in engine damage.<
Page 225 of 274
Mobility
223Reference
At a glance
Controls
Driving tips
Communications
Navigation
Entertainment
Maintenance
BMW Maintenance System
The BMW Maintenance System supports the
preservation of the traffic and operating safety
of your BMW. The objective is to optimize
efforts with respect to minimal vehicle mainte-
nance costs.
If and when you come to sell your BMW, a com-
prehensive record of servicing will prove a sig-
nificant benefit.
Condition Based Service CBS
Sensors and special algorithms take the differ-
ent driving conditions of your BMW into
account. Condition Based Service uses this to
determine the current and future service
requirements. By letting you define a service
and maintenance regimen that reflects your
own individual requirements, the system builds
the basis for trouble-free driving.
On the Control Display, you can have the
remaining times or distances for selected main-
tenance tasks and any legally prescribed dates
displayed, refer to page73:
>Engine oil
>Brake pads: separately for front and rear
>Brake fluid
>Vehicle check
>Legally mandated inspections depending
on local regulations
>Diesel particulate filter
*
Service data in the remote control
Your vehicle continuously stores service-
requirement information in the remote control
while you are driving. Your BMW Service Advi-
sor can read out this data from the remote con-
trol unit, and propose an optimized mainte-
nance approach. Whenever you take your car in
for servicing you should therefore hand your
BMW Service Advisor the remote control unit
that you last used.
Make sure that the date is always set cor-
rectly, refer to page76; otherwise, the
effectiveness of Condition Based Service CBS
is not assured.<
Service and Warranty Information
Booklet for US models and Warranty
and Service Guide Booklet for
Canadian models
Please consult your Service and Warranty Infor-
mation Booklet for US models and Warranty
and Service Guide Booklet for Canadian models
for additional information on service require-
ments.
BMW recommends that you have service
and repair operations performed at your
BMW center.
Take the time to ensure that these service pro-
cedures are confirmed by entries in your vehi-
cle's Service and Warranty Information Booklet
for US models and Warranty and Service Guide
Booklet for Canadian models. These entries
verify that your vehicle has received the speci-
fied regular maintenance.<
Page 233 of 274
Mobility
231Reference
At a glance
Controls
Driving tips
Communications
Navigation
Entertainment
Replacing the corner-illuminating
lamp*
H3 bulb, 55 watts
1.Switch off the lamps and take the remote
control out of the ignition lock.
2.Remove the upper cover from the head-
lamp. To do so, pull the rubber seal up and
off and unscrew the cover using the screw-
driver from the onboard vehicle tool kit, see
arrow.
3.Release the wire bracket from the anchor,
see arrow, and fold it up.
4.Disconnect the plug, change the bulb and
reconnect the plug.
5.Insert the bulb.
6.Fold the wire bracket down and engage it.
7.Reattach the cover.
Be careful when installing the cover; oth-
erwise, leaks could occur and cause dam-
age to the headlamp system.<
Halogen lamps
H7 bulb, 55 watts
Always wear gloves and eye protection;
the atmosphere within the H7 bulb is pressurized. Otherwise, there is a risk of injury if
the bulb is damaged.<
There are separate headlamp covers for low-
beam headlamps and high-beam headlamps.
Be careful when installing the covers; oth-
erwise, leaks could occur and cause dam-
age to the headlamp system.<
For checking and adjusting headlamp
aim, please contact your BMW center.<
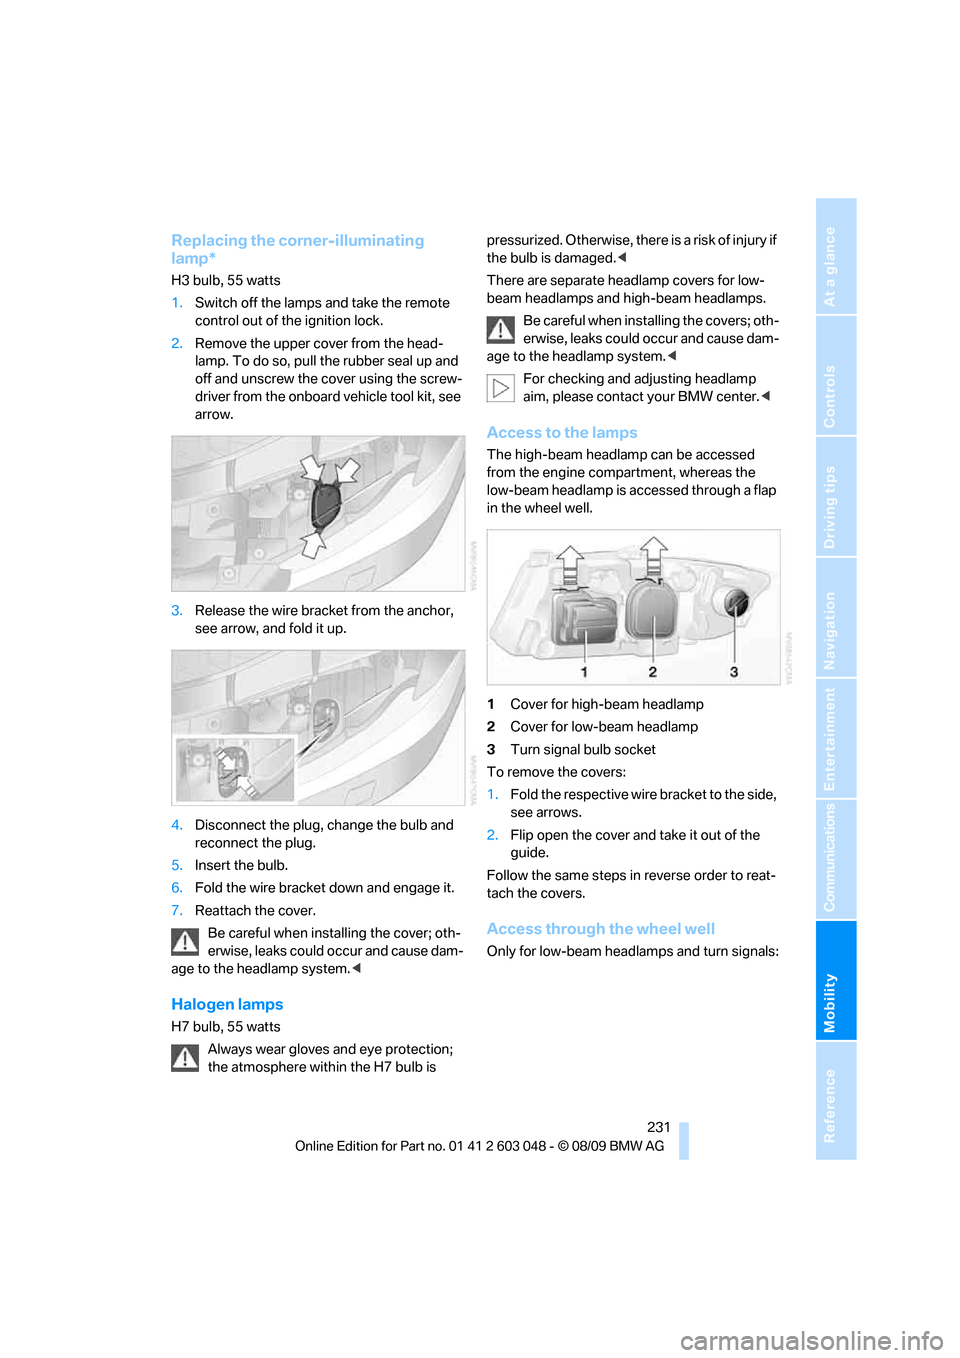
Access to the lamps
The high-beam headlamp can be accessed
from the engine compartment, whereas the
low-beam headlamp is accessed through a flap
in the wheel well.
1Cover for high-beam headlamp
2Cover for low-beam headlamp
3Turn signal bulb socket
To remove the covers:
1.Fold the respective wire bracket to the side,
see arrows.
2.Flip open the cover and take it out of the
guide.
Follow the same steps in reverse order to reat-
tach the covers.
Access through the wheel well
Only for low-beam headlamps and turn signals:
Page 237 of 274
Mobility
235Reference
At a glance
Controls
Driving tips
Communications
Navigation
Entertainment
3.Release the bulb holder at the clip, see
arrow, and remove.
4.Apply gentle pressure to the bulb while
turning it to the left for removal and replace-
ment.
5.Re-engage the bulb holder so that it audibly
clicks into place.
6.Reattach the trim of the tailgate.
License plate lamp, center brake lamp,
parking/tail lamp and turn signal*
These lamps use LED technology for operation.
In the event of a malfunction, please contact
your BMW center or a workshop that works
according to BMW repair procedures with cor-
respondingly trained personnel.
Changing wheels
Your BMW is equipped with run-flat tires as
standard. This removes the need to change a
wheel immediately in the event of a puncture.
For information on continuing to drive with a
damaged tire, refer to Indication of a flat tire on
page85.
The symbol identifying run-flat tires is a circle
with the letters RSC on the sidewall, refer to
Run-flat tires, page216.
When mounting new tires or changing over
from summer to winter tires and vice versa,
mount run-flat tires for your own safety. In the
event of a flat, no spare wheel is available. Your
BMW center will be glad to advise you. Refer
also to New wheels and tires, page216.The tools for changing wheels are avail-
able as optional accessories from your
BMW center.<
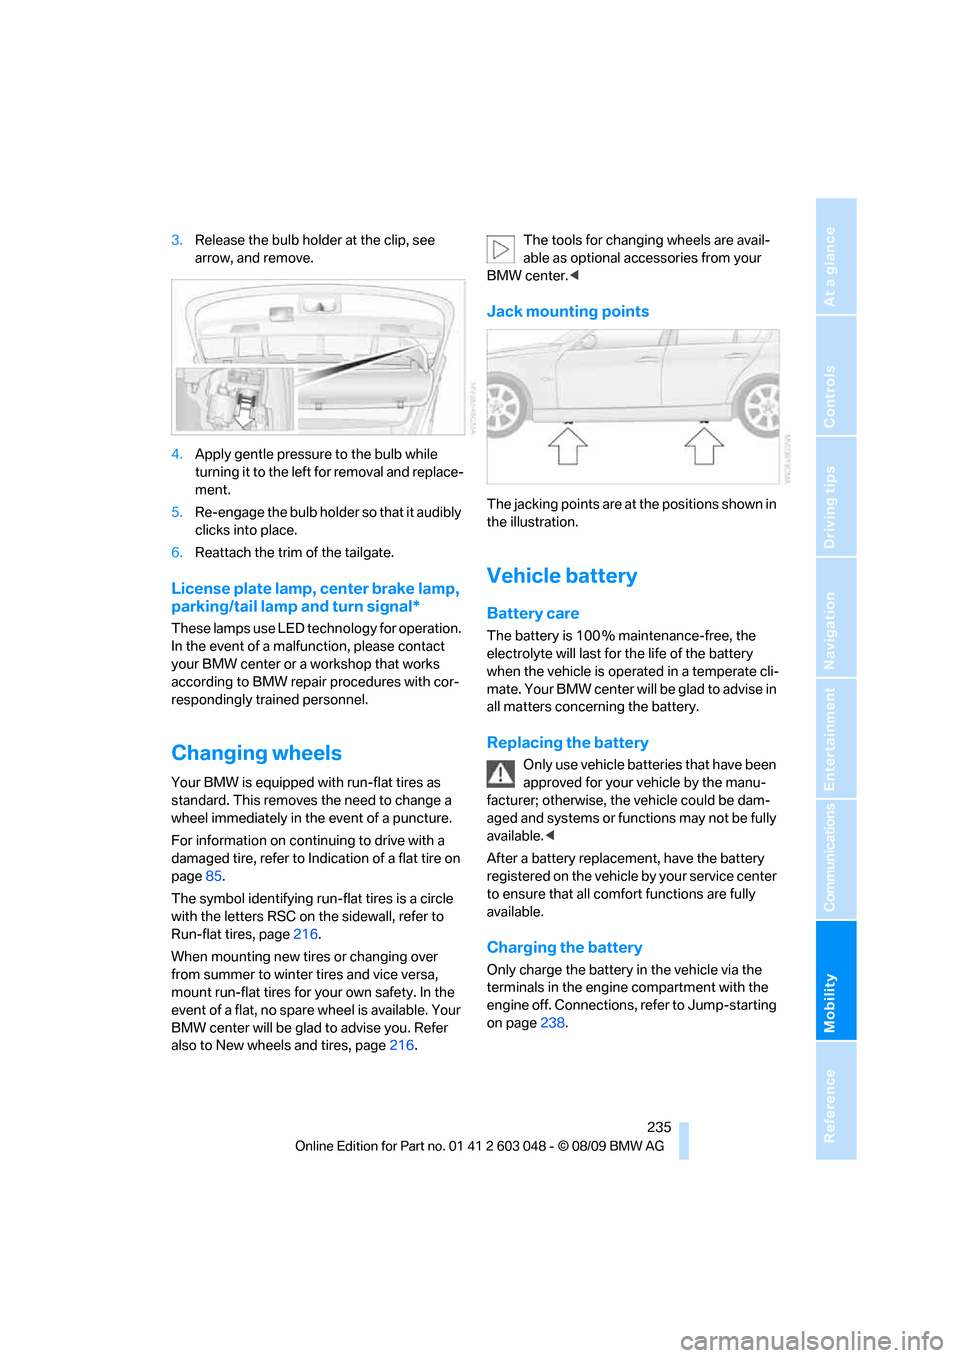
Jack mounting points
The jacking points are at the positions shown in
the illustration.
Vehicle battery
Battery care
The battery is 100 % maintenance-free, the
electrolyte will last for the life of the battery
when the vehicle is operated in a temperate cli-
mate. Your BMW center will be glad to advise in
all matters concerning the battery.
Replacing the battery
Only use vehicle batteries that have been
approved for your vehicle by the manu-
facturer; otherwise, the vehicle could be dam-
aged and systems or functions may not be fully
available.<
After a battery replacement, have the battery
registered on the vehicle by your service center
to ensure that all comfort functions are fully
available.
Charging the battery
Only charge the battery in the vehicle via the
terminals in the engine compartment with the
engine off. Connections, refer to Jump-starting
on page238.