display BMW 335I XDRIVE CONVERTIBLE 2011 E94 User Guide
[x] Cancel search | Manufacturer: BMW, Model Year: 2011, Model line: 335I XDRIVE CONVERTIBLE, Model: BMW 335I XDRIVE CONVERTIBLE 2011 E94Pages: 278, PDF Size: 8.23 MB
Page 21 of 278
At a glance
19Reference
Controls
Driving tips
Communications
Navigation
Entertainment
Mobility
4.Turn the controller until "Time:" is high-
lighted, and then press the controller.
5.Turn the controller to set the hours and
press the controller.
6.Turn the controller to set the minutes and
press the controller.
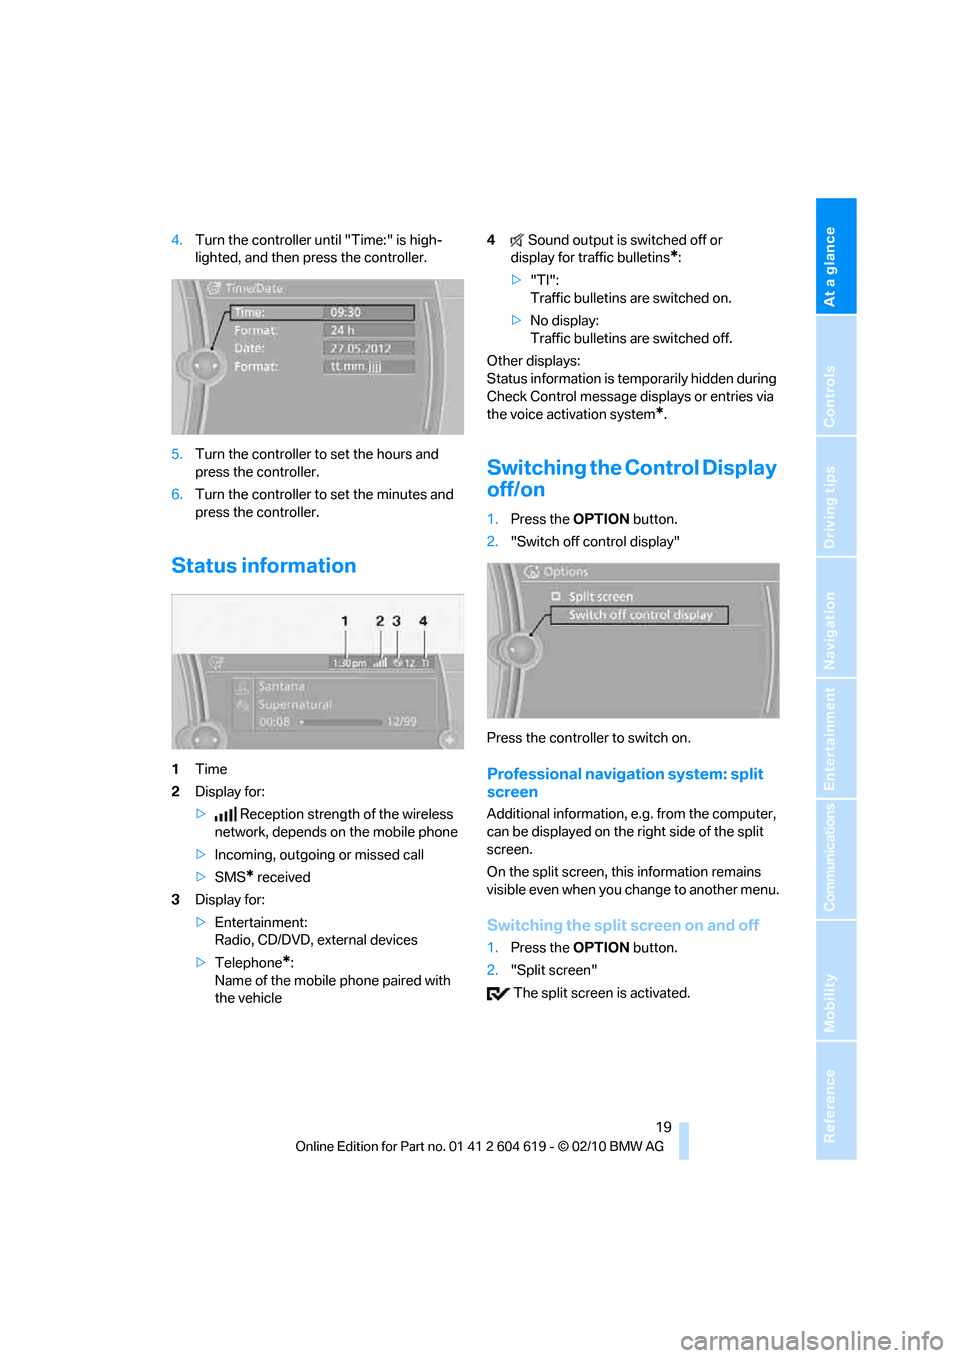
Status information
1Time
2Display for:
>Reception strength of the wireless
network, depends on the mobile phone
>Incoming, outgoing or missed call
>SMS
* received
3Display for:
>Entertainment:
Radio, CD/DVD, external devices
>Telephone
*:
Name of the mobile phone paired with
the vehicle4Sound output is switched off or
display for traffic bulletins
*:
>"TI":
Traffic bulletins are switched on.
>No display:
Traffic bulletins are switched off.
Other displays:
Status information is temporarily hidden during
Check Control message displays or entries via
the voice activation system
*.
Switching the Control Display
off/on
1.Press the OPTIONbutton.
2."Switch off control display"
Press the controller to switch on.
Professional navigation system: split
screen
Additional information, e.g. from the computer,
can be displayed on the right side of the split
screen.
On the split screen, this information remains
visible even when you change to another menu.
Switching the split screen on and off
1.Press the OPTIONbutton.
2."Split screen"
The split screen is activated.
Page 22 of 278
iDrive
20
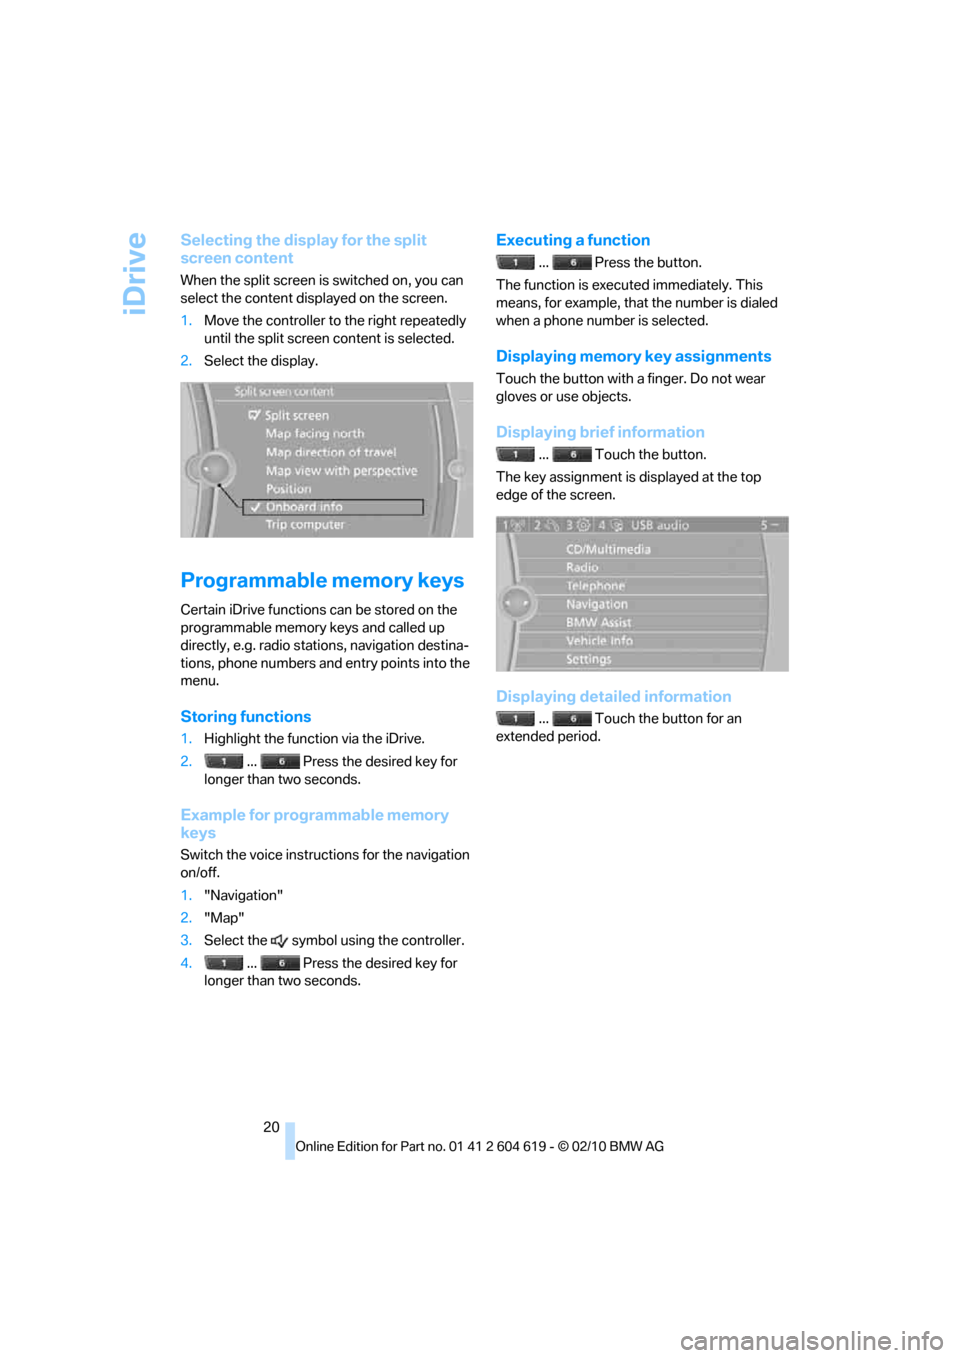
Selecting the display for the split
screen content
When the split screen is switched on, you can
select the content displayed on the screen.
1.Move the controller to the right repeatedly
until the split screen content is selected.
2.Select the display.
Programmable memory keys
Certain iDrive functions can be stored on the
programmable memory keys and called up
directly, e.g. radio stations, navigation destina-
tions, phone numbers and entry points into the
menu.
Storing functions
1.Highlight the function via the iDrive.
2. ... Press the desired key for
longer than two seconds.
Example for programmable memory
keys
Switch the voice instructions for the navigation
on/off.
1."Navigation"
2."Map"
3.Select the symbol using the controller.
4. ... Press the desired key for
longer than two seconds.
Executing a function
... Press the button.
The function is executed immediately. This
means, for example, that the number is dialed
when a phone number is selected.
Displaying memory key assignments
Touch the button with a finger. Do not wear
gloves or use objects.
Displaying brief information
... Touch the button.
The key assignment is displayed at the top
edge of the screen.
Displaying detailed information
... Touch the button for an
extended period.
Page 23 of 278
At a glance
21Reference
Controls
Driving tips
Communications
Navigation
Entertainment
Mobility
Letters and numbers
Entering letters and numbers
1.Turn the controller: select the letters or
numbers.
2.Select additional letters or numbers if
needed.
3."OK": confirm the entry.
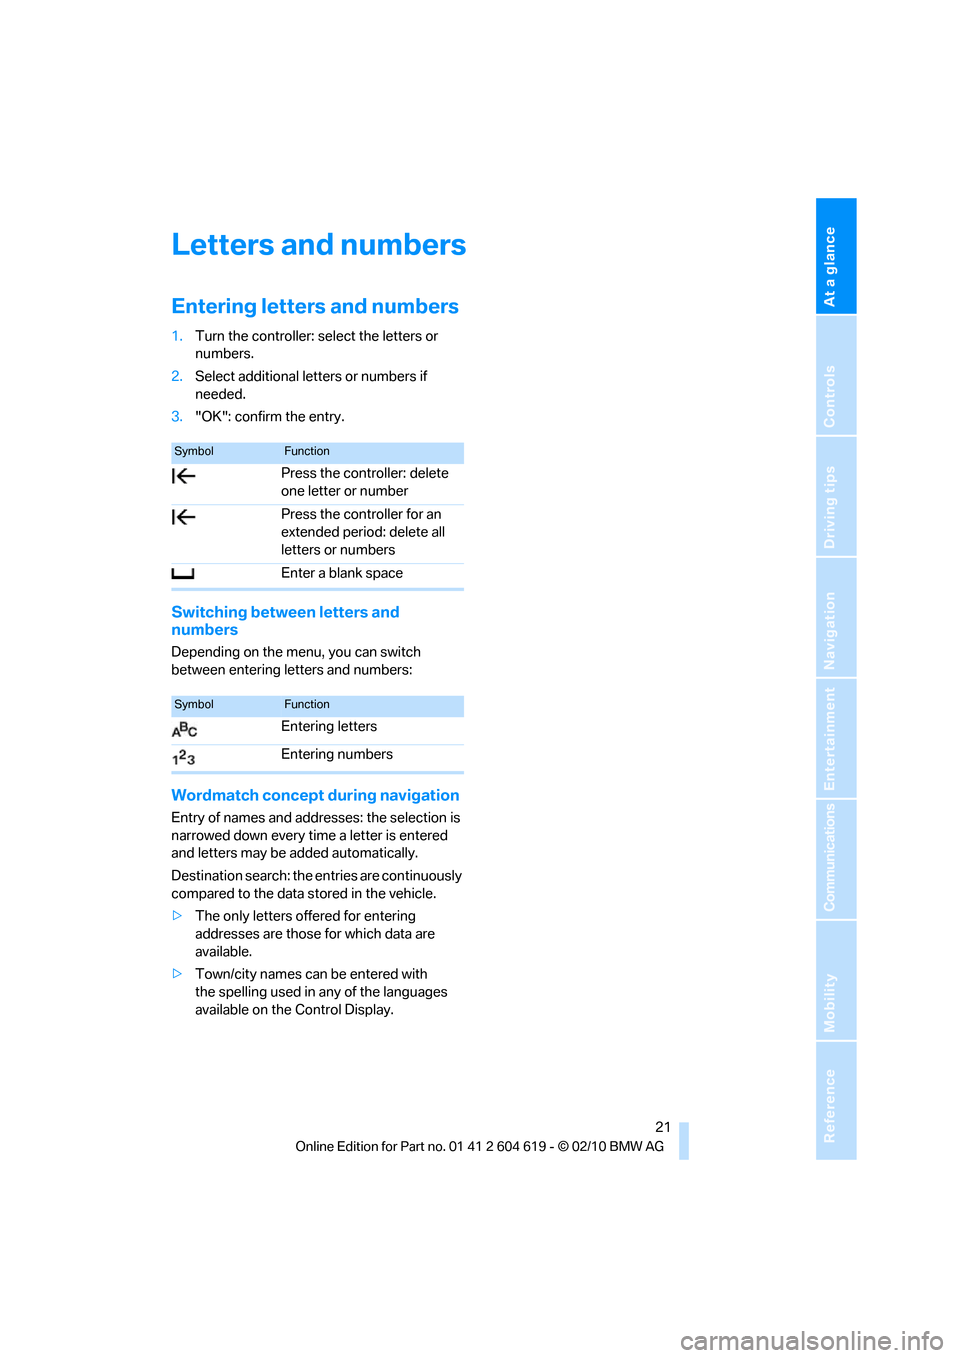
Switching between letters and
numbers
Depending on the menu, you can switch
between entering letters and numbers:
Wordmatch concept during navigation
Entry of names and addresses: the selection is
narrowed down every time a letter is entered
and letters may be added automatically.
Destination search: the entries are continuously
compared to the data stored in the vehicle.
>The only letters offered for entering
addresses are those for which data are
available.
>Town/city names can be entered with
the spelling used in any of the languages
available on the Control Display.
SymbolFunction
Press the controller: delete
one letter or number
Press the controller for an
extended period: delete all
letters or numbers
Enter a blank space
SymbolFunction
Entering letters
Entering numbers
Page 24 of 278
Voice activation system
22
Voice activation system
The concept
The voice activation system allows you to con-
trol operation of various vehicle systems with-
out removing your hands from the steering
wheel.
Most menu items on the Control Display can be
voiced as commands. It is not necessary to use
the controller.
The voice activation system transforms your
oral commands into control signals for the
selected systems and provides support in the
form of instructions or questions.
Coupe: the voice activation system uses a spe-
cial microphone located in the area of the inte-
rior rearview mirror, refer to page14.
Convertible: the voice activation system uses a
special microphone located in the area of the
steering column.
Precondition
Via iDrive, select the language in which the
voice activation system is operating, so that the
spoken commands can be identified. Selecting
the language for iDrive, refer to page87.
Symbols in the Owner's Manual
Saying commands
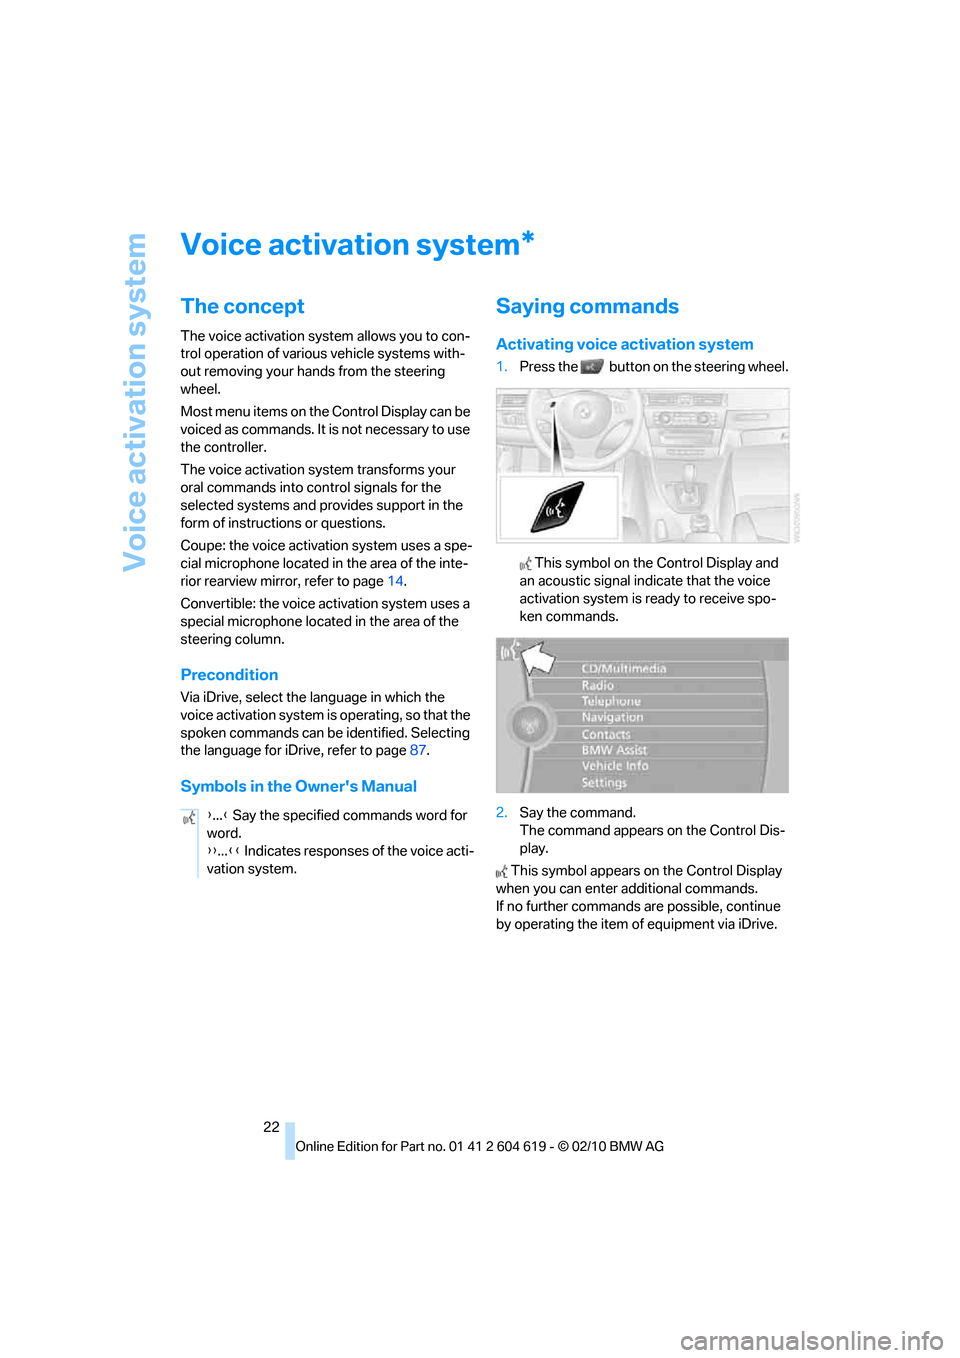
Activating voice activation system
1.Press the button on the steering wheel.
This symbol on the Control Display and
an acoustic signal indicate that the voice
activation system is ready to receive spo-
ken commands.
2.Say the command.
The command appears on the Control Dis-
play.
This symbol appears on the Control Display
when you can enter additional commands.
If no further commands are possible, continue
by operating the item of equipment via iDrive.
*
{...} Say the specified commands word for
word.
{{...}} Indicates responses of the voice acti-
vation system.
Page 29 of 278
Controls
27Reference
At a glance
Driving tips
Communications
Navigation
Entertainment
Mobility
>Settings for the display on the Control
Display and in the instrument cluster:
>12h/24h format of the clock, refer to
page83
>Date format, refer to page84
>Brightness of the Control Display, refer
to page87
>Language on the Control Display, refer
to page87
>Units of measure, refer to page80
>Show visual warning for Park Distance
Control PDC
*, refer to page89
>Light settings:
>Welcome lamps, refer to page101
>Pathway lighting, refer to page102
>Daytime running lights, refer to
page102
>High-beam assistant, refer to page103
>Automatic climate control: activating/deac-
tivating AUTO program, cooling function
and automatic recirculated-air control, set-
ting temperature, air volume and distribu-
tion, refer to page107 ff
>Entertainment:
>Tone control, refer to page154
>Speed-dependent volume control, refer
to page155
Central locking system
The concept
The central locking system functions when the
driver's door is closed.
The system simultaneously engages and
releases the locks on the following:
>Doors
>Trunk lid
>Fuel filler flap
>Convertible: glove compartment
Operating from outside
>Via the remote control
>Via the door lock
*
>In cars with Comfort Access*, via the
handles on the driver's and front passenger
doors
In addition, if the remote control is used, the
welcome lamps, interior lamps and the door's
courtesy lamps
* are switched on or off. The
alarm system
* is also armed or disarmed.
For further details of the alarm system,
refer to
page32.
Operating from inside
By means of the button for central locking,
refer to page30.
In the event of a sufficiently severe accident, the
central locking system unlocks automatically. In
addition, the hazard warning flashers and inte-
rior lamps come on.
Opening and closing:
Using the remote control
Persons or animals in a parked vehicle
could lock the doors from the inside. You
should therefore take the remote control with
you when you leave the vehicle so that the latter
can be opened from outside.<
Convertible: to operate the retractable
hardtop with the remote control, the
doors and trunk lid must be closed and the
cargo area partition must be folded down and
engaged on both sides. Refer also to page39.<
Unlocking
Press the button.
The interior lamps, the courtesy lamps
* and the
welcome lamps come on.
Page 35 of 278
Controls
33Reference
At a glance
Driving tips
Communications
Navigation
Entertainment
Mobility
Indicator lamp displays
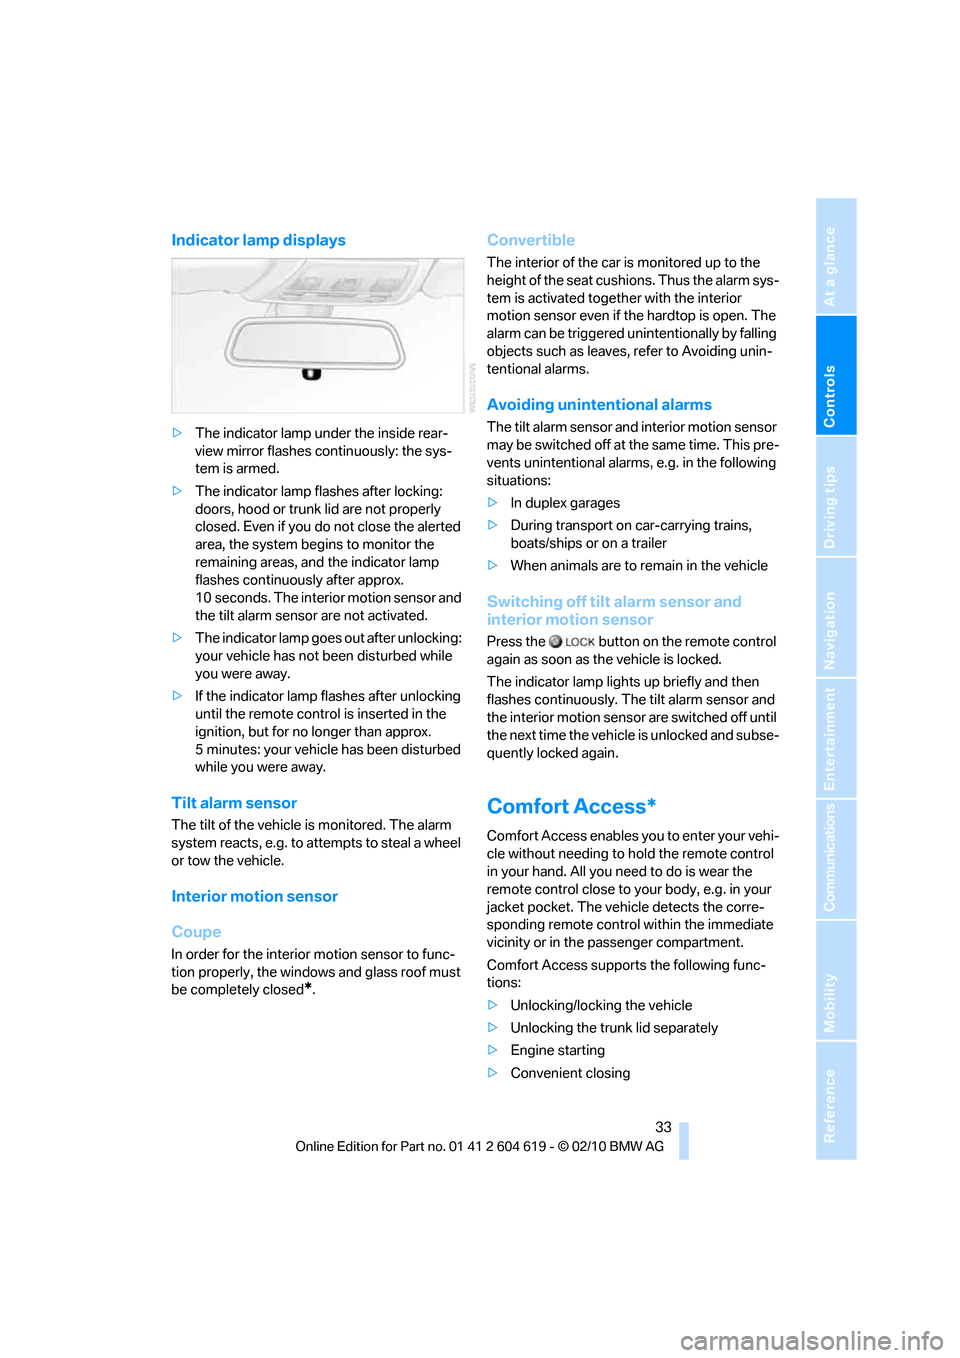
>The indicator lamp under the inside rear-
view mirror flashes continuously: the sys-
tem is armed.
>The indicator lamp flashes after locking:
doors, hood or trunk lid are not properly
closed. Even if you do not close the alerted
area, the system begins to monitor the
remaining areas, and the indicator lamp
flashes continuously after approx.
10 seconds. The interior m o t i o n s e n s o r a n d
the tilt alarm sensor are not activated.
>The indicator lamp goes out after unlocking:
your vehicle has not been disturbed while
you were away.
>If the indicator lamp flashes after unlocking
until the remote control is inserted in the
ignition, but for no longer than approx.
5 minutes: your vehicle has been disturbed
while you were away.
Tilt alarm sensor
The tilt of the vehicle is monitored. The alarm
system reacts, e.g. to attempts to steal a wheel
or tow the vehicle.
Interior motion sensor
Coupe
In order for the interior motion sensor to func-
tion properly, the windows and glass roof must
be completely closed
*.
Convertible
The interior of the car is monitored up to the
height of the seat cushions. Thus the alarm sys-
tem is activated together with the interior
motion sensor even if the hardtop is open. The
alarm can be triggered unintentionally by falling
objects such as leaves, refer to Avoiding unin-
tentional alarms.
Avoiding unintentional alarms
The tilt alarm sensor and interior motion sensor
may be switched off at the same time. This pre-
vents unintentional alarms, e.g. in the following
situations:
>In duplex garages
>During transport on car-carrying trains,
boats/ships or on a trailer
>When animals are to remain in the vehicle
Switching off tilt alarm sensor and
interior motion sensor
Press the button on the remote control
again as soon as the vehicle is locked.
The indicator lamp lights up briefly and then
flashes continuously. The tilt alarm sensor and
the interior motion sensor are switched off until
the next time the vehicle is unlocked and subse-
quently locked again.
Comfort Access*
Comfort Access enables you to enter your vehi-
cle without needing to hold the remote control
in your hand. All you need to do is wear the
remote control close to your body, e.g. in your
jacket pocket. The vehicle detects the corre-
sponding remote control within the immediate
vicinity or in the passenger compartment.
Comfort Access supports the following func-
tions:
>Unlocking/locking the vehicle
>Unlocking the trunk lid separately
>Engine starting
>Convenient closing
Page 37 of 278
Controls
35Reference
At a glance
Driving tips
Communications
Navigation
Entertainment
Mobility
Switching off the engine in cars with
automatic transmission
The engine can only be switched off when the
selector lever is in position P, refer to page57.
To switch the engine off when the selector lever
is in position N, the remote control must be in
the ignition lock.
Malfunction
Comfort Access may malfunction due to local
radio waves. If this happens, open or close the
vehicle via the buttons on the remote control or
using the integrated key. To start the engine
afterward, insert the remote control into the
ignition lock.
Warning lamps
The warning lamp in the instrument
cluster lights up when you attempt to
start the engine: the engine cannot
be started. The remote control is not inside the
vehicle or is malfunctioning.
Take the remote control with you inside the
vehicle or have it checked. If necessary, insert
another remote control into the ignition lock.
The warning lamp in the instrument
cluster lights up while the engine is
running: the remote control is no
longer inside the vehicle. After the engine is
switched off, the engine can only be restarted
within approx. 10 seconds.
The indicator lamp in the instrument
cluster comes on and a message
appears on the Control Display:
replace the battery in the remote control.
Replacing the battery
The remote control for Comfort Access con-
tains a battery that will need to be replaced from
time to time.
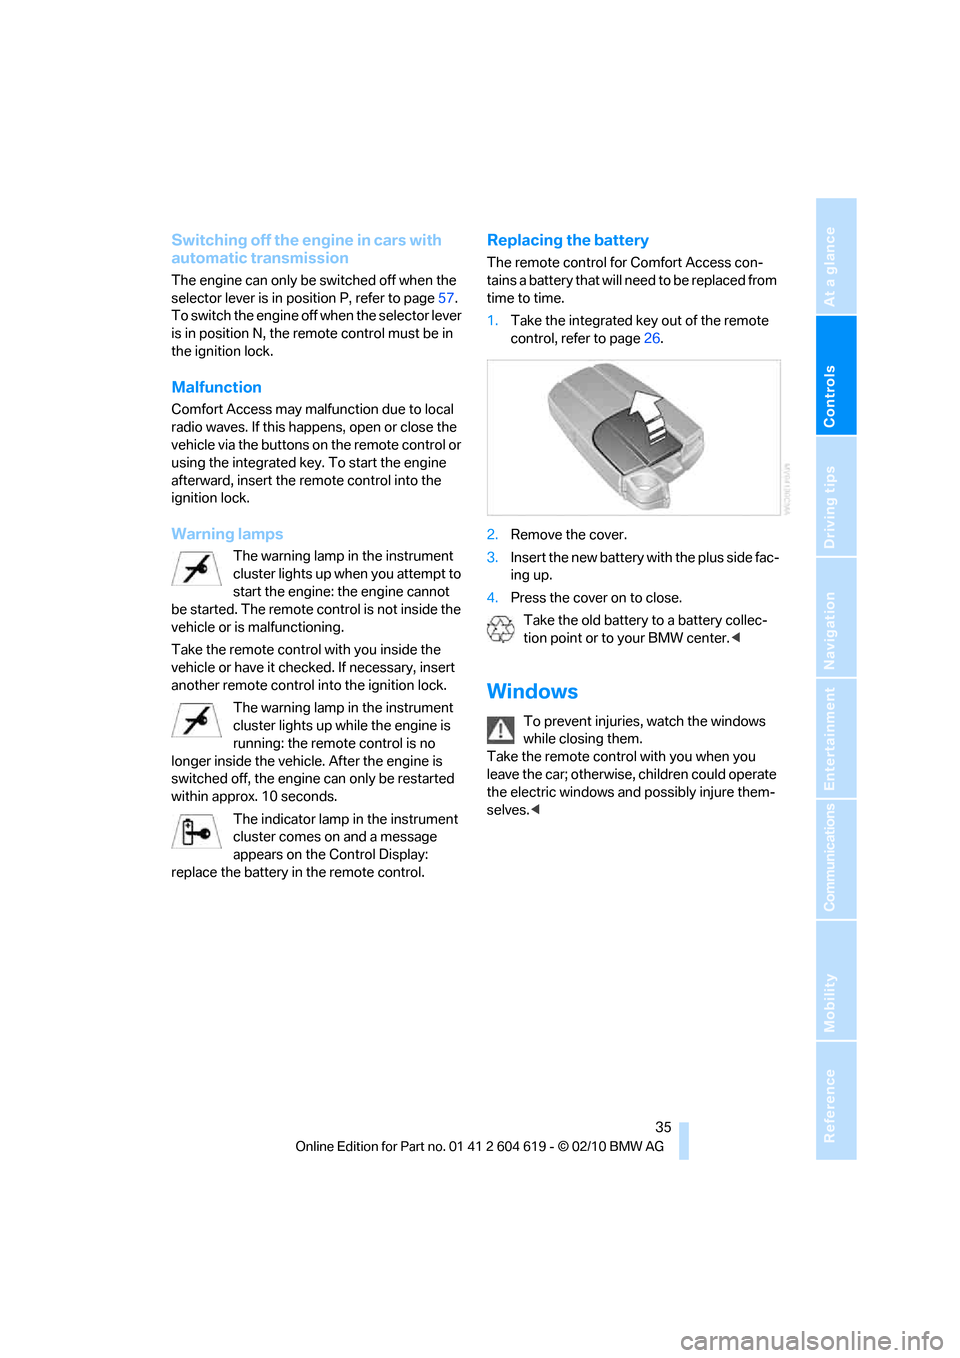
1.Take the integrated key out of the remote
control, refer to page26.
2.Remove the cover.
3.Insert the new battery with the plus side fac-
ing up.
4.Press the cover on to close.
Take the old battery to a battery collec-
tion point or to your BMW center.<
Windows
To prevent injuries, watch the windows
while closing them.
Take the remote control with you when you
leave the car; otherwise, children could operate
the electric windows and possibly injure them-
selves.<
Page 41 of 278
Controls
39Reference
At a glance
Driving tips
Communications
Navigation
Entertainment
Mobility
>If you open the hardtop while it is wet, e.g.
after driving in the rain, water may drip into
the cargo area. If necessary, remove items
from the cargo area beforehand to avoid
water stains or soiling.
Do not place any objects on the retract-
able hardtop or on the trunk lid; other-
wise, they could fall during movements of the
retractable hardtop and cause damage or injury.
Never move the retractable hardtop when the
rollover protection system is in the activated
position.
Driving when the hardtop is not fully opened or
closed may result in damage or injury.
Do not reach into the mechanism during the
opening or closing procedure. Keep children
away from the swiveling area of the retractable
hardtop.<
The retractable hardtop cannot be moved
at temperatures below + 147/–106. A
message appears on the Control Display.<
The retractable hardtop can only be
opened and closed when the vehicle is
stationary. To avoid causing damage, do not
drive off until the hardtop has stopped mov-
ing.<
Before opening and closing
>Comply with the safety precautions
described above.
>Ensure that the cargo area partition is
folded down and engaged on both sides,
refer to page119; otherwise, it will not be
possible to open the retractable hardtop.
>Do not place any objects next to or on the
cargo area partition and close the storage
compartment on the left side of the cargo
area.
>Do not exceed the maximum loading height
under the cargo area partition; refer to the
label in the cargo area showing a line indi-
cating the maximum height.
>Ensure that the trunk lid is closed.
>The vehicle should be parked on fairly
level ground. Excessive angle is indicated
by a lamp.
Opening and closing
When the vehicle is stationary and at radio
readiness or beyond, refer to page55:
If possible, conserve the battery by only
operating the retractable hardtop when
the engine is running.
Before closing the retractable hardtop, remove
all foreign objects from the windshield frame as
these could prevent the hardtop from closing
properly.<
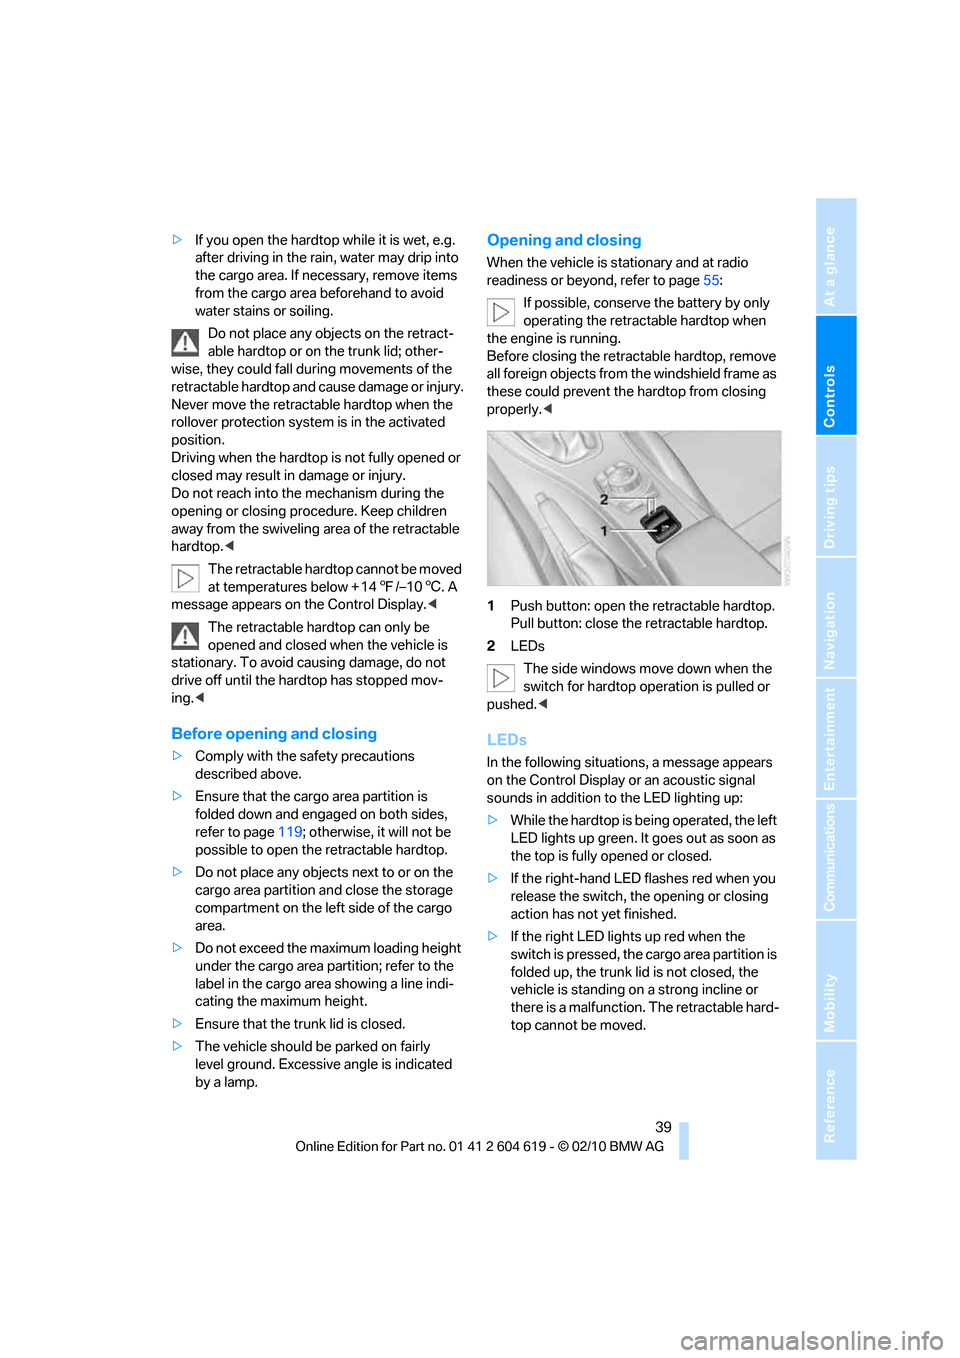
1Push button: open the retractable hardtop.
Pull button: close the retractable hardtop.
2LEDs
The side windows move down when the
switch for hardtop operation is pulled or
pushed.<
LEDs
In the following situations, a message appears
on the Control Display or an acoustic signal
sounds in addition to the LED lighting up:
>While the hardtop is being operated, the left
LED lights up green. It goes out as soon as
the top is fully opened or closed.
>If the right-hand LED flashes red when you
release the switch, the opening or closing
action has not yet finished.
>If the right LED lights up red when the
switch is pressed, the cargo area partition is
folded up, the trunk lid is not closed, the
vehicle is standing on a strong incline or
there is a malfunction. The retractable hard-
top cannot be moved.
Page 49 of 278
Controls
47Reference
At a glance
Driving tips
Communications
Navigation
Entertainment
Mobility
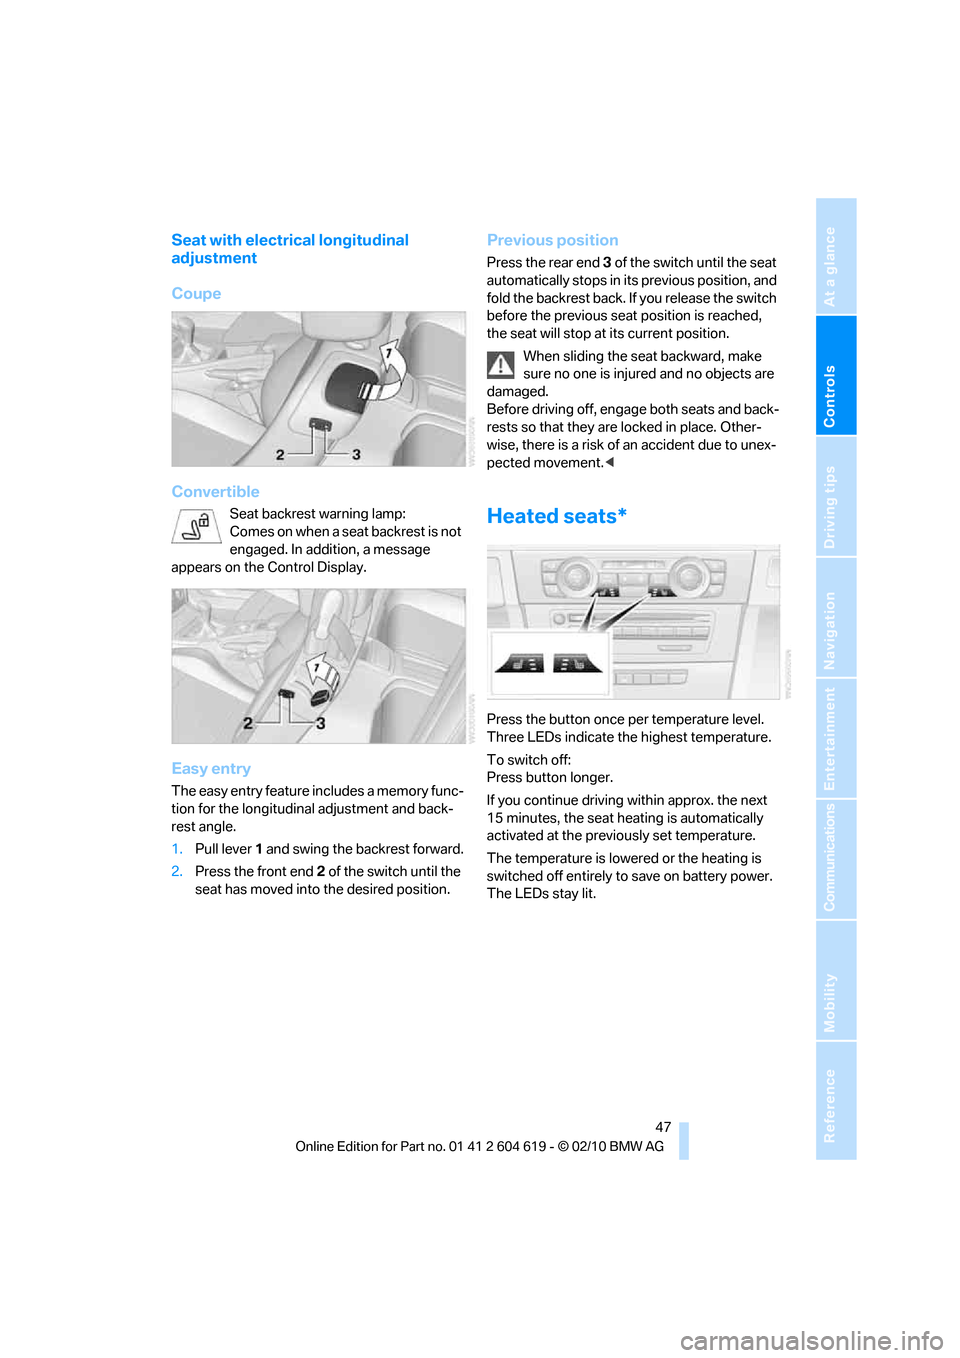
Seat with electrical longitudinal
adjustment
Coupe
Convertible
Seat backrest warning lamp:
Comes on when a seat backrest is not
engaged. In addition, a message
appears on the Control Display.
Easy entry
The easy entry feature includes a memory func-
tion for the longitudinal adjustment and back-
rest angle.
1.Pull lever 1 and swing the backrest forward.
2.Press the front end 2 of the switch until the
seat has moved into the desired position.
Previous position
Press the rear end 3 of the switch until the seat
automatically stops in its previous position, and
fold the backrest back. If you release the switch
before the previous seat position is reached,
the seat will stop at its current position.
When sliding the seat backward, make
sure no one is injured and no objects are
damaged.
Before driving off, engage both seats and back-
rests so that they are locked in place. Other-
wise, there is a risk of an accident due to unex-
pected movement.<
Heated seats*
Press the button once per temperature level.
Three LEDs indicate the highest temperature.
To switch off:
Press button longer.
If you continue driving within approx. the next
15 minutes, the seat heating is automatically
activated at the previously set temperature.
The temperature is lowered or the heating is
switched off entirely to save on battery power.
The LEDs stay lit.
Page 51 of 278
Controls
49Reference
At a glance
Driving tips
Communications
Navigation
Entertainment
Mobility
Safety belts
Observe the adjustment instructions on
page43 to ensure the best possible per-
sonal protection.<
Before every drive, make sure that all occupants
wear their safety belts. Airbags complement the
safety belt as an additional safety device, but
they do not represent a substitute.
Closing
Make sure you hear the latch plate engage in
the belt buckle.
The upper belt anchor is suitable for adults of
any stature as long as the seat is adjusted prop-
erly, refer to page43.
Opening
1.Grasp the belt firmly.
2.Press the red button in the buckle.
3.Guide the belt into its reel.
"Fasten safety belts" reminder for
driver's and front passenger seat
The indicator lamps light up and an
acoustic signal sounds. In addition,
a message appears on the Control
Display. Check whether the safety
belt has been fastened correctly.
The "Fasten safety belts" reminder is issued as
long as the driver's safety belt has not been fas-
tened. The "Fasten safety belts" reminder is
also activated at road speeds above approx.
5 mph or 8 km/h if the front passenger safety
belt is not fastened, if objects are placed on the
front passenger seat, or if driver or front pas-
senger unfasten their safety belts.
Damage to safety belts
If the safety belts are damaged or
stressed in an accident: have the belt sys-
tem, including any belt tensioners or child
restraint systems, replaced and the belt
anchors checked. Have this work done only by
your BMW center or at a workshop that works
according to BMW repair procedures with cor-
respondingly trained personnel. Otherwise, it is
not guaranteed that the safety devices will func-
tion properly.<
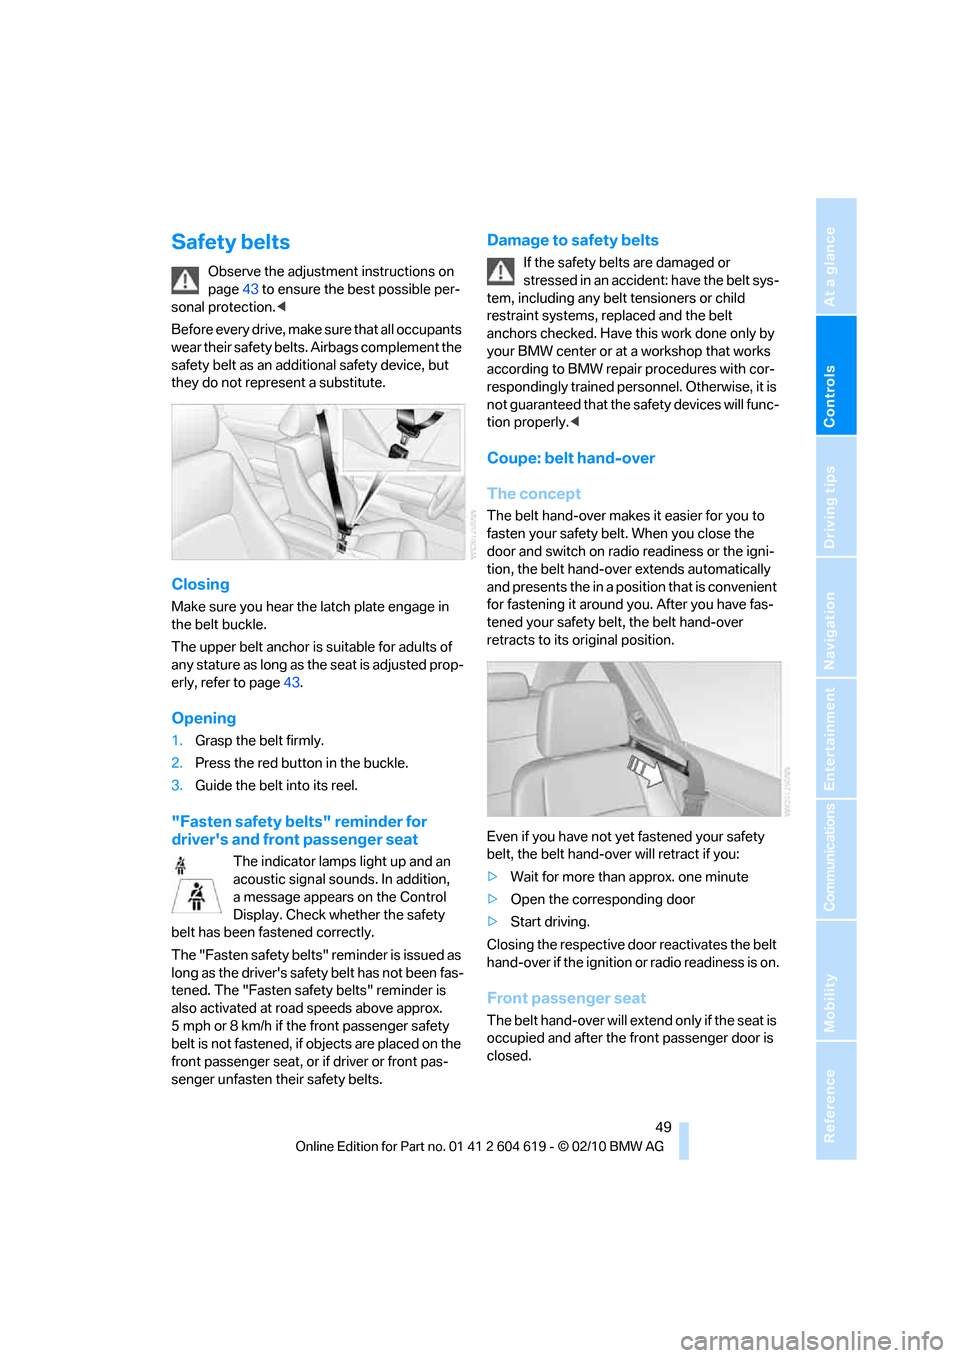
Coupe: belt hand-over
The concept
The belt hand-over makes it easier for you to
fasten your safety belt. When you close the
door and switch on radio readiness or the igni-
tion, the belt hand-over extends automatically
and presents the in a position that is convenient
for fastening it around you. After you have fas-
tened your safety belt, the belt hand-over
retracts to its original position.
Even if you have not yet fastened your safety
belt, the belt hand-over will retract if you:
>Wait for more than approx. one minute
>Open the corresponding door
>Start driving.
Closing the respective door reactivates the belt
hand-over if the ignition or radio readiness is on.
Front passenger seat
The belt hand-over will extend only if the seat is
occupied and after the front passenger door is
closed.