BMW 335I XDRIVE COUPE 2013 Owners Manual
Manufacturer: BMW, Model Year: 2013, Model line: 335I XDRIVE COUPE, Model: BMW 335I XDRIVE COUPE 2013Pages: 308, PDF Size: 5.65 MB
Page 181 of 308
180
EntertainmentCD/DVD player and CD changer
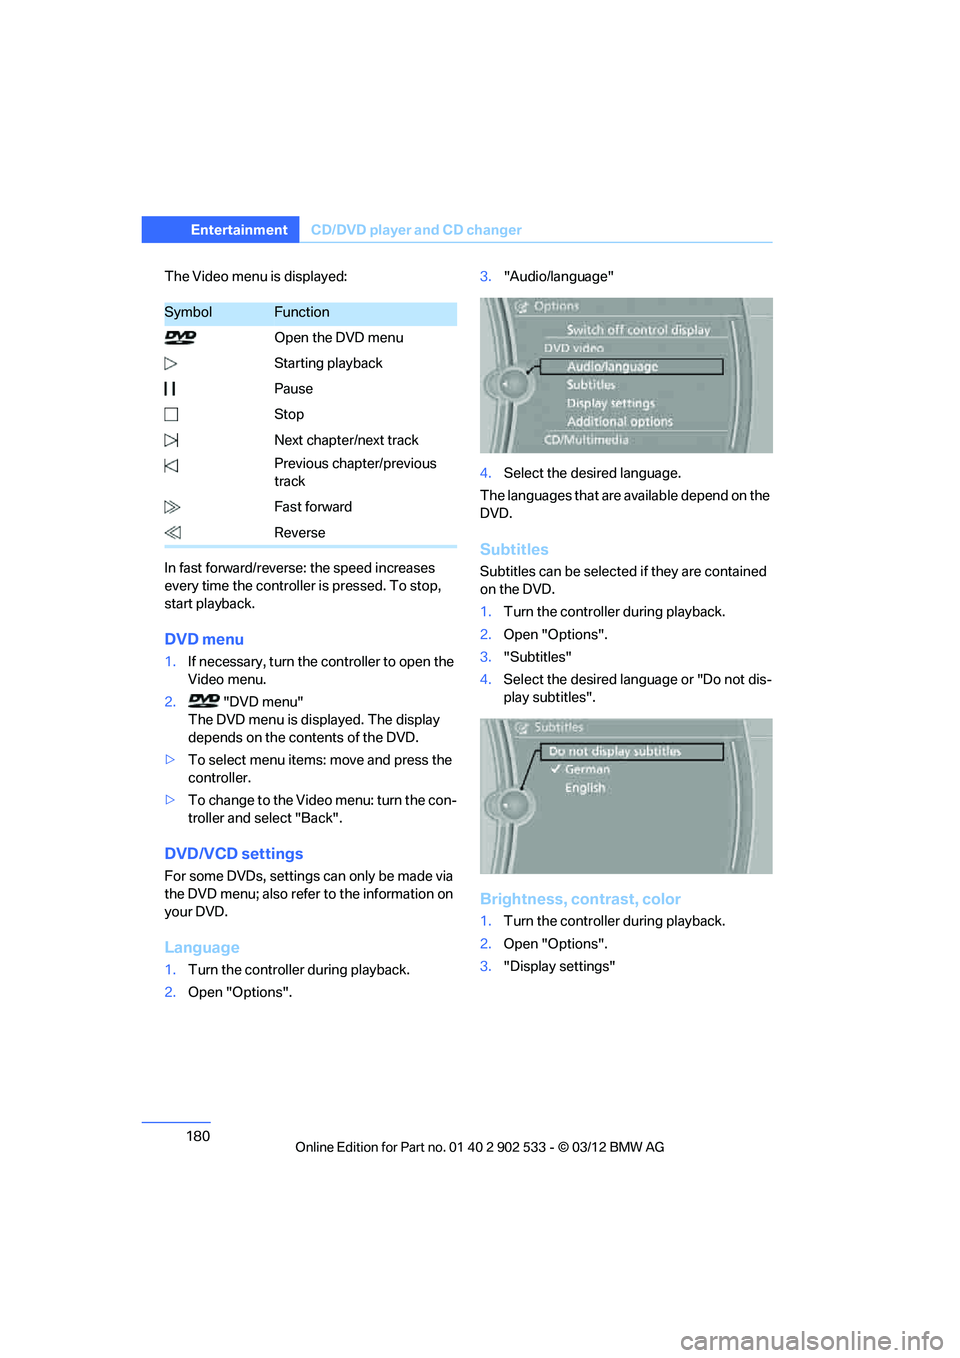
The Video menu is displayed:
In fast forward/reverse: the speed increases
every time the controller is pressed. To stop,
start playback.
DVD menu
1.If necessary, turn the controller to open the
Video menu.
2. "DVD menu"
The DVD menu is displayed. The display
depends on the contents of the DVD.
> To select menu items: move and press the
controller.
> To change to the Video menu: turn the con-
troller and select "Back".
DVD/VCD settings
For some DVDs, settings can only be made via
the DVD menu; also refer to the information on
your DVD.
Language
1.Turn the controller during playback.
2. Open "Options". 3.
"Audio/language"
4. Select the desired language.
The languages that are available depend on the
DVD.
Subtitles
Subtitles can be selected if they are contained
on the DVD.
1. Turn the controller during playback.
2. Open "Options".
3. "Subtitles"
4. Select the desired language or "Do not dis-
play subtitles".
Brightness, contrast, color
1.Turn the controller during playback.
2. Open "Options".
3. "Display settings"
SymbolFunction
Open the DVD menu
Starting playback
Pause
Stop
Next chapter/next track
Previous chapter/previous
track
Fast forward
Reverse
00320051004F004C00510048000300280047004C0057004C005200510003
Page 182 of 308
181
CD/DVD player and CD changer
Entertainment
4.
"Brightness", "Contrast" or "Color"
5. Turn the controller until the desired setting
is displayed, and then press the controller.
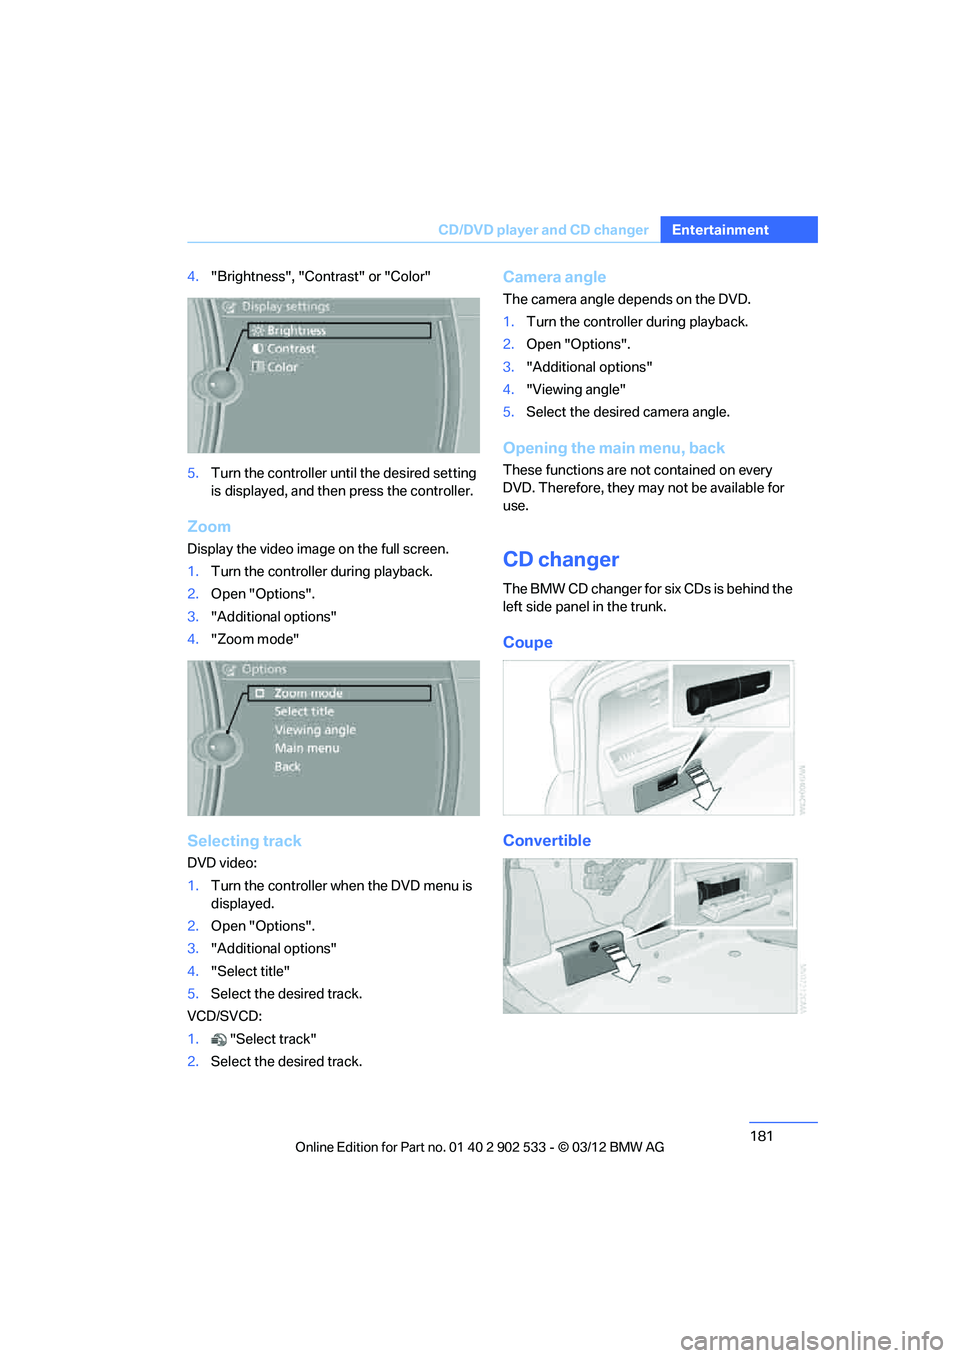
Zoom
Display the video image on the full screen.
1.Turn the controller during playback.
2. Open "Options".
3. "Additional options"
4. "Zoom mode"
Selecting track
DVD video:
1.Turn the controller when the DVD menu is
displayed.
2. Open "Options".
3. "Additional options"
4. "Select title"
5. Select the desired track.
VCD/SVCD:
1. "Select track"
2. Select the desired track.
Camera angle
The camera angle depends on the DVD.
1.Turn the controller during playback.
2. Open "Options".
3. "Additional options"
4. "Viewing angle"
5. Select the desired camera angle.
Opening the main menu, back
These functions are not contained on every
DVD. Therefore, they may not be available for
use.
CD changer
The BMW CD changer for six CDs is behind the
left side panel in the trunk.
Coupe
Convertible
00320051004F004C00510048000300280047004C0057004C005200510003
Page 183 of 308
182
EntertainmentCD/DVD player and CD changer
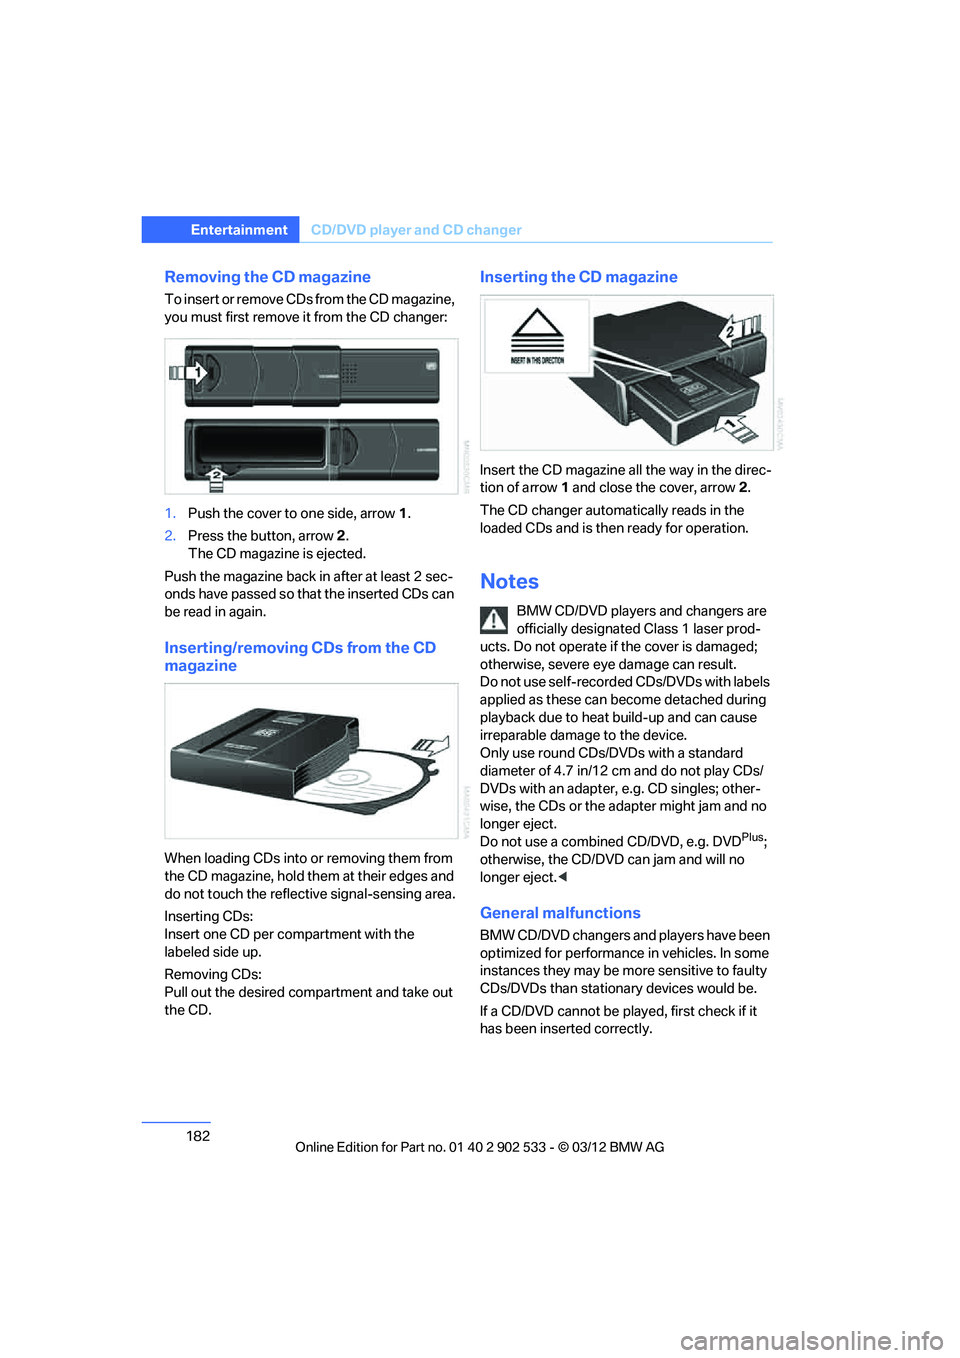
Removing the CD magazine
To insert or remove CDs from the CD magazine,
you must first remove it from the CD changer:
1.Push the cover to one side, arrow 1.
2. Press the button, arrow 2 .
The CD magazine is ejected.
Push the magazine back in after at least 2 sec-
onds have passed so that the inserted CDs can
be read in again.
Inserting/removing CDs from the CD
magazine
When loading CDs into or removing them from
the CD magazine, hold them at their edges and
do not touch the reflective signal-sensing area.
Inserting CDs:
Insert one CD per compartment with the
labeled side up.
Removing CDs:
Pull out the desired compartment and take out
the CD.
Inserting the CD magazine
Insert the CD magazine all the way in the direc-
tion of arrow 1 and close the cover, arrow 2.
The CD changer automatically reads in the
loaded CDs and is then ready for operation.
Notes
BMW CD/DVD players and changers are
officially designated Class 1 laser prod-
ucts. Do not operate if the cover is damaged;
otherwise, severe eye damage can result.
Do not use self-recorded CDs/DVDs with labels
applied as these can become detached during
playback due to heat build-up and can cause
irreparable damage to the device.
Only use round CDs/DVDs with a standard
diameter of 4.7 in/12 cm and do not play CDs/
DVDs with an adapter, e.g. CD singles; other-
wise, the CDs or the adapter might jam and no
longer eject.
Do not use a combined CD/DVD, e.g. DVD
Plus;
otherwise, the CD/DVD can jam and will no
longer eject. <
General malfunctions
BMW CD/DVD changers and players have been
optimized for performance in vehicles. In some
instances they may be more sensitive to faulty
CDs/DVDs than stationary devices would be.
If a CD/DVD cannot be played, first check if it
has been inserted correctly.
00320051004F004C00510048000300280047004C0057004C005200510003
Page 184 of 308
183
CD/DVD player and CD changer
Entertainment
Humidity
High levels of humidity can lead to condensa-
tion on the CD/DVD or the laser's scan lens and
temporarily prevent playback.
Malfunctions with individual CDs/DVDs
If malfunctions occur only with particular CDs/
DVDs, this may be due to one of the following
reasons.
Self-recorded CDs/DVDs
Possible reasons for malfunctions with self-
recorded CDs/DVDs are, for example, inconsis-
tent data-creation or recording processes, or
poor quality or old age of the CD/DVD blank.
Only label CDs/DVDs on the top, with a pen
designed for this purpose.
Damage
Avoid leaving fingerprints, as well as dust,
scratches or moisture on the CDs/DVDs.
Keep CDs/DVDs in protective sleeves or cases.
Do not subject CDs/DVDs to temperatures
above 122
7/50 6, nor to high humidity levels
or direct sunlight.
CDs/DVDs with copy protection
CDs/DVDs are often copy-protected by the
manufacturer. This can mean that some CDs/
DVDs cannot be played or can only be played to
a limited extent.
MACROVISION
This product contains copyrighted technology
that is based on multiple registered U.S. pat-
ents and the intellectual property of the Macro-
vision Corporation and other manufacturers.
The use of this copy protection must be
approved by Macrovision. Unless otherwise
agreed with Macrovision, media with this pro-
tection may only be used for private purposes.
Copying of this technology is prohibited.
DTS Digital Surround™
Manufactured under license of US
patent numbers: 5,451,942;
5,956,674; 5,974,380; 5,978,762; 6,487,535 &
other patents granted and pending in both the
USA and worldwide. DTS and the logo are reg-
istered trademarks & DTS Digital Surround and
the DTS logos are trademarks of DTS Inc. ©
DTS, Inc. All rights reserved.
00320051004F004C00510048000300280047004C0057004C005200510003
Page 185 of 308
184
EntertainmentMusic collection
Music collection
Vehicle equipment
In this chapter, all production, country, and
optional equipment that is offered in the model
range is described. Equipment is also described
that is not available because of, for example,
selected options or country version. This also
applies to safety related functions and systems.
Storing music
The music tracks from CDs, DVDs and USB
devices can be stored in the music collection in
the vehicle and played from there.
>Audio CD: tracks are converted into a com-
pressed audio format when they are stored.
If available, information on the album, such
as the artist, is stored as well.
> CD/DVD or USB device with compressed
audio files: the entire content of the CD/
DVD or the USB device is stored in the vehi-
cle as an album. After storing, the tracks and
directories can be deleted individually. Files
a r e o n ly s t o re d in t h e W M A , M P 3 , M 4 A , a n d
AAC formats.
Tracks with DRM copy protection can be
stored in the vehicle but cannot be played
back.
Regularly back up the music data; other-
wise, it could be lost if there is a fault on
the hard disc. <
Music recognition technology and
related data are provided by
Gracenote®. Gracenote® is the industry stan-
dard in music recognition technology and
related content delivery. For more information,
please visit www.gracenote.com.
CD and music-related data from Gracenote,
Inc., copyright © 2000-2009 Gracenote.
Gracenote Software, copyright © 2000-2009
Gracenote. This product and service may prac- tice one or more of the following U.S. Patents:
5.987.525, 6.061.680, 6.154.773, 6.161.132,
6.230.192, 6.230.207, 6.240.459 and
6.330.593 as well as other granted or pending
patents. Some services supplied under license
from Open Globe, Inc. for U.S. Patent:
6.304.523.
Gracenote and CDDB are registered trade-
marks of Gracenote. The Gracenote logo and
logotype, and the "Powered by Gracenote"
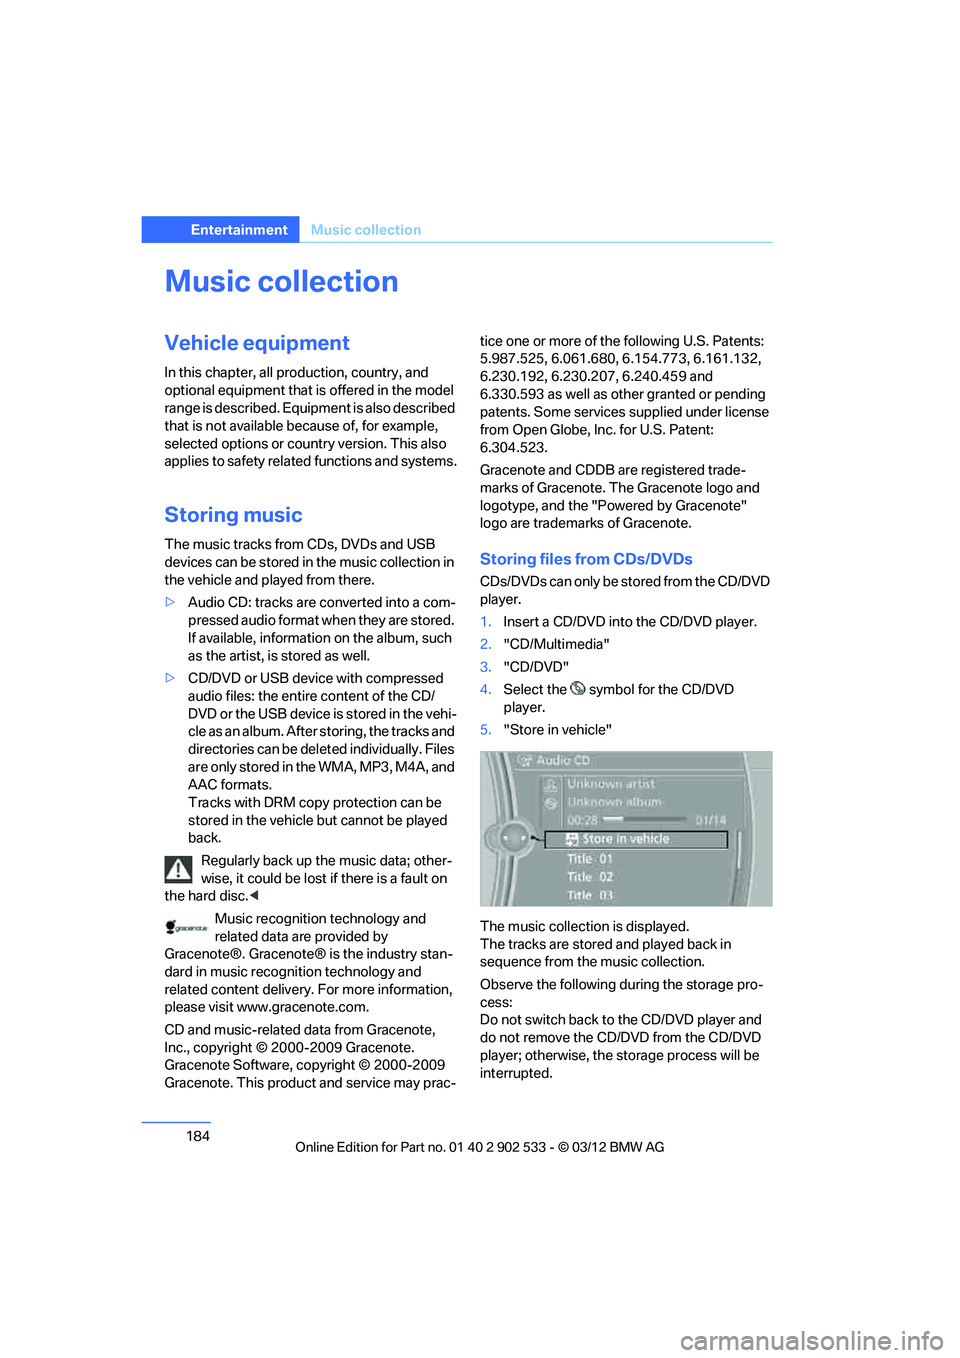
logo are trademarks of Gracenote.Storing files from CDs/DVDs
CDs/DVDs can only be stored from the CD/DVD
player.
1.
Insert a CD/DVD into the CD/DVD player.
2. "CD/Multimedia"
3. "CD/DVD"
4. Select the symbol for the CD/DVD
player.
5. "Store in vehicle"
The music collection is displayed.
The tracks are stored and played back in
sequence from the music collection.
Observe the following during the storage pro-
cess:
Do not switch back to the CD/DVD player and
do not remove the CD/DVD from the CD/DVD
player; otherwise, the storage process will be
interrupted.
00320051004F004C00510048000300280047004C0057004C005200510003
Page 186 of 308
185
Music collection
Entertainment
You can switch to the other audio sources with-
out interrupting the storage process. Tracks
from the current CD/DVD can also be called up,
if they have been stored already.
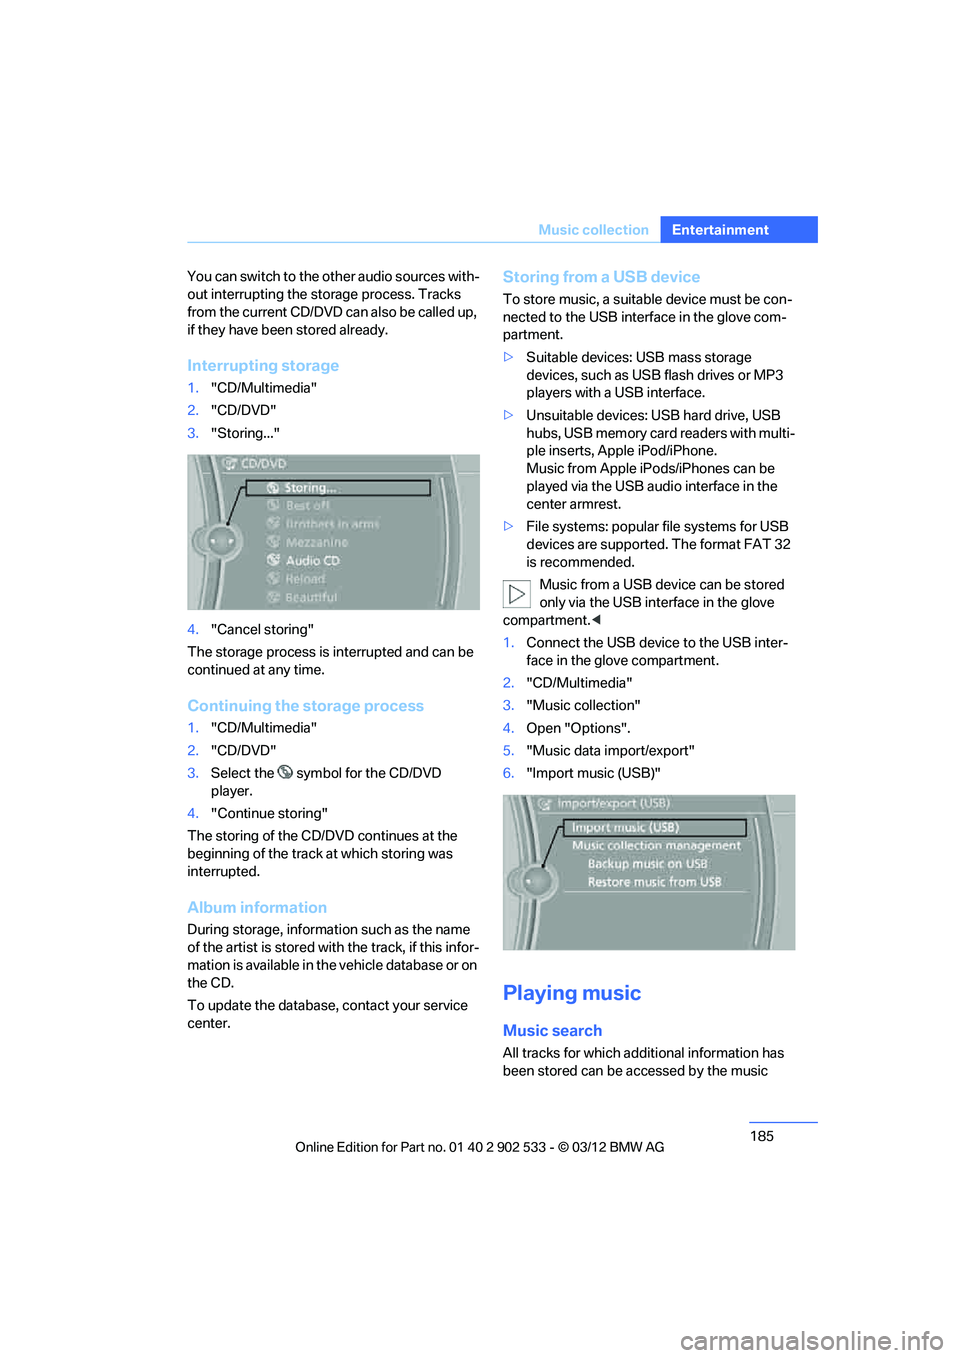
Interrupting storage
1.
"CD/Multimedia"
2. "CD/DVD"
3. "Storing..."
4. "Cancel storing"
The storage process is interrupted and can be
continued at any time.
Continuing the storage process
1. "CD/Multimedia"
2. "CD/DVD"
3. Select the symbol for the CD/DVD
player.
4. "Continue storing"
The storing of the CD/DVD continues at the
beginning of the track at which storing was
interrupted.
Album information
During storage, information such as the name
of the artist is stored with the track, if this infor-
mation is available in the vehicle database or on
the CD.
To update the database, contact your service
center.
Storing from a USB device
To store music, a suitable device must be con-
nected to the USB interface in the glove com-
partment.
> Suitable devices: USB mass storage
devices, such as USB flash drives or MP3
players with a USB interface.
> Unsuitable devices: USB hard drive, USB
hubs, USB memory card readers with multi-
ple inserts, Apple iPod/iPhone.
Music from Apple iPods/iPhones can be
played via the USB audio interface in the
center armrest.
> File systems: popular file systems for USB
devices are supported. The format FAT 32
is recommended.
Music from a USB device can be stored
only via the USB interface in the glove
compartment. <
1. Connect the USB device to the USB inter-
face in the glove compartment.
2. "CD/Multimedia"
3. "Music collection"
4. Open "Options".
5. "Music data import/export"
6. "Import music (USB)"
Playing music
Music search
All tracks for which additional information has
been stored can be accessed by the music
00320051004F004C00510048000300280047004C0057004C005200510003
Page 187 of 308
186
EntertainmentMusic collection
search. Tracks without additional information
can be called up via the corresponding album.
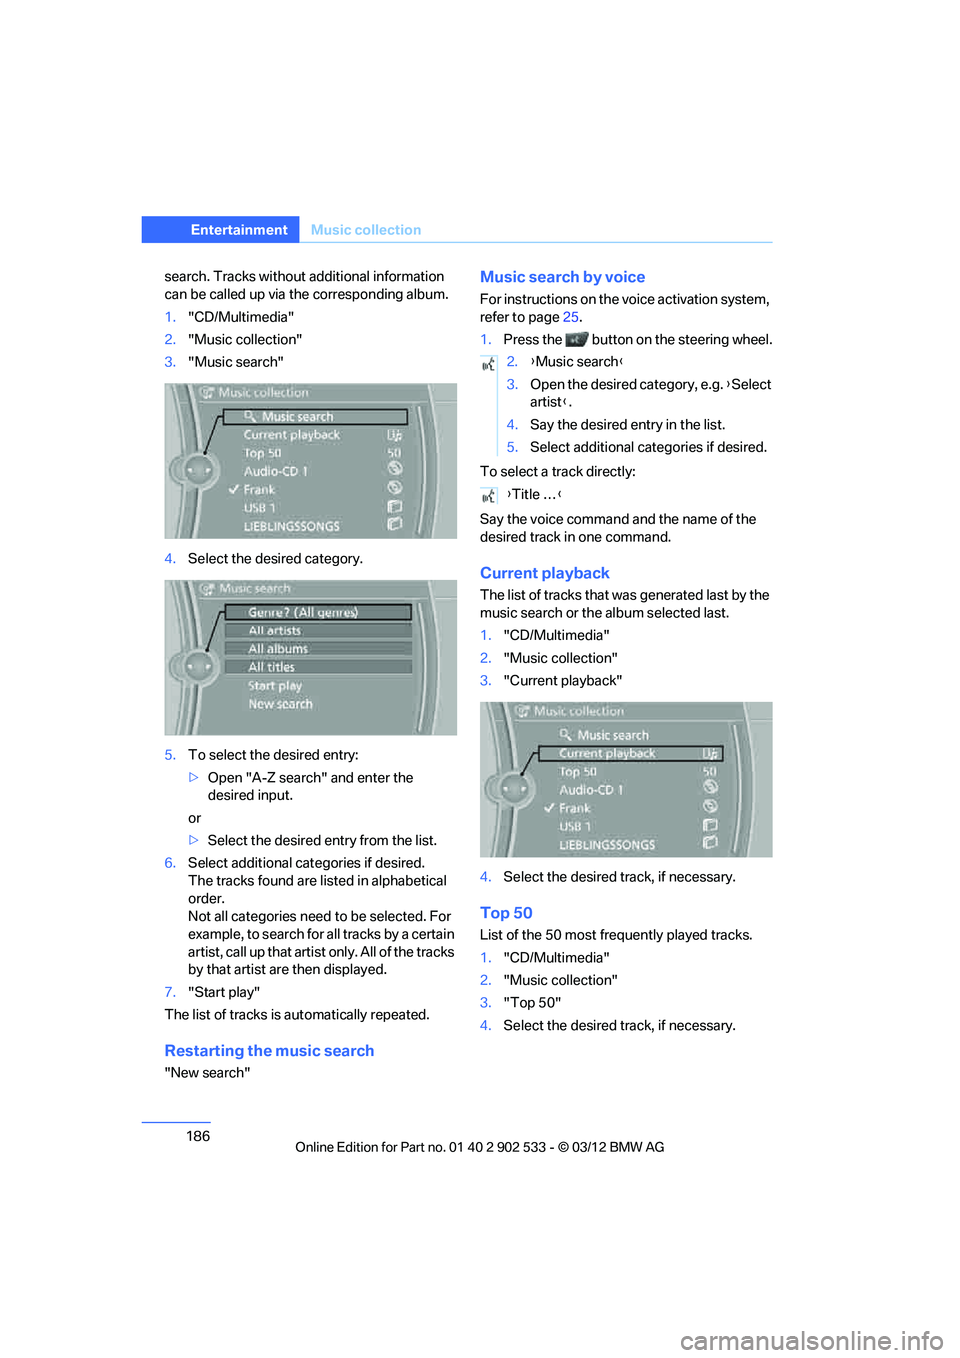
1."CD/Multimedia"
2. "Music collection"
3. "Music search"
4. Select the desired category.
5. To select the desired entry:
>Open "A-Z search" and enter the
desired input.
or
> Select the desired entry from the list.
6. Select additional categories if desired.
The tracks found are listed in alphabetical
order.
Not all categories need to be selected. For
example, to search for all tracks by a certain
artist, call up that artist only. All of the tracks
by that artist are then displayed.
7. "Start play"
The list of tracks is automatically repeated.
Restarting the music search
"New search"
Music search by voice
For instructions on the voice activation system,
refer to page 25.
1. Press the button on the steering wheel.
To select a track directly:
Say the voice command and the name of the
desired track in one command.
Current playback
The list of tracks that was generated last by the
music search or the album selected last.
1. "CD/Multimedia"
2. "Music collection"
3. "Current playback"
4. Select the desired track, if necessary.
Top 50
List of the 50 most frequently played tracks.
1."CD/Multimedia"
2. "Music collection"
3. "Top 50"
4. Select the desired track, if necessary.
2.{Music search }
3. Open the desired category, e.g. { Select
artist }.
4. Say the desired entry in the list.
5. Select additional categories if desired.
{ Title … }
00320051004F004C00510048000300280047004C0057004C005200510003
Page 188 of 308
187
Music collection
Entertainment
Albums
All stored albums, listed in order of their storage
dates. Symbols indicate the format.
1.
"CD/Multimedia"
2. "Music collection"
3. Select the desired album.
Depending on the album, the tracks or the
subdirectories of the album are displayed.
The first track is played automatically, if
possible.
4. To select tracks, change directories if
needed. To go up one level in the directory,
move the controller to the left.
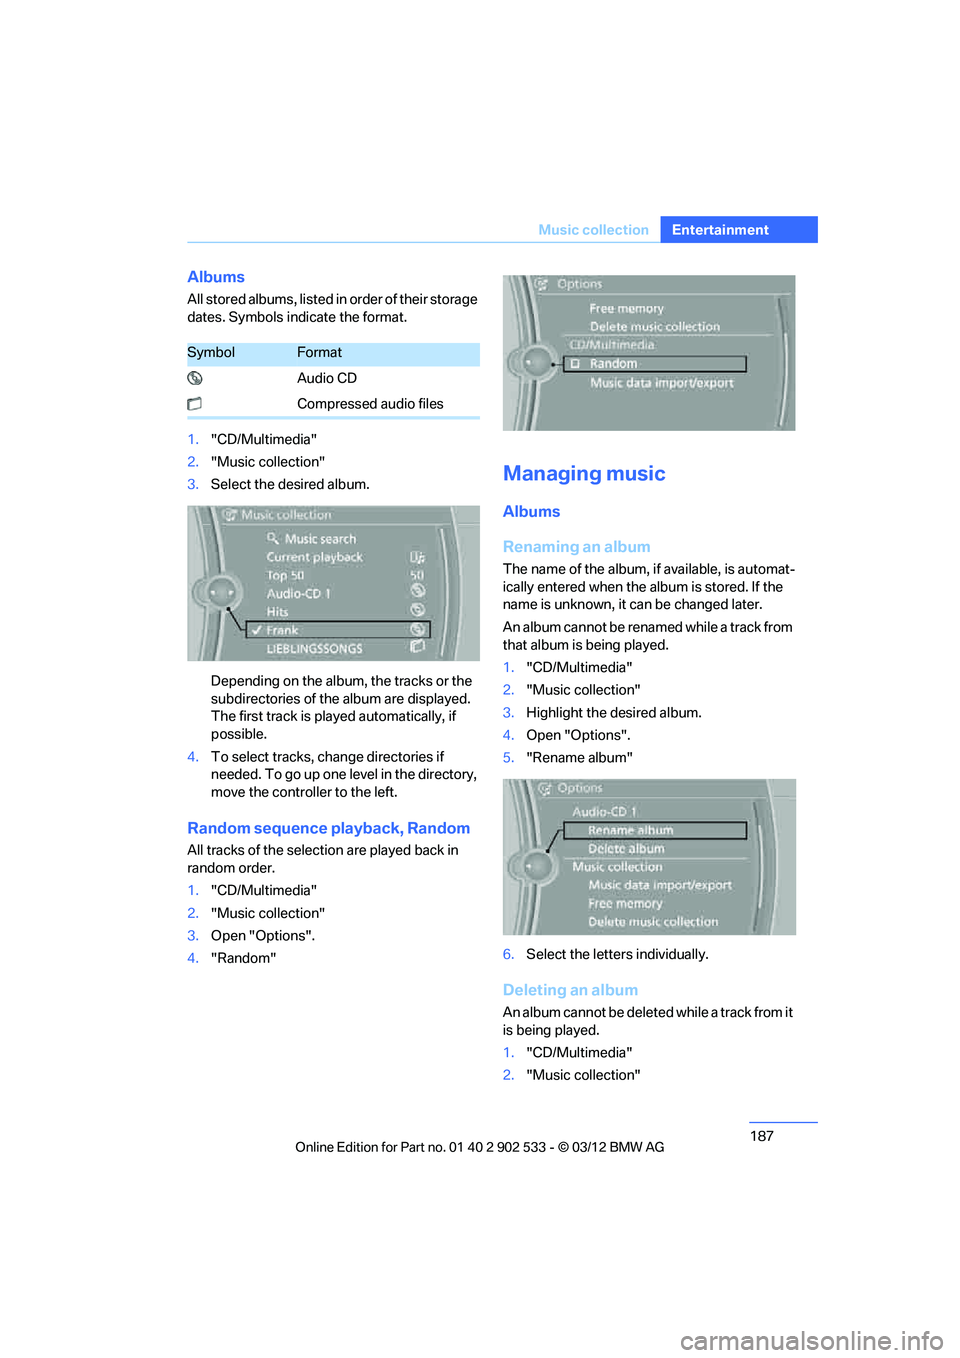
Random sequence playback, Random
All tracks of the selection are played back in
random order.
1."CD/Multimedia"
2. "Music collection"
3. Open "Options".
4. "Random"
Managing music
Albums
Renaming an album
The name of the album, if available, is automat-
ically entered when the album is stored. If the
name is unknown, it can be changed later.
An album cannot be renamed while a track from
that album is being played.
1."CD/Multimedia"
2. "Music collection"
3. Highlight the desired album.
4. Open "Options".
5. "Rename album"
6. Select the letters individually.
Deleting an album
An album cannot be deleted while a track from it
is being played.
1."CD/Multimedia"
2. "Music collection"
SymbolFormat
Audio CD
Compressed audio files
00320051004F004C00510048000300280047004C0057004C005200510003
Page 189 of 308
188
EntertainmentMusic collection
3.Highlight the desired album.
4. Open "Options".
5. "Delete album"
Deleting a track and directory
A track cannot be deleted while it is being
played.
A directory cannot be deleted while a track from
it is being played.
1."CD/Multimedia"
2. "Music collection"
3. Highlight the directory or track.
4. Open "Options".
5. "Delete folder" or "Delete track"
Free memory capacity
Display the free memory capacity in the music
collection.
1."CD/Multimedia"
2. "Music collection"
3. Open "Options".
4. "Free memory"
Music collection
Backing up the music collection
The entire music collection can be stored on a
USB medium. Make sure there is enough free
memory capacity on the USB device.
Depending on the number of tracks, backing up
the music collection may take several hours.
Therefore, it is best to perform the backup dur-
ing a long trip.
1.Start the engine.
2. Connect the USB medium to the USB inter-
face in the glove compartment, refer to
page 124.
3. "CD/Multimedia"
4. "Music collection"
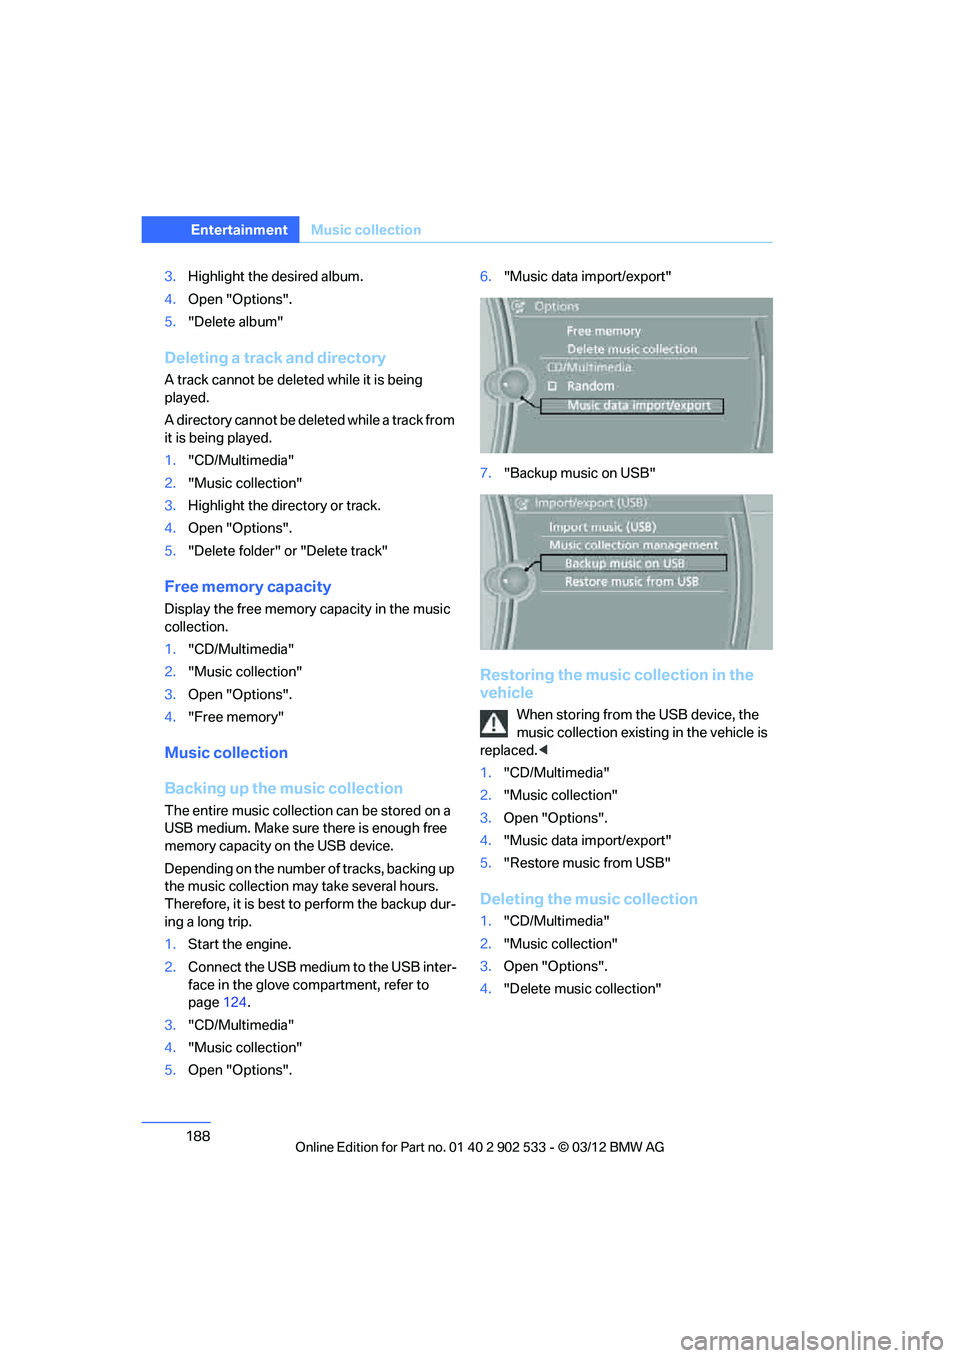
5. Open "Options". 6.
"Music data import/export"
7. "Backup music on USB"
Restoring the music collection in the
vehicle
When storing from the USB device, the
music collection existing in the vehicle is
replaced. <
1. "CD/Multimedia"
2. "Music collection"
3. Open "Options".
4. "Music data import/export"
5. "Restore music from USB"
Deleting the music collection
1."CD/Multimedia"
2. "Music collection"
3. Open "Options".
4. "Delete music collection"
00320051004F004C00510048000300280047004C0057004C005200510003
Page 190 of 308
189
External devices
Entertainment
External devices
Vehicle equipment
In this chapter, all production, country, and
optional equipment that is offered in the model
range is described. Equipment is also described
that is not available because of, for example,
selected options or country version. This also
applies to safety related functions and systems.
Overview
AUX-IN port
Overview
>
It is possible to connect audio devices, e.g.
MP3 players. Sound is output over the vehi-
cle speakers.
> Recommended settings: mid-level tone and
volume settings on the audio device. Tone
may depend on the quality of the audio files.
Connecting
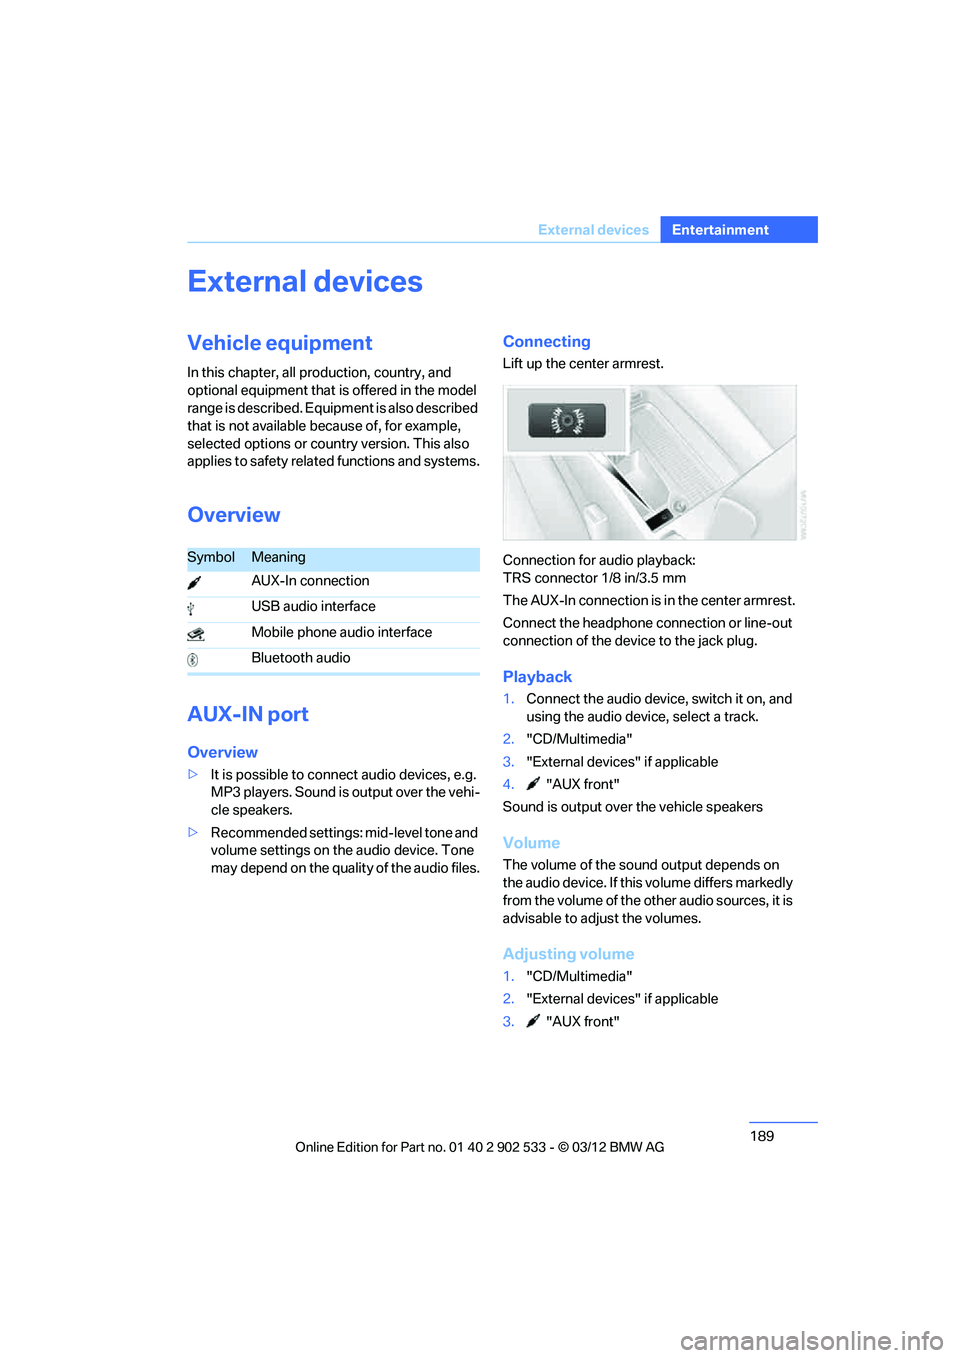
Lift up the center armrest.
Connection for audio playback:
TRS connector 1/8 in/3.5 mm
The AUX-In connection is in the center armrest.
Connect the headphone co nnection or line-out
connection of the device to the jack plug.
Playback
1. Connect the audio device, switch it on, and
using the audio device, select a track.
2. "CD/Multimedia"
3. "External devices" if applicable
4. "AUX front"
Sound is output over the vehicle speakers
Volume
The volume of the sound output depends on
the audio device. If this volume differs markedly
from the volume of the other audio sources, it is
advisable to adjust the volumes.
Adjusting volume
1. "CD/Multimedia"
2. "External devices" if applicable
3. "AUX front"
SymbolMeaning
AUX-In connection
USB audio interface
Mobile phone audio interface
Bluetooth audio
00320051004F004C00510048000300280047004C0057004C005200510003