start stop button BMW 335IS CONVERTIBLE 2013 Owners Manual
[x] Cancel search | Manufacturer: BMW, Model Year: 2013, Model line: 335IS CONVERTIBLE, Model: BMW 335IS CONVERTIBLE 2013Pages: 308, PDF Size: 5.65 MB
Page 12 of 308
11
Dashboard
At a glance
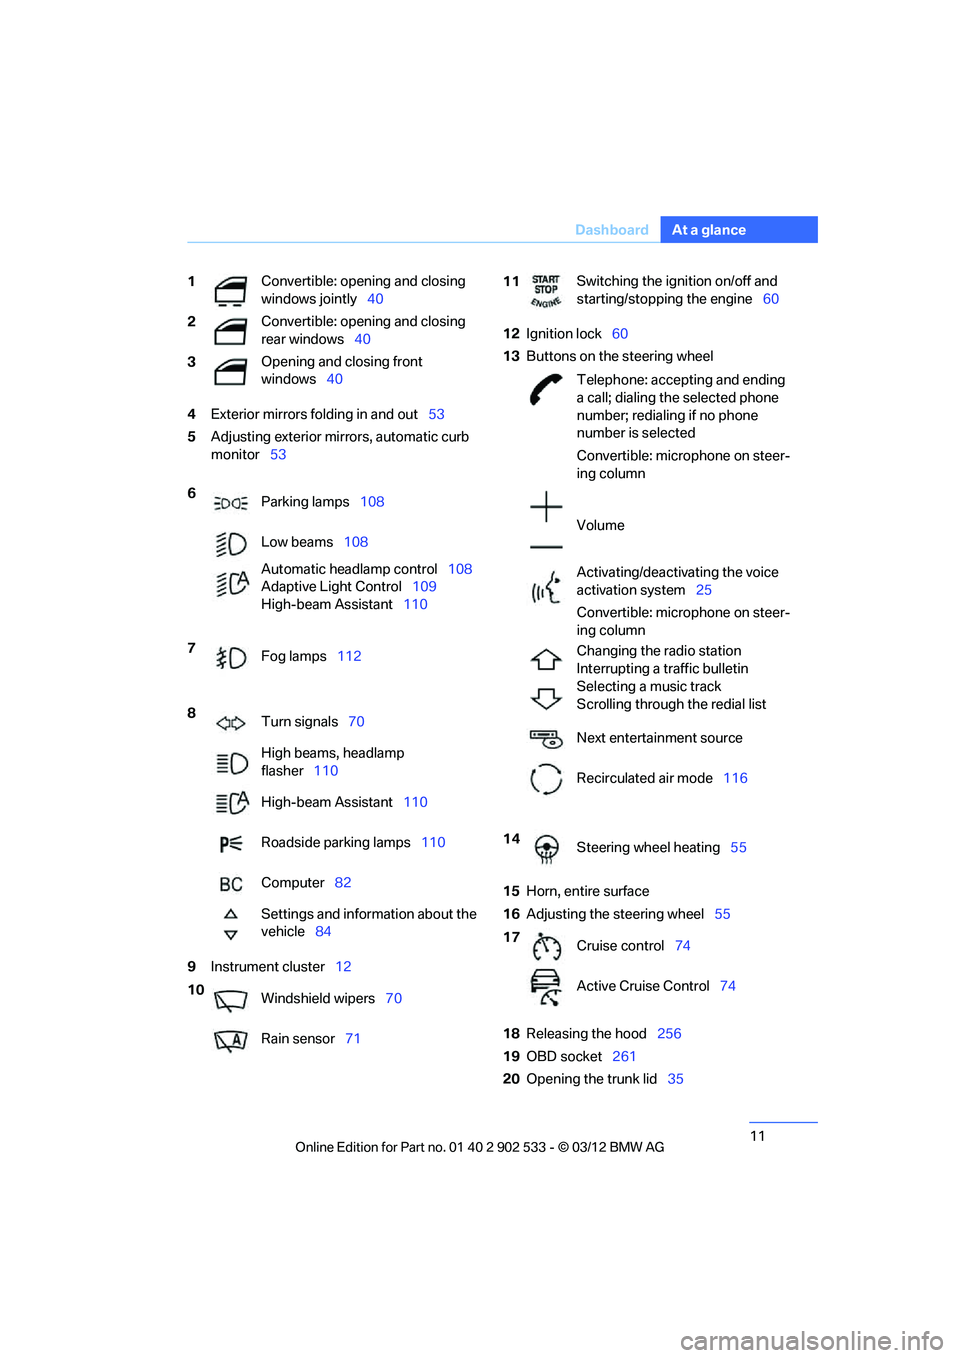
4
Exterior mirrors folding in and out 53
5 Adjusting exterior mirrors, automatic curb
monitor 53
9 Instrument cluster 12 12
Ignition lock 60
13 Buttons on the steering wheel
15 Horn, entire surface
16 Adjusting the steering wheel 55
18 Releasing the hood 256
19 OBD socket 261
20 Opening the trunk lid 35
1
Convertible: opening and closing
windows jointly
40
2 Convertible: opening and closing
rear windows
40
3 Opening and closing front
windows
40
6 Parking lamps 108
Low beams 108
Automatic headlamp control 108
Adaptive Light Control 109
High-beam Assistant 110
7 Fog lamps 112
8 Turn signals 70
High beams, headlamp
flasher 110
High-beam Assistant 110
Roadside parking lamps 110
Computer 82
Settings and information about the
vehicle 84
10 Windshield wipers 70
Rain sensor 71
11Switching the ignition on/off and
starting/stopping the engine
60
Telephone: accepting and ending
a call; dialing the selected phone
number; redialing if no phone
number is selected
Convertible: microphone on steer-
ing column
Volume
Activating/deactivating the voice
activation system 25
Convertible: microphone on steer-
ing column
Changing the radio station
Interrupting a traffic bulletin
Selecting a music track
Scrolling through the redial list
Next entertainment source
Recirculated air mode 116
14 Steering wheel heating 55
17 Cruise control 74
Active Cruise Control 74
00320051004F004C00510048000300280047004C0057004C005200510003
Page 40 of 308
39
Opening and closing
Controls
consumers are switched off before locking the
vehicle.
<
Coupe: Convenient closing
Keep pressing the surface, arrow 2, with your
finger.
Convertible: window and convertible
top operation
With the ignition at radio readiness or beyond,
you can open and close the windows and the
convertible top when a remote control is
located inside the vehicle.
Unlocking the trunk lid separately
Press the button on the outside of the trunk lid.
This corresponds to pressing the button.
If the vehicle detects that a remote con-
trol has been accidentally left inside the
locked vehicle's trunk after the trunk lid is
closed, the lid will reopen. The hazard warning
flashers flash and a signal sounds. <
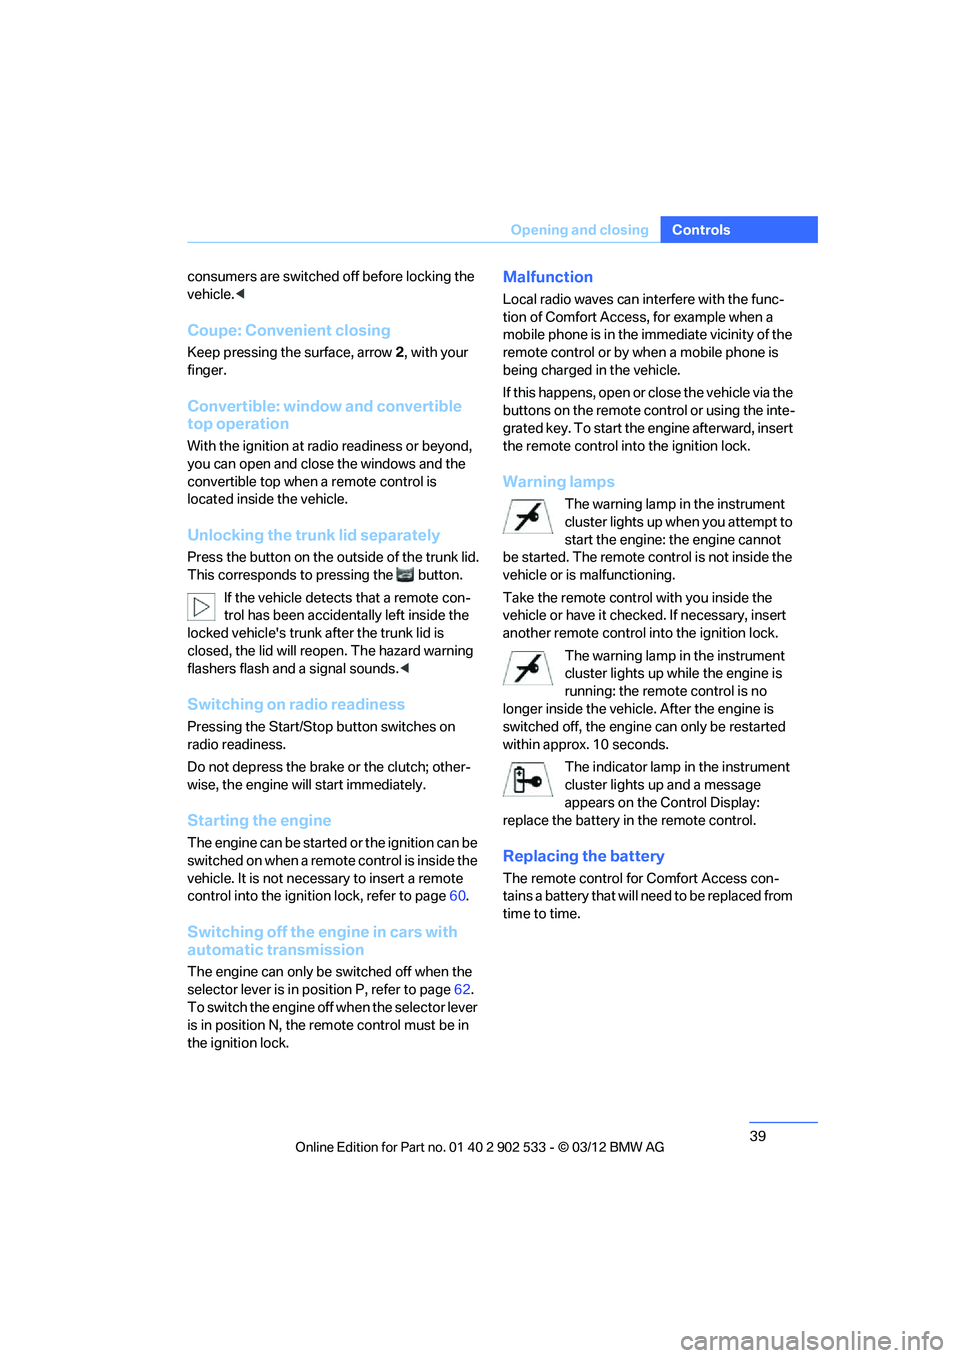
Switching on radio readiness
Pressing the Start/Stop button switches on
radio readiness.
Do not depress the brake or the clutch; other-
wise, the engine will start immediately.
Starting the engine
The engine can be started or the ignition can be
switched on when a remote control is inside the
vehicle. It is not necessary to insert a remote
control into the ignition lock, refer to page 60.
Switching off the engine in cars with
automatic transmission
The engine can only be switched off when the
selector lever is in position P, refer to page 62.
To switch the engine off when the selector lever
is in position N, the remote control must be in
the ignition lock.
Malfunction
Local radio waves can interfere with the func-
tion of Comfort Access, for example when a
mobile phone is in the immediate vicinity of the
remote control or by when a mobile phone is
being charged in the vehicle.
If this happens, open or close the vehicle via the
buttons on the remote control or using the inte-
grated key. To start the engine afterward, insert
the remote control into the ignition lock.
Warning lamps
The warning lamp in the instrument
cluster lights up when you attempt to
start the engine: the engine cannot
be started. The remote control is not inside the
vehicle or is malfunctioning.
Take the remote control with you inside the
vehicle or have it checked. If necessary, insert
another remote control into the ignition lock.
The warning lamp in the instrument
cluster lights up while the engine is
running: the remote control is no
longer inside the vehicle. After the engine is
switched off, the engine can only be restarted
within approx. 10 seconds.
The indicator lamp in the instrument
cluster lights up and a message
appears on the Control Display:
replace the battery in the remote control.
Replacing the battery
The remote control for Comfort Access con-
tains a battery that will need to be replaced from
time to time.
00320051004F004C00510048000300280047004C0057004C005200510003
Page 61 of 308
60
ControlsDriving
Driving
Vehicle equipment
In this chapter, all production, country, and
optional equipment that is offered in the model
range is described. For this reason, descrip-
tions will be given of some equipment that may
not be available in a vehicle, for example due to
the special options or national-market version
selected. This also applies to safety related
functions and systems.
Ignition lock
Insert the remote control into the
ignition lock
Insert the remote control all the way into the
ignition lock.
>Radio readiness is switched on.
Individual electrical consumers can operate.
Comfort Access
If the car is equipped with Comfort Access, only
insert the remote control into the ignition lock
under special circumstances, refer to page 38.
Removing the remote control from the
ignition lock
Do not forcibly pull the remote control out
of the ignition lock as this may cause
damage. < Before removing the remote control, push it all
the way in to release the locking mechanism.
>
The ignition is switched off if it was on.
Automatic transmission
You cannot take out the remote control unless
the selector lever is in the P position: interlock.
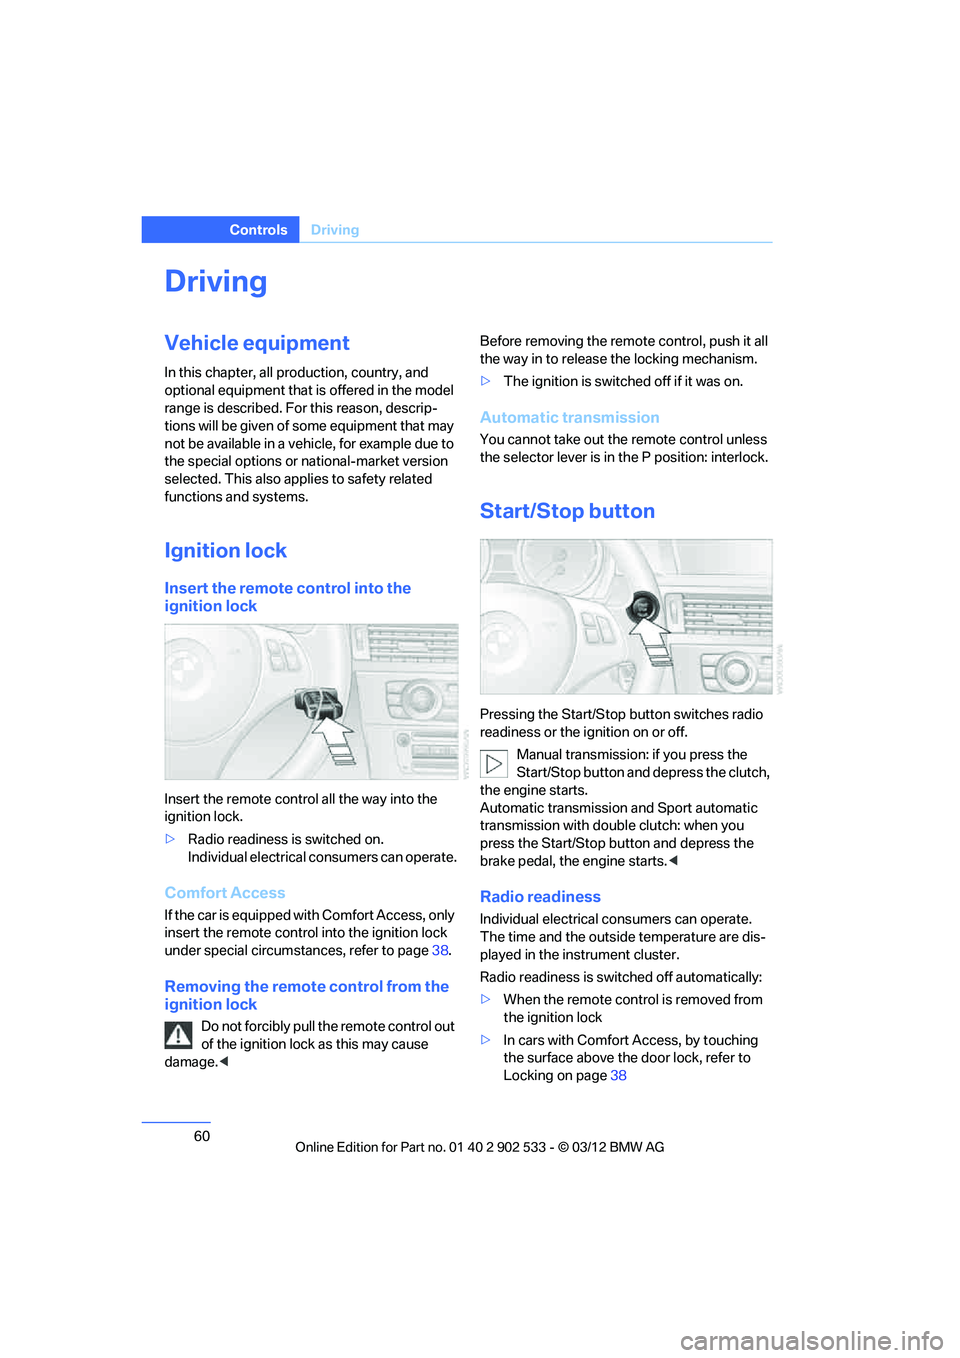
Start/Stop button
Pressing the Start/Stop button switches radio
readiness or the ignition on or off.
Manual transmission: if you press the
Start/Stop button and depress the clutch,
the engine starts.
Automatic transmission and Sport automatic
transmission with double clutch: when you
press the Start/Stop button and depress the
brake pedal, the engine starts. <
Radio readiness
Individual electrical consumers can operate.
The time and the outside temperature are dis-
played in the instrument cluster.
Radio readiness is switched off automatically:
>When the remote control is removed from
the ignition lock
> In cars with Comfort Access, by touching
the surface above the door lock, refer to
Locking on page 38
00320051004F004C00510048000300280047004C0057004C005200510003
Page 62 of 308
61
Driving
Controls
Ignition on
All electrical consumers can operate. The
odometer and trip odometer are displayed in
the instrument cluster.
When the engine is off, please switch off
the ignition and any unnecessary electri-
cal consumers in order to preserve the bat-
tery.<
Radio readiness and ignition off
All indicator and warning lamps as well as dis-
plays in the instrument cluster go out.
Starting the engine
Do not run the engine in enclosed areas;
otherwise, the inhalation of toxic exhaust
gases can cause loss of consciousness and
death. The exhaust gases contain carbon mon-
oxide, an odorless and colorless, but highly
toxic gas. Never leave an unattended vehicle
with the engine running; otherwise, such a vehi-
cle represents a potential safety hazard.
Before leaving the car with the engine running,
place the transmission in neutral or move the
selector lever to position P and forcefully apply
the parking brake to prevent the car from mov-
ing. <
Avoid frequent starting in quick succes-
sion as well as repeated start attempts in
which the engine does not start. Otherwise, the
fuel is not burned or incompletely burned and
there is a danger of overheating and damaging
the catalytic converter.<
Do not wait for the engine to warm up while the
vehicle remains stationary. Start driving right
away, but at moderate engine speeds.
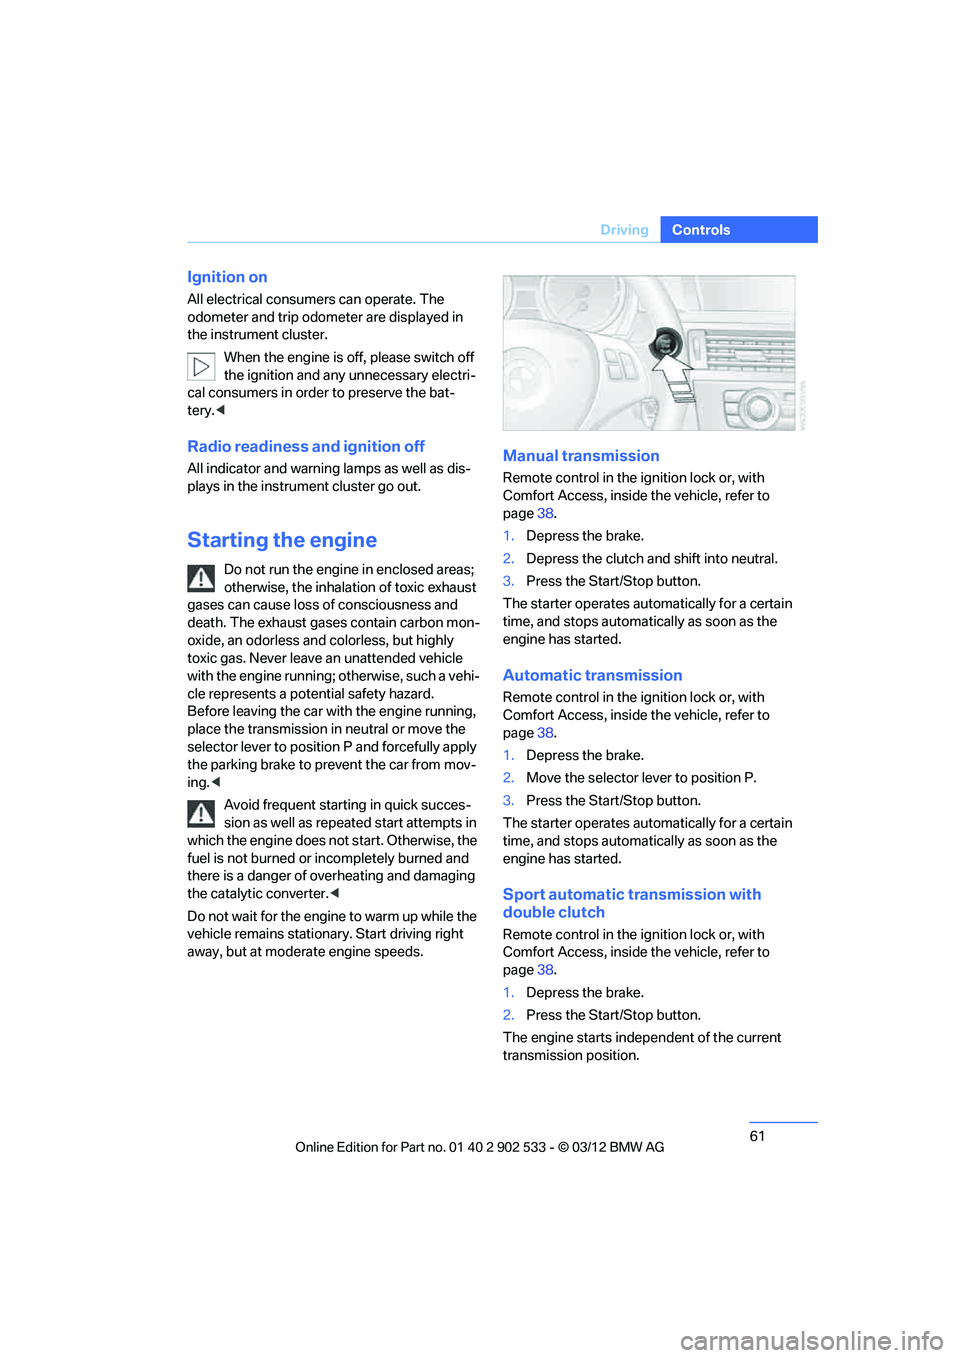
Manual transmission
Remote control in the ignition lock or, with
Comfort Access, inside the vehicle, refer to
page 38.
1. Depress the brake.
2. Depress the clutch and shift into neutral.
3. Press the Start/Stop button.
The starter operates automatically for a certain
time, and stops automatically as soon as the
engine has started.
Automatic transmission
Remote control in the ignition lock or, with
Comfort Access, inside the vehicle, refer to
page 38.
1. Depress the brake.
2. Move the selector lever to position P.
3. Press the Start/Stop button.
The starter operates automatically for a certain
time, and stops automatically as soon as the
engine has started.
Sport automatic transmission with
double clutch
Remote control in the ignition lock or, with
Comfort Access, inside the vehicle, refer to
page 38.
1. Depress the brake.
2. Press the Start/Stop button.
The engine starts independent of the current
transmission position.
00320051004F004C00510048000300280047004C0057004C005200510003
Page 63 of 308
62
ControlsDriving
Switching off the engine
When leaving the vehicle, always take
along the remote control; this precaution
prevents children from starting the engine, for
example. <
When parking, apply the parking brake
forcefully; otherwise, the vehicle could
begin to roll. On steep uphill and downhill
inclines, also secure the vehicle by turning the
wheels toward the curb, for example. <
Manual transmission
1.With the car at a standstill, press the Start/
Stop button.
2. Shift into first gear or reverse.
3. Forcefully apply the parking brake.
4. Removing the remote control from the igni-
tion lock, refer to page 60.
Automatic transmission
1. With the car at a standstill, move the selec-
tor lever to position P.
2. Press the Start/Stop button.
3. Forcefully apply the parking brake.
4. Removing the remote control from the igni-
tion lock, refer to page 60.
Sport automatic transmission with
double clutch
1. With the car at a standstill, press the Start/
Stop button.
If the transmission is shifted into N when the
engine is switched off, you will be notified
visually and acoustically of this fact.
2. Forcefully apply the parking brake.
3. Remove remote control from the ignition
lock, refer to page 60. The transmission is
automatically shifted into transmission
position P.
Parking brake
The parking brake is primarily intended to pre-
vent the vehicle from rolling while parked; it
brakes the rear wheels.
Also follow the instructions on page 62, under
Switching off the engine.
Indicator lamp
The indicator lamp is lit, and when you
drive off an acoustic signal sounds in
addition. The parking brake is still
applied.
Indicator lamp for Canadian models.
Applying
The lever locks in position automatically.
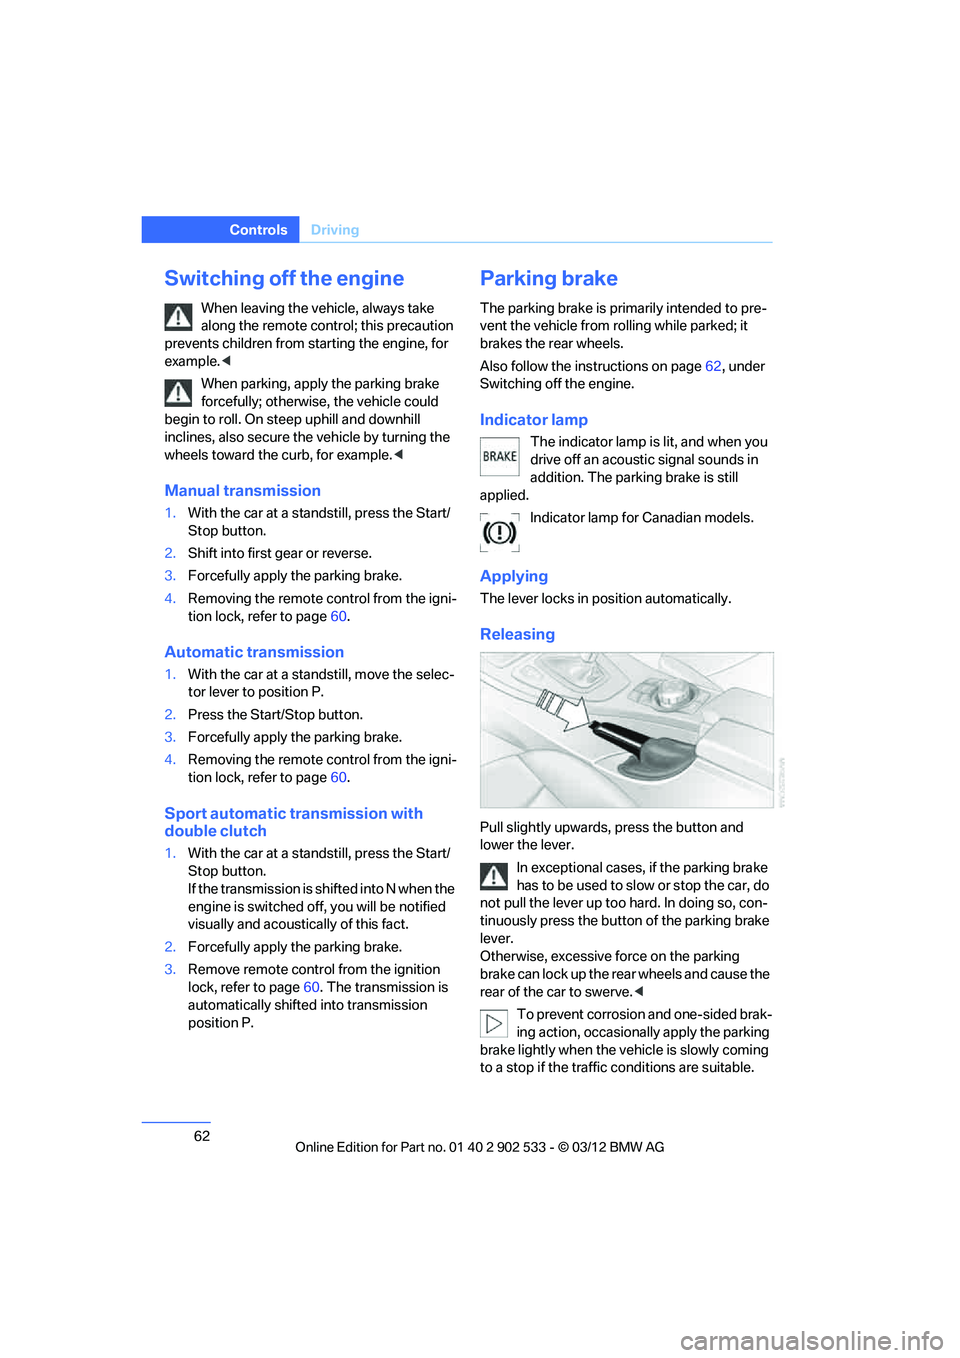
Releasing
Pull slightly upwards, press the button and
lower the lever.In exceptional cases, if the parking brake
has to be used to slow or stop the car, do
not pull the lever up too hard. In doing so, con-
tinuously press the button of the parking brake
lever.
Otherwise, excessive force on the parking
brake can lock up the rear wheels and cause the
rear of the car to swerve. <
To prevent corrosion and one-sided brak-
ing action, occasionally apply the parking
brake lightly when the vehicle is slowly coming
to a stop if the traffic conditions are suitable.
00320051004F004C00510048000300280047004C0057004C005200510003
Page 70 of 308
69
Driving
Controls
4.
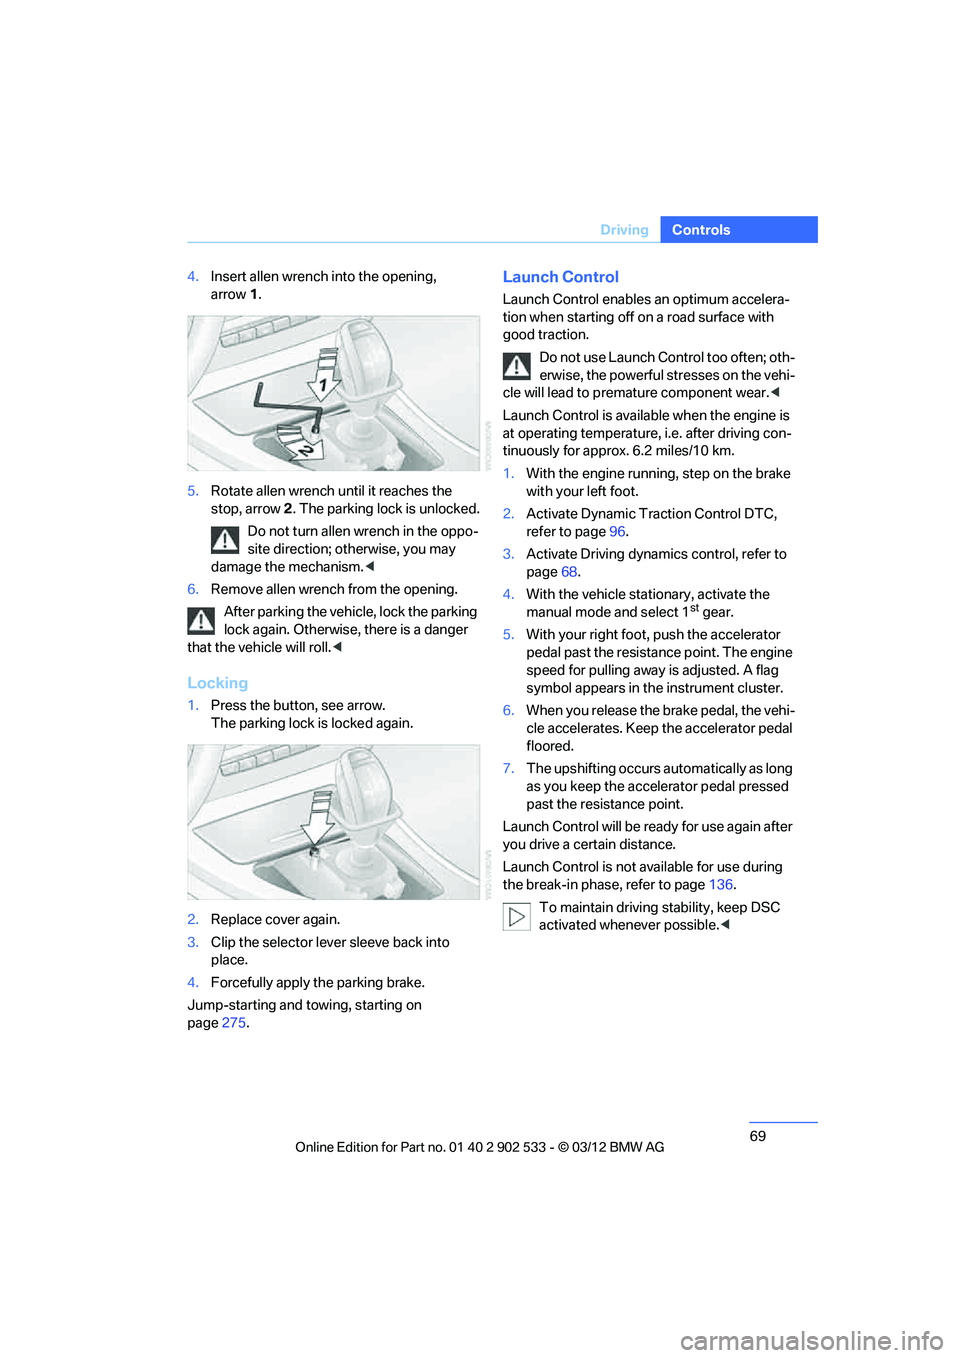
Insert allen wrench into the opening,
arrow 1.
5. Rotate allen wrench until it reaches the
stop, arrow 2. The parking lock is unlocked.
Do not turn allen wrench in the oppo-
site direction; otherwise, you may
damage the mechanism. <
6. Remove allen wrench from the opening.
After parking the vehicle, lock the parking
lock again. Otherwise, there is a danger
that the vehicle will roll. <
Locking
1.Press the button, see arrow.
The parking lock is locked again.
2. Replace cover again.
3. Clip the selector lever sleeve back into
place.
4. Forcefully apply the parking brake.
Jump-starting and towing, starting on
page 275.
Launch Control
Launch Control enables an optimum accelera-
tion when starting off on a road surface with
good traction.
Do not use Launch Control too often; oth-
erwise, the powerful stresses on the vehi-
cle will lead to premature component wear. <
Launch Control is available when the engine is
at operating temperature, i.e. after driving con-
tinuously for approx. 6.2 miles/10 km.
1. With the engine running, step on the brake
with your left foot.
2. Activate Dynamic Traction Control DTC,
refer to page 96.
3. Activate Driving dynamics control, refer to
page 68.
4. With the vehicle stationary, activate the
manual mode and select 1
stgear.
5. With your right foot, push the accelerator
pedal past the resistance point. The engine
speed for pulling away is adjusted. A flag
symbol appears in the instrument cluster.
6. When you release the brake pedal, the vehi-
cle accelerates. Keep the accelerator pedal
floored.
7. The upshifting occurs automatically as long
as you keep the accelerator pedal pressed
past the resistance point.
Launch Control will be ready for use again after
you drive a certain distance.
Launch Control is not available for use during
the break-in phase, refer to page 136.
To maintain driving stability, keep DSC
activated whenever possible. <
00320051004F004C00510048000300280047004C0057004C005200510003
Page 113 of 308
112
ControlsLamps
Fog lamps
The parking lamps or low beams must
be switched on for the fog lamps to
operate. The green indicator lamp in
the instrument cluster lights up whenever the
fog lamps are on.
The fog lamps are switched off while you acti-
vate the headlamp flasher or switch on the high
beams.
If the automatic headlamp control is acti-
vated, the low beams will come on auto-
matically when you switch on the fog lamps. <
Instrument lighting
You can adjust the brightness of the instrument
lighting only when the parking lamps or the low
beams are switched on.
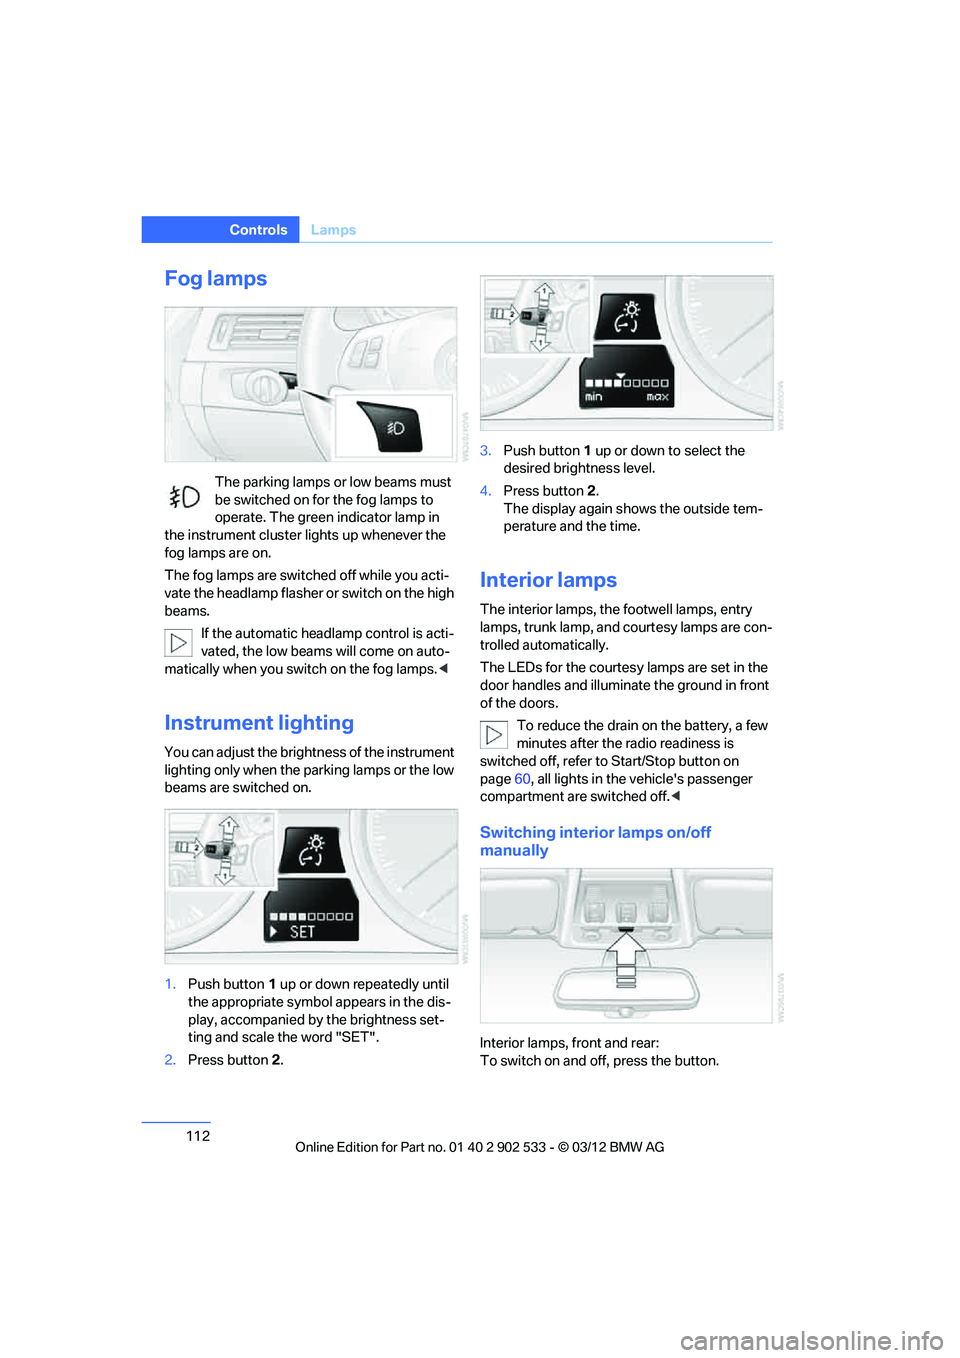
1.Push button 1 up or down repeatedly until
the appropriate symbol appears in the dis-
play, accompanied by the brightness set-
ting and scale the word "SET".
2. Press button 2. 3.
Push button 1 up or down to select the
desired brightness level.
4. Press button 2.
The display again shows the outside tem-
perature and the time.
Interior lamps
The interior lamps, the footwell lamps, entry
lamps, trunk lamp, and courtesy lamps are con-
trolled automatically.
The LEDs for the courtesy lamps are set in the
door handles and illuminate the ground in front
of the doors.
To reduce the drain on the battery, a few
minutes after the radio readiness is
switched off, refer to Start/Stop button on
page 60, all lights in the vehicle's passenger
compartment are switched off. <
Switching interior lamps on/off
manually
Interior lamps, front and rear:
To switch on and off, press the button.
00320051004F004C00510048000300280047004C0057004C005200510003
Page 294 of 308
293
Everything from A to Z
Reference
AUX-IN
– port
125
Available services 228
Average fuel consumption 82
– setting the units 85
Average speed 82
Avoid highways in
navigation 155
Avoiding unintentional alarms 38
Axle loads, refer to Weights 283
B
Backrest contour, refer to
Lumbar support 48
Backrests, refer to Seat adjustment 47
Backrest width adjustment 48
Back seats
– refer to Rear seats 50
Bag holder 129
Band-aids, refer to First aid pouch 273
Bar, refer to Towing methods 276
Base plate for telephone or
mobile phone
– refer to Snap-in adapter 211
– refer to Snap-in adapter in
the center armrest storage
compartment 124
Battery 270
– charging 270
– disposal 40,271
– jump-starting 274
– remote control 30
– replacing 270
– temporary power failure 270
Battery renewal
– remote control 40
– remote control for vehicle 39
Being towed 275
Belt hand-over 53
– pinch protection system 53
Belts, refer to Safety belts 52Belt tensioner, refer to Safety
belts 52
Beverage holders, refer to Cupholders 126
Black ice, refer to Outside temperature warning 80
Blinds, refer to Roller
sunblinds 124
Blower, refer to Air volume 116
Bluetooth, activating/ deactivating 201
BMW
– car shampoo 265
BMW Assist 224
– updating 228
BMW Homepage 4
BMW Info 218
BMW Maintenance
System 260
BMW Online 226
BMW webpage 4
Bottle holders, refer to Cupholders 126
Brake Assist, refer to Dynamic
Brake Control DBC 95
Brake fluid, refer to Service requirements 85
Brake Force Display 104
Brake lamps
– B ra
ke Force Display 104
Brake pads 136
– breaking in 136
Brake pedal, refer to Braking
safely 138
Brake rotors 139
– brakes 136
– breaking in 136
Brakes
– ABS 95
– BMW Maintenance System 260
– Brake Force Display 104
– breaking in 136
– parking brake 62
– service requirements 85Brakes, refer to Braking
safely 138
Brake system 136
– BMW Maintenance
System 260
– breaking in 136
– disc brakes 139
Breakdown services, refer to Roadside Assistance 273
Breaking in the clutch 136
Breaking in the differential, refer to Engine and
differential 136
Break-in period 136
Brightness of the Control Display 92
Bulb changing, refer to Lamps and bulbs 266
Button for starting the engine,
refer to Start/Stop button 60
Buttons on the steering wheel 11
C
Calendar 219
– displaying appointment 219
– selecting calendar day 219
California Proposition 65 warning 6
Call
– accepting 205
– ending 205
– muting the microphone 207
– rejecting 205
Calling, refer to Phone numbers, dialing 206
Calling, refer to Telephone owner's manual
Calls
– with multiple parties 206
Can holders, refer to Cupholders 126
Capacities 284
Capacity of the trunk 283
Car battery, refer to Vehicle
battery 270
00320051004F004C00510048000300280047004C0057004C005200510003
Page 304 of 308
303
Everything from A to Z
Reference
Setting times, refer to
Preselecting switch-on
times 118
Shifting 67
– 7-gear Sport automatic transmission with double
clutch 67
Shifting gears
– automatic transmission with Steptronic 64
– manual transmission 63
Shift into a drive position, refer to selector lever
positions 66
Shiftlock
– automatic transmission, refer to Changing selector
lever positions 63
Shift paddles on the steering
wheel 67
Short commands for the voice activation system 285
Short route in navigation, refer to Selecting route 155
Side airbags 104
Side windows, refer to Windows 40
Signal horn, refer to
Horn 10,11
Sitting safely 46
– with airbags 46
– with head restraint 46
– with safety belts 46
Ski bag 130
Ski bag for Convertible, refer to Through-loading opening
with integrated transport
bag 131
Sliding/tilt sunroof, refer to Glass roof, electric 41
Slot for remote control 60
Smokers' package, refer to Ashtray 127
Snap-in adapter 200
– inserting/removing 211Snap-in adapter, refer to
Center armrest storage
compartment 124
Socket, Onboard Diagnosis
OBD 261
Socket, refer to Connecting electrical appliances 127
SOS, refer to Sending an Emergency Request 272
Spare fuses 271
Special destinations 150
Special destinations, displaying 151
Special oils, refer to Approved engine oils 258
Specified engine oils, refer to
Approved engine oils 258
Speed
– run-flat tires 99
– with winter tires 254
Speed limit 91
Speed limit warning, refer to
Speed limit 91
Spee do,
refer to
Speedometer 12
Speedometer 12
Split screen content, refer to Selecting the display for the
split screen content 22
Sport automatic transmission with double clutch 65
– driving dynamics control 68
– kickdown 67
– Launch Control 69
– manually unlocking parking lock 68
– neutral 66
– reverse gear 66
Sport program with 7-gear Sport automatic
transmission with double
clutch 67
Spray nozzles, refer to
Cleaning windshield and
headlamps 71 Stability control, refer to
Driving stability control
systems 95
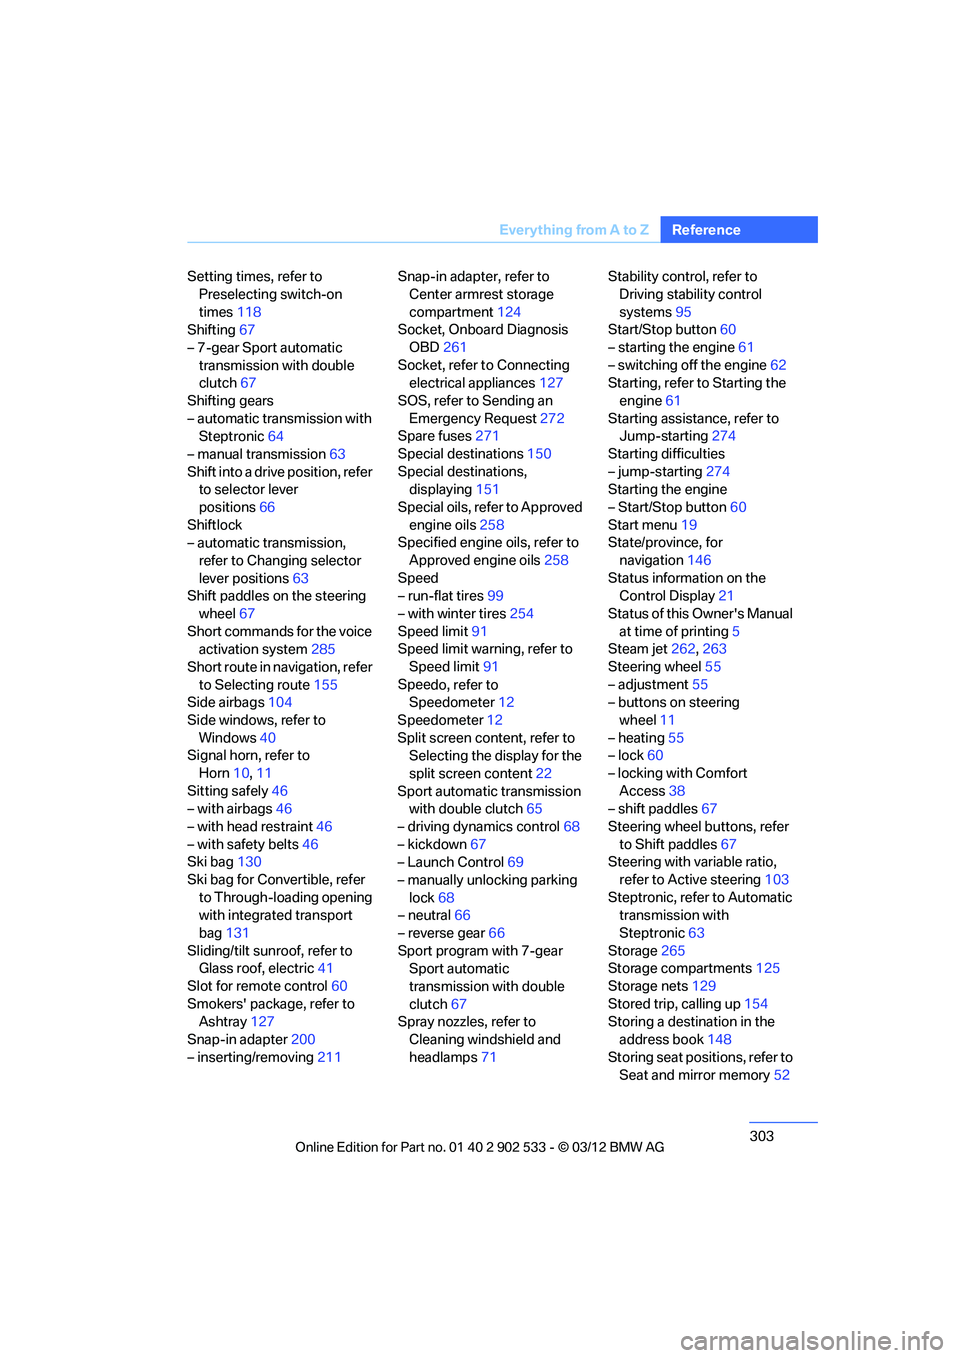
Start/Stop button 60
– starting the engine 61
– switching off the engine 62
Starting, refer to Starting the
engine 61
Starting assistance, refer to Jump-starting 274
Starting difficulties
– jump-starting 274
Starting the engine
– Start/Stop button 60
Start menu 19
State/province, for
navigation 146
Status information on the Control Display 21
Status of this Owner's Manual at time of printing 5
Steam jet 262,263
Steering wheel 55
– adjustment 55
– buttons on steering
wheel 11
– heating 55
– lock 60
– locking with Comfort Access 38
– shift paddles 67
Steering wheel buttons, refer to Shift paddles 67
Steering with variable ratio,
refer to Active steering 103
Steptronic, refer to Automatic transmission with
Steptronic 63
Storage 265
Storage compartments 125
Storage nets 129
Stored trip, calling up 154
St or
ing a destination in the
address book 148
Storing seat positions, refer to Seat and mirror memory 52
00320051004F004C00510048000300280047004C0057004C005200510003
Page 305 of 308
304
Referen ceEverything from A to Z
Storing tires254
Stowage, refer to Storage compartments 125
Street, entering,
navigation 147
Suitable mobile phones 200
Summer tires, refer to Wheels
and tires 235
Switches, refer to Cockpit 10
Switching off
– engine 62
Switching off the engine
– Start/Stop button 60
Switching the cooling function on and off 117
Switch-on times of parked car
ventilation, preselecting 118
Symbols 4
T
Tachometer 81
Tailgate, refer to Trunk lid 35
Tail lamp
– replacing bulb 269
Tail lamp, refer to Tail lamps 268
Tail lamps 268
– replacing bulb 268,269
Tank contents, refer to Capacities 284
Tasks 219
Technical data 280
– dimensions 281
Technical modifications, refer to For your own safety 5
Telephone 200
– hands-free system 209
– installation location, refer to Center armrest 124
– phone book 207
– received calls 208
– redialing 208
– refer to separate Owner's Manual
– voice commands 209TeleService
225
Teleservice Diagnosis 226
Temperature
– automatic climate control 115
– changing unit of measure 85
– coolant, refer to Coolant
temperature 259
Temperature display
– outside temperature 80
– outside temperature warning 80
– setting the units 85
Tempomat, refer to Cruise control 72
Tensioning straps, refer to
Securing cargo 140
Text message 217
Third brake lamp, refer to
Center brake lamp 269
Through-loading opening with integrated transport
bag 131
Through-loading system 128
Tilt alarm sensor 37
Tilt function, passenger side mirror 54
Timer, refer to Preselecting
switch-on times 118
Tire inflation pressure 235
– loss 99,100
Tire pressure monitoring, refer to Flat Tire Monitor 98
Tire Pressure Monitor
TPM 100
– r es
etting the system 101
– system limitations 100
– warning lamp 101
Tire puncture, refer to Flat Tire Monitor 99
Tire Quality Grading 251Tires
– age
251,253
– air loss 101
– breaking in 136
– changing, refer to Changing wheels 269
– condition 252
– damage 252
– inflation pressure 235
– labels 251
– minimum tread depth 252
– new wheels and tires 253
– pressure monitoring, refer to
Flat Tire Monitor 98
– pressure monitoring, refer to Tire Pressure Monitor
TPM 100
– puncture 99
– replacing 253
– run-flat tires 254
– size 251
– storage 254
– tread depth 252
– wear indicators, refer to Minimum tread depth 252
– wheel/tire combination, refer to Correct wheels and
tires 253
– winter tires 254
TMC station, refer to Traffic bulletins 159
Tools, refer to Onboard vehicle tool kit 266
Top, refer to Retractable
hardtop 42
Tow bar 276
Tow fitting 275
– screw thread 275
Tow fittings for tow-starting and towing away 275
Towing 275
– car with automatic transmission 275
– methods 276
– with 7-gear Sport automatic transmission with double
clutch 276
00320051004F004C00510048000300280047004C0057004C005200510003