Press and hold BMW 4 SERIES COUPE 2014 F32 Owner's Guide
[x] Cancel search | Manufacturer: BMW, Model Year: 2014, Model line: 4 SERIES COUPE, Model: BMW 4 SERIES COUPE 2014 F32Pages: 244, PDF Size: 6.13 MB
Page 129 of 244
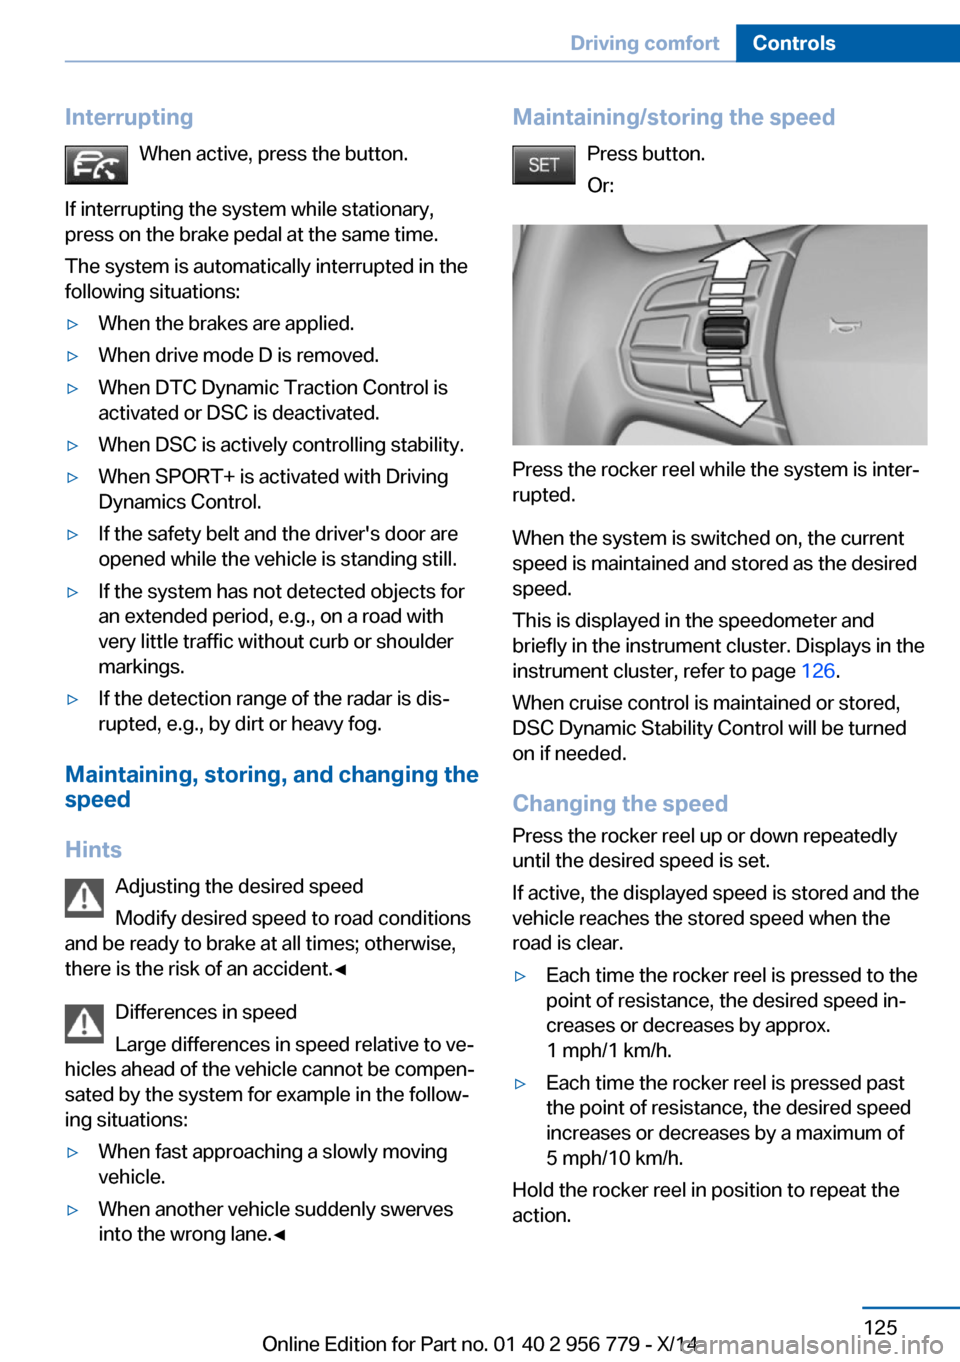
InterruptingWhen active, press the button.
If interrupting the system while stationary,
press on the brake pedal at the same time.
The system is automatically interrupted in the
following situations:âˇWhen the brakes are applied.âˇWhen drive mode D is removed.âˇWhen DTC Dynamic Traction Control is
activated or DSC is deactivated.âˇWhen DSC is actively controlling stability.âˇWhen SPORT+ is activated with Driving
Dynamics Control.âˇIf the safety belt and the driver's door are
opened while the vehicle is standing still.âˇIf the system has not detected objects for
an extended period, e.g., on a road with
very little traffic without curb or shoulder
markings.âˇIf the detection range of the radar is disâ
rupted, e.g., by dirt or heavy fog.
Maintaining, storing, and changing the
speed
Hints Adjusting the desired speedModify desired speed to road conditions
and be ready to brake at all times; otherwise,
there is the risk of an accident.â
Differences in speed
Large differences in speed relative to veâ
hicles ahead of the vehicle cannot be compenâ
sated by the system for example in the followâ
ing situations:
âˇWhen fast approaching a slowly moving
vehicle.âˇWhen another vehicle suddenly swerves
into the wrong lane.âMaintaining/storing the speed
Press button.
Or:
Press the rocker reel while the system is interâ
rupted.
When the system is switched on, the current
speed is maintained and stored as the desired
speed.
This is displayed in the speedometer and
briefly in the instrument cluster. Displays in the
instrument cluster, refer to page 126.
When cruise control is maintained or stored,
DSC Dynamic Stability Control will be turned
on if needed.
Changing the speed
Press the rocker reel up or down repeatedly
until the desired speed is set.
If active, the displayed speed is stored and the vehicle reaches the stored speed when the
road is clear.
âˇEach time the rocker reel is pressed to the
point of resistance, the desired speed inâ
creases or decreases by approx.
1 mph/1 km/h.âˇEach time the rocker reel is pressed past
the point of resistance, the desired speed
increases or decreases by a maximum of
5 mph/10 km/h.
Hold the rocker reel in position to repeat the
action.
Seite 125Driving comfortControls125
Online Edition for Part no. 01 40 2 956 779 - X/14
Page 134 of 244
At a glance
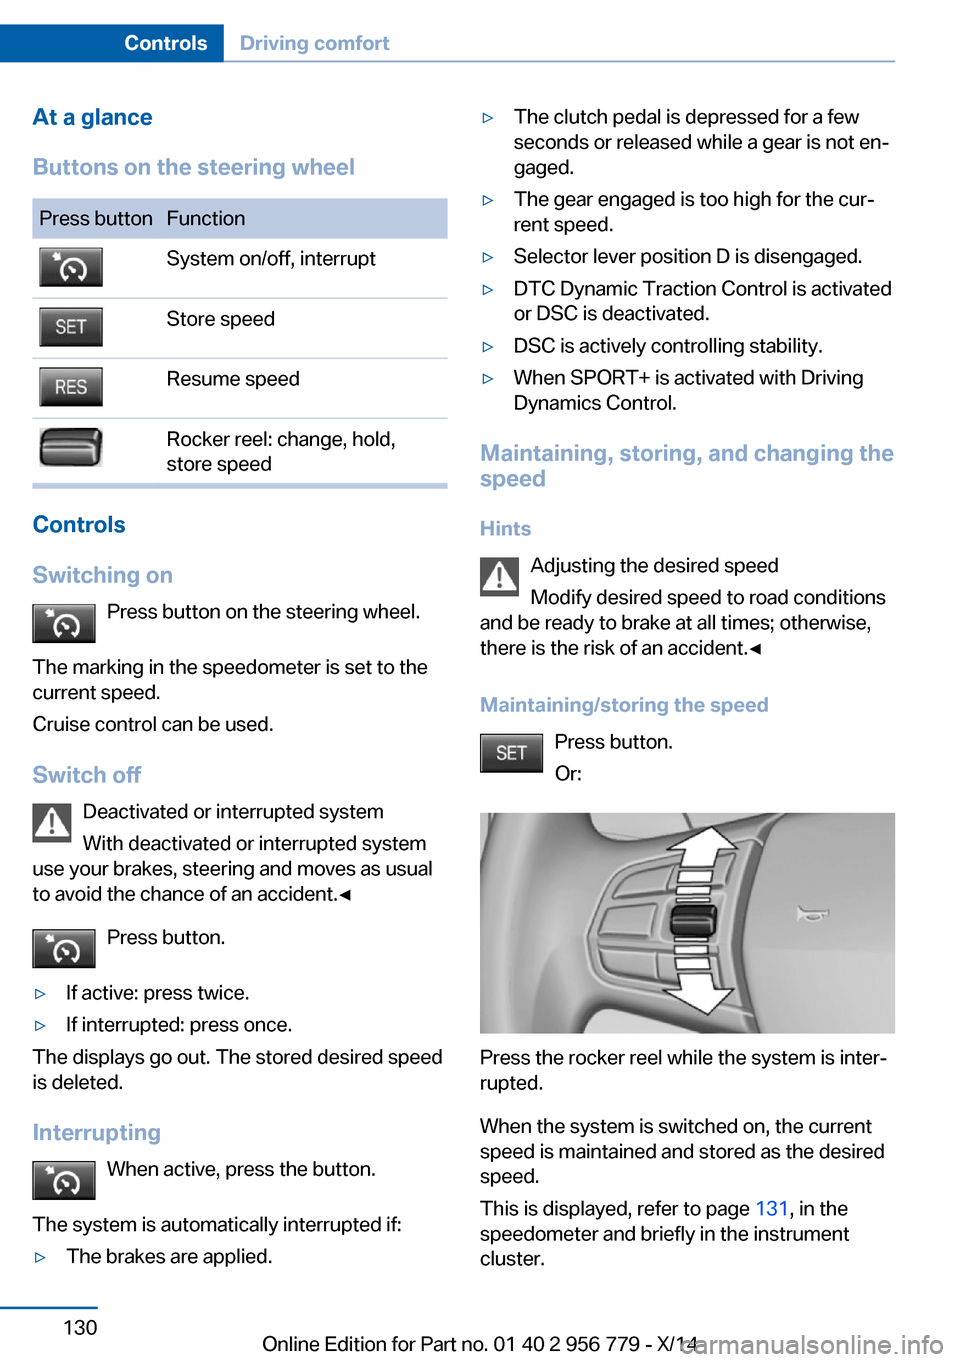
Buttons on the steering wheelPress buttonFunctionSystem on/off, interruptStore speedResume speedRocker reel: change, hold,
store speed
Controls
Switching on Press button on the steering wheel.
The marking in the speedometer is set to the
current speed.
Cruise control can be used.
Switch off Deactivated or interrupted system
With deactivated or interrupted system
use your brakes, steering and moves as usual
to avoid the chance of an accident.â
Press button.
âˇIf active: press twice.âˇIf interrupted: press once.
The displays go out. The stored desired speed
is deleted.
Interrupting When active, press the button.
The system is automatically interrupted if:
âˇThe brakes are applied.âˇThe clutch pedal is depressed for a few
seconds or released while a gear is not enâ
gaged.âˇThe gear engaged is too high for the curâ
rent speed.âˇSelector lever position D is disengaged.âˇDTC Dynamic Traction Control is activated
or DSC is deactivated.âˇDSC is actively controlling stability.âˇWhen SPORT+ is activated with Driving
Dynamics Control.
Maintaining, storing, and changing the
speed
Hints Adjusting the desired speed
Modify desired speed to road conditions
and be ready to brake at all times; otherwise,
there is the risk of an accident.â
Maintaining/storing the speed Press button.
Or:
Press the rocker reel while the system is interâ
rupted.
When the system is switched on, the current
speed is maintained and stored as the desired
speed.
This is displayed, refer to page 131, in the
speedometer and briefly in the instrument
cluster.
Seite 130ControlsDriving comfort130
Online Edition for Part no. 01 40 2 956 779 - X/14
Page 135 of 244
When cruise control is maintained or stored,
DSC Dynamic Stability Control will be turned
on if needed.
Changing the speed
Press the rocker reel up or down repeatedly
until the desired speed is set.
If active, the displayed speed is stored and the
vehicle reaches the stored speed when the
road is clear.âˇEach time the rocker reel is pressed to the
point of resistance, the desired speed inâ
creases or decreases by approx.
1 mph/1 km/h.âˇEach time the rocker reel is pressed past
the point of resistance, the desired speed
increases or decreases by a maximum of
5 mph/10 km/h.
The maximum speed that can be set deâ
pends on the vehicle.âˇPressing the rocker reel to the resistance
point and holding it accelerates or decelerâ
ates the vehicle without requiring pressure
on the accelerator pedal.
After the rocker reel is released, the vehicle
maintains its final speed. Pressing the reel
beyond the resistance point causes the veâ
hicle to accelerate more rapidly.
Resuming the desired speed
Press button.
The stored speed is reached and maintained. Displays in the instrument cluster
Indicator lamp Depending on how the vehicle is equipâ
ped, the indicator lamp in the instruâ
ment cluster indicates whether the sysâ
tem is switched on.
Desired speedâˇThe marking lights up green:
the system is active.âˇThe marking lights up orâ
ange: the system has been
interrupted.âˇThe marking does not light up: the system
is switched off.
Brief status display
Selected desired speed.
If --- appears briefly on the display for Check
Control messages, it is possible that the sysâ
tem requirements are currently not ready for
operations.
Displays in the Head-up Display Some system information can also be disâplayed in the Head-up Display.
PDC Park Distance Control
The concept PDC is a support when parking. When you
slowly approach an object in the rear - or also
in the front of the vehicle if the feature is availaâ
ble - then the object is reported through:
âˇSignal tones.âˇVisual display.
General information
Ultrasound sensors in the bumpers measure
the distances from objects.
The maneuvering range, depending on the obâ
stacle and environmental conditions, is approx.
6 ft/2 m.
An acoustic warning is first given:
âˇBy the front sensors and the two rear corâ
ner sensors at approx. 24 in/60 cm.Seite 131Driving comfortControls131
Online Edition for Part no. 01 40 2 956 779 - X/14
Page 155 of 244
Interior equipmentVehicle features and optionsThis chapter describes all standard, country-
specific and optional features offered with the
series. It also describes features that are not
necessarily available in your car, e. g., due to
the selected options or country versions. This
also applies to safety-related functions and
systems.
Universal Integrated RemoteControl
The concept
The universal garage door opener can operate
up to 3 functions of remote-controlled sysâ
tems such as garage door drives or lighting
systems. The universal garage door opener reâ
places up to 3 different hand-held transmitters.
To operate the remote control, the buttons on
the interior rearview mirror must be programâ
med with the desired functions. The hand-held
transmitter for the particular system is required
in order to program the remote control.
During programming
During programming and before activatâ
ing a device using the universal garage door
opener, ensure that there are no people, aniâ
mals or objects in the area of the remote-conâ
trolled device; otherwise, there is a risk of inâ
jury or damage.
Also follow the safety instructions of the hand-
held transmitter.â
Before selling the vehicle, delete the stored
functions for the sake of security.
Compatibility If this symbol is printed on the packagâ
ing or in the instructions of the system
to be controlled, the system is generâally compatible with the universal garage door
opener.
If you have any questions, please contact:âˇYour service center.âˇwww.homelink.com on the Internet.
HomeLink is a registered trademark of Gentex
Corporation.
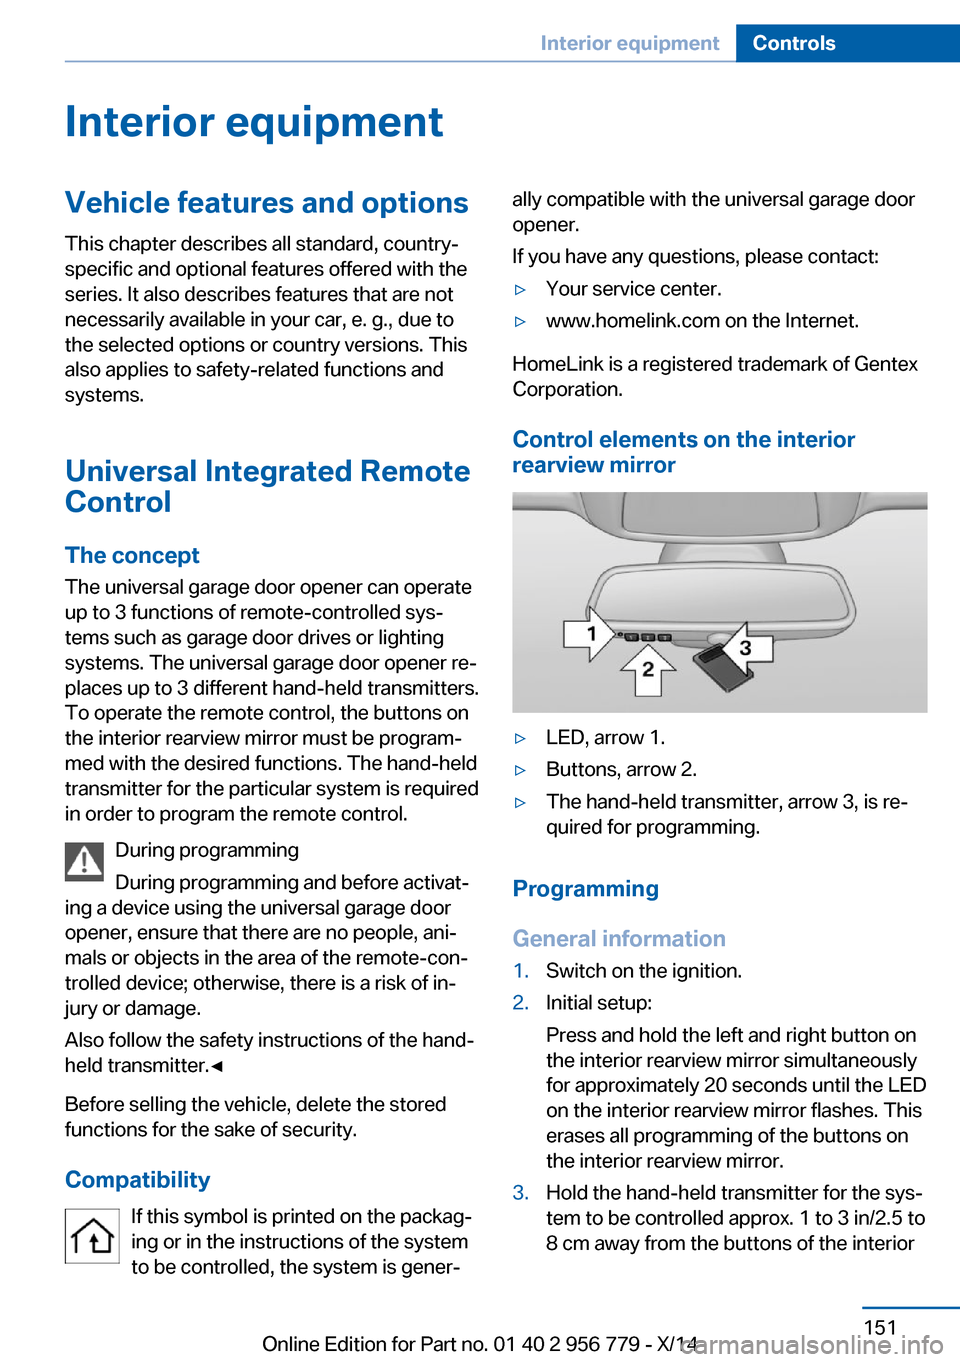
Control elements on the interior
rearview mirror
âˇLED, arrow 1.âˇButtons, arrow 2.âˇThe hand-held transmitter, arrow 3, is reâ
quired for programming.
Programming
General information
1.Switch on the ignition.2.Initial setup:
Press and hold the left and right button on
the interior rearview mirror simultaneously
for approximately 20 seconds until the LED
on the interior rearview mirror flashes. This
erases all programming of the buttons on
the interior rearview mirror.3.Hold the hand-held transmitter for the sysâ
tem to be controlled approx. 1 to 3 in/2.5 to
8 cm away from the buttons of the interiorSeite 151Interior equipmentControls151
Online Edition for Part no. 01 40 2 956 779 - X/14
Page 156 of 244
rearview mirror. The required distance deâ
pends on the manual transmitter.4.Simultaneously press and hold the button
of the desired function on the hand-held
transmitter and the button to be programâ
med on the interior rearview mirror. The
LED on the interior rearview mirror will beâ
gin flashing slowly.5.Release both buttons as soon as the LED
flashes more rapidly. The LED flashing
faster indicates that the button on the inteâ
rior rearview mirror has been programmed.
If the LED does not flash faster after at
least 60 seconds, change the distance beâ
tween the interior rearview mirror and the
hand-held transmitter and repeat the step.
Several more attempts at different distanâ
ces may be necessary. Wait at least
15 seconds between attempts.
Canada: if programming with the hand-
held transmitter was interrupted, hold
down the interior rearview mirror button
and repeatedly press and release the
hand-held transmitter button for 2 secâ
onds.6.To program other functions on other butâ
tons, repeat steps 3 to 5.
The systems can be controlled using the inteâ
rior rearview mirror buttons.
Special feature of the alternating-
code wireless system
If you are unable to operate the system after
repeated programming, please check if the
system to be controlled features an alternatâ
ing-code system.
Read the system's operating manual, or press
the programmed button on the interior rearâ
view mirror longer. If the LED on the interior
rearview mirror starts flashing rapidly and then
stays lit constantly for 2 seconds, the system
features an alternating-code system. Flashing
and continuous illumination of the LED will reâ
peat for approximately 20 seconds.
For systems with an alternating-code system,
the universal garage door opener and the sysâ
tem also have to be synchronized.
Please read the operating manual to find out how to synchronize the system.
Synchronizing is easier with the aid of a secâ
ond person.
To synchronize:1.Park the vehicle within range of the reâ
mote-controlled system.2.Program the relevant button on the interior
rearview mirror as described.3.Locate and press the synchronizing button
on the system being programmed. You
have approx. 30 seconds for the next step.4.Hold down the programmed button on the
interior rearview mirror for approximately
3 seconds and then release it. If necessary,
repeat this step up to three times in order
to finish synchronization. Once synchroniâ
zation is complete, the programmed funcâ
tion will be carried out.
Reprogramming individual buttons
1.Switch on the ignition.2.Press and hold the interior rearview mirror
button to be programmed.3.As soon as the interior rearview mirror LED
starts flashing slowly, hold the hand-held
transmitter for the system to be controlled
approx. 1 to 3 in/2.5 to 8 cm away from the
buttons of the interior rearview mirror. The
required distance depends on the manual
transmitter.4.Likewise, press and hold the button of the
desired function on the hand-held transâ
mitter.5.Release both buttons as soon as the inteâ
rior rearview mirror LED flashes more rapâ
idly. The LED flashing faster indicates that
the button on the interior rearview mirror
has been programmed. The system canSeite 152ControlsInterior equipment152
Online Edition for Part no. 01 40 2 956 779 - X/14
Page 157 of 244
then be controlled by the button on the inâ
terior rearview mirror.
If the LED does not flash faster after at
least 60 seconds, change the distance and
repeat the step. Several more attempts at
different distances may be necessary. Wait
at least 15 seconds between attempts.
Canada: if programming with the hand-
held transmitter was interrupted, hold
down the interior rearview mirror button
and repeatedly press and release the
hand-held transmitter button for 2 secâ
onds.
Controls
Before operation
Before operating a system using the uniâ
versal garage door opener, ensure that there are no people, animals, or objects within the
range of movement of the remote-controlled
system; otherwise, there is a risk of injury or
damage.
Also follow the safety instructions of the hand-
held transmitter.â
The system, such as the garage door, can be
operated using the button on the interior rearâ
view mirror while the engine is running or when
the ignition is started. To do this, hold down
the button within receiving range of the system
until the function is activated. The interior rearâ view mirror LED stays lit while the wireless sigâ
nal is being transmitted.
Deleting stored functions Press and hold the left and right button on the
interior rearview mirror simultaneously for apâ
proximately 20 seconds until the LED flashes
rapidly. All stored functions are deleted. The
functions cannot be deleted individually.
Digital compass
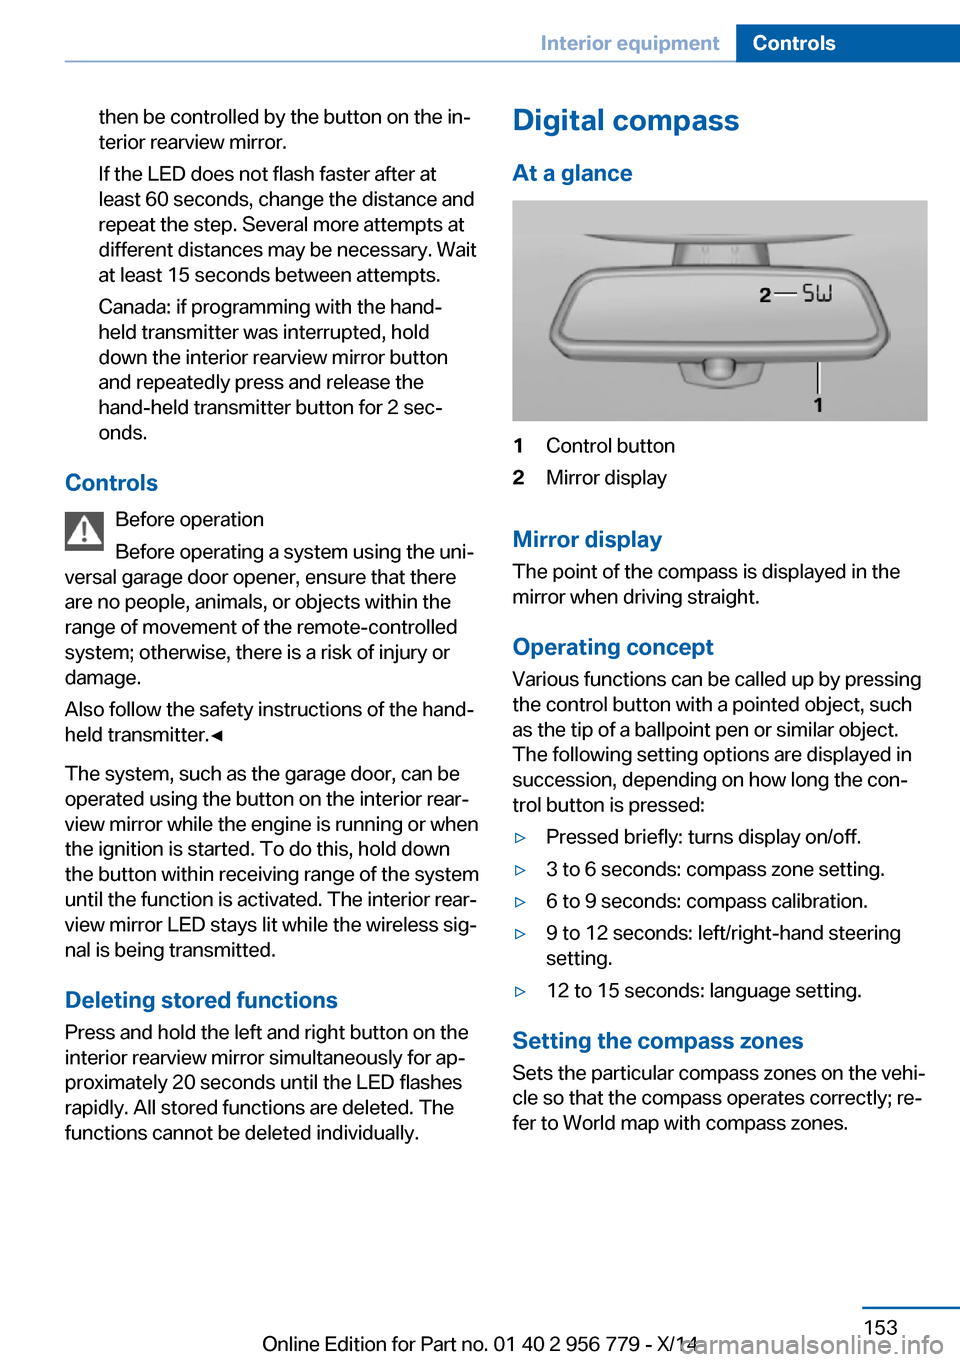
At a glance1Control button2Mirror display
Mirror display
The point of the compass is displayed in the
mirror when driving straight.
Operating concept
Various functions can be called up by pressing
the control button with a pointed object, such
as the tip of a ballpoint pen or similar object.
The following setting options are displayed in
succession, depending on how long the conâ
trol button is pressed:
âˇPressed briefly: turns display on/off.âˇ3 to 6 seconds: compass zone setting.âˇ6 to 9 seconds: compass calibration.âˇ9 to 12 seconds: left/right-hand steering
setting.âˇ12 to 15 seconds: language setting.
Setting the compass zones
Sets the particular compass zones on the vehiâ
cle so that the compass operates correctly; reâ
fer to World map with compass zones.
Seite 153Interior equipmentControls153
Online Edition for Part no. 01 40 2 956 779 - X/14
Page 158 of 244
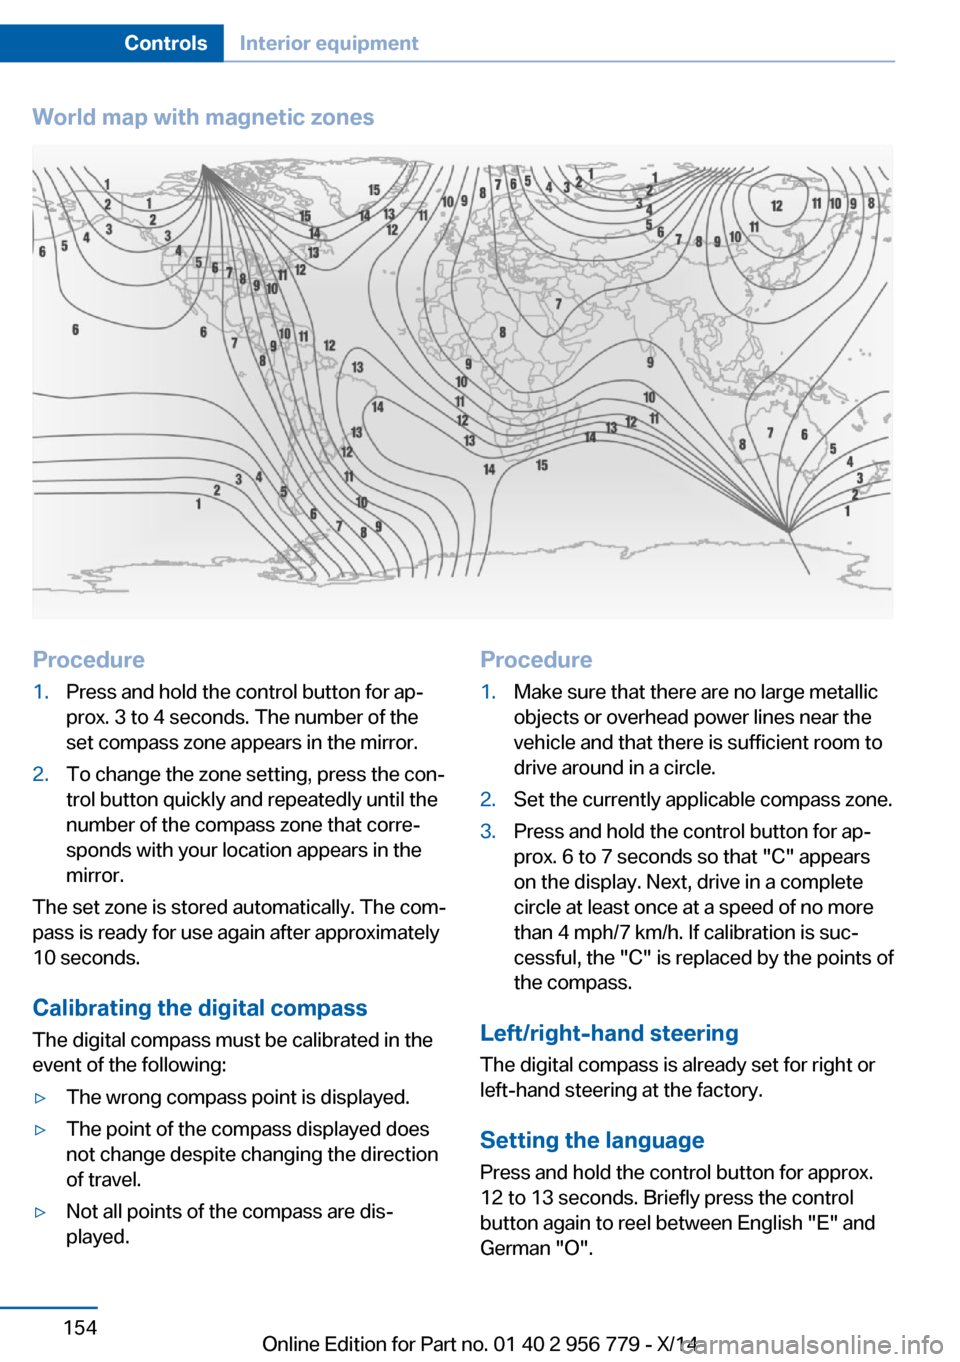
World map with magnetic zonesProcedure1.Press and hold the control button for apâ
prox. 3 to 4 seconds. The number of the
set compass zone appears in the mirror.2.To change the zone setting, press the conâ
trol button quickly and repeatedly until the
number of the compass zone that correâ
sponds with your location appears in the
mirror.
The set zone is stored automatically. The comâ
pass is ready for use again after approximately
10 seconds.
Calibrating the digital compass
The digital compass must be calibrated in the
event of the following:
âˇThe wrong compass point is displayed.âˇThe point of the compass displayed does
not change despite changing the direction
of travel.âˇNot all points of the compass are disâ
played.Procedure1.Make sure that there are no large metallic
objects or overhead power lines near the
vehicle and that there is sufficient room to
drive around in a circle.2.Set the currently applicable compass zone.3.Press and hold the control button for apâ
prox. 6 to 7 seconds so that "C" appears
on the display. Next, drive in a complete
circle at least once at a speed of no more
than 4 mph/7 km/h. If calibration is sucâ
cessful, the "C" is replaced by the points of
the compass.
Left/right-hand steering
The digital compass is already set for right or
left-hand steering at the factory.
Setting the language
Press and hold the control button for approx.
12 to 13 seconds. Briefly press the control
button again to reel between English "E" and
German "O".
Seite 154ControlsInterior equipment154
Online Edition for Part no. 01 40 2 956 779 - X/14
Page 165 of 244
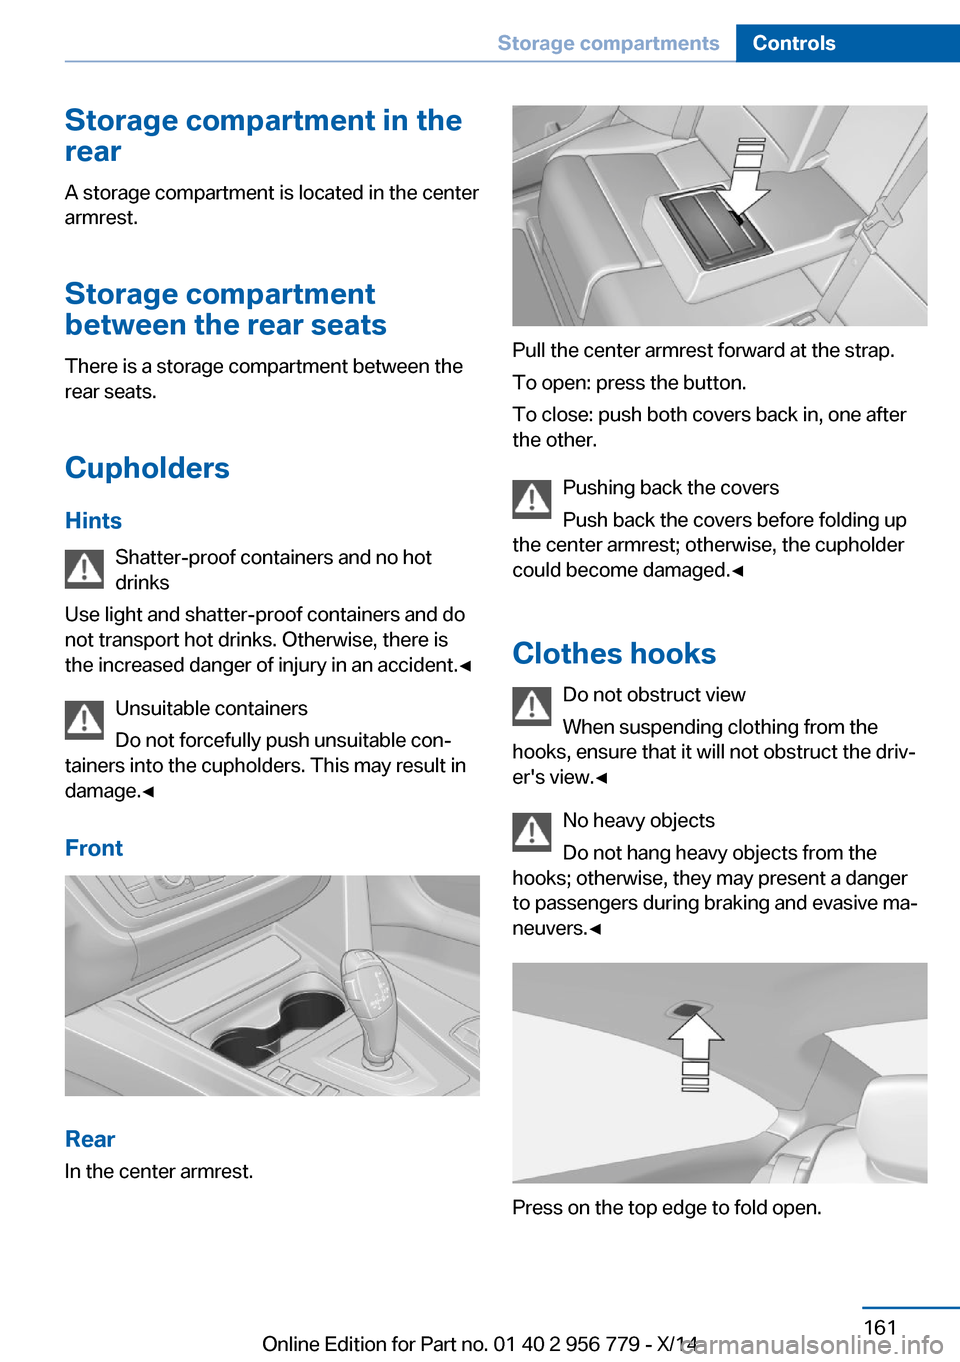
Storage compartment in the
rear
A storage compartment is located in the center
armrest.
Storage compartment
between the rear seats
There is a storage compartment between the
rear seats.
Cupholders
Hints Shatter-proof containers and no hot
drinks
Use light and shatter-proof containers and do
not transport hot drinks. Otherwise, there is the increased danger of injury in an accident.â
Unsuitable containers
Do not forcefully push unsuitable conâ
tainers into the cupholders. This may result in
damage.â
Front
Rear
In the center armrest.
Pull the center armrest forward at the strap.
To open: press the button.
To close: push both covers back in, one after
the other.
Pushing back the covers
Push back the covers before folding up
the center armrest; otherwise, the cupholder
could become damaged.â
Clothes hooks Do not obstruct view
When suspending clothing from the
hooks, ensure that it will not obstruct the drivâ
er's view.â
No heavy objects
Do not hang heavy objects from the
hooks; otherwise, they may present a danger
to passengers during braking and evasive maâ
neuvers.â
Press on the top edge to fold open.
Seite 161Storage compartmentsControls161
Online Edition for Part no. 01 40 2 956 779 - X/14
Page 211 of 244
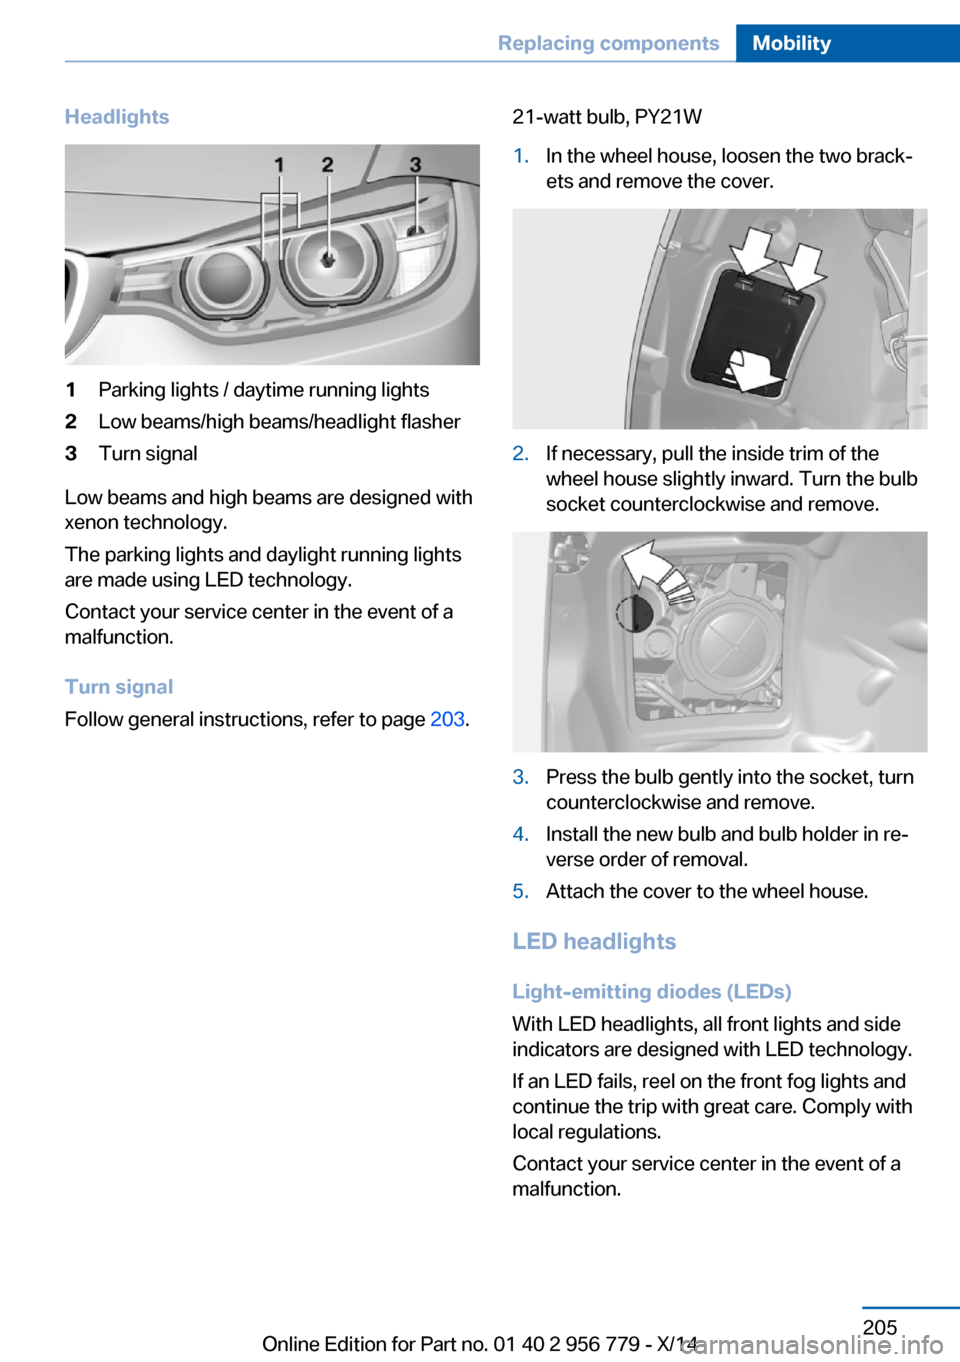
Headlights1Parking lights / daytime running lights2Low beams/high beams/headlight flasher3Turn signal
Low beams and high beams are designed with
xenon technology.
The parking lights and daylight running lights
are made using LED technology.
Contact your service center in the event of a
malfunction.
Turn signal
Follow general instructions, refer to page 203.
21-watt bulb, PY21W1.In the wheel house, loosen the two brackâ
ets and remove the cover.2.If necessary, pull the inside trim of the
wheel house slightly inward. Turn the bulb
socket counterclockwise and remove.3.Press the bulb gently into the socket, turn
counterclockwise and remove.4.Install the new bulb and bulb holder in reâ
verse order of removal.5.Attach the cover to the wheel house.
LED headlights
Light-emitting diodes (LEDs)
With LED headlights, all front lights and side
indicators are designed with LED technology.
If an LED fails, reel on the front fog lights and
continue the trip with great care. Comply with
local regulations.
Contact your service center in the event of a
malfunction.
Seite 205Replacing componentsMobility205
Online Edition for Part no. 01 40 2 956 779 - X/14
Page 213 of 244
Outer brake lamp: 21-watt bulb, H21WLL.
The tail lights feature LED technology. Contact
your service center in the event of a malfuncâ
tion.
Use caution when replacing the bulb
Use caution and proceed one step at a
time when replacing the bulbs to prevent damâ
age to the tail lights or the vehicle.â
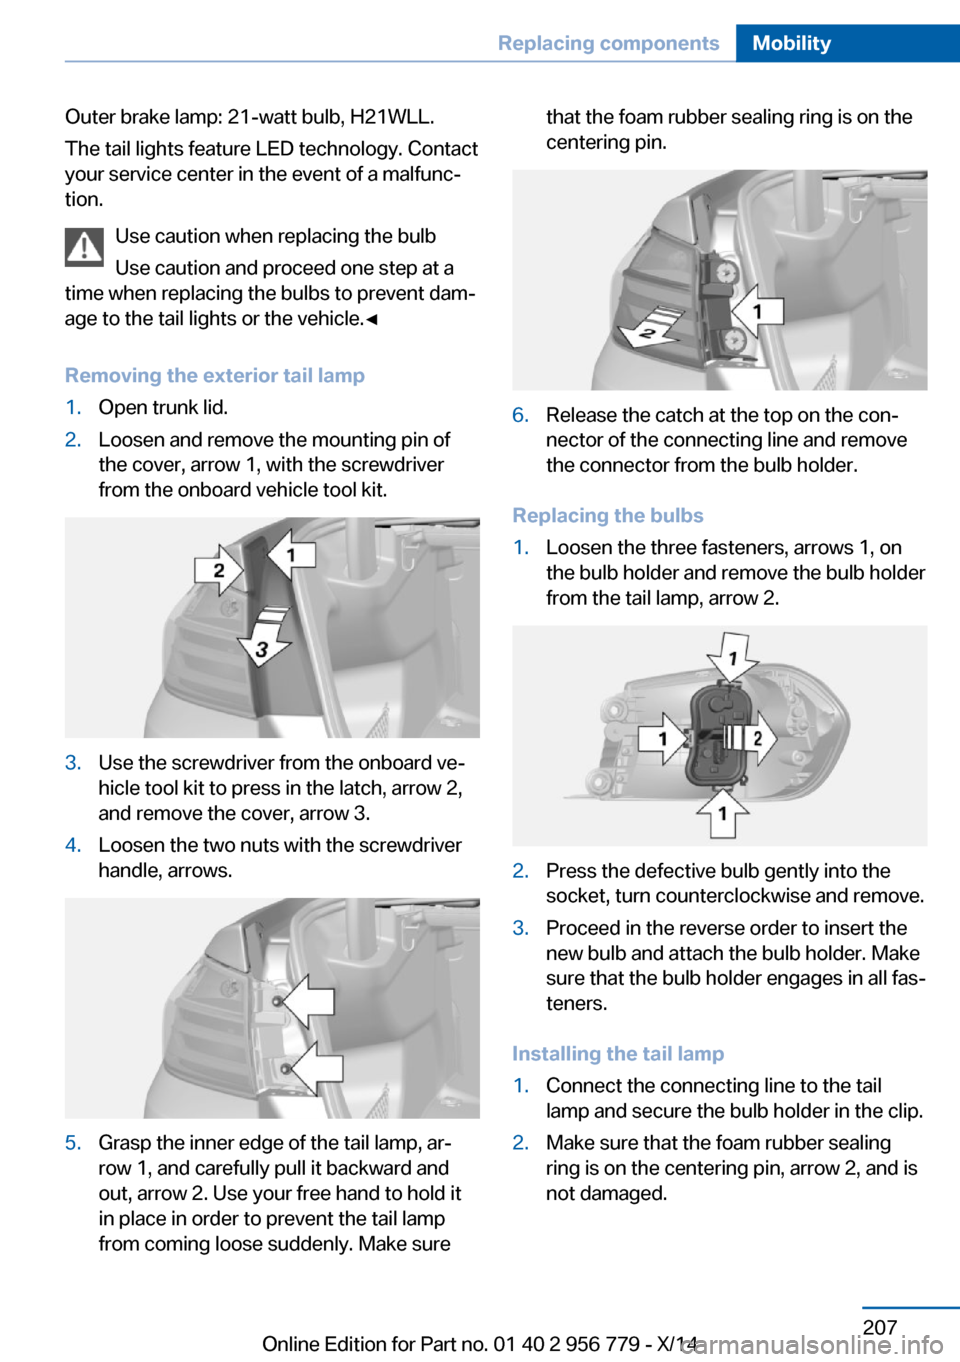
Removing the exterior tail lamp1.Open trunk lid.2.Loosen and remove the mounting pin of
the cover, arrow 1, with the screwdriver
from the onboard vehicle tool kit.3.Use the screwdriver from the onboard veâ
hicle tool kit to press in the latch, arrow 2,
and remove the cover, arrow 3.4.Loosen the two nuts with the screwdriver
handle, arrows.5.Grasp the inner edge of the tail lamp, arâ
row 1, and carefully pull it backward and
out, arrow 2. Use your free hand to hold it
in place in order to prevent the tail lamp
from coming loose suddenly. Make surethat the foam rubber sealing ring is on the
centering pin.6.Release the catch at the top on the conâ
nector of the connecting line and remove
the connector from the bulb holder.
Replacing the bulbs
1.Loosen the three fasteners, arrows 1, on
the bulb holder and remove the bulb holder
from the tail lamp, arrow 2.2.Press the defective bulb gently into the
socket, turn counterclockwise and remove.3.Proceed in the reverse order to insert the
new bulb and attach the bulb holder. Make
sure that the bulb holder engages in all fasâ
teners.
Installing the tail lamp
1.Connect the connecting line to the tail
lamp and secure the bulb holder in the clip.2.Make sure that the foam rubber sealing
ring is on the centering pin, arrow 2, and is
not damaged.Seite 207Replacing componentsMobility207
Online Edition for Part no. 01 40 2 956 779 - X/14