Storage compartment BMW 5 SERIES 2013 F10 Owner's Manual
[x] Cancel search | Manufacturer: BMW, Model Year: 2013, Model line: 5 SERIES, Model: BMW 5 SERIES 2013 F10Pages: 273, PDF Size: 6.63 MB
Page 9 of 273
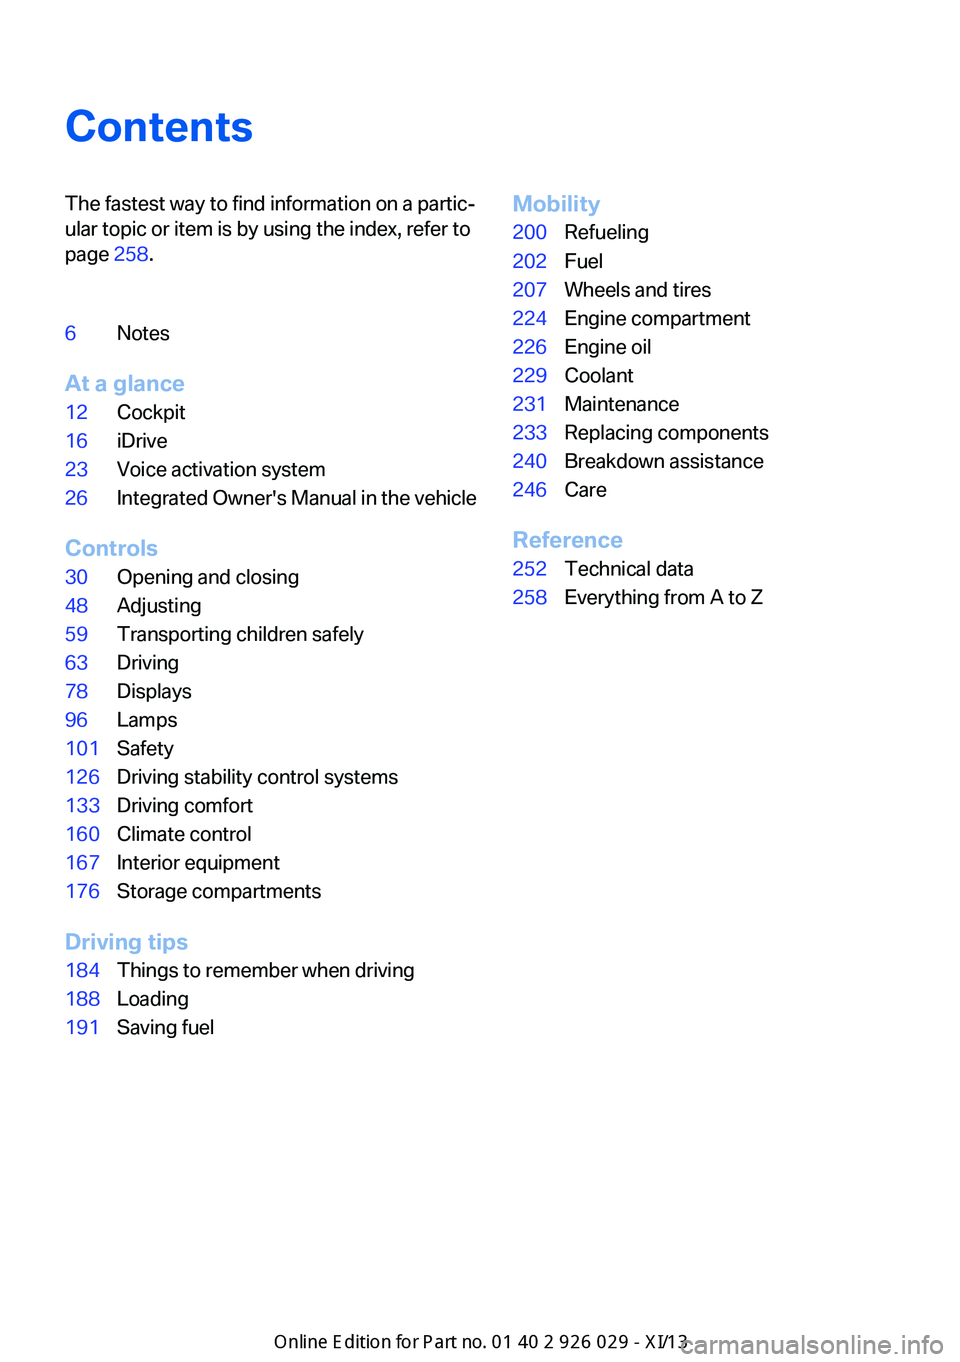
ContentsThe fastest way to find information on a partic‐
ular topic or item is by using the index, refer to
page 258.6Notes
At a glance
12Cockpit16iDrive23Voice activation system26Integrated Owner's Manual in the vehicle
Controls
30Opening and closing48Adjusting59Transporting children safely63Driving78Displays96Lamps101Safety126Driving stability control systems133Driving comfort160Climate control167Interior equipment176Storage compartments
Driving tips
184Things to remember when driving188Loading191Saving fuelMobility200Refueling202Fuel207Wheels and tires224Engine compartment226Engine oil229Coolant231Maintenance233Replacing components240Breakdown assistance246Care
Reference
252Technical data258Everything from A to Z
Online Edition for Part no. 01 40 2 911 177 - VI/13
Page 34 of 273
Opening and closingVehicle equipment
All standard, country-specific and optional
equipment that is offered in the model series is
described in this chapter. Therefore, equip‐
ment is also described that is not available in a
vehicle, e. g., because of the selected optional
equipment or country variant. This also applies
for safety-related functions and systems.
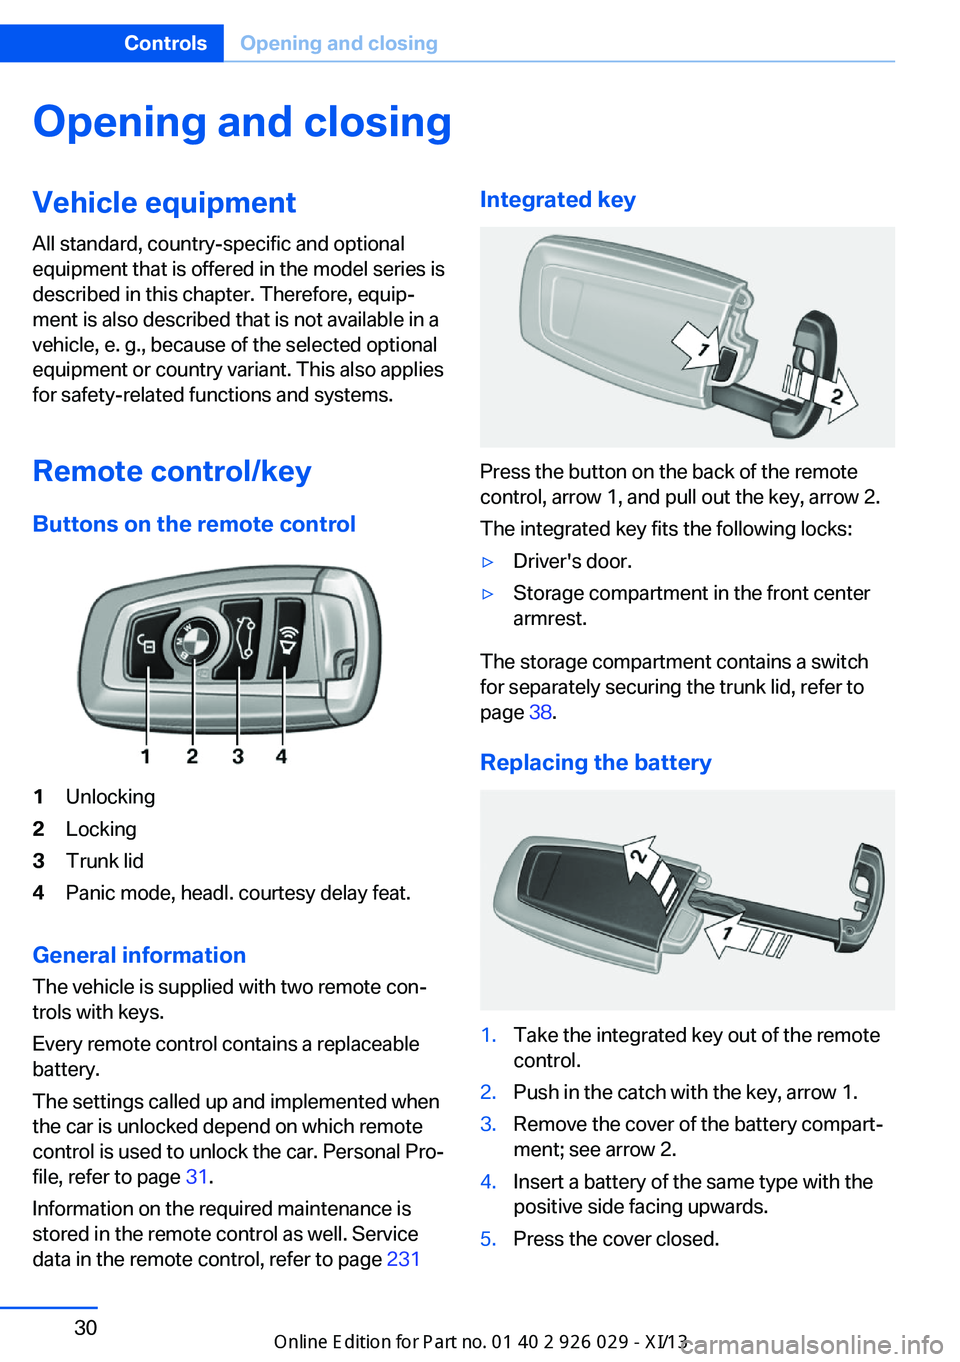
Remote control/key Buttons on the remote control1Unlocking2Locking3Trunk lid4Panic mode, headl. courtesy delay feat.
General information
The vehicle is supplied with two remote con‐
trols with keys.
Every remote control contains a replaceable
battery.
The settings called up and implemented when
the car is unlocked depend on which remote
control is used to unlock the car. Personal Pro‐
file, refer to page 31.
Information on the required maintenance is
stored in the remote control as well. Service
data in the remote control, refer to page 231
Integrated key
Press the button on the back of the remote
control, arrow 1, and pull out the key, arrow 2.
The integrated key fits the following locks:
▷Driver's door.▷Storage compartment in the front center
armrest.
The storage compartment contains a switch
for separately securing the trunk lid, refer to
page 38.
Replacing the battery
1.Take the integrated key out of the remote
control.2.Push in the catch with the key, arrow 1.3.Remove the cover of the battery compart‐
ment; see arrow 2.4.Insert a battery of the same type with the
positive side facing upwards.5.Press the cover closed.Seite 30ControlsOpening and closing30
Online Edition for Part no. 01 40 2 911 177 - VI/13
Page 180 of 273
Storage compartmentsVehicle equipmentAll standard, country-specific and optional
equipment that is offered in the model series is
described in this chapter. Therefore, equip‐
ment is also described that is not available in a
vehicle, e. g., because of the selected optional
equipment or country variant. This also applies
for safety-related functions and systems.
Notes No loose objects in the passenger com‐
partment
Do not stow any objects in the passenger
compartment without securing them; other‐
wise, they may present a danger to occupants
for instance during braking and avoidance ma‐
neuvers.◀
Do not place anti-slip mats on the dash‐
board
Do not place anti-slip mats on the dashboard.
The mat materials could damage the dash‐
board.◀
Storage compartments
The following storage compartments are avail‐
able in the vehicle interior:▷Glove compartment on the driver's and
front passenger side, refer to page 176.▷Storage compartment on the center con‐
sole: manual transmission.▷Storage compartment, refer to page 179,
in the center console for remote control:
automatic transmission.▷Storage compartment in the center arm‐
rest, refer to page 177, in the front and
rear.▷Compartments in the doors.▷Pockets on the backrests of the front
seats.▷Net in the front passenger footwell.
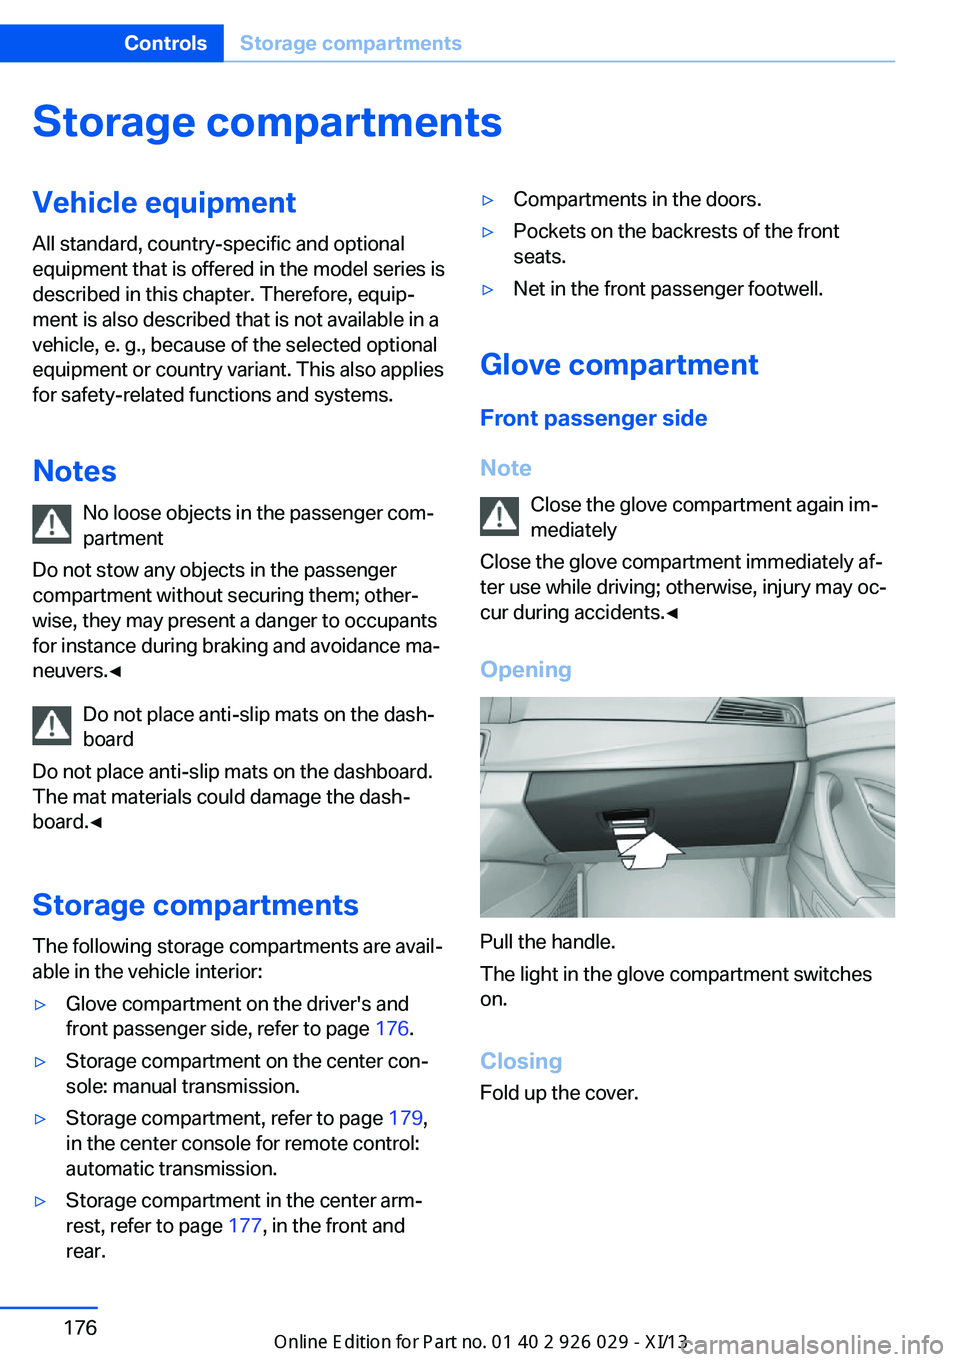
Glove compartment
Front passenger side
Note Close the glove compartment again im‐
mediately
Close the glove compartment immediately af‐
ter use while driving; otherwise, injury may oc‐
cur during accidents.◀
Opening
Pull the handle.
The light in the glove compartment switches
on.
ClosingFold up the cover.
Seite 176ControlsStorage compartments176
Online Edition for Part no. 01 40 2 911 177 - VI/13
Page 181 of 273
Driver's side
Note Close the glove compartment again im‐
mediately
Close the glove compartment immediately af‐
ter use while driving; otherwise, injury may oc‐
cur during accidents.◀
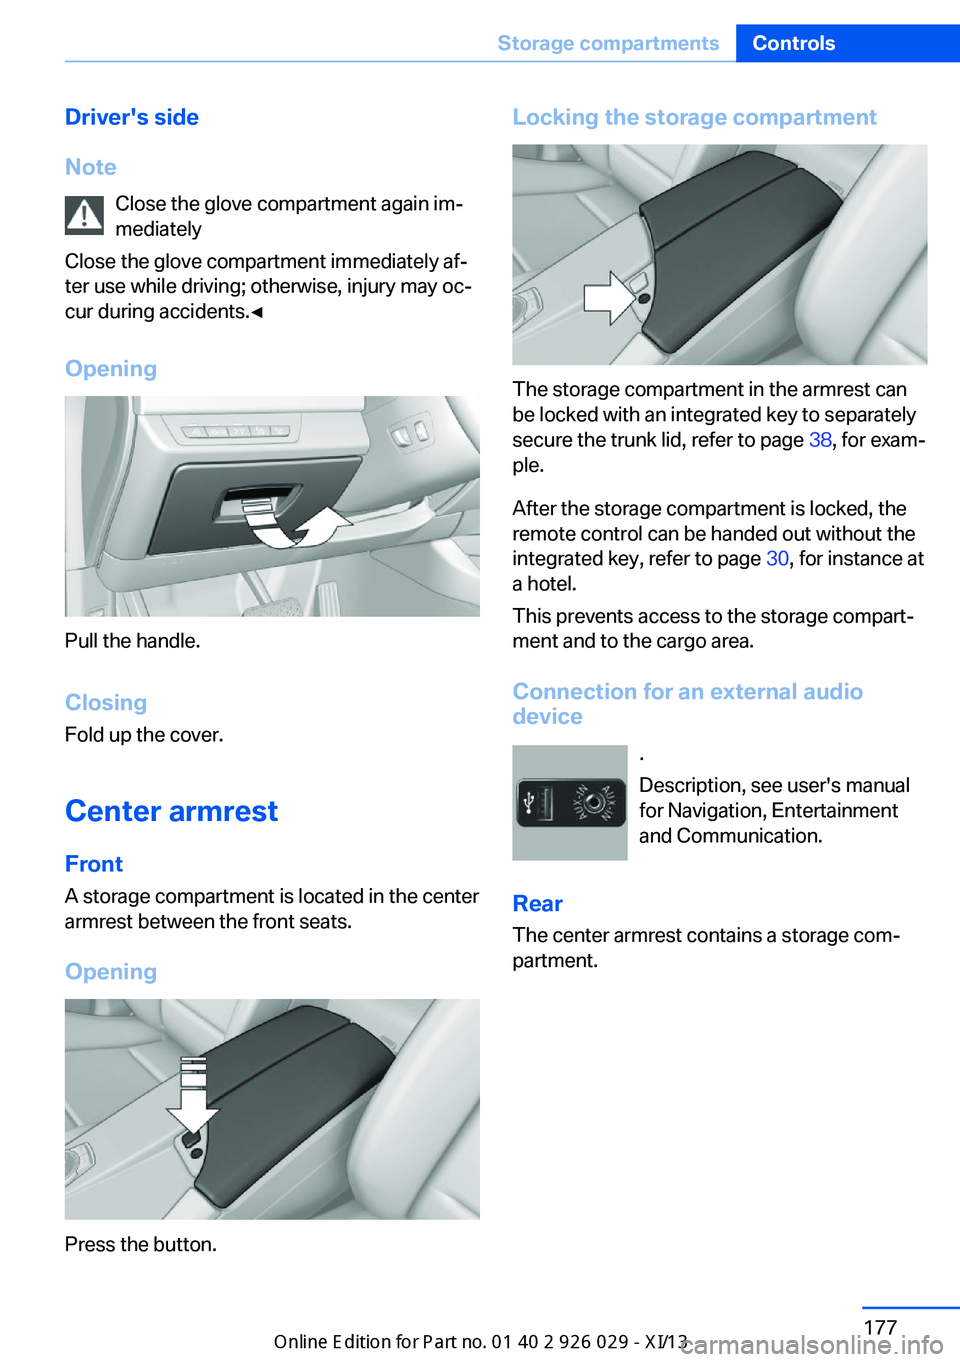
Opening
Pull the handle.
ClosingFold up the cover.
Center armrest
Front A storage compartment is located in the center
armrest between the front seats.
Opening
Press the button.
Locking the storage compartment
The storage compartment in the armrest can
be locked with an integrated key to separately
secure the trunk lid, refer to page 38, for exam‐
ple.
After the storage compartment is locked, the
remote control can be handed out without the
integrated key, refer to page 30, for instance at
a hotel.
This prevents access to the storage compart‐
ment and to the cargo area.
Connection for an external audio
device
.
Description, see user's manual
for Navigation, Entertainment
and Communication.
Rear The center armrest contains a storage com‐
partment.
Seite 177Storage compartmentsControls177
Online Edition for Part no. 01 40 2 911 177 - VI/13
Page 182 of 273
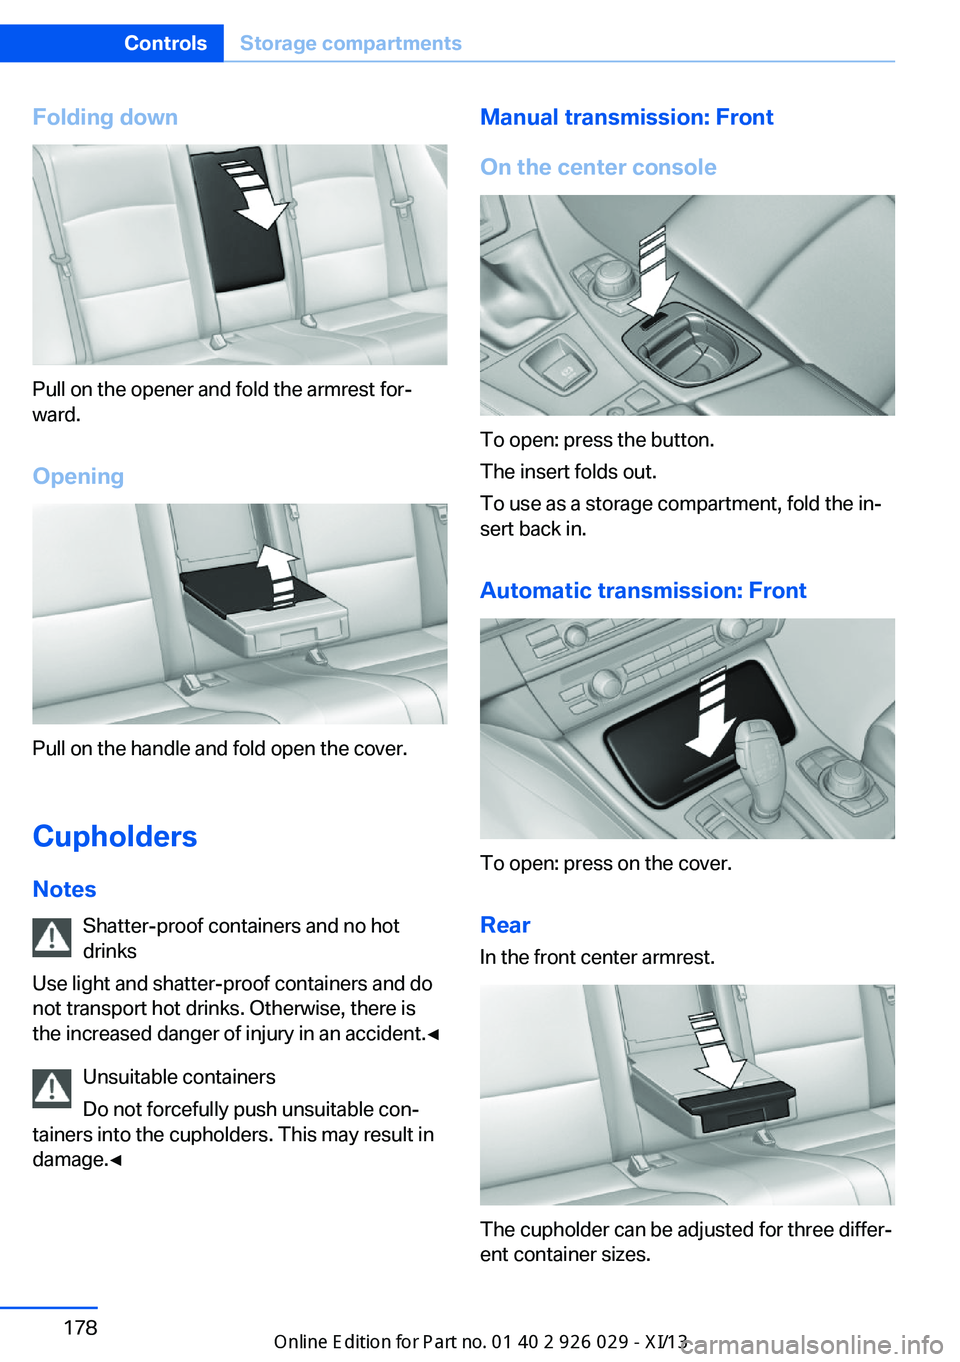
Folding down
Pull on the opener and fold the armrest for‐
ward.
Opening
Pull on the handle and fold open the cover.
Cupholders Notes Shatter-proof containers and no hot
drinks
Use light and shatter-proof containers and do
not transport hot drinks. Otherwise, there is
the increased danger of injury in an accident.◀
Unsuitable containers
Do not forcefully push unsuitable con‐
tainers into the cupholders. This may result in
damage.◀
Manual transmission: Front
On the center console
To open: press the button.
The insert folds out.
To use as a storage compartment, fold the in‐
sert back in.
Automatic transmission: Front
To open: press on the cover.Rear In the front center armrest.
The cupholder can be adjusted for three differ‐
ent container sizes.
Seite 178ControlsStorage compartments178
Online Edition for Part no. 01 40 2 911 177 - VI/13
Page 183 of 273
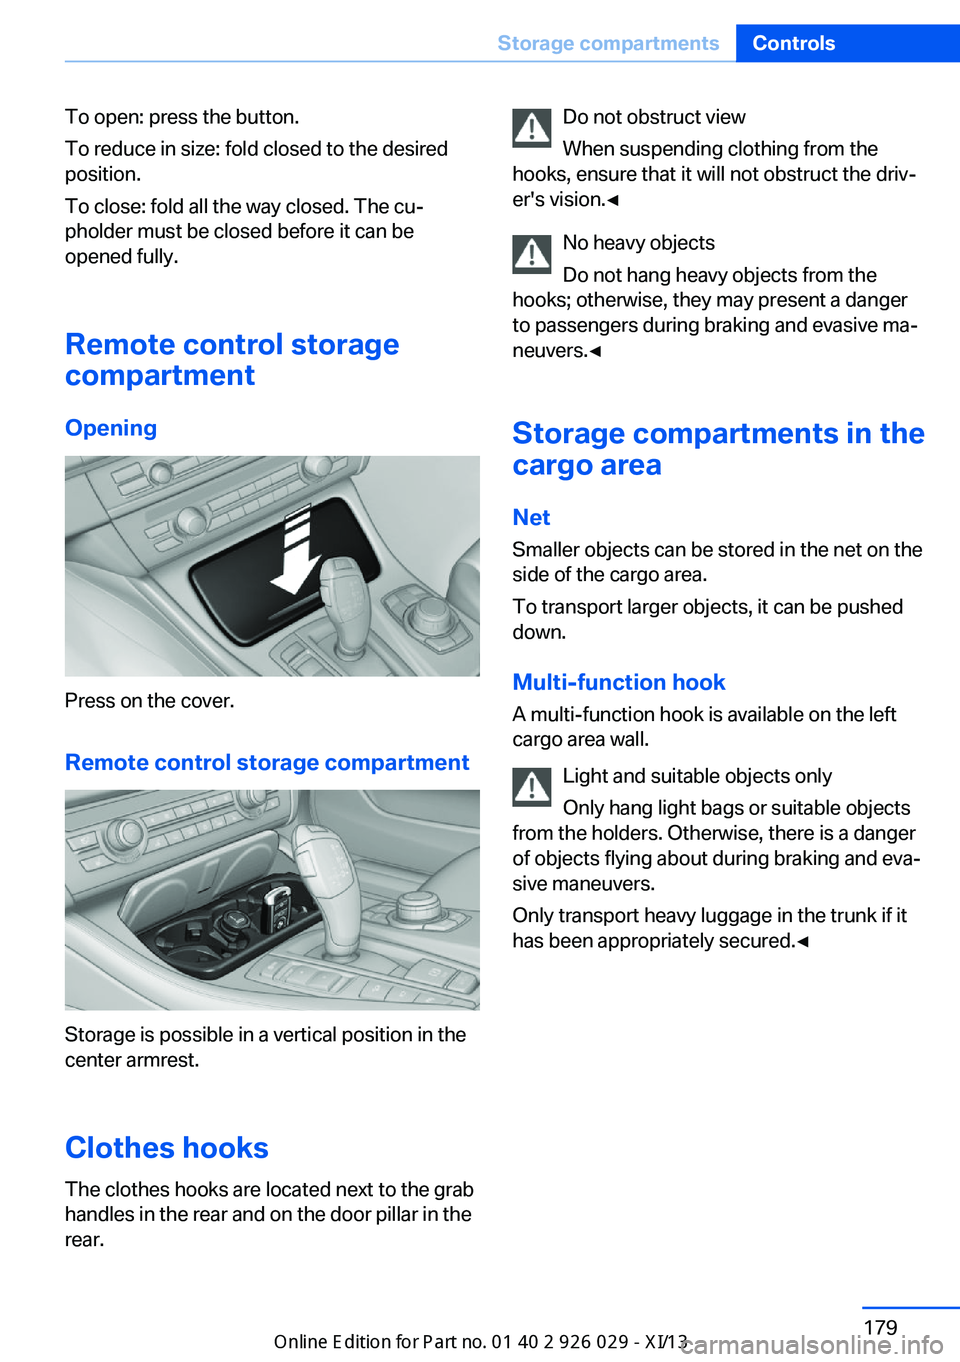
To open: press the button.
To reduce in size: fold closed to the desired
position.
To close: fold all the way closed. The cu‐
pholder must be closed before it can be
opened fully.
Remote control storage
compartment
Opening
Press on the cover.
Remote control storage compartment
Storage is possible in a vertical position in the
center armrest.
Clothes hooks
The clothes hooks are located next to the grab
handles in the rear and on the door pillar in the
rear.
Do not obstruct view
When suspending clothing from the
hooks, ensure that it will not obstruct the driv‐
er's vision.◀
No heavy objects
Do not hang heavy objects from the
hooks; otherwise, they may present a danger
to passengers during braking and evasive ma‐
neuvers.◀
Storage compartments in the
cargo area
Net
Smaller objects can be stored in the net on the
side of the cargo area.
To transport larger objects, it can be pushed
down.
Multi-function hook
A multi-function hook is available on the left
cargo area wall.
Light and suitable objects only
Only hang light bags or suitable objects
from the holders. Otherwise, there is a danger
of objects flying about during braking and eva‐
sive maneuvers.
Only transport heavy luggage in the trunk if it
has been appropriately secured.◀Seite 179Storage compartmentsControls179
Online Edition for Part no. 01 40 2 911 177 - VI/13
Page 184 of 273
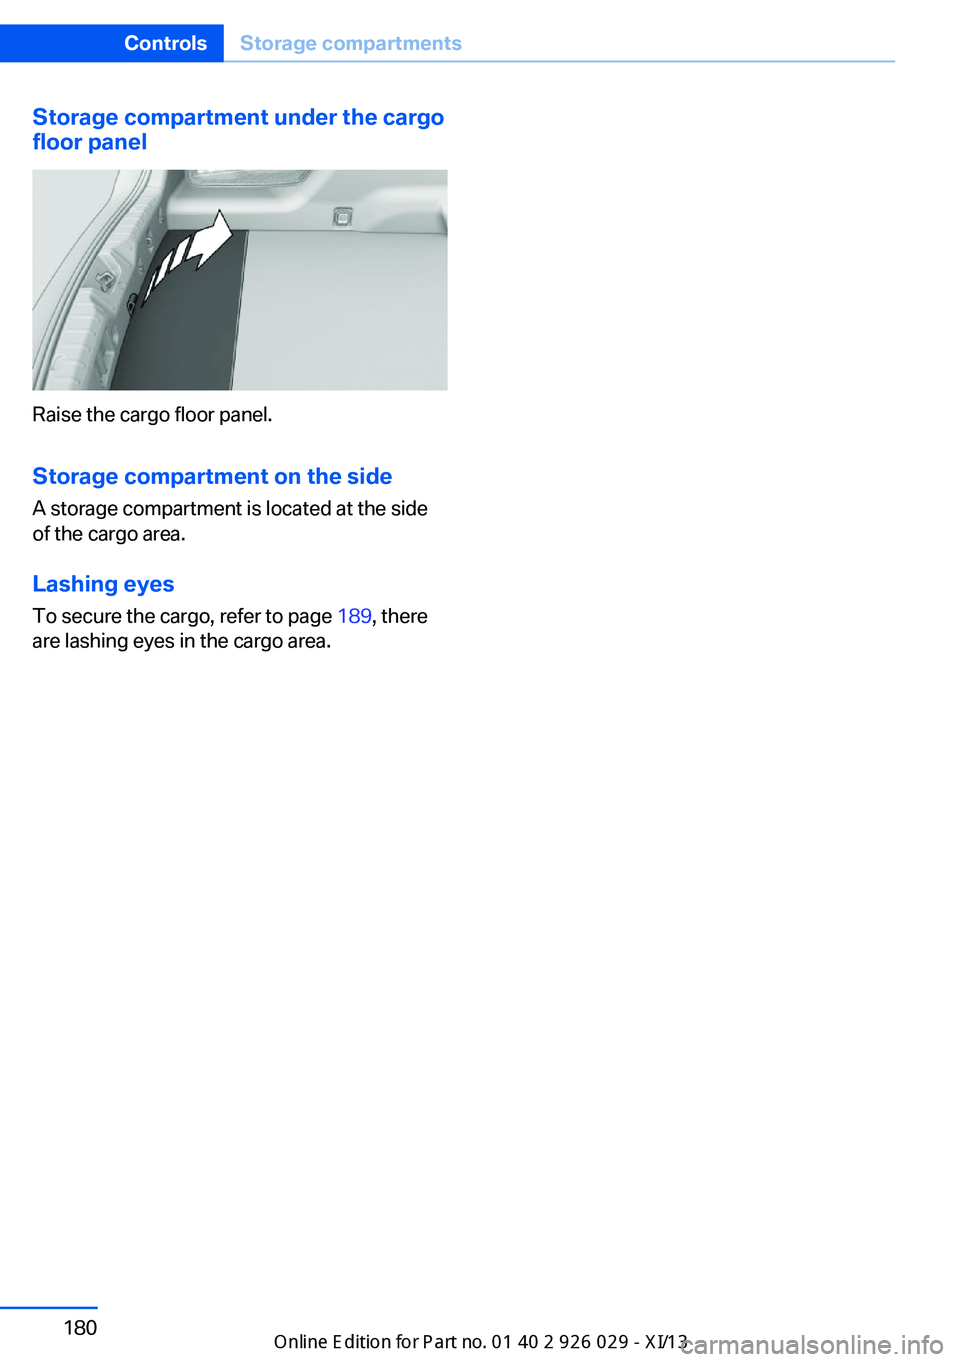
Storage compartment under the cargofloor panel
Raise the cargo floor panel.
Storage compartment on the side
A storage compartment is located at the side
of the cargo area.
Lashing eyesTo secure the cargo, refer to page 189, there
are lashing eyes in the cargo area.
Seite 180ControlsStorage compartments180
Online Edition for Part no. 01 40 2 911 177 - VI/13
Page 185 of 273

Seite 181Storage compartmentsControls181
Online Edition for Part no. 01 40 2 911 177 - VI/13
Page 243 of 273
Disposing of old batteriesHave old batteries disposed of by your
service center or bring them to a recy‐
cling center.
Maintain the battery in an upright position for
transport and storage. Secure the battery so
that it does not tip over during transport.
Fuses Notes Replacing fuses
Never attempt to repair a blown fuse and
do not replace a defective fuse with a substi‐
tute of another color or amperage rating; this could lead to a circuit overload, ultimately re‐
sulting in a fire in the vehicle.◀
Plastic tweezers and information on the fuse
types and locations are stored in the fuse box
in the cargo area.
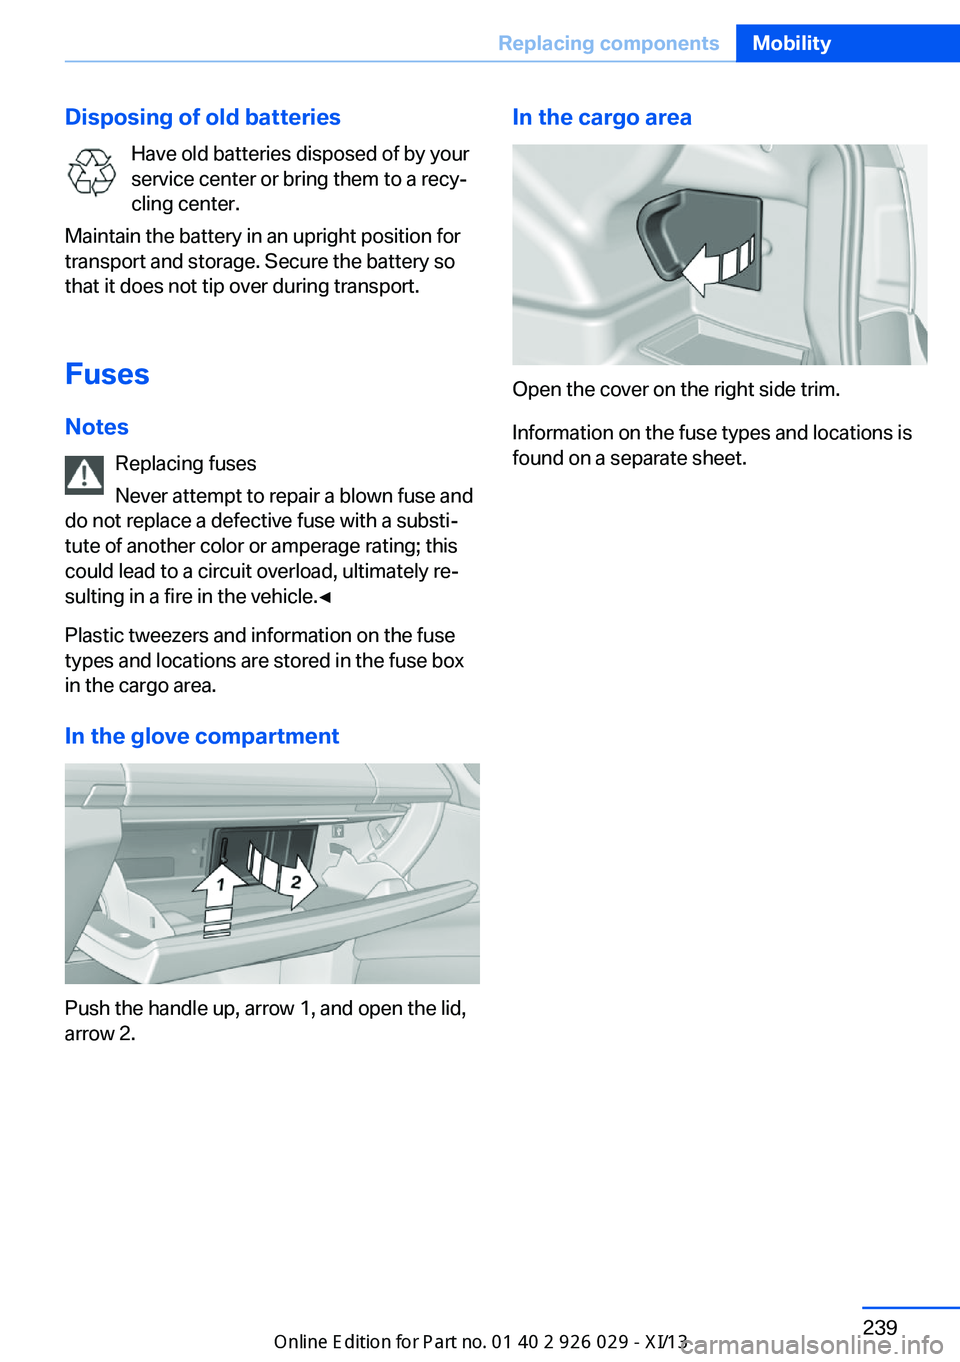
In the glove compartment
Push the handle up, arrow 1, and open the lid,
arrow 2.
In the cargo area
Open the cover on the right side trim.
Information on the fuse types and locations is
found on a separate sheet.
Seite 239Replacing componentsMobility239
Online Edition for Part no. 01 40 2 911 177 - VI/13
Page 253 of 273
Use only a mild soapy solution, with the safety
belts clipped into their buckles.
Do not allow the reels to retract the safety
belts until they are dry.
Carpets and floor mats No objects in the area around the pedals
Keep floor mats, carpets, and any other
objects out of the area of motion of the pedals;
otherwise, the function of the pedals could be
impeded while driving
Do not place additional floor mats over existing
mats or other objects.
Only use floor mats that have been approved
for the vehicle and can be properly fixed in
place.
Ensure that the floor mats are securely fas‐
tened again after they were removed for clean‐
ing, for example.◀
Floor mats can be removed from the passen‐
ger compartment for cleaning.
If the floor carpets are very dirty, clean with a
microfiber cloth and water or a textile cleaner.
To prevent matting of the carpet, rub back and
forth in the direction of travel only.
Sensors/cameras
To clean sensors and cameras, use a cloth
moistened with a small amount of glass
cleaner.
Displays/screens
Clean the displays with an antistatic microfiber
cloth.
Cleaning displays
Do not use chemical or household
cleansers.
Keep all fluids and moisture away from the
unit.
Otherwise, they could affect or damage surfa‐
ces or electrical components.Avoid pressing too hard when cleaning and do
not use abrasive materials; otherwise, damage
can result.◀
Long-term vehicle storage
Your service center can advise you on what to
consider when storing the vehicle for longer
than three months.Seite 249CareMobility249
Online Edition for Part no. 01 40 2 911 177 - VI/13