Break BMW 5 SERIES 2015 F10 User Guide
[x] Cancel search | Manufacturer: BMW, Model Year: 2015, Model line: 5 SERIES, Model: BMW 5 SERIES 2015 F10Pages: 277, PDF Size: 5.63 MB
Page 251 of 277
PreparationBodywork contact between vehicles
Make sure that there is no contact be‐
tween the bodywork of the two vehicles; other‐
wise, there is a danger of short circuits.◀1.Check whether the battery of the other ve‐
hicle has a voltage of 12 volts. This infor‐
mation can be found on the battery.2.Switch off the engine of the assisting vehi‐
cle.3.Switch off any electronic systems/power
consumers in both vehicles.
Starting aid terminals
Connecting order
Connect the jumper cables in the correct
order to prevent risk of injury from arcing.◀
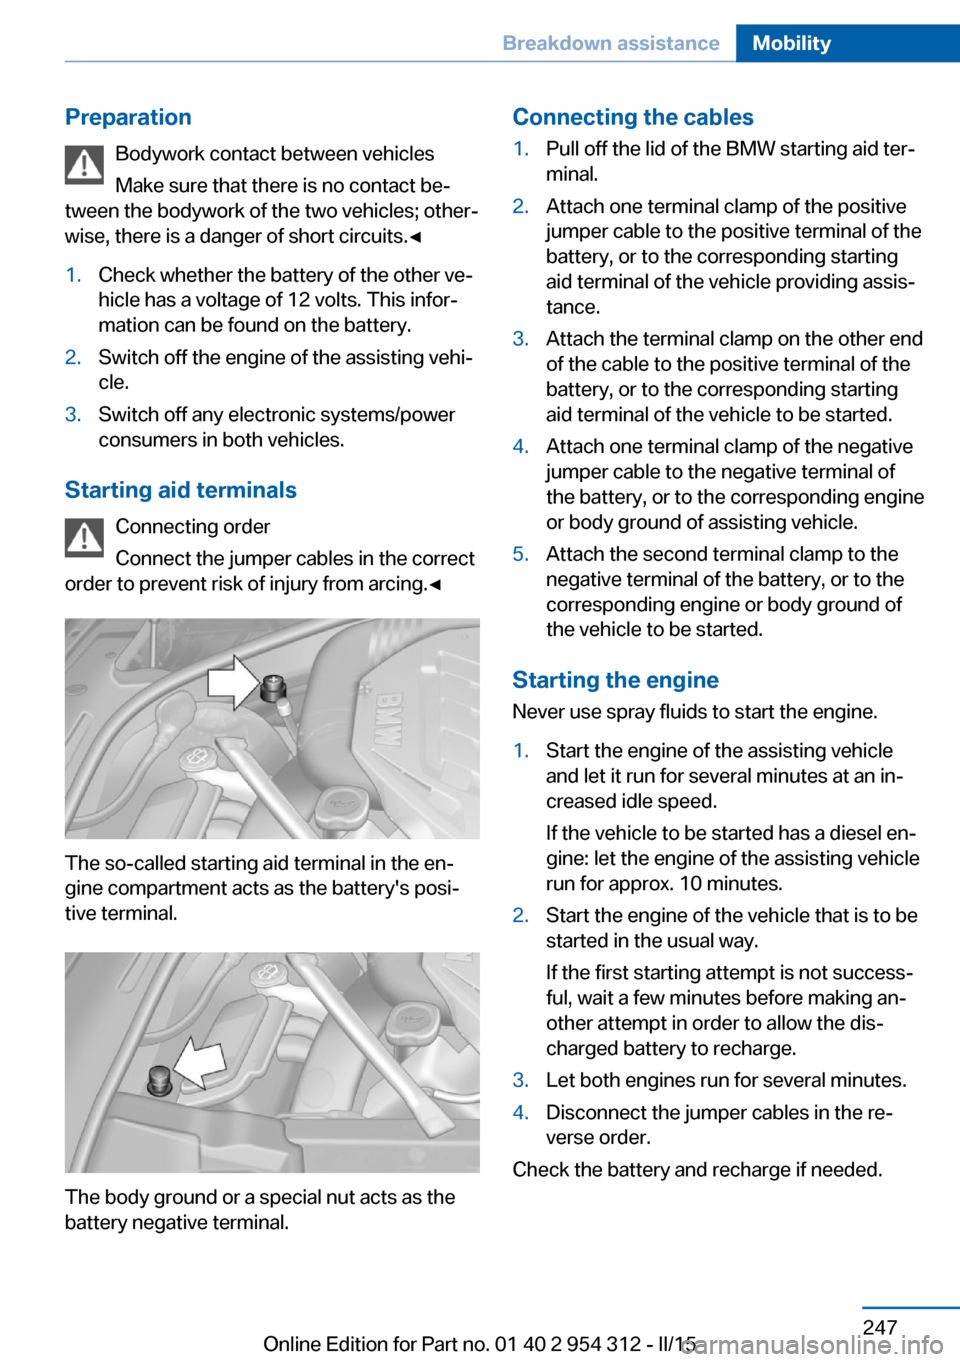
The so-called starting aid terminal in the en‐
gine compartment acts as the battery's posi‐
tive terminal.
The body ground or a special nut acts as the
battery negative terminal.
Connecting the cables1.Pull off the lid of the BMW starting aid ter‐
minal.2.Attach one terminal clamp of the positive
jumper cable to the positive terminal of the
battery, or to the corresponding starting
aid terminal of the vehicle providing assis‐
tance.3.Attach the terminal clamp on the other end
of the cable to the positive terminal of the
battery, or to the corresponding starting
aid terminal of the vehicle to be started.4.Attach one terminal clamp of the negative
jumper cable to the negative terminal of
the battery, or to the corresponding engine
or body ground of assisting vehicle.5.Attach the second terminal clamp to the
negative terminal of the battery, or to the
corresponding engine or body ground of
the vehicle to be started.
Starting the engine
Never use spray fluids to start the engine.
1.Start the engine of the assisting vehicle
and let it run for several minutes at an in‐
creased idle speed.
If the vehicle to be started has a diesel en‐
gine: let the engine of the assisting vehicle
run for approx. 10 minutes.2.Start the engine of the vehicle that is to be
started in the usual way.
If the first starting attempt is not success‐
ful, wait a few minutes before making an‐
other attempt in order to allow the dis‐
charged battery to recharge.3.Let both engines run for several minutes.4.Disconnect the jumper cables in the re‐
verse order.
Check the battery and recharge if needed.
Seite 247Breakdown assistanceMobility247
Online Edition for Part no. 01 40 2 954 312 - II/15
Page 252 of 277
Tow-starting and towingNote Tow-starting and towing
For tow-starting or towing, switch off the
Intelligent Safety systems; otherwise malfunc‐
tions of the individual braking systems might
lead to accidents.◀
Steptronic transmission: transporting
your vehicle
Note Your vehicle is not permitted to be towed.
Therefore, contact a service center in the
event of a breakdown.
Do not have the vehicle towed
Have your vehicle transported on a load‐
ing platform only; otherwise, damage may oc‐
cur.◀
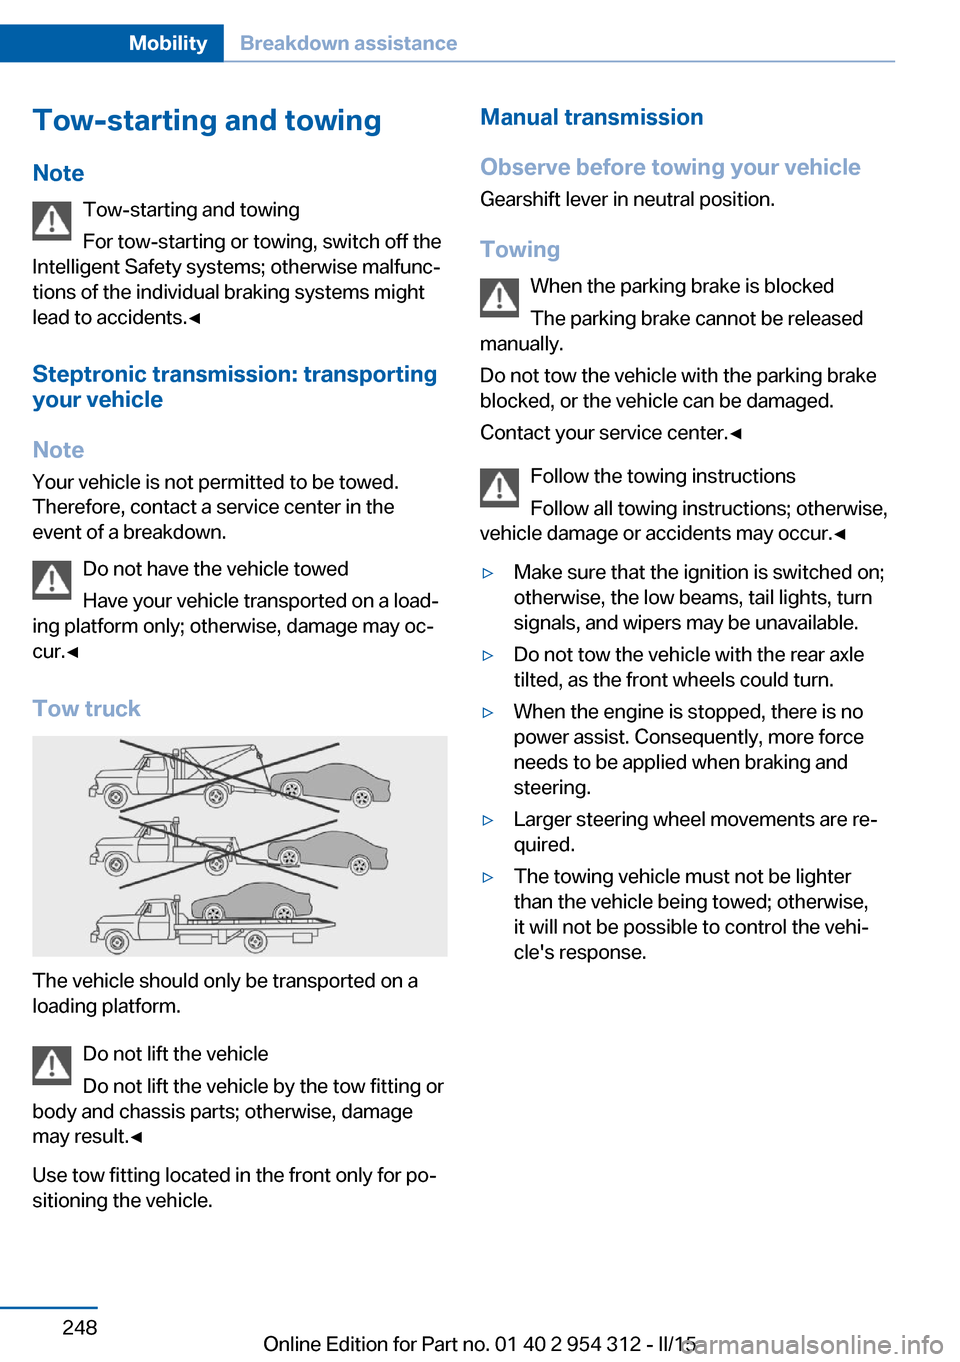
Tow truck
The vehicle should only be transported on a
loading platform.
Do not lift the vehicle
Do not lift the vehicle by the tow fitting or
body and chassis parts; otherwise, damage
may result.◀
Use tow fitting located in the front only for po‐
sitioning the vehicle.
Manual transmission
Observe before towing your vehicle Gearshift lever in neutral position.
Towing When the parking brake is blocked
The parking brake cannot be released
manually.
Do not tow the vehicle with the parking brake
blocked, or the vehicle can be damaged.
Contact your service center.◀
Follow the towing instructions
Follow all towing instructions; otherwise,
vehicle damage or accidents may occur.◀▷Make sure that the ignition is switched on;
otherwise, the low beams, tail lights, turn
signals, and wipers may be unavailable.▷Do not tow the vehicle with the rear axle
tilted, as the front wheels could turn.▷When the engine is stopped, there is no
power assist. Consequently, more force
needs to be applied when braking and
steering.▷Larger steering wheel movements are re‐
quired.▷The towing vehicle must not be lighter
than the vehicle being towed; otherwise,
it will not be possible to control the vehi‐
cle's response.Seite 248MobilityBreakdown assistance248
Online Edition for Part no. 01 40 2 954 312 - II/15
Page 253 of 277
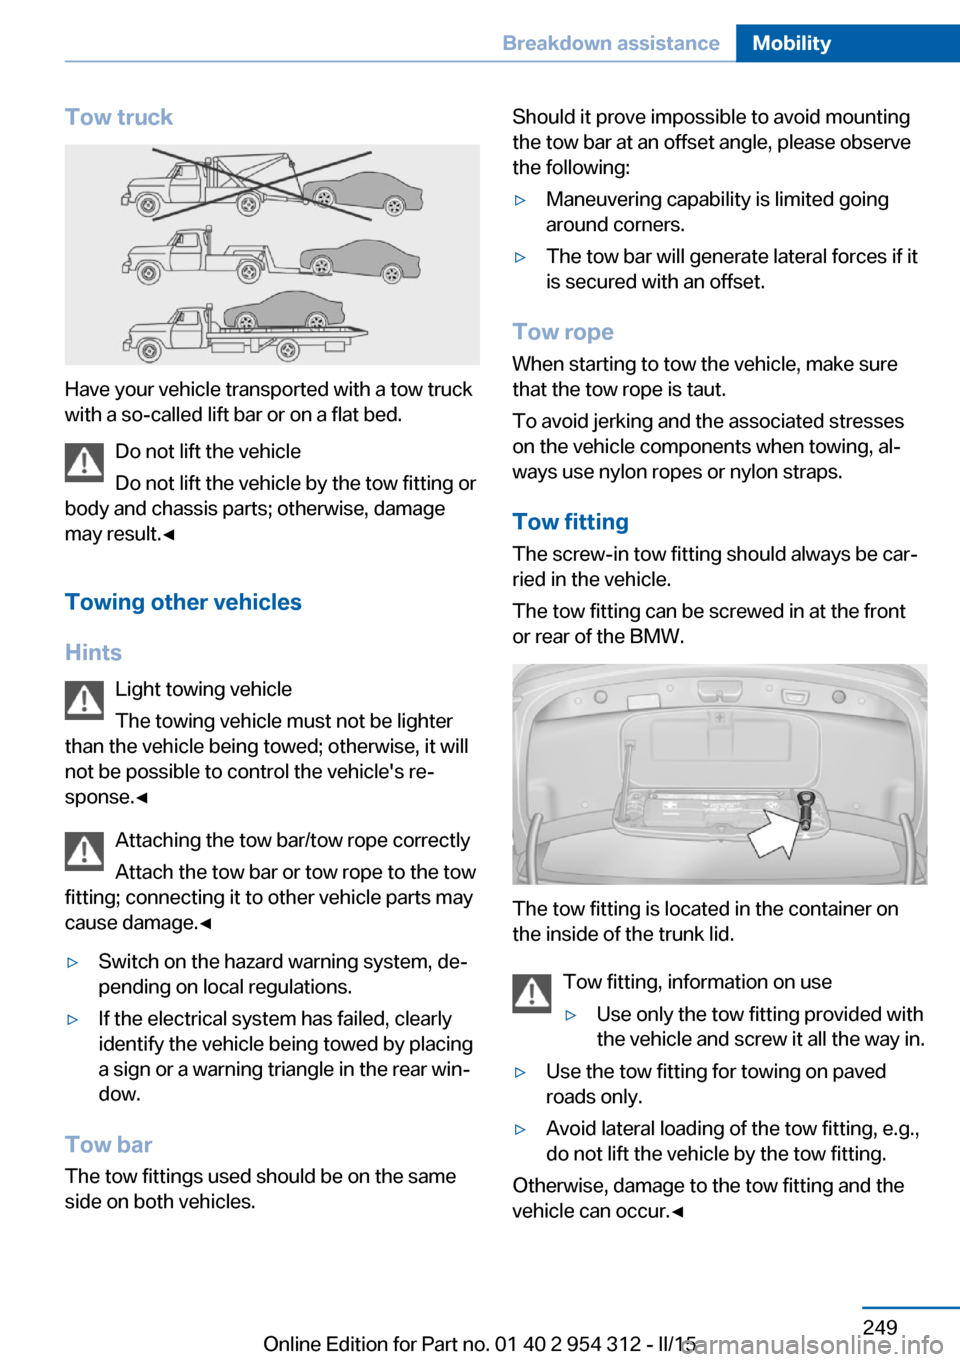
Tow truck
Have your vehicle transported with a tow truck
with a so-called lift bar or on a flat bed.
Do not lift the vehicle
Do not lift the vehicle by the tow fitting or
body and chassis parts; otherwise, damage
may result.◀
Towing other vehicles
Hints Light towing vehicle
The towing vehicle must not be lighter
than the vehicle being towed; otherwise, it will
not be possible to control the vehicle's re‐
sponse.◀
Attaching the tow bar/tow rope correctly
Attach the tow bar or tow rope to the tow
fitting; connecting it to other vehicle parts may
cause damage.◀
▷Switch on the hazard warning system, de‐
pending on local regulations.▷If the electrical system has failed, clearly
identify the vehicle being towed by placing
a sign or a warning triangle in the rear win‐
dow.
Tow bar
The tow fittings used should be on the same
side on both vehicles.
Should it prove impossible to avoid mounting
the tow bar at an offset angle, please observe
the following:▷Maneuvering capability is limited going
around corners.▷The tow bar will generate lateral forces if it
is secured with an offset.
Tow rope
When starting to tow the vehicle, make sure
that the tow rope is taut.
To avoid jerking and the associated stresses
on the vehicle components when towing, al‐
ways use nylon ropes or nylon straps.
Tow fitting
The screw-in tow fitting should always be car‐
ried in the vehicle.
The tow fitting can be screwed in at the front
or rear of the BMW.
The tow fitting is located in the container on
the inside of the trunk lid.
Tow fitting, information on use
▷Use only the tow fitting provided with
the vehicle and screw it all the way in.▷Use the tow fitting for towing on paved
roads only.▷Avoid lateral loading of the tow fitting, e.g.,
do not lift the vehicle by the tow fitting.
Otherwise, damage to the tow fitting and the
vehicle can occur.◀
Seite 249Breakdown assistanceMobility249
Online Edition for Part no. 01 40 2 954 312 - II/15
Page 254 of 277
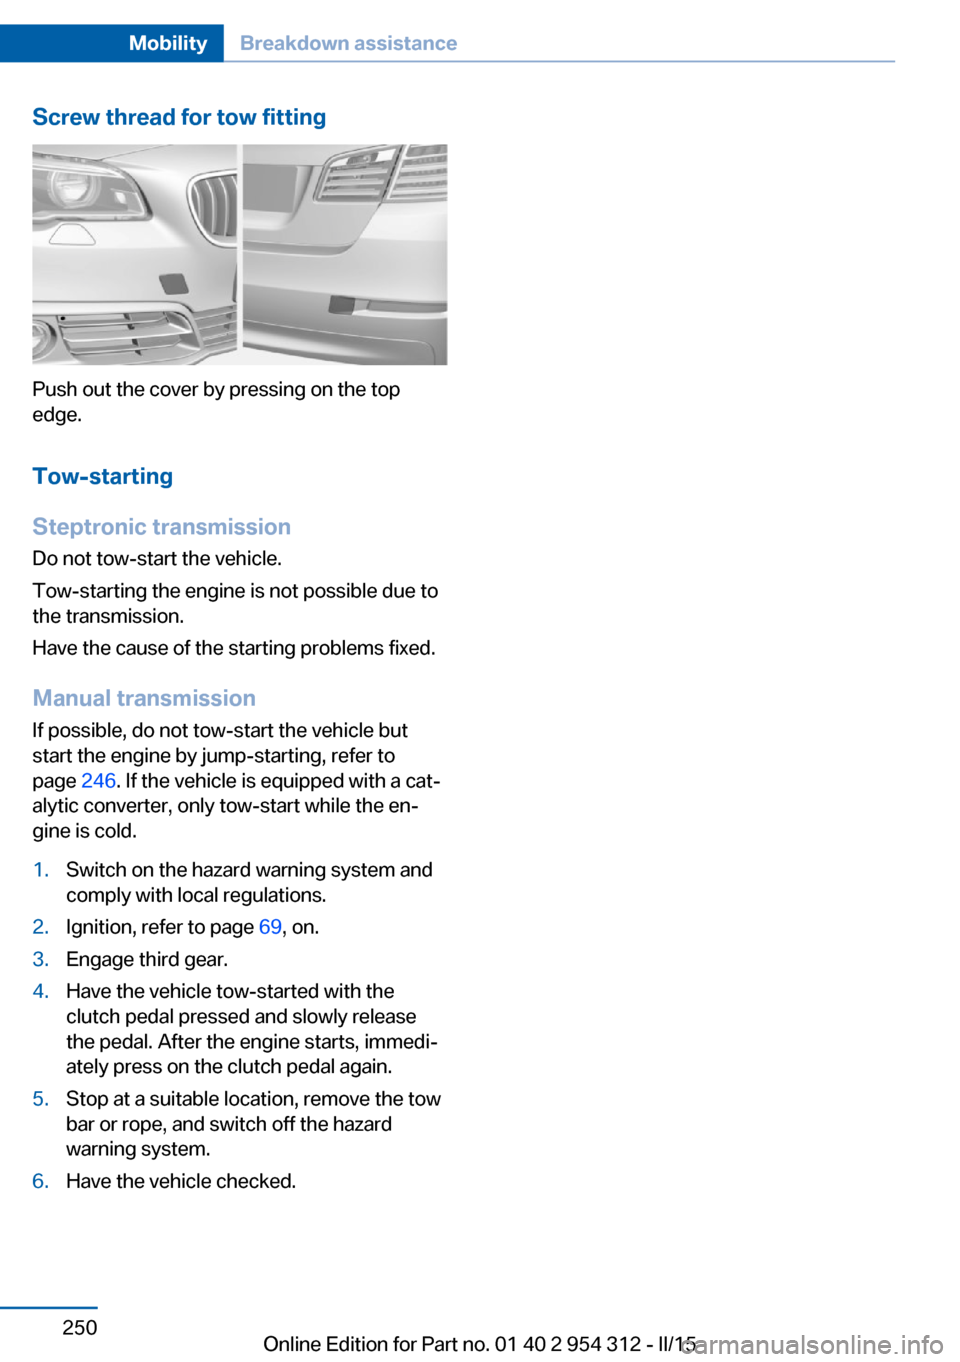
Screw thread for tow fitting
Push out the cover by pressing on the top
edge.
Tow-starting
Steptronic transmission Do not tow-start the vehicle.
Tow-starting the engine is not possible due to
the transmission.
Have the cause of the starting problems fixed.
Manual transmission If possible, do not tow-start the vehicle but
start the engine by jump-starting, refer to
page 246. If the vehicle is equipped with a cat‐
alytic converter, only tow-start while the en‐ gine is cold.
1.Switch on the hazard warning system and
comply with local regulations.2.Ignition, refer to page 69, on.3.Engage third gear.4.Have the vehicle tow-started with the
clutch pedal pressed and slowly release
the pedal. After the engine starts, immedi‐
ately press on the clutch pedal again.5.Stop at a suitable location, remove the tow
bar or rope, and switch off the hazard
warning system.6.Have the vehicle checked.Seite 250MobilityBreakdown assistance250
Online Edition for Part no. 01 40 2 954 312 - II/15
Page 257 of 277
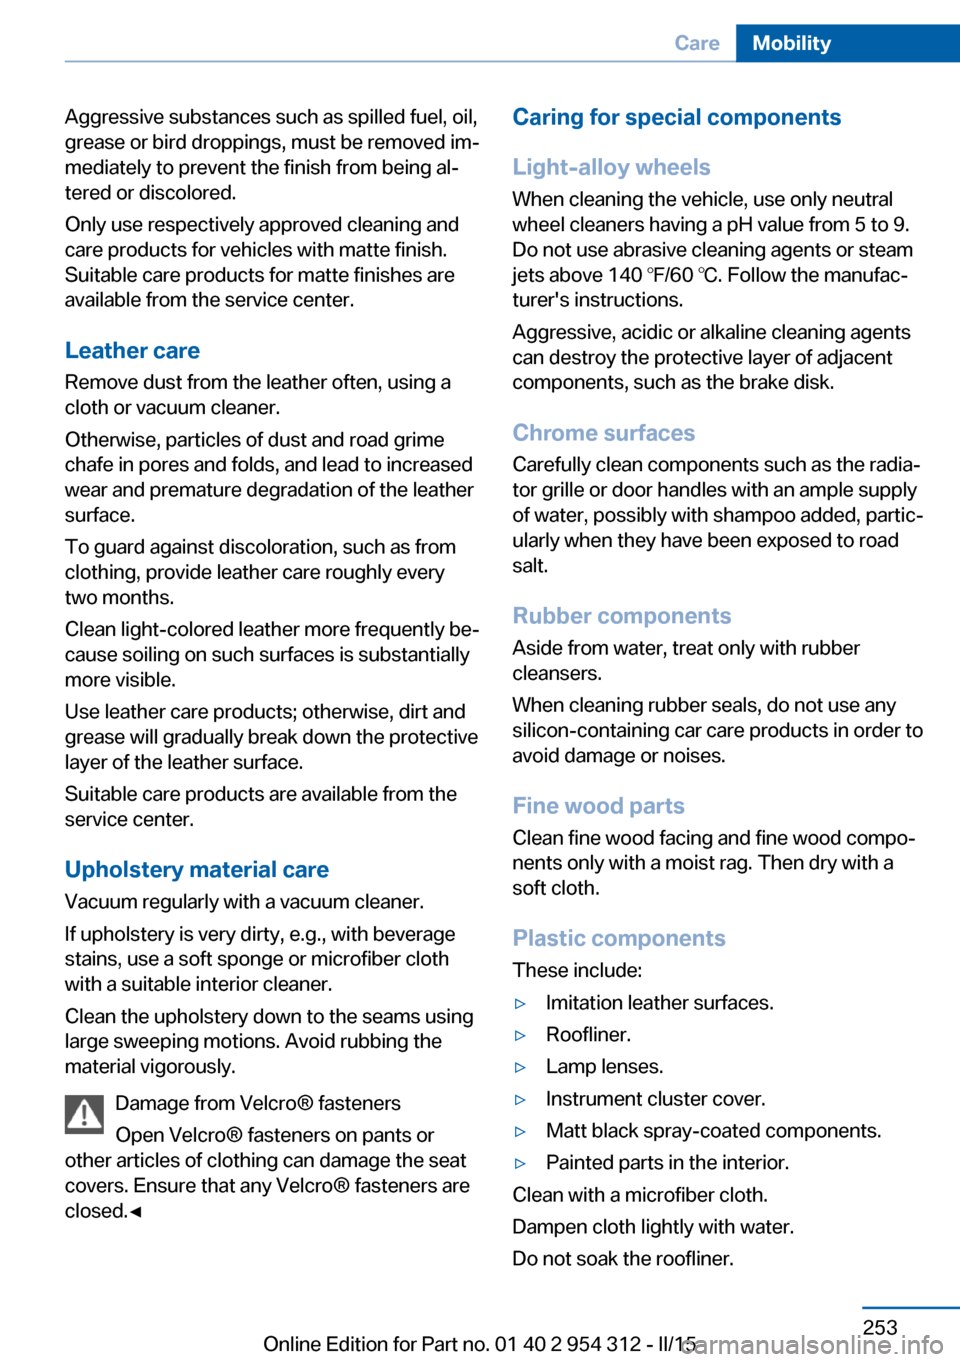
Aggressive substances such as spilled fuel, oil,
grease or bird droppings, must be removed im‐
mediately to prevent the finish from being al‐
tered or discolored.
Only use respectively approved cleaning and
care products for vehicles with matte finish.
Suitable care products for matte finishes are
available from the service center.
Leather care
Remove dust from the leather often, using a
cloth or vacuum cleaner.
Otherwise, particles of dust and road grime
chafe in pores and folds, and lead to increased
wear and premature degradation of the leather
surface.
To guard against discoloration, such as from
clothing, provide leather care roughly every
two months.
Clean light-colored leather more frequently be‐
cause soiling on such surfaces is substantially
more visible.
Use leather care products; otherwise, dirt and
grease will gradually break down the protective
layer of the leather surface.
Suitable care products are available from the
service center.
Upholstery material care Vacuum regularly with a vacuum cleaner.
If upholstery is very dirty, e.g., with beverage
stains, use a soft sponge or microfiber cloth
with a suitable interior cleaner.
Clean the upholstery down to the seams using
large sweeping motions. Avoid rubbing the
material vigorously.
Damage from Velcro® fasteners
Open Velcro® fasteners on pants or
other articles of clothing can damage the seat
covers. Ensure that any Velcro® fasteners are
closed.◀Caring for special components
Light-alloy wheels When cleaning the vehicle, use only neutral
wheel cleaners having a pH value from 5 to 9.
Do not use abrasive cleaning agents or steam
jets above 140 ℉/60 ℃. Follow the manufac‐
turer's instructions.
Aggressive, acidic or alkaline cleaning agents
can destroy the protective layer of adjacent
components, such as the brake disk.
Chrome surfaces Carefully clean components such as the radia‐
tor grille or door handles with an ample supply of water, possibly with shampoo added, partic‐
ularly when they have been exposed to road
salt.
Rubber components Aside from water, treat only with rubber
cleansers.
When cleaning rubber seals, do not use any
silicon-containing car care products in order to
avoid damage or noises.
Fine wood parts
Clean fine wood facing and fine wood compo‐ nents only with a moist rag. Then dry with a
soft cloth.
Plastic components These include:▷Imitation leather surfaces.▷Roofliner.▷Lamp lenses.▷Instrument cluster cover.▷Matt black spray-coated components.▷Painted parts in the interior.
Clean with a microfiber cloth.
Dampen cloth lightly with water.
Do not soak the roofliner.
Seite 253CareMobility253
Online Edition for Part no. 01 40 2 954 312 - II/15
Page 267 of 277
Blinds, sun protection 49
BMW Advanced Diesel 207
BMW Assist, see user's manual for Navigation, En‐
tertainment and Communi‐
cation
BMW Driver’s Guide App 6
BMW Homepage 6
BMW Internet page 6
BMW maintenance sys‐ tem 236
Bonus range, ECO PRO 197
Bottle holder, refer to Cu‐ pholder 183
Brake assistant 135
Brake assistant, adaptive 135
Brake discs, break-in 188
Brake force display 132
Brake lights, adaptive 132
Brake lights, brake force dis‐ play 132
Brake lights, bulb replace‐ ment 241
Brake pads, break-in 188
Braking, hints 190
Breakdown assistance 245
Break-in 188
Brightness of Control Dis‐ play 100
Bulb replacement 238
Bulb replacement, front 239
Bulb replacement, rear 241
Bulbs and lights 238
Button, RES 146
Button, Start/Stop 69
Bypassing, refer to Jump- starting 246
C
California Proposition 65 Warning 7
Calling up mirror adjust‐ ment 46
Calling up seat adjust‐ ment 46 Calling up steering wheel ad‐
justment 46
Camera lenses, care 254
Camera, rearview cam‐ era 155
Camera, Side View 157
Camera, Top View 159
Can holder, refer to Cu‐ pholder 183
Car battery 243
Car care products 252
Care, displays 254
Care, vehicle 252
Cargo 192
Cargo area, enlarging 177
Cargo area, storage compart‐ ments 184
Cargo, securing 193
Cargo straps, securing cargo 193
Car key, refer to Remote con‐ trol 34
Carpet, care 254
Car wash 251
Catalytic converter, refer to Hot exhaust system 189
CBS Condition Based Serv‐ ice 236
CD/Multimedia, see user's manual for Navigation, En‐
tertainment and Communi‐
cation
Center armrest 182
Center console 16
Central locking system 40
Central screen, refer to Con‐ trol Display 18
Changes, technical, refer to Safety 7
Changing parts 238
Changing wheels 243
Changing wheels/tires 223
Chassis number, see vehicle identification number 9
Check Control 88 Checking the engine oil level
electronically 231
Checking the oil level elec‐ tronically 231
Children, seating position 65
Children, transporting safely 65
Child restraint fixing sys‐ tem 65
Child restraint fixing system LATCH 66
Child restraint fixing systems, mounting 65
Child safety locks 68
Child seat, mounting 65
Child seats 65
Chrome parts, care 253
Cigarette lighter 174
Cleaning displays 254
Climate control 165
Climate control laminated tinted safety glass 189
Climate control wind‐ shield 189
Clock 93
Closing/opening via door lock 39
Closing/opening with remote control 37
Closing the trunk lid with no- touch activation 44
Clothes hooks 184
Coasting 199
Coasting with engine decou‐ pled, coasting 199
Coasting with idling en‐ gine 199
Cold starting, refer to Starting the engine 70
Combination reel, refer to Turn signals 76
Combination switch, refer to Wiper system 77
COMFORT+ program, Driving Dynamics Control 141
Comfort Access 43 Seite 263Everything from A to ZReference263
Online Edition for Part no. 01 40 2 954 312 - II/15
Page 268 of 277
COMFORT program, DrivingDynamics Control 141
Compressor 224
Computer, refer to On-board computer 97
Condensation on win‐ dows 166
Condensation under the vehi‐ cle 191
Condition Based Service CBS 236
Configure driving mode 141
Confirmation signal 46
ConnectedDrive, see user's manual for Navigation, En‐
tertainment and Communi‐
cation
ConnectedDrive Services
Continued driving with a flat tire 113 , 116
Control Display 18
Control Display, settings 99
Controller 18
Control systems, driving sta‐ bility 135
Convenient opening with the remote control 37
Coolant 234
Coolant level 234
Coolant temperature 92
Cooling function 167
Cooling, maximum 167
Cooling system 234
Cornering light 104
Corrosion on brake discs 190
Cosmetic mirror 174
Courtesy lamps during un‐ locking 37
Courtesy lamps with the vehi‐ cle locked 38
Cruise control 150
Cruise control, active with Stop & Go 143
Cruise Control, refer to Active Cruise Control 143
Cruising range 93 Cupholder 183
Current fuel consumption 93
D
Damage, tires 222
Damping control, dy‐ namic 138
Data, technical 258
Date 93
Daytime running lights 104
Defrosting, refer to Windows, defrosting 166
Dehumidifying, air 167
Deleting personal data 24
Deletion of personal data 24
Destination distance 98
Diesel exhaust fluid, at low temperatures 208
Diesel exhaust fluid, having refilled 208
Diesel exhaust fluid, on mini‐ mum 208
Diesel exhaust fluid, replen‐ ishing yourself 208
Diesel particulate filter 189
Digital clock 93
Dimensions 258
Dimmable exterior mirrors 63
Dimmable interior rearview mirror 63
Direction indicator, refer to Turn signals 76
Display, electronic, instru‐ ment cluster 84
Display in windshield 101
Display lighting, refer to In‐ strument lighting 106
Displays 85
Displays, cleaning 254
Disposal, coolant 235
Disposal, vehicle battery 244
Distance control, refer to PDC 152
Distance to destination 98 Divided screen view, split
screen 23
Door lock 39
Door lock, refer to Remote control 34
Doors, Automatic Soft Clos‐ ing 40
Downhill control 137
Drive-off assistant 135
Drive-off assistant, refer to DSC 135
Driver assistance, refer to In‐ telligent Safety 117
Driving Assistant, refer to In‐ telligent Safety 117
Driving Dynamics Con‐ trol 139
Driving instructions, break- in 188
Driving mode 139
Driving notes, general 188
Driving stability control sys‐ tems 135
Driving tips 188
DSC Dynamic Stability Con‐ trol 135
DTC Dynamic Traction Con‐ trol 136
Dynamic Damping Con‐ trol 138
Dynamic Drive 138
Dynamic Stability Control DSC 135
Dynamic Traction Control DTC 136
E ECO PRO 196
ECO PRO, bonus range 197
ECO PRO display 196
ECO PRO displays 86
ECO PRO driving mode 196
ECO PRO mode 196
ECO PRO Tip - driving in‐ struction 198 Seite 264ReferenceEverything from A to Z264
Online Edition for Part no. 01 40 2 954 312 - II/15
Page 275 of 277
U
Unintentional alarm 48
Units of measure 100
Universal remote control 172
Unlock button, Steptronic transmission 80
Unlocking/locking via door lock 39
Unlocking/locking with re‐ mote control 37
Unlocking, settings 46
Updates made after the edito‐ rial deadline 7
Upholstery care 253
USB interface 177
V
Vanity mirror 174
Variable steering, Integral Ac‐ tive Steering 139
Vehicle battery 243
Vehicle battery, replac‐ ing 243
Vehicle, break-in 188
Vehicle care 252
Vehicle features and op‐ tions 6
Vehicle identification num‐ ber 9
Vehicle jack 243
Vehicle paint 252
Vehicle storage 254
Vehicle wash 251
Ventilation 168
Ventilation, refer to Parked- car ventilation 171
Venting, see ventilation 168
Vent, see ventilation 168
VIN, see vehicle identification number 9
Voice activation system 26 W
Warning and indicator lamps, see Check Control 88
Warning displays, see Check Control 88
Warning messages, see Check Control 88
Warning triangle 246
Warranty 7
Washer fluid 78
Washer nozzles, wind‐ shield 78
Washer system 77
Washing, vehicle 251
Water on roads 190
Weights 259
Welcome lamps during un‐ locking 37
Welcome lights 103
Wheel base, vehicle 258
Wheel cleaner 253
Wheels, changing 223
Wheels, everything on wheels and tires 211
Wheels, Flat Tire Monitor FTM 115
Wheels, Tire Pressure Moni‐ tor TPM 111
Width, vehicle 258
Window defroster, rear 167
Windows, powered 48
Windshield, climate con‐ trol 189
Windshield washer fluid 78
Windshield washer noz‐ zles 78
Windshield washer sys‐ tem 77
Windshield wiper 77
Winter diesel 207
Winter storage, care 254
Winter tires, suitable tires 224
Winter tires, tread 222
Wiper 77 Wiper blades, replacing 238
Wiper fluid 78
Wiper, fold-out position 78
Wiper system 77
Wood, care 253
Word match concept, naviga‐ tion 24
Wrench, see Onboard vehicle tool kit 238
X
xDrive 137
Xenon headlights, bulb re‐ placement 239 Seite 271Everything from A to ZReference271
Online Edition for Part no. 01 40 2 954 312 - II/15