triangle BMW 5 SERIES 2015 F10 Owner's Manual
[x] Cancel search | Manufacturer: BMW, Model Year: 2015, Model line: 5 SERIES, Model: BMW 5 SERIES 2015 F10Pages: 277, PDF Size: 5.63 MB
Page 250 of 277

When the emergency request is received
at the BMW Response Center, the BMW
Response Center contacts you and takes
further steps to help you.
Even if you are unable to respond, the
BMW Response Center can take further
steps to help you under certain circum‐
stances.
For this, data are transmitted to the BMW
Response Center which serve to deter‐
mine the necessary rescue measures. E. g.
the current position of the vehicle, if it can
be established.▷If the LED is flashing green, but the BMW
Response Center can no longer be heard
via the speaker, you can nevertheless still
be heard at the BMW Response Center.
Initiating an Emergency Request
automatically
Under certain conditions, an Emergency Re‐
quest is automatically initiated immediately af‐
ter a severe accident. Automatic Collision Noti‐
fication is not affected by pressing the SOS
button.
Warning triangle
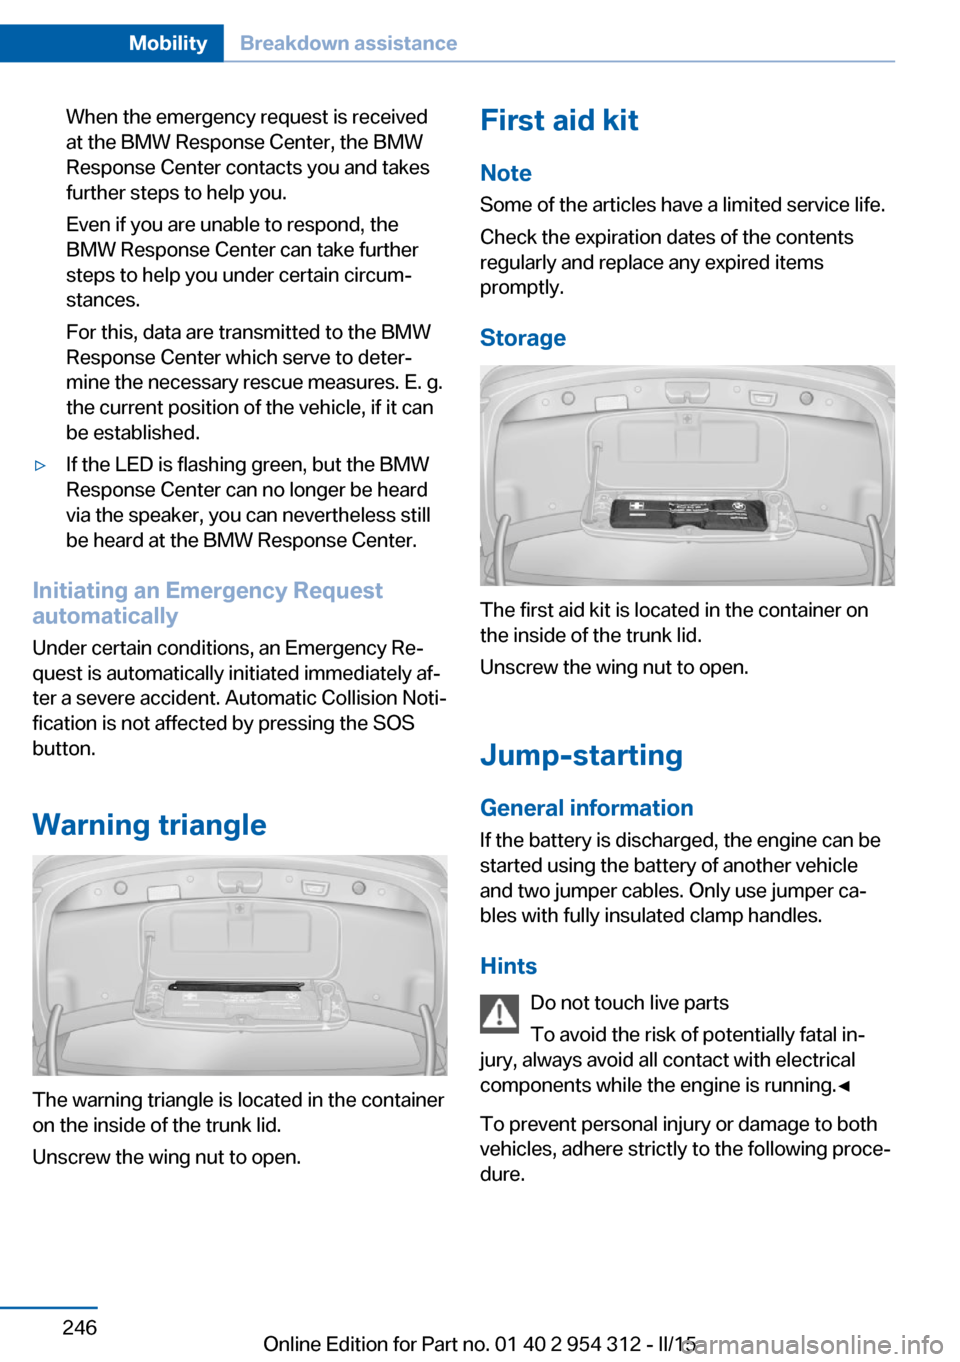
The warning triangle is located in the container
on the inside of the trunk lid.
Unscrew the wing nut to open.
First aid kit
Note
Some of the articles have a limited service life.
Check the expiration dates of the contents
regularly and replace any expired items
promptly.
Storage
The first aid kit is located in the container on
the inside of the trunk lid.
Unscrew the wing nut to open.
Jump-starting
General information
If the battery is discharged, the engine can be
started using the battery of another vehicle
and two jumper cables. Only use jumper ca‐
bles with fully insulated clamp handles.
Hints Do not touch live parts
To avoid the risk of potentially fatal in‐
jury, always avoid all contact with electrical
components while the engine is running.◀
To prevent personal injury or damage to both
vehicles, adhere strictly to the following proce‐
dure.
Seite 246MobilityBreakdown assistance246
Online Edition for Part no. 01 40 2 954 312 - II/15
Page 253 of 277

Tow truck
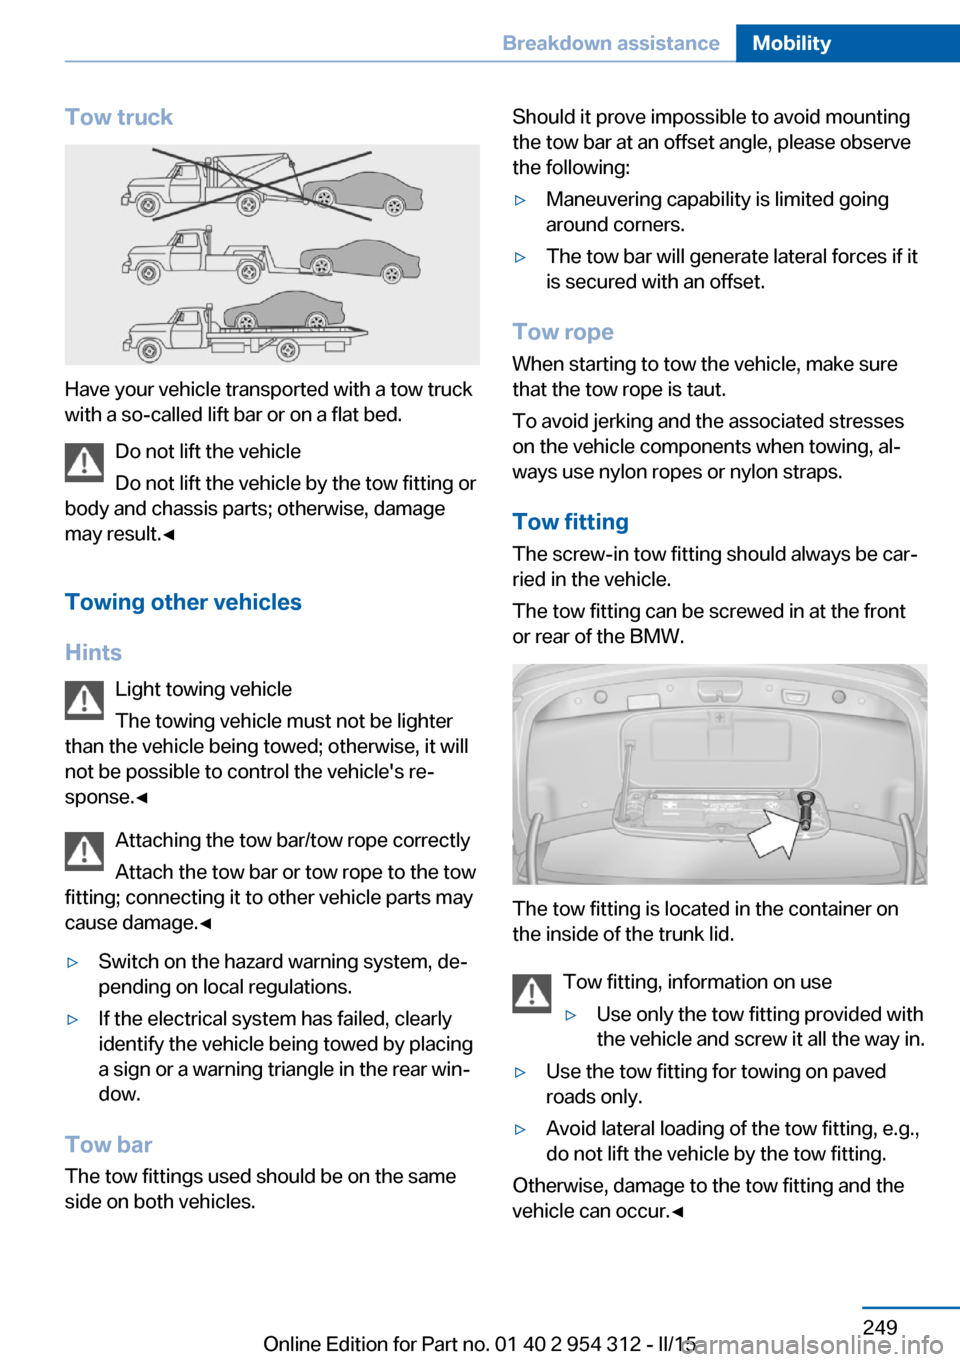
Have your vehicle transported with a tow truck
with a so-called lift bar or on a flat bed.
Do not lift the vehicle
Do not lift the vehicle by the tow fitting or
body and chassis parts; otherwise, damage
may result.◀
Towing other vehicles
Hints Light towing vehicle
The towing vehicle must not be lighter
than the vehicle being towed; otherwise, it will
not be possible to control the vehicle's re‐
sponse.◀
Attaching the tow bar/tow rope correctly
Attach the tow bar or tow rope to the tow
fitting; connecting it to other vehicle parts may
cause damage.◀
▷Switch on the hazard warning system, de‐
pending on local regulations.▷If the electrical system has failed, clearly
identify the vehicle being towed by placing
a sign or a warning triangle in the rear win‐
dow.
Tow bar
The tow fittings used should be on the same
side on both vehicles.
Should it prove impossible to avoid mounting
the tow bar at an offset angle, please observe
the following:▷Maneuvering capability is limited going
around corners.▷The tow bar will generate lateral forces if it
is secured with an offset.
Tow rope
When starting to tow the vehicle, make sure
that the tow rope is taut.
To avoid jerking and the associated stresses
on the vehicle components when towing, al‐
ways use nylon ropes or nylon straps.
Tow fitting
The screw-in tow fitting should always be car‐
ried in the vehicle.
The tow fitting can be screwed in at the front
or rear of the BMW.
The tow fitting is located in the container on
the inside of the trunk lid.
Tow fitting, information on use
▷Use only the tow fitting provided with
the vehicle and screw it all the way in.▷Use the tow fitting for towing on paved
roads only.▷Avoid lateral loading of the tow fitting, e.g.,
do not lift the vehicle by the tow fitting.
Otherwise, damage to the tow fitting and the
vehicle can occur.◀
Seite 249Breakdown assistanceMobility249
Online Edition for Part no. 01 40 2 954 312 - II/15
Page 275 of 277

U
Unintentional alarm 48
Units of measure 100
Universal remote control 172
Unlock button, Steptronic transmission 80
Unlocking/locking via door lock 39
Unlocking/locking with re‐ mote control 37
Unlocking, settings 46
Updates made after the edito‐ rial deadline 7
Upholstery care 253
USB interface 177
V
Vanity mirror 174
Variable steering, Integral Ac‐ tive Steering 139
Vehicle battery 243
Vehicle battery, replac‐ ing 243
Vehicle, break-in 188
Vehicle care 252
Vehicle features and op‐ tions 6
Vehicle identification num‐ ber 9
Vehicle jack 243
Vehicle paint 252
Vehicle storage 254
Vehicle wash 251
Ventilation 168
Ventilation, refer to Parked- car ventilation 171
Venting, see ventilation 168
Vent, see ventilation 168
VIN, see vehicle identification number 9
Voice activation system 26 W
Warning and indicator lamps, see Check Control 88
Warning displays, see Check Control 88
Warning messages, see Check Control 88
Warning triangle 246
Warranty 7
Washer fluid 78
Washer nozzles, wind‐ shield 78
Washer system 77
Washing, vehicle 251
Water on roads 190
Weights 259
Welcome lamps during un‐ locking 37
Welcome lights 103
Wheel base, vehicle 258
Wheel cleaner 253
Wheels, changing 223
Wheels, everything on wheels and tires 211
Wheels, Flat Tire Monitor FTM 115
Wheels, Tire Pressure Moni‐ tor TPM 111
Width, vehicle 258
Window defroster, rear 167
Windows, powered 48
Windshield, climate con‐ trol 189
Windshield washer fluid 78
Windshield washer noz‐ zles 78
Windshield washer sys‐ tem 77
Windshield wiper 77
Winter diesel 207
Winter storage, care 254
Winter tires, suitable tires 224
Winter tires, tread 222
Wiper 77 Wiper blades, replacing 238
Wiper fluid 78
Wiper, fold-out position 78
Wiper system 77
Wood, care 253
Word match concept, naviga‐ tion 24
Wrench, see Onboard vehicle tool kit 238
X
xDrive 137
Xenon headlights, bulb re‐ placement 239 Seite 271Everything from A to ZReference271
Online Edition for Part no. 01 40 2 954 312 - II/15