fog light BMW 5 SERIES GRAN TURISMO 2014 F07 User Guide
[x] Cancel search | Manufacturer: BMW, Model Year: 2014, Model line: 5 SERIES GRAN TURISMO, Model: BMW 5 SERIES GRAN TURISMO 2014 F07Pages: 259, PDF Size: 5.68 MB
Page 132 of 259
HintsPersonal responsibility
The system cannot serve as a substitute
for the driver's personal judgment of the
course of the road and the traffic situation.
In the event of a warning, do not jerk the steer‐
ing wheel, as you may lose control of the vehi‐
cle.◀
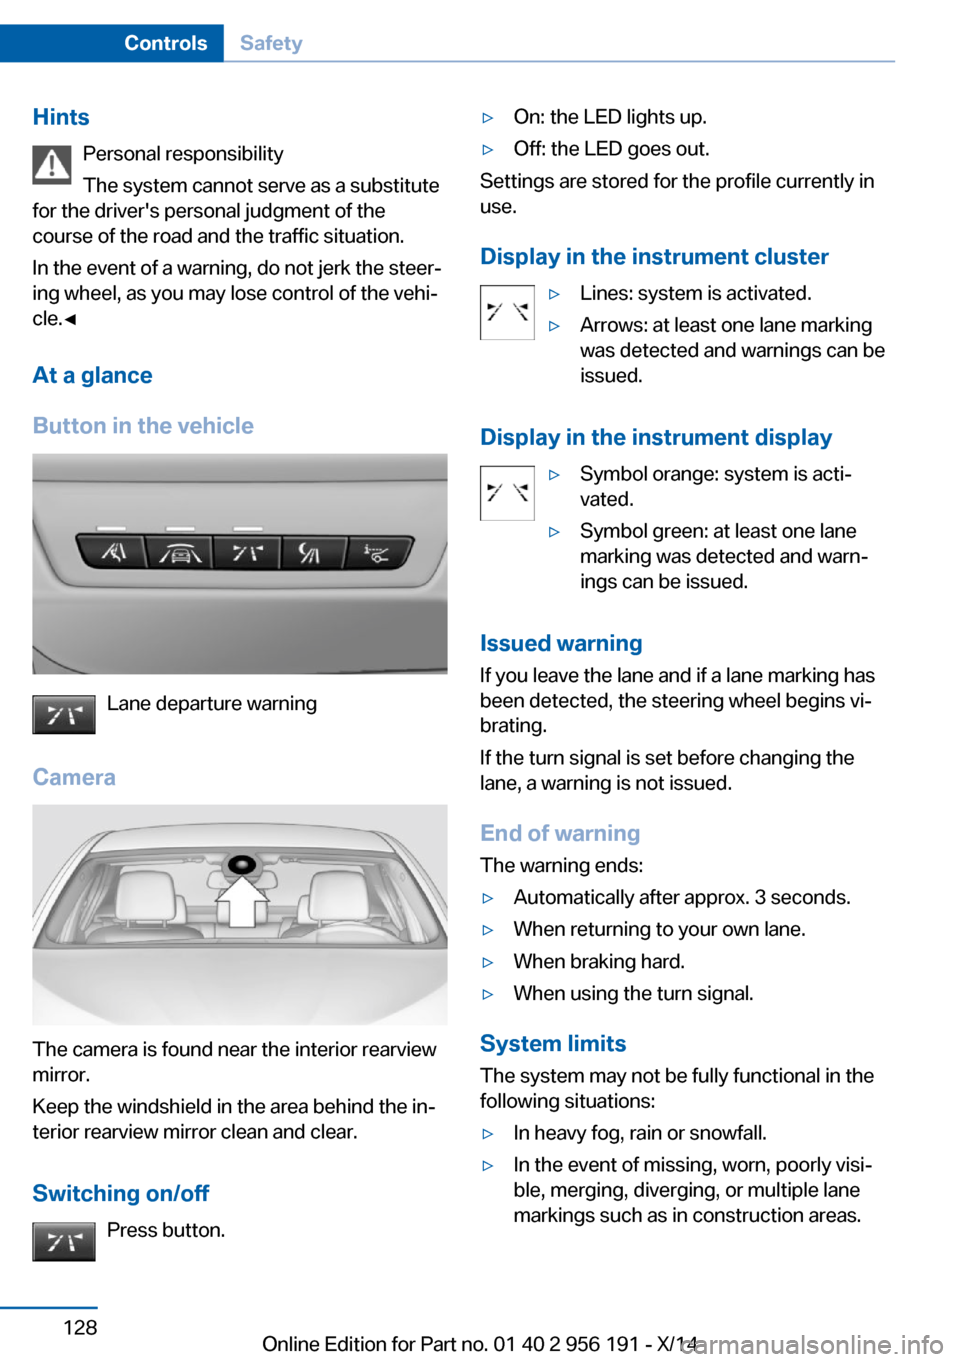
At a glance
Button in the vehicle
Lane departure warning
Camera
The camera is found near the interior rearview
mirror.
Keep the windshield in the area behind the in‐
terior rearview mirror clean and clear.
Switching on/off Press button.
▷On: the LED lights up.▷Off: the LED goes out.
Settings are stored for the profile currently in
use.
Display in the instrument cluster
▷Lines: system is activated.▷Arrows: at least one lane marking
was detected and warnings can be
issued.
Display in the instrument display
▷Symbol orange: system is acti‐
vated.▷Symbol green: at least one lane
marking was detected and warn‐
ings can be issued.
Issued warning
If you leave the lane and if a lane marking has
been detected, the steering wheel begins vi‐
brating.
If the turn signal is set before changing the
lane, a warning is not issued.
End of warning
The warning ends:
▷Automatically after approx. 3 seconds.▷When returning to your own lane.▷When braking hard.▷When using the turn signal.
System limits
The system may not be fully functional in the
following situations:
▷In heavy fog, rain or snowfall.▷In the event of missing, worn, poorly visi‐
ble, merging, diverging, or multiple lane
markings such as in construction areas.Seite 128ControlsSafety128
Online Edition for Part no. 01 40 2 956 191 - X/14
Page 133 of 259
▷When lane markings are covered in snow,
ice, dirt or water.▷In tight curves or on narrow lanes.▷When the lane markings are covered by
objects.▷When driving very close to the vehicle in
front of you.▷When driving toward bright lights.▷When the windshield in front of the interior
rearview mirror is fogged over, dirty or cov‐
ered with stickers, etc.▷During calibration of the camera immedi‐
ately after vehicle shipment.
Active Blind Spot Detection
The concept
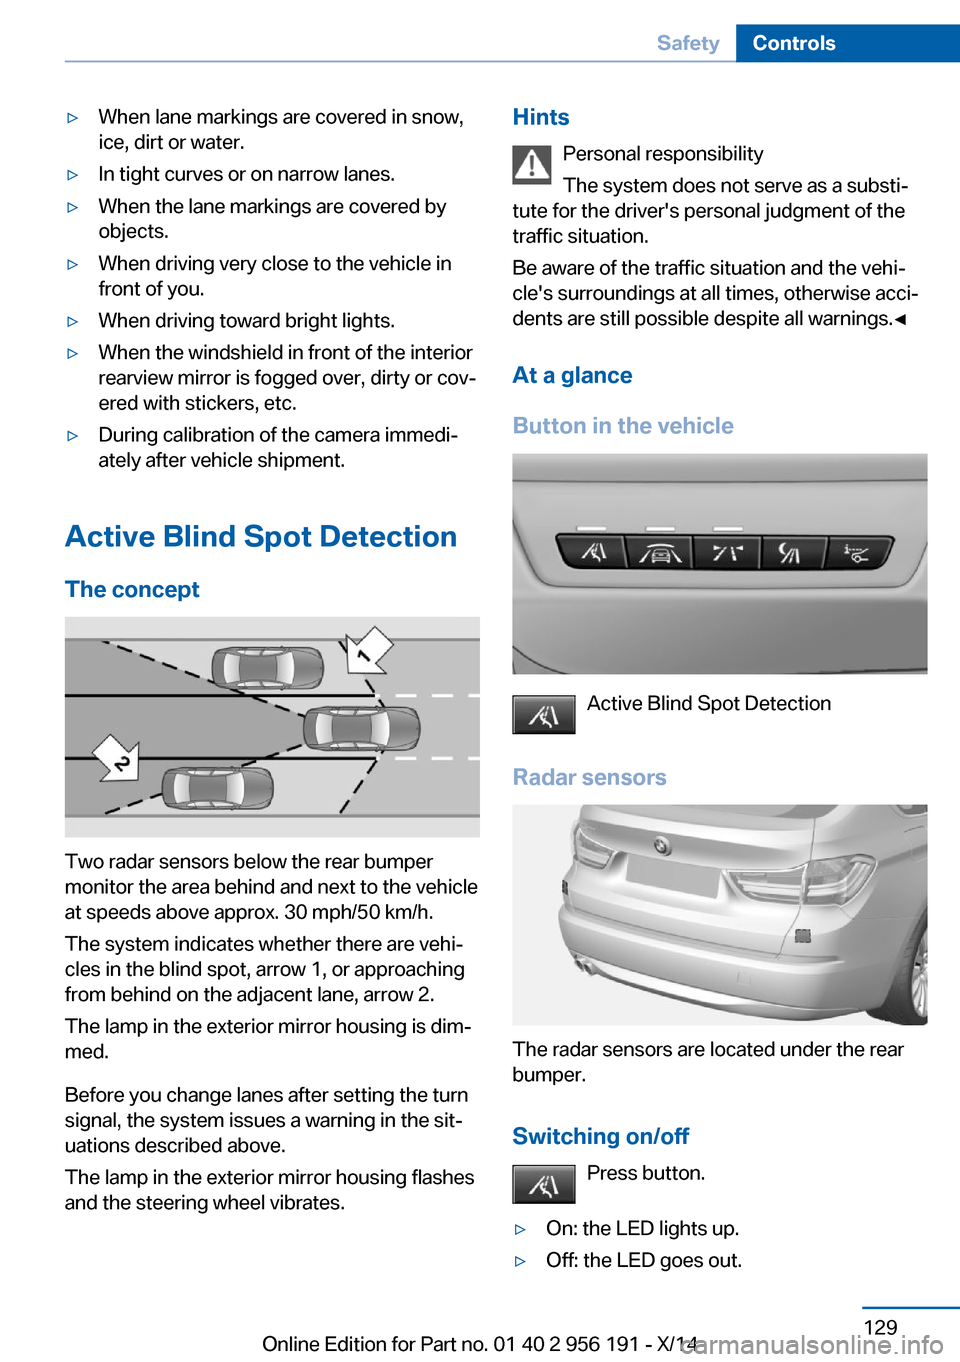
Two radar sensors below the rear bumper
monitor the area behind and next to the vehicle
at speeds above approx. 30 mph/50 km/h.
The system indicates whether there are vehi‐
cles in the blind spot, arrow 1, or approaching
from behind on the adjacent lane, arrow 2.
The lamp in the exterior mirror housing is dim‐
med.
Before you change lanes after setting the turn
signal, the system issues a warning in the sit‐
uations described above.
The lamp in the exterior mirror housing flashes
and the steering wheel vibrates.
Hints
Personal responsibility
The system does not serve as a substi‐
tute for the driver's personal judgment of the
traffic situation.
Be aware of the traffic situation and the vehi‐
cle's surroundings at all times, otherwise acci‐
dents are still possible despite all warnings.◀
At a glance
Button in the vehicle
Active Blind Spot Detection
Radar sensors
The radar sensors are located under the rear
bumper.
Switching on/off Press button.
▷On: the LED lights up.▷Off: the LED goes out.Seite 129SafetyControls129
Online Edition for Part no. 01 40 2 956 191 - X/14
Page 134 of 259
The system can issue warnings at speeds
above approx. 30 mph/50 km/h.
Settings are stored for the profile currently in
use.
Display
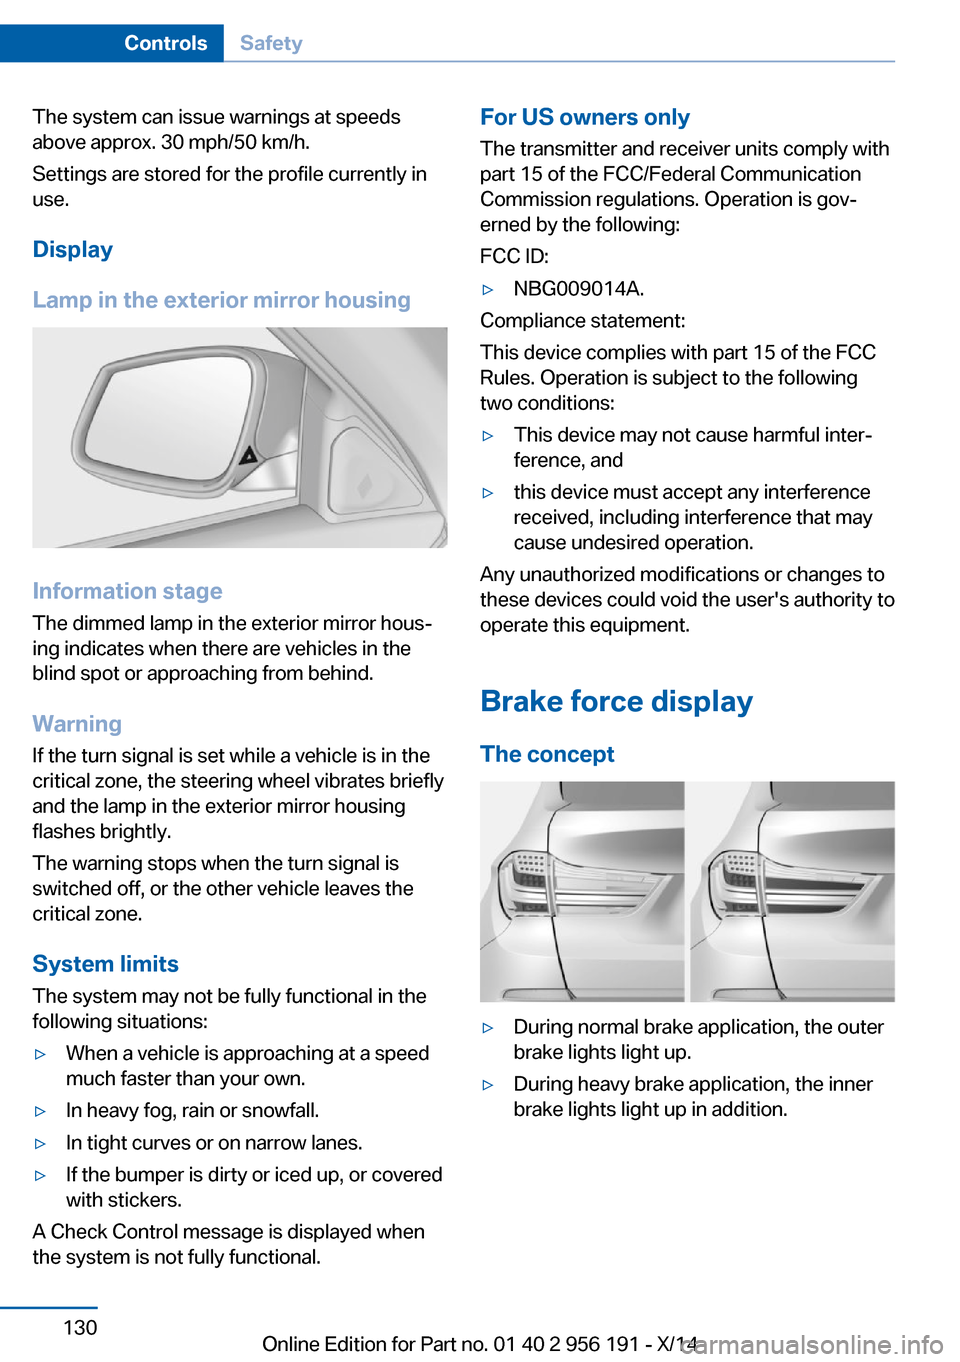
Lamp in the exterior mirror housing
Information stage
The dimmed lamp in the exterior mirror hous‐
ing indicates when there are vehicles in the
blind spot or approaching from behind.
Warning If the turn signal is set while a vehicle is in the
critical zone, the steering wheel vibrates briefly
and the lamp in the exterior mirror housing
flashes brightly.
The warning stops when the turn signal is
switched off, or the other vehicle leaves the
critical zone.
System limits
The system may not be fully functional in the
following situations:
▷When a vehicle is approaching at a speed
much faster than your own.▷In heavy fog, rain or snowfall.▷In tight curves or on narrow lanes.▷If the bumper is dirty or iced up, or covered
with stickers.
A Check Control message is displayed when
the system is not fully functional.
For US owners only
The transmitter and receiver units comply with
part 15 of the FCC/Federal Communication
Commission regulations. Operation is gov‐
erned by the following:
FCC ID:▷NBG009014A.
Compliance statement:
This device complies with part 15 of the FCC
Rules. Operation is subject to the following
two conditions:
▷This device may not cause harmful inter‐
ference, and▷this device must accept any interference
received, including interference that may
cause undesired operation.
Any unauthorized modifications or changes to
these devices could void the user's authority to
operate this equipment.
Brake force display
The concept
▷During normal brake application, the outer
brake lights light up.▷During heavy brake application, the inner
brake lights light up in addition.Seite 130ControlsSafety130
Online Edition for Part no. 01 40 2 956 191 - X/14
Page 145 of 259
Driving comfortVehicle features and options
This chapter describes all standard, country-
specific and optional features offered with the
series. It also describes features that are not
necessarily available in your car, e. g., due to
the selected options or country versions. This
also applies to safety-related functions and
systems.
Active Cruise Control withStop & Go function, ACC
The concept Use this system to select a desired speed that
the vehicle will maintain automatically on clear
roads.
To the extent possible, the system automati‐
cally adjusts the speed to a slower vehicle
ahead of you.
The distance that the vehicle maintains to the
vehicle ahead of you can be varied.
For safety reasons, it depends on the speed.
To maintain a certain distance, the system au‐ tomatically reduces the speed, applies the
brakes lightly, or accelerates again if the vehi‐
cle ahead begins moving faster.
If the vehicle ahead of you brakes to a halt, and
then proceeds to drive again within a brief pe‐
riod, the system is able to detect this within the
given system limits. Your own vehicle will
brake automatically and then accelerate again.
If the vehicle ahead of you drives away again
after a prolonged period, briefly press the ac‐
celerator pedal or press the appropriate button
to reactivate the system. The vehicle will auto‐
matically accelerate.
As soon as the road is clear, the vehicle accel‐
erates to the desired speed.The speed is also maintained downhill, but
may not be maintained uphill if engine power is
insufficient.
General information Depending on the driving settings, the features
of the cruise control can change in certain
areas.
Hints Personal responsibility
Even an active system holds the driver
responsible for his or her driving, particularly
for staying in your lane, adjusting your speed,
keeping your distance and for your driving
style all in relation to traffic.
Technically the system has its limits, it cannot
independently react to all traffic situations.
Monitor your driving, be on the alert, observe
the vehicle surroundings and other traffic and react when needed, e.g. through braking,
steering or make evasive maneuvers - risk of
accident.◀
Unfavorable weather conditions
In the event of unfavorable weather and
light conditions, e. g. if there is rain, snowfall,
slush, fog or glare, this may result in poorer
recognition of vehicles as well as short-term
interruptions for vehicles that are already de‐
tected. Drive attentively, and react to the cur‐
rent traffic situation. Intervene actively when
necessary, e.g., by braking, steering or making
an evasive maneuver, otherwise, there is the
risk of an accident.◀
Before leaving the vehicle, secure it
against moving on its own.
Before leaving the vehicle with the engine run‐
ning: set the parking brake and ensure that theSeite 141Driving comfortControls141
Online Edition for Part no. 01 40 2 956 191 - X/14
Page 147 of 259
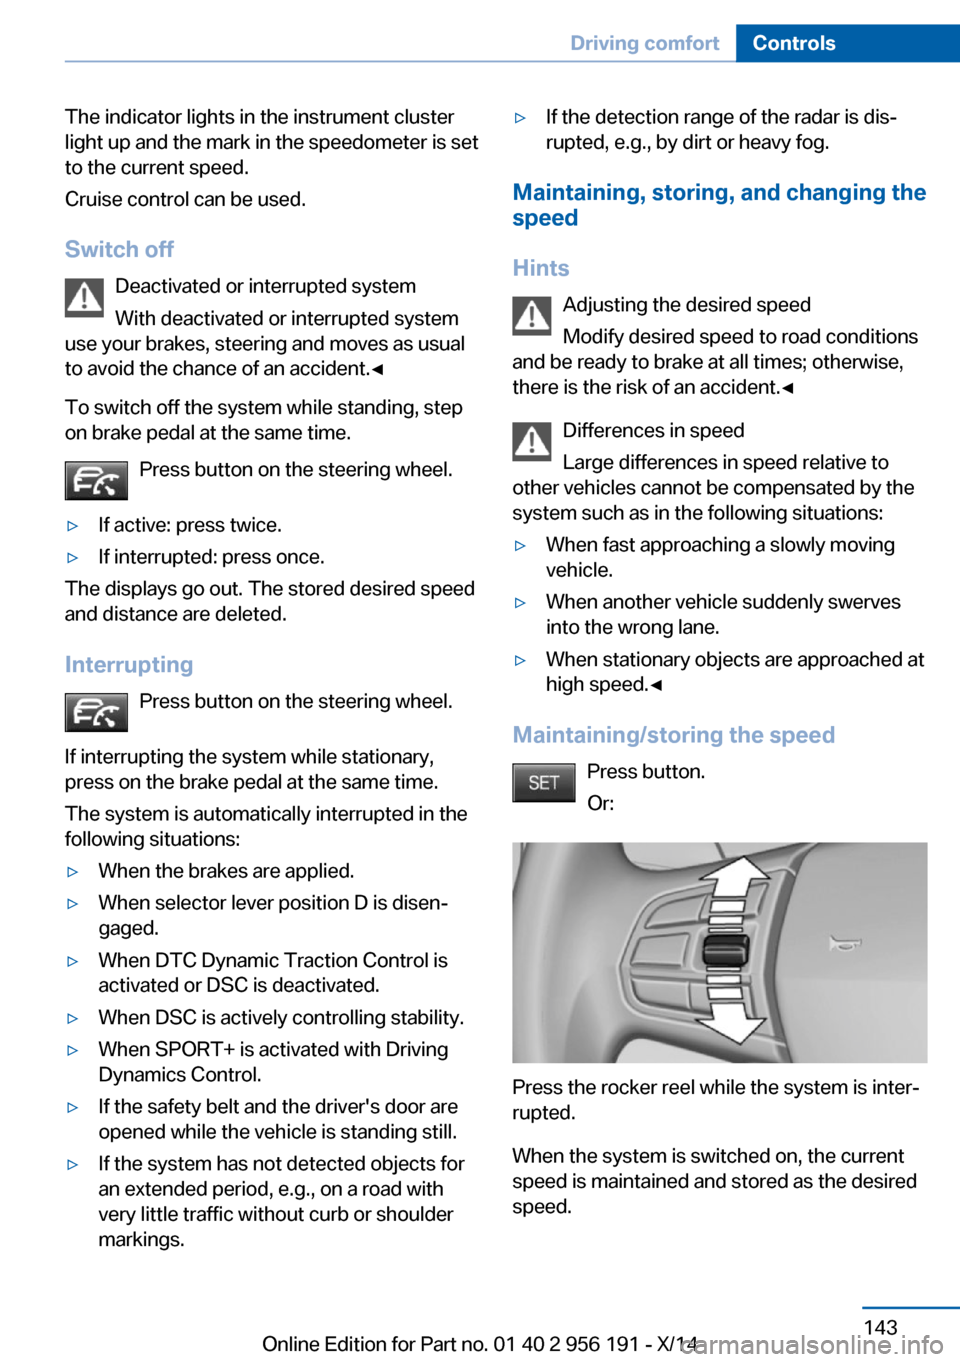
The indicator lights in the instrument cluster
light up and the mark in the speedometer is set
to the current speed.
Cruise control can be used.
Switch off Deactivated or interrupted system
With deactivated or interrupted system
use your brakes, steering and moves as usual
to avoid the chance of an accident.◀
To switch off the system while standing, step
on brake pedal at the same time.
Press button on the steering wheel.▷If active: press twice.▷If interrupted: press once.
The displays go out. The stored desired speed
and distance are deleted.
Interrupting Press button on the steering wheel.
If interrupting the system while stationary,
press on the brake pedal at the same time.
The system is automatically interrupted in the
following situations:
▷When the brakes are applied.▷When selector lever position D is disen‐
gaged.▷When DTC Dynamic Traction Control is
activated or DSC is deactivated.▷When DSC is actively controlling stability.▷When SPORT+ is activated with Driving
Dynamics Control.▷If the safety belt and the driver's door are
opened while the vehicle is standing still.▷If the system has not detected objects for
an extended period, e.g., on a road with
very little traffic without curb or shoulder
markings.▷If the detection range of the radar is dis‐
rupted, e.g., by dirt or heavy fog.
Maintaining, storing, and changing the
speed
Hints Adjusting the desired speedModify desired speed to road conditions
and be ready to brake at all times; otherwise,
there is the risk of an accident.◀
Differences in speed
Large differences in speed relative to
other vehicles cannot be compensated by the
system such as in the following situations:
▷When fast approaching a slowly moving
vehicle.▷When another vehicle suddenly swerves
into the wrong lane.▷When stationary objects are approached at
high speed.◀
Maintaining/storing the speed
Press button.
Or:
Press the rocker reel while the system is inter‐
rupted.
When the system is switched on, the current
speed is maintained and stored as the desired
speed.
Seite 143Driving comfortControls143
Online Edition for Part no. 01 40 2 956 191 - X/14
Page 227 of 259
Hints
Because of the long life of these bulbs, the
likelihood of failure is very low. Switching the
lights on and off frequently shortens their life.
If a bulb fails, reel on the front fog lights and
continue the trip with great care. Comply with
local regulations.
Do not perform work/bulb replacement
on xenon headlights
Have any work on the xenon lighting system,
including bulb replacement, performed only by
a service center. Due to the high voltage
present in the system, there is a danger of fatal
injuries if work is carried out improperly.◀
For checking and adjusting headlamp aim,
please contact your BMW center.
Parking lights and roadside parking lamp,
turn signal lights
Follow general instructions, refer to page 221.
These lights feature LED technology.
Contact your service center in the event of a
malfunction.
Corner-illuminating lights
Follow general instructions, refer to page 221.
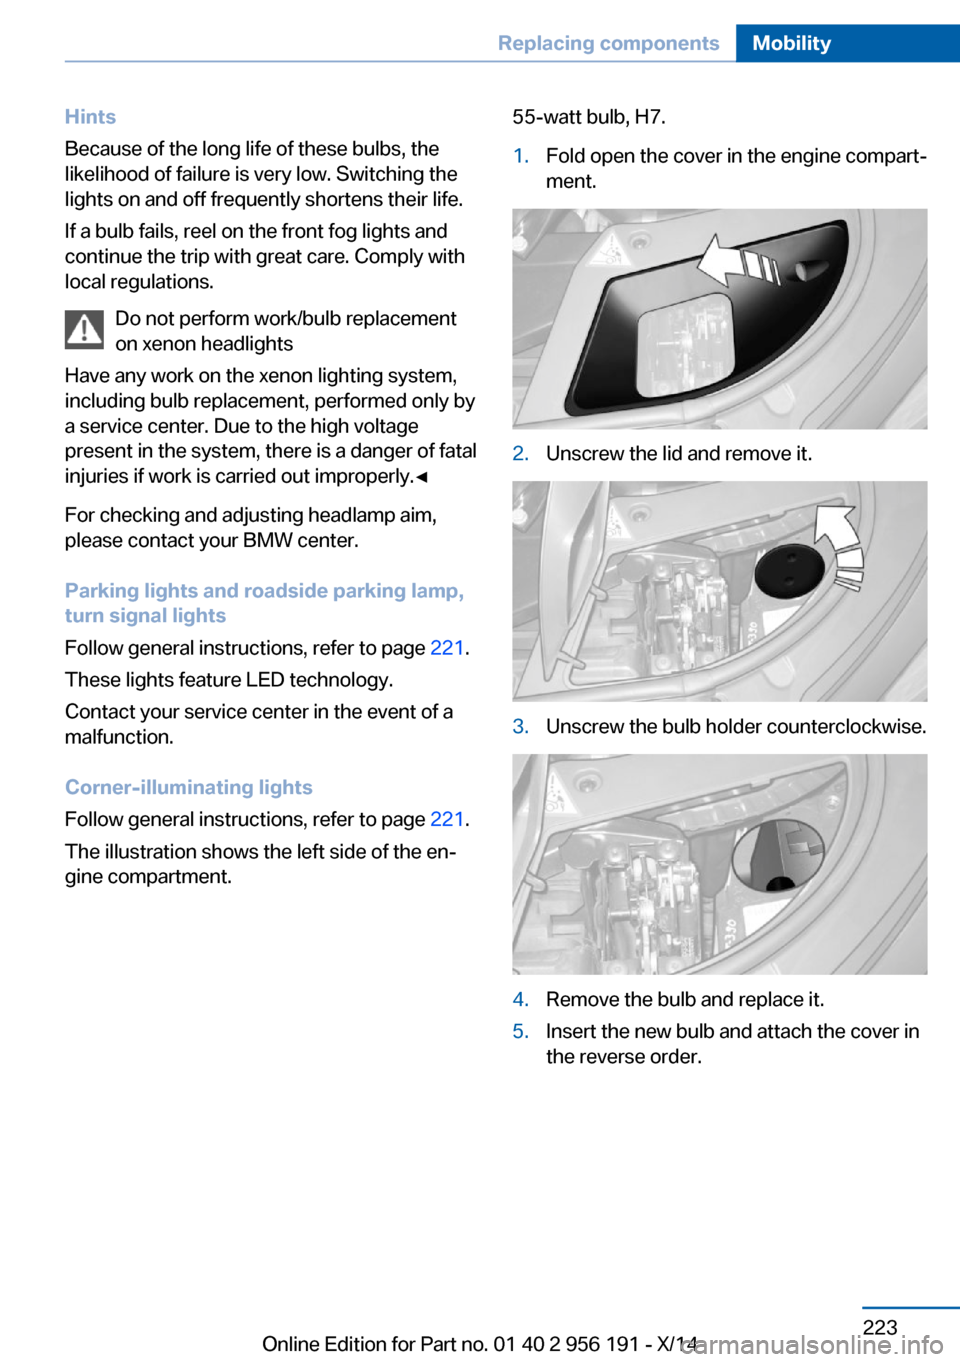
The illustration shows the left side of the en‐
gine compartment.55-watt bulb, H7.1.Fold open the cover in the engine compart‐
ment.2.Unscrew the lid and remove it.3.Unscrew the bulb holder counterclockwise.4.Remove the bulb and replace it.5.Insert the new bulb and attach the cover in
the reverse order.Seite 223Replacing componentsMobility223
Online Edition for Part no. 01 40 2 956 191 - X/14
Page 228 of 259
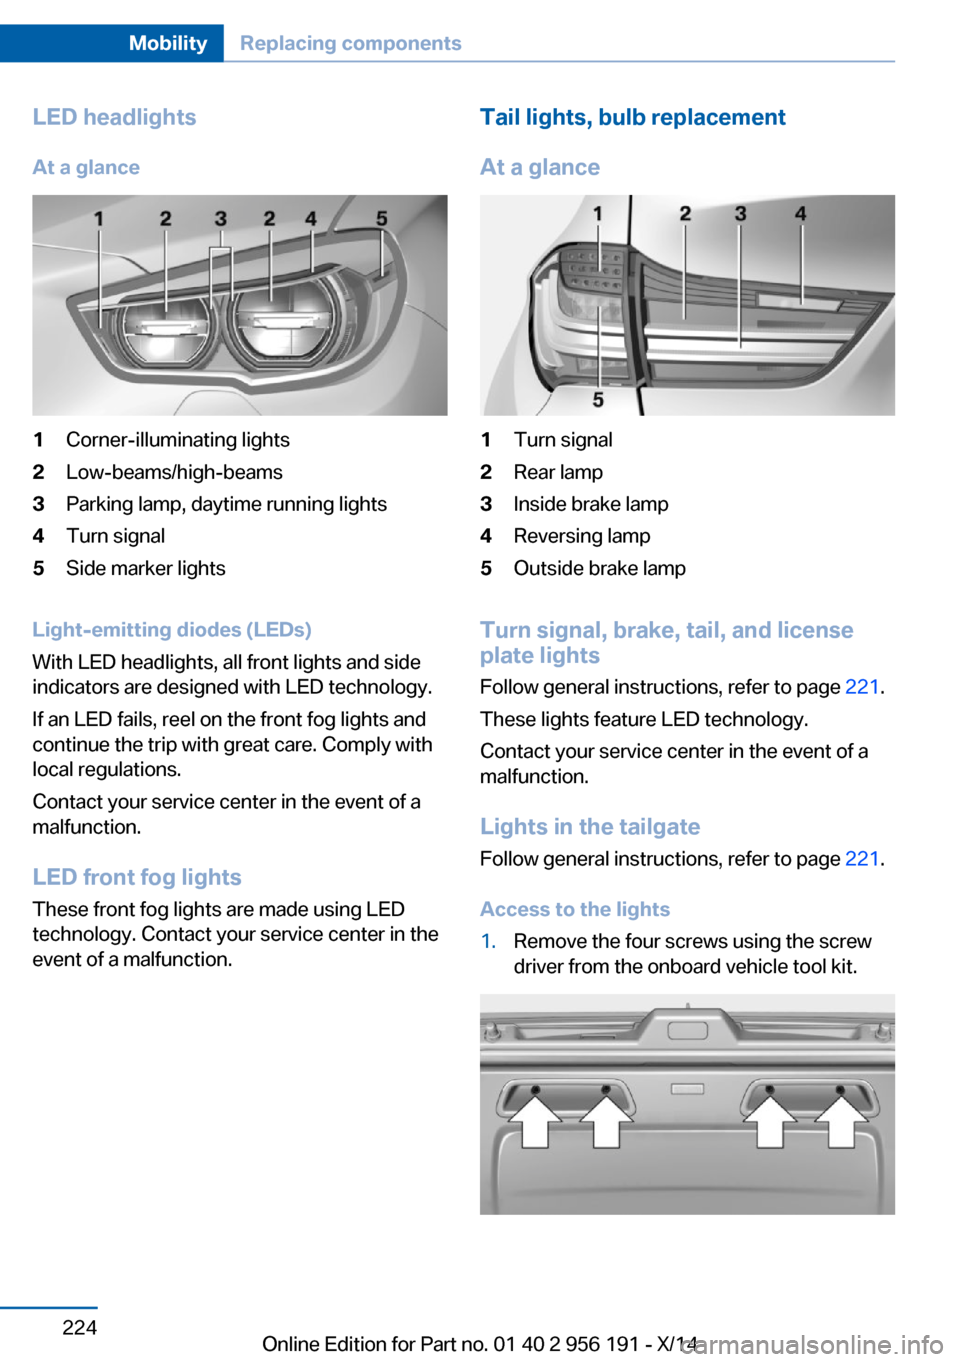
LED headlightsAt a glance1Corner-illuminating lights2Low-beams/high-beams3Parking lamp, daytime running lights4Turn signal5Side marker lights
Light-emitting diodes (LEDs)
With LED headlights, all front lights and side
indicators are designed with LED technology.
If an LED fails, reel on the front fog lights and
continue the trip with great care. Comply with
local regulations.
Contact your service center in the event of a
malfunction.
LED front fog lights
These front fog lights are made using LED
technology. Contact your service center in the
event of a malfunction.
Tail lights, bulb replacement
At a glance1Turn signal2Rear lamp3Inside brake lamp4Reversing lamp5Outside brake lamp
Turn signal, brake, tail, and license
plate lights
Follow general instructions, refer to page 221.
These lights feature LED technology.
Contact your service center in the event of a
malfunction.
Lights in the tailgate Follow general instructions, refer to page 221.
Access to the lights
1.Remove the four screws using the screw
driver from the onboard vehicle tool kit.Seite 224MobilityReplacing components224
Online Edition for Part no. 01 40 2 956 191 - X/14
Page 251 of 259
Emergency unlocking, trans‐mission lock 83
Energy Control 93
Energy recovery 93
Engine, automatic reel-off 71
Engine, automatic Start/Stop function 71
Engine compartment 212
Engine compartment, work‐ ing in 212
Engine coolant 217
Engine idling when driving, coasting 194
Engine oil 214
Engine oil, adding 215
Engine oil additives 215
Engine oil change 216
Engine oil filler neck 215
Engine oil temperature 91
Engine oil types, alterna‐ tive 216
Engine oil types, ap‐ proved 216
Engine start during malfunc‐ tion 35
Engine start, jump-start‐ ing 230
Engine start, refer to Starting the engine 71
Engine stop 71
Engine temperature 91
Entering a car wash 233
Equipment, interior 169
Error displays, see Check Control 87
ESP Electronic Stability Pro‐ gram, refer to DSC 133
Exchanging wheels/tires 208
Exhaust system 184
Exterior mirror, automatic dimming feature 63
Exterior mirrors 62
External start 230
External temperature dis‐ play 92 External temperature warn‐
ing 92
Eyes for securing cargo 188
F
Failure message, see Check Control 87
False alarm, refer to Uninten‐ tional alarm 48
Fan, refer to Air flow 163
Filler neck for engine oil 215
Fine wood, care 235
First aid kit 229
Fitting for towing, see tow fit‐ ting 232
Flat tire, changing wheels 225
Flat Tire Monitor FTM 110
Flat tire, Tire Pressure Moni‐ tor TPM 112
Flat tire, warning lamp 111, 113
Flooding 185
Floor carpet, care 236
Floor mats, care 236
Fold-out position, wiper 80
Foot brake 185
Front airbags 107
Front-end collision warning with braking function 119
Front-end collision warning with City Braking func‐
tion 116
Front fog lights 105
Front fog lights, bulb replace‐ ment 224
front-seat passenger airbags, automatic deactivation 109
Front-seat passenger airbags, indicator lamp 109
Front seats 53
FTM Flat Tire Monitor 110
Fuel 200
Fuel consumption, current 93 Fuel consumption, refer to
Average fuel consump‐
tion 97
Fuel filler flap 198
Fuel gauge 91
Fuel lid 198
Fuel quality 200
Fuel recommendation 200
Fuel, tank capacity 242
Fuse 226
G
Garage door opener, refer to Universal Integrated Remote
Control 169
Gasoline 200
Gear change, Steptronic transmission 81
Gear shift indicator 94
General driving notes 184
Glare shield 171
Glass sunroof, refer to Panor‐ amic glass sunroof 51
Glove compartment 177
Gross vehicle weight, ap‐ proved 241
H
Handbrake, refer to Parking brake 73
Hand-held transmitter, alter‐ nating code 170
Hazard warning flashers 228
HDC Hill Descent Con‐ trol 135
Head airbags 107
Headlight control, auto‐ matic 103
Headlight courtesy delay fea‐ ture 102
Headlight courtesy delay fea‐ ture, remote control 47
Headlight courtesy delay fea‐ ture via remote control 39 Seite 247Everything from A to ZReference247
Online Edition for Part no. 01 40 2 956 191 - X/14
Page 252 of 259
Headlight flasher 78
Headlight glass 222
Headlights, care 234
Headlight washer system 78
Head restraints 53
Head restraints, front 59
Head restraints, rear 60
Head-up Display 100
Head-up Display, care 236
Heavy cargo, stowing 188
Height, vehicle 240
High-beam Assistant 104
High beams 78
High beams/low beams, refer to High-beam Assistant 104
Hill Descent Control HDC 135
Hills 186
Hill start assistant, refer to Drive-off assistant 133
Hints 6
Holder for beverages 179
Hood 212
Horn 14
Hotel function, tailgate 43
Hot exhaust system 184
HUD Head-up Display 100
Hydroplaning 185
I Ice warning, see External temperature warning 92
Icy roads, see External tem‐ perature warning 92
Identification marks, tires 206
Identification number, see ve‐ hicle identification num‐
ber 9
iDrive 18
Ignition key, refer to Remote control 34
Ignition off 70
Ignition on 70
Indication of a flat tire 111 , 113 Indicator and alarm lamps,
see Check Control 87
Indicator lamp, see Check Control 87
Individual air distribution 163
Individual settings, refer to Personal Profile 35
Inflation pressure, tires 202
Inflation pressure warning FTM, tires 110
Info display, refer to Com‐ puter 96
Initialization, Integral Active Steering 137
Initialize, Tire Pressure Moni‐ tor TPM 113
Initializing, Flat Tire Monitor FTM 110
Instrument cluster 84
Instrument cluster, electronic displays 84
Instrument display, multifunc‐ tional 85
Instrument lighting 105
Integral Active Steering 137
Integrated key 34
Integrated Owner's Manual in the vehicle 29
Intelligent Emergency Re‐ quest 228
Intelligent Safety 115
Intensity, AUTO pro‐ gram 163
Interior equipment 169
Interior lights 105
Interior lights via remote con‐ trol 38
Interior motion sensor 48
Interior rearview mirror, auto‐ matic dimming feature 63
Interior rearview mirror, man‐ ually dimmable 63
Interval display, service re‐ quirements 93 J
Jacking points for the vehicle jack 225
Joystick, Steptronic transmis‐ sion 81
Jump-starting 230
K
Key/remote control 34
Keyless Go, refer to Comfort Access 44
Key Memory, refer to Per‐ sonal Profile 35
Kickdown, Steptronic trans‐ mission 81
Knee airbag 107
L Lamp replacement, rear 224
Lane departure warning 127
Lane margin, warning 127
Language on Control Dis‐ play 99
Large tailgate via remote con‐ trol 38
Lashing eyes, securing cargo 188
LATCH child restraint sys‐ tem 66
Leather, care 234
LED front fog lights, bulb re‐ placement 224
LED headlights, Bulb replace‐ ment 224
LED light 224
LEDs, light-emitting di‐ odes 222
Length, vehicle 240
Letters and numbers, enter‐ ing 24
License plate lamp, bulb re‐ placement 224
Light alloy wheels, care 235 Seite 248ReferenceEverything from A to Z248
Online Edition for Part no. 01 40 2 956 191 - X/14