park assist BMW 5 SERIES GRAN TURISMO 2015 Owners Manual
[x] Cancel search | Manufacturer: BMW, Model Year: 2015, Model line: 5 SERIES GRAN TURISMO, Model: BMW 5 SERIES GRAN TURISMO 2015Pages: 263, PDF Size: 5.06 MB
Page 5 of 263
Addendum
ADDENDUM TO OWNER'S MANUAL
We wanted to provide you with some updates
and clarifications with respect to the printed
BMW Owner's Manual. These updates and
clarifications will supersede the materials con-
tained in that document.
1. Where the terms “service center,” “the ser-
vice center,” “your service center,” “service
specialist,” or “service” are used in the
Owner's Manual, we wanted to clarify that
the terms refer to a BMW dealer's service
center or another service center or repair
shop that employs trained personnel that
can perform maintenance and repair work
on your vehicle in accordance with BMW
specifications.
2. Where the text of the Owner's Manual con-
tains an affirmative instruction to contact a
“service center” or “your service center,”
we wanted to clarify that BMW recom-
mends that, if you are faced with one of the
situations addressed by that text, you con-
tact or seek the assistance of a BMW
dealer's service center or another service
center or repair shop that employs trained
personnel that can perform maintenance
and repair work on your vehicle in accor-
dance with BMW specifications.
While BMW of North America LLC, at no
cost to you, will pay for repairs required by
the limited warranties provided with respect
to your vehicle and for maintenance under
the Maintenance Program during the appli-
cable warranty and maintenance coverage
periods, you are free to elect, both during
those periods and thereafter, to have main-
tenance and repair work provided by other
service centers or repair shops.
3. Where the Owner's Manual makes refer-
ence to parts and accessories having been
approved by BMW, those references are
intended to reflect that those parts and
accessories are recommended by BMW of
North America LLC. You may elect to use
other parts and accessories, but, if you do,
we recommend that you make sure that any
such parts and/or accessories are appropri-
ate for use on your vehicle.
4. At page 7, under the warranty section's dis-
cussion of homologation, where it states
that you “cannot lodge warranty claims for
your vehicle there,” the text should read
that you “may not be able to lodge warranty
claims for your vehicle there.”
5. At page 7, under the “Parts and Accesso-
ries” section, in the sixth sentence, the
word “cannot” should read “does not.”
6. At page 60, in the “Check and replace
safety belts” section, the text beginning,
“This should only be done by your service
center …” should be disregarded and the
following text should be read in lieu thereof:
“BMW recommends having this work per-
formed by a service center as it is important
that this safety feature functions properly.”
7. At page 60, under the heading: “Active
head restraint,” the paragraph beginning,
“Only attach accessories …” should be dis-
regarded and the following text should be
read in lieu thereof: “BMW recommends
that you attach accessories approved by
BMW to the seat or head restraint.”
8. At page 76, under the heading “Have the
malfunction corrected,” the text should be
disregarded and the following text should
be read in lieu thereof:
If the parking brake has been released man-
ually in response to a malfunction, it is
strongly recommended that a technician
return it to operation and that you have the
malfunction corrected at your BMW
dealer's service center or another service
center or repair shop that employs trained
personnel that can perform maintenance
and repair work on your vehicle in accor-
dance with BMW specifications.
9. At page 101, under the heading: “Special
windshield,” the paragraph beginning,
Online Edition for Part no. 01 40 2 954 285 - II/15
Page 19 of 263
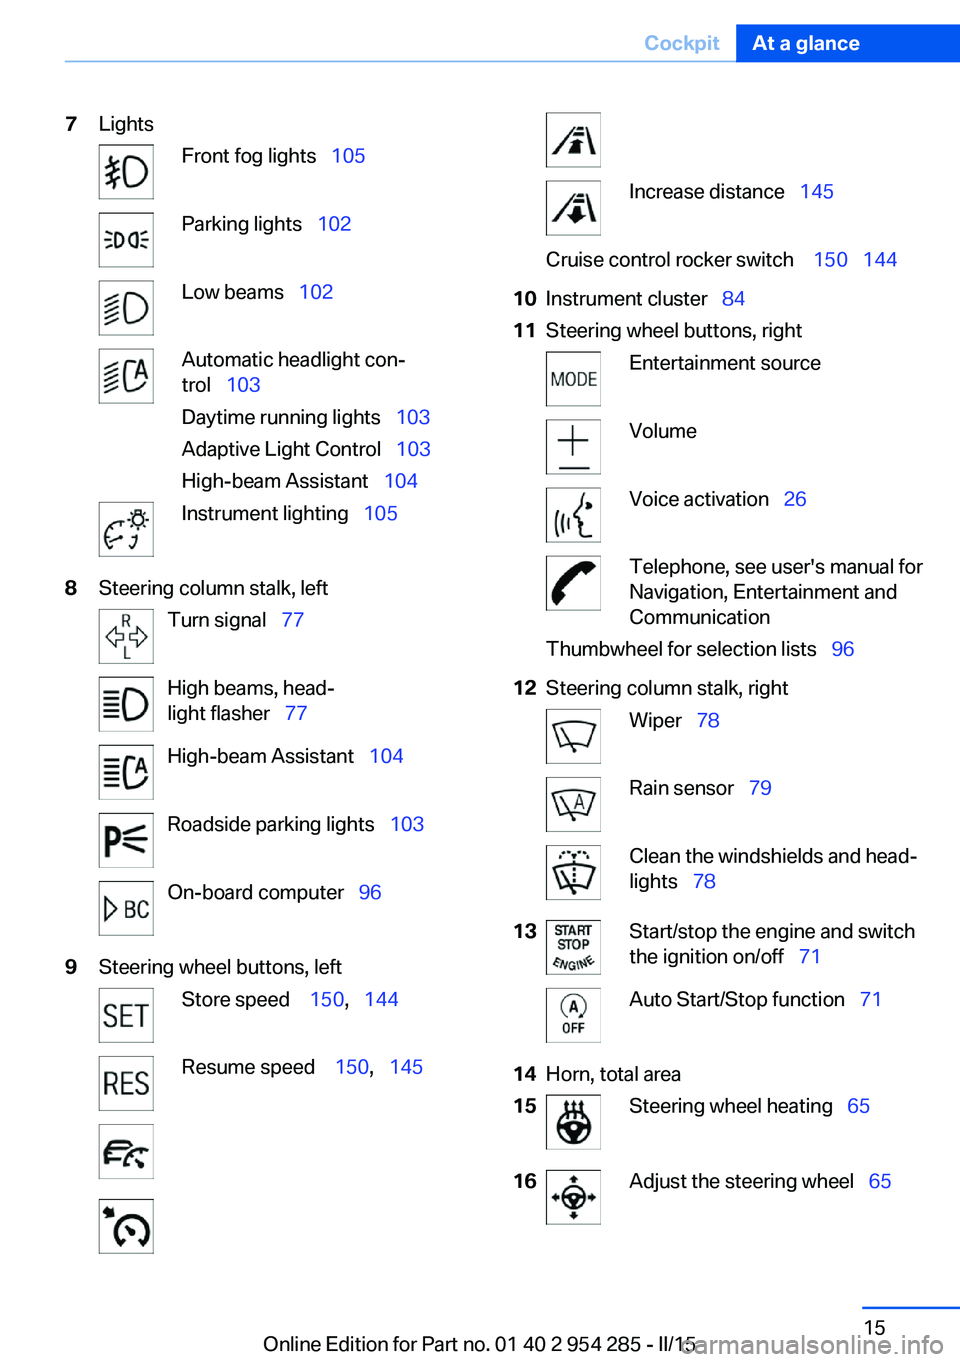
7LightsFront fog lights 105Parking lights 102Low beams 102Automatic headlight con‐
trol 103
Daytime running lights 103
Adaptive Light Control 103
High-beam Assistant 104Instrument lighting 1058Steering column stalk, leftTurn signal 77High beams, head‐
light flasher 77High-beam Assistant 104Roadside parking lights 103On-board computer 969Steering wheel buttons, leftStore speed 150, 144Resume speed 150, 145Increase distance 145Cruise control rocker switch 150 14410Instrument cluster 8411Steering wheel buttons, rightEntertainment sourceVolumeVoice activation 26Telephone, see user's manual for
Navigation, Entertainment and
CommunicationThumbwheel for selection lists 9612Steering column stalk, rightWiper 78Rain sensor 79Clean the windshields and head‐
lights 7813Start/stop the engine and switch
the ignition on/off 71Auto Start/Stop function 7114Horn, total area15Steering wheel heating 6516Adjust the steering wheel 65Seite 15CockpitAt a glance15
Online Edition for Part no. 01 40 2 954 285 - II/15
Page 76 of 263
stop, e.g., in traffic congestion or at traffic
lights. The ignition remains switched on. The
engine starts again automatically for driving
off.
Automatic mode After every start of the engine using the Start/
Stop button, the Auto Start/Stop function is in
the last selected state, refer to page 73.
When the Auto Start/Stop function is active, it
is available when the vehicle is traveling faster
than about 3 mph, approx. 5 km/h.
Engine stop
The engine is switched off automatically dur‐
ing a stop under the following conditions:
Steptronic transmission:▷The selector lever is in selector lever posi‐
tion D.▷The brake pedal remains pressed while the
vehicle is stationary or the vehicle is held
by Automatic Hold.▷The driver's safety belt is buckled or the
driver's door is closed.
The air flow from the air conditioner is reduced
when the engine is switched off.
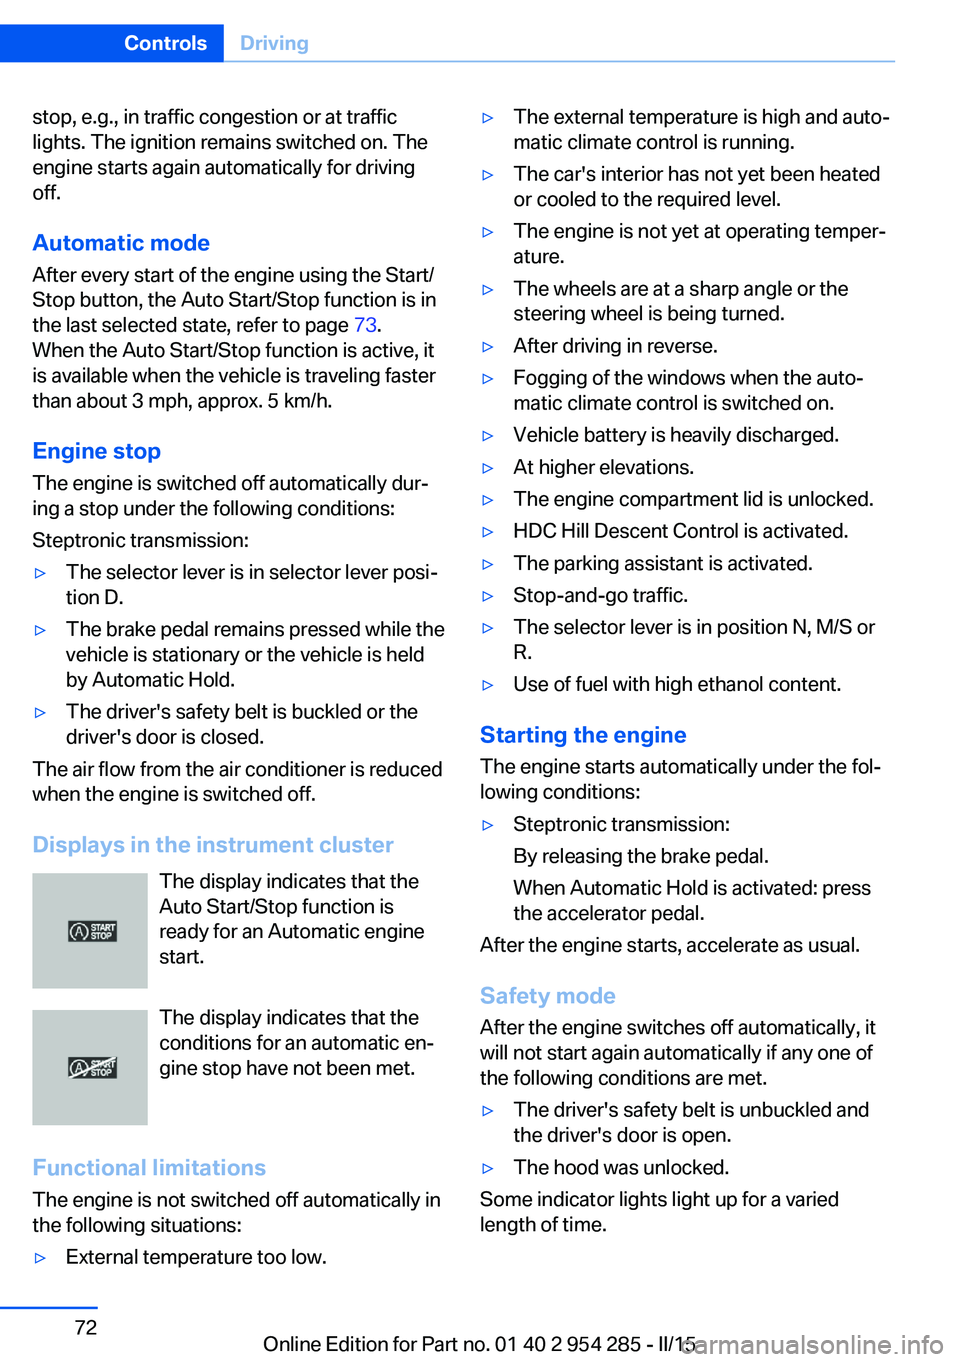
Displays in the instrument cluster The display indicates that the
Auto Start/Stop function is
ready for an Automatic engine
start.
The display indicates that the conditions for an automatic en‐
gine stop have not been met.
Functional limitations The engine is not switched off automatically in
the following situations:
▷External temperature too low.▷The external temperature is high and auto‐
matic climate control is running.▷The car's interior has not yet been heated
or cooled to the required level.▷The engine is not yet at operating temper‐
ature.▷The wheels are at a sharp angle or the
steering wheel is being turned.▷After driving in reverse.▷Fogging of the windows when the auto‐
matic climate control is switched on.▷Vehicle battery is heavily discharged.▷At higher elevations.▷The engine compartment lid is unlocked.▷HDC Hill Descent Control is activated.▷The parking assistant is activated.▷Stop-and-go traffic.▷The selector lever is in position N, M/S or
R.▷Use of fuel with high ethanol content.
Starting the engine
The engine starts automatically under the fol‐
lowing conditions:
▷Steptronic transmission:
By releasing the brake pedal.
When Automatic Hold is activated: press
the accelerator pedal.
After the engine starts, accelerate as usual.
Safety mode
After the engine switches off automatically, it
will not start again automatically if any one of
the following conditions are met.
▷The driver's safety belt is unbuckled and
the driver's door is open.▷The hood was unlocked.
Some indicator lights light up for a varied
length of time.
Seite 72ControlsDriving72
Online Edition for Part no. 01 40 2 954 285 - II/15
Page 78 of 263
At a glance
SettingApply parking brake and further secure
the vehicle if needed.
Set the parking brake firmly when parking; oth‐
erwise, the vehicle could roll. On steep upward
and downward inclines, further secure the ve‐
hicle, e.g., by turning the steering wheel in the
direction of the curb.◀
Take the remote control with you
Take the remote control with you when
leaving the vehicle so that children, e.g., can‐
not release the parking brake.◀
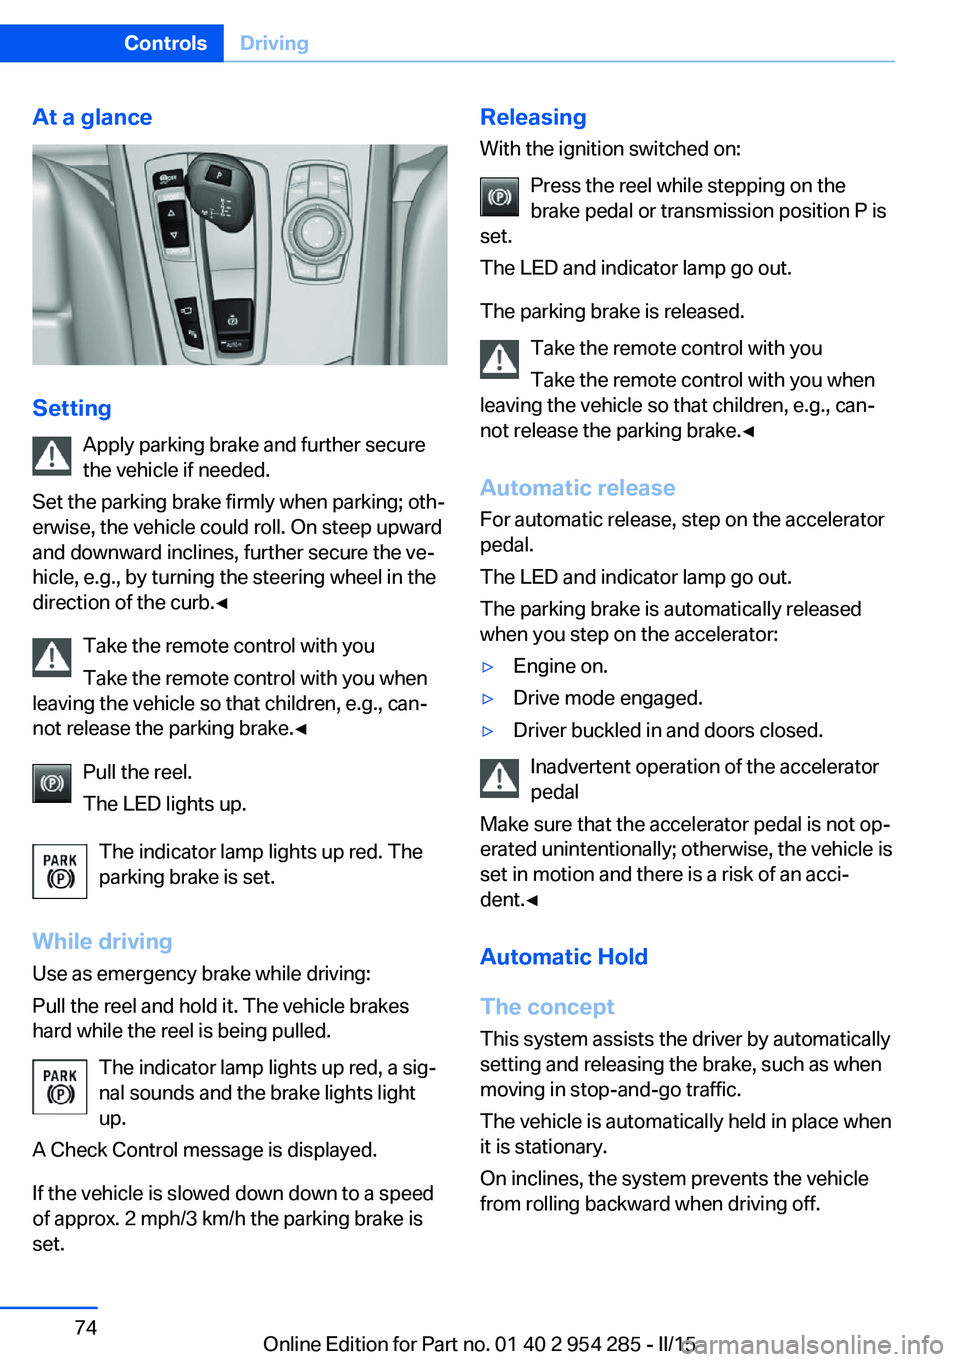
Pull the reel.
The LED lights up.
The indicator lamp lights up red. The
parking brake is set.
While driving
Use as emergency brake while driving:
Pull the reel and hold it. The vehicle brakes
hard while the reel is being pulled.
The indicator lamp lights up red, a sig‐
nal sounds and the brake lights light
up.
A Check Control message is displayed.
If the vehicle is slowed down down to a speed of approx. 2 mph/3 km/h the parking brake is
set.
Releasing
With the ignition switched on:
Press the reel while stepping on the
brake pedal or transmission position P is
set.
The LED and indicator lamp go out.
The parking brake is released. Take the remote control with you
Take the remote control with you when
leaving the vehicle so that children, e.g., can‐
not release the parking brake.◀
Automatic release For automatic release, step on the accelerator
pedal.
The LED and indicator lamp go out.
The parking brake is automatically released
when you step on the accelerator:▷Engine on.▷Drive mode engaged.▷Driver buckled in and doors closed.
Inadvertent operation of the accelerator
pedal
Make sure that the accelerator pedal is not op‐
erated unintentionally; otherwise, the vehicle is
set in motion and there is a risk of an acci‐
dent.◀
Automatic Hold
The concept This system assists the driver by automatically
setting and releasing the brake, such as when
moving in stop-and-go traffic.
The vehicle is automatically held in place when
it is stationary.
On inclines, the system prevents the vehicle
from rolling backward when driving off.
Seite 74ControlsDriving74
Online Edition for Part no. 01 40 2 954 285 - II/15
Page 94 of 263
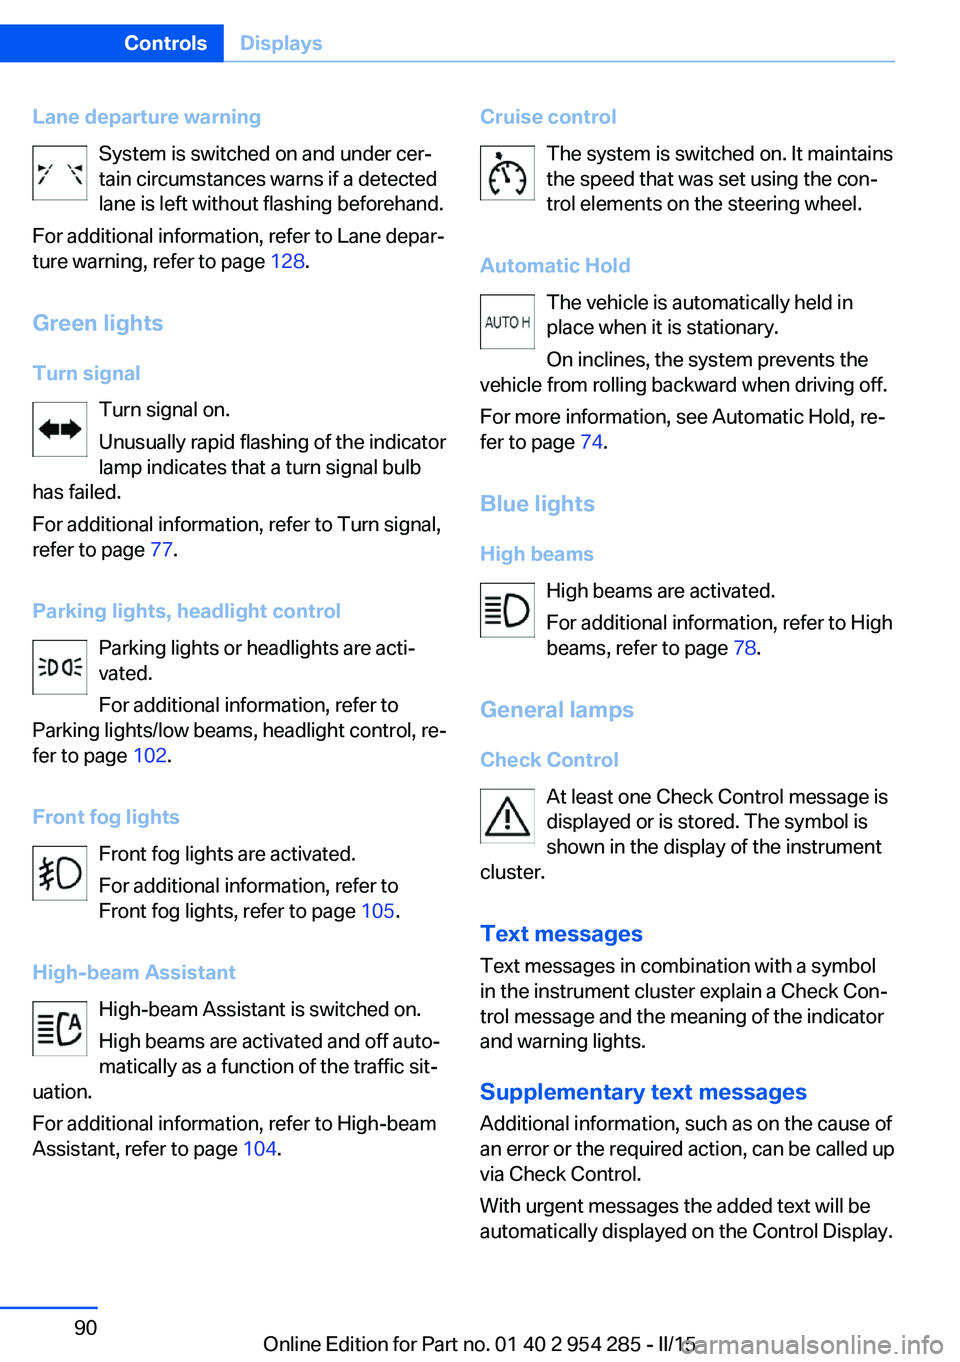
Lane departure warningSystem is switched on and under cer‐
tain circumstances warns if a detected
lane is left without flashing beforehand.
For additional information, refer to Lane depar‐
ture warning, refer to page 128.
Green lights Turn signal Turn signal on.
Unusually rapid flashing of the indicator
lamp indicates that a turn signal bulb
has failed.
For additional information, refer to Turn signal,
refer to page 77.
Parking lights, headlight control Parking lights or headlights are acti‐
vated.
For additional information, refer to
Parking lights/low beams, headlight control, re‐
fer to page 102.
Front fog lights Front fog lights are activated.
For additional information, refer to
Front fog lights, refer to page 105.
High-beam Assistant High-beam Assistant is switched on.
High beams are activated and off auto‐
matically as a function of the traffic sit‐
uation.
For additional information, refer to High-beam
Assistant, refer to page 104.Cruise control
The system is switched on. It maintains
the speed that was set using the con‐
trol elements on the steering wheel.
Automatic Hold The vehicle is automatically held in
place when it is stationary.
On inclines, the system prevents the
vehicle from rolling backward when driving off.
For more information, see Automatic Hold, re‐
fer to page 74.
Blue lights
High beams High beams are activated.
For additional information, refer to High
beams, refer to page 78.
General lamps
Check Control At least one Check Control message is
displayed or is stored. The symbol is
shown in the display of the instrument
cluster.
Text messagesText messages in combination with a symbol
in the instrument cluster explain a Check Con‐
trol message and the meaning of the indicator
and warning lights.
Supplementary text messages
Additional information, such as on the cause of
an error or the required action, can be called up
via Check Control.
With urgent messages the added text will be
automatically displayed on the Control Display.Seite 90ControlsDisplays90
Online Edition for Part no. 01 40 2 954 285 - II/15
Page 106 of 263
LightsVehicle features and optionsThis chapter describes all standard, country-
specific and optional features offered with the
series. It also describes features that are not
necessarily available in your car, e. g., due to
the selected options or country versions. This
also applies to safety-related functions and
systems. The respectively applicable country
provisions must be observed when using the
respective features and systems.
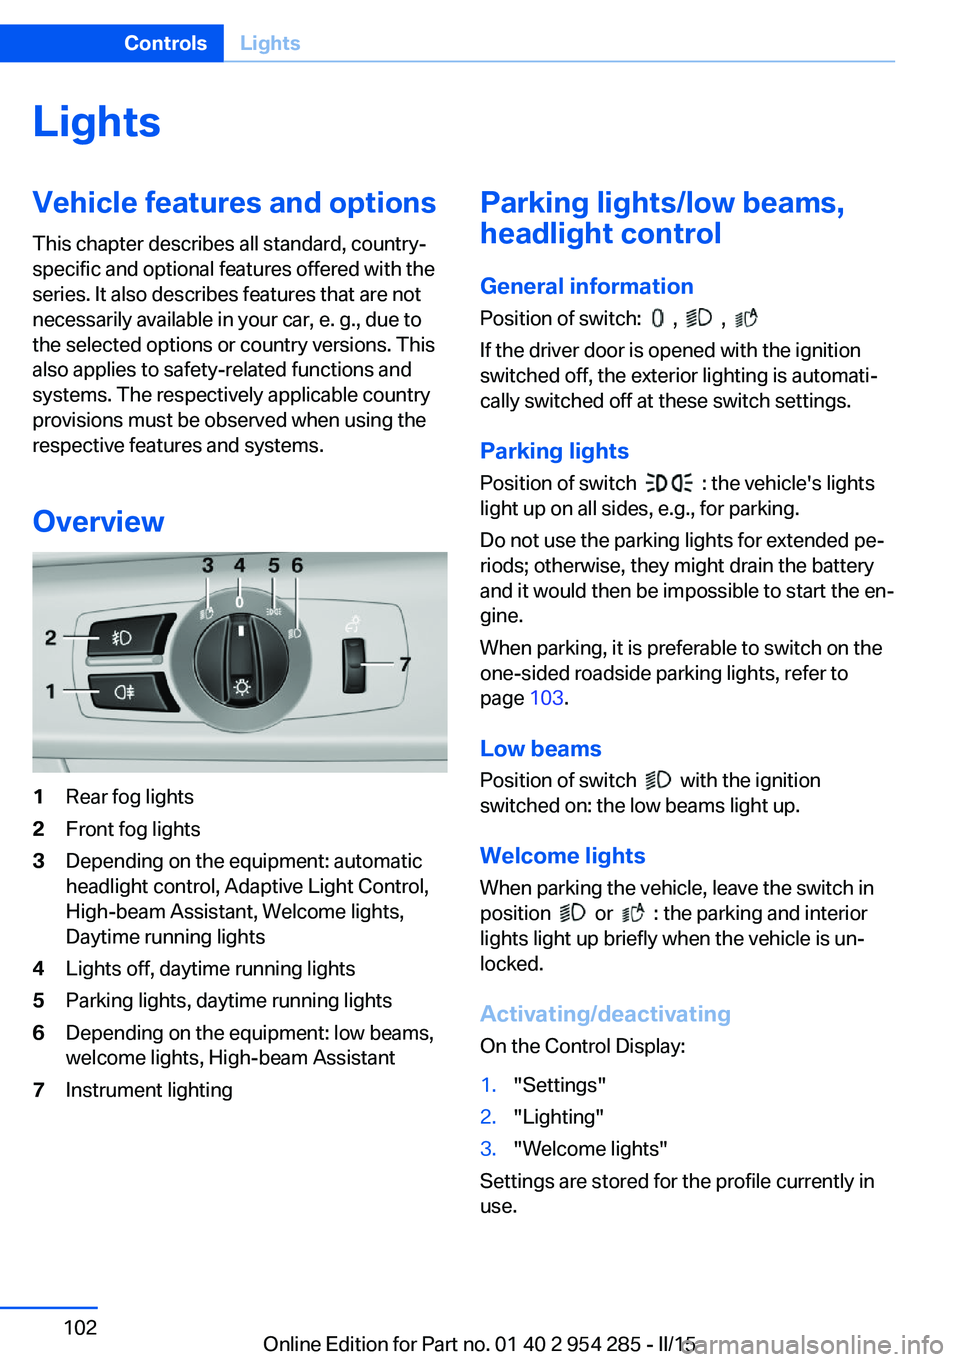
Overview1Rear fog lights2Front fog lights3Depending on the equipment: automatic
headlight control, Adaptive Light Control,
High-beam Assistant, Welcome lights,
Daytime running lights4Lights off, daytime running lights5Parking lights, daytime running lights6Depending on the equipment: low beams,
welcome lights, High-beam Assistant7Instrument lightingParking lights/low beams,
headlight control
General information
Position of switch:
, ,
If the driver door is opened with the ignition
switched off, the exterior lighting is automati‐
cally switched off at these switch settings.
Parking lights
Position of switch
: the vehicle's lights
light up on all sides, e.g., for parking.
Do not use the parking lights for extended pe‐
riods; otherwise, they might drain the battery
and it would then be impossible to start the en‐
gine.
When parking, it is preferable to switch on the
one-sided roadside parking lights, refer to
page 103.
Low beams Position of switch
with the ignition
switched on: the low beams light up.
Welcome lights
When parking the vehicle, leave the switch in
position
or : the parking and interior
lights light up briefly when the vehicle is un‐
locked.
Activating/deactivating
On the Control Display:
1."Settings"2."Lighting"3."Welcome lights"
Settings are stored for the profile currently in
use.
Seite 102ControlsLights102
Online Edition for Part no. 01 40 2 954 285 - II/15
Page 109 of 263
Switching the high beams on and off
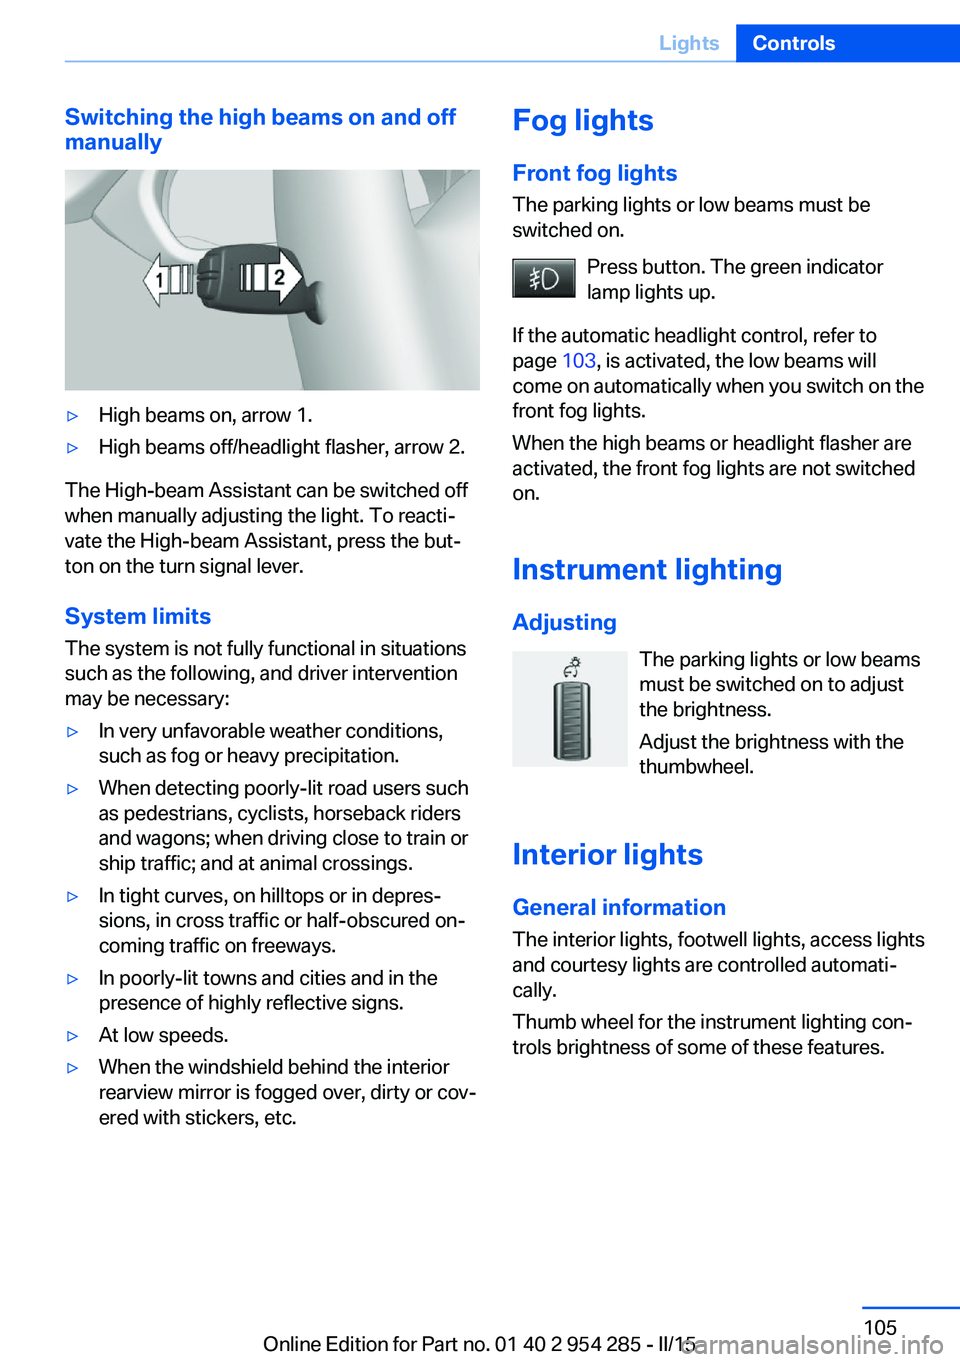
manually▷High beams on, arrow 1.▷High beams off/headlight flasher, arrow 2.
The High-beam Assistant can be switched off
when manually adjusting the light. To reacti‐
vate the High-beam Assistant, press the but‐
ton on the turn signal lever.
System limits
The system is not fully functional in situations such as the following, and driver intervention
may be necessary:
▷In very unfavorable weather conditions,
such as fog or heavy precipitation.▷When detecting poorly-lit road users such
as pedestrians, cyclists, horseback riders
and wagons; when driving close to train or
ship traffic; and at animal crossings.▷In tight curves, on hilltops or in depres‐
sions, in cross traffic or half-obscured on‐
coming traffic on freeways.▷In poorly-lit towns and cities and in the
presence of highly reflective signs.▷At low speeds.▷When the windshield behind the interior
rearview mirror is fogged over, dirty or cov‐
ered with stickers, etc.Fog lights
Front fog lights
The parking lights or low beams must be
switched on.
Press button. The green indicator
lamp lights up.
If the automatic headlight control, refer to
page 103, is activated, the low beams will
come on automatically when you switch on the
front fog lights.
When the high beams or headlight flasher are
activated, the front fog lights are not switched
on.
Instrument lighting Adjusting The parking lights or low beams
must be switched on to adjust
the brightness.
Adjust the brightness with the
thumbwheel.
Interior lights
General information The interior lights, footwell lights, access lights
and courtesy lights are controlled automati‐
cally.
Thumb wheel for the instrument lighting con‐
trols brightness of some of these features.Seite 105LightsControls105
Online Edition for Part no. 01 40 2 954 285 - II/15
Page 138 of 263
Driving stability control systemsVehicle features and optionsThis chapter describes all standard, country-
specific and optional features offered with the
series. It also describes features that are not
necessarily available in your car, e. g., due to
the selected options or country versions. This
also applies to safety-related functions and
systems. The respectively applicable country
provisions must be observed when using the
respective features and systems.
Antilock Brake System ABS ABS prevents locking of the wheels during
braking.
The vehicle contains its steering power even
during full brake applications, thus increasing
active safety.
ABS is operational every time you start the en‐
gine.
Brake assistant When you apply the brakes rapidly, this system
automatically produces the greatest possible
braking force boost. It reduces the braking dis‐
tance to a minimum during emergency stop.
This system utilizes all of the benefits provided
by ABS.
Do not reduce the pressure on the brake pedal
for the duration of the emergency stop.
Adaptive brake assistant In combination with the Active Cruise Control,
this system ensures that the brakes respond
even more rapidly when braking in critical sit‐
uations.Drive-off assistant
This system supports driving off on inclines.
The parking brake is not required.1.Hold the vehicle in place with the foot
brake.2.Release the foot brake and drive off with‐
out delay.
After the foot brake is released, the vehicle is
held in place for approx. 2 seconds.
Depending on the vehicle load or when a trailer
is used, the vehicle may roll back slightly.
Driving off without delay
After releasing the foot brake, start driv‐
ing without delay, since the drive-off assistant
will not hold the vehicle in place for more than
approx. 2 seconds and the vehicle will begin to
roll back.◀
DSC Dynamic Stability
Control
The concept DSC prevents traction loss in the power
wheels when driving off and accelerating.
DSC also recognizes unstable vehicle condi‐
tions such as fishtailing or nose-diving. Within
the physical limits DSC helps to keep the vehi‐
cle on a steady course by reducing engine
speed and by applying brakes to the individual
wheels.
Note Adjust your driving style to the situation
An appropriate driving style is always the
responsibility of the driver.
The laws of physics cannot be repealed, not
even with DSC.
Seite 134ControlsDriving stability control systems134
Online Edition for Part no. 01 40 2 954 285 - II/15
Page 157 of 263
Low objects already displayed, e.g., curbs, can
move into the blind area of the sensors before
or after a continuous tone sounds.
False warnings
PDC may issue a warning under the following conditions even though there is no obstacle
within the detection range:▷In heavy rain.▷When sensors are very dirty or covered
with ice.▷When sensors are covered in snow.▷On rough road surfaces.▷On uneven surfaces, such as speed
bumps.▷In large buildings with right angles and
smooth walls, e.g., in underground ga‐
rages.▷In automatic car washes.▷Through heavy pollution.▷Due to other ultrasound sources, e.g.,
sweeping machines, high pressure steam
cleaners or neon lights.
Malfunction
A Check Control message is displayed.
The range of the sensors is shown as a shaded
area on the Control Display.
PDC has failed. Have the system checked.
To ensure full functionality:
▷Keep the sensors clean and free of ice.▷dimmedDo not put any stickers on sen‐
sors.▷When using high-pressure washers, do not
spray the sensors for long periods and
maintain a distance of at least 12 in/30 cm.Surround View
The concept Surround View comprises various camera as‐
sistance systems that help the driver when
parking, maneuvering, and at complex exits
and intersections.▷Rearview camera, refer to page 153▷Side View, refer to page 156.▷Top View, refer to page 157.
Rearview camera
The concept The rearview camera provides assistance in
parking and maneuvering backwards. The area
behind the vehicle is shown on the Control
Display.
Hints Check the traffic situation as well
Check the traffic situation around the ve‐
hicle with your own eyes. Otherwise, an acci‐
dent could result from road users or objects
that are not lidtured by the camera.◀
At a glance
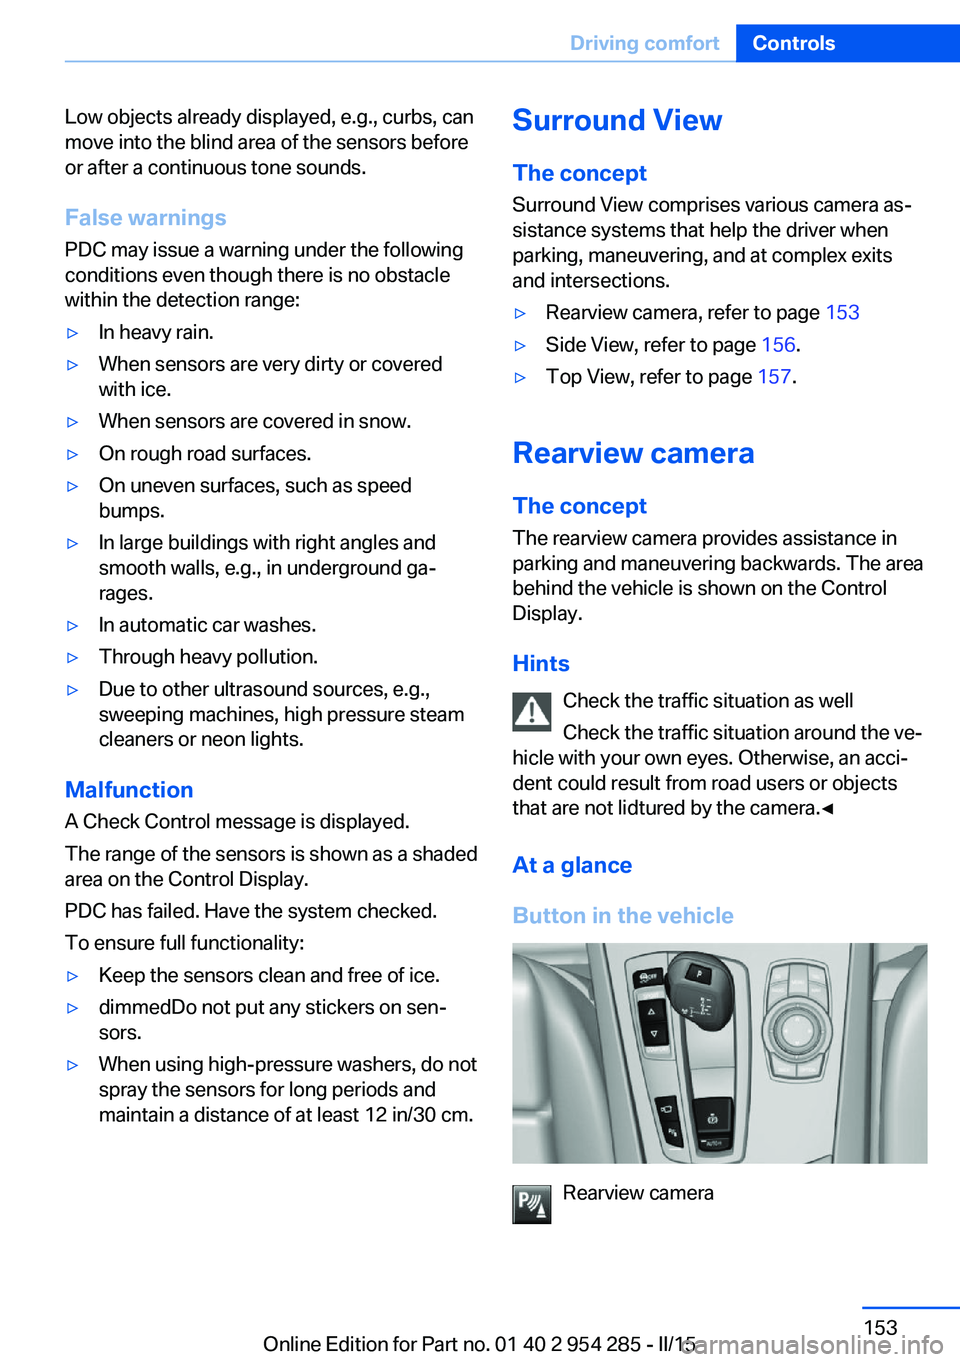
Button in the vehicle
Rearview camera
Seite 153Driving comfortControls153
Online Edition for Part no. 01 40 2 954 285 - II/15
Page 158 of 263
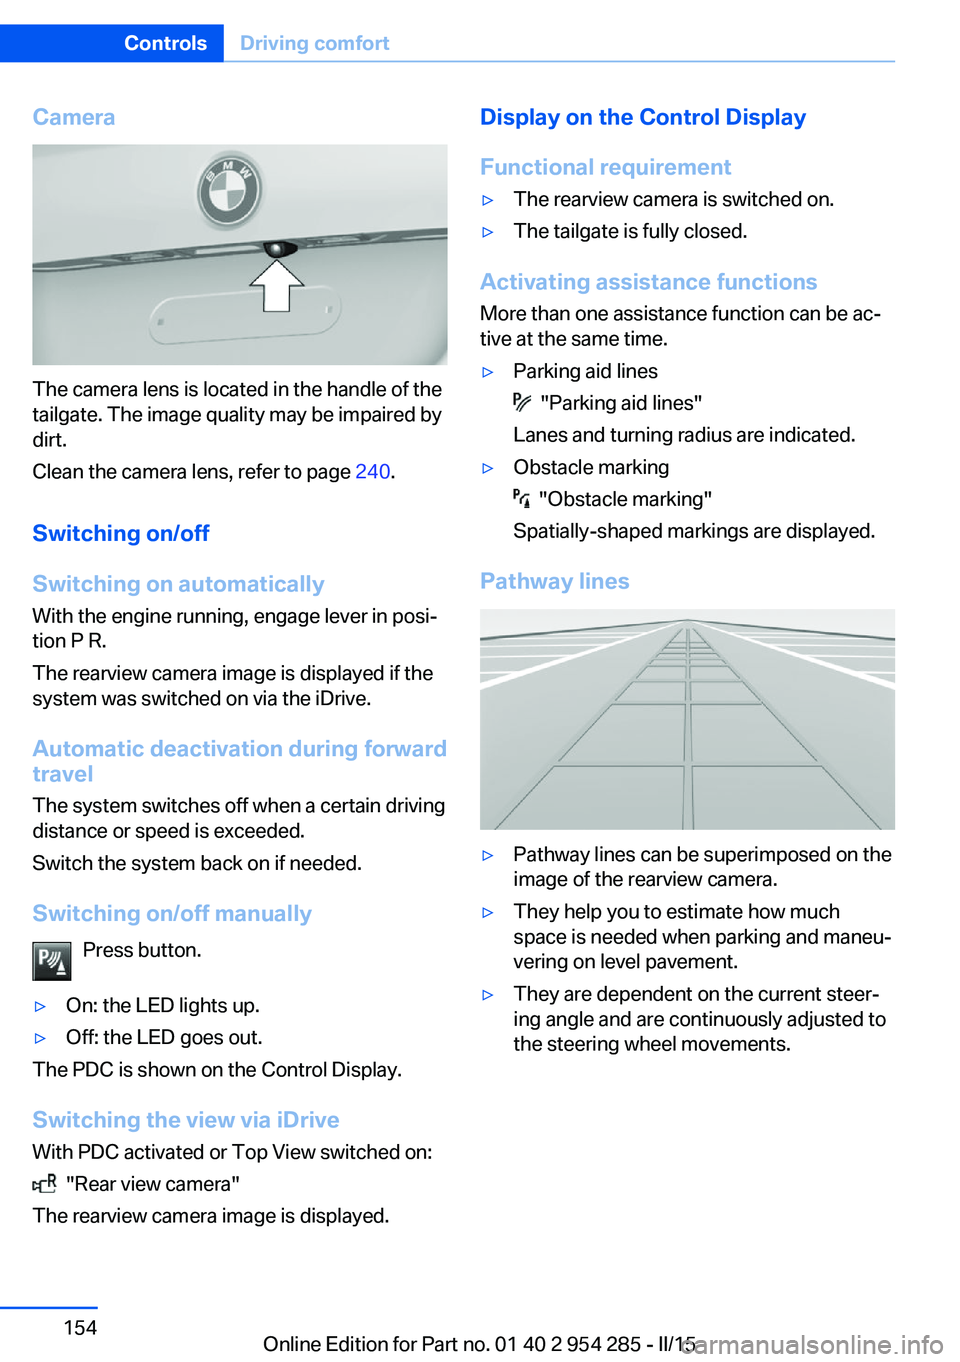
Camera
The camera lens is located in the handle of the
tailgate. The image quality may be impaired by
dirt.
Clean the camera lens, refer to page 240.
Switching on/off
Switching on automatically With the engine running, engage lever in posi‐
tion P R.
The rearview camera image is displayed if the
system was switched on via the iDrive.
Automatic deactivation during forward
travel
The system switches off when a certain driving
distance or speed is exceeded.
Switch the system back on if needed.
Switching on/off manually Press button.
▷On: the LED lights up.▷Off: the LED goes out.
The PDC is shown on the Control Display.
Switching the view via iDrive With PDC activated or Top View switched on:
"Rear view camera"
The rearview camera image is displayed.
Display on the Control Display
Functional requirement▷The rearview camera is switched on.▷The tailgate is fully closed.
Activating assistance functions
More than one assistance function can be ac‐
tive at the same time.
▷Parking aid lines
"Parking aid lines"
Lanes and turning radius are indicated.
▷Obstacle marking
"Obstacle marking"
Spatially-shaped markings are displayed.
Pathway lines
▷Pathway lines can be superimposed on the
image of the rearview camera.▷They help you to estimate how much
space is needed when parking and maneu‐
vering on level pavement.▷They are dependent on the current steer‐
ing angle and are continuously adjusted to
the steering wheel movements.Seite 154ControlsDriving comfort154
Online Edition for Part no. 01 40 2 954 285 - II/15