door lock BMW 525XI SEDAN 2006 User Guide
[x] Cancel search | Manufacturer: BMW, Model Year: 2006, Model line: 525XI SEDAN, Model: BMW 525XI SEDAN 2006Pages: 259, PDF Size: 8.9 MB
Page 43 of 259
Controls
41Reference
At a glance
Driving tips
Communications
Navigation
Entertainment
Mobility
You can close the windows in the same manner
by pulling the switch.
Separate switches for the rear windows are
located in the rear.
For information on using the convenience oper-
ation at the door lock or with the remote control,
refer to page31 or32.
For information on comfort closing with comfort
access, refer to page39.
After switching off ignition
You can still operate the windows with the
remote control removed or the ignition
switched off for approx. 1 minute, as long as
neither of the front doors has been opened.
Pinch protection system
If the closing force rises beyond a predefined
threshold during closing, the system will imme-
diately stop moving the window prior to lower-
ing it slightly.
Despite the pinch protection system,
inspect the window's travel path prior to
closing it, as the safety system might fail to
detect certain kinds of obstructions, such as
thin objects, and the window would continue
closing.
Pulling the switch beyond the resistance point
and holding it limits the response of the pinch
protection system. In this case, if the closing
force exceeds a defined threshold, the window
will only open a little.
If the switch is pulled past the resistance point
again within approx. 4 seconds, the pinch pro-
tection system will be deactivated.
Do not install any accessories in the range of
movement of the windows, as otherwise the
pinch protection system will be impaired.<
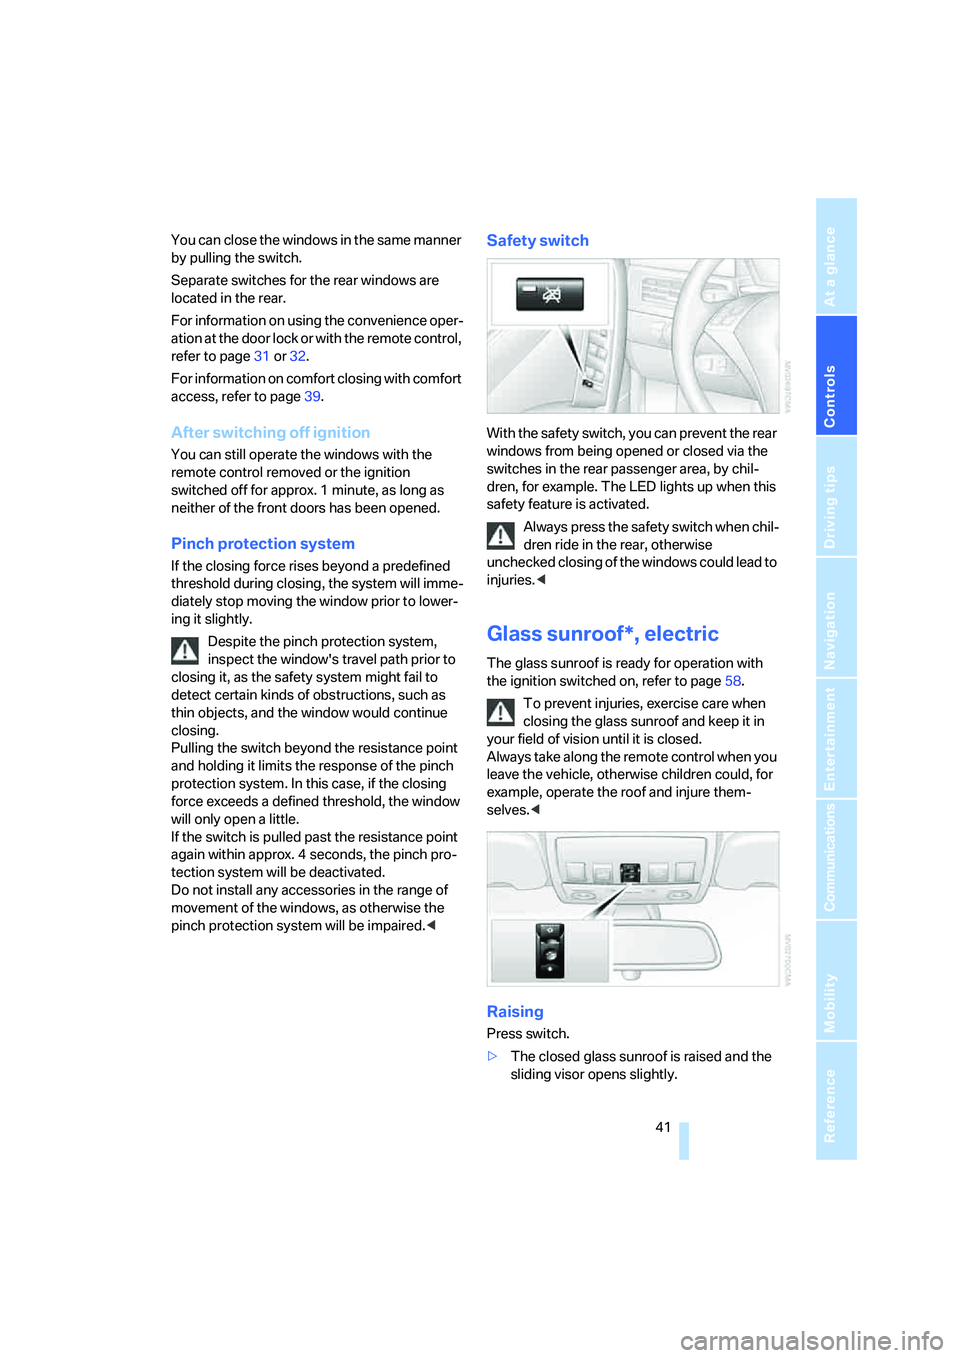
Safety switch
With the safety switch, you can prevent the rear
windows from being opened or closed via the
switches in the rear passenger area, by chil-
dren, for example. The LED lights up when this
safety feature is activated.
Always press the safety switch when chil-
dren ride in the rear, otherwise
unchecked closing of the windows could lead to
injuries.<
Glass sunroof*, electric
The glass sunroof is ready for operation with
the ignition switched on, refer to page58.
To prevent injuries, exercise care when
closing the glass sunroof and keep it in
your field of vision until it is closed.
Always take along the remote control when you
leave the vehicle, otherwise children could, for
example, operate the roof and injure them-
selves.<
Raising
Press switch.
>The closed glass sunroof is raised and the
sliding visor opens slightly.
Page 44 of 259
Opening and closing
42 >The opened glass sunroof automatically
moves into the raised position. The sliding
visor remains completely open.
Do not use force to close the headliner
insert with the glass sunroof in its raised
position, otherwise the mechanism will be dam-
aged.<
Opening, closing
>Press switch back to the resistance point.
The glass sunroof and the sliding visor open
together for as long as you hold the switch
in this position.
>Press switch back past the resistance point.
The glass sunroof and the sliding visor open
automatically. Briefly press the switch again
to stop the opening movement.
In a similar manner, the glass sunroof closes
when you slide the switch forward. The sliding
visor remains open and can be closed by hand.
For information on using the convenience oper-
ation at the door lock or with the remote control,
refer to page31 or32.
For information on comfort closing with comfort
access, refer to page39.
Automatic opening and closing
Press the switch past the resistance point.
The following movements are also automatic:
>When the sunroof is open, press the switch
in the lifting direction: the sunroof is raised
all the way.
>When the sunroof is raised, press the
switch in the opening direction: the sunroof
is opened all the way.
Pressing the switch again stops the motion.
Pinch protection system
If the glass sunroof encounters resistance when
closing from roughly the center of the roof
opening or when closing from the raised posi-
tion, the closing action is interrupted and the
glass sunroof reopens a short way.Despite the pinch protection system,
inspect the sunroof's travel path prior to
closing it, as the safety system might fail to
detect certain kinds of obstructions, such as
very thin objects, and the sunroof would con-
tinue closing.
Pressing the switch beyond the resistance
point and holding it there deactivates the pinch
protection system.<
Following interruptions in electrical
power supply
After a power loss, the sunroof may only
respond to the lift command. The system must
be initialized. BMW recommends having this
work done by your BMW center.
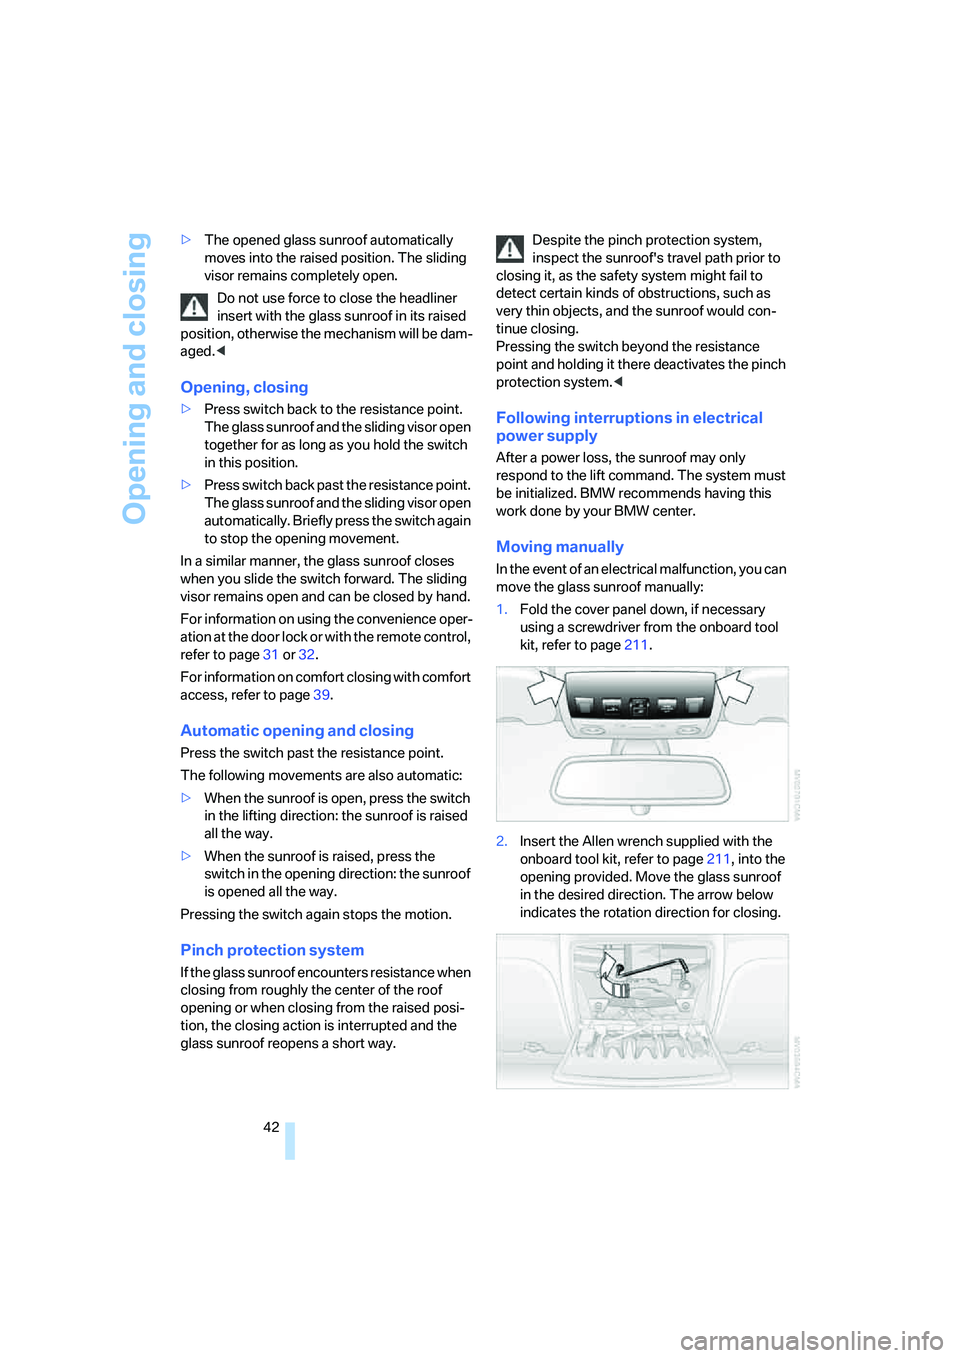
Moving manually
In the event of an electrical malfunction, you can
move the glass sunroof manually:
1.Fold the cover panel down, if necessary
using a screwdriver from the onboard tool
kit, refer to page211.
2.Insert the Allen wrench supplied with the
onboard tool kit, refer to page211, into the
opening provided. Move the glass sunroof
in the desired direction. The arrow below
indicates the rotation direction for closing.
Page 45 of 259
Controls
43Reference
At a glance
Driving tips
Communications
Navigation
Entertainment
Mobility
Sports Wagon:
Panorama glass sunroof
The panorama glass sunroof is ready for opera-
tion with the ignition switched on, refer to
page58.
To prevent injuries, exercise care when
closing the panorama glass sunroof and
keep it in your field of vision until it is closed.
Always take along the remote control when you
leave the vehicle, otherwise children could, for
example, operate the roof and injure them-
selves.<
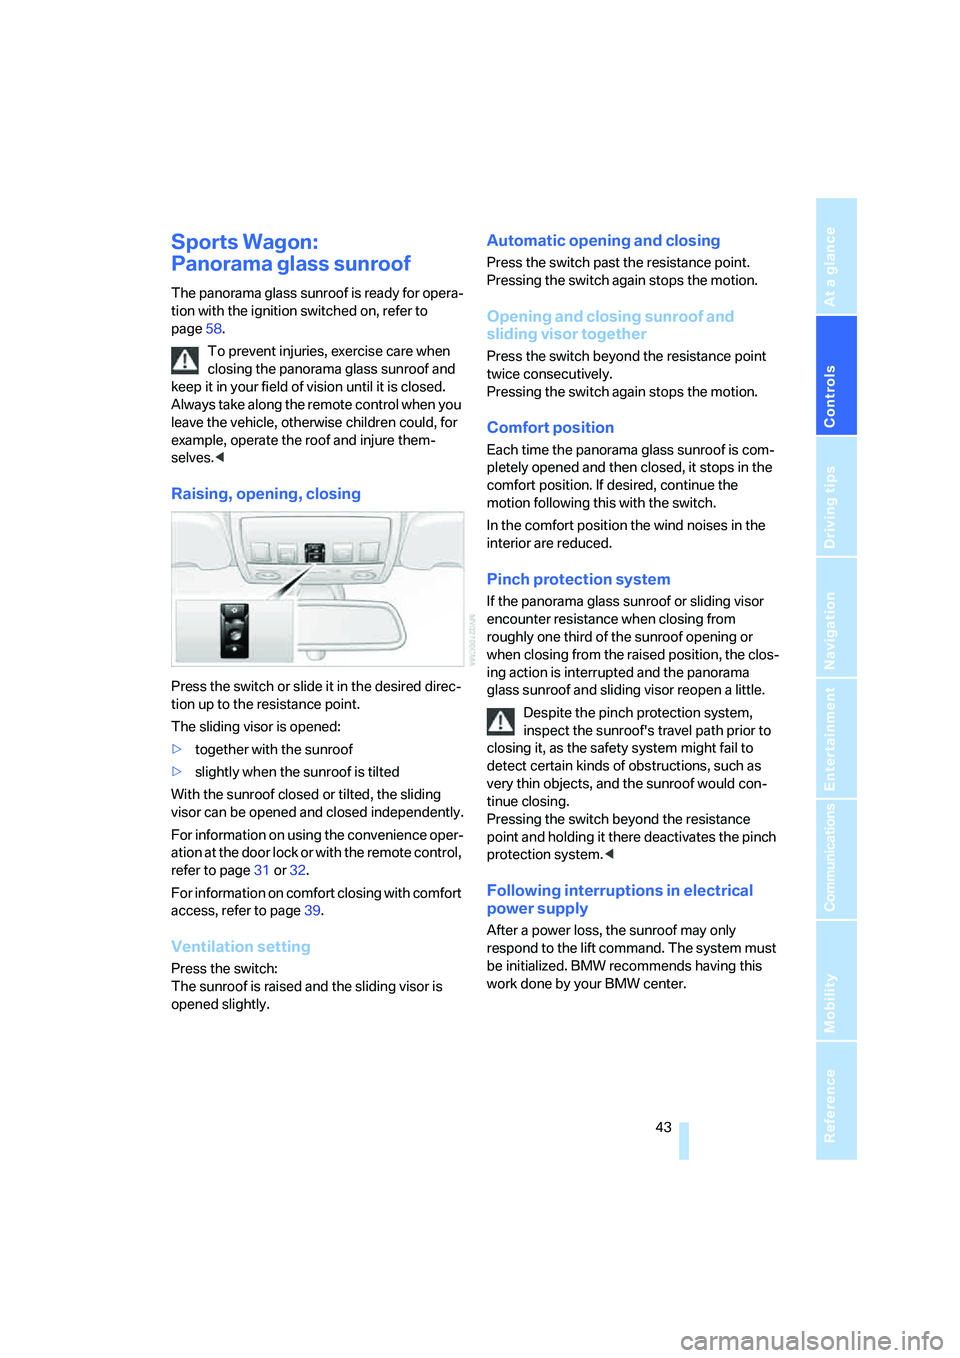
Raising, opening, closing
Press the switch or slide it in the desired direc-
tion up to the resistance point.
The sliding visor is opened:
>together with the sunroof
>slightly when the sunroof is tilted
With the sunroof closed or tilted, the sliding
visor can be opened and closed independently.
For information on using the convenience oper-
ation at the door lock or with the remote control,
refer to page31 or32.
For information on comfort closing with comfort
access, refer to page39.
Ventilation setting
Press the switch:
The sunroof is raised and the sliding visor is
opened slightly.
Automatic opening and closing
Press the switch past the resistance point.
Pressing the switch again stops the motion.
Opening and closing sunroof and
sliding visor together
Press the switch beyond the resistance point
twice consecutively.
Pressing the switch again stops the motion.
Comfort position
Each time the panorama glass sunroof is com-
pletely opened and then closed, it stops in the
comfort position. If desired, continue the
motion following this with the switch.
In the comfort position the wind noises in the
interior are reduced.
Pinch protection system
If the panorama glass sunroof or sliding visor
encounter resistance when closing from
roughly one third of the sunroof opening or
when closing from the raised position, the clos-
ing action is interrupted and the panorama
glass sunroof and sliding visor reopen a little.
Despite the pinch protection system,
inspect the sunroof's travel path prior to
closing it, as the safety system might fail to
detect certain kinds of obstructions, such as
very thin objects, and the sunroof would con-
tinue closing.
Pressing the switch beyond the resistance
point and holding it there deactivates the pinch
protection system.<
Following interruptions in electrical
power supply
After a power loss, the sunroof may only
respond to the lift command. The system must
be initialized. BMW recommends having this
work done by your BMW center.
Page 49 of 259
Controls
47Reference
At a glance
Driving tips
Communications
Navigation
Entertainment
Mobility
The upper hips and spinal column receive sup-
plementary support to help you maintain a
relaxed, upright sitting position.
>Increase or decrease curvature: push
switch forward or back.
>Shift curvature up or down: push switch up
or down.
Adjusting active backrest width*
First set a comfortable backrest width, see
above. Based on the backrest width set, the lat-
eral support is automatically adapted to the cur-
rent driving situation.
The adaptation of the backrest width and the
speed of the adjustment vary depending on the
program. You can select from among three pro-
grams from comfort to sport.
Press program button once:
>"Comfort" program: one LED
>"Normal" program: two LEDs
>"Sport" program: three LEDs
To switch off: press button longer.
Easy entry/exit*
To facilitate entry and exit, the backrest width
temporarily opens all the way.
Seat, mirror and steering
wheel memory*
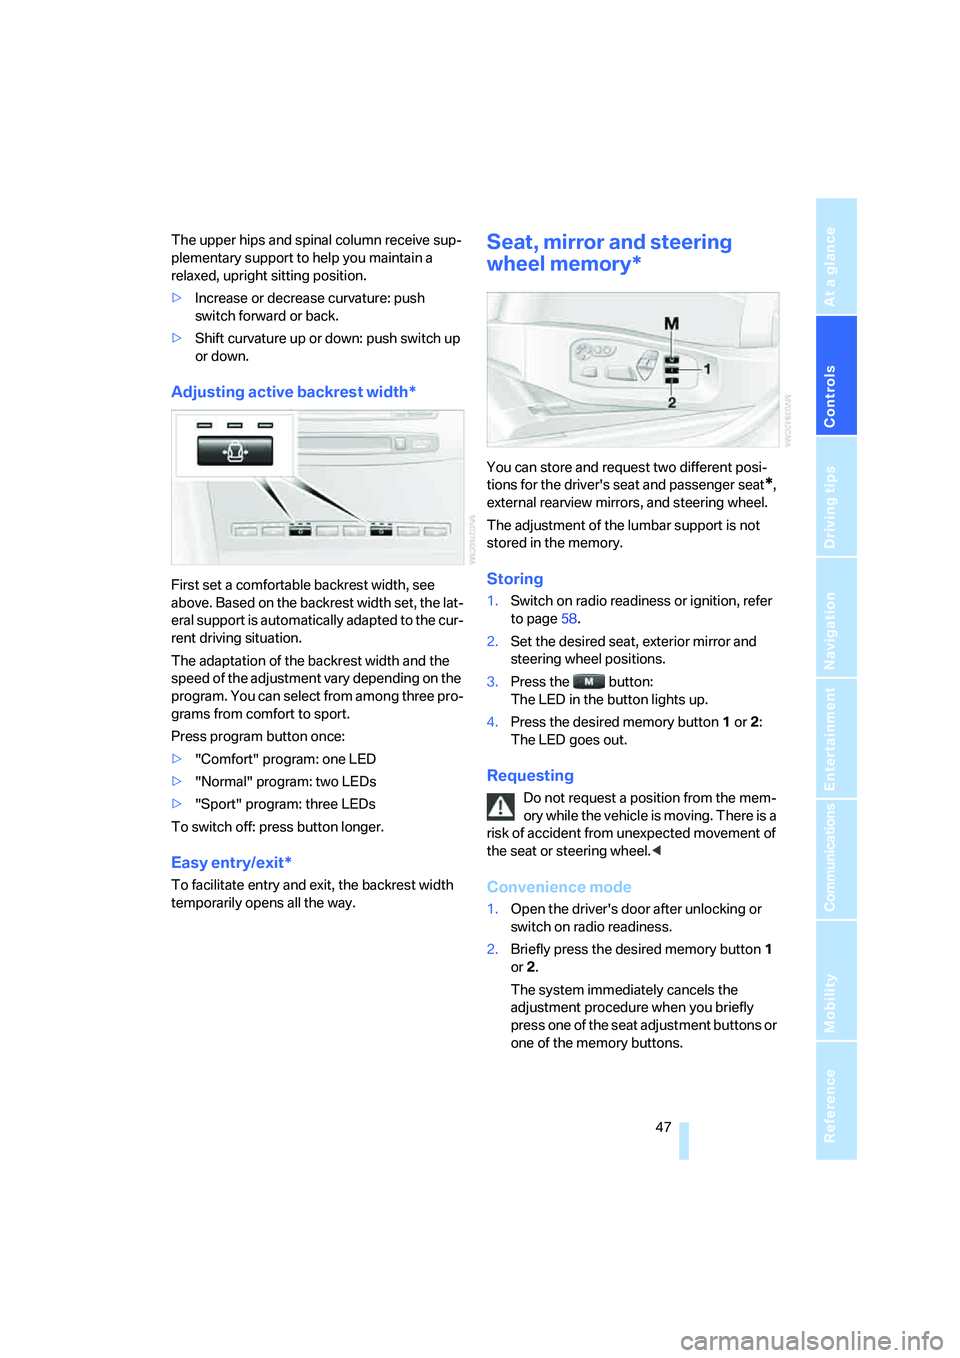
You can store and request two different posi-
tions for the driver's seat and passenger seat
*,
external rearview mirrors, and steering wheel.
The adjustment of the lumbar support is not
stored in the memory.
Storing
1.Switch on radio readiness or ignition, refer
to page58.
2.Set the desired seat, exterior mirror and
steering wheel positions.
3.Press the button:
The LED in the button lights up.
4.Press the desired memory button1 or2:
The LED goes out.
Requesting
Do not request a position from the mem-
ory while the vehicle is moving. There is a
risk of accident from unexpected movement of
the seat or steering wheel.<
Convenience mode
1.Open the driver's door after unlocking or
switch on radio readiness.
2.Briefly press the desired memory button1
or2.
The system immediately cancels the
adjustment procedure when you briefly
press one of the seat adjustment buttons or
one of the memory buttons.
Page 50 of 259
Adjustments
48
Safety feature
1.Close the driver's door and switch the igni-
tion on or off.
2.Press the desired memory button1 or2
and maintain pressure until the adjustment
process has been completed.
If the button was pressed inadvertently:
press the button again; the LED goes out.
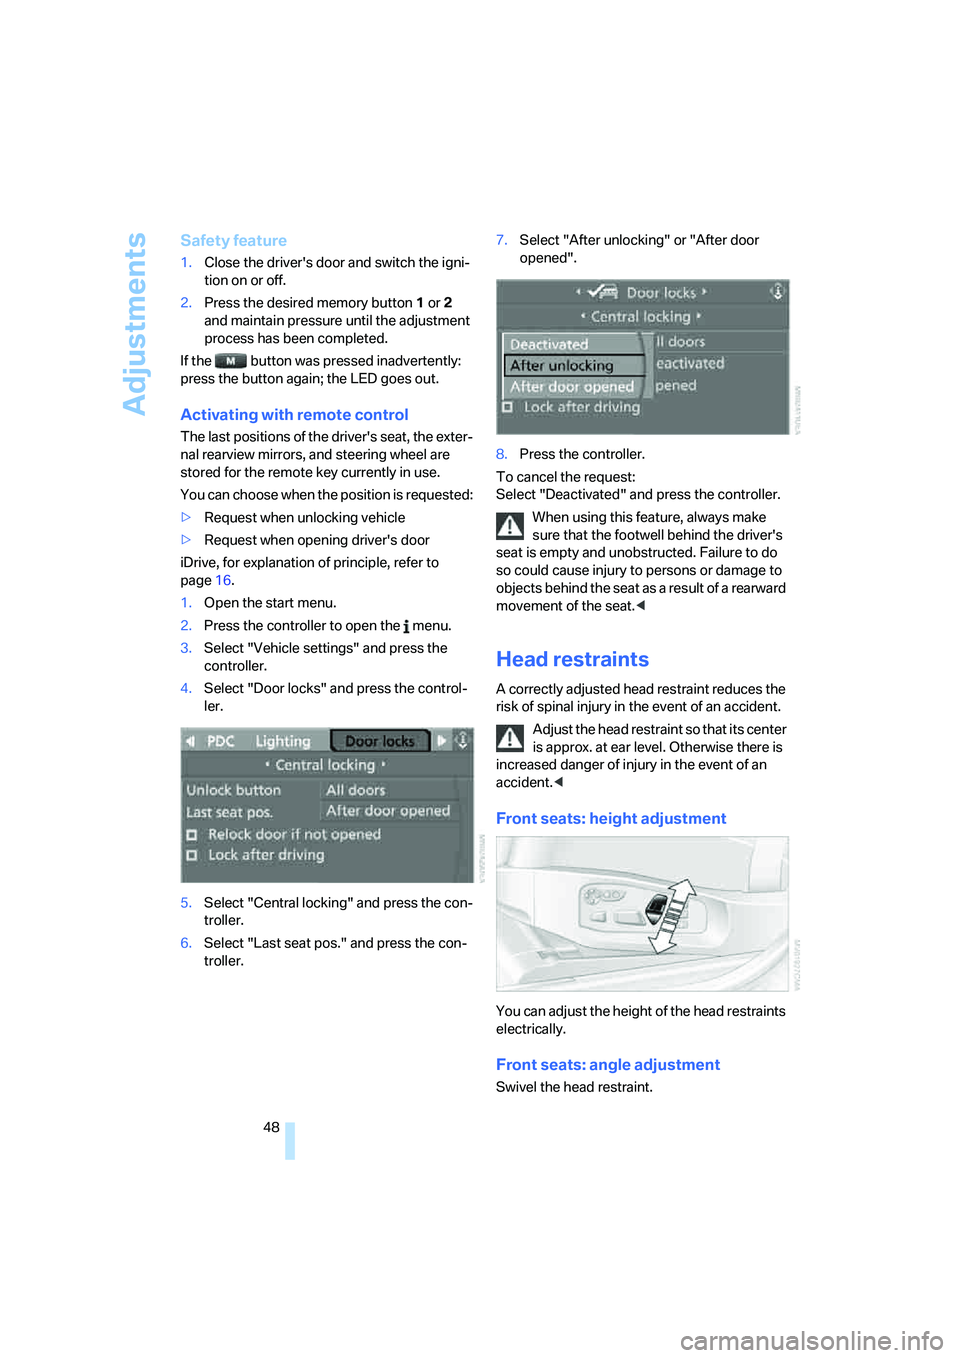
Activating with remote control
The last positions of the driver's seat, the exter-
nal rearview mirrors, and steering wheel are
stored for the remote key currently in use.
You can choose when the position is requested:
>Request when unlocking vehicle
>Request when opening driver's door
iDrive, for explanation of principle, refer to
page16.
1.Open the start menu.
2.Press the controller to open the menu.
3.Select "Vehicle settings" and press the
controller.
4.Select "Door locks" and press the control-
ler.
5.Select "Central locking" and press the con-
troller.
6.Select "Last seat pos." and press the con-
troller.7.Select "After unlocking" or "After door
opened".
8.Press the controller.
To cancel the request:
Select "Deactivated" and press the controller.
When using this feature, always make
sure that the footwell behind the driver's
seat is empty and unobstructed. Failure to do
so could cause injury to persons or damage to
objects behind the seat as a result of a rearward
movement of the seat.<
Head restraints
A correctly adjusted head restraint reduces the
risk of spinal injury in the event of an accident.
Adjust the head restraint so that its center
is approx. at ear level. Otherwise there is
increased danger of injury in the event of an
accident.<
Front seats: height adjustment
You can adjust the height of the head restraints
electrically.
Front seats: angle adjustment
Swivel the head restraint.
Page 56 of 259
Transporting children safely
54
Transporting children safely
The right place for children
Do not leave children unattended in the
vehicle, otherwise they could endanger
themselves and other persons, e.g. by opening
the doors.<
Children always in the rear
Accident research shows that the safest place
for children is on the back seat.
Children younger than 13 years of age or
with a height under 5 ft/150 cm may only
be transported in the rear in child restraint sys-
tems which correspond to the age, weight and
height of the child. Otherwise there is an
increased danger of injury in an accident.<
Children 13 years of age or older must wear a
safety belt as soon as a suitable child restraint
system can no longer be used due to their age,
size and weight.
With the exception of the driver's seat, all seats
in your BMW comply with the recommenda-
tions of the standard SAE J1819 for the safe
securing of child restraint systems in motor
vehicles.
Exception for front passenger seat
Should it be necessary to use a child
restraint system on the front passenger
seat, the front and side airbag on the passenger
side must be deactivated. Otherwise, there is
an increased risk of injury for the child if the air-
bags are triggered, even with a child restraint
s ystem. Your BMW center will be glad to advis e
you.<
For more information on automatic deactivation
of the front passenger airbags, refer to page95.
Installing child restraint
systems
Observe the child restraint system manu-
facturer's instructions for selection,
installation and use of the child restraint sys-
tems. Otherwise the degree of protection may
be reduced.<
Backrest width* on front passenger
seat
Before mounting a child restraint system
on the front passenger seat, the backrest
width adjustment must be open completely.
After mounting the child's seat, no memory
position may be called up and the active back-
rest width adjustment must be deactivated,
otherwise the stability of the child's seat on the
front passenger seat is limited.<
1.After unlocking the vehicle, place on the
front passenger seat and close the door to
call up the memory position.
2.Completely open the backrest width adjust-
ment, refer to page46.
3.Deactivate active backrest width adjust-
ment, refer to page47.
4.Install child's seat.
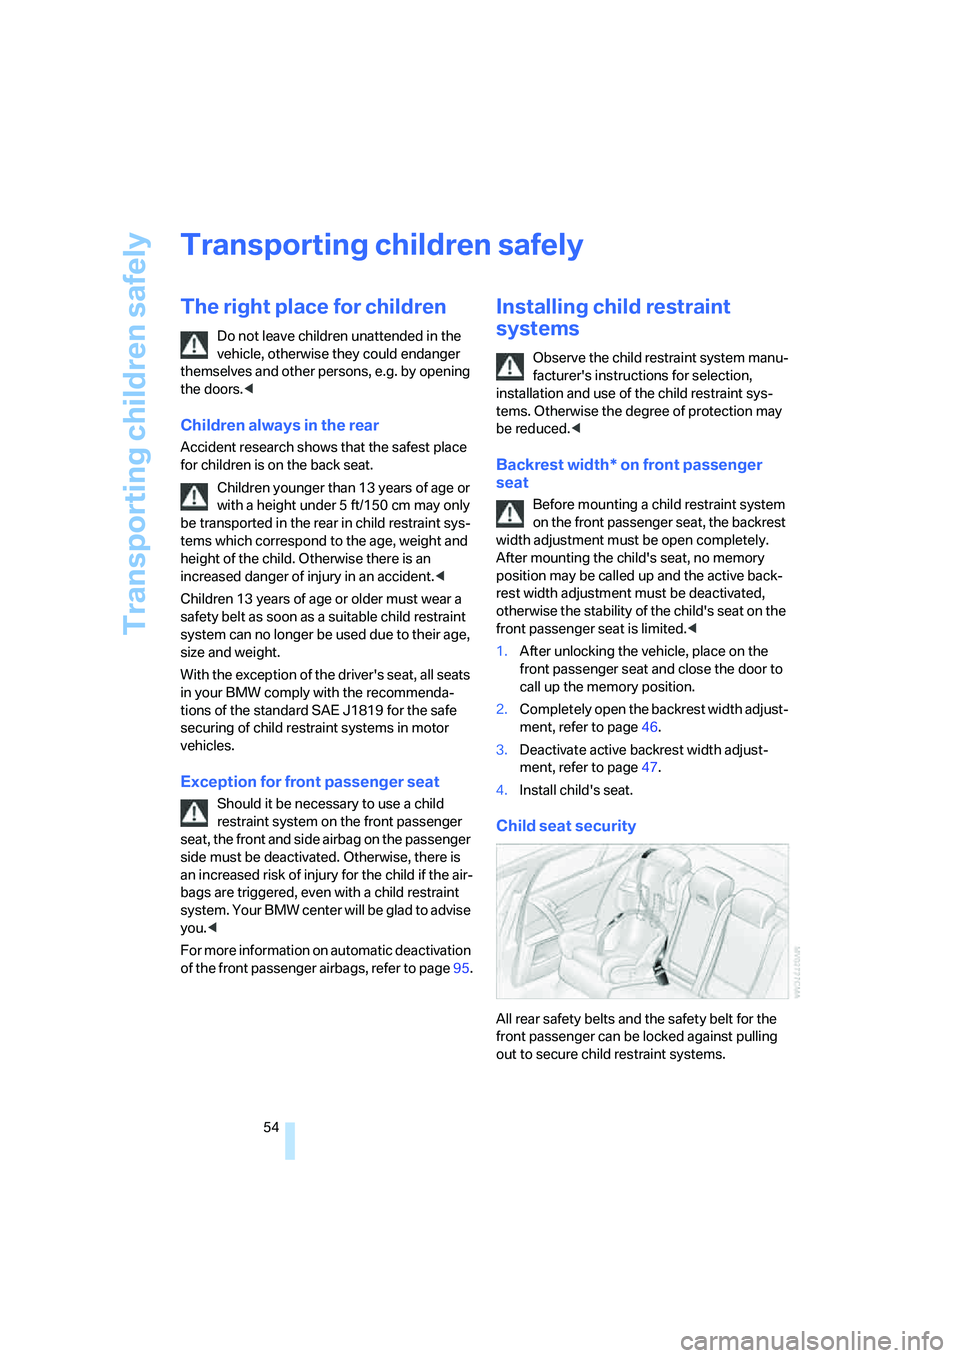
Child seat security
All rear safety belts and the safety belt for the
front passenger can be locked against pulling
out to secure child restraint systems.
Page 59 of 259
Controls
57Reference
At a glance
Driving tips
Communications
Navigation
Entertainment
Mobility
On trips
If the vehicle is equipped with rear side
airbags, make sure that children do not
lean out of the child's seat towards the door
panels. Otherwise injuries can be caused if the
side airbags are triggered.<
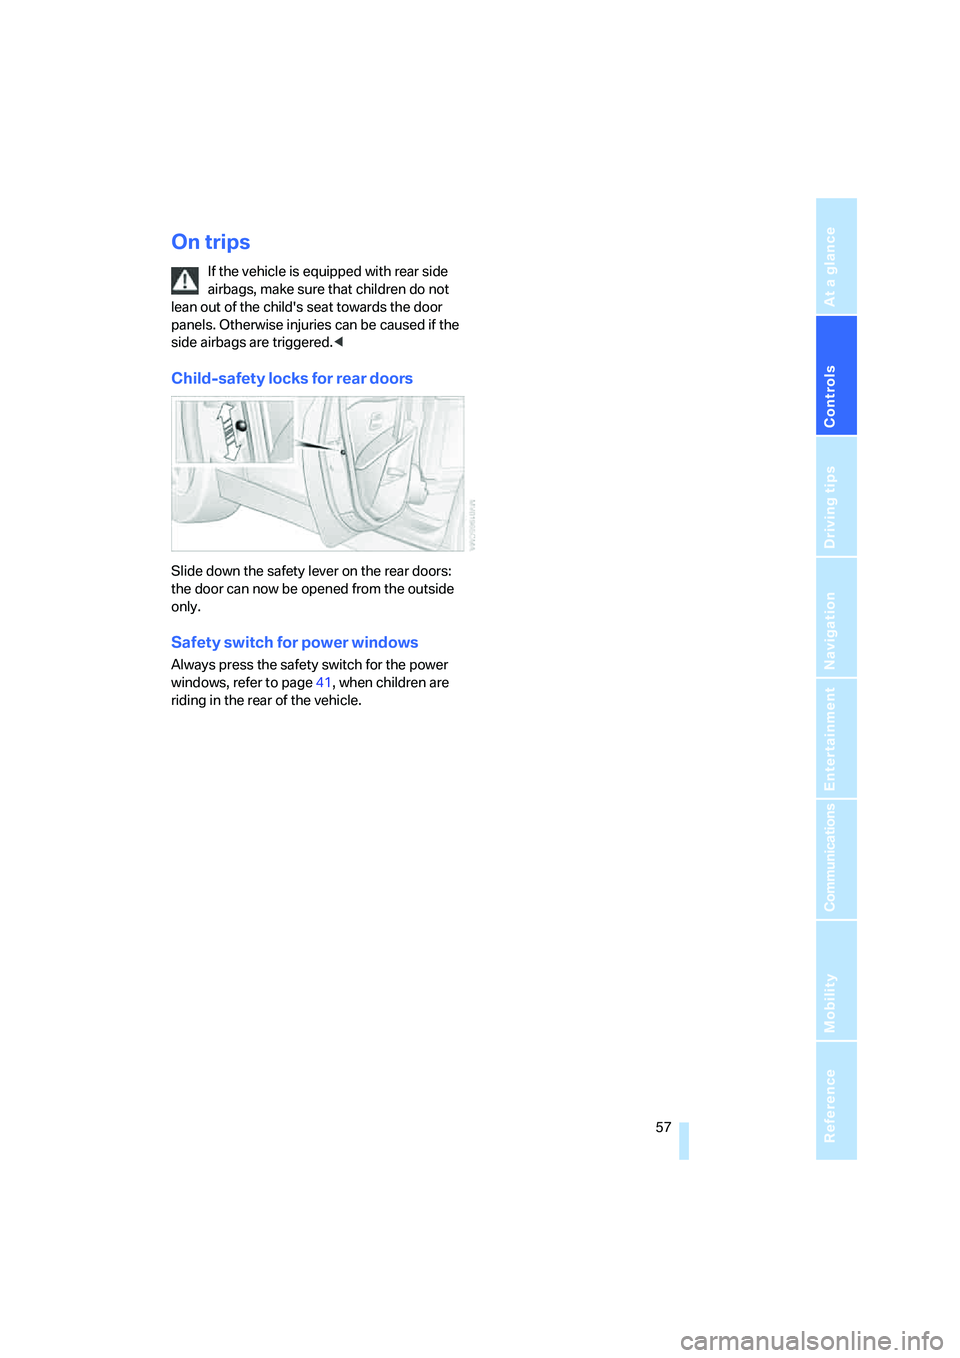
Child-safety locks for rear doors
Slide down the safety lever on the rear doors:
the door can now be opened from the outside
only.
Safety switch for power windows
Always press the safety switch for the power
windows, refer to page41, when children are
riding in the rear of the vehicle.
Page 60 of 259
Driving
58
Driving
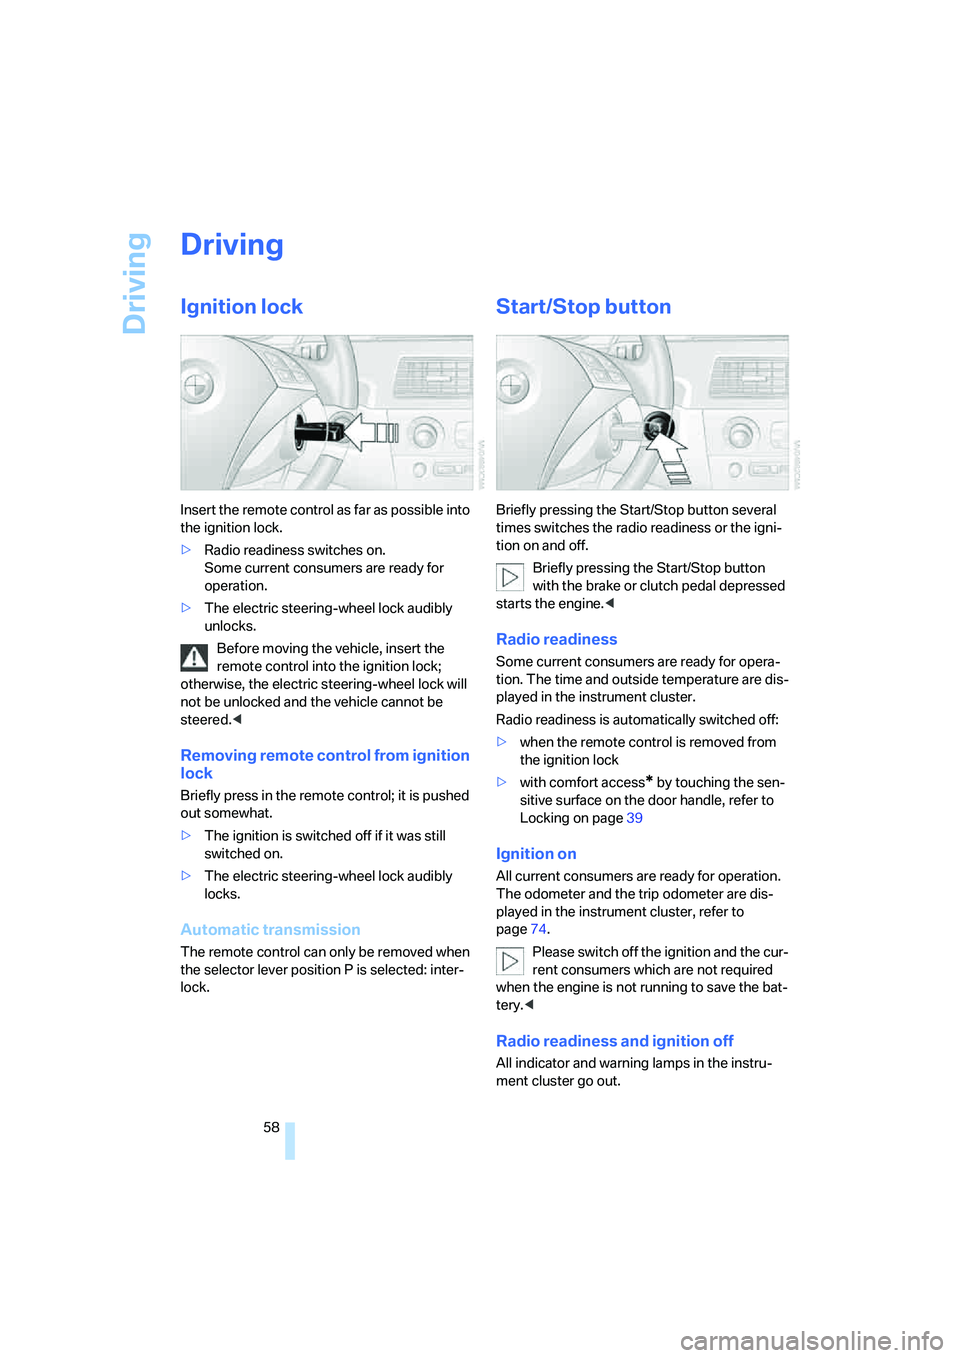
Ignition lock
Insert the remote control as far as possible into
the ignition lock.
>Radio readiness switches on.
Some current consumers are ready for
operation.
>The electric steering-wheel lock audibly
unlocks.
Before moving the vehicle, insert the
remote control into the ignition lock;
otherwise, the electric steering-wheel lock will
not be unlocked and the vehicle cannot be
steered.<
Removing remote control from ignition
lock
Briefly press in the remote control; it is pushed
out somewhat.
>The ignition is switched off if it was still
switched on.
>The electric steering-wheel lock audibly
locks.
Automatic transmission
The remote control can only be removed when
the selector lever position P is selected: inter-
lock.
Start/Stop button
Briefly pressing the Start/Stop button several
times switches the radio readiness or the igni-
tion on and off.
Briefly pressing the Start/Stop button
with the brake or clutch pedal depressed
starts the engine.<
Radio readiness
Some current consumers are ready for opera-
tion. The time and outside temperature are dis-
played in the instrument cluster.
Radio readiness is automatically switched off:
>when the remote control is removed from
the ignition lock
>with comfort access
* by touching the sen-
sitive surface on the door handle, refer to
Locking on page39
Ignition on
All current consumers are ready for operation.
The odometer and the trip odometer are dis-
played in the instrument cluster, refer to
page74.
Please switch off the ignition and the cur-
rent consumers which are not required
when the engine is not running to save the bat-
tery.<
Radio readiness and ignition off
All indicator and warning lamps in the instru-
ment cluster go out.
Page 63 of 259
Controls
61Reference
At a glance
Driving tips
Communications
Navigation
Entertainment
Mobility
Reverse gear
Select only when the vehicle is stationary.
When pressing the gearshift lever to the left,
overcome some resistance.
SMG Sequential Manual
Transmission*
The concept
The SMG Sequential Manual Transmission is
an automated manual transmission in which an
electrohydraulic system handles the clutching
and gear changes.
The SMG is operated with the selector lever
and two shift paddles on the steering wheel.
It offers you the following functions:
>Optional manual or automatic operation:
Sequential mode or Drive mode
>You have a choice of two driving programs:
Normal or Sport, refer to Dynamic Driving
Control page62
>Automatic downshifting and prevention of
incorrect shifting even in Sequential opera-
tion
>Acceleration assistant, refer to page63.
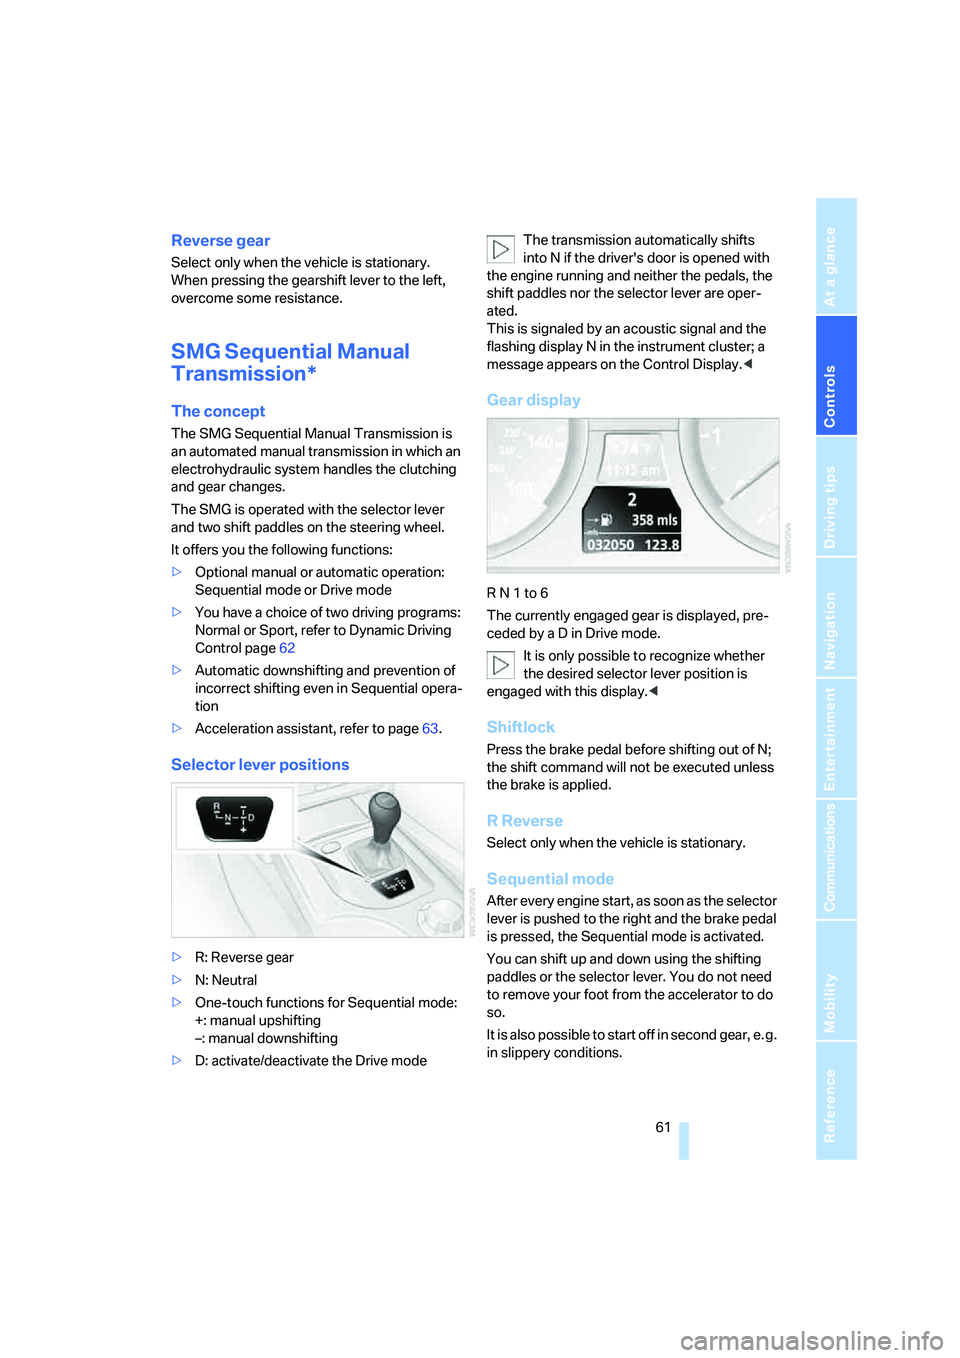
Selector lever positions
>R: Reverse gear
>N: Neutral
>One-touch functions for Sequential mode:
+: manual upshifting
–: manual downshifting
>D: activate/deactivate the Drive modeThe transmission automatically shifts
into N if the driver's door is opened with
the engine running and neither the pedals, the
shift paddles nor the selector lever are oper-
ated.
This is signaled by an acoustic signal and the
flashing display N in the instrument cluster; a
message appears on the Control Display.<
Gear display
R N 1 to 6
The currently engaged gear is displayed, pre-
ceded by a D in Drive mode.
It is only possible to recognize whether
the desired selector lever position is
engaged with this display.<
Shiftlock
Press the brake pedal before shifting out of N;
the shift command will not be executed unless
the brake is applied.
R Reverse
Select only when the vehicle is stationary.
Sequential mode
After every engine start, as soon as the selector
lever is pushed to the right and the brake pedal
is pressed, the Sequential mode is activated.
You can shift up and down using the shifting
paddles or the selector lever. You do not need
to remove your foot from the accelerator to do
so.
It is also possible to start off in second gear, e. g.
in slippery conditions.
Page 196 of 259
Refueling
194
Refueling
Always switch off the engine before refu-
eling, otherwise no fuel can be filled into
the tank and a message is displayed.<
When handling fuel, always observe all
applicable precautionary measures and
regulations. Never transport reserve fuel con-
tainers in the vehicle. These could become
leaky and cause an explosion or a fire in an acci-
dent.<
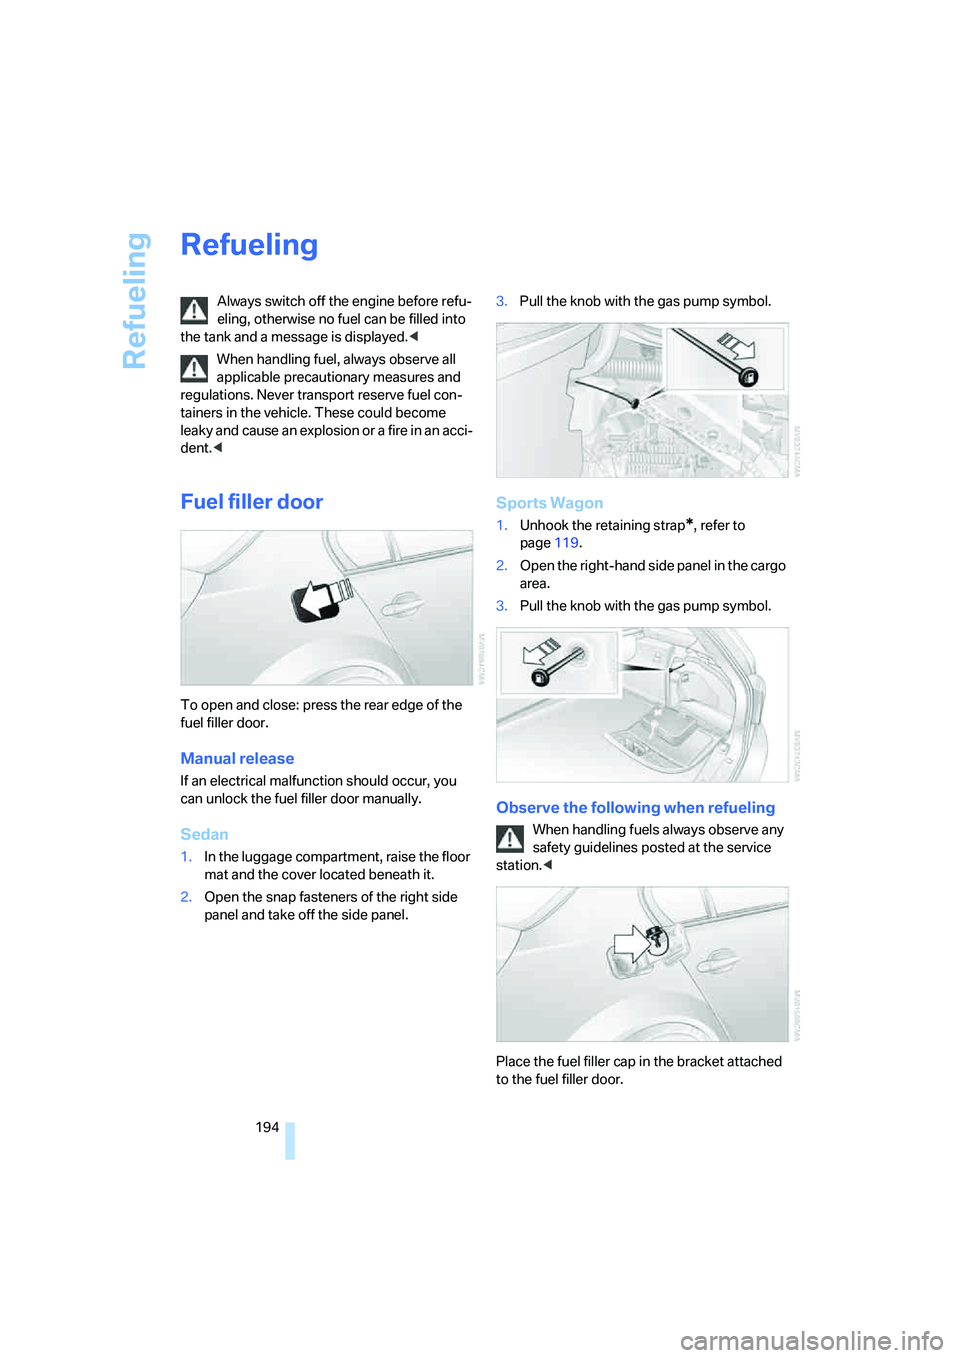
Fuel filler door
To open and close: press the rear edge of the
fuel filler door.
Manual release
If an electrical malfunction should occur, you
can unlock the fuel filler door manually.
Sedan
1.In the luggage compartment, raise the floor
mat and the cover located beneath it.
2.Open the snap fasteners of the right side
panel and take off the side panel.3.Pull the knob with the gas pump symbol.
Sports Wagon
1.Unhook the retaining strap*, refer to
page119.
2.Open the right-hand side panel in the cargo
area.
3.Pull the knob with the gas pump symbol.
Observe the following when refueling
When handling fuels always observe any
safety guidelines posted at the service
station.<
Place the fuel filler cap in the bracket attached
to the fuel filler door.