ac recharge BMW 528i 2000 E39 User Guide
[x] Cancel search | Manufacturer: BMW, Model Year: 2000, Model line: 528i, Model: BMW 528i 2000 E39Pages: 1002
Page 780 of 1002
Downloaded from www.Manualslib.com manuals search engine
.- -
Brakes
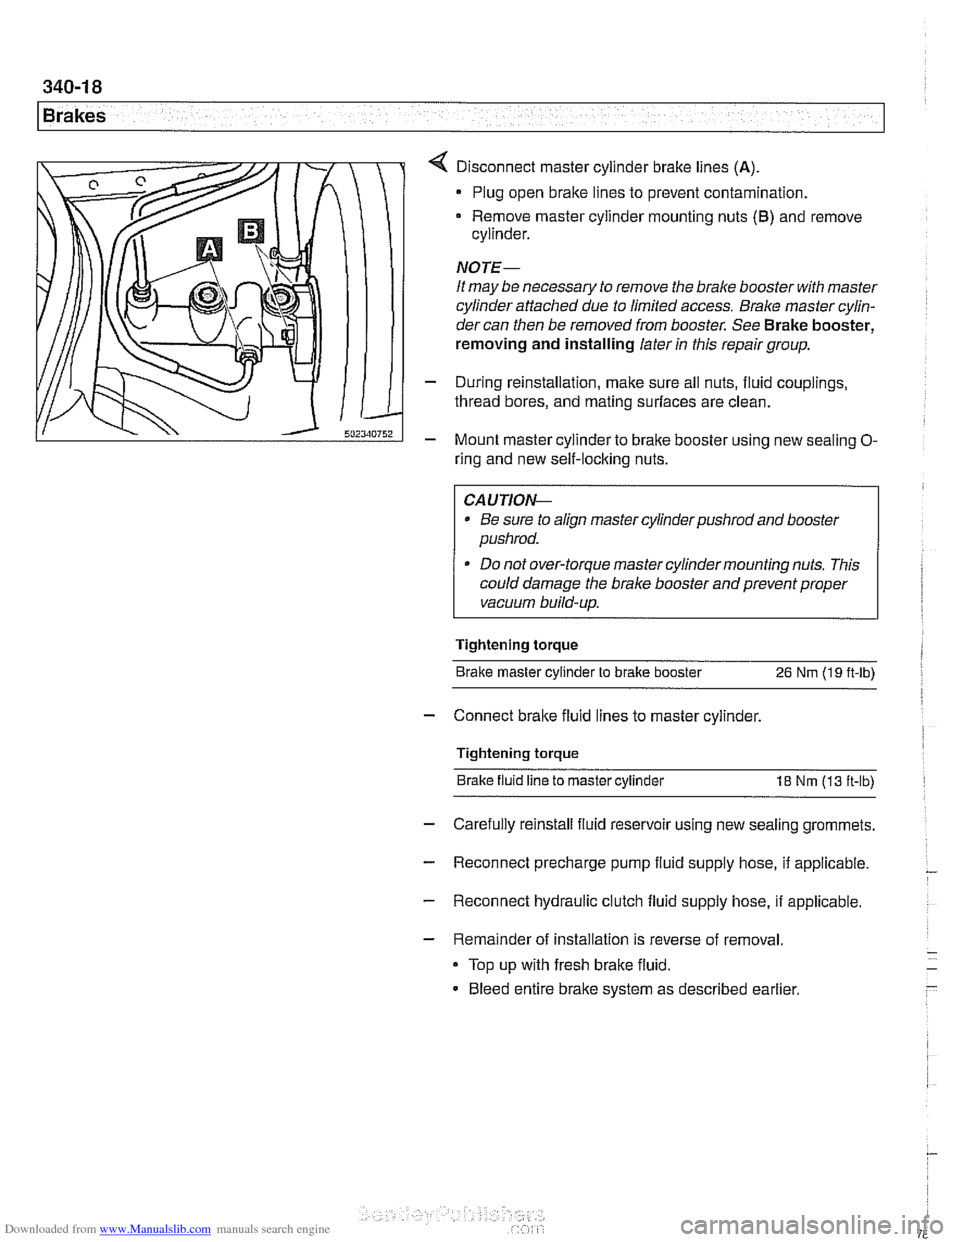
Disconnect master cylinder brake lines (A)
Plug open brake lines to prevent contamination.
Remove master cylinder mounting nuts
(6) and remove
cylinder.
NOTE-
It may be necessary to remove the brake booster with master
cylinder attached due to limited access.
Bralce master cylin-
dercan then be removed from booster. See Brake booster,
removing and installing later
in this repair group.
- During reinstallation, make sure all nuts, fluid couplings,
thread bores, and mating surfaces are clean.
- Mount master cylinder to bralte booster using new sealing O-
ring and new self-locking nuts.
CAUTIOI\C
* Be sure to align master cylinderpushrod and booster
pushrod.
* Do not over-torque master cylinder mounting nuts. This
could damage the brake booster and prevent proper
vacuum build-up.
Tightening torque Brake master cylinder to brake booster
26 Nm (19 ft-lb)
- Connect bralte fluid lines to master cylinder.
Tightening torque Brake fluid line to master cylinder
18 Nm (13 ft-lb)
- Carefully reinstall fluid reservoir using new sealing grommets.
- Reconnect precharge pump fluid supply hose, if applicable. -
- Reconnect hydraulic clutch fluid supply hose, if applicable.
- Remainder of installation is reverse of removal.
Top up with fresh brake fluid.
Bleed entire brake system as described earlier
Page 791 of 1002
Downloaded from www.Manualslib.com manuals search engine
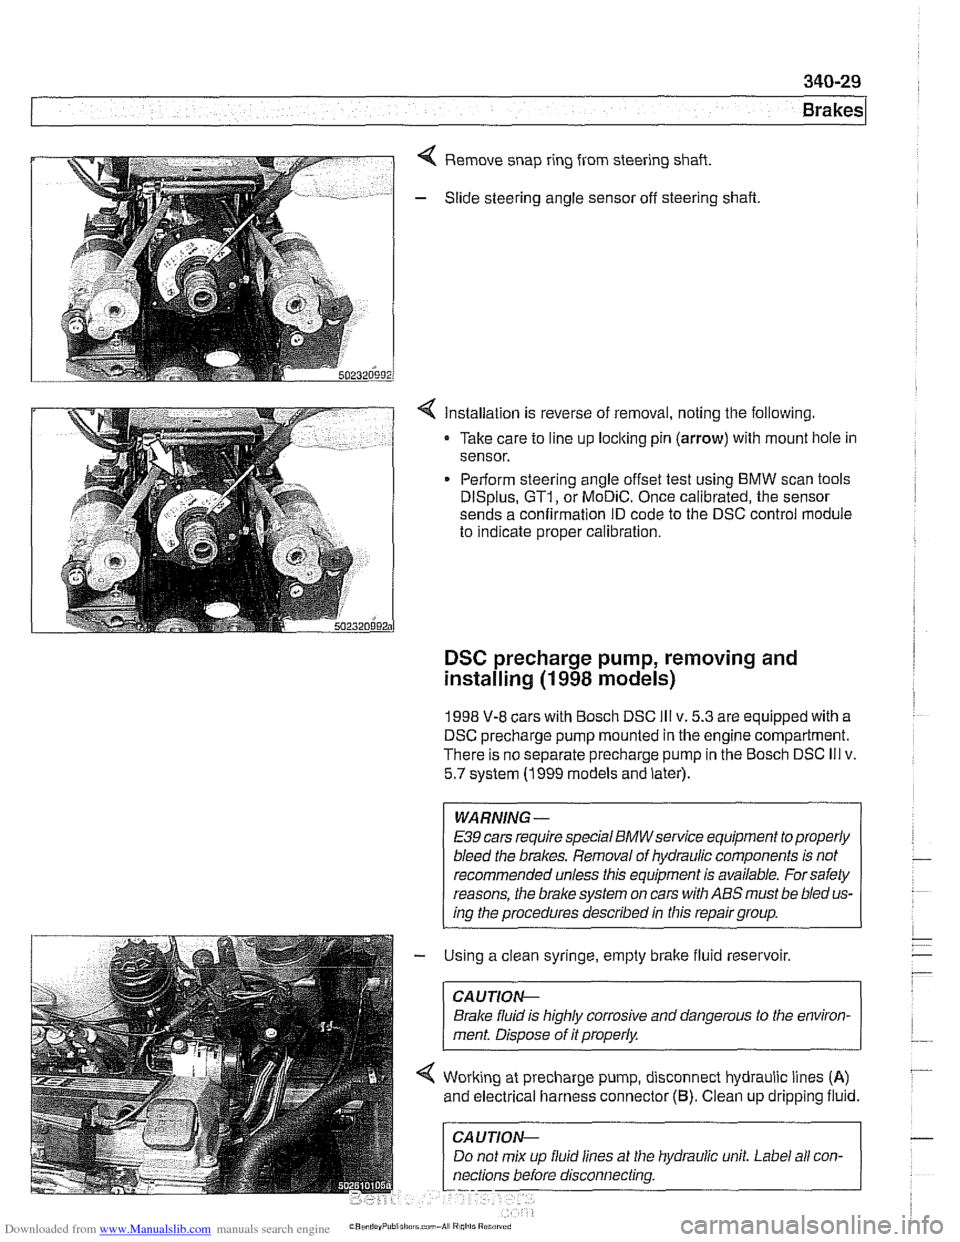
Remove snap ring from steering shaft.
- Slide steering angle sensor off steering shaft
< Installation is reverse of removal, noting the following.
Take care to line up loclting pin
(arrow) with mount hole in
sensor.
Perform steering angle offset test using BMW scan tools
DISplus, GT1, or MoDiC. Once calibrated, the sensor
sends a confirmation ID code to the DSC control module
to indicate proper calibration.
DSC precharge pump, removing and
installing
(1 998 models)
1998 V-8 cars with Bosch DSC Ill v. 5.3 are equipped with a
DSC precharge pump mounted in the engine compartment.
There is no separate precharge pump in the Bosch DSC
Ill v.
5.7 system (1999 models and later).
WARNING-
E39 cars require special BMWservice equipment to properly
bleed the brakes. Removal of hydraulic components is not
recommended unless this equipment is available. For safety
reasons, the
brake system on cars with ABS must be bled us-
ing the procedures described in this repair group.
- Using a clean syringe, empty brake fluid reservoir.
CAUTIOI\C
Brake fluid is highly corrosive and dangerous to the environ-
ment. Disoose of it
orooerlv.
Working at precharge pump, disconnect hydraulic lines (A)
and electrical harness connector (6). Clean up dripping fluid.
hydraulic unit. Label all
con-
Page 792 of 1002
Downloaded from www.Manualslib.com manuals search engine
1 Brakes
- Remove precharge pump mounting bracket fasteners and re-
move pump.
- Installation is reverse of removal, noting the following:
Be sure to replace rubber pump mounts if damaged
01
worn.
Bleed brakes as described earlier.
Tightening torque Brake line
to precharge pump 18 Nrn (13 ft-lb)
DSC pressure sensor (1 999 - 2002 models)
On 1999 and later DSC systems, the DSC pressure sensor is
screwed into the DSC hydraulic unit (right rear of engine com-
partment).
WARNING-
* €39 cars require special BMW service equipment to prop-
erly bleed the brakes. Removal of the
DSCpressure sensor
is not recommended unless this equipment is available. For
safety reasons, the brake system on cars with ABS must be
bled using the procedures described in this repair group.
Switch off ignition and remove
key to male sure brake
system cannot be activated.
- Disconnect electrical harness connector at switch.
- Use BMW special tool 34 5 160 to remove and install sensor.
Inspect threads and sealing surfaces for damage.
* Work quicltly to avoid excessive brake fluid leakage.
Tightening torque
Pressure sensor
to hydraulic 19 Nrn (14ft-lb)
unit
- Reconnect harness connector
- Bleed front brakes as described earlier.
- Press on brakes and check for leaks at sensor.
- Turn on ignition and firmly depress brake pedal. Check that
DSC warning light does not come on.
Page 904 of 1002
Downloaded from www.Manualslib.com manuals search engine
1 Central Locking and Anti-Theft
NOJE-
A single unlock request from the driver's door with the FZV
key unlocks the driver's door only.
A second unlock request
unlocls the remaining doors and trunk. This feature can be
modified for individual users with the Key Memory capabil-
ities to activate all lock actuators simultaneously See Car
Memory
/ Key Memory later in this section.
Starting with 2000 models, the battery in the FZV ignition
Icey is recharged by the ignition switch ring antenna while
the ley is in the ignition switch.
Transmitter self-test (models to
1999)
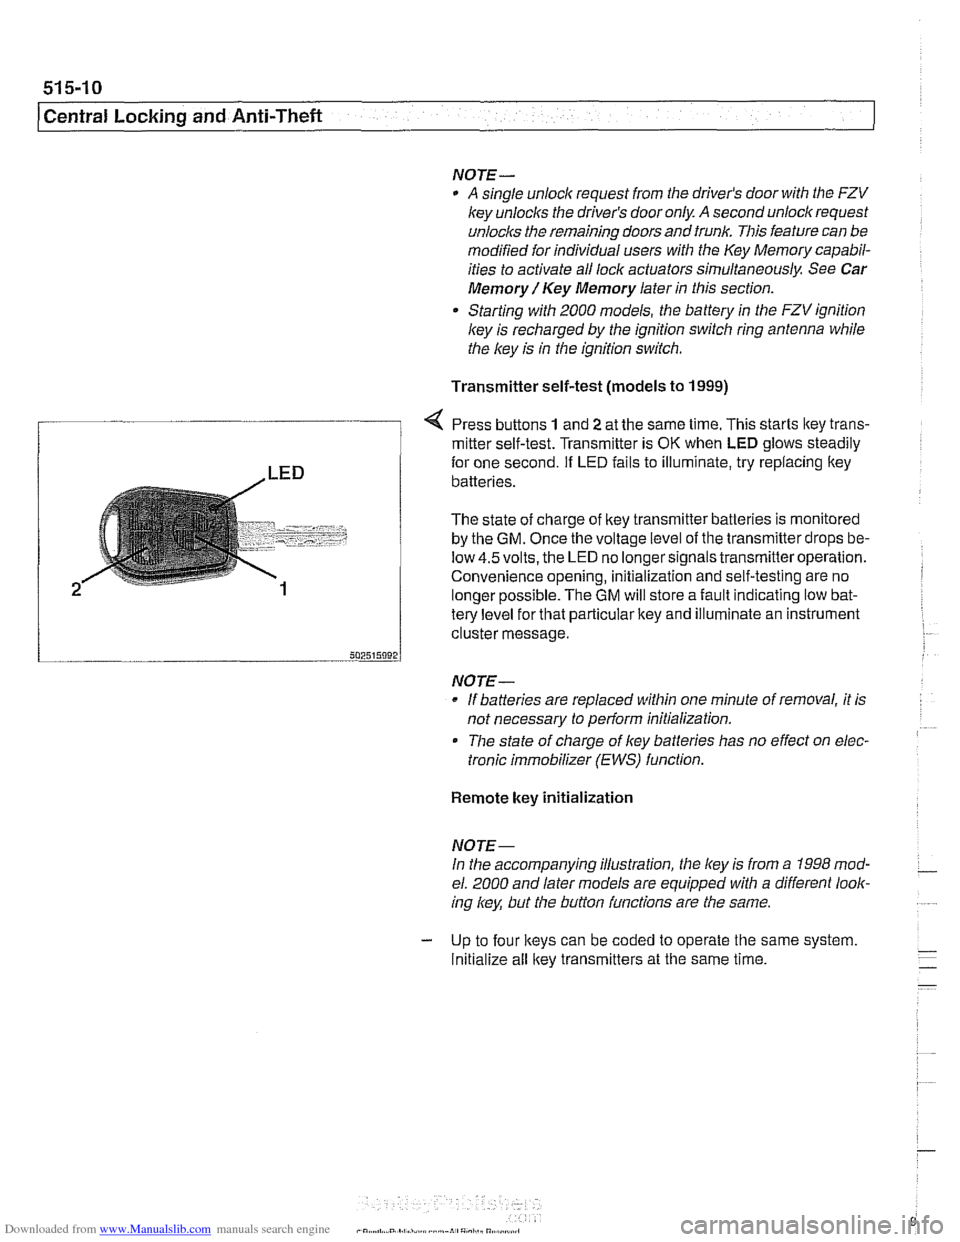
Press buttons 1 and 2 at the same time. This starts ltey trans-
/ mitter self-test. Transmitter is OK when LED glows steadily
te{le"el for that particular key and illuminate an instrument
cluster message.
-- 502515092 J
NO JE-
If batteries are replaced within one minute of removal, it is
not necessary to
periorm initialization.
Tlie state of charge of key batteries has no effect on elec-
tronic immobilizer (EWS) function.
2
Remote key initialization
for one second. If LED fails to illuminate, try replacing ltey~
batteries.
The state of charge of key transmitter batteries is monitored
by the
GM. Once the voltage level of the transmitter drops be-
low
4.5volts, the LED no longersignals transmitteroperation.
Convenience opening, initialization and self-testing are no
lonaer ~ossible. The GM will store a fault indicatina low bat-
NOJE-
In the accompanying illustration, the key is from a 1998 mod-
el. 2000 and later models are equipped with a different look-
ing
/
Initialize all key transmitters at the same time.
Page 906 of 1002
Downloaded from www.Manualslib.com manuals search engine
51 5-12
I Central Locking and Anti-Theft
Key battery
9
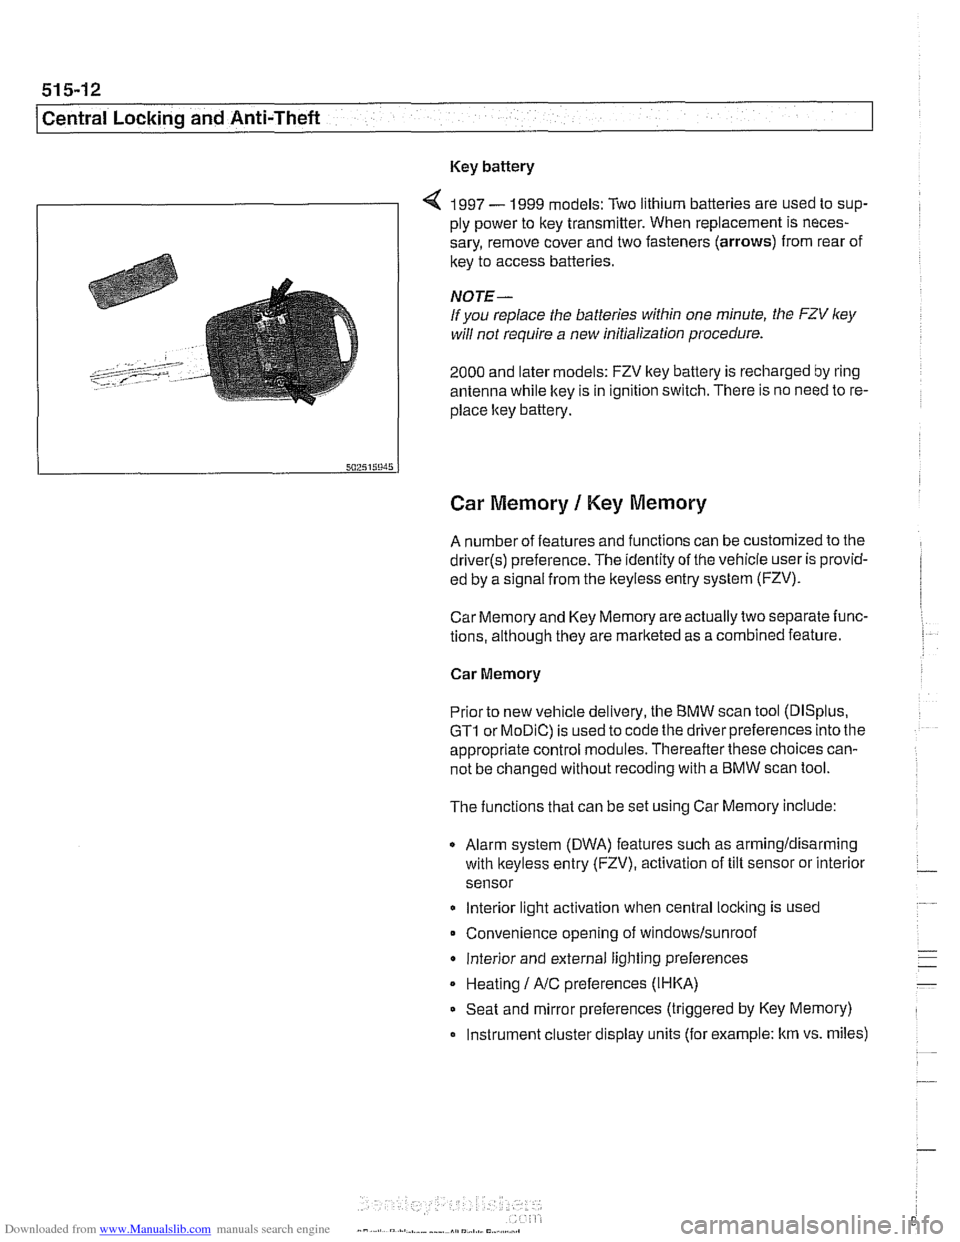
4 1997 - 1999 models: Two lithium batteries are used to sup-
ply power to key transmitter. When replacement is neces-
sary, remove cover and two fasteners (arrows) from rear of
key to access batteries
NOTE-
If you replace the batteries within one minute, the FZV ley
will not require a new initialization procedure.
2000 and later models: FZV key battery is recharged by ring
antenna while ltey is in ignition switch. There is no need to re-
place ltey battery.
Car Memory 1 Key Memory
A number of features and functions can be customized to the
driver(s) preference. The identity of the vehicle user is provid-
ed by a
s~gnal from the keyless entry system (FZV).
Car Memory and Key Memory are actually two separate func-
tions, although they are marketed as a combined feature.
Car Memory
Pr'or ro new
veh c,e de very, the BMW scan roo (DISp us,
GTI or MOD C) is ~sed lo cooc ine driver preierences nro ine
appropriate control modules. Thereafter these choices can-
not be changed without
recoding with a BMW scan tool.
The functions that can be set using Car Memory include:
Alarm system (DWA) features such as armingldisarming
with
lkeyless entry (FZV), activation of tilt sensor or interior
sensor
lnterior light activation when central
locking is used
Convenience opening of
windows/sunroof
lnterior and external lighting preferences
Heating
I A/C preferences (IHKA)
Seat and mirror preferences (triggered by Key Memory)
Instrument cluster display units (for example: km vs. miles)