Auto H BMW 528I 2011 F10 Manual PDF
[x] Cancel search | Manufacturer: BMW, Model Year: 2011, Model line: 528I, Model: BMW 528I 2011 F10Pages: 304, PDF Size: 10.18 MB
Page 134 of 304
Ashtray/cigarette lighter*
Front: manual transmission
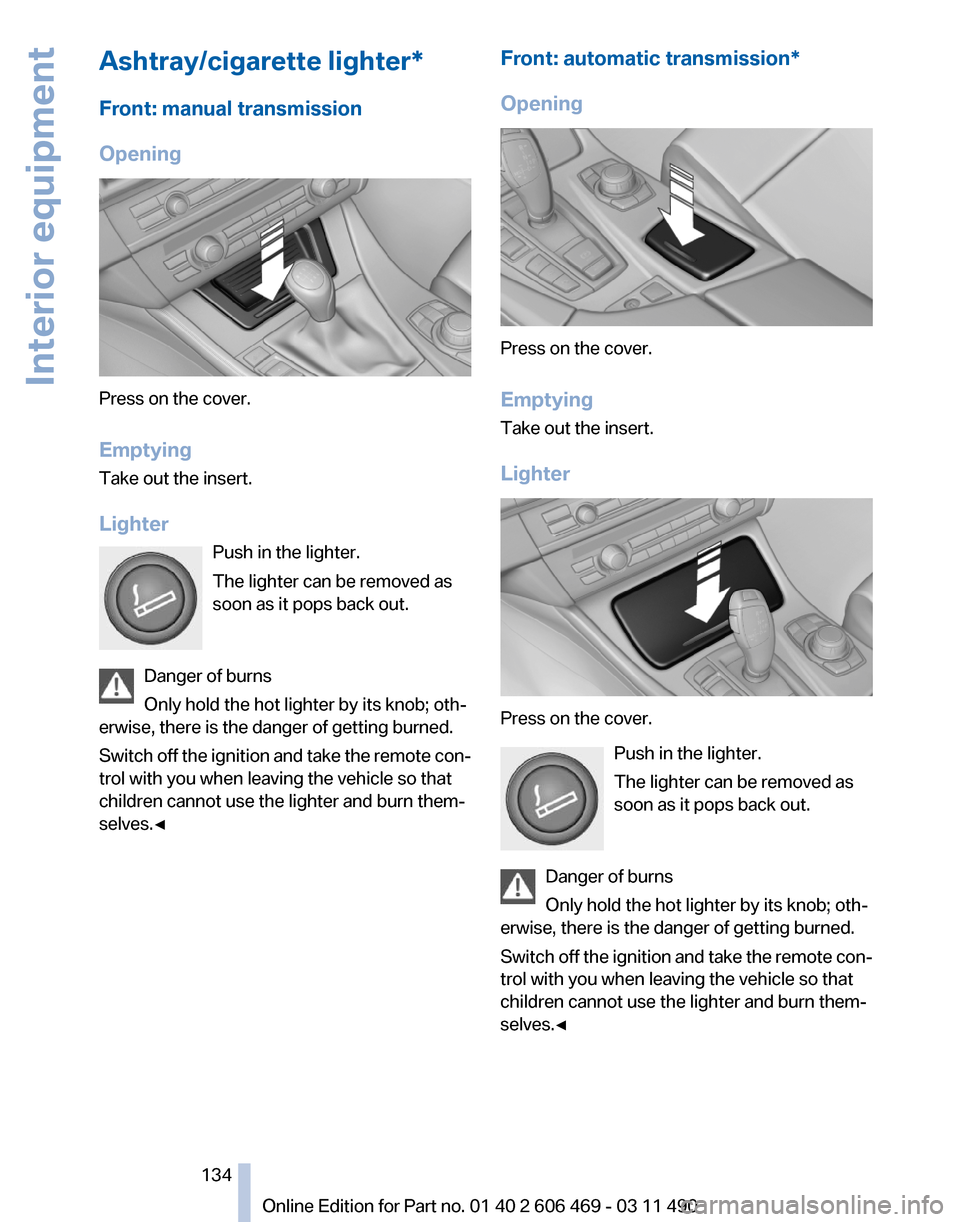
Opening
Press on the cover.
Emptying
Take out the insert.
Lighter
Push in the lighter.
The lighter can be removed as
soon as it pops back out.
Danger of burns
Only hold the hot lighter by its knob; oth‐
erwise, there is the danger of getting burned.
Switch
off the ignition and take the remote con‐
trol with you when leaving the vehicle so that
children cannot use the lighter and burn them‐
selves.◀ Front: automatic transmission*
Opening
Press on the cover.
Emptying
Take out the insert.
Lighter
Press on the cover.
Push in the lighter.
The lighter can be removed as
soon as it pops back out.
Danger of burns
Only hold the hot lighter by its knob; oth‐
erwise, there is the danger of getting burned.
Switch
off the ignition and take the remote con‐
trol with you when leaving the vehicle so that
children cannot use the lighter and burn them‐
selves.◀ Seite 134
134 Online Edition for Part no. 01 40 2 606 469 - 03 11 490
Interior equipment
Page 135 of 304
Rear
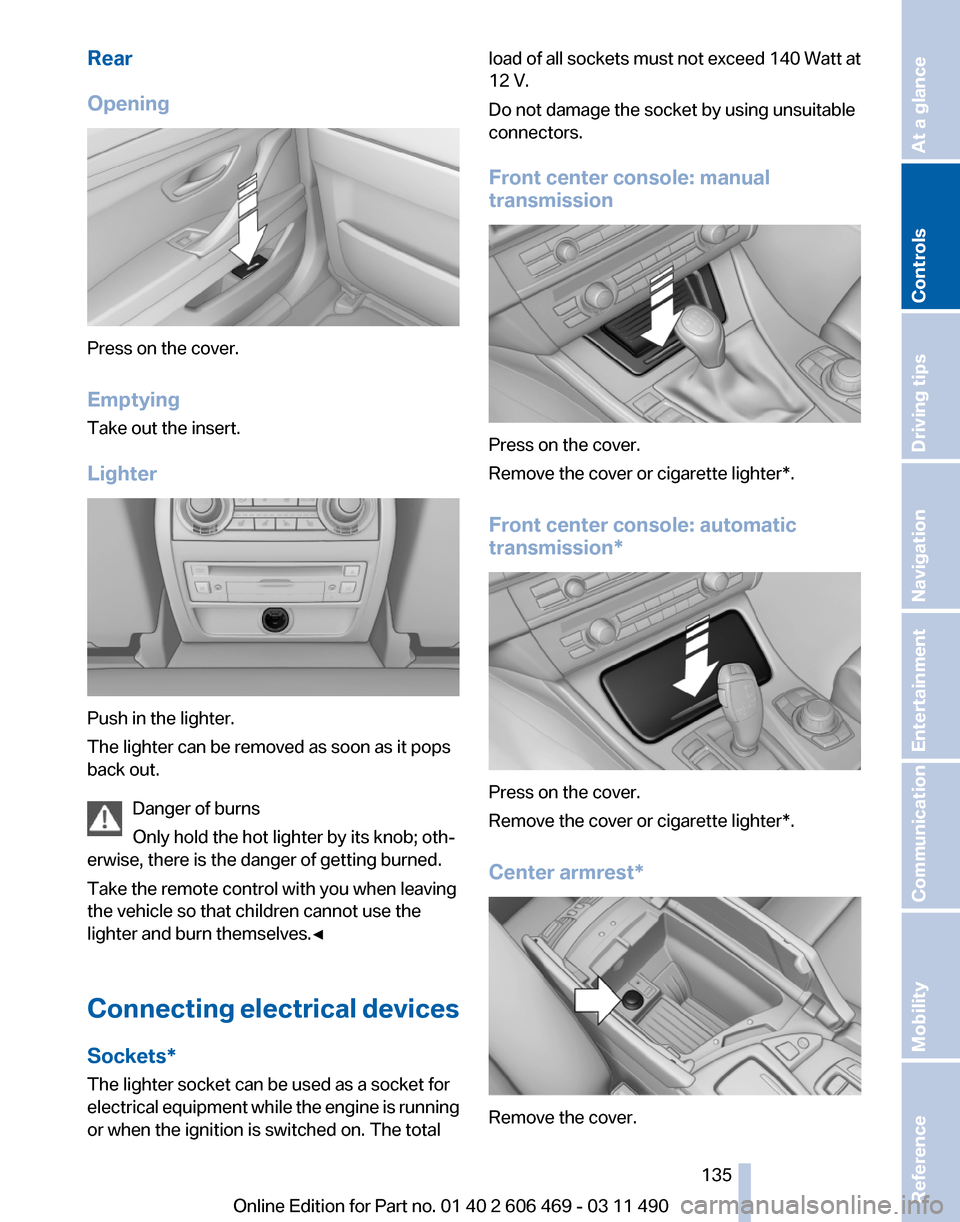
Opening
Press on the cover.
Emptying
Take out the insert.
Lighter
Push in the lighter.
The lighter can be removed as soon as it pops
back out.
Danger of burns
Only hold the hot lighter by its knob; oth‐
erwise, there is the danger of getting burned.
Take the remote control with you when leaving
the vehicle so that children cannot use the
lighter and burn themselves.◀
Connecting
electrical devices
Sockets*
The lighter socket can be used as a socket for
electrical equipment while the engine is running
or when the ignition is switched on. The total load of all sockets must not exceed 140 Watt at
12 V.
Do not damage the socket by using unsuitable
connectors.
Front center console: manual
transmission
Press on the cover.
Remove the cover or cigarette lighter*.
Front center console:
automatic
transmission* Press on the cover.
Remove the cover or cigarette lighter*.
Center armrest*
Remove the cover.
Seite 135
135Online Edition for Part no. 01 40 2 606 469 - 03 11 490
Reference Mobility Communication Entertainment Navigation Driving tips
Controls At a glance
Page 140 of 304
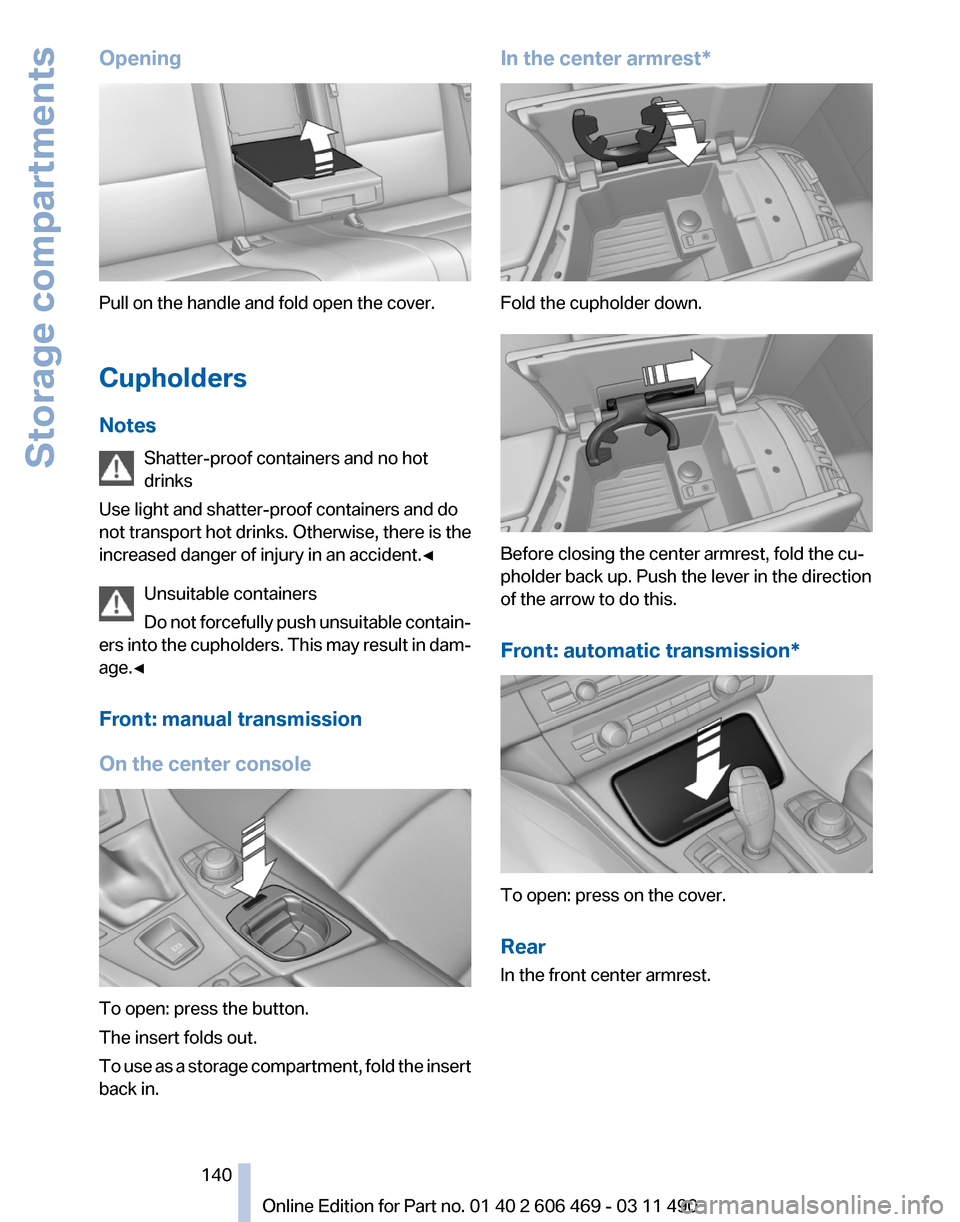
Opening
Pull on the handle and fold open the cover.
Cupholders
Notes
Shatter-proof containers and no hot
drinks
Use light and shatter-proof containers and do
not
transport hot drinks. Otherwise, there is the
increased danger of injury in an accident.◀
Unsuitable containers
Do not forcefully push unsuitable contain‐
ers into the cupholders. This may result in dam‐
age.◀
Front: manual transmission
On the center console To open: press the button.
The insert folds out.
To
use as a storage compartment, fold the insert
back in. In the center armrest*
Fold the cupholder down.
Before closing the center armrest, fold the cu‐
pholder back up. Push the lever in the direction
of the arrow to do this.
Front: automatic transmission
* To open: press on the cover.
Rear
In the front center armrest.
Seite 140
140 Online Edition for Part no. 01 40 2 606 469 - 03 11 490
Storage compartments
Page 148 of 304
Driving in wet conditions
When
roads are wet or there is heavy rain, briefly
exert gentle pressure on the brake pedal every
few miles.
Ensure that this action does not endanger other
road users.
The heat generated in this process helps dry the
brake discs and pads.
In this way braking efficiency will be available
when you need it.
Hills
Drive long or steep downhill gradients in the gear
in which the least braking is required. Otherwise,
the brake system may overheat, resulting in a
reduction in the brake system efficiency.
Manual transmission:
You can increase the engine's braking effect by
shifting down, going all the way to first gear, if
necessary.
Automatic transmission*:
You can increase the engine's braking effect by
shifting down in the manual mode of the auto‐
matic transmission, refer to page 65.
Avoid load on the brakes
Avoid placing excessive load on the brake
system. Light but consistent brake pressure can
lead to high temperatures, brake wear and pos‐
sibly even brake failure.◀
Do not drive in neutral
Do not drive in neutral or with the engine
stopped, as doing so disables engine braking. In
addition, steering and brake assist is unavailable
with the engine stopped.◀
Brake disc corrosion
Corrosion on the brake discs and contamination
on the brake pads are furthered by:
▷ Low mileage.
▷ Extended periods when the vehicle is not
used at all.
▷ Infrequent use of the brakes. Corrosion occurs when the minimum pressure
that must be exerted by the pads during brake
applications to clean the discs is not reached.
Should corrosion form on the brake discs, the
brakes will tend to respond with a pulsating ef‐
fect that generally cannot be corrected.
Condensation
under the parked vehicle
When using the automatic climate control, con‐
densation water develops that exits underneath
the vehicle.
Therefore, traces of condensed water under the
vehicle are normal.
Loading
Overloading the vehicle
To avoid exceeding the approved carrying
capacity of the tires, never overload the vehicle.
Overloading can lead to overheating and in‐
creases the rate at which damage develops in‐
side the tires. This could result in a sudden loss
of tire inflation pressure.◀
No fluids in the trunk
Make sure that fluids do not leak into the
trunk; otherwise, the vehicle may be damaged.◀
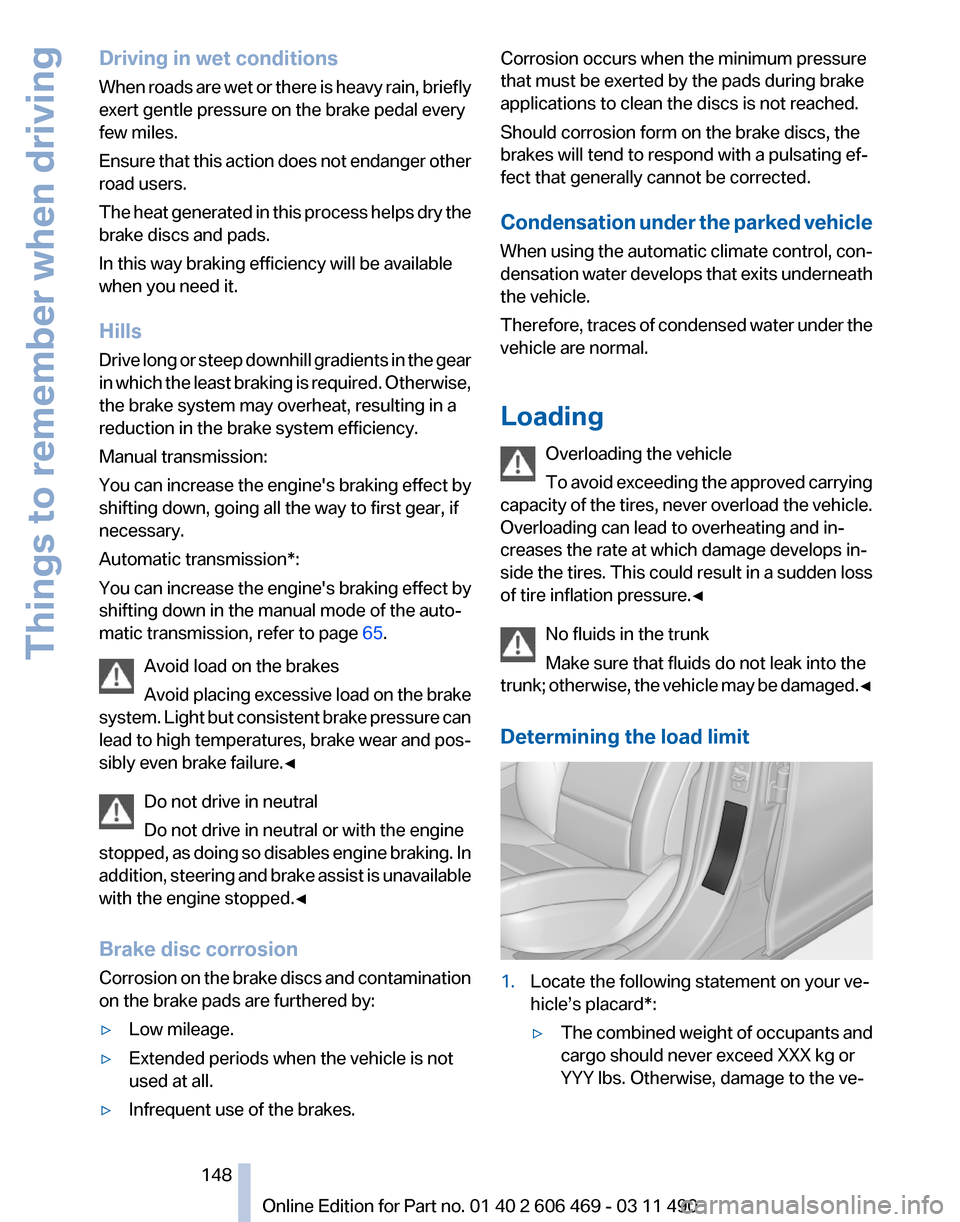
Determining the load limit 1.
Locate the following statement on your ve‐
hicle’s placard*:
▷The combined weight of occupants and
cargo should never exceed XXX kg or
YYY lbs. Otherwise, damage to the ve‐ Seite 148
148 Online Edition for Part no. 01 40 2 606 469 - 03 11 490
Things to remember when driving
Page 154 of 304
Navigation*
Navigation system
General information
The navigation system can determine the pre‐
cise position of the vehicle, with the aid of sat‐
ellites and vehicle sensors, and can reliably
guide you to every entered destination.
Navigation
data are stored in the vehicle and can
be updated.
Entries in stationary vehicle
Enter data only when the vehicle is sta‐
tionary, and always give priority to the applicable
traffic regulations in the event of any contradic‐
tion between traffic and road conditions and the
instructions issued by the navigation system.
Failure to take to this precaution can place you
in violation of the law and put vehicle occupants
and other road users in danger.◀
Destination input
Manual destination entry
General information
The system supports you in entering street
names and house numbers by automatically
completing the entry and providing entry com‐
parisons, refer to page 21.
Stored town/city and street names can be called
up quickly.
▷ If the existing entries should not be changed,
the entries for the state/province and town/
city can be skipped.
▷ Destination guidance is started to the town/
city center if no street is entered.
Entering a state/province
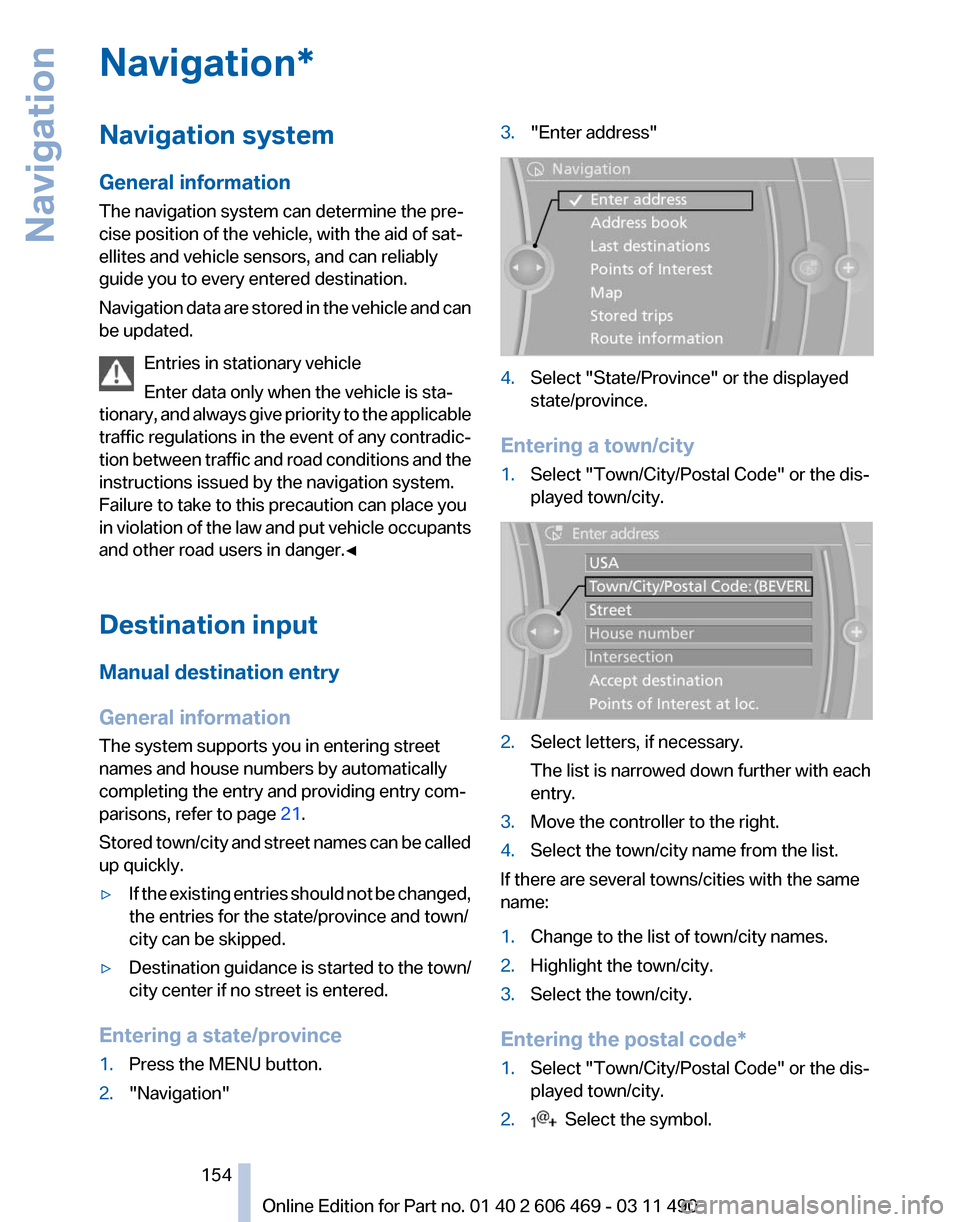
1. Press the MENU button.
2. "Navigation" 3.
"Enter address" 4.
Select "State/Province" or the displayed
state/province.
Entering a town/city
1. Select "Town/City/Postal Code" or the dis‐
played town/city. 2.
Select letters, if necessary.
The list is narrowed down further with each
entry.
3. Move the controller to the right.
4. Select the town/city name from the list.
If there are several towns/cities with the same
name:
1. Change to the list of town/city names.
2. Highlight the town/city.
3. Select the town/city.
Entering the postal code*
1. Select "Town/City/Postal Code" or the dis‐
played town/city.
2. Select the symbol.
Seite 154
154 Online Edition for Part no. 01 40 2 606 469 - 03 11 490
Navigation
Page 157 of 304
Last destinations
At a glance
The destinations previously entered are stored
automatically.
The
destinations can be called up and used as a
destination for destination guidance.
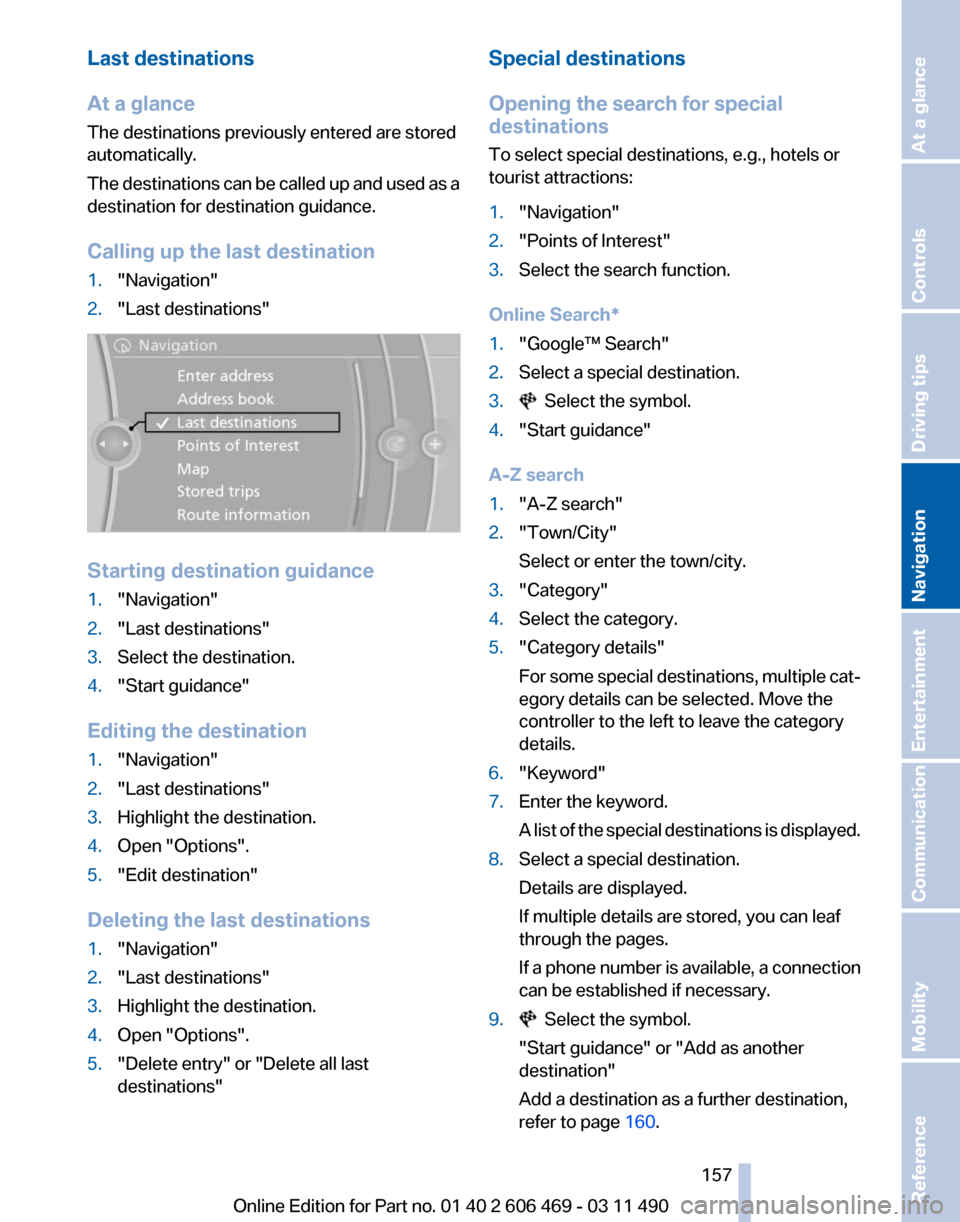
Calling up the last destination
1. "Navigation"
2. "Last destinations" Starting destination guidance
1.
"Navigation"
2. "Last destinations"
3. Select the destination.
4. "Start guidance"
Editing the destination
1. "Navigation"
2. "Last destinations"
3. Highlight the destination.
4. Open "Options".
5. "Edit destination"
Deleting the last destinations
1. "Navigation"
2. "Last destinations"
3. Highlight the destination.
4. Open "Options".
5. "Delete entry" or "Delete all last
destinations" Special destinations
Opening the search for special
destinations
To select special destinations, e.g., hotels or
tourist attractions:
1.
"Navigation"
2. "Points of Interest"
3. Select the search function.
Online Search*
1. "Google™ Search"
2. Select a special destination.
3. Select the symbol.
4. "Start guidance"
A-Z search
1. "A-Z search"
2. "Town/City"
Select or enter the town/city.
3. "Category"
4. Select the category.
5. "Category details"
For
some special destinations, multiple cat‐
egory details can be selected. Move the
controller to the left to leave the category
details.
6. "Keyword"
7. Enter the keyword.
A
list of the special destinations is displayed.
8. Select a special destination.
Details are displayed.
If multiple details are stored, you can leaf
through the pages.
If
a phone number is available, a connection
can be established if necessary.
9. Select the symbol.
"Start guidance" or "Add as another
destination"
Add a destination as a further destination,
refer to page 160.
Seite 157
157Online Edition for Part no. 01 40 2 606 469 - 03 11 490
Reference Mobility Communication Entertainment
Navigation Driving tips Controls At a glance
Page 164 of 304
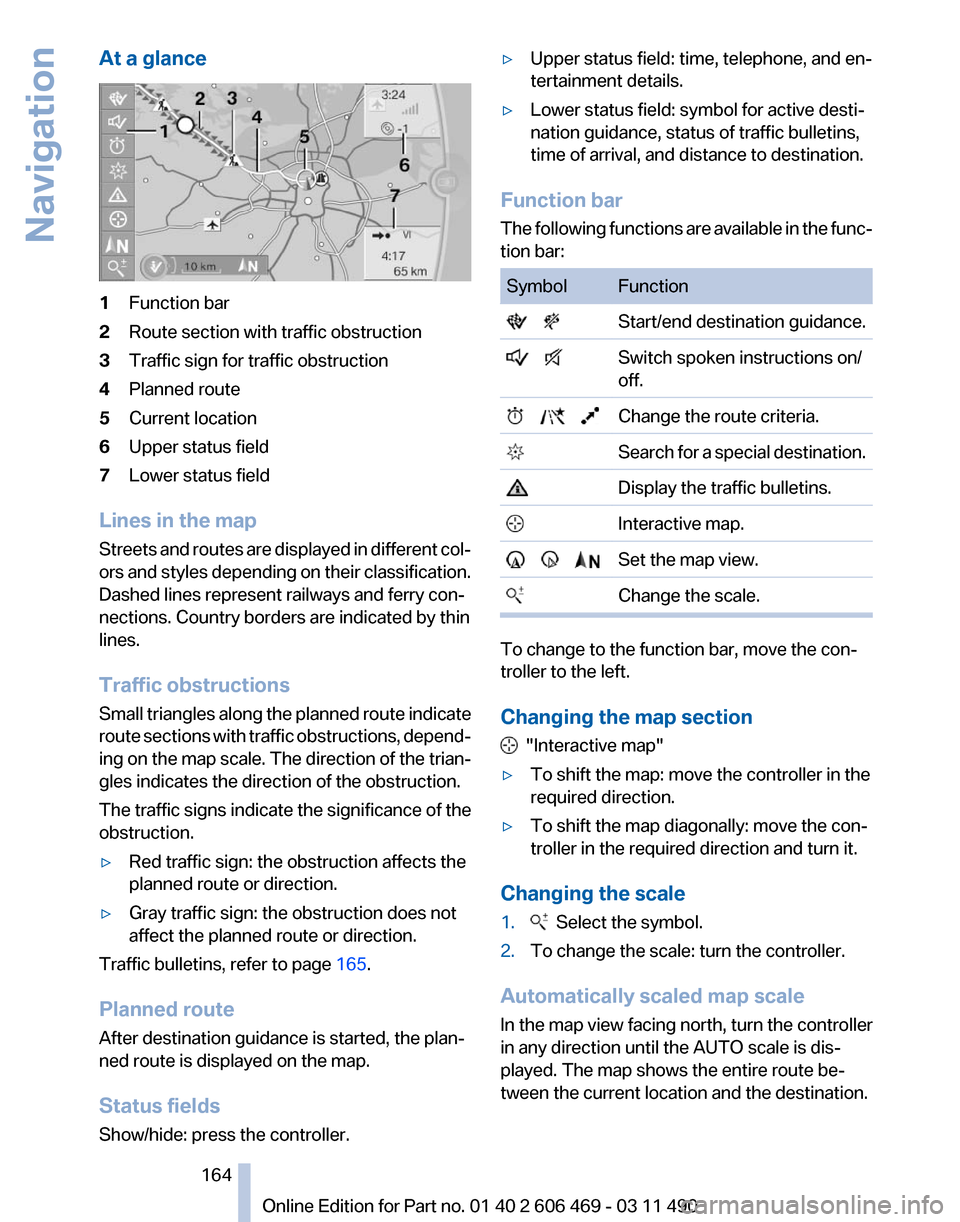
At a glance
1
Function bar
2 Route section with traffic obstruction
3 Traffic sign for traffic obstruction
4 Planned route
5 Current location
6 Upper status field
7 Lower status field
Lines in the map
Streets and routes are displayed in different col‐
ors and styles depending on their classification.
Dashed lines represent railways and ferry con‐
nections. Country borders are indicated by thin
lines.
Traffic obstructions
Small triangles along the planned route indicate
route sections with traffic obstructions, depend‐
ing on the map scale. The direction of the trian‐
gles indicates the direction of the obstruction.
The traffic signs indicate the significance of the
obstruction.
▷ Red traffic sign: the obstruction affects the
planned route or direction.
▷ Gray traffic sign: the obstruction does not
affect the planned route or direction.
Traffic bulletins, refer to page 165.
Planned route
After destination guidance is started, the plan‐
ned route is displayed on the map.
Status fields
Show/hide: press the controller. ▷
Upper status field: time, telephone, and en‐
tertainment details.
▷ Lower status field: symbol for active desti‐
nation guidance, status of traffic bulletins,
time of arrival, and distance to destination.
Function bar
The
following functions are available in the func‐
tion bar: Symbol Function
Start/end destination guidance.
Switch spoken instructions on/
off. Change the route criteria.
Search for a special destination. Display the traffic bulletins.
Interactive map. Set the map view.
Change the scale. To change to the function bar, move the con‐
troller to the left.
Changing the map section
"Interactive map"
▷ To shift the map: move the controller in the
required direction.
▷ To shift the map diagonally: move the con‐
troller in the required direction and turn it.
Changing the scale
1. Select the symbol.
2. To change the scale: turn the controller.
Automatically scaled map scale
In the map view facing north, turn the controller
in any direction until the AUTO scale is dis‐
played. The map shows the entire route be‐
tween the current location and the destination.
Seite 164
164 Online Edition for Part no. 01 40 2 606 469 - 03 11 490
Navigation
Page 167 of 304
in the map using triangles or gray bars along the
calculated route.
▷
Red: congestion.
▷ Orange: stop-and-go traffic.
▷ Yellow: heavy traffic.
▷ Green: clear roads.
▷ Gray: general traffic bulletins, e.g., construc‐
tion site.
The displayed information depends on the par‐
ticular traffic information service.
Filtering traffic bulletins
You
can set which traffic bulletins appear on the
map.
1. "Navigation"
2. "Map"
3. Open "Options".
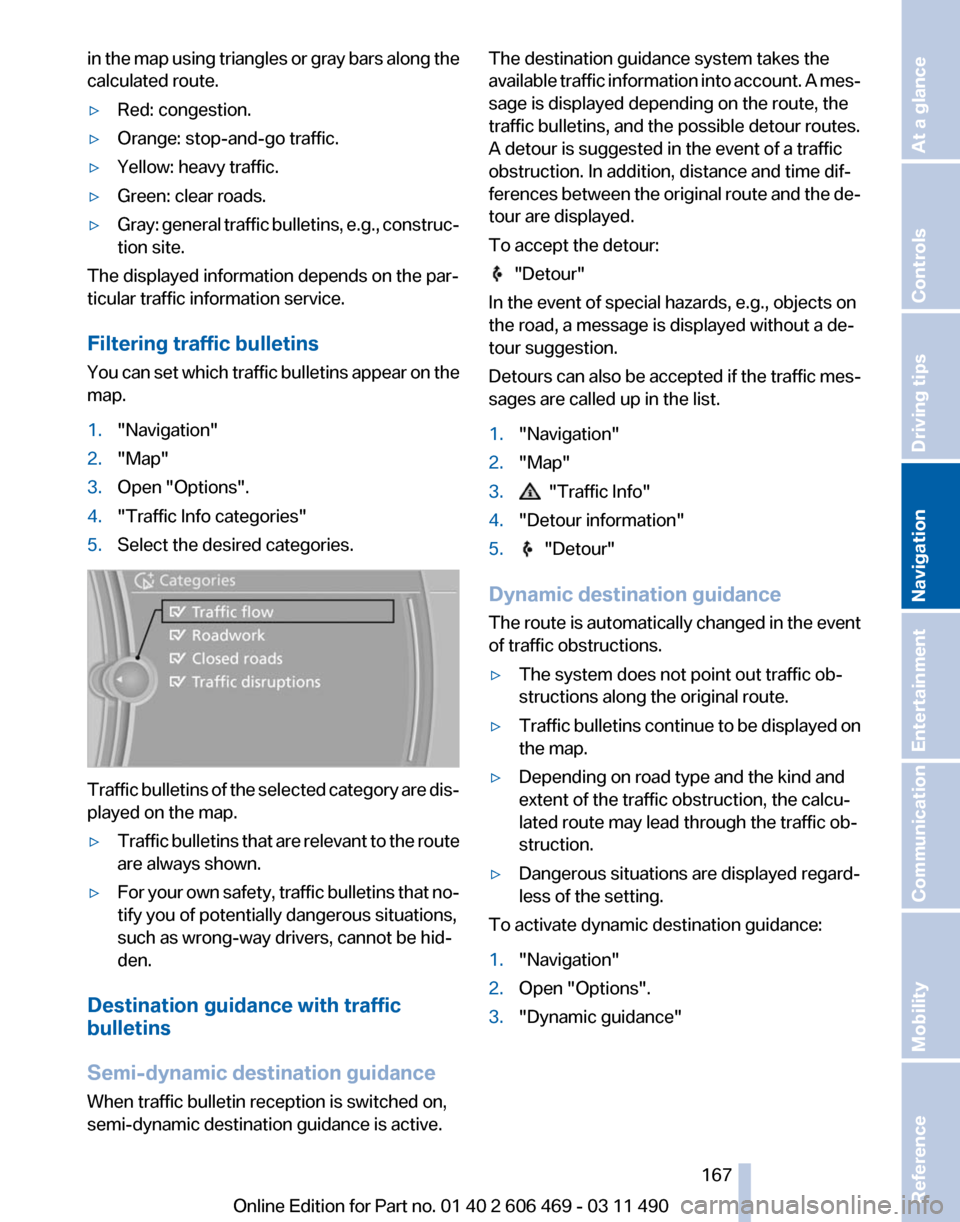
4. "Traffic Info categories"
5. Select the desired categories. Traffic bulletins of the selected category are dis‐
played on the map.
▷
Traffic bulletins that are relevant to the route
are always shown.
▷ For your own safety, traffic bulletins that no‐
tify you of potentially dangerous situations,
such as wrong-way drivers, cannot be hid‐
den.
Destination guidance with traffic
bulletins
Semi-dynamic destination guidance
When traffic bulletin reception is switched on,
semi-dynamic destination guidance is active. The destination guidance system takes the
available
traffic information into account. A mes‐
sage is displayed depending on the route, the
traffic bulletins, and the possible detour routes.
A detour is suggested in the event of a traffic
obstruction. In addition, distance and time dif‐
ferences between the original route and the de‐
tour are displayed.
To accept the detour: "Detour"
In the event of special hazards, e.g., objects on
the road, a message is displayed without a de‐
tour suggestion.
Detours
can also be accepted if the traffic mes‐
sages are called up in the list.
1. "Navigation"
2. "Map"
3. "Traffic Info"
4. "Detour information"
5. "Detour"
Dynamic destination guidance
The
route is automatically changed in the event
of traffic obstructions.
▷ The system does not point out traffic ob‐
structions along the original route.
▷ Traffic bulletins continue to be displayed on
the map.
▷ Depending on road type and the kind and
extent of the traffic obstruction, the calcu‐
lated route may lead through the traffic ob‐
struction.
▷ Dangerous situations are displayed regard‐
less of the setting.
To activate dynamic destination guidance:
1. "Navigation"
2. Open "Options".
3. "Dynamic guidance"
Seite 167
167Online Edition for Part no. 01 40 2 606 469 - 03 11 490
Reference Mobility Communication Entertainment
Navigation Driving tips Controls At a glance
Page 175 of 304
1.
"Radio"
2. "FM" or "AM"
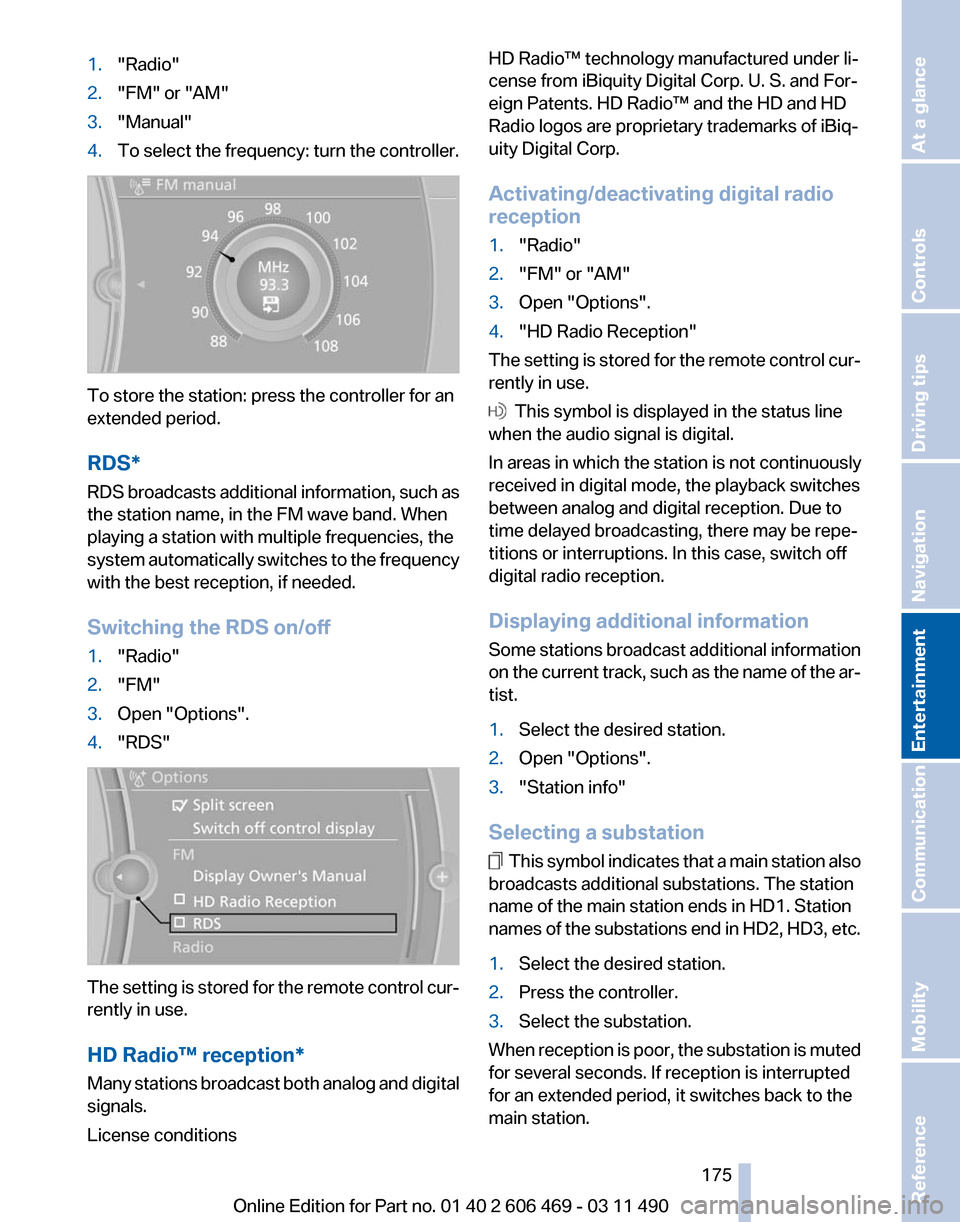
3. "Manual"
4. To select the frequency: turn the controller. To store the station: press the controller for an
extended period.
RDS*
RDS
broadcasts additional information, such as
the station name, in the FM wave band. When
playing a station with multiple frequencies, the
system automatically switches to the frequency
with the best reception, if needed.
Switching the RDS on/off
1. "Radio"
2. "FM"
3. Open "Options".
4. "RDS" The setting is stored for the remote control cur‐
rently in use.
HD Radio™ reception
*
Many stations broadcast both analog and digital
signals.
License conditions HD Radio™ technology manufactured under li‐
cense from iBiquity Digital Corp. U. S. and For‐
eign Patents. HD Radio™ and the HD and HD
Radio logos are proprietary trademarks of iBiq‐
uity Digital Corp.
Activating/deactivating digital radio
reception
1.
"Radio"
2. "FM" or "AM"
3. Open "Options".
4. "HD Radio Reception"
The setting is stored for the remote control cur‐
rently in use. This symbol is displayed in the status line
when the audio signal is digital.
In areas in which the station is not continuously
received in digital mode, the playback switches
between analog and digital reception. Due to
time delayed broadcasting, there may be repe‐
titions or interruptions. In this case, switch off
digital radio reception.
Displaying additional information
Some
stations broadcast additional information
on the current track, such as the name of the ar‐
tist.
1. Select the desired station.
2. Open "Options".
3. "Station info"
Selecting a substation This symbol indicates that a main station also
broadcasts additional substations. The station
name of the main station ends in HD1. Station
names
of the substations end in HD2, HD3, etc.
1. Select the desired station.
2. Press the controller.
3. Select the substation.
When reception is poor, the substation is muted
for several seconds. If reception is interrupted
for an extended period, it switches back to the
main station.
Seite 175
175Online Edition for Part no. 01 40 2 606 469 - 03 11 490
Reference Mobility Communication
Entertainment Navigation Driving tips Controls At a glance
Page 178 of 304
Selecting a category
1.
"Radio"
2. "Satellite radio"
3. "Category"
4. Select the desired category.
Timeshift
Approx. one hour of the program being broad‐
cast on the channel currently being listened to
is
stored in a buffer. Prerequisite: the signal must
be available.
The stored audio track can be played with a de‐
lay following the live broadcast. When the buffer
is full, the older tracks are overwritten. The buf‐
fer is cleared when a new channel is selected.
Opening the timeshift function
1. "Radio"
2. "Satellite radio"
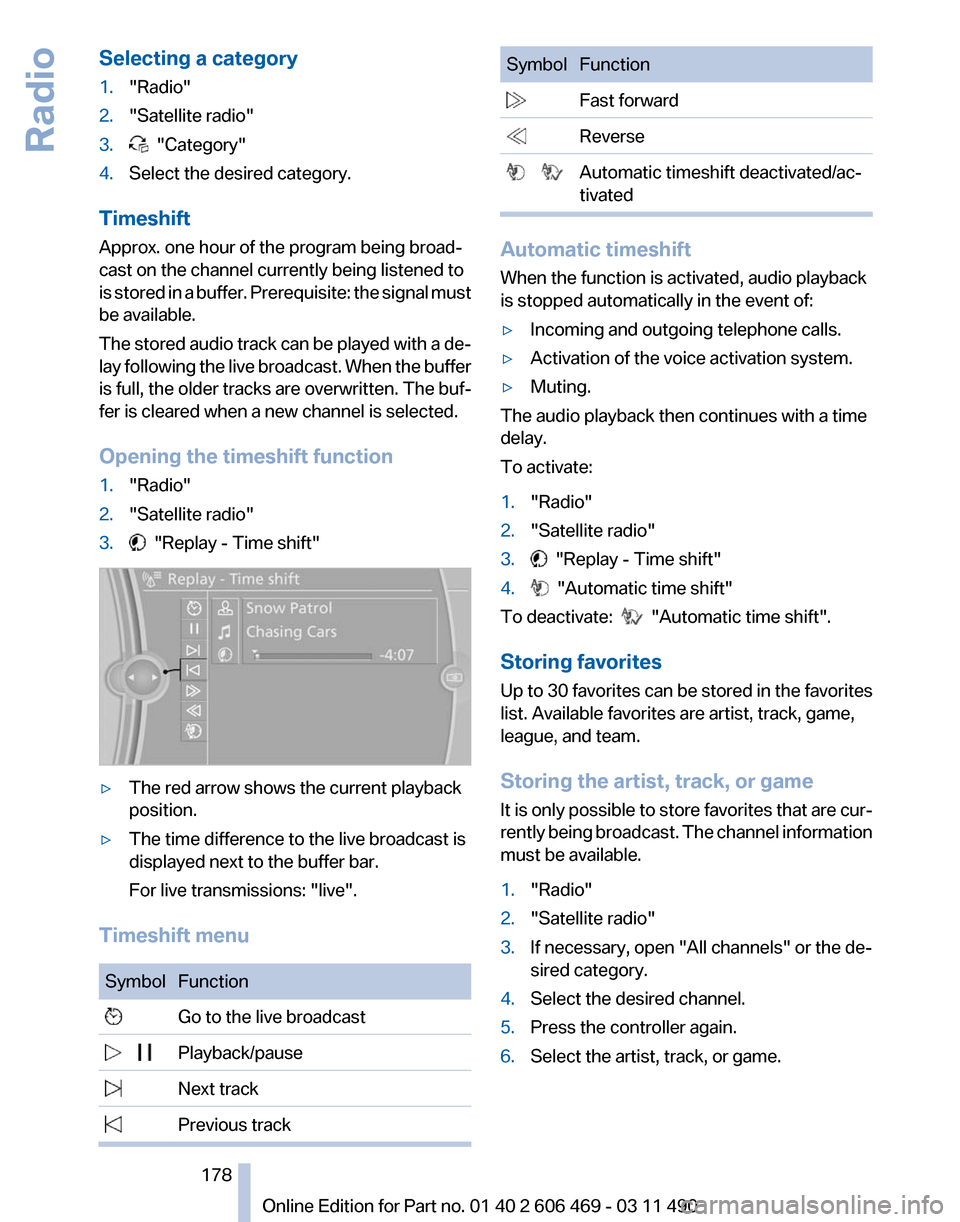
3. "Replay - Time shift"
▷
The red arrow shows the current playback
position.
▷ The time difference to the live broadcast is
displayed next to the buffer bar.
For live transmissions: "live".
Timeshift menu Symbol Function
Go to the live broadcast
Playback/pause
Next track
Previous track Symbol Function
Fast forward
Reverse
Automatic timeshift deactivated/ac‐
tivated Automatic timeshift
When the function is activated, audio playback
is stopped automatically in the event of:
▷
Incoming and outgoing telephone calls.
▷ Activation of the voice activation system.
▷ Muting.
The audio playback then continues with a time
delay.
To activate:
1. "Radio"
2. "Satellite radio"
3. "Replay - Time shift"
4. "Automatic time shift"
To deactivate: "Automatic time shift".
Storing favorites
Up
to 30 favorites can be stored in the favorites
list. Available favorites are artist, track, game,
league, and team.
Storing the artist, track, or game
It is only possible to store favorites that are cur‐
rently being broadcast. The channel information
must be available.
1. "Radio"
2. "Satellite radio"
3. If necessary, open "All channels" or the de‐
sired category.
4. Select the desired channel.
5. Press the controller again.
6. Select the artist, track, or game.
Seite 178
178 Online Edition for Part no. 01 40 2 606 469 - 03 11 490
Radio