Fail BMW 530I SEDAN 2004 E60 User Guide
[x] Cancel search | Manufacturer: BMW, Model Year: 2004, Model line: 530I SEDAN, Model: BMW 530I SEDAN 2004 E60Pages: 220, PDF Size: 7.12 MB
Page 80 of 220
Technology for comfort, convenience and safety
78
CBC Cornering Brake Control
CBC is a supplement to ABS. It provides
further enhancements in vehicle stability
and steering response during lane changes
and cornering at high rates of lateral accel-
eration.
EBV Electronic Brake Force
Distribution
EBV controls the brake system's applica-
tion pressure at the rear wheels to ensure
stable deceleration.
In case of malfunction
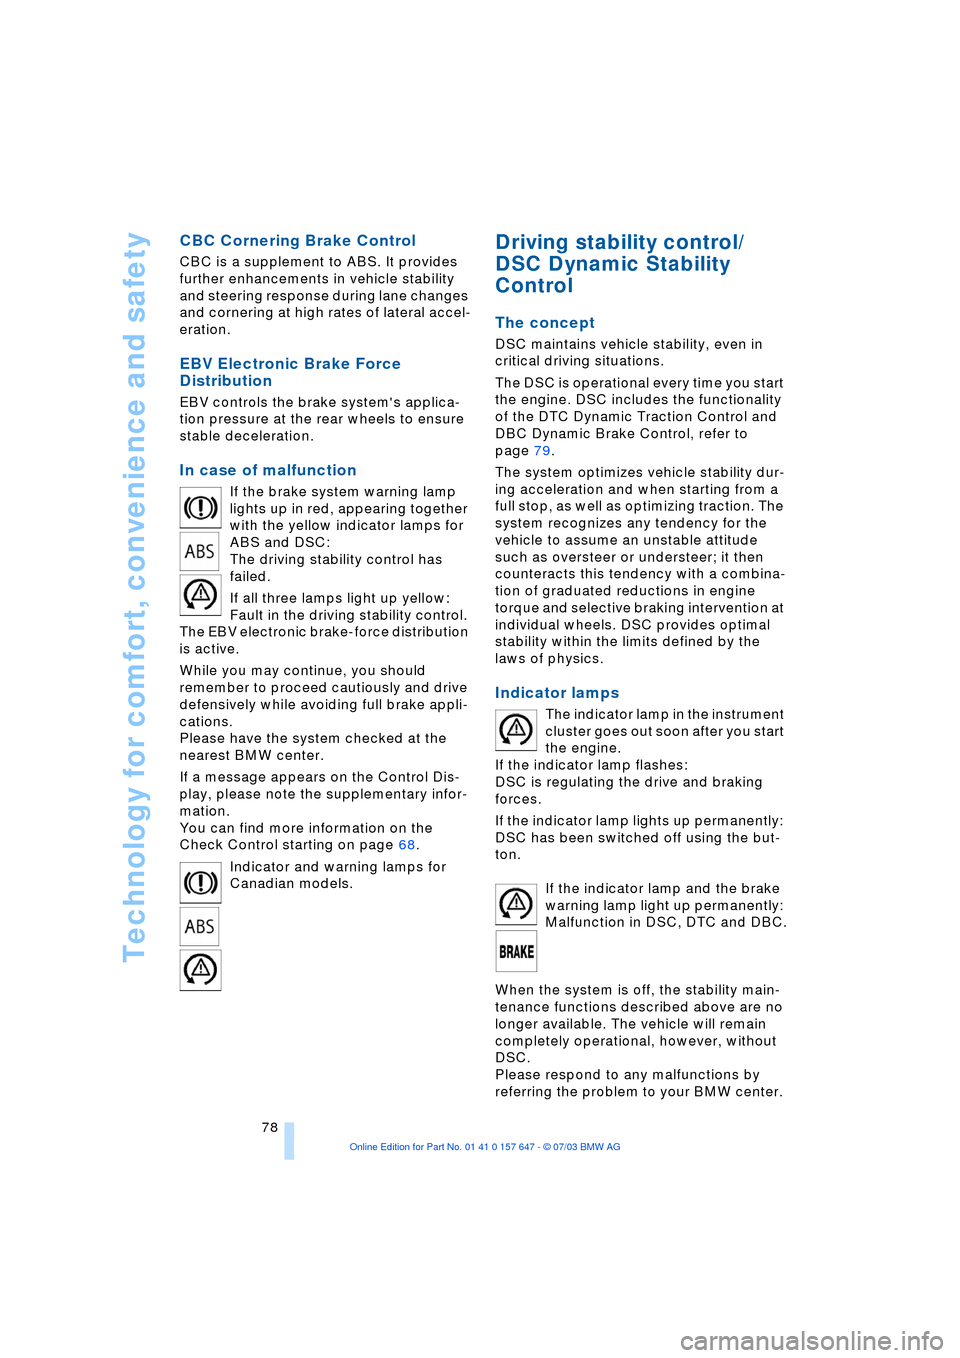
If the brake system warning lamp
lights up in red, appearing together
with the yellow indicator lamps for
ABS and DSC:
The driving stability control has
failed.
If all three lamps light up yellow:
Fault in the driving stability control.
The EBV electronic brake-force distribution
is active.
While you may continue, you should
remember to proceed cautiously and drive
defensively while avoiding full brake appli-
cations.
Please have the system checked at the
nearest BMW center.
If a message appears on the Control Dis-
play, please note the supplementary infor-
mation.
You can find more information on the
Check Control starting on page 68.
Indicator and warning lamps for
Canadian models.
Driving stability control/
DSC Dynamic Stability
Control
The concept
DSC maintains vehicle stability, even in
critical driving situations.
The DSC is operational every time you start
the engine. DSC includes the functionality
of the DTC Dynamic Traction Control and
DBC Dynamic Brake Control, refer to
page 79.
The system optimizes vehicle stability dur-
ing acceleration and when starting from a
full stop, as well as optimizing traction. The
system recognizes any tendency for the
vehicle to assume an unstable attitude
such as oversteer or understeer; it then
counteracts this tendency with a combina-
tion of graduated reductions in engine
torque and selective braking intervention at
individual wheels. DSC provides optimal
stability within the limits defined by the
laws of physics.
Indicator lamps
The indicator lamp in the instrument
cluster goes out soon after you start
the engine.
If the indicator lamp flashes:
DSC is regulating the drive and braking
forces.
If the indicator lamp lights up permanently:
DSC has been switched off using the but-
ton.
If the indicator lamp and the brake
warning lamp light up permanently:
Malfunction in DSC, DTC and DBC.
When the system is off, the stability main-
tenance functions described above are no
longer available. The vehicle will remain
completely operational, however, without
DSC.
Please respond to any malfunctions by
referring the problem to your BMW center.
Page 83 of 220
Controls
81Reference
At a glance
Driving tips
Communications
Navigation
Entertainment
Mobility
natural, even pressure drop in all four
tires.<
In the following situations, on the other
hand, there can be delays in detecting tire
pressure losses, and even system failure:
>When you are driving on snow-covered
or slippery road surfaces
>If you are using a sports driving style:
slip on the drive wheels, high lateral
acceleration
>False alarms and undetected loss of
pressure may occur when you are driv-
ing with snow chains fitted
>When you are driving with the compact
wheel, the Flat Tire Monitor is unable to
function.
Initializing the system
Perform the initialization immediately
after correcting the inflation pressure,
after changing a tire or changing a wheel or
all wheels. A drive is necessary for this pur-
pose.<
Control Center, for principle details, refer to
page 16:
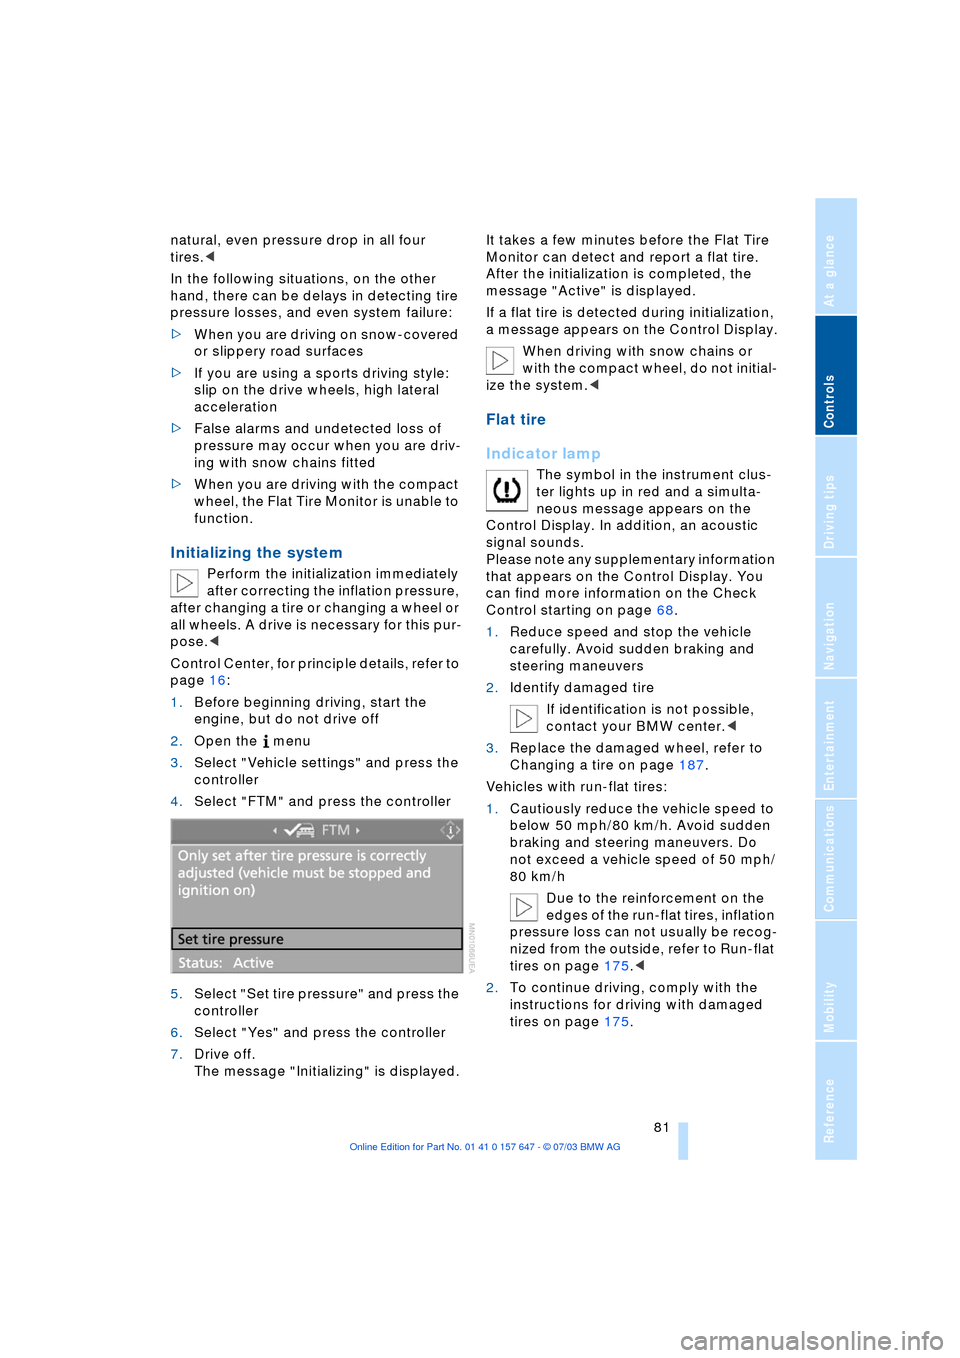
1.Before beginning driving, start the
engine, but do not drive off
2.Open the menu
3.Select "Vehicle settings" and press the
controller
4.Select "FTM" and press the controller
5.Select "Set tire pressure" and press the
controller
6.Select "Yes" and press the controller
7.Drive off.
The message "Initializing" is displayed.It takes a few minutes before the Flat Tire
Monitor can detect and report a flat tire.
After the initialization is completed, the
message "Active" is displayed.
If a flat tire is detected during initialization,
a message appears on the Control Display.
When driving with snow chains or
with the compact wheel, do not initial-
ize the system.<
Flat tire
Indicator lamp
The symbol in the instrument clus-
ter lights up in red and a simulta-
neous message appears on the
Control Display. In addition, an acoustic
signal sounds.
Please note any supplementary information
that appears on the Control Display. You
can find more information on the Check
Control starting on page 68.
1.Reduce speed and stop the vehicle
carefully. Avoid sudden braking and
steering maneuvers
2.Identify damaged tire
If identification is not possible,
contact your BMW center.<
3.Replace the damaged wheel, refer to
Changing a tire on page 187.
Vehicles with run-flat tires:
1.Cautiously reduce the vehicle speed to
below 50 mph/80 km/h. Avoid sudden
braking and steering maneuvers. Do
not exceed a vehicle speed of 50 mph/
80 km/h
Due to the reinforcement on the
edges of the run-flat tires, inflation
pressure loss can not usually be recog-
nized from the outside, refer to Run-flat
tires on page 175.<
2.To continue driving, comply with the
instructions for driving with damaged
tires on page 175.
Page 85 of 220
Controls
83Reference
At a glance
Driving tips
Communications
Navigation
Entertainment
Mobility
Airbags
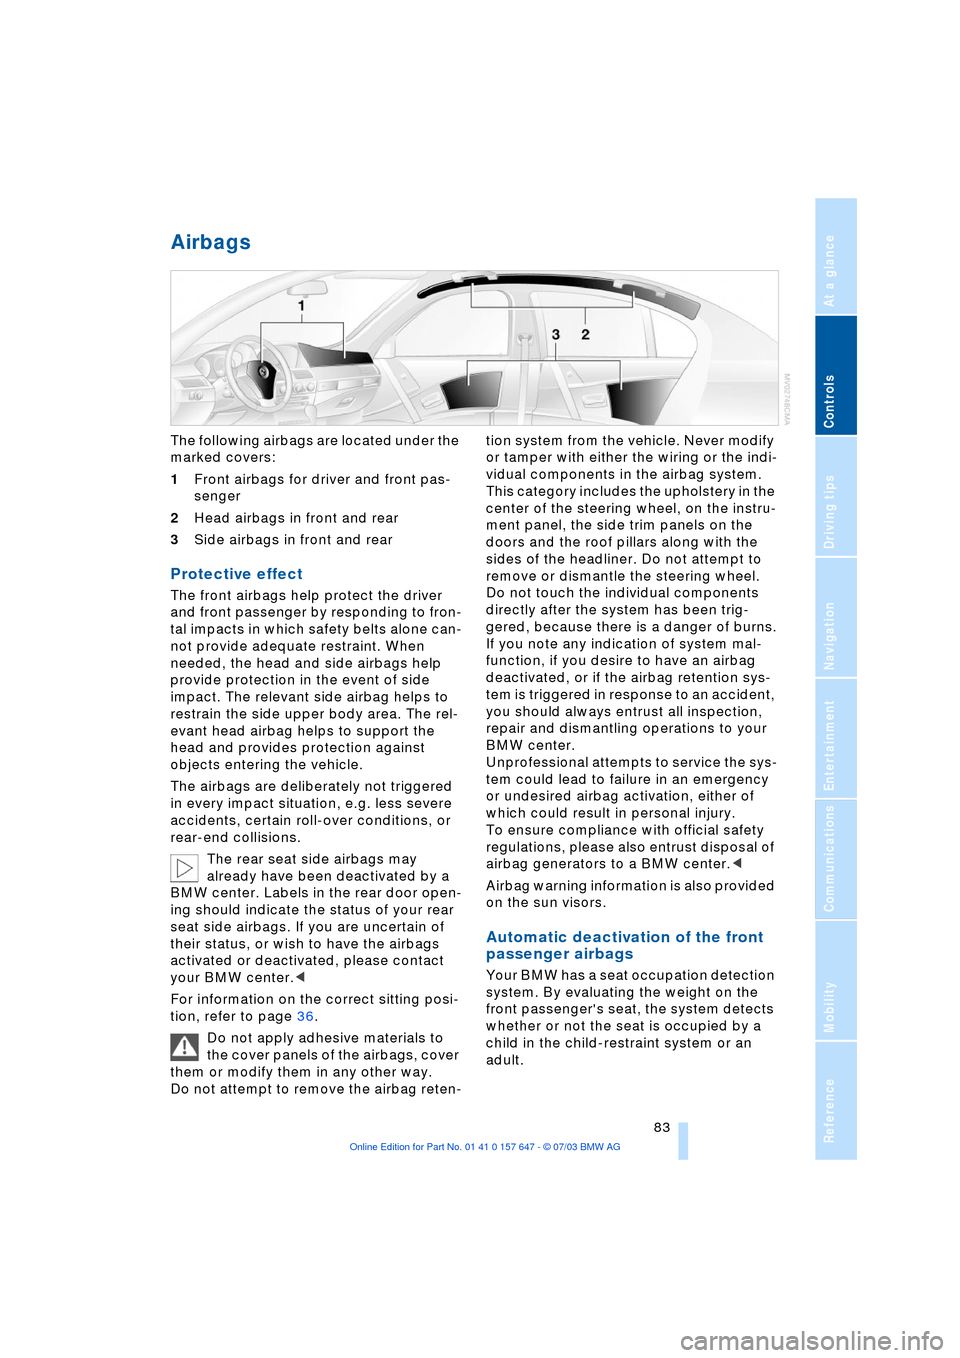
The following airbags are located under the
marked covers:
1Front airbags for driver and front pas-
senger
2Head airbags in front and rear
3Side airbags in front and rear
Protective effect
The front airbags help protect the driver
and front passenger by responding to fron-
tal impacts in which safety belts alone can-
not provide adequate restraint. When
needed, the head and side airbags help
provide protection in the event of side
impact. The relevant side airbag helps to
restrain the side upper body area. The rel-
evant head airbag helps to support the
head and provides protection against
objects entering the vehicle.
The airbags are deliberately not triggered
in every impact situation, e.g. less severe
accidents, certain roll-over conditions, or
rear-end collisions.
The rear seat side airbags may
already have been deactivated by a
BMW center. Labels in the rear door open-
ing should indicate the status of your rear
seat side airbags. If you are uncertain of
their status, or wish to have the airbags
activated or deactivated, please contact
your BMW center.<
For information on the correct sitting posi-
tion, refer to page 36.
Do not apply adhesive materials to
the cover panels of the airbags, cover
them or modify them in any other way.
Do not attempt to remove the airbag reten-tion system from the vehicle. Never modify
or tamper with either the wiring or the indi-
vidual components in the airbag system.
This category includes the upholstery in the
center of the steering wheel, on the instru-
ment panel, the side trim panels on the
doors and the roof pillars along with the
sides of the headliner. Do not attempt to
remove or dismantle the steering wheel.
Do not touch the individual components
directly after the system has been trig-
gered, because there is a danger of burns.
If you note any indication of system mal-
function, if you desire to have an airbag
deactivated, or if the airbag retention sys-
tem is triggered in response to an accident,
you should always entrust all inspection,
repair and dismantling operations to your
BMW center.
Unprofessional attempts to service the sys-
tem could lead to failure in an emergency
or undesired airbag activation, either of
which could result in personal injury.
To ensure compliance with official safety
regulations, please also entrust disposal of
airbag generators to a BMW center.<
Airbag warning information is also provided
on the sun visors.
Automatic deactivation of the front
passenger airbags
Your BMW has a seat occupation detection
system. By evaluating the weight on the
front passenger's seat, the system detects
whether or not the seat is occupied by a
child in the child-restraint system or an
adult.
Page 100 of 220
Practical interior accessories
98
Glove compartment
Opening
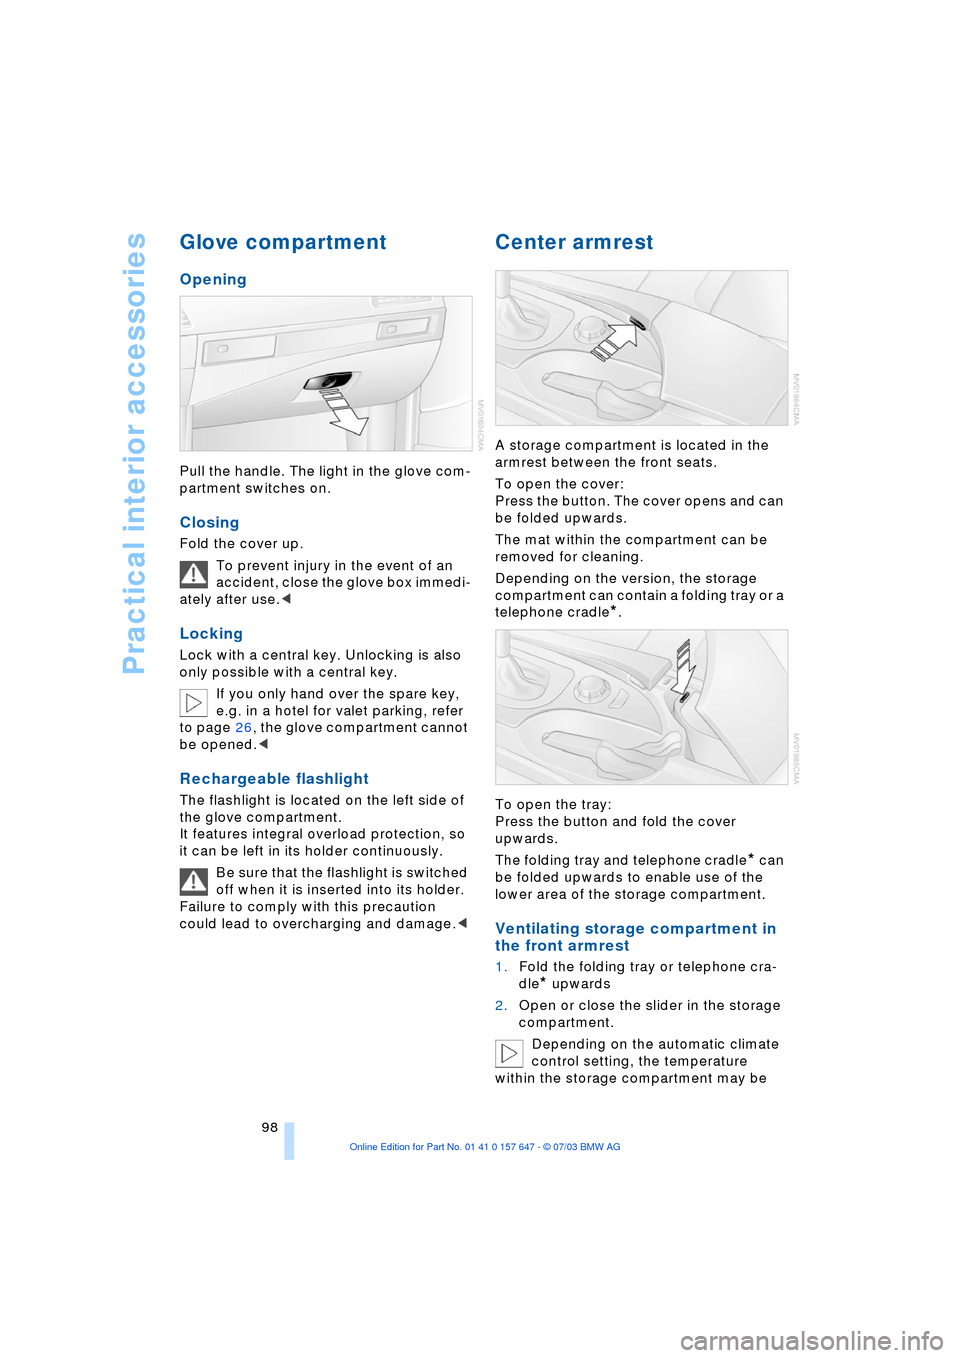
Pull the handle. The light in the glove com-
partment switches on.
Closing
Fold the cover up.
To prevent injury in the event of an
accident, close the glove box immedi-
ately after use.<
Locking
Lock with a central key. Unlocking is also
only possible with a central key.
If you only hand over the spare key,
e.g. in a hotel for valet parking, refer
to page 26, the glove compartment cannot
be opened.<
Rechargeable flashlight
The flashlight is located on the left side of
the glove compartment.
It features integral overload protection, so
it can be left in its holder continuously.
Be sure that the flashlight is switched
off when it is inserted into its holder.
Failure to comply with this precaution
could lead to overcharging and damage.<
Center armrest
A storage compartment is located in the
armrest between the front seats.
To open the cover:
Press the button. The cover opens and can
be folded upwards.
The mat within the compartment can be
removed for cleaning.
Depending on the version, the storage
compartment can contain a folding tray or a
telephone cradle
*.
To open the tray:
Press the button and fold the cover
upwards.
The folding tray and telephone cradle
* can
be folded upwards to enable use of the
lower area of the storage compartment.
Ventilating storage compartment in
the front armrest
1.Fold the folding tray or telephone cra-
dle
* upwards
2.Open or close the slider in the storage
compartment.
Depending on the automatic climate
control setting, the temperature
within the storage compartment may be
Page 104 of 220
Practical interior accessories
102
Loading
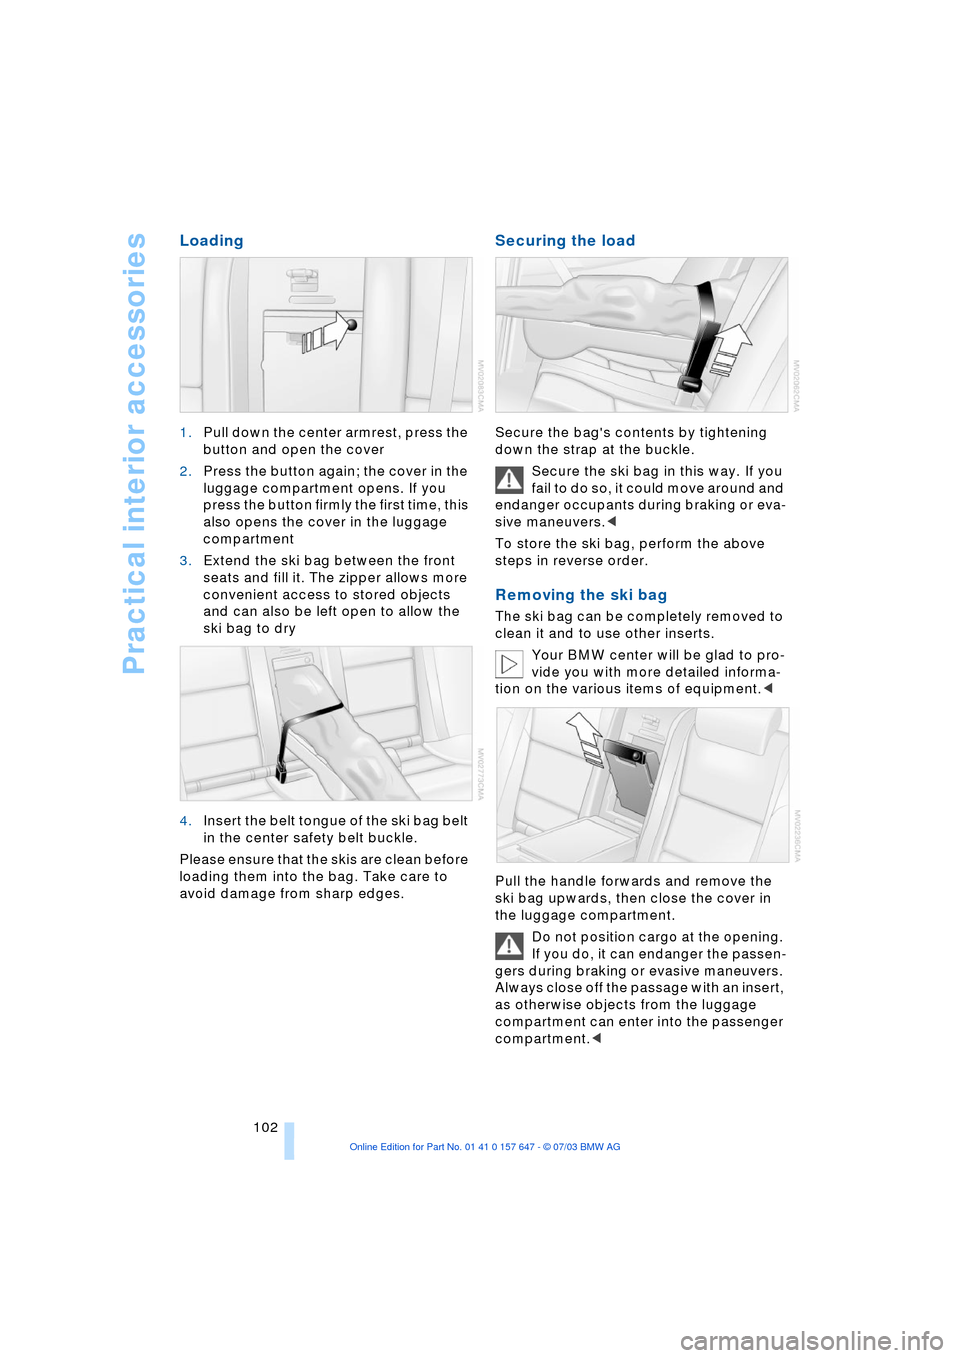
1.Pull down the center armrest, press the
button and open the cover
2.Press the button again; the cover in the
luggage compartment opens. If you
press the button firmly the first time, this
also opens the cover in the luggage
compartment
3.Extend the ski bag between the front
seats and fill it. The zipper allows more
convenient access to stored objects
and can also be left open to allow the
ski bag to dry
4.Insert the belt tongue of the ski bag belt
in the center safety belt buckle.
Please ensure that the skis are clean before
loading them into the bag. Take care to
avoid damage from sharp edges.
Securing the load
Secure the bag's contents by tightening
down the strap at the buckle.
Secure the ski bag in this way. If you
fail to do so, it could move around and
endanger occupants during braking or eva-
sive maneuvers.<
To store the ski bag, perform the above
steps in reverse order.
Removing the ski bag
The ski bag can be completely removed to
clean it and to use other inserts.
Your BMW center will be glad to pro-
vide you with more detailed informa-
tion on the various items of equipment.<
Pull the handle forwards and remove the
ski bag upwards, then close the cover in
the luggage compartment.
Do not position cargo at the opening.
If you do, it can endanger the passen-
gers during braking or evasive maneuvers.
Always close off the passage with an insert,
as otherwise objects from the luggage
compartment can enter into the passenger
compartment.<
Page 109 of 220
Driving tips
107Reference
At a glance
Controls
Communications
Navigation
Entertainment
Mobility
The risk of hydroplaning increases as the
tread depth of the tires decreases, refer
also to Tire tread on page 173.
Water on the road
Do not drive through water on the
road if it is deeper than 1 ft/30 cm,
and then only at walking speed at the most.
Otherwise, the vehicle's engine, the electri-
cal systems and the transmission may be
damaged.<
Brakes
Your BMW is equipped with ABS as stan-
dard. The best way to achieve optimized
response from the ABS is to apply maxi-
mum pressure to the brake pedal during
emergency: panic stops. Since the vehicle
maintains steering responsiveness, you
can nevertheless avoid possible obstacles
with a minimum of steering effort.
Pulsation at the brake pedal combines with
sounds from the hydraulic circuits to indi-
cate to the driver that ABS is in its active
mode.
Do not drive with your foot resting on
the brake pedal. Even light but con-
sistent pedal pressure can lead to high
temperatures, brake wear and possibly
even brake failure.<
Driving in wet conditions
While driving in wet conditions and in
heavy rain, it is a good idea to apply light
pressure to the brake pedal every few
miles. Monitor traffic conditions to ensure
that this maneuver does not endanger
other road users. The heat generated in this
process helps dry the pads and rotors to
ensure that full braking efficiency will then
be available when you need it.
Hills
You can retain full and unimpaired braking
efficiency by downshifting to a gear in
which only minimal brake applications are
needed when descending long or steep
downhill stretches. You can further enhance the engine's brak-
ing effect by selecting a lower gear in the
automatic transmission's manual mode,
downshifting as far as first gear on
extremely steep stretches, refer to
pages 50 and 55. This strategy helps you
avoid placing excessive loads on the brake
system.
Never drive with the clutch pressed or
allow the vehicle to coast with the
transmission in Neutral Ð or with the engine
switched off Ð there is no engine braking
when the transmission is in Neutral, and no
power-assist for brakes and steering when
the engine is not running.
Never allow floor mats, carpets or any other
objects to protrude into the area around the
accelerator and brake pedals and obstruct
their movement.<
Corrosion on the brake rotors
When the vehicle is driven only occasion-
ally, during extended periods when the
vehicle is not used at all, and in operating
conditions where brake applications are
less frequent, there is an increased ten-
dency for corrosion to form on rotors, while
contaminants accumulate on the brake
pads. This occurs because the minimum
pressure which must be exerted by the
pads during brake applications to clean the
rotors is not reached.
Should corrosion form on the brake rotors,
the brakes will tend to respond with a pul-
sating effect that even extended applica-
tion will fail to cure.
Brake pads
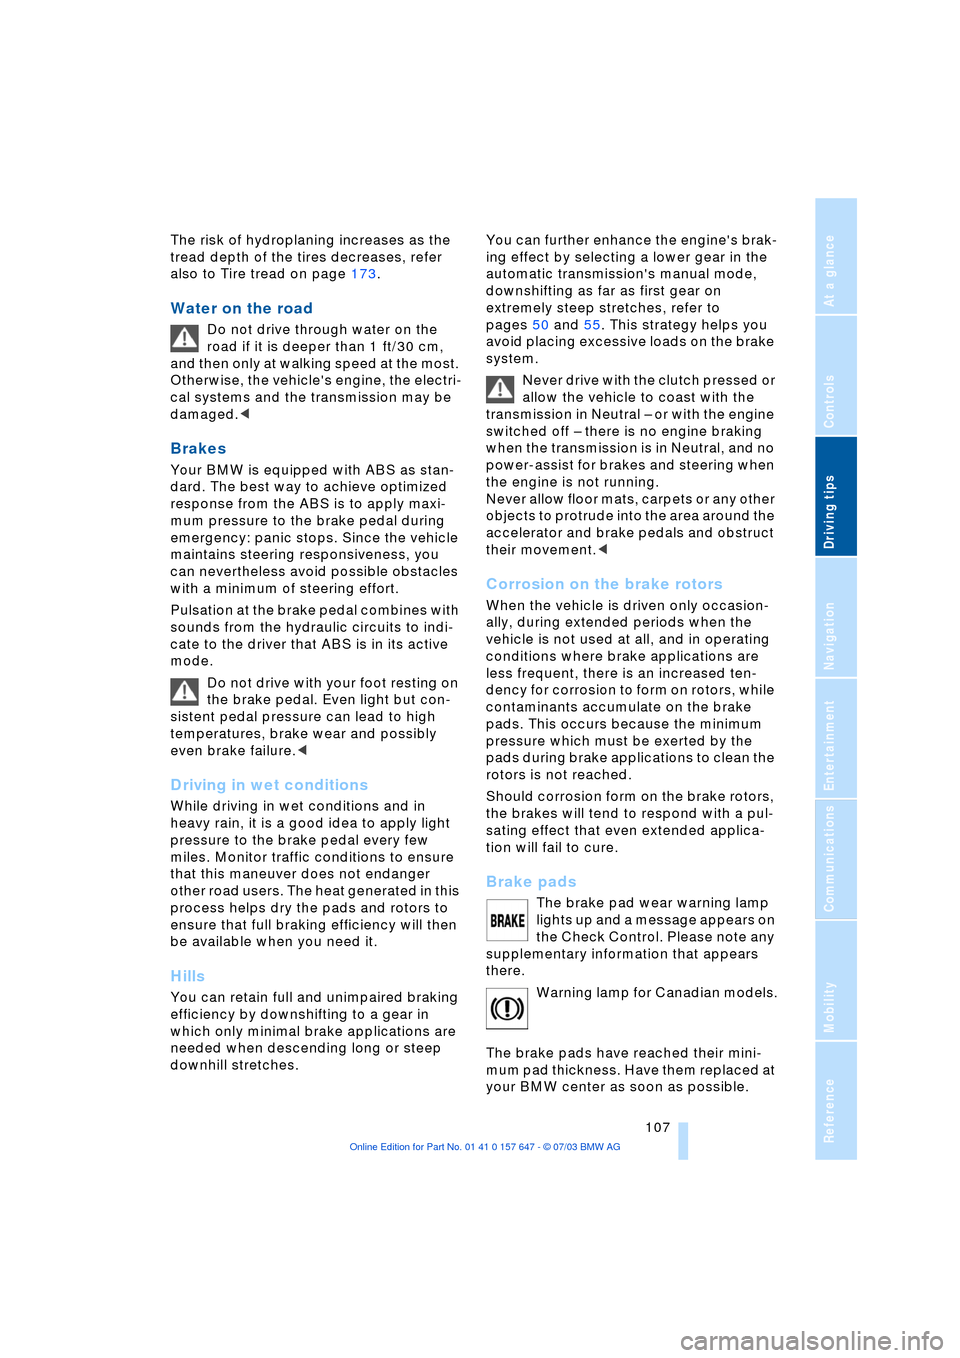
The brake pad wear warning lamp
lights up and a message appears on
the Check Control. Please note any
supplementary information that appears
there.
Warning lamp for Canadian models.
The brake pads have reached their mini-
mum pad thickness. Have them replaced at
your BMW center as soon as possible.
Page 145 of 220
Navigation
Entertainment
Driving tips
143Reference
At a glance
Controls
Communications
Mobility
Malfunctions
The BMW CD player is a Class 1 laser
product. Do not operate the system if
the cover is damaged, otherwise severe
eye damage can result.
Always refer repair and maintenance oper-
ations to qualified technicians.
With self-recorded CDs, labels applied
later can become detached during play-
back due to the development of heat and
cause irreparable damage to the device.<
CDs with copy protection devices
cannot be played on your CD player
or only with certain restrictions. These CDs
differ from the CD Audio Standard Red
Book, on the basis of which all CD players
and changers are designed. In this case,
please contact the CD dealer or manufac-
turer.
You may experience playback problems,
such as skips, when using CDs that you
have copied at home.
If the display fails to detect a CD that you
have loaded in the drive, check to ensure
that the CD has been inserted correctly and
inspect it for signs of defects.
High levels of humidity inside the system
can condense on the laser's scan lens and
temporarily prevent it from reading the
CD.<
Page 148 of 220
CD changer
146
Random play sequence
In this mode, the music tracks on the cur-
rent CD are played in a random sequence.
Control Center, for principle details, refer to
page 16:
1.Select "Set" and press the controller to
display a list of additional menu items
2.Select "Random" and press the control-
ler.
To cancel the random mode:
>Press the controller, select "Random"
and press the controller
>Select another function using the Con-
trol Center.
Fast forward/reverse
Buttons in the center console:
1.Select the direction:
Press and hold the button. The tracks
can be heard, but the tone is distorted
2.To interrupt the fast forward/reverse
function, release the button.
The system will continue play at the
point on the CD at which the button was
released.
The track is displayed on the Control Dis-
play, refer to page 18.
Malfunctions
The BMW CD changer is a Class 1
laser product. Do not operate the sys-
tem if the cover is damaged, otherwise
severe eye damage can result.
Always refer repair and maintenance oper-
ations to qualified technicians.
With self-recorded CDs, labels applied
later can become detached during play-
back due to the development of heat and
cause irreparable damage to the device.<
CDs with copy protection devices
cannot be played on your CD changer
or only with certain restrictions. These CDs
differ from the CD Audio Standard Red
Book, on the basis of which all CD players
and changers are designed. In this case,
please contact the CD dealer or manufac-
turer.
You may experience playback problems,
such as skips, when using CDs that you
have copied at home.
If the display fails to detect a CD that you
have loaded in the magazine, check to
ensure that the CD has been inserted cor-
rectly and inspect it for signs of defects.
High levels of humidity inside the system
can condense on the laser's scan lens and
temporarily prevent it from reading the
CD.<
Page 172 of 220
Wheels and tires
170
Wheels and tires
Tire inflation pressure
Information for your safety
It is not merely the tire's service life, but
also driving comfort and Ð to a great extent
Ð driving safety that depend on the condi-
tion of the tires and the maintenance of the
specified tire pressure.
Check and if necessary adjust tire
inflation pressures regularly, also on
the compact wheel, at least every two
weeks and before beginning a longer trip. If
you fail to observe this precaution you may
be driving on tires with incorrect tire pres-
sures, a condition that cannot only com-
promise your vehicle's driving stability, but
also lead to tire damage and the risk of an
accident.
Do not drive with deflated, i.e. flat tires,
except run-flat tires. A flat tire will seriously
impair your vehicle's handling and braking
response. Attempts to drive on a flat tire
can lead to loss of control over the vehi-
cle.<
Checking the pressure
Only check tire inflation pressure when the
tires are cold. This means after a maximum
of 1.25 miles/2 km driving or when the
vehicle has been parked for at least
2 hours. When tires are warm, the tire infla-
tion pressure increases.
After correcting the inflation pressure(s),
always reinitialize the Flat Tire Monitor,
refer to page 81.
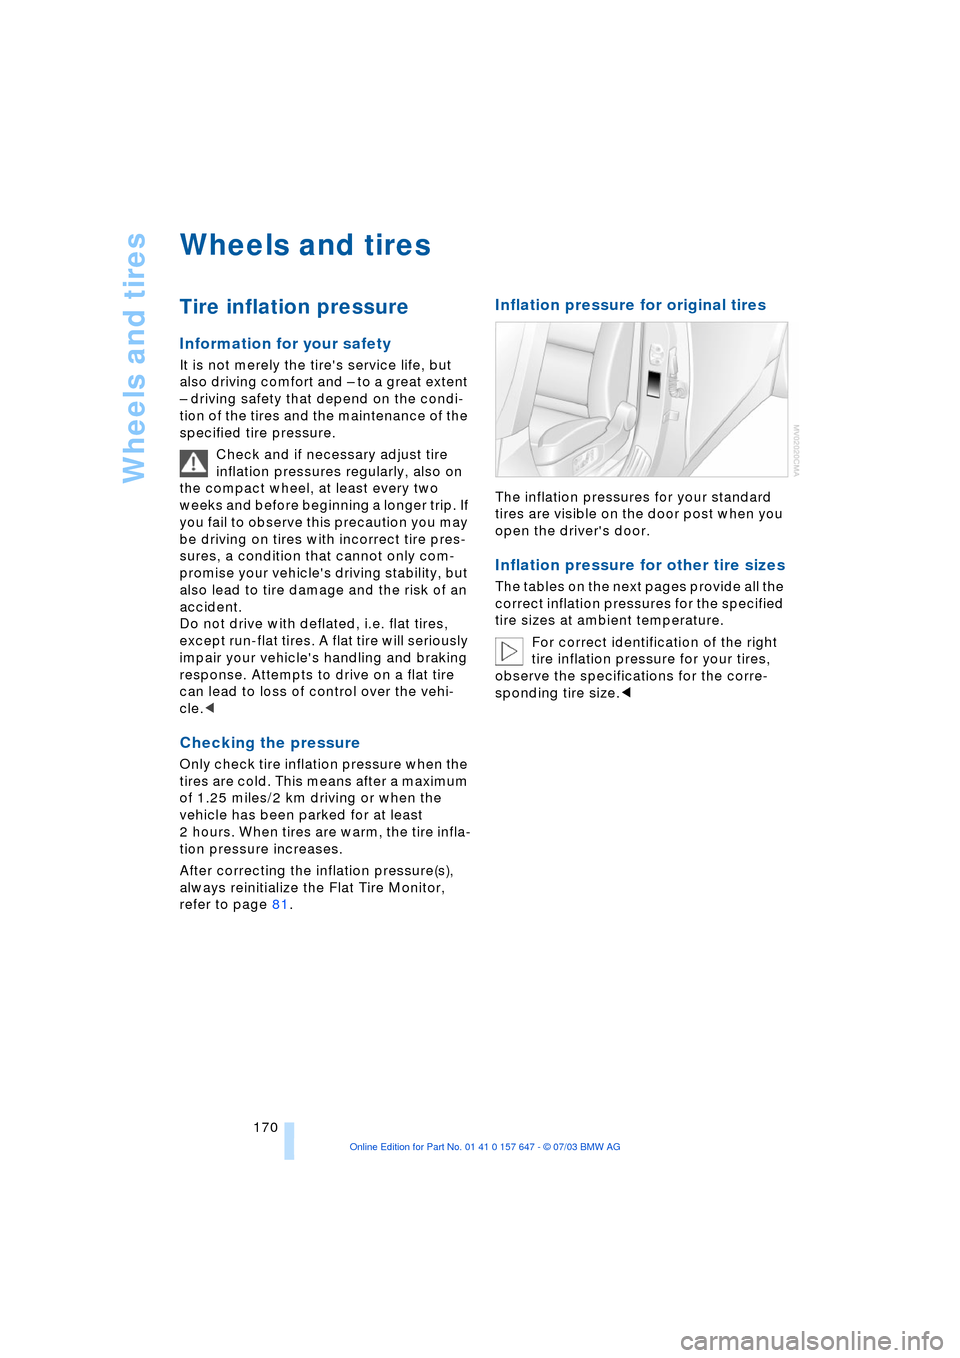
Inflation pressure for original tires
The inflation pressures for your standard
tires are visible on the door post when you
open the driver's door.
Inflation pressure for other tire sizes
The tables on the next pages provide all the
correct inflation pressures for the specified
tire sizes at ambient temperature.
For correct identification of the right
tire inflation pressure for your tires,
observe the specifications for the corre-
sponding tire size.<
Page 175 of 220
Mobility
173Reference
At a glance
Controls
Driving tips
Communications
Navigation
Entertainment
dently of the fact that tires can reach an age
of 10 years.
Uniform Tire Quality Grading
Quality grades can be found where appli-
cable on the tire sidewall between tread
shoulder and maximum section width. For
example:
Treadwear 200 Traction AA
Temperature A
DOT Quality Grades
Treadwear
Traction AA A B C
Temperature A B C
All passenger car tires must conform
to Federal Safety Requirements in
addition to these grades.<
Treadwear
The treadwear grade is a comparative rat-
ing based on the wear rate of the tire when
tested under controlled conditions on a
specified government test course.
For example, a tire graded 150 would wear
one and one-half (1 g) times as well on the
government course as a tire graded 100.
The relative performance of tires depends
upon the actual conditions of their use,
however, and may depart significantly from
the norm due to variations in driving habits,
service practices and differences in road
characteristics and climate.
Traction
The traction grades, from highest to lowest,
are AA, A, B, and C.
Those grades represent the tire's ability to
stop on wet pavement as measured under
controlled conditions on specified govern-
ment test surfaces of asphalt and concrete.
A tire marked C may have poor traction
performance.
The traction grade assigned to this
tire is based on straight-ahead brak-
ing traction tests, and does not include
acceleration, cornering, hydroplaning, or
peak traction characteristics.<
Temperature
The temperature grades are A Ð the
highest Ð B, and C, representing the tire's
resistance to the generation of heat and its
ability to dissipate heat when tested under
controlled conditions on a specified indoor
laboratory test wheel.
Sustained high temperature can cause the
material of the tire to degenerate and
reduce tire life, and excessive temperature
can lead to sudden tire failure. The grade C
corresponds to a level of performance
which all passenger car tires must meet
under the Federal Motor Vehicle Safety
Standard No. 109. Grades B and A repre-
sent higher levels of performance on the
laboratory test wheel than the minimum
required by law.
The temperature grade for this tire is
established for a tire that is properly
inflated and not overloaded. Excessive
speed, underinflation, or excessive load-
ing, either separately or in combination,
can cause heat buildup and possible tire
failure.<
RSC Ð Run-flat tires
You will recognize run-flat tires by a circular
symbol containing the letters RSC on the
side of the tire, refer to page 175.
M+S
Winter and all-season tires.
These have better winter properties than
summer tires.
Tire condition
Inspect your tires frequently for treadwear,
signs of damage and for foreign objects
lodged in the tread. Check the tread depth.
Tire tread
The tread depth should not drop below
0.12 in/3 mm, although, for example, Euro-
pean legislation only specifies a minimum
tread depth of 0.063 in/1.6 mm. At tread
depths below 0.12 in/3 mm there is an
increased risk of high-speed hydroplaning,