remote control BMW 530I SEDAN 2004 E60 Owner's Manual
[x] Cancel search | Manufacturer: BMW, Model Year: 2004, Model line: 530I SEDAN, Model: BMW 530I SEDAN 2004 E60Pages: 220, PDF Size: 7.12 MB
Page 28 of 220
Opening and closing
26
Opening and closing
The key set
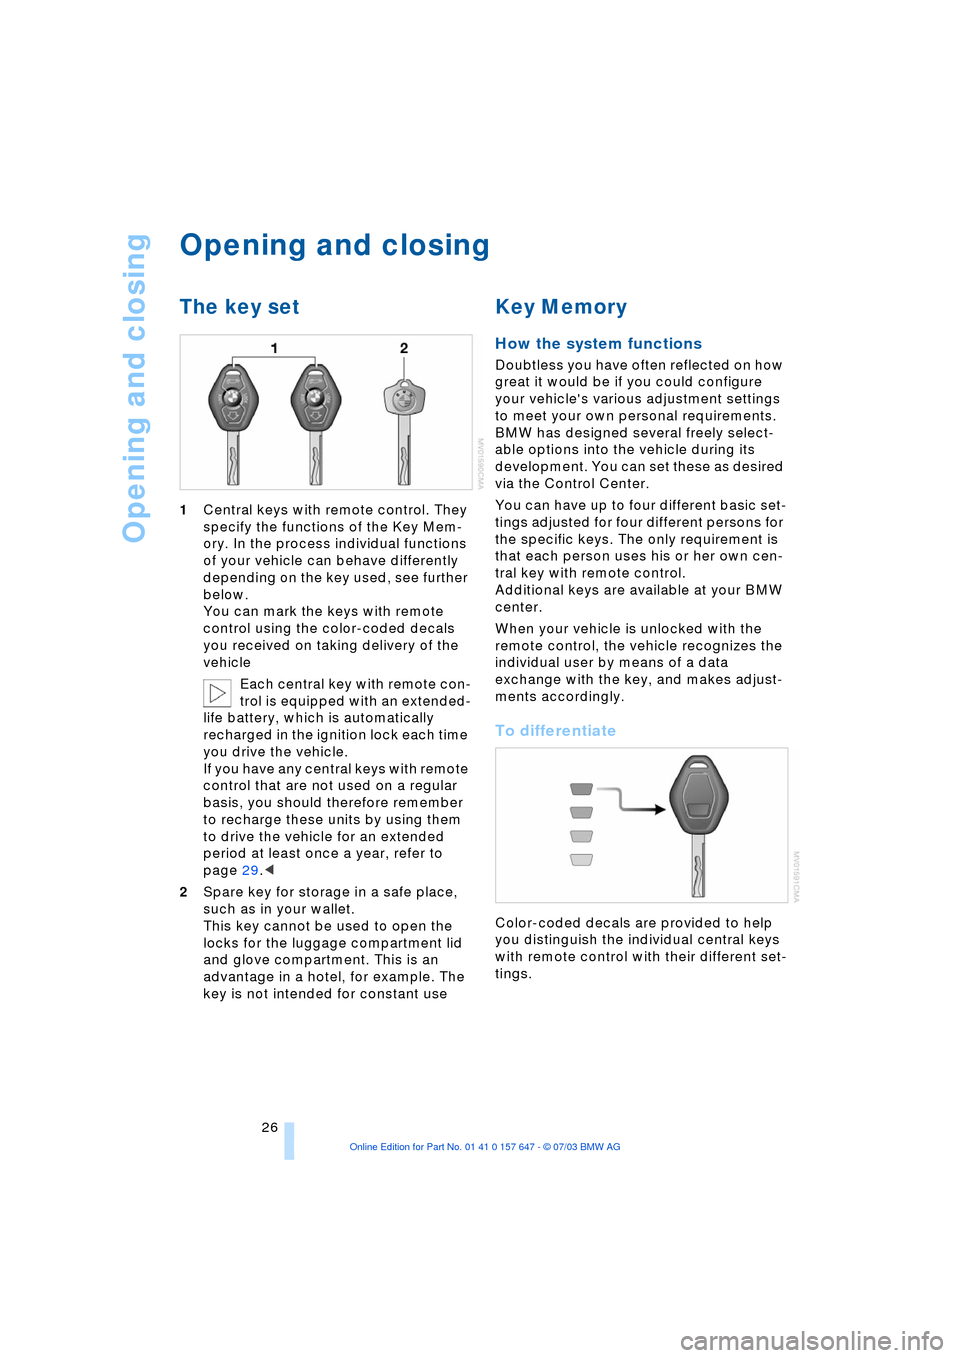
1Central keys with remote control. They
specify the functions of the Key Mem-
ory. In the process individual functions
of your vehicle can behave differently
depending on the key used, see further
below.
You can mark the keys with remote
control using the color-coded decals
you received on taking delivery of the
vehicle
Each central key with remote con-
trol is equipped with an extended-
life battery, which is automatically
recharged in the ignition lock each time
you drive the vehicle.
If you have any central keys with remote
control that are not used on a regular
basis, you should therefore remember
to recharge these units by using them
to drive the vehicle for an extended
period at least once a year, refer to
page 29.<
2Spare key for storage in a safe place,
such as in your wallet.
This key cannot be used to open the
locks for the luggage compartment lid
and glove compartment. This is an
advantage in a hotel, for example. The
key is not intended for constant use
Key Memory
How the system functions
Doubtless you have often reflected on how
great it would be if you could configure
your vehicle's various adjustment settings
to meet your own personal requirements.
BMW has designed several freely select-
able options into the vehicle during its
development. You can set these as desired
via the Control Center.
You can have up to four different basic set-
tings adjusted for four different persons for
the specific keys. The only requirement is
that each person uses his or her own cen-
tral key with remote control.
Additional keys are available at your BMW
center.
When your vehicle is unlocked with the
remote control, the vehicle recognizes the
individual user by means of a data
exchange with the key, and makes adjust-
ments accordingly.
To differentiate
Color-coded decals are provided to help
you distinguish the individual central keys
with remote control with their different set-
tings.
Page 29 of 220
Controls
27Reference
At a glance
Driving tips
Communications
Navigation
Entertainment
Mobility
Examples of Key Memory functions
>Automatic adjustment of the electric
driver's seat
>Locking the vehicle after moving off
>When unlocking with the remote con-
trol, either unlock only the driver's door
or the entire vehicle
>Activating optical warning for Park Dis-
tance Control PDC
>Setting the volume.
Central locking system
The concept
The central locking system is ready for
operation whenever the driver's door is
closed. This simultaneously engages and
releases the locks on the following:
>Doors
>Luggage compartment lid
>Fuel filler door.
The central locking system can be oper-
ated from the outside
>via the remote control
>via the driver's door lock
and from inside via the button for the cen-
tral locking system.
When the system is locked from inside, the
fuel filler door remains unlocked, refer to
page 30.
The anti-theft system is automatically acti-
vated whenever you operate the central
locking system from outside the vehicle. It
prevents the doors from being unlocked
using the safety lock buttons or door han-
dles. The alarm system is armed/disarmed
at the same time.
In the event of an accident, the central
locking system automatically unlocks the
vehicle. In addition, the hazard warning
flashers and interior lamps come on.
Opening and closing: from
outside
Using the remote control
The remote control provides two additional
functions for the central locking system:
>Switching on the interior lamps, refer to
page 28.
You can also use this function to locate
your vehicle in parking garages etc.
>Opening the luggage compartment lid,
refer to page 28.
The luggage compartment lid opens,
regardless of whether it was previously
locked or unlocked.
In addition, the remote control offers you
another function:
>Panic mode
In case of danger, you can trigger an
alarm.
When you lock/unlock the vehicle, you
simultaneously activate/deactivate the
anti-theft system, arm/disarm the alarm
system, and switch the interior lamps on/
off.
Protect the remote control against
unauthorized use by handing over
only the spare key, for example when using
hotel valet parking.<
Because any persons or animals left
unattended in a parked vehicle could
lock the doors from the inside, you should
always keep the remote control with you;
this precaution ensures that you will remain
able to unlock the vehicle from the outside
at all times.<
Unlocking
Press the button.
You can set which doors are to be
unlocked for each specific key:
Control Center, for principle details, refer to
page 16:
1.Open the menu
2.Select "Vehicle settings" and press the
controller
Page 31 of 220
Controls
29Reference
At a glance
Driving tips
Communications
Navigation
Entertainment
Mobility
Malfunctions
External systems or devices may cause
local interference in the functions of the
remote control.
Should the remote control fail to operate
owing to interference of this kind, you can
respond by using the central key to unlock
your vehicle at one of the doors.
In the event of a system malfunction,
please contact your BMW center, which is
also your source for replacement keys.
When it is no longer possible to lock the
vehicle via the remote control, the battery is
discharged. Use this remote control during
an extended drive; this will recharge the
battery, refer to page 26.
For US owners only
The transmitter and receiver units comply
with part 15 of the FCC/Federal Communi-
cation Commission regulations. Operation
is governed by the following:
FCC ID: LX8766S
LX8766E
LX8CAS
Compliance statement:
This device complies with part 15 of the
FCC Rules. Operation is subject to the fol-
lowing two conditions:
>This device may not cause harmful
interference, and
>this device must accept any interfer-
ence received, including interference
that may cause undesired operation.
Any unauthorized modifications or
changes to these devices could void
the user's authority to operate this equip-
ment.<
Using the door lock
Do not lock the vehicle when persons
are inside, as the vehicle cannot be
unlocked from inside.<
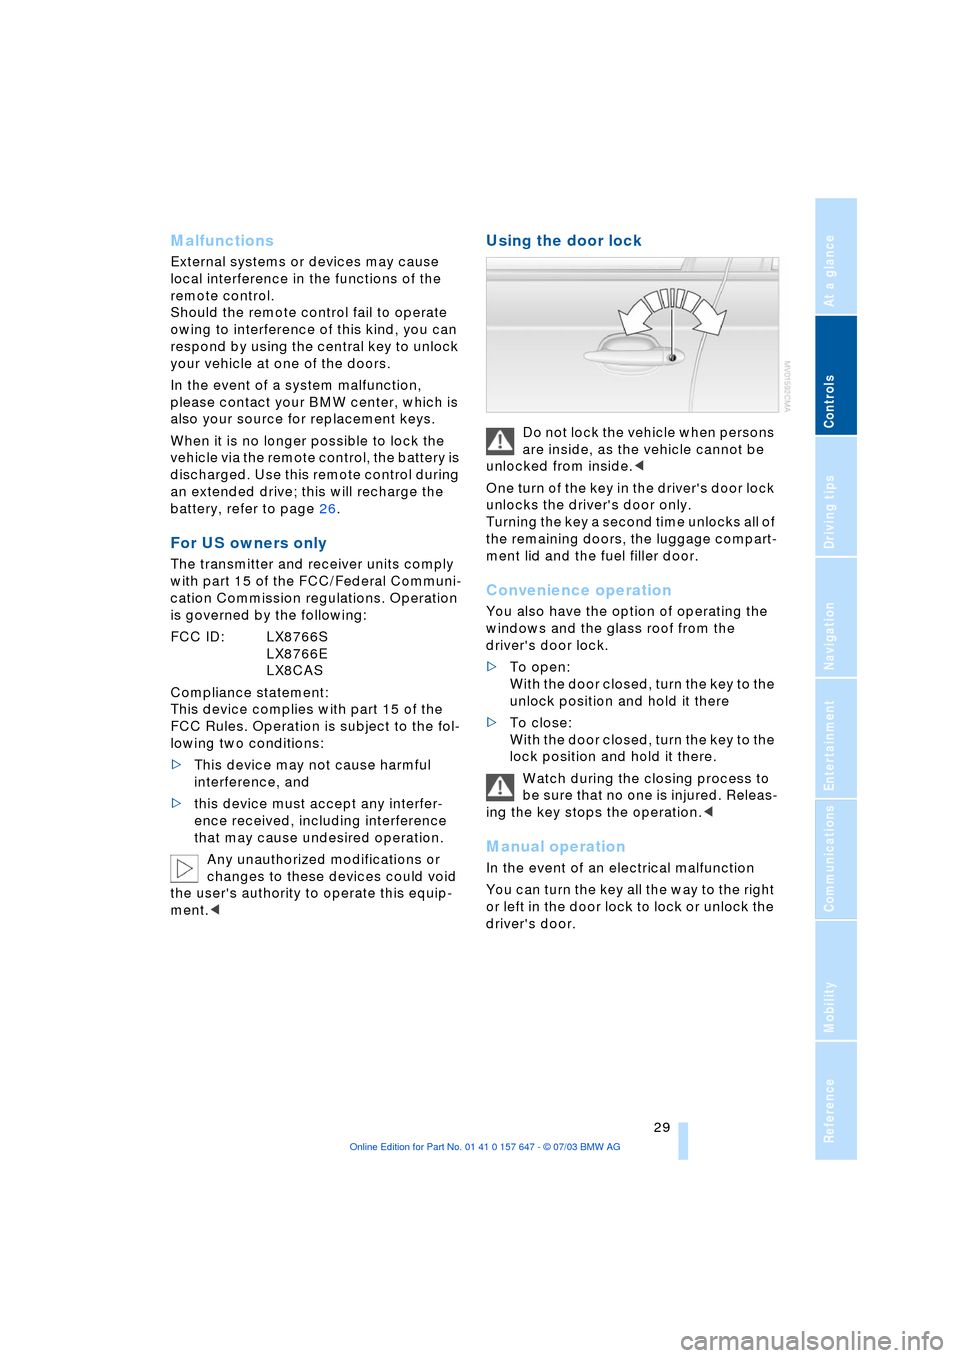
One turn of the key in the driver's door lock
unlocks the driver's door only.
Turning the key a second time unlocks all of
the remaining doors, the luggage compart-
ment lid and the fuel filler door.
Convenience operation
You also have the option of operating the
windows and the glass roof from the
driver's door lock.
>To open:
With the door closed, turn the key to the
unlock position and hold it there
>To close:
With the door closed, turn the key to the
lock position and hold it there.
Watch during the closing process to
be sure that no one is injured. Releas-
ing the key stops the operation.<
Manual operation
In the event of an electrical malfunction
You can turn the key all the way to the right
or left in the door lock to lock or unlock the
driver's door.
Page 32 of 220
Opening and closing
30
Opening and closing: from
inside
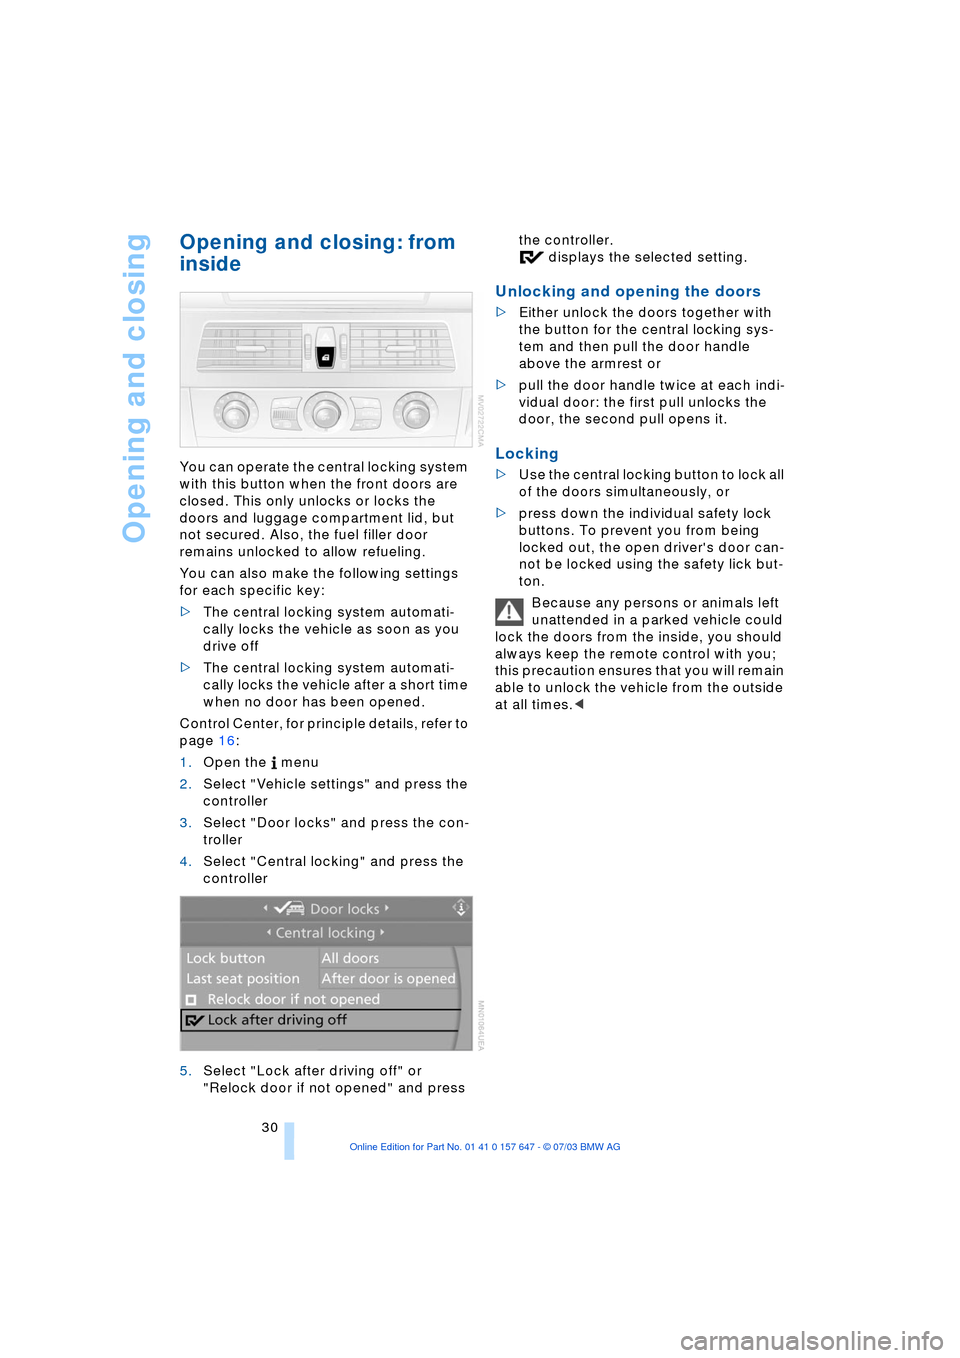
You can operate the central locking system
with this button when the front doors are
closed. This only unlocks or locks the
doors and luggage compartment lid, but
not secured. Also, the fuel filler door
remains unlocked to allow refueling.
You can also make the following settings
for each specific key:
>The central locking system automati-
cally locks the vehicle as soon as you
drive off
>The central locking system automati-
cally locks the vehicle after a short time
when no door has been opened.
Control Center, for principle details, refer to
page 16:
1.Open the menu
2.Select "Vehicle settings" and press the
controller
3.Select "Door locks" and press the con-
troller
4.Select "Central locking" and press the
controller
5.Select "Lock after driving off" or
"Relock door if not opened" and press the controller.
displays the selected setting.
Unlocking and opening the doors
>Either unlock the doors together with
the button for the central locking sys-
tem and then pull the door handle
above the armrest or
>pull the door handle twice at each indi-
vidual door: the first pull unlocks the
door, the second pull opens it.
Locking
>Use the central locking button to lock all
of the doors simultaneously, or
>press down the individual safety lock
buttons. To prevent you from being
locked out, the open driver's door can-
not be locked using the safety lick but-
ton.
Because any persons or animals left
unattended in a parked vehicle could
lock the doors from the inside, you should
always keep the remote control with you;
this precaution ensures that you will remain
able to unlock the vehicle from the outside
at all times.<
Page 33 of 220
Controls
31Reference
At a glance
Driving tips
Communications
Navigation
Entertainment
Mobility
Luggage compartment lid
Opening from inside
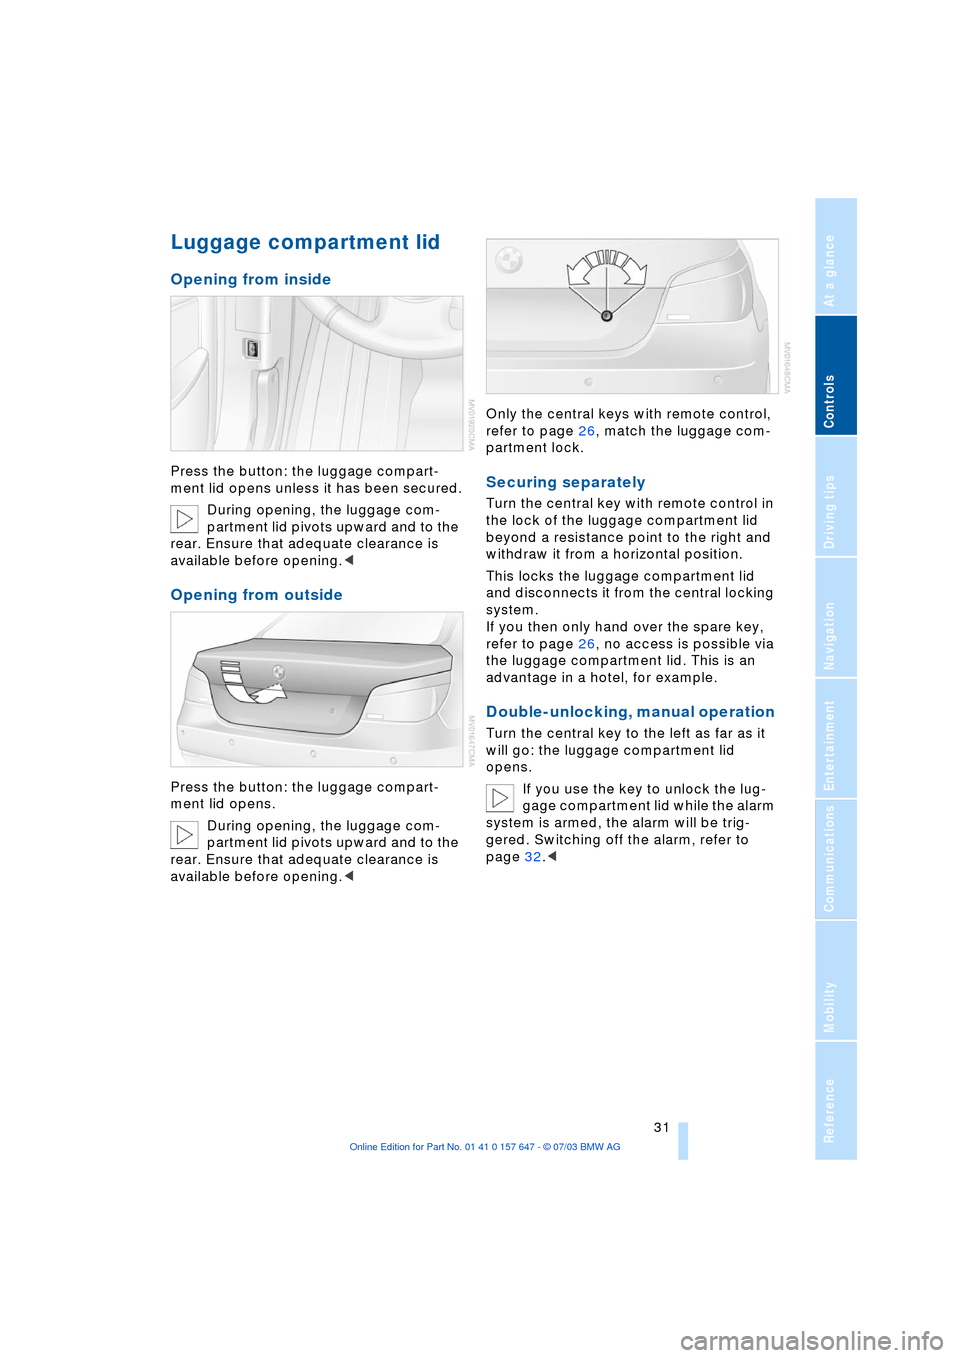
Press the button: the luggage compart-
ment lid opens unless it has been secured.
During opening, the luggage com-
partment lid pivots upward and to the
rear. Ensure that adequate clearance is
available before opening.<
Opening from outside
Press the button: the luggage compart-
ment lid opens.
During opening, the luggage com-
partment lid pivots upward and to the
rear. Ensure that adequate clearance is
available before opening.
partment lock.
Securing separately
Turn the central key with remote control in
the lock of the luggage compartment lid
beyond a resistance point to the right and
withdraw it from a horizontal position.
This locks the luggage compartment lid
and disconnects it from the central locking
system.
If you then only hand over the spare key,
refer to page 26, no access is possible via
the luggage compartment lid. This is an
advantage in a hotel, for example.
Double-unlocking, manual operation
Turn the central key to the left as far as it
will go: the luggage compartment lid
opens.
If you use the key to unlock the lug-
gage compartment lid while the alarm
system is armed, the alarm will be trig-
gered. Switching off the alarm, refer to
page 32.<
Page 34 of 220
Opening and closing
32
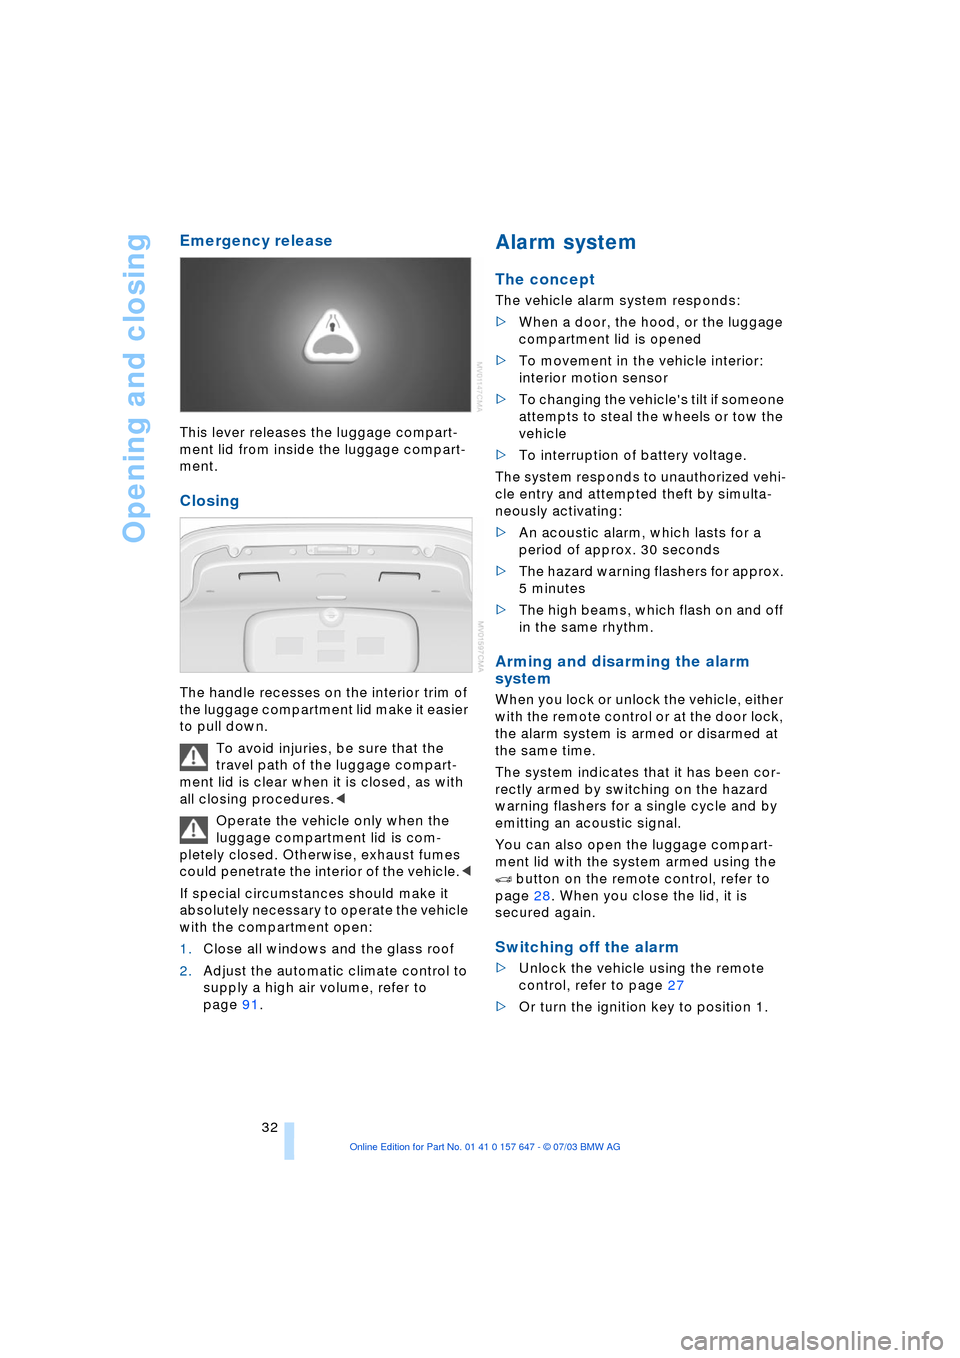
Emergency release
This lever releases the luggage compart-
ment lid from inside the luggage compart-
ment.
Closing
The handle recesses on the interior trim of
the luggage compartment lid make it easier
to pull down.
To avoid injuries, be sure that the
travel path of the luggage compart-
ment lid is clear when it is closed, as with
all closing procedures.<
Operate the vehicle only when the
luggage compartment lid is com-
pletely closed. Otherwise, exhaust fumes
could penetrate the interior of the vehicle.<
If special circumstances should make it
absolutely necessary to operate the vehicle
with the compartment open:
1.Close all windows and the glass roof
2.Adjust the automatic climate control to
supply a high air volume, refer to
page 91.
Alarm system
The concept
The vehicle alarm system responds:
>When a door, the hood, or the luggage
compartment lid is opened
>To movement in the vehicle interior:
interior motion sensor
>To changing the vehicle's tilt if someone
attempts to steal the wheels or tow the
vehicle
>To interruption of battery voltage.
The system responds to unauthorized vehi-
cle entry and attempted theft by simulta-
neously activating:
>An acoustic alarm, which lasts for a
period of approx. 30 seconds
>The hazard warning flashers for approx.
5 minutes
>The high beams, which flash on and off
in the same rhythm.
Arming and disarming the alarm
system
When you lock or unlock the vehicle, either
with the remote control or at the door lock,
the alarm system is armed or disarmed at
the same time.
The system indicates that it has been cor-
rectly armed by switching on the hazard
warning flashers for a single cycle and by
emitting an acoustic signal.
You can also open the luggage compart-
ment lid with the system armed using the
button on the remote control, refer to
page 28. When you close the lid, it is
secured again.
Switching off the alarm
>Unlock the vehicle using the remote
control, refer to page 27
>Or turn the ignition key to position 1.
Page 35 of 220
Controls
33Reference
At a glance
Driving tips
Communications
Navigation
Entertainment
Mobility
Indicator lamp displays
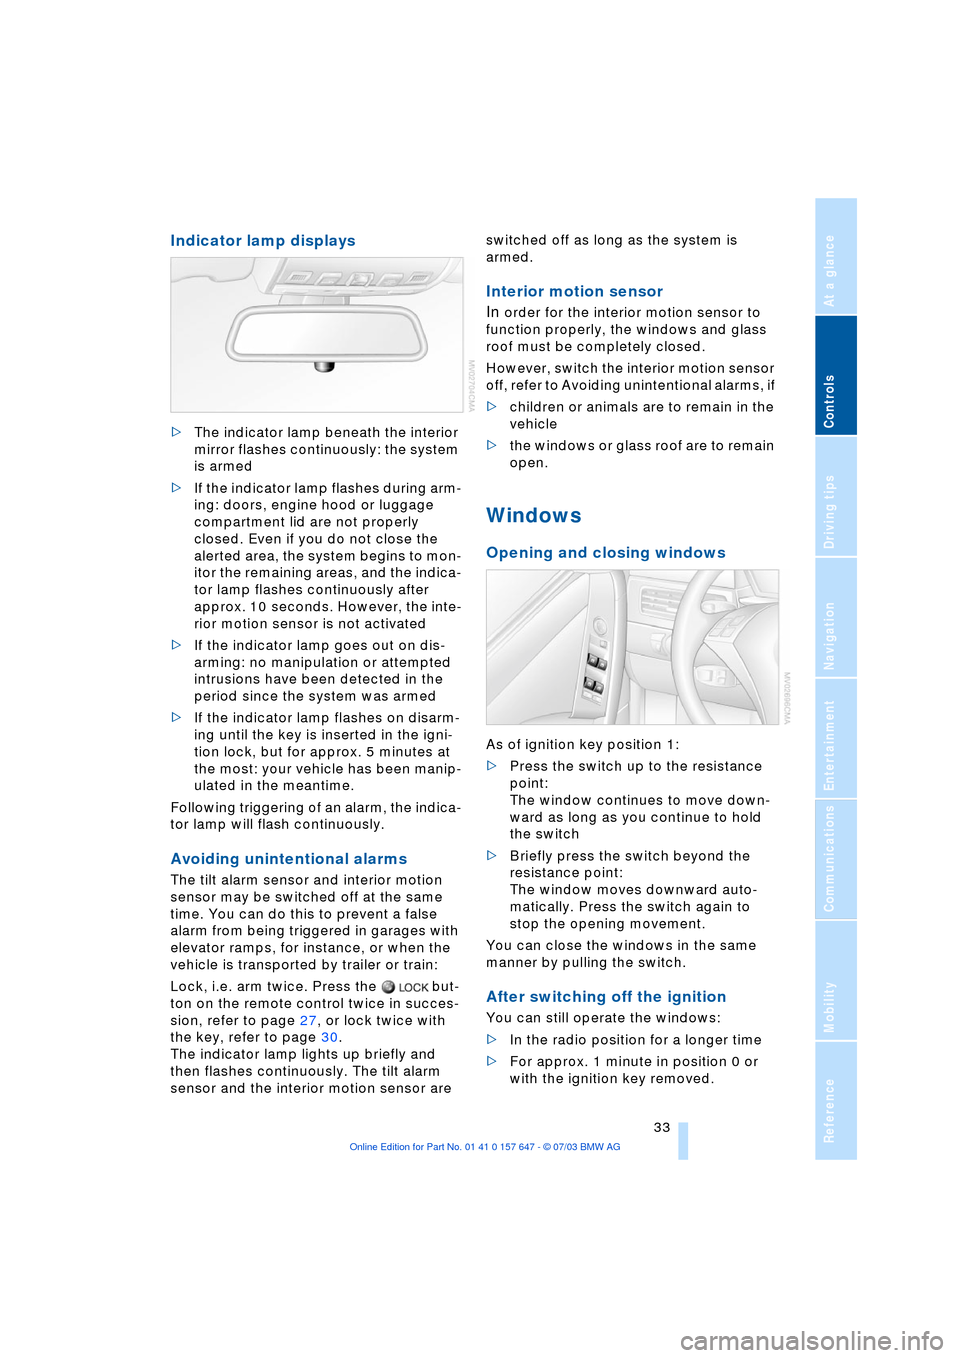
>The indicator lamp beneath the interior
mirror flashes continuously: the system
is armed
>If the indicator lamp flashes during arm-
ing: doors, engine hood or luggage
compartment lid are not properly
closed. Even if you do not close the
alerted area, the system begins to mon-
itor the remaining areas, and the indica-
tor lamp flashes continuously after
approx. 10 seconds. However, the inte-
rior motion sensor is not activated
>If the indicator lamp goes out on dis-
arming: no manipulation or attempted
intrusions have been detected in the
period since the system was armed
>If the indicator lamp flashes on disarm-
ing until the key is inserted in the igni-
tion lock, but for approx. 5 minutes at
the most: your vehicle has been manip-
ulated in the meantime.
Following triggering of an alarm, the indica-
tor lamp will flash continuously.
Avoiding unintentional alarms
The tilt alarm sensor and interior motion
sensor may be switched off at the same
time. You can do this to prevent a false
alarm from being triggered in garages with
elevator ramps, for instance, or when the
vehicle is transported by trailer or train:
Lock, i.e. arm twice. Press the but-
ton on the remote control twice in succes-
sion, refer to page 27, or lock twice with
the key, refer to page 30.
The indicator lamp lights up briefly and
then flashes continuously. The tilt alarm
sensor and the interior motion sensor are switched off as long as the system is
armed.
Interior motion sensor
In
order for the interior motion sensor to
function properly, the windows and glass
roof must be completely closed.
However, switch the interior motion sensor
off, refer to Avoiding unintentional alarms, if
>children or animals are to remain in the
vehicle
>the windows or glass roof are to remain
open.
Windows
Opening and closing windows
As of ignition key position 1:
>Press the switch up to the resistance
point:
The window continues to move down-
ward as long as you continue to hold
the switch
>Briefly press the switch beyond the
resistance point:
The window moves downward auto-
matically. Press the switch again to
stop the opening movement.
You can close the windows in the same
manner by pulling the switch.
After switching off the ignition
You can still operate the windows:
>In the radio position for a longer time
>For approx. 1 minute in position 0 or
with the ignition key removed.
Page 36 of 220
Opening and closing
34 To open, press the switch beyond the
resistance point.
When leaving the vehicle parked,
always remove the central key with
remote control from the ignition lock and
close the doors; this precaution prevents
children from operating the power win-
dows and injuring themselves etc.<
For information on using the convenience
operation mode at the door lock or with the
remote control, refer to page 28 or 29.
Safety feature
If the closing force rises beyond a pre-
defined threshold during closing, the sys-
tem will immediately stop moving the win-
dow prior to lowering it slightly.
Despite this safety feature you should
always inspect the window's travel
path prior to closing it, as the safety system
might fail to detect certain kinds of obstruc-
tions, such as very thin objects, and the
window would continue closing.
Pulling the switch beyond the resistance
point and holding it limits the response of
the safety feature.
Under these conditions the window will
respond to forces beyond a defined thresh-
old by only opening several inches/millime-
ters.
If you again pull the switch past the resis-
tance point and hold it in position within a
period of roughly 4 seconds, the safety fea-
ture is deactivated.<
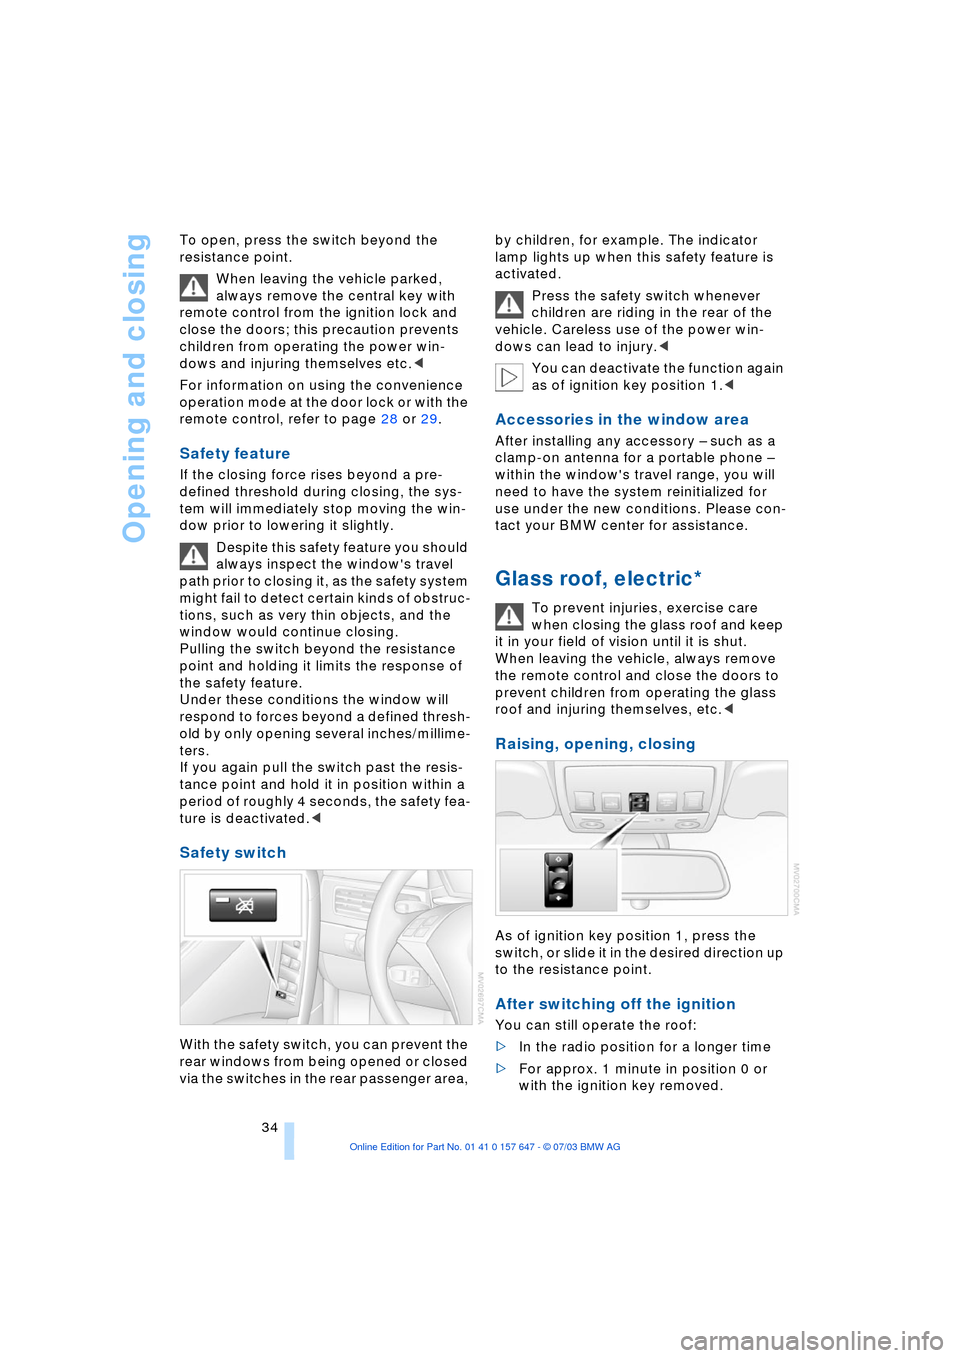
Safety switch
With the safety switch, you can prevent the
rear windows from being opened or closed
via the switches in the rear passenger area, by children, for example. The indicator
lamp lights up when this safety feature is
activated.
Press the safety switch whenever
children are riding in the rear of the
vehicle. Careless use of the power win-
dows can lead to injury.<
You can deactivate the function again
as of ignition key position 1.<
Accessories in the window area
After installing any accessory Ð such as a
clamp-on antenna for a portable phone Ð
within the window's travel range, you will
need to have the system reinitialized for
use under the new conditions. Please con-
tact your BMW center for assistance.
Glass roof, electric*
To prevent injuries, exercise care
when closing the glass roof and keep
it in your field of vision until it is shut.
When leaving the vehicle, always remove
the remote control and close the doors to
prevent children from operating the glass
roof and injuring themselves, etc.<
Raising, opening, closing
As of ignition key position 1, press the
switch, or slide it in the desired direction up
to the resistance point.
After switching off the ignition
You can still operate the roof:
>In the radio position for a longer time
>For approx. 1 minute in position 0 or
with the ignition key removed.
Page 37 of 220
Controls
35Reference
At a glance
Driving tips
Communications
Navigation
Entertainment
Mobility
The headliner insert slides back somewhat
when you raise the glass roof. When the
glass roof is opened the headliner retracts
with it.
Do not use force to close the head-
liner insert with the glass roof in its
raised position, as damage to the mecha-
nism could result.<
For information on using the convenience
operation mode at the door lock or with the
remote control, refer to page 28 or 29.
Automatic* opening and closing
Briefly press the switch past the resistance
point and then release it.
In addition, the following movements are
also automatic:
>With the glass roof open, move the
switch towards 'Raise': the glass roof
moves to the end position of 'Raise'
>With the glass roof raised, move the
switch towards 'Open': the glass roof
moves to the end position of 'Open'.
Press the switch again in any direction to
stop the glass roof.
Safety feature
If the glass roof encounters resistance
when closing from roughly the center of the
roof opening or when closing from the
raised position, the closing action is inter-
rupted and the glass roof reopens a little.
Despite this safety feature, you
should always inspect the glass roof's
travel range prior to closing it, as the safety
feature might fail to detect certain kinds of
obstructions, such as very thin objects, and
the glass roof would continue closing.
Pressing the switch beyond the resistance
point and holding it limits the response of
the safety feature. The glass roof only
opens a short distance.
If you again press the switch past the resis-
tance point and hold it in position within a
period of roughly 2 seconds, the safety fea-
ture is deactivated.<
When you close the glass roof, it will
slow down as it approaches the end of its travel path; this is to allow the safety
feature to respond more precisely to any
obstructions encountered in this critical
area.<
Following interruptions in electrical
power supply
Following interruptions in electrical power
supply, for instance, when the battery is
disconnected, it is possible that the glass
roof will extend to its raised position, but
fail to respond to other commands. Should
this occur, please have the glass roof rein-
itialized at your BMW center.
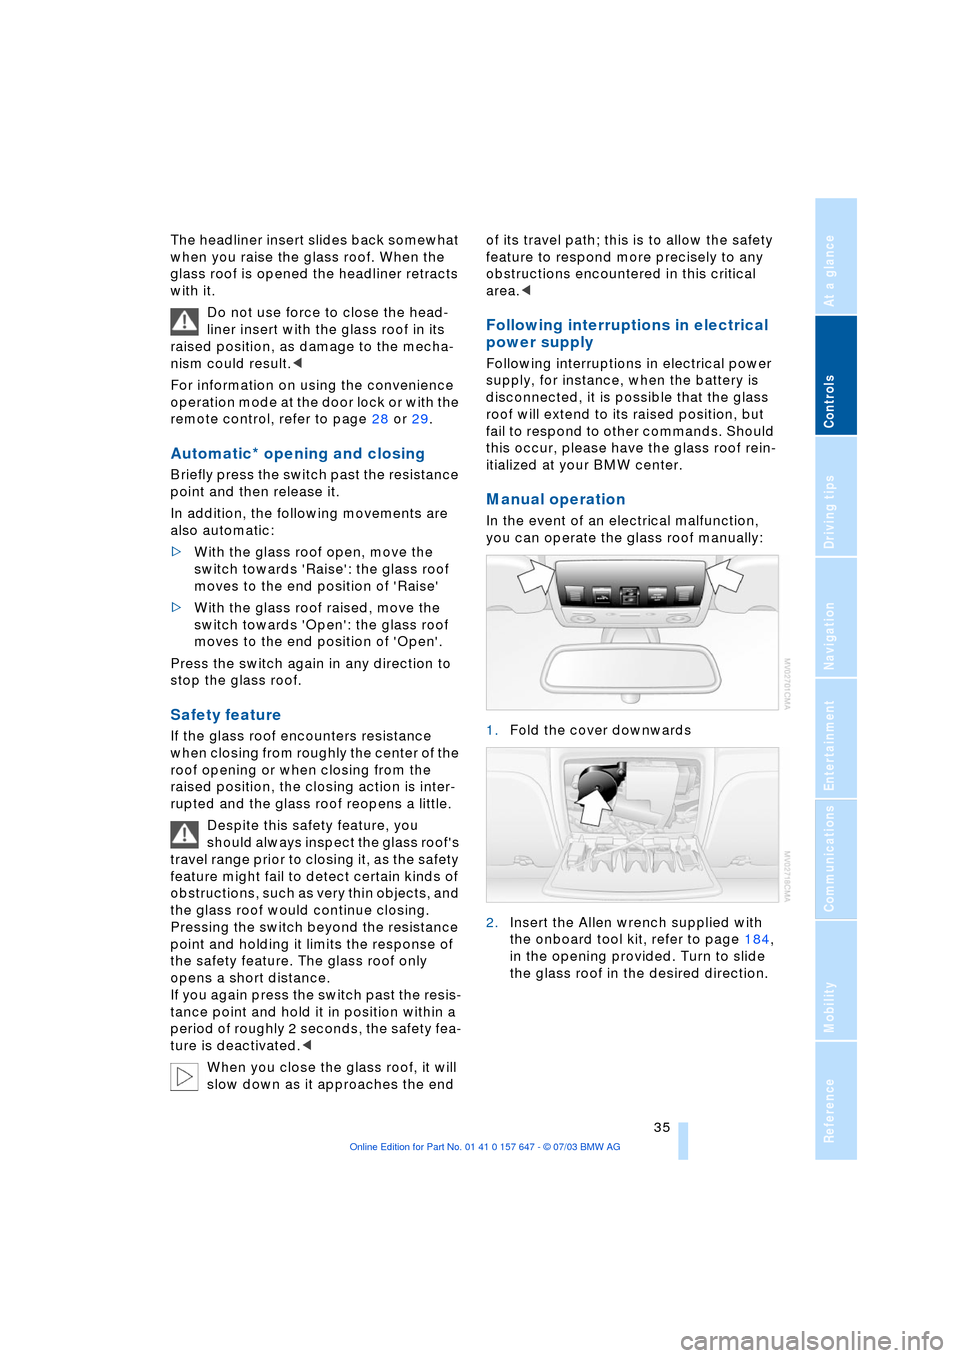
Manual operation
In the event of an electrical malfunction,
you can operate the glass roof manually:
1.Fold the cover downwards
2.Insert the Allen wrench supplied with
the onboard tool kit, refer to page 184,
in the opening provided. Turn to slide
the glass roof in the desired direction.
Page 98 of 220
Practical interior accessories
96
Practical interior accessories
Integrated universal remote
control*
The concept
The integrated universal remote control
replaces up to three different hand-held
transmitters for various remote-controlled
equipment such as door openers and
house alarm systems. The integrated uni-
versal remote control registers and stores
signals from the original hand-held trans-
mitters.
The signal of an original hand-held trans-
mitter can be programmed on one of the
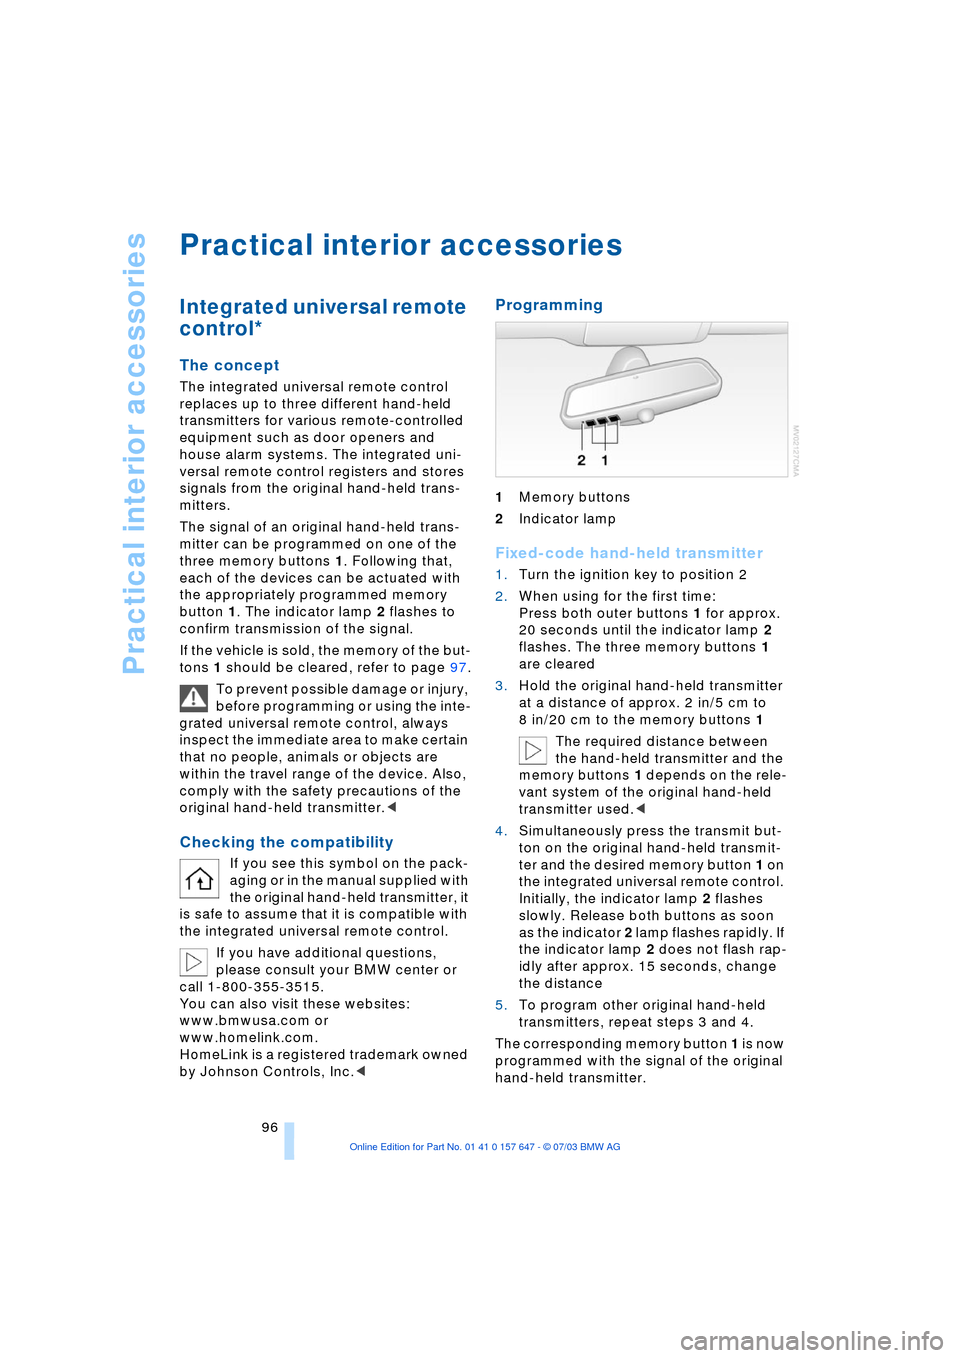
three memory buttons 1. Following that,
each of the devices can be actuated with
the appropriately programmed memory
button 1. The indicator lamp 2 flashes to
confirm transmission of the signal.
If the vehicle is sold, the memory of the but-
tons 1 should be cleared, refer to page 97.
To prevent possible damage or injury,
before programming or using the inte-
grated universal remote control, always
inspect the immediate area to make certain
that no people, animals or objects are
within the travel range of the device. Also,
comply with the safety precautions of the
original hand-held transmitter.<
Checking the compatibility
If you see this symbol on the pack-
aging or in the manual supplied with
the original hand-held transmitter, it
is safe to assume that it is compatible with
the integrated universal remote control.
If you have additional questions,
please consult your BMW center or
call 1-800-355-3515.
You can also visit these websites:
www.bmwusa.com or
www.homelink.com.
HomeLink is a registered trademark owned
by Johnson Controls, Inc.<
Programming
1Memory buttons
2Indicator lamp
Fixed-code hand-held transmitter
1.Turn the ignition key to position 2
2.When using for the first time:
Press both outer buttons 1 for approx.
20 seconds until the indicator lamp 2
flashes. The three memory buttons 1
are cleared
3.Hold the original hand-held transmitter
at a distance of approx. 2 in/5 cm to
8 in/20 cm to the memory buttons 1
The required distance between
the hand-held transmitter and the
memory buttons 1 depends on the rele-
vant system of the original hand-held
transmitter used.<
4.Simultaneously press the transmit but-
ton on the original hand-held transmit-
ter and the desired memory button 1 on
the integrated universal remote control.
Initially, the indicator lamp 2 flashes
slowly. Release both buttons as soon
as the indicator 2 lamp flashes rapidly. If
the indicator lamp 2 does not flash rap-
idly after approx. 15 seconds, change
the distance
5.To program other original hand-held
transmitters, repeat steps 3 and 4.
The corresponding memory button 1 is now
programmed with the signal of the original
hand-held transmitter.