navigation BMW 535I GRAN TURISMO 2011 Owner's Manual
[x] Cancel search | Manufacturer: BMW, Model Year: 2011, Model line: 535I GRAN TURISMO, Model: BMW 535I GRAN TURISMO 2011Pages: 297, PDF Size: 8.59 MB
Page 45 of 297
▷
The indicator lamp flashes after unlocking
until
the engine is started, but no longer than
approx. 5 minutes:
An alarm has been triggered.
Tilt alarm sensor
The tilt of the vehicle is monitored.
The alarm system responds in situations such
as attempts to steal a wheel or tow the car.
Interior motion sensor
The
windows and glass sunroof* must be closed
for the system to function properly.
Avoiding unintentional alarms
The tilt alarm sensor and interior motion sensor
can be switched off together, such as in the fol‐
lowing situations:
▷ In automatic car washes
▷ In duplex garages.
▷ During transport on car-carrying trains, at
sea or on a trailer.
▷ When animals are to remain in the vehicle.
Switching off the tilt alarm sensor and
interior motion sensor Press the button on the remote control
twice in succession.
The indicator lamp lights up for approx. 2 sec‐
onds and then flashes continuously.
The
tilt alarm sensor and interior motion sensor
are switched off until the vehicle is locked again.
Power windows
General information
Take the remote control with you
Take the remote control with you when
leaving the vehicle so that children, for example,
cannot operate the power windows and injure
themselves.◀ Opening
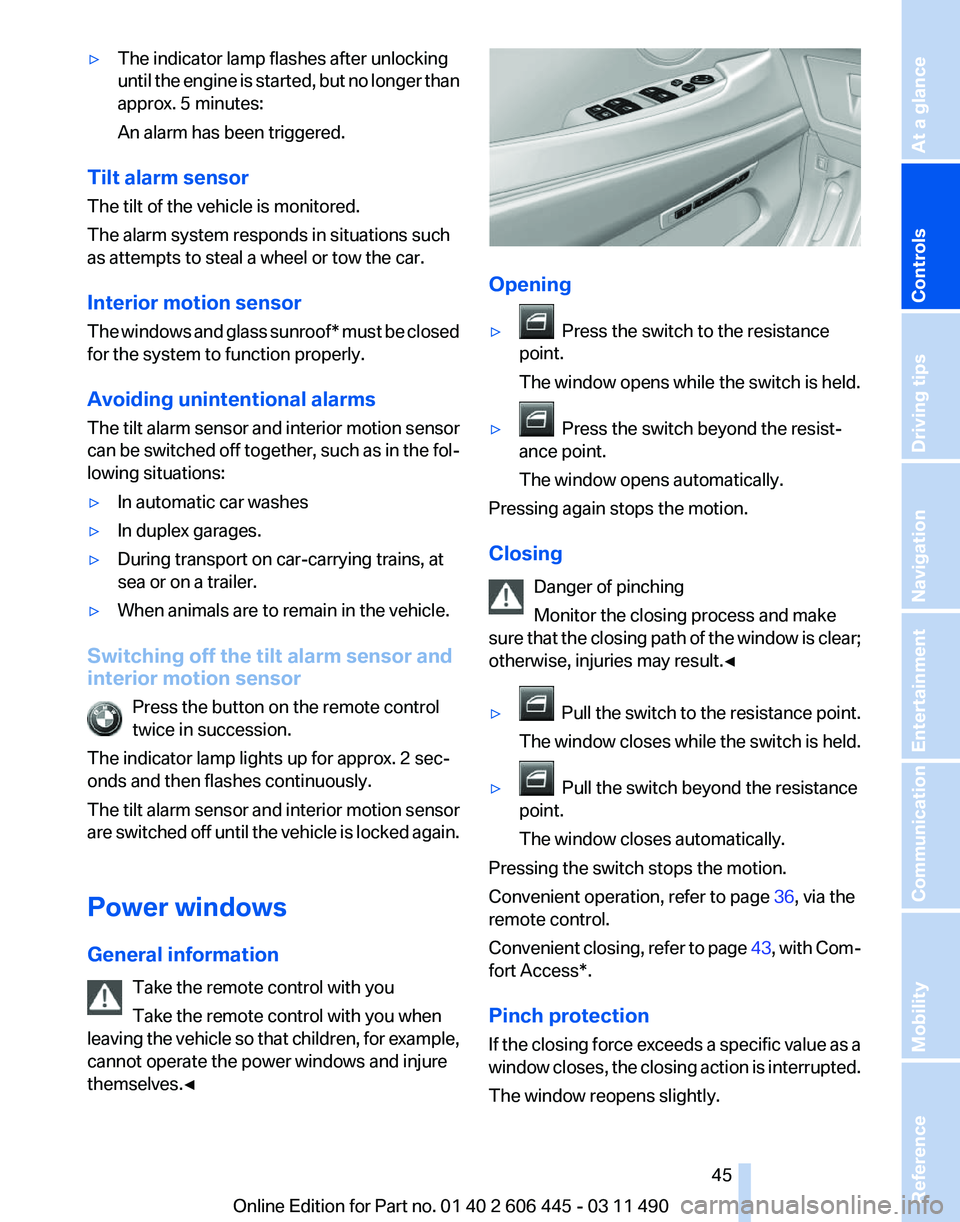
▷
Press the switch to the resistance
point.
The window opens while the switch is held.
▷ Press the switch beyond the resist‐
ance point.
The window opens automatically.
Pressing again stops the motion.
Closing
Danger of pinching
Monitor the closing process and make
sure
that the closing path of the window is clear;
otherwise, injuries may result.◀
▷ Pull
the switch to the resistance point.
The window closes while the switch is held.
▷ Pull the switch beyond the resistance
point.
The window closes automatically.
Pressing the switch stops the motion.
Convenient operation, refer to page 36, via the
remote control.
Convenient
closing, refer to page 43, with Com‐
fort Access*.
Pinch protection
If the closing force exceeds a specific value as a
window closes, the closing action is interrupted.
The window reopens slightly. Seite 45
45Online Edition for Part no. 01 40 2 606 445 - 03 11 490
Reference Mobility Communication Entertainment Navigation Driving tips
Controls At a glance
Page 47 of 297
Rear door controls
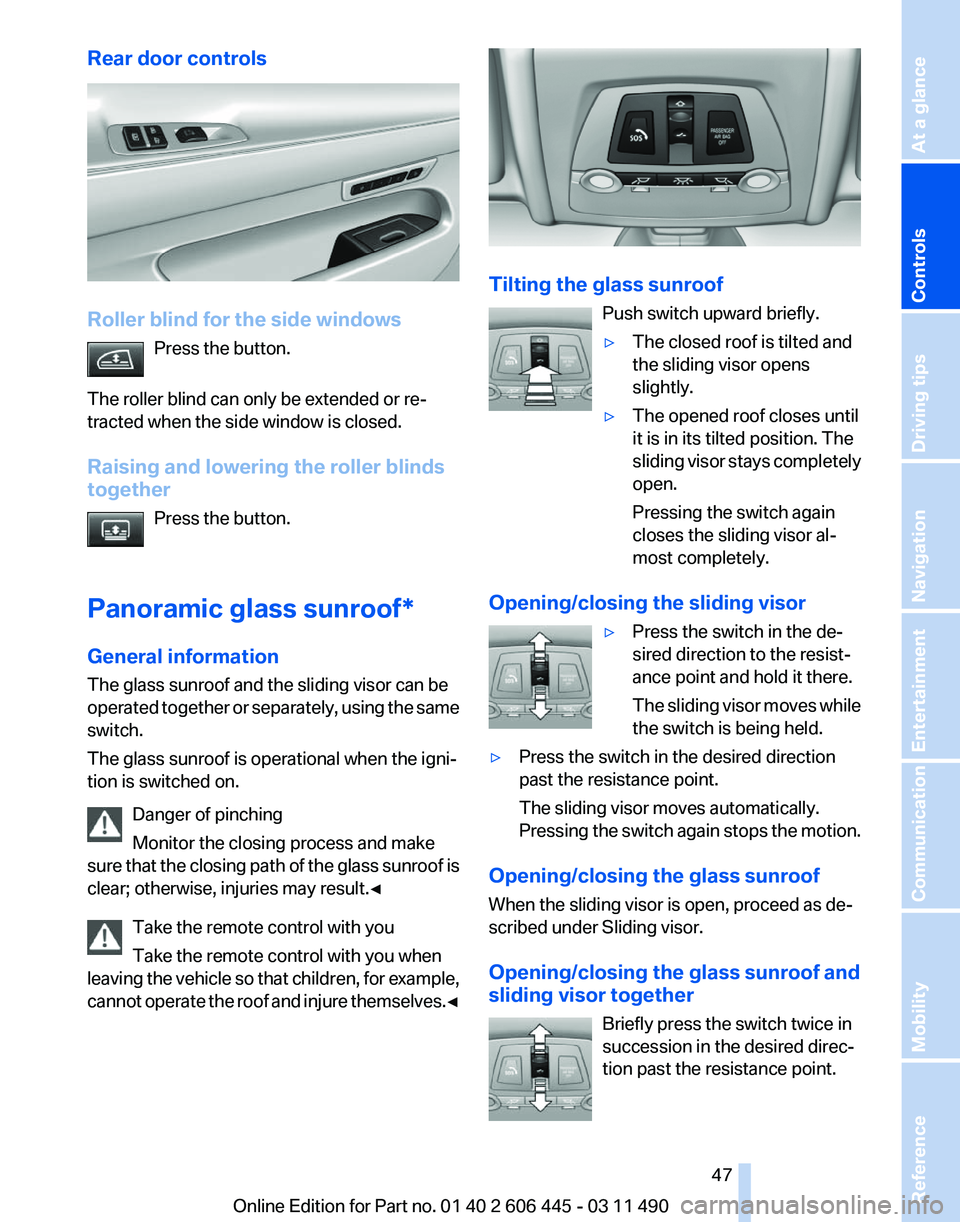
Roller blind for the side windows
Press the button.
The roller blind can only be extended or re‐
tracted when the side window is closed.
Raising and lowering the roller blinds
together Press the button.
Panoramic glass sunroof*
General information
The glass sunroof and the sliding visor can be
operated
together or separately, using the same
switch.
The glass sunroof is operational when the igni‐
tion is switched on.
Danger of pinching
Monitor the closing process and make
sure that the closing path of the glass sunroof is
clear; otherwise, injuries may result.◀
Take the remote control with you
Take the remote control with you when
leaving the vehicle so that children, for example,
cannot operate the roof and injure themselves.◀ Tilting the glass sunroof
Push switch upward briefly.
▷The closed roof is tilted and
the sliding visor opens
slightly.
▷ The opened roof closes until
it is in its tilted position. The
sliding
visor stays completely
open.
Pressing the switch again
closes the sliding visor al‐
most completely.
Opening/closing the sliding visor ▷Press the switch in the de‐
sired direction to the resist‐
ance point and hold it there.
The
sliding visor moves while
the switch is being held.
▷ Press the switch in the desired direction
past the resistance point.
The sliding visor moves automatically.
Pressing
the switch again stops the motion.
Opening/closing the glass sunroof
When the sliding visor is open, proceed as de‐
scribed under Sliding visor.
Opening/closing the glass sunroof and
sliding visor together Briefly press the switch twice in
succession in the desired direc‐
tion past the resistance point. Seite 47
47Online Edition for Part no. 01 40 2 606 445 - 03 11 490
Reference Mobility Communication Entertainment Navigation Driving tips
Controls At a glance
Page 49 of 297
Adjusting
Sitting safely
The
ideal seating position can make a vital con‐
tribution to relaxed, fatigue-free driving.
The seating position plays an important role in
an accident in combination with:
▷ Safety belts, refer to page 55.
▷ Head restraints, refer to page 56.
▷ Airbags, refer to page 89.
Front seats
Adjusting
General information Do not adjust the seat while driving
Never attempt to adjust the driver's seat
while driving.
The
seat could respond with unexpected move‐
ment and the ensuing loss of vehicle control
could lead to an accident.◀
Do not incline the backrest too far to the
rear
Do not incline the backrest on the front passen‐
ger side too far to the rear during driving. Oth‐
erwise, there is the danger of sliding under the
safety belt in an accident. This would eliminate
the protection normally provided by the belt.◀
The seat setting is stored for the remote control
currently in use. When the vehicle is unlocked
via the remote control, the position is automati‐
cally retrieved if this function, refer to page 37,
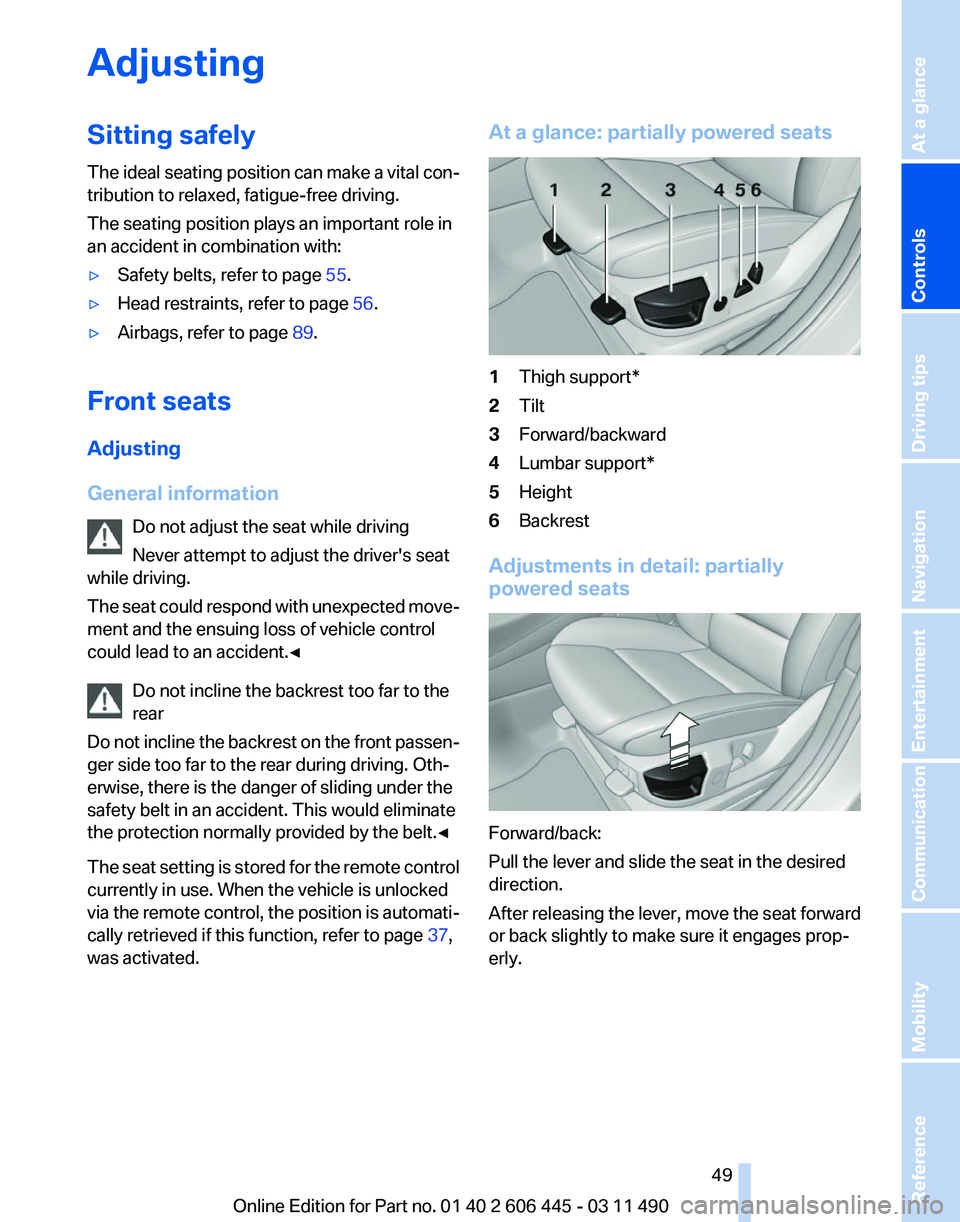
was activated. At a glance: partially powered seats
1
Thigh support*
2 Tilt
3 Forward/backward
4 Lumbar support*
5 Height
6 Backrest
Adjustments in detail: partially
powered seats Forward/back:
Pull the lever and slide the seat in the desired
direction.
After
releasing the lever, move the seat forward
or back slightly to make sure it engages prop‐
erly.
Seite 49
49Online Edition for Part no. 01 40 2 606 445 - 03 11 490
Reference Mobility Communication Entertainment Navigation Driving tips
Controls At a glance
Page 51 of 297
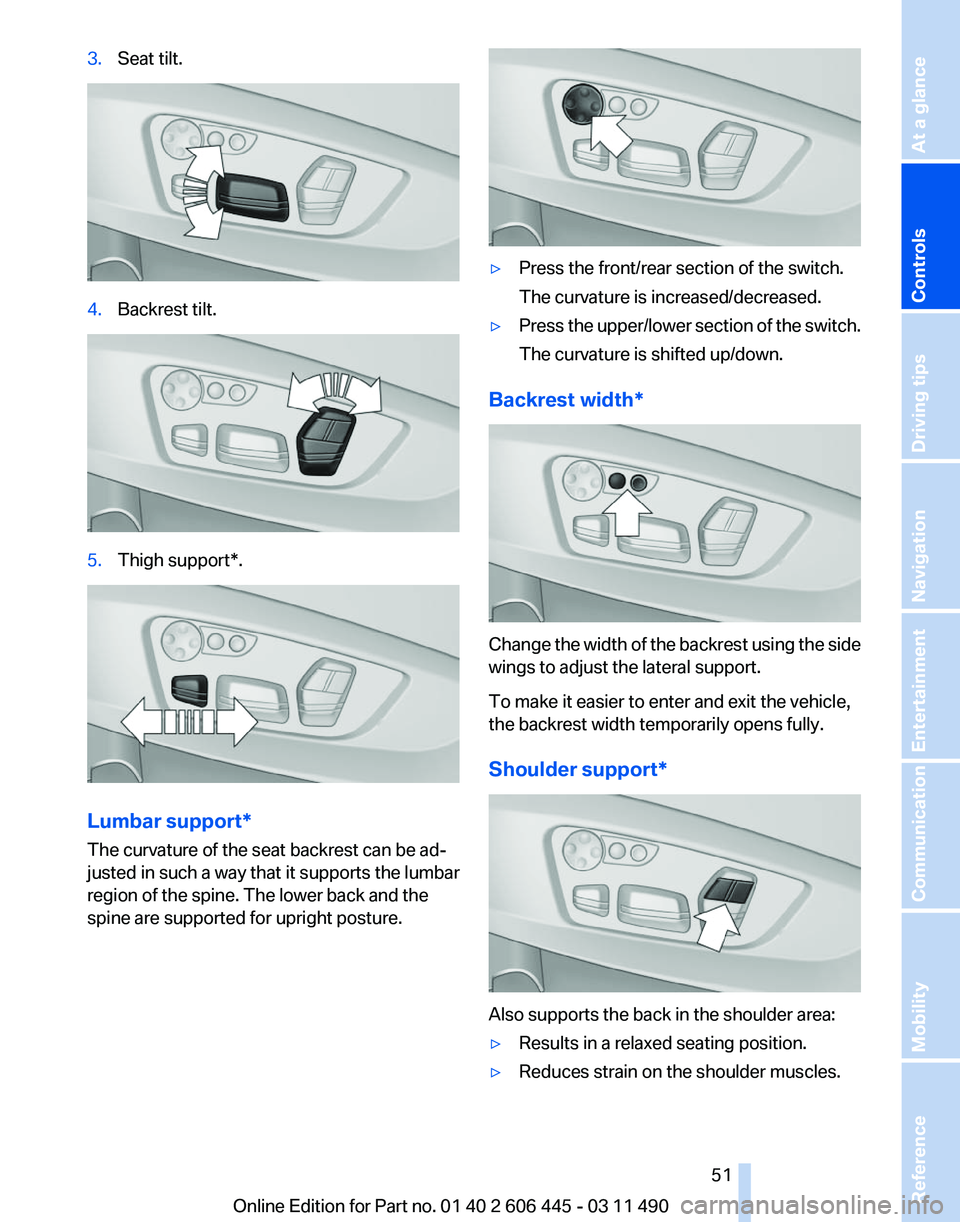
3.
Seat tilt. 4.
Backrest tilt. 5.
Thigh support*. Lumbar support*
The curvature of the seat backrest can be ad‐
justed in such a way that it supports the lumbar
region of the spine. The lower back and the
spine are supported for upright posture. ▷
Press the front/rear section of the switch.
The curvature is increased/decreased.
▷ Press the upper/lower section of the switch.
The curvature is shifted up/down.
Backrest width* Change the width of the backrest using the side
wings to adjust the lateral support.
To make it easier to enter and exit the vehicle,
the backrest width temporarily opens fully.
Shoulder support*
Also supports the back in the shoulder area:
▷
Results in a relaxed seating position.
▷ Reduces strain on the shoulder muscles.
Seite 51
51Online Edition for Part no. 01 40 2 606 445 - 03 11 490
Reference Mobility Communication Entertainment Navigation Driving tips
Controls At a glance
Page 53 of 297
Rear seats
Adjusting
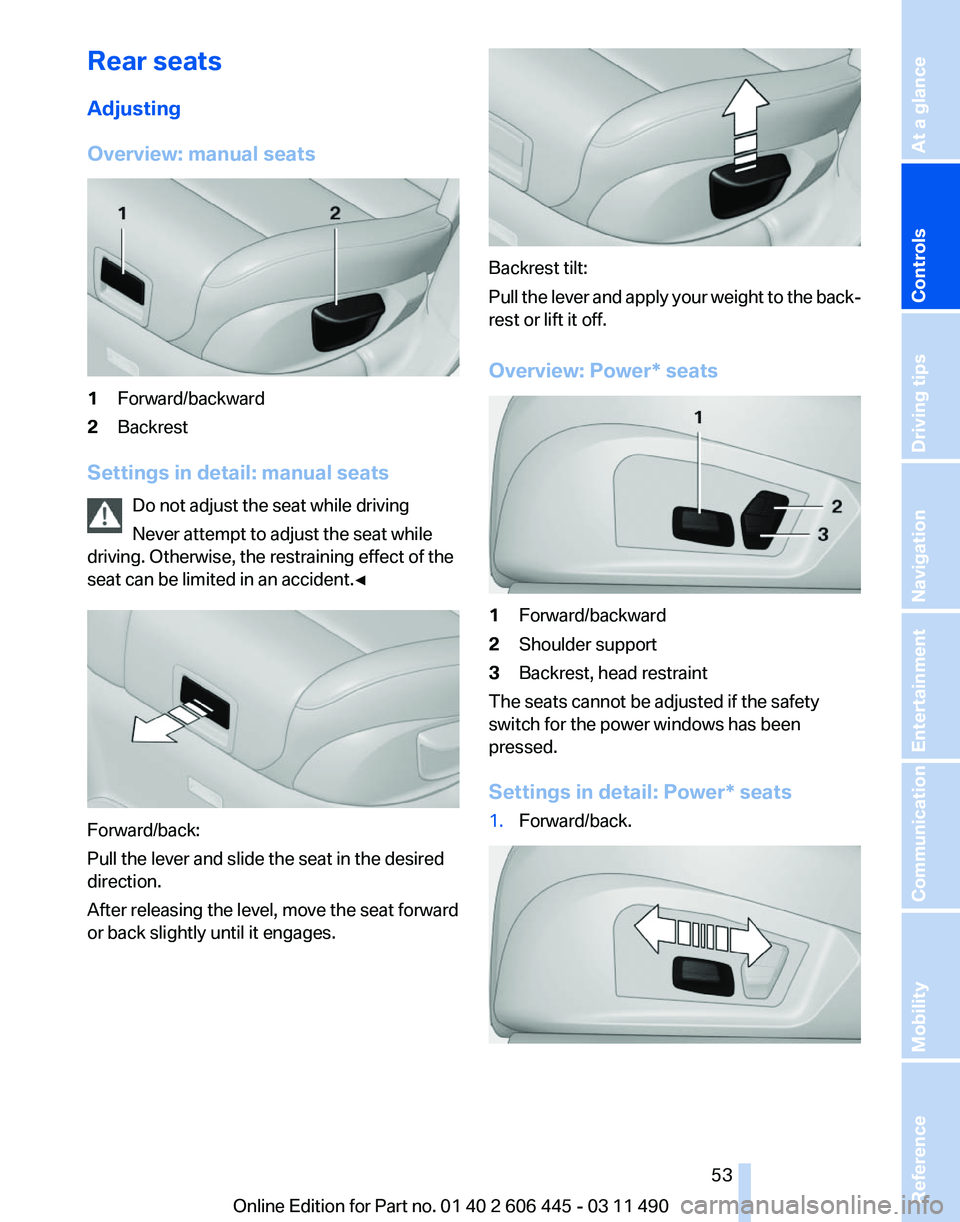
Overview: manual seats
1
Forward/backward
2 Backrest
Settings in detail: manual seats Do not adjust the seat while driving
Never attempt to adjust the seat while
driving. Otherwise, the restraining effect of the
seat can be limited in an accident.
◀Forward/back:
Pull the lever and slide the seat in the desired
direction.
After releasing the level, move the seat forward
or back slightly until it engages. Backrest tilt:
Pull
the lever and apply your weight to the back‐
rest or lift it off.
Overview: Power* seats 1
Forward/backward
2 Shoulder support
3 Backrest, head restraint
The seats cannot be adjusted if the safety
switch for the power windows has been
pressed.
Settings in detail:
Power* seats
1. Forward/back. Seite 53
53Online Edition for Part no. 01 40 2 606 445 - 03 11 490
Reference Mobility Communication Entertainment Navigation Driving tips
Controls At a glance
Page 55 of 297
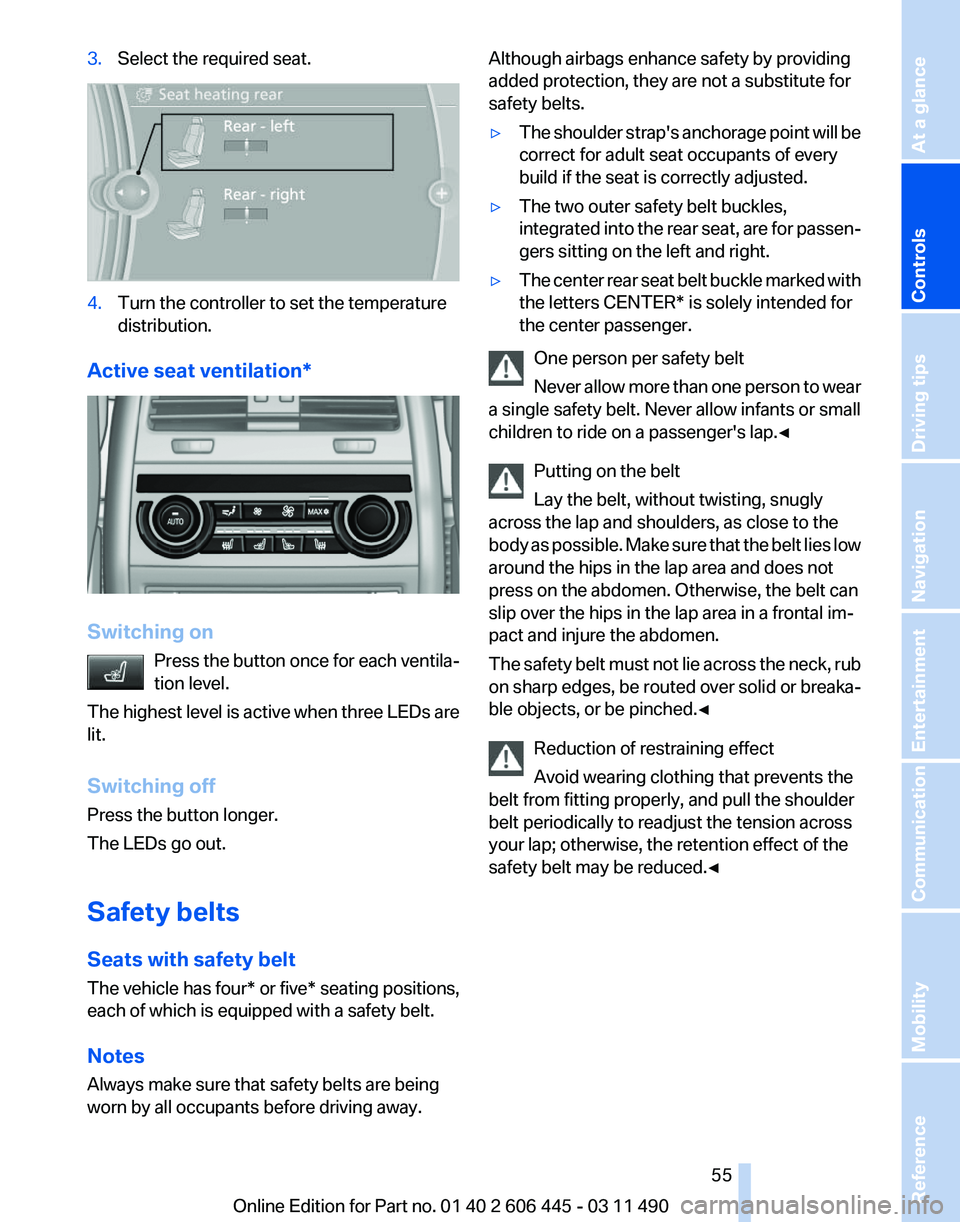
3.
Select the required seat. 4.
Turn the controller to set the temperature
distribution.
Active seat ventilation* Switching on
Press the button once for each ventila‐
tion level.
The highest level is active when three LEDs are
lit.
Switching off
Press the button longer.
The LEDs go out.
Safety belts
Seats with safety belt
The vehicle has four* or five* seating positions,
each of which is equipped with a safety belt.
Notes
Always make sure that safety belts are being
worn by all occupants before driving away. Although airbags enhance safety by providing
added protection, they are not a substitute for
safety belts.
▷
The shoulder strap's anchorage point will be
correct for adult seat occupants of every
build if the seat is correctly adjusted.
▷ The two outer safety belt buckles,
integrated
into the rear seat, are for passen‐
gers sitting on the left and right.
▷ The center rear seat belt buckle marked with
the letters CENTER* is solely intended for
the center passenger.
One person per safety belt
Never
allow more than one person to wear
a single safety belt. Never allow infants or small
children to ride on a passenger's lap.◀
Putting on the belt
Lay the belt, without twisting, snugly
across the lap and shoulders, as close to the
body as possible. Make sure that the belt lies low
around the hips in the lap area and does not
press on the abdomen. Otherwise, the belt can
slip over the hips in the lap area in a frontal im‐
pact and injure the abdomen.
The safety belt must not lie across the neck, rub
on sharp edges, be routed over solid or breaka‐
ble objects, or be pinched.◀
Reduction of restraining effect
Avoid wearing clothing that prevents the
belt from fitting properly, and pull the shoulder
belt periodically to readjust the tension across
your lap; otherwise, the retention effect of the
safety belt may be reduced.◀ Seite 55
55Online Edition for Part no. 01 40 2 606 445 - 03 11 490
Reference Mobility Communication Entertainment Navigation Driving tips
Controls At a glance
Page 57 of 297
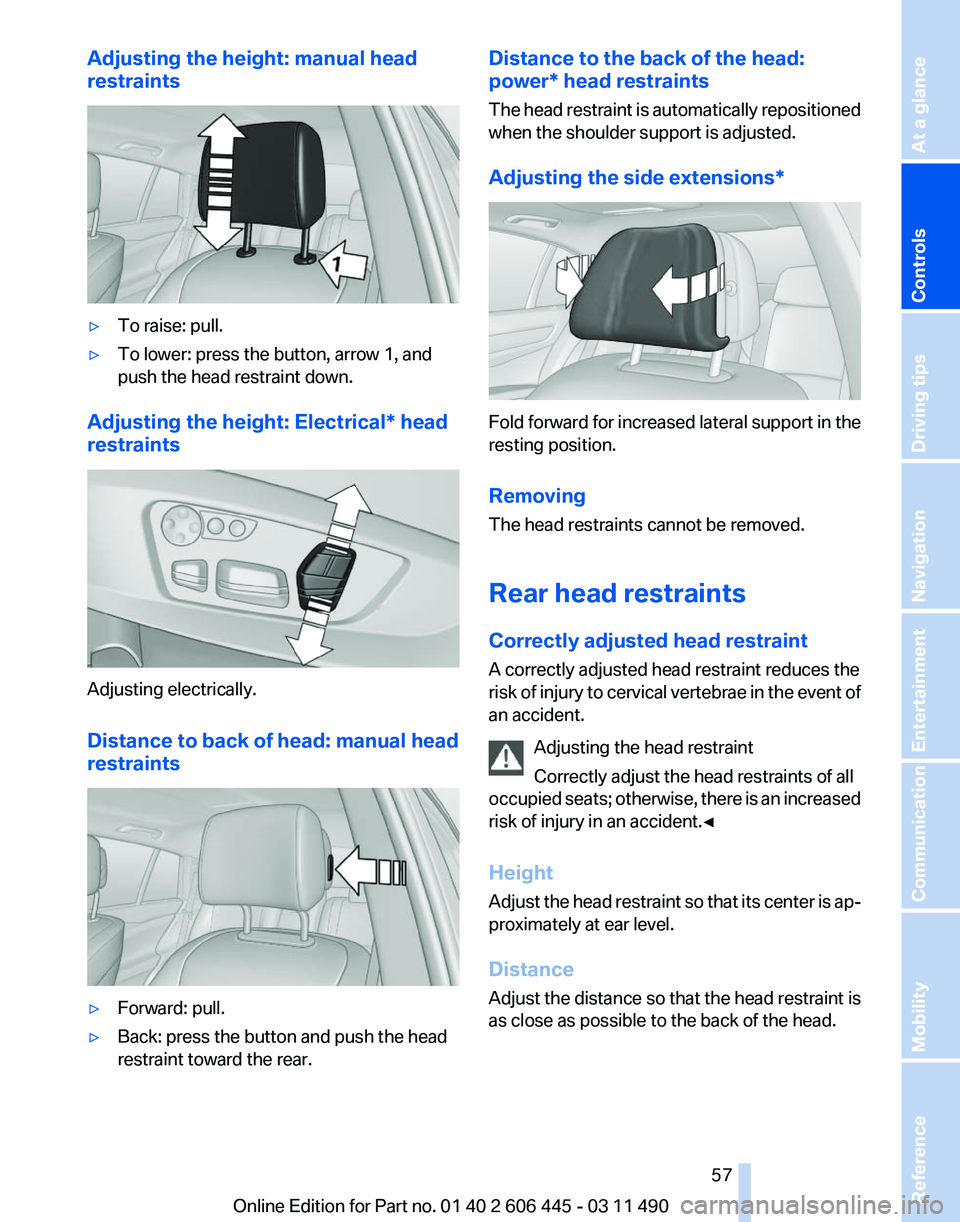
Adjusting the height: manual head
restraints
▷
To raise: pull.
▷ To lower: press the button, arrow 1, and
push the head restraint down.
Adjusting the height: Electrical* head
restraints Adjusting electrically.
Distance to back of head: manual head
restraints
▷
Forward: pull.
▷ Back: press the button and push the head
restraint toward the rear. Distance to the back of the head:
power* head restraints
The
head restraint is automatically repositioned
when the shoulder support is adjusted.
Adjusting the side extensions* Fold forward for increased lateral support in the
resting position.
Removing
The head restraints cannot be removed.
Rear head restraints
Correctly adjusted head restraint
A correctly adjusted head restraint reduces the
risk
of injury to cervical vertebrae in the event of
an accident.
Adjusting the head restraint
Correctly adjust the head restraints of all
occupied seats; otherwise, there is an increased
risk of injury in an accident.◀
Height
Adjust the head restraint so that its center is ap‐
proximately at ear level.
Distance
Adjust the distance so that the head restraint is
as close as possible to the back of the head. Seite 57
57Online Edition for Part no. 01 40 2 606 445 - 03 11 490
Reference Mobility Communication Entertainment Navigation Driving tips
Controls At a glance
Page 59 of 297
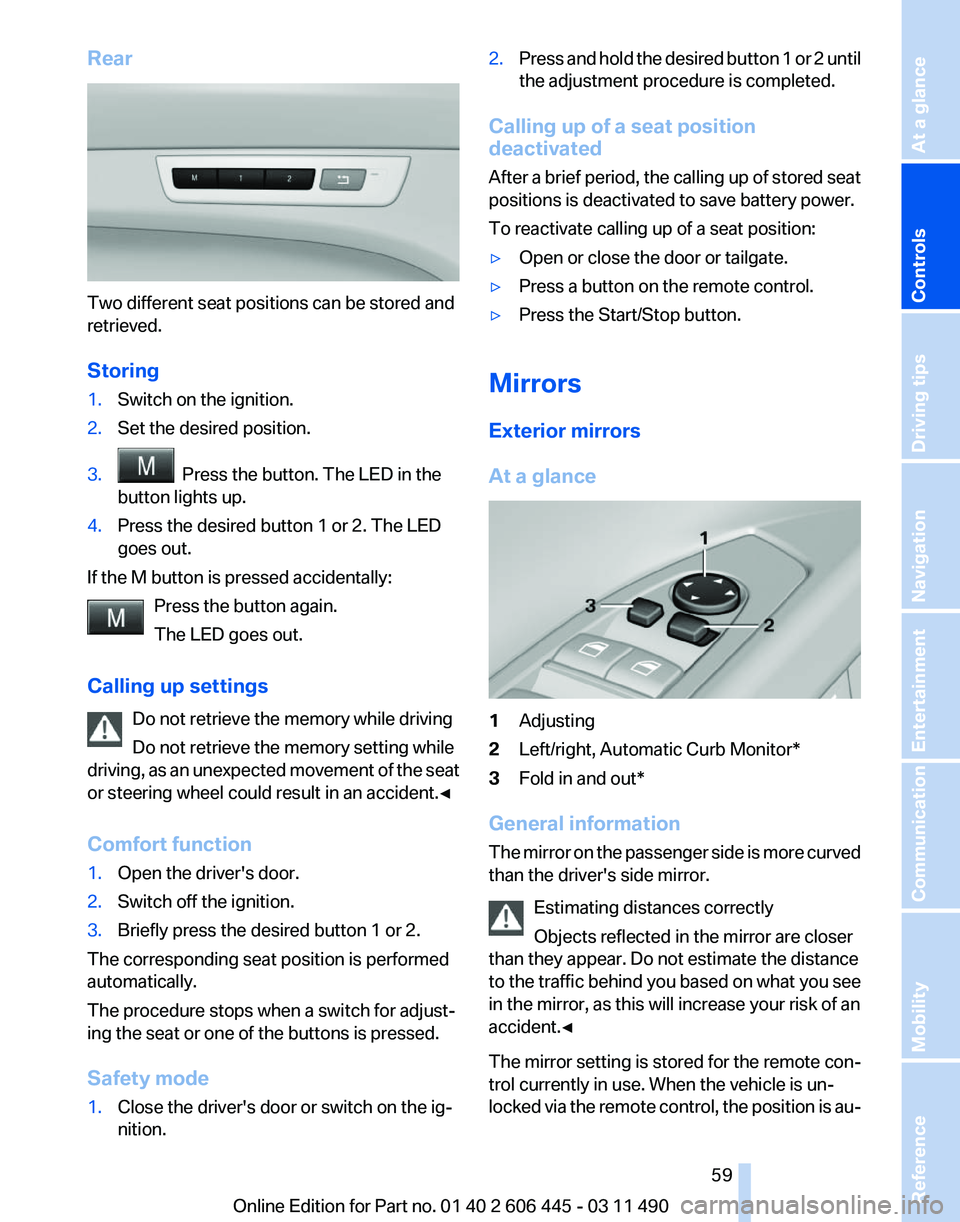
Rear
Two different seat positions can be stored and
retrieved.
Storing
1.
Switch on the ignition.
2. Set the desired position.
3. Press the button. The LED in the
button lights up.
4. Press the desired button 1 or 2. The LED
goes out.
If the M button is pressed accidentally: Press the button again.
The LED goes out.
Calling up settings Do not retrieve the memory while driving
Do not retrieve the memory setting while
driving,
as an unexpected movement of the seat
or steering wheel could result in an accident.◀
Comfort function
1. Open the driver's door.
2. Switch off the ignition.
3. Briefly press the desired button 1 or 2.
The corresponding seat position is performed
automatically.
The procedure stops when a switch for adjust‐
ing the seat or one of the buttons is pressed.
Safety mode
1. Close the driver's door or switch on the ig‐
nition. 2.
Press and hold the desired button 1 or 2 until
the adjustment procedure is completed.
Calling up of a seat position
deactivated
After
a brief period, the calling up of stored seat
positions is deactivated to save battery power.
To reactivate calling up of a seat position:
▷ Open or close the door or tailgate.
▷ Press a button on the remote control.
▷ Press the Start/Stop button.
Mirrors
Exterior mirrors
At a glance 1
Adjusting
2 Left/right, Automatic Curb Monitor*
3 Fold in and out*
General information
The
mirror on the passenger side is more curved
than the driver's side mirror.
Estimating distances correctly
Objects reflected in the mirror are closer
than they appear. Do not estimate the distance
to the traffic behind you based on what you see
in the mirror, as this will increase your risk of an
accident.◀
The mirror setting is stored for the remote con‐
trol currently in use. When the vehicle is un‐
locked via the remote control, the position is au‐ Seite 59
59Online Edition for Part no. 01 40 2 606 445 - 03 11 490
Reference Mobility Communication Entertainment Navigation Driving tips
Controls At a glance
Page 61 of 297
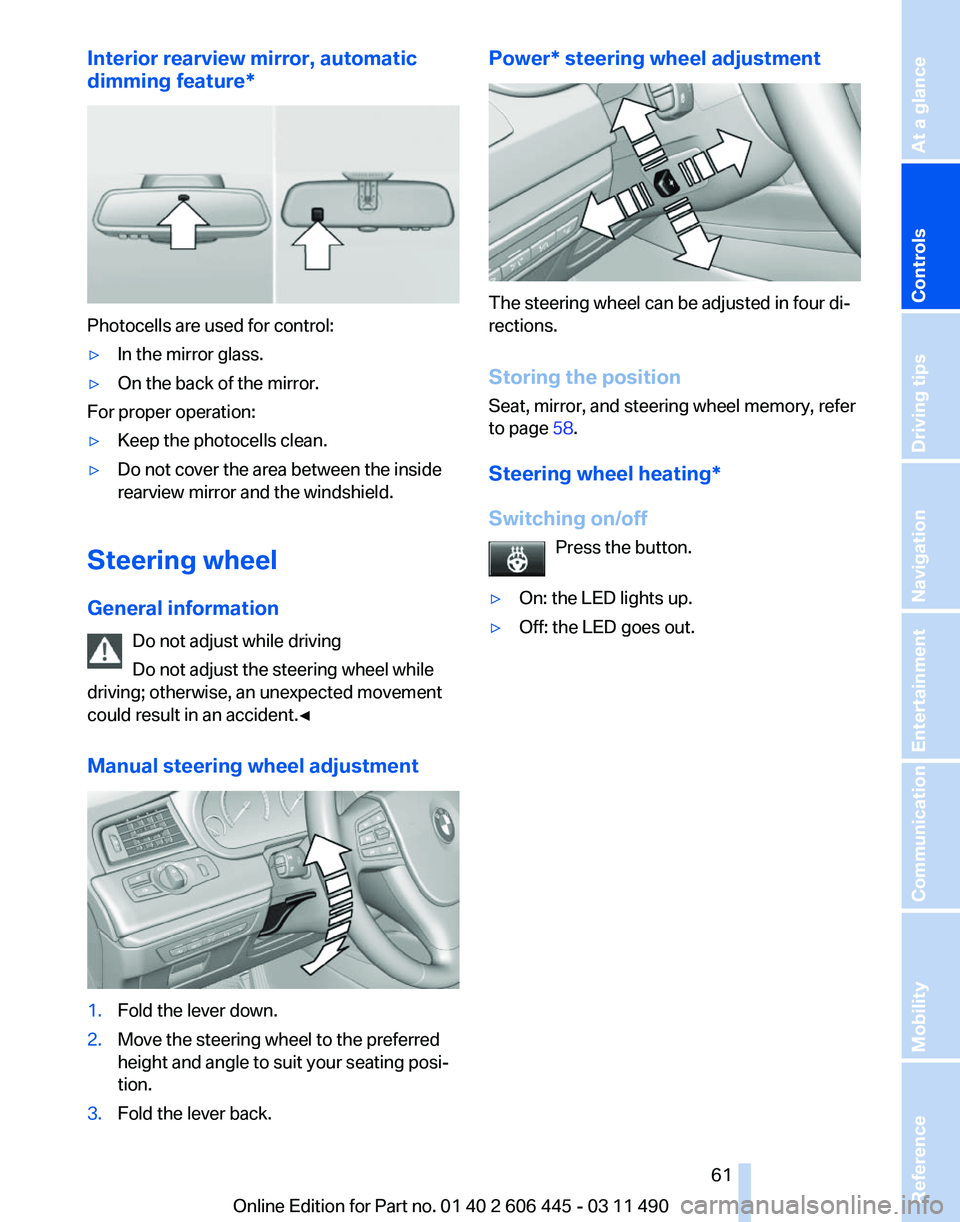
Interior rearview mirror, automatic
dimming feature
*Photocells are used for control:
▷
In the mirror glass.
▷ On the back of the mirror.
For proper operation:
▷ Keep the photocells clean.
▷ Do not cover the area between the inside
rearview mirror and the windshield.
Steering wheel
General information Do not adjust while driving
Do not adjust the steering wheel while
driving; otherwise, an unexpected movement
could result in an accident.◀
Manual steering wheel adjustment 1.
Fold the lever down.
2. Move the steering wheel to the preferred
height and angle to suit your seating posi‐
tion.
3. Fold the lever back. Power* steering wheel adjustment
The steering wheel can be adjusted in four di‐
rections.
Storing the position
Seat, mirror, and steering wheel memory, refer
to page
58.
Steering wheel heating
*
Switching on/off Press the button.
▷ On: the LED lights up.
▷ Off: the LED goes out. Seite 61
61Online Edition for Part no. 01 40 2 606 445 - 03 11 490
Reference Mobility Communication Entertainment Navigation Driving tips
Controls At a glance
Page 63 of 297
Backrest width*
Before
installing a child restraint fixing system in
the front passenger seat, open the backrest
width completely. Do not change the backrest
width again and do not call up a memory posi‐
tion.
Backrest width for the child seat
Before installing a child restraint fixing
system in the front passenger seat, the backrest
width must be opened completely. Do not
change the adjustment after this; otherwise, the
stability of the child seat will be reduced.◀
Child seat security The rear safety belts and the front passenger
safety belt can be locked against pulling out for
mounting the child restraint fixing systems.
Locking the safety belt
1.
Pull out the belt webbing completely.
2. Secure the child restraint fixing system with
the belt.
3. Allow the belt webbing to be pulled in and
pull it taut against the child restraint fixing
system. The safety belt is locked.
Unlocking the safety belt
1. Unbuckle the belt buckle.
2. Remove the child restraint fixing system.
3. Allow the belt webbing to be pulled in com‐
pletely. LATCH child restraint fixing
system
LATCH:
Lower Anchors and Tether for Children.
Note Manufacturer's information for LATCH
child restraint fixing systems
To mount and use the LATCH child restraint fix‐
ing systems, observe the operating and safety
information from the system manufacturer; oth‐
erwise, the level of protection may be reduced.◀
Mounts for the lower LATCH anchors
Correctly engage the lower LATCH an‐
chors
Make sure that the lower LATCH anchors have
properly engaged and that the child restraint fix‐
ing system is resting snugly against the back‐
rest; otherwise, the degree of protection offered
may be reduced.◀
Before mounting the LATCH child restraint fix‐
ing system, pull the belt away from the child re‐
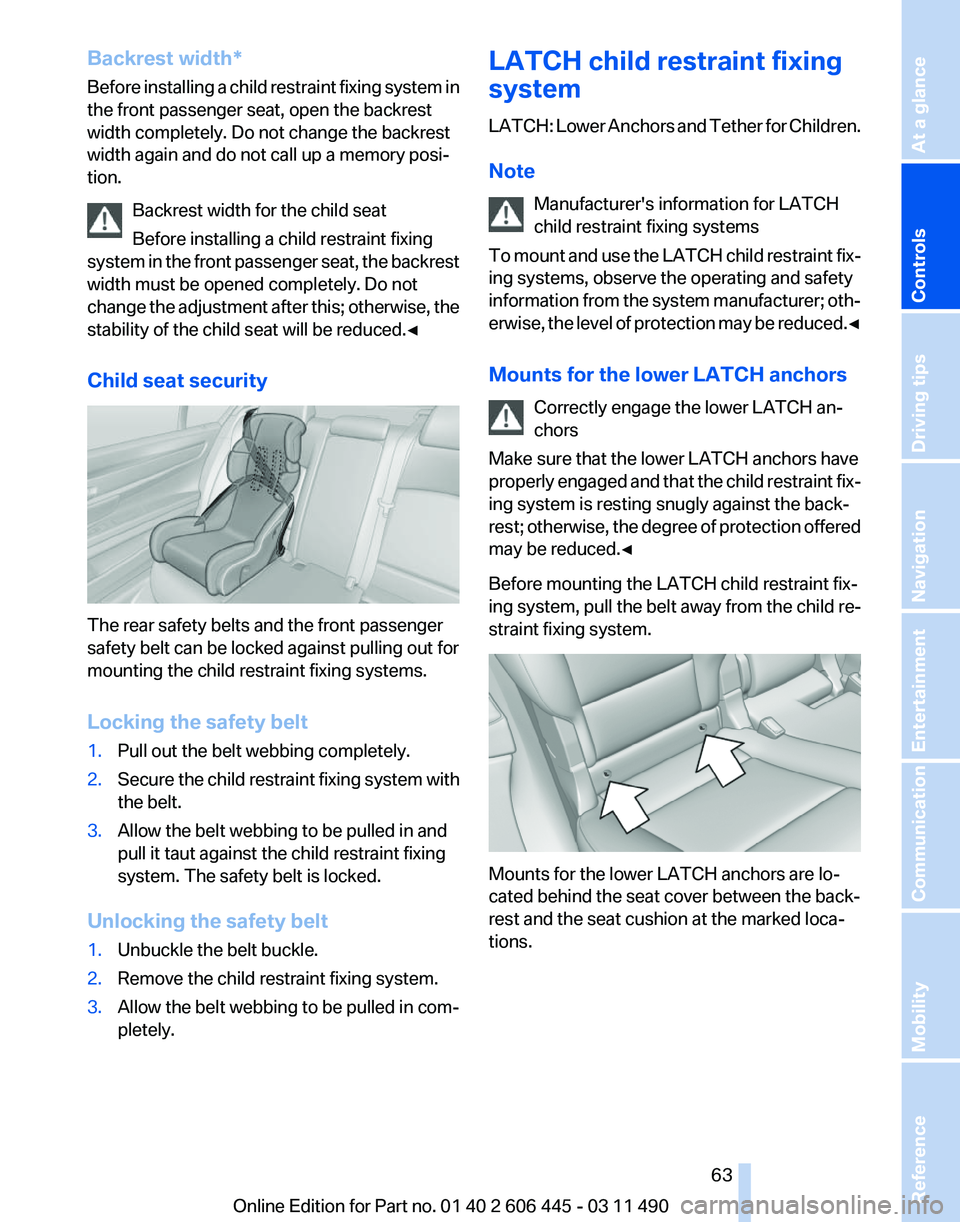
straint fixing system. Mounts for the lower LATCH anchors are lo‐
cated behind the seat cover between the back‐
rest and the seat cushion at the marked loca‐
tions. Seite 63
63Online Edition for Part no. 01 40 2 606 445 - 03 11 490
Reference Mobility Communication Entertainment Navigation Driving tips
Controls At a glance