remote control BMW 535I XDRIVE 2010 Owner's Manual
[x] Cancel search | Manufacturer: BMW, Model Year: 2010, Model line: 535I XDRIVE, Model: BMW 535I XDRIVE 2010Pages: 271, PDF Size: 8.83 MB
Page 62 of 271
Driving
60
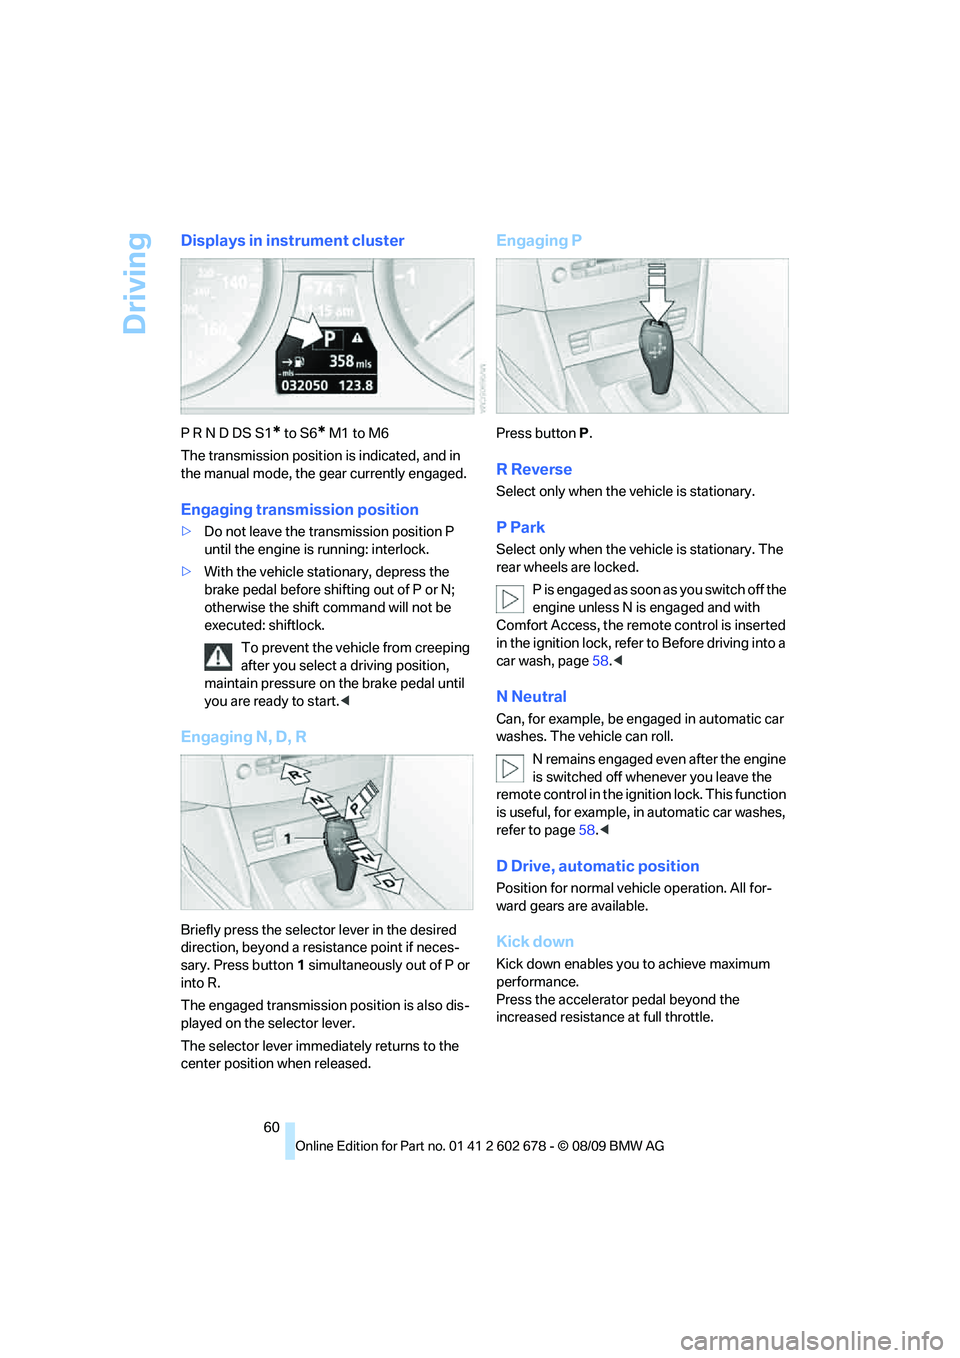
Displays in instrument cluster
P R N D DS S1* to S6* M1 to M6
The transmission position is indicated, and in
the manual mode, the gear currently engaged.
Engaging transmission position
>Do not leave the transmission position P
until the engine is running: interlock.
>With the vehicle stationary, depress the
brake pedal before shifting out of P or N;
otherwise the shift command will not be
executed: shiftlock.
To prevent the vehicle from creeping
after you select a driving position,
maintain pressure on the brake pedal until
you are ready to start.<
Engaging N, D, R
Briefly press the selector lever in the desired
direction, beyond a resistance point if neces-
sary. Press button1 simultaneously out of P or
into R.
The engaged transmission position is also dis-
played on the selector lever.
The selector lever immediately returns to the
center position when released.
Engaging P
Press buttonP.
R Reverse
Select only when the vehicle is stationary.
P Park
Select only when the vehicle is stationary. The
rear wheels are locked.
P i s e n g a g e d a s s o o n a s y o u s w i t c h o f f t h e
engine unless N is engaged and with
Comfort Access, the remote control is inserted
in the ignition lock, refer to Before driving into a
car wash, page58.<
N Neutral
Can, for example, be engaged in automatic car
washes. The vehicle can roll.
N remains engaged even after the engine
is switched off whenever you leave the
remote control in the ignition lock. This function
is useful, for example, in automatic car washes,
refer to page58.<
D Drive, automatic position
Position for normal vehicle operation. All for-
ward gears are available.
Kick down
Kick down enables you to achieve maximum
performance.
Press the accelerator pedal beyond the
increased resistance at full throttle.
Page 65 of 271
Controls
63Reference
At a glance
Driving tips
Communications
Navigation
Entertainment
Mobility
>In the automatic mode, the 6th gear is not
engaged.
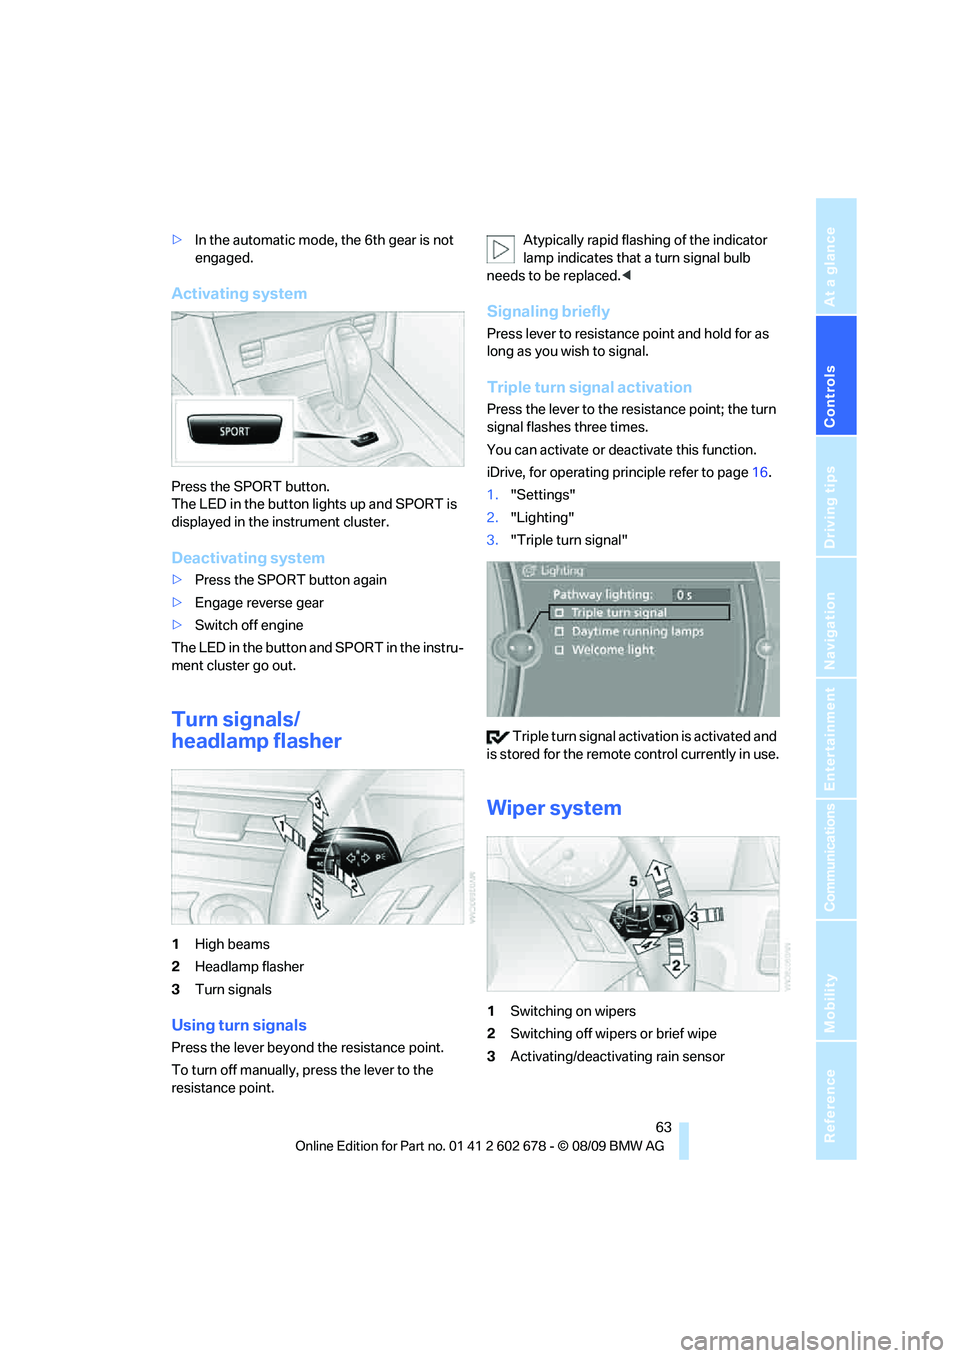
Activating system
Press the SPORT button.
The LED in the button lights up and SPORT is
displayed in the instrument cluster.
Deactivating system
>Press the SPORT button again
>Engage reverse gear
>Switch off engine
The LED in the button and SPORT in the instru-
ment cluster go out.
Turn signals/
headlamp flasher
1High beams
2Headlamp flasher
3Turn signals
Using turn signals
Press the lever beyond the resistance point.
To turn off manually, press the lever to the
resistance point.Atypically rapid flashing of the indicator
lamp indicates that a turn signal bulb
needs to be replaced.<
Signaling briefly
Press lever to resistance point and hold for as
long as you wish to signal.
Triple turn signal activation
Press the lever to the resistance point; the turn
signal flashes three times.
You can activate or deactivate this function.
iDrive, for operating principle refer to page16.
1."Settings"
2."Lighting"
3."Triple turn signal"
Triple turn signal activation is activated and
is stored for the remote control currently in use.
Wiper system
1Switching on wipers
2Switching off wipers or brief wipe
3Activating/deactivating rain sensor
Page 79 of 271
Controls
77Reference
At a glance
Driving tips
Communications
Navigation
Entertainment
Mobility
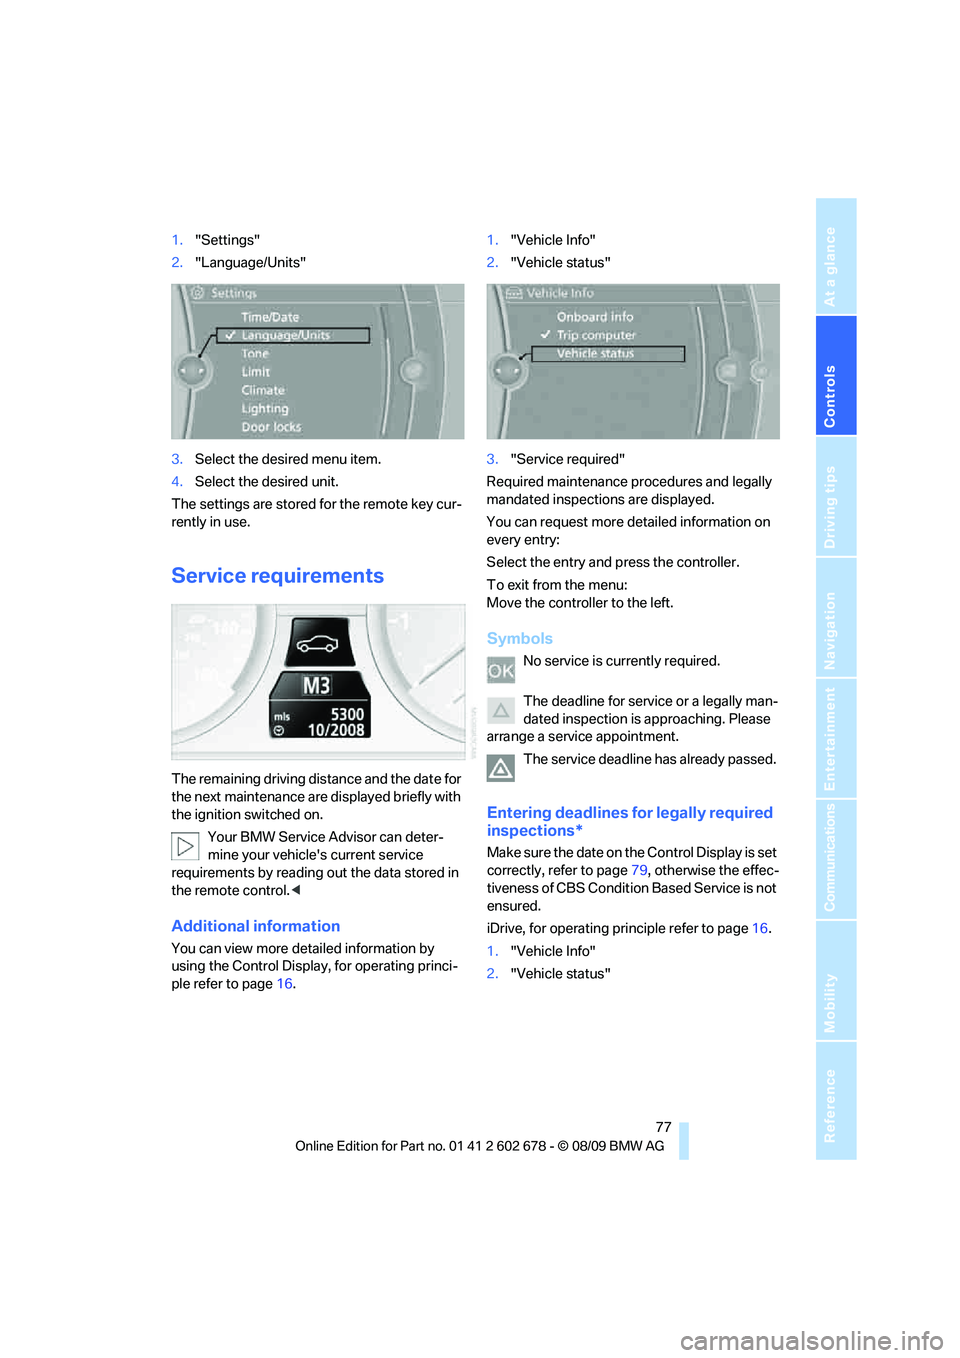
1."Settings"
2."Language/Units"
3.Select the desired menu item.
4.Select the desired unit.
The settings are stored for the remote key cur-
rently in use.
Service requirements
The remaining driving distance and the date for
the next maintenance are displayed briefly with
the ignition switched on.
Your BMW Service Advisor can deter-
mine your vehicle's current service
requirements by reading out the data stored in
the remote control.<
Additional information
You can view more detailed information by
using the Control Display, for operating princi-
ple refer to page16.1."Vehicle Info"
2."Vehicle status"
3."Service required"
Required maintenance procedures and legally
mandated inspections are displayed.
You can request more detailed information on
every entry:
Select the entry and press the controller.
To exit from the menu:
Move the controller to the left.
Symbols
No service is currently required.
The deadline for service or a legally man-
dated inspection is approaching. Please
arrange a service appointment.
The service deadline has already passed.
Entering deadlines for legally required
inspections*
Make sure the date on the Control Display is set
correctly, refer to page79, otherwise the effec-
tiveness of CBS Condition Based Service is not
ensured.
iDrive, for operating principle refer to page16.
1."Vehicle Info"
2."Vehicle status"
Page 80 of 271
Controls Overview
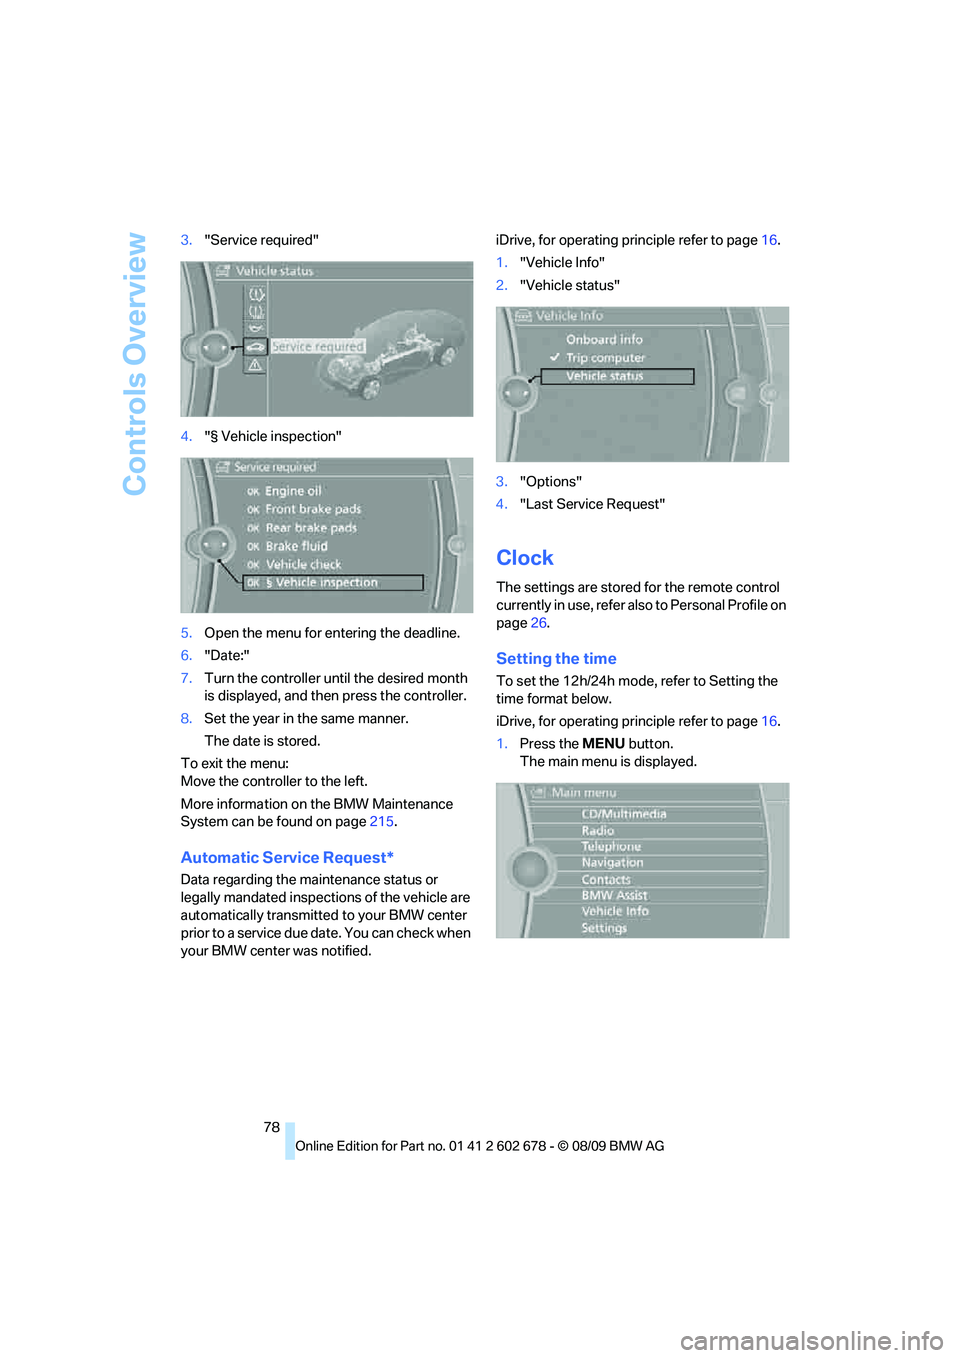
78 3."Service required"
4."§ Vehicle inspection"
5.Open the menu for entering the deadline.
6."Date:"
7.Turn the controller until the desired month
is displayed, and then press the controller.
8.Set the year in the same manner.
The date is stored.
To exit the menu:
Move the controller to the left.
More information on the BMW Maintenance
System can be found on page215.
Automatic Service Request*
Data regarding the maintenance status or
legally mandated inspections of the vehicle are
automatically transmitted to your BMW center
prior to a service due date. You can check when
your BMW center was notified.iDrive, for operating principle refer to page16.
1."Vehicle Info"
2."Vehicle status"
3."Options"
4."Last Service Request"
Clock
The settings are stored for the remote control
currently in use, refer also to Personal Profile on
page26.
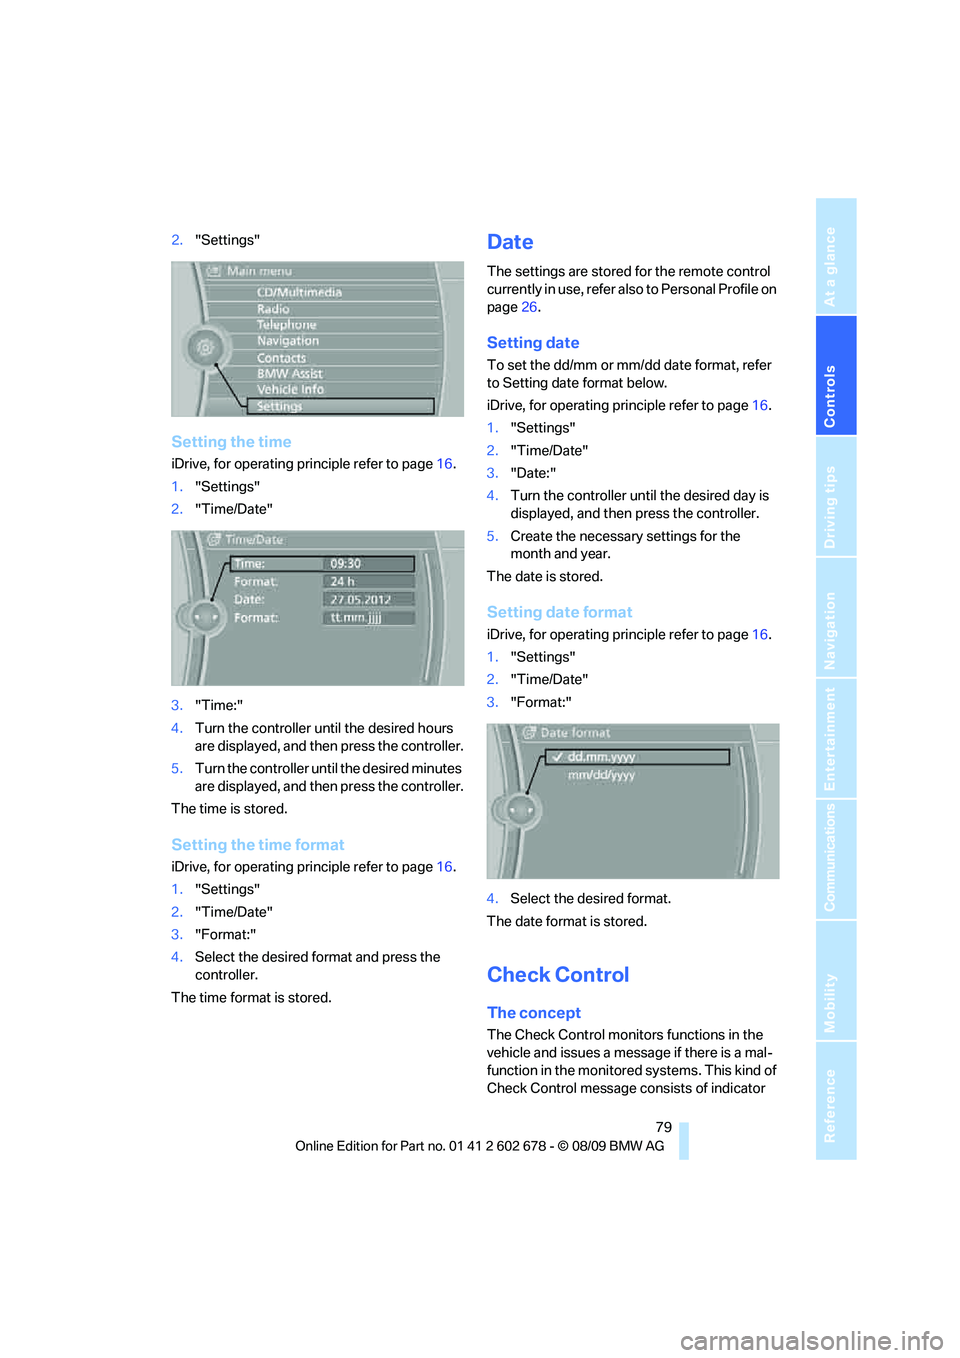
Setting the time
To set the 12h/24h mode, refer to Setting the
time format below.
iDrive, for operating principle refer to page16.
1.Press the MENU button.
The main menu is displayed.
Page 81 of 271
Controls
79Reference
At a glance
Driving tips
Communications
Navigation
Entertainment
Mobility
2."Settings"
Setting the time
iDrive, for operating principle refer to page16.
1."Settings"
2."Time/Date"
3."Time:"
4.Turn the controller until the desired hours
are displayed, and then press the controller.
5.Turn the controller until the desired minutes
are displayed, and then press the controller.
The time is stored.
Setting the time format
iDrive, for operating principle refer to page16.
1."Settings"
2."Time/Date"
3."Format:"
4.Select the desired format and press the
controller.
The time format is stored.
Date
The settings are stored for the remote control
currently in use, refer also to Personal Profile on
page26.
Setting date
To set the dd/mm or mm/dd date format, refer
to Setting date format below.
iDrive, for operating principle refer to page16.
1."Settings"
2."Time/Date"
3."Date:"
4.Turn the controller until the desired day is
displayed, and then press the controller.
5.Create the necessary settings for the
month and year.
The date is stored.
Setting date format
iDrive, for operating principle refer to page16.
1."Settings"
2."Time/Date"
3."Format:"
4.Select the desired format.
The date format is stored.
Check Control
The concept
The Check Control monitors functions in the
vehicle and issues a message if there is a mal-
function in the monitored systems. This kind of
Check Control message consists of indicator
Page 84 of 271
Controls Overview
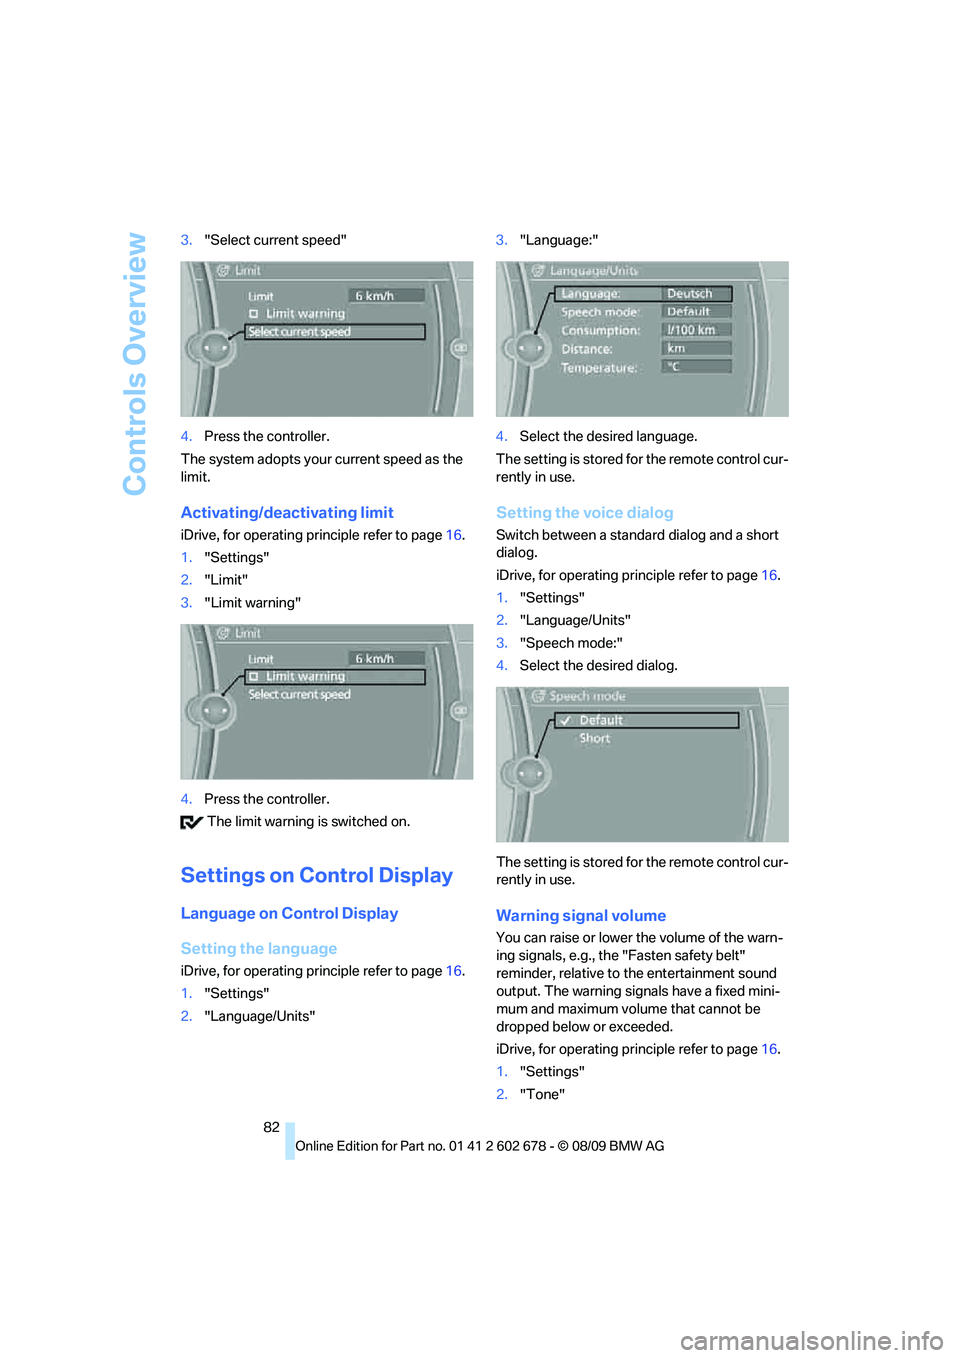
82 3."Select current speed"
4.Press the controller.
The system adopts your current speed as the
limit.
Activating/deactivating limit
iDrive, for operating principle refer to page16.
1."Settings"
2."Limit"
3."Limit warning"
4.Press the controller.
The limit warning is switched on.
Settings on Control Display
Language on Control Display
Setting the language
iDrive, for operating principle refer to page16.
1."Settings"
2."Language/Units"3."Language:"
4.Select the desired language.
The setting is stored for the remote control cur-
rently in use.
Setting the voice dialog
Switch between a standard dialog and a short
dialog.
iDrive, for operating principle refer to page16.
1."Settings"
2."Language/Units"
3."Speech mode:"
4.Select the desired dialog.
The setting is stored for the remote control cur-
rently in use.
Warning signal volume
You can raise or lower the volume of the warn-
ing signals, e.g., the "Fasten safety belt"
reminder, relative to the entertainment sound
output. The warning signals have a fixed mini-
mum and maximum volume that cannot be
dropped below or exceeded.
iDrive, for operating principle refer to page16.
1."Settings"
2."Tone"
Page 85 of 271
Controls
83Reference
At a glance
Driving tips
Communications
Navigation
Entertainment
Mobility
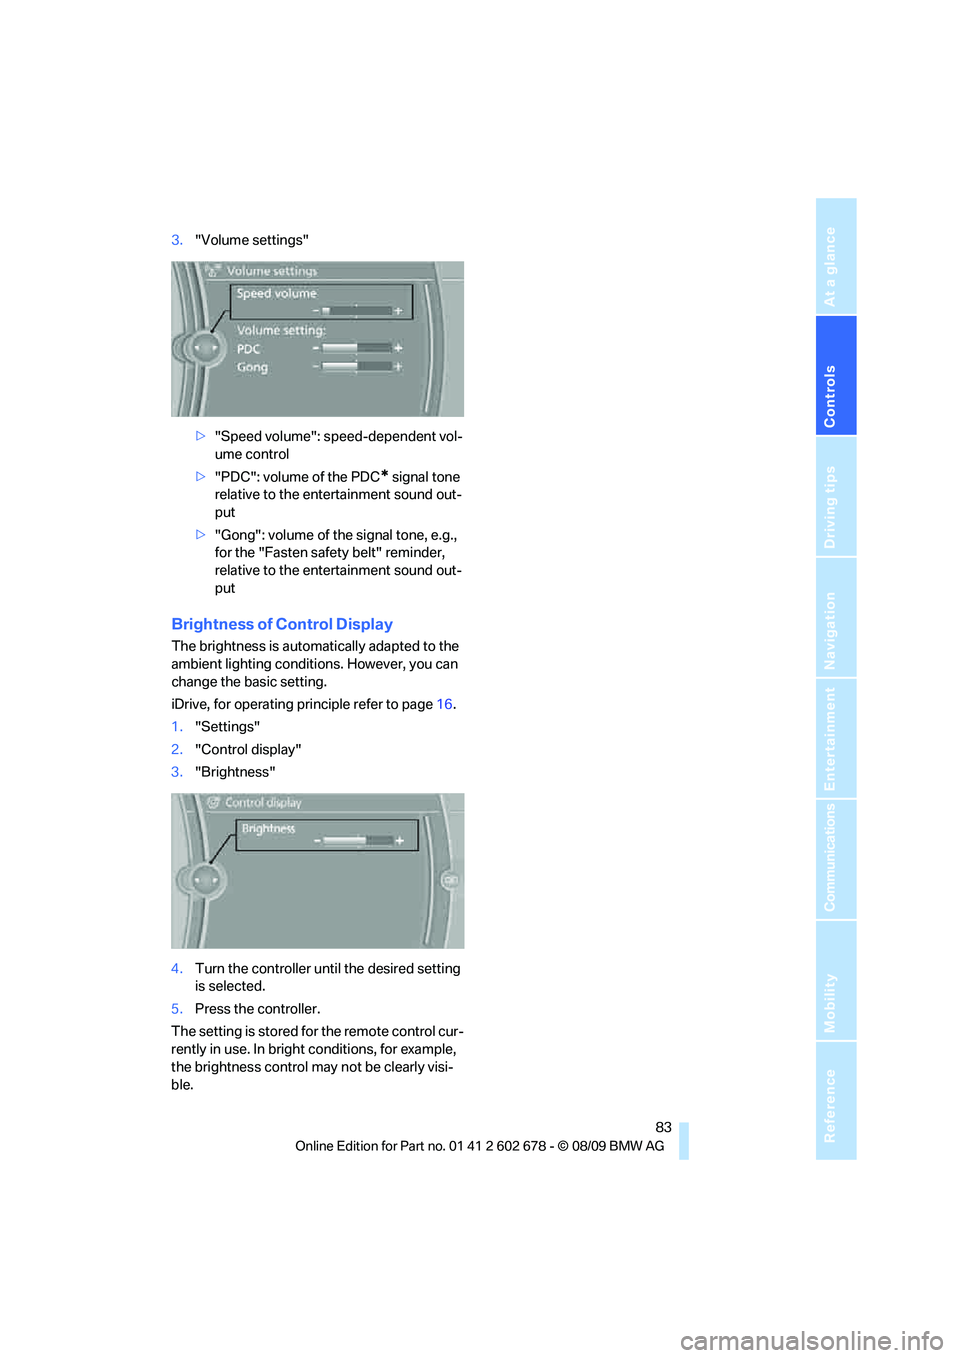
3."Volume settings"
>"Speed volume": speed-dependent vol-
ume control
>"PDC": volume of the PDC
* signal tone
relative to the entertainment sound out-
put
>"Gong": volume of the signal tone, e.g.,
for the "Fasten safety belt" reminder,
relative to the entertainment sound out-
put
Brightness of Control Display
The brightness is automatically adapted to the
ambient lighting conditions. However, you can
change the basic setting.
iDrive, for operating principle refer to page16.
1."Settings"
2."Control display"
3."Brightness"
4.Turn the controller until the desired setting
is selected.
5.Press the controller.
The setting is stored for the remote control cur-
rently in use. In bright conditions, for example,
the brightness control may not be clearly visi-
ble.
Page 98 of 271
Technology for comfort, convenience and safety
96
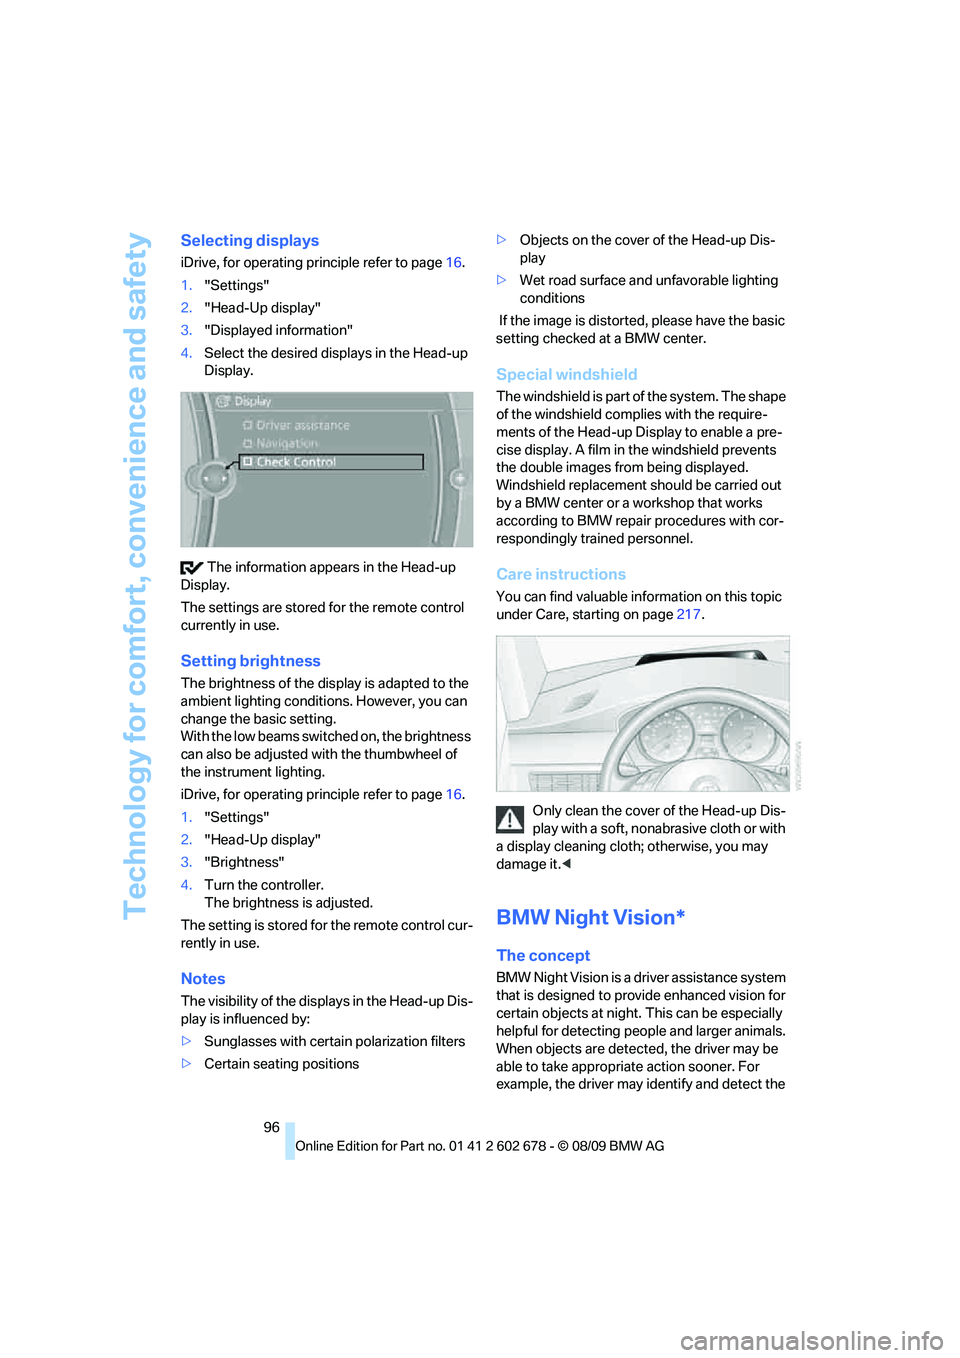
Selecting displays
iDrive, for operating principle refer to page16.
1."Settings"
2."Head-Up display"
3."Displayed information"
4.Select the desired displays in the Head-up
Display.
The information appears in the Head-up
Display.
The settings are stored for the remote control
currently in use.
Setting brightness
The brightness of the display is adapted to the
ambient lighting conditions. However, you can
change the basic setting.
With the low beams switched on, the brightness
can also be adjusted with the thumbwheel of
the instrument lighting.
iDrive, for operating principle refer to page16.
1."Settings"
2."Head-Up display"
3."Brightness"
4.Turn the controller.
The brightness is adjusted.
The setting is stored for the remote control cur-
rently in use.
Notes
The visibility of the displays in the Head-up Dis-
play is influenced by:
>Sunglasses with certain polarization filters
>Certain seating positions>Objects on the cover of the Head-up Dis-
play
>Wet road surface and unfavorable lighting
conditions
If the image is distorted, please have the basic
setting checked at a BMW center.
Special windshield
The windshield is part of the system. The shape
of the windshield complies with the require-
ments of the Head-up Display to enable a pre-
cise display. A film in the windshield prevents
the double images from being displayed.
Windshield replacement should be carried out
by a BMW center or a workshop that works
according to BMW repair procedures with cor-
respondingly trained personnel.
Care instructions
You can find valuable information on this topic
under Care, starting on page217.
Only clean the cover of the Head-up Dis-
play with a soft, nonabrasive cloth or with
a display cleaning cloth; otherwise, you may
damage it.<
BMW Night Vision*
The concept
BMW Night Vision is a driver assistance system
that is designed to provide enhanced vision for
certain objects at night. This can be especially
helpful for detecting people and larger animals.
When objects are detected, the driver may be
able to take appropriate action sooner. For
example, the driver may identify and detect the
Page 100 of 271
Technology for comfort, convenience and safety
98
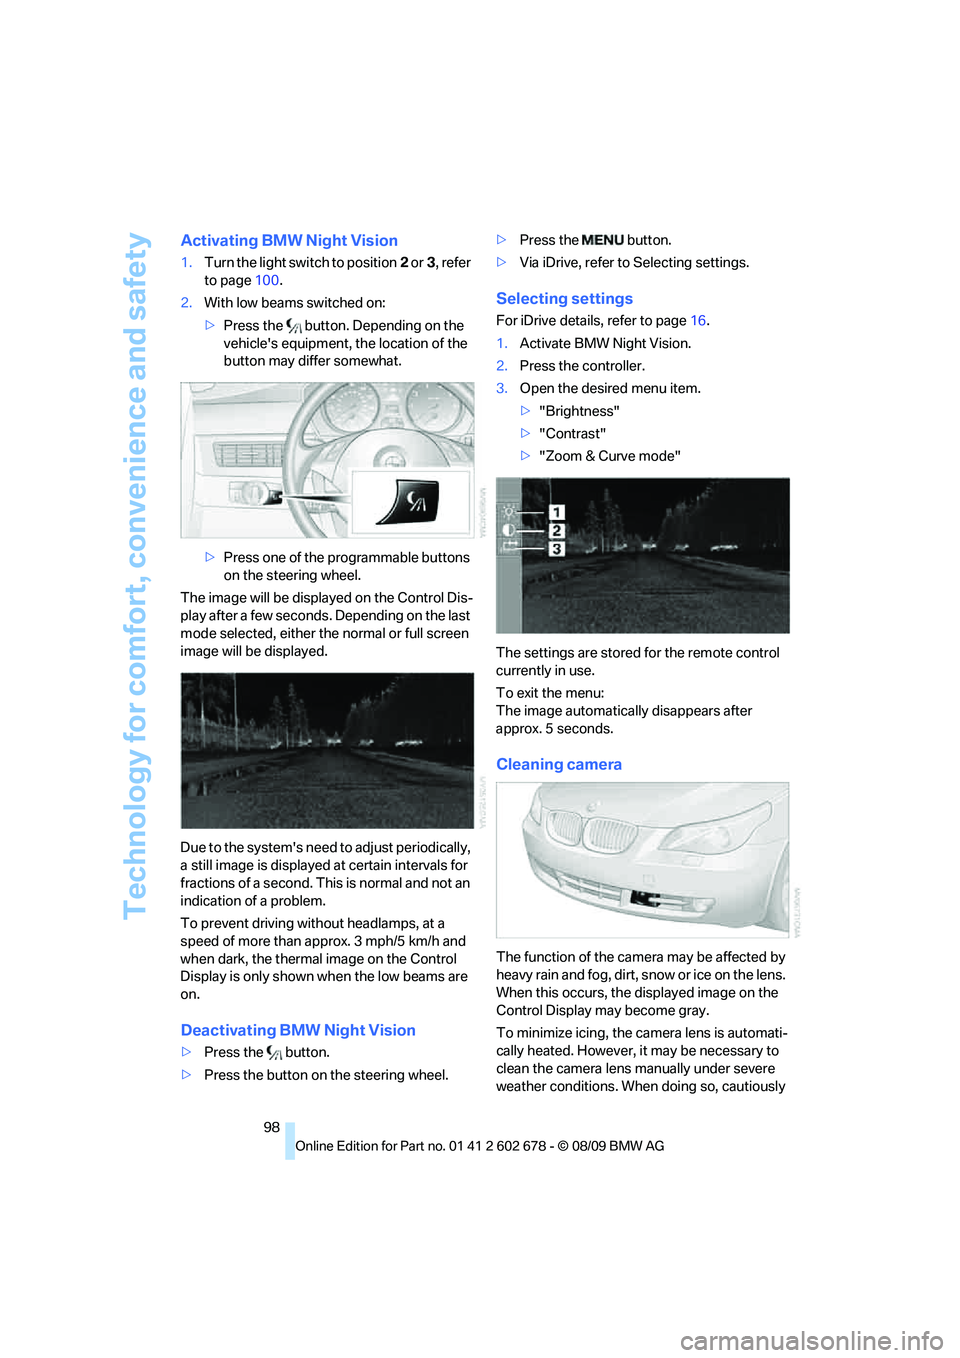
Activating BMW Night Vision
1.Turn the light switch to position2 or3, refer
to page100.
2.With low beams switched on:
>Press the button. Depending on the
vehicle's equipment, the location of the
button may differ somewhat.
>Press one of the programmable buttons
on the steering wheel.
The image will be displayed on the Control Dis-
play after a few seconds. Depending on the last
mode selected, either the normal or full screen
image will be displayed.
Due to the system's need to adjust periodically,
a still image is displayed at certain intervals for
fractions of a second. This is normal and not an
indication of a problem.
To prevent driving without headlamps, at a
speed of more than approx. 3 mph/5 km/h and
when dark, the thermal image on the Control
Display is only shown when the low beams are
on.
Deactivating BMW Night Vision
>Press the button.
>Press the button on the steering wheel.>Press the button.
>Via iDrive, refer to Selecting settings.
Selecting settings
For iDrive details, refer to page16.
1.Activate BMW Night Vision.
2.Press the controller.
3.Open the desired menu item.
>"Brightness"
>"Contrast"
>"Zoom & Curve mode"
The settings are stored for the remote control
currently in use.
To exit the menu:
The image automatically disappears after
approx. 5 seconds.
Cleaning camera
The function of the camera may be affected by
heavy rain and fog, dirt, snow or ice on the lens.
When this occurs, the displayed image on the
Control Display may become gray.
To minimize icing, the camera lens is automati-
cally heated. However, it may be necessary to
clean the camera lens manually under severe
weather conditions. When doing so, cautiously
Page 103 of 271
Controls
101Reference
At a glance
Driving tips
Communications
Navigation
Entertainment
Mobility
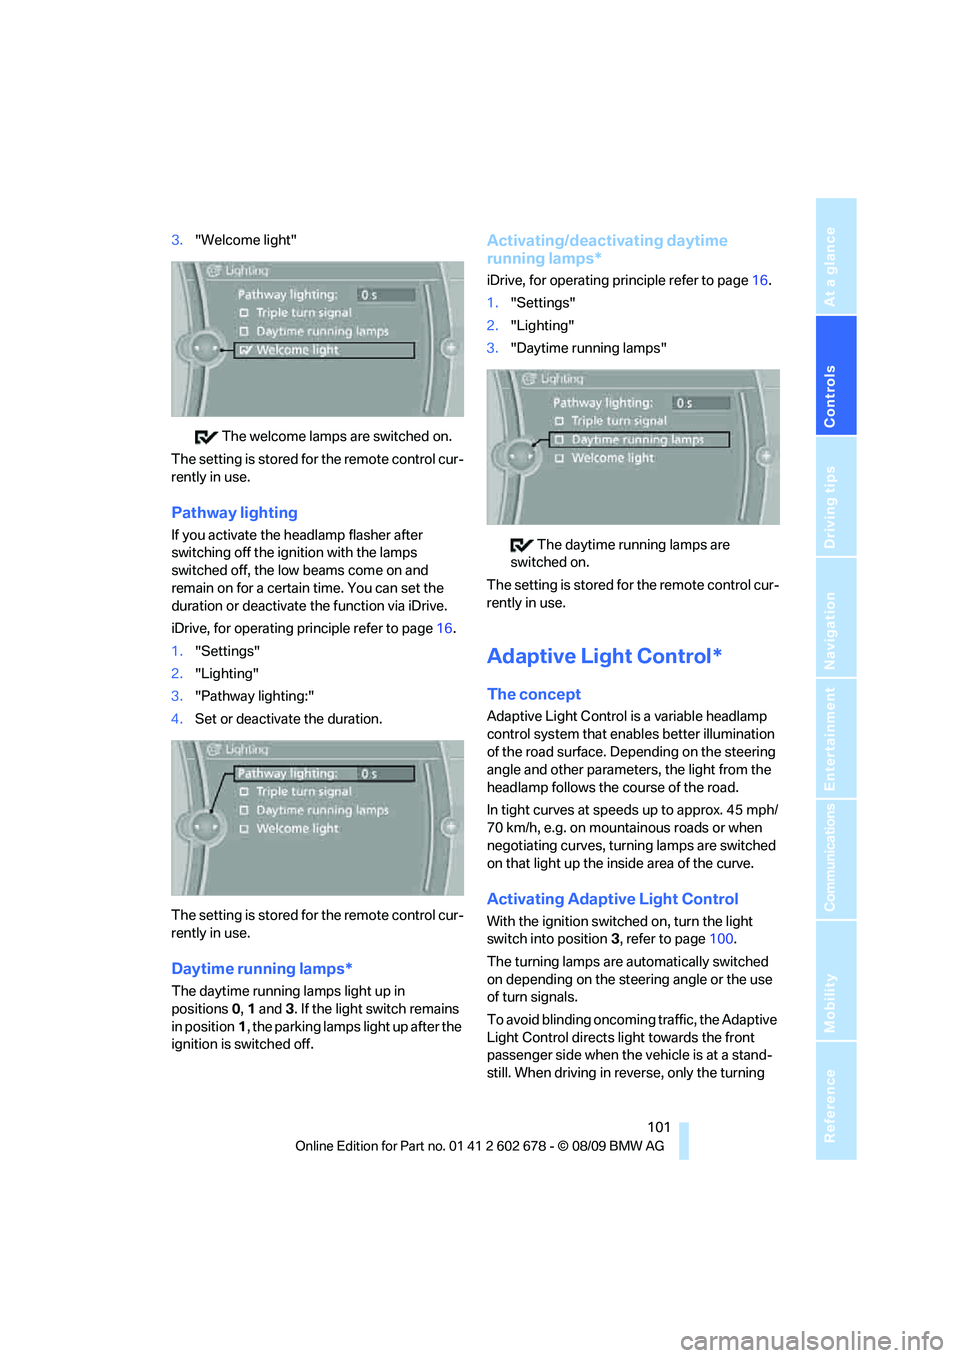
3."Welcome light"
The welcome lamps are switched on.
The setting is stored for the remote control cur-
rently in use.
Pathway lighting
If you activate the headlamp flasher after
switching off the ignition with the lamps
switched off, the low beams come on and
remain on for a certain time. You can set the
duration or deactivate the function via iDrive.
iDrive, for operating principle refer to page16.
1."Settings"
2."Lighting"
3."Pathway lighting:"
4.Set or deactivate the duration.
The setting is stored for the remote control cur-
rently in use.
Daytime running lamps*
The daytime running lamps light up in
positions0, 1 and 3. If the light switch remains
in position1, the parking lamps light up after the
ignition is switched off.
Activating/deactivating daytime
running lamps*
iDrive, for operating principle refer to page16.
1."Settings"
2."Lighting"
3."Daytime running lamps"
The daytime running lamps are
switched on.
The setting is stored for the remote control cur-
rently in use.
Adaptive Light Control*
The concept
Adaptive Light Control is a variable headlamp
control system that enables better illumination
of the road surface. Depending on the steering
angle and other parameters, the light from the
headlamp follows the course of the road.
In tight curves at speeds up to approx. 45 mph/
70 km/h, e.g. on mountainous roads or when
negotiating curves, turning lamps are switched
on that light up the inside area of the curve.
Activating Adaptive Light Control
With the ignition switched on, turn the light
switch into position 3, refer to page100.
The turning lamps are automatically switched
on depending on the steering angle or the use
of turn signals.
To avoid blinding oncoming traffic, the Adaptive
Light Control directs light towards the front
passenger side when the vehicle is at a stand-
still. When driving in reverse, only the turning