window BMW 535I XDRIVE 2010 Owner's Manual
[x] Cancel search | Manufacturer: BMW, Model Year: 2010, Model line: 535I XDRIVE, Model: BMW 535I XDRIVE 2010Pages: 271, PDF Size: 8.83 MB
Page 107 of 271
Controls
105Reference
At a glance
Driving tips
Communications
Navigation
Entertainment
Mobility
Climate
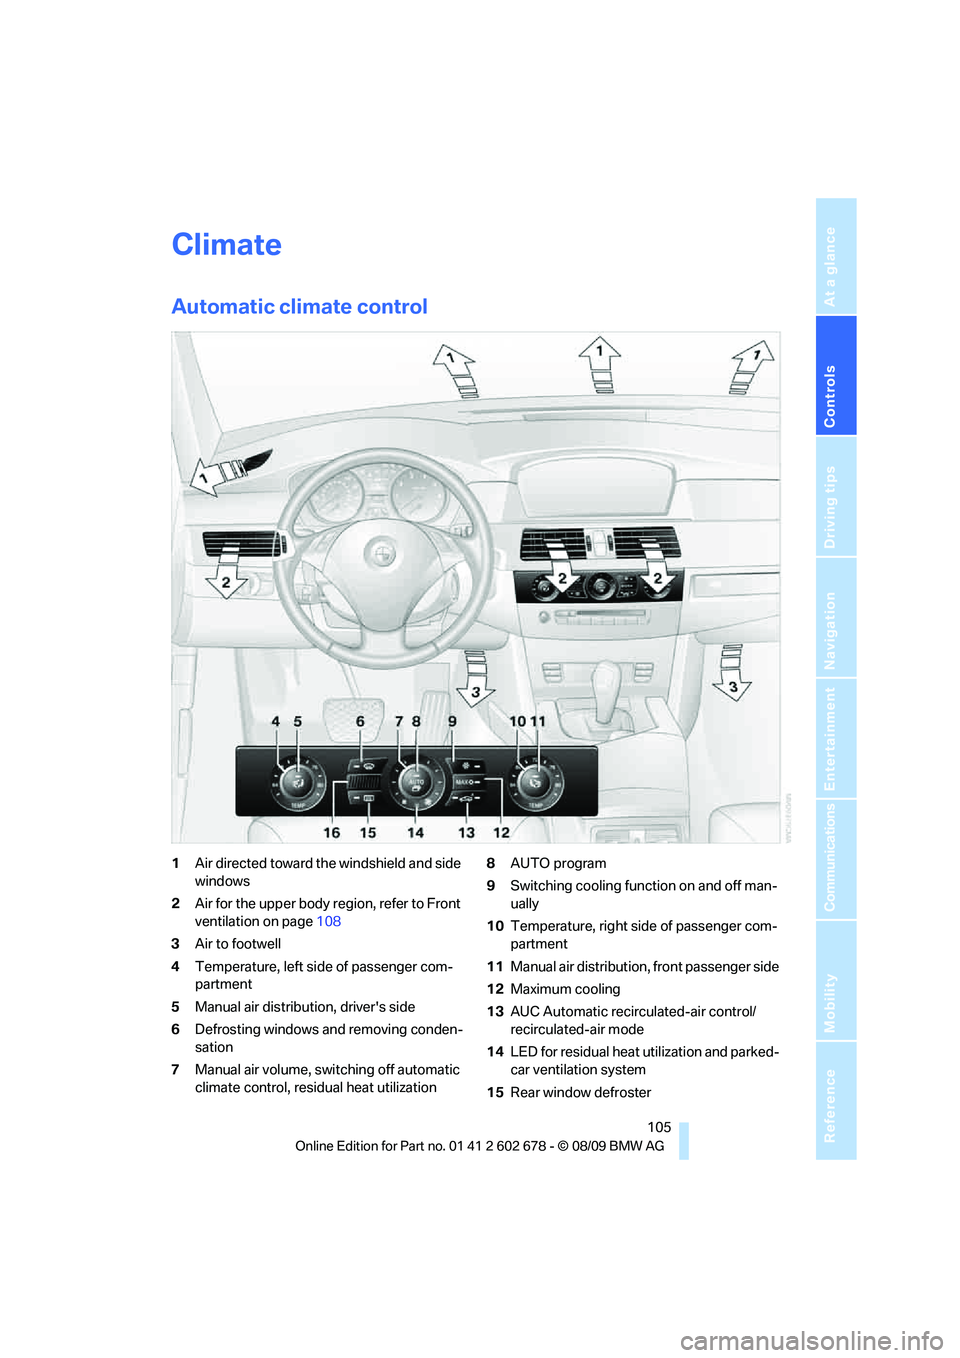
Automatic climate control
1Air directed toward the windshield and side
windows
2Air for the upper body region, refer to Front
ventilation on page108
3Air to footwell
4Temperature, left side of passenger com-
partment
5Manual air distribution, driver's side
6Defrosting windows and removing conden-
sation
7Manual air volume, switching off automatic
climate control, residual heat utilization8AUTO program
9Switching cooling function on and off man-
ually
10Temperature, right side of passenger com-
partment
11Manual air distribution, front passenger side
12Maximum cooling
13AUC Automatic recirculated-air control/
recirculated-air mode
14LED for residual heat utilization and parked-
car ventilation system
15Rear window defroster
Page 108 of 271
Climate
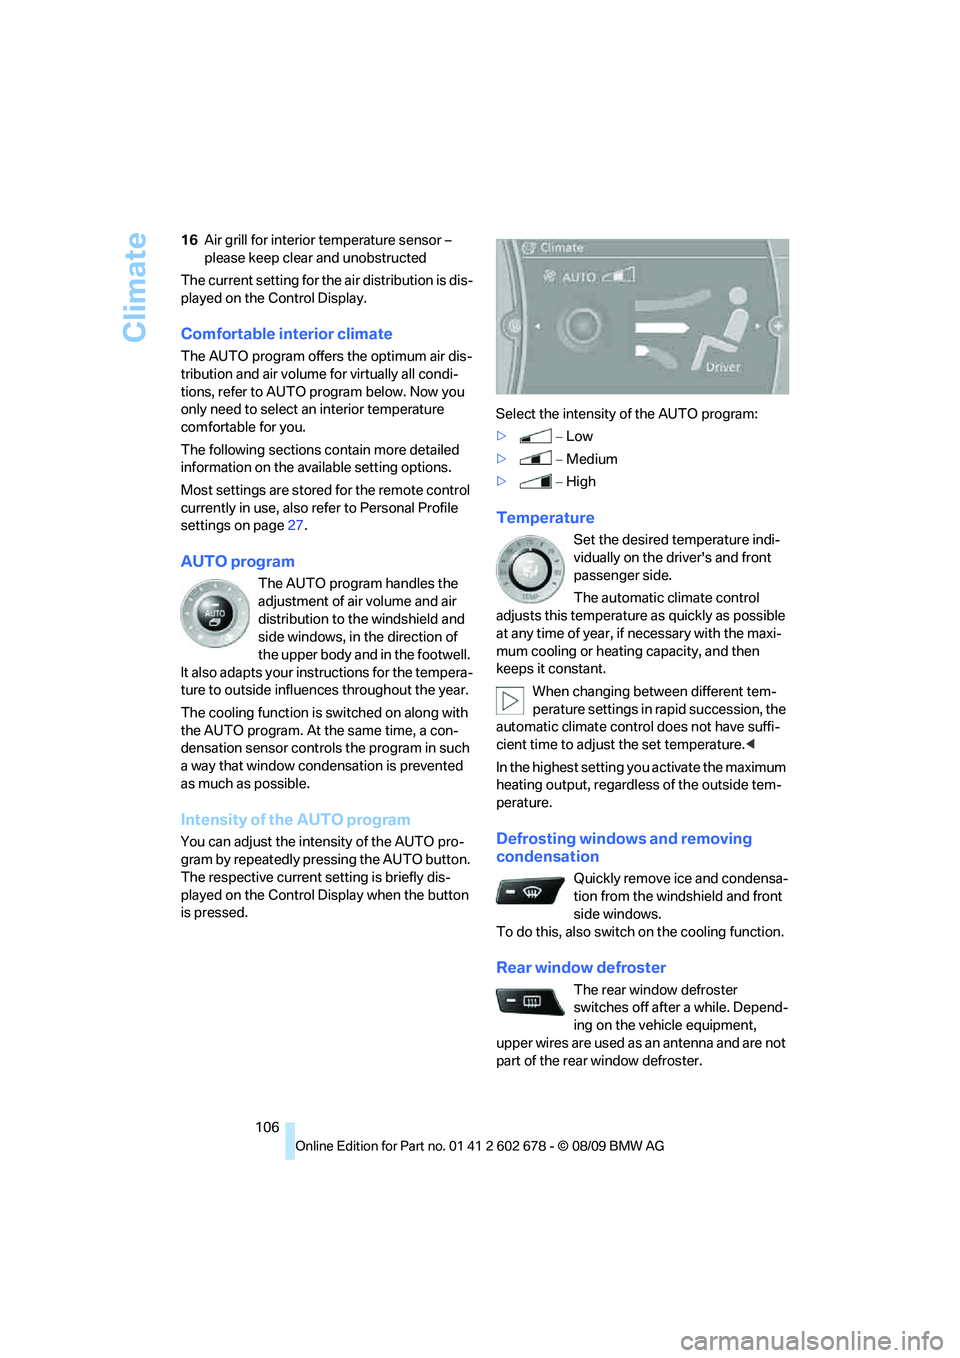
106 16Air grill for interior temperature sensor –
please keep clear and unobstructed
The current setting for the air distribution is dis-
played on the Control Display.
Comfortable interior climate
The AUTO program offers the optimum air dis-
tribution and air volume for virtually all condi-
tions, refer to AUTO program below. Now you
only need to select an interior temperature
comfortable for you.
The following sections contain more detailed
information on the available setting options.
Most settings are stored for the remote control
currently in use, also refer to Personal Profile
settings on page27.
AUTO program
The AUTO program handles the
adjustment of air volume and air
distribution to the windshield and
side windows, in the direction of
the upper body and in the footwell.
It also adapts your instructions for the tempera-
ture to outside influences throughout the year.
The cooling function is switched on along with
the AUTO program. At the same time, a con-
densation sensor controls the program in such
a way that window condensation is prevented
as much as possible.
Intensity of the AUTO program
You can adjust the intensity of the AUTO pro-
gram by repeatedly pressing the AUTO button.
The respective current setting is briefly dis-
played on the Control Display when the button
is pressed.Select the intensity of the AUTO program:
>−Low
>−Medium
>−High
Temperature
Set the desired temperature indi-
vidually on the driver's and front
passenger side.
The automatic climate control
adjusts this temperature as quickly as possible
at any time of year, if necessary with the maxi-
mum cooling or heating capacity, and then
keeps it constant.
When changing between different tem-
perature settings in rapid succession, the
automatic climate control does not have suffi-
cient time to adjust the set temperature.<
In the highest setting you activate the maximum
heating output, regardless of the outside tem-
perature.
Defrosting windows and removing
condensation
Quickly remove ice and condensa-
tion from the windshield and front
side windows.
To do this, also switch on the cooling function.
Rear window defroster
The rear window defroster
switches off after a while. Depend-
ing on the vehicle equipment,
upper wires are used as an antenna and are not
part of the rear window defroster.
Page 109 of 271
Controls
107Reference
At a glance
Driving tips
Communications
Navigation
Entertainment
Mobility
Air volume, manual
You can adjust the air volume by
turning. You can reactivate the
automatic mode for the air volume
with the AUTO button.
The air volume is reduced to save battery
power. The display stays the same.
Air distribution, manual
You can route the air flowing out into the vehicle
interior via various programs, separately for the
driver's and passenger's side:
>Upper body region
>Upper body region and footwell
>Footwell
>Driver's side: windows and footwell
Selecting program
Press the button repeatedly until
the desired air distribution of the
respective program is shown on
the Control Display.
Switching cooling function on and off
The cooling function cools and
dehumidifies the incoming air
before also reheating it as
required, according to the temperature setting.
This function is only available when the engine
is running.
The cooling function helps to avoid condensa-
tion on the window surfaces or to quickly
remove them.
Depending on the weather, the windshield may
fog over briefly when the engine is started.
The cooling function is also switched on with
the AUTO program.
Maximum cooling
Maximally cooled air is obtained as
quickly as possible at an outside
temperature above approx. 327/
06 and with the engine running.
At the lowest temperature, the automatic cli-
mate control switches into recirculated-air mode. The maximum air volume flows out of the
vents for the upper body. Therefore, open these
vents for maximum cooling.
AUC Automatic recirculated-air
control/recirculated-air mode
You can respond to pollutants or
unpleasant odors in the immediate
environment by suspending the
supply of outside air. The system then recircu-
lates the air currently within the vehicle. During
AUC operation, a sensor detects pollutants in
the outside air and controls the shut-off auto-
matically.
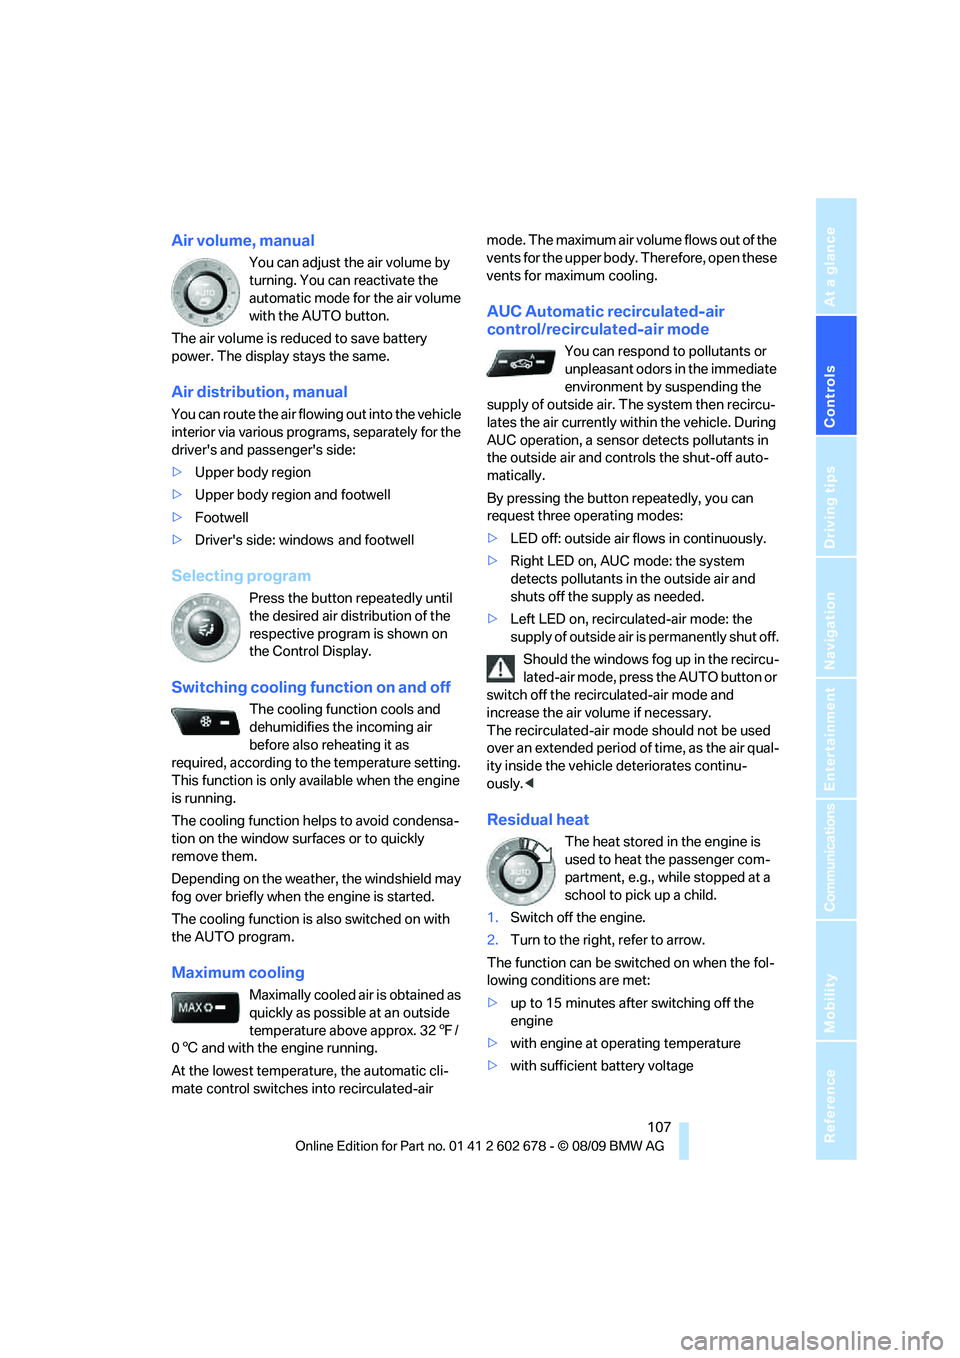
By pressing the button repeatedly, you can
request three operating modes:
>LED off: outside air flows in continuously.
>Right LED on, AUC mode: the system
detects pollutants in the outside air and
shuts off the supply as needed.
>Left LED on, recirculated-air mode: the
supply of outside air is permanently shut off.
Should the windows fog up in the recircu-
lated-air mode, press the AUTO button or
switch off the recirculated-air mode and
increase the air volume if necessary.
The recirculated-air mode should not be used
over an extended period of time, as the air qual-
ity inside the vehicle deteriorates continu-
ously.<
Residual heat
The heat stored in the engine is
used to heat the passenger com-
partment, e.g., while stopped at a
school to pick up a child.
1.Switch off the engine.
2.Turn to the right, refer to arrow.
The function can be switched on when the fol-
lowing conditions are met:
>up to 15 minutes after switching off the
engine
>with engine at operating temperature
>with sufficient battery voltage
Page 113 of 271
Controls
111Reference
At a glance
Driving tips
Communications
Navigation
Entertainment
Mobility
You can operate the device when the engine is
running or when the ignition is switched on.
If the device fails to function even after
repeated programming, check whether
the original hand-held transmitter uses an alter-
nating-code system. To do so, either read the
instructions for the original hand-held transmit-
ter or hold down the programmed memory
button1 of the integrated universal remote
control. If the LED2 on the integrated universal
remote control flashes rapidly for a short time
and then remains lit for approx. 2 seconds, this
indicates that the original hand-held transmitter
uses an alternating-code system. In the case of
an alternating-code system, program the mem-
ory buttons1 as described at Alternating-code
hand-held transmitters.<
Alternating-code hand-held
transmitters
To program the integrated universal remote
control, consult the operating instructions for
the equipment to be set. You will find informa-
tion there on the possibilities for synchroniza-
tion.
When programming hand-held transmitters
that employ an alternating code, please observe
the following supplementary instructions:
P r o g ra m m in g w i ll b e ea s i er w it h t h e a i d o f
a second person.<
1.Park your vehicle within the range of the
remote-controlled device.
2.Program the integrated universal remote
control as described above in the section
Fixed-code hand-held transmitters.
3.Locate the button on the receiver of the
device to be set, e. g. on the drive unit.
4.Press the button on the receiver of the
device to be set. After step 4, you have
approx. 30 seconds for step 5.
5.Press the programmed memory button1
of the integrated universal remote control
three times.
The corresponding memory button 1 is now
programmed with the signal of the original
hand-held transmitter.If you have any additional questions,
please contact your BMW center.<
Deleting all stored programs
Press the left and right-hand memory button1
for approx. 20 seconds until the LED2 flashes
quickly:
All stored programs are deleted.
Individual programs cannot be deleted.
Rememorizing individual programs
1.Hold the original handheld remote control
approx. 4 in/10 cm to 12 in/30 cm away
from the memory buttons1.
The required distance between the
hand-held transmitter and the mem-
ory buttons1 depends on the relevant sys-
tem of the original hand-held transmitter
used.<
2.Press the desired memory button1 of the
integrated universal remote control.
3.If the LED2 flashes slowly after approx.
20 seconds, press the command button of
the original hand-held transmitter. As soon
as the LED2 flashes rapidly, release both
buttons. If the LED2 does not flash rapidly
after approx. 15 seconds, alter the distance
and repeat the step.
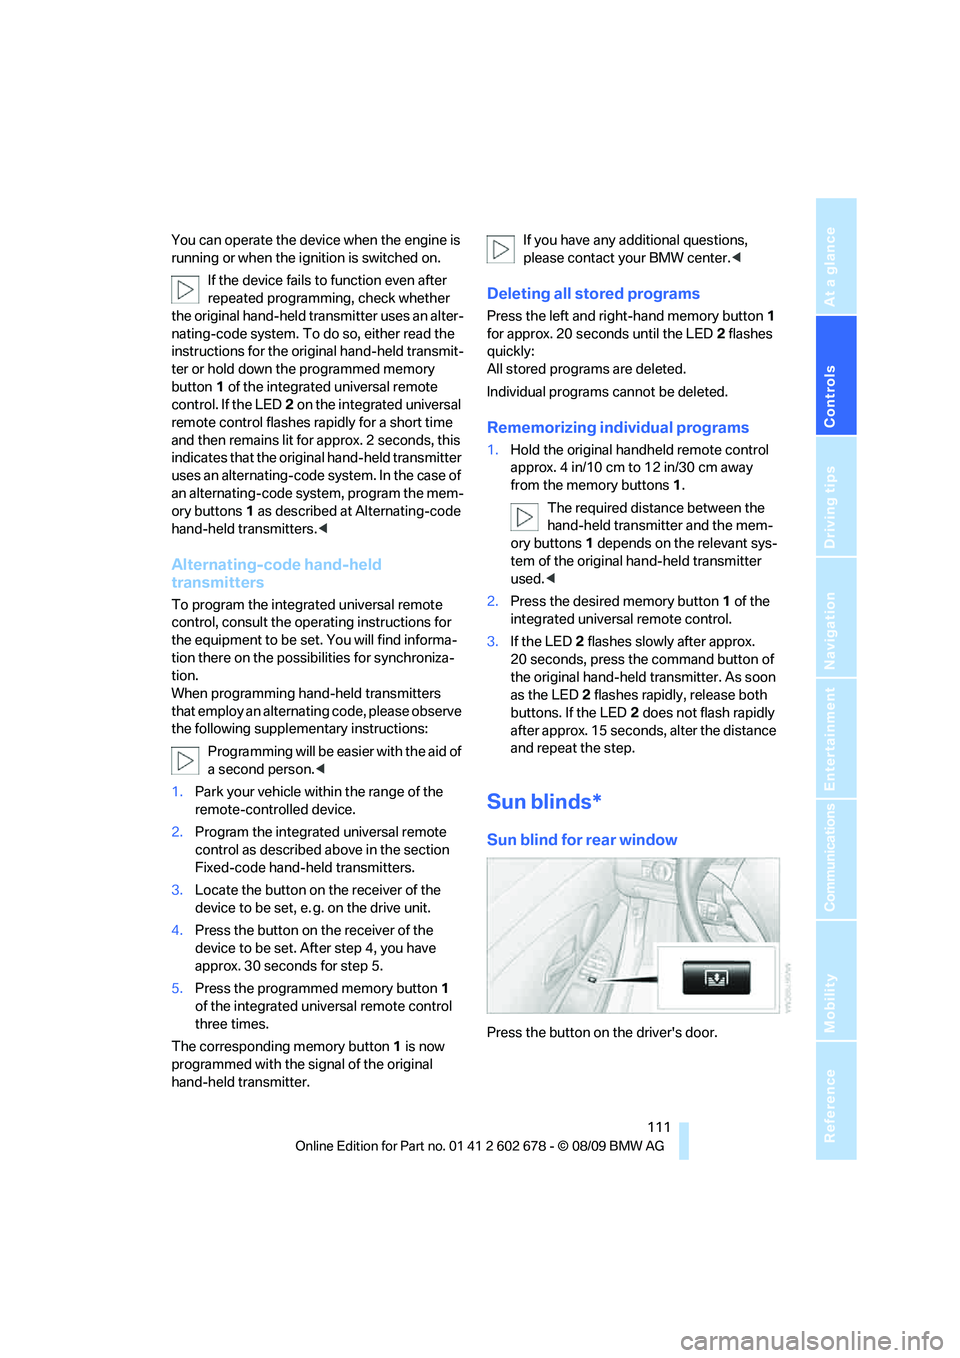
Sun blinds*
Sun blind for rear window
Press the button on the driver's door.
Page 114 of 271
Practical interior accessories
112
Sun blinds for rear side windows
Pull the loop of the roller sun blind and hook
onto bracket.
Do not open the window with the roller
sun blind deployed. Otherwise, there is a
risk of damage and injury at higher speeds.<
Glove compartment
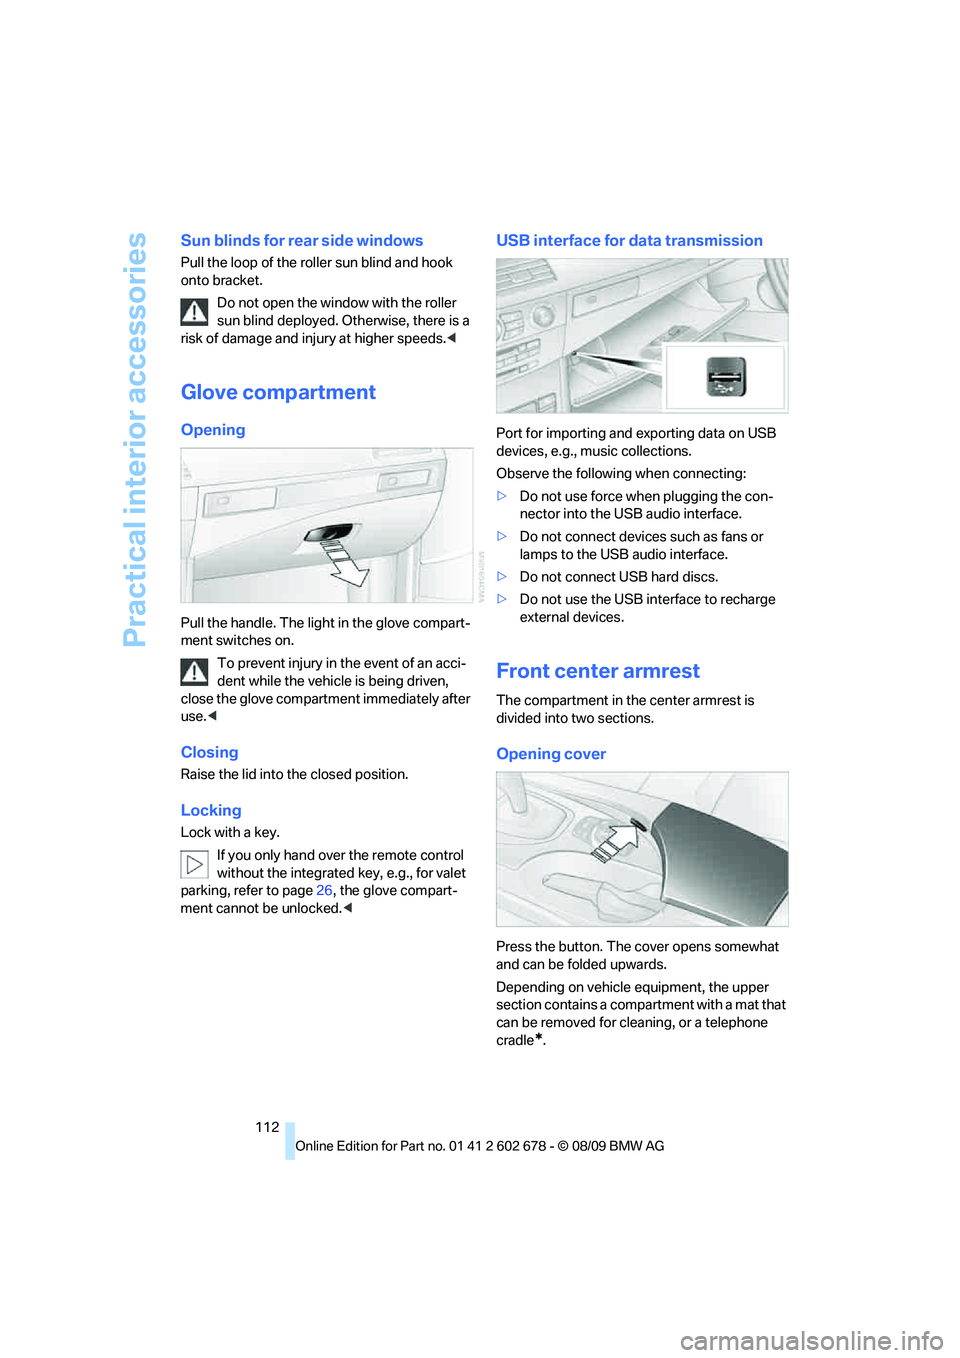
Opening
Pull the handle. The light in the glove compart-
ment switches on.
To prevent injury in the event of an acci-
dent while the vehicle is being driven,
close the glove compartment immediately after
use.<
Closing
Raise the lid into the closed position.
Locking
Lock with a key.
If you only hand over the remote control
without the integrated key, e.g., for valet
parking, refer to page26, the glove compart-
ment cannot be unlocked.<
USB interface for data transmission
Port for importing and exporting data on USB
devices, e.g., music collections.
Observe the following when connecting:
>Do not use force when plugging the con-
nector into the USB audio interface.
>Do not connect devices such as fans or
lamps to the USB audio interface.
>Do not connect USB hard discs.
>Do not use the USB interface to recharge
external devices.
Front center armrest
The compartment in the center armrest is
divided into two sections.
Opening cover
Press the button. The cover opens somewhat
and can be folded upwards.
Depending on vehicle equipment, the upper
section contains a compartment with a mat that
can be removed for cleaning, or a telephone
cradle
*.
Page 118 of 271
Practical interior accessories
116
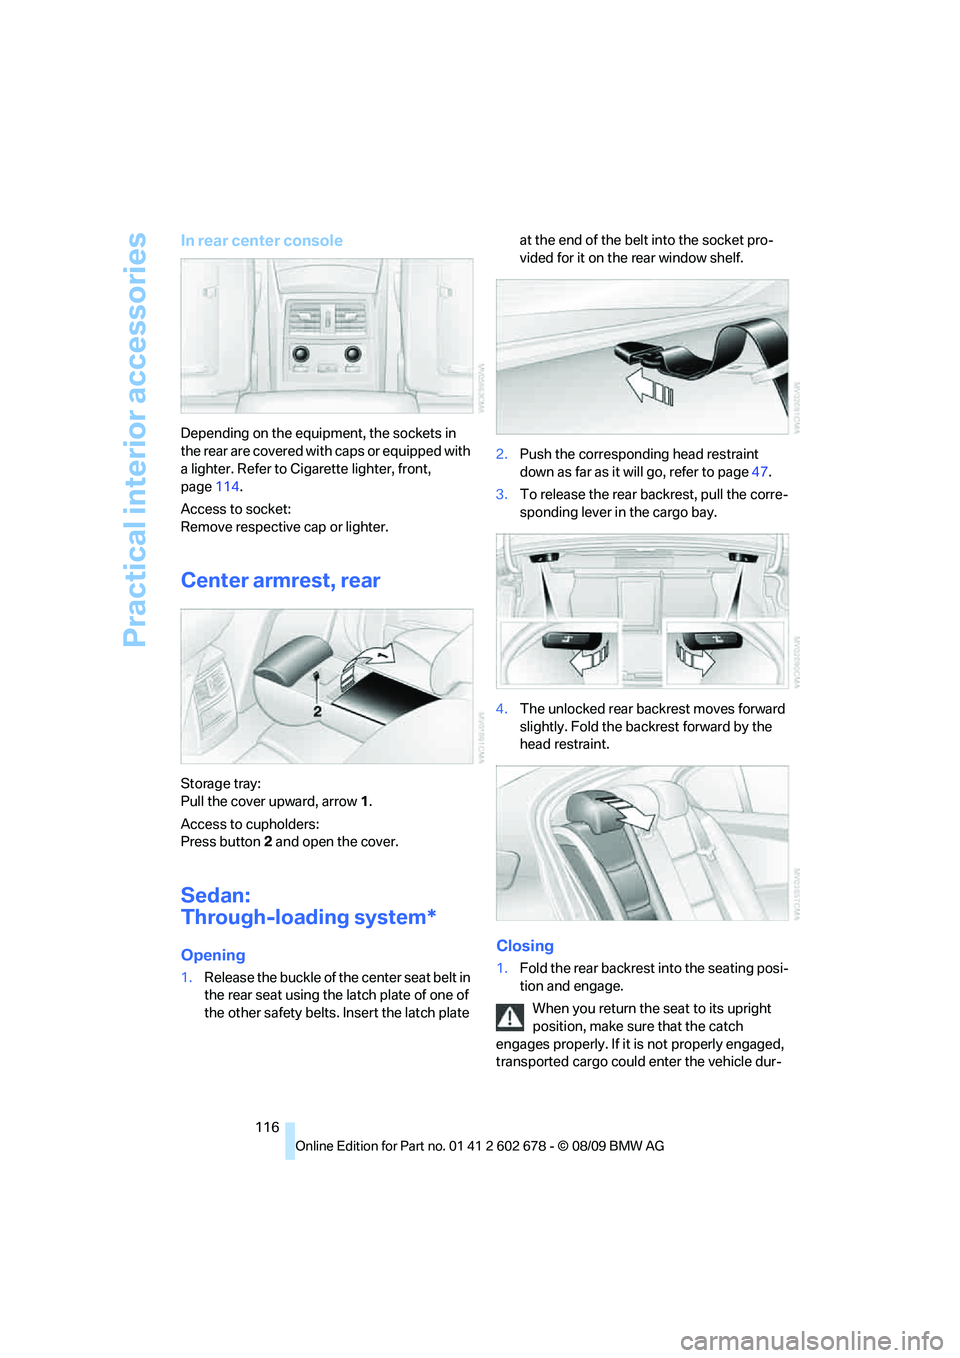
In rear center console
Depending on the equipment, the sockets in
the rear are covered with caps or equipped with
a lighter. Refer to Cigarette lighter, front,
page114.
Access to socket:
Remove respective cap or lighter.
Center armrest, rear
Storage tray:
Pull the cover upward, arrow1.
Access to cupholders:
Press button2 and open the cover.
Sedan:
Through-loading system*
Opening
1.Release the buckle of the center seat belt in
the rear seat using the latch plate of one of
the other safety belts. Insert the latch plate at the end of the belt into the socket pro-
vided for it on the rear window shelf.
2.Push the corresponding head restraint
down as far as it will go, refer to page47.
3.To release the rear backrest, pull the corre-
sponding lever in the cargo bay.
4.The unlocked rear backrest moves forward
slightly. Fold the backrest forward by the
head restraint.
Closing
1.Fold the rear backrest into the seating posi-
tion and engage.
When you return the seat to its upright
position, make sure that the catch
engages properly. If it is not properly engaged,
transported cargo could enter the vehicle dur-
Page 119 of 271
Controls
117Reference
At a glance
Driving tips
Communications
Navigation
Entertainment
Mobility
ing braking or evasive maneuvers and endanger
the vehicle occupants.<
2.Release the latch plate from the bracket on
the rear window shelf and insert it into the
buckle of the center safety belt. Make sure
the latch plate audibly engages.
The lashing eyes in the cargo bay provide you
with a way to attach cargo-bay nets
* or luggage
straps for securing suitcases and luggage, refer
to page128.
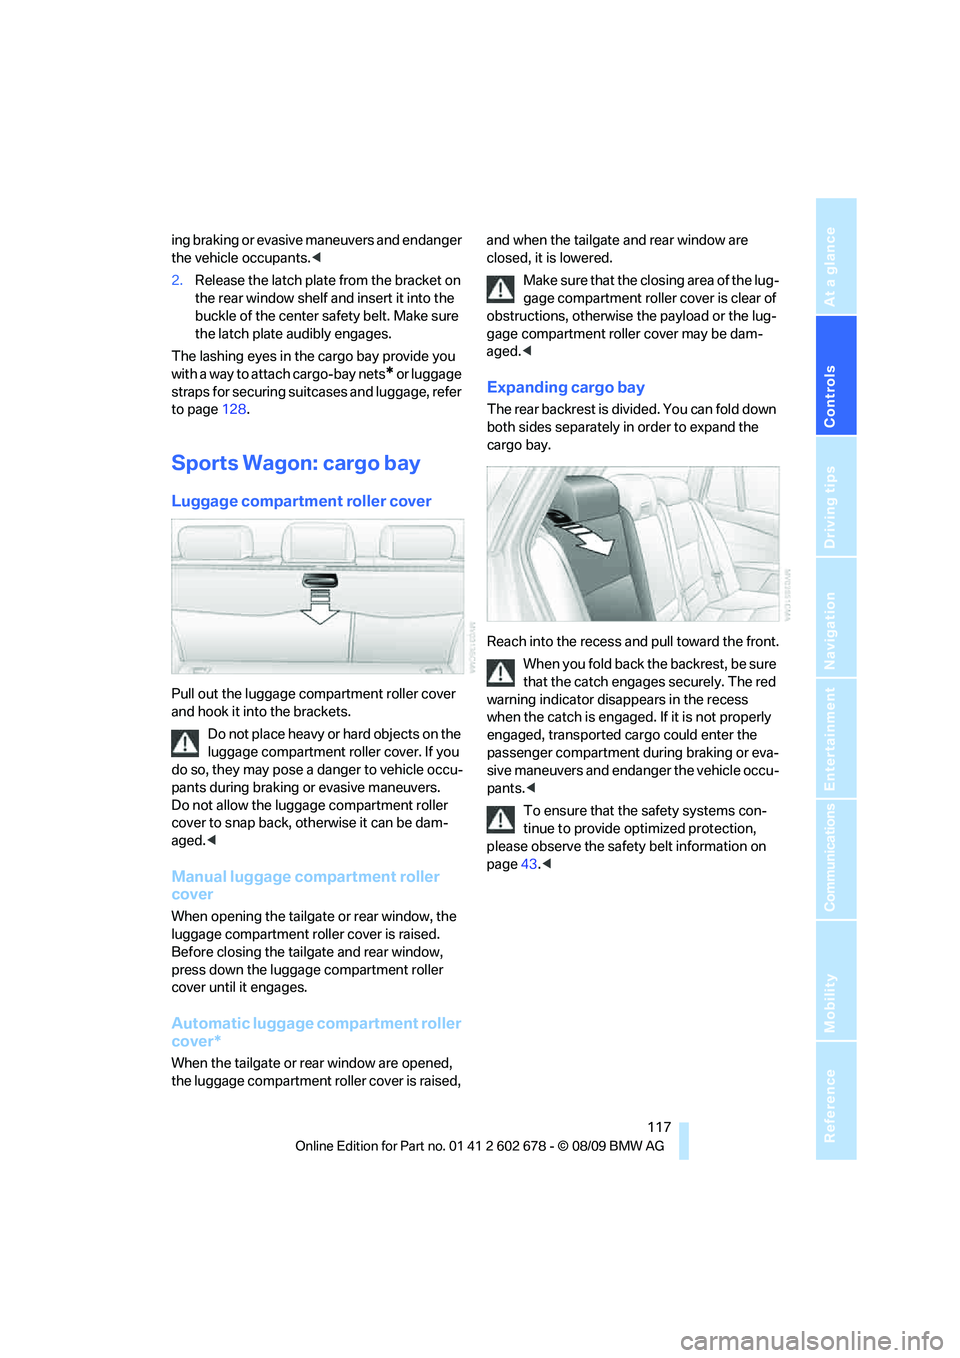
Sports Wagon: cargo bay
Luggage compartment roller cover
Pull out the luggage compartment roller cover
and hook it into the brackets.
Do not place heavy or hard objects on the
luggage compartment roller cover. If you
do so, they may pose a danger to vehicle occu-
pants during braking or evasive maneuvers.
Do not allow the luggage compartment roller
cover to snap back, otherwise it can be dam-
aged.<
Manual luggage compartment roller
cover
When opening the tailgate or rear window, the
luggage compartment roller cover is raised.
Before closing the tailgate and rear window,
press down the luggage compartment roller
cover until it engages.
Automatic luggage compartment roller
cover*
When the tailgate or rear window are opened,
the luggage compartment roller cover is raised, and when the tailgate and rear window are
closed, it is lowered.
Make sure that the closing area of the lug-
gage compartment roller cover is clear of
obstructions, otherwise the payload or the lug-
gage compartment roller cover may be dam-
aged.<
Expanding cargo bay
The rear backrest is divided. You can fold down
both sides separately in order to expand the
cargo bay.
Reach into the recess and pull toward the front.
When you fold back the backrest, be sure
that the catch engages securely. The red
warning indicator disappears in the recess
when the catch is engaged. If it is not properly
engaged, transported cargo could enter the
passenger compartment during braking or eva-
sive maneuvers and endanger the vehicle occu-
pants.<
To ensure that the safety systems con-
tinue to provide optimized protection,
please observe the safety belt information on
page43.<
Page 126 of 271
Things to remember when driving
124
Things to remember when driving
Break-in period
Moving parts need breaking-in time to adjust to
each other. To ensure that your vehicle contin-
ues to provide optimized economy of operation
throughout an extended service life, we request
that you devote careful attention to the follow-
ing section.
Engine and differential
Always obey all official speed limits.
Up to 1,200 miles/2,000 km
Drive at changing engine and driving speeds,
however do not exceed 4,500 rpm or 100 mph/
160 km/h.
Avoid full-throttle operation and use of the
transmission's kick down mode during these
initial miles.
From 1,200 miles/2,000 km
The engine and vehicle speed can gradually be
increased.
Tires
Due to technical factors associated with their
manufacture, tires do not achieve their full trac-
tion potential until after an initial break-in
period. Therefore, drive reservedly during the
first 200 miles/300 km.
Brake system
Brakes require an initial break-in period of
approx. 300 miles/500 km to achieve optimized
contact and wear patterns between brake pads
and rotors. Drive in a reserved manner during
this break-in period.
Clutch
The function of the clutch is only at its opti-
mized level after a distance driven of approx.
300 miles/500 km. During this break-in period,
engage the clutch gently.
Following part replacement
Observe the break-in instructions again if com-
ponents mentioned above must be replaced
after subsequent driving operation.
Saving fuel
The fuel consumption of your vehicle depends
on various factors. Through a few simple steps,
your driving style, and regular maintenance, you
can have a positive influence on your fuel con-
sumption and environmental impact.
Removing unnecessary cargo
Additional weight increases fuel consumption.
Removing add-on parts after use
Remove unneeded auxiliary mirrors, roof or rear
luggage racks after use. Add-on parts attached
to the vehicle impede the aerodynamics and
increase the fuel consumption.
Closing windows and glass sunroof
An open glass sunroof or open windows like-
wise increase the drag coefficient and therefore
the fuel consumption.
Checking tire inflation pressures
regularly
Check and correct the tire inflation pressure as
needed at least twice a month and before long
trips.
An insufficient tire inflation pressure increases
the rolling resistance and thus increases the
fuel consumption and tire wear.
Driving off immediately
Do not allow the engine to warm up by leaving it
running while the vehicle remains stationary.
Instead, begin to drive at a moderate engine
speed. This is the fastest way for the cold
engine to reach its operating temperature.
Page 127 of 271
Driving tips
125Reference
At a glance
Controls
Communications
Navigation
Entertainment
Mobility
Thinking ahead when driving
Avoid unnecessary acceleration and braking.
To do so, maintain the appropriate distance
from the vehicle in front of you. An anticipatory
and smooth driving style reduces fuel con-
sumption.
Avoiding high engine speeds
Use 1st gear only for starting off. Accelerate
rapidly in 2nd gear and above. Avoid high
engine speeds in doing so and shift into the
next gear early.
When you have reached the desired speed,
shift into the highest possible gear and drive
with the lowest possible engine speed while
maintaining a constant vehicle speed.
In general: driving at a low engine speed
reduces fuel consumption and minimizes wear.
Taking advantage of coasting
When approaching a red light, let off the gas
and allow the vehicle to coast to a stop in the
highest possible gear.
On steep roadways, let off the gas and allow the
vehicle to roll in the appropriate gear.
The flow of fuel is interrupted when coasting.
Switching off the engine during longer
stops
Switch off the engine at longer stops such as
traffic signals, railroad crossings, or in traffic
jams. Even having the engine switched off for
approx. 4 seconds results in fuel savings.
Switching off functions currently not
required
Functions such as the cooling function of the
automatic climate control, seat heating or rear
window defroster draw large amounts of power
and consume additional fuel. Their influence is
p a r t i c u l a r l y p r o n o u n c e d i n c i t y t r a f f i c a n d s t o p &
go operation. For this reason, it is a good idea to
switch these functions off when they are not
really needed.
Having maintenance carried out
Have the vehicle serviced regularly in order to
achieve the optimum economy and service life
of your vehicle. BMW recommends having the
maintenance performed by a BMW center. Also
please pay attention to the BMW maintenance
system, refer to page215.
General driving notes
Closing luggage compartment lid/
tailgate
Operate the vehicle only when the lug-
gage compartment lid/tailgate is com-
pletely closed. Otherwise, exhaust fumes could
enter the interior of the vehicle.<
If it is absolutely necessary to drive with the lug-
gage compartment lid open:
1.Close all windows and the glass sunroof or
panorama glass sunroof.
2.Increase the air volume of the automatic cli-
mate control to a high level, refer to
page107.
Hot exhaust system
As in all vehicles, extremely high temper-
atures are generated on the exhaust sys-
tem. Do not remove the heat shields installed
adjacent to it, and never apply undercoating to
them. When driving, standing at idle and while
parking take care to avoid possible contact
between the hot exhaust system and any highly
flammable materials such as hay, leaves, grass,
etc. Such contact could lead to a fire, and with it
the risk of serious property damage as well as
personal injury. Do not touch hot exhaust tail
pipes. Otherwise there is a risk of burns.<
Hydroplaning
When driving on wet or slushy roads,
reduce road speed. If you do not, a wedge
of water can form between tires and road sur-
face. This phenomenon is referred to as hydro-
planing, and is characterized by a partial or
complete loss of contact between the tires and
Page 130 of 271
Things to remember when driving
128 >Do not pile objects higher than the top edge
of the backrest.
>Sports Wagon:
Use the partition net to protect the occu-
pants, refer to page118. Make sure that
objects cannot penetrate through the parti-
tion net.
Wrap sharp-edged or pointed objects
which could strike the rear window while
driving.
Securing cargo
>Use the luggage net*, luggage straps, or
securing straps to hold down small and
lightweight luggage and cargo.
>Heavy-duty cargo straps
* for securing
larger and heavier objects are available at
your BMW center. Four lashing eyes
mounted in the cargo bay are used to
secure these heavy-duty cargo straps, refer
to illustration.
>Please observe the special instructions
supplied with the heavy-duty cargo straps.
Position and secure the cargo as
described above, so that it cannot endan-
ger the vehicle's occupants, for example if sud-
den braking or evasive maneuvers are neces-
sary.
Never exceed either the approved gross vehicle
weight or either of the approved axle loads, refer
to page241, as excessive loads can pose a
safety hazard, and may also place you in viola-
tion of traffic safety laws.
You should never transport unsecured heavy or
hard objects in the passenger compartment, as
they could fly around and pose a safety hazard
to the vehicle's occupants during abrupt brak-
ing or evasive maneuvers.Use only the lashing eyes pictured to fasten the
heavy-duty cargo straps. Do not secure cargo
with the upper attachment points for LATCH,
refer to page55; otherwise, you could damage
them.<
Roof-mounted luggage rack*
A special rack system is available as an option
for your BMW. Please comply with the precau-
tions included with the installation instructions.
Mounting points
The mounting points are located in the door
openings or on the roof rails
*.
Loading roof-mounted luggage rack
Because roof racks raise the vehicle's center of
gravity when loaded, they have a major effect on
its handling and steering response.
You should therefore always remember not to
exceed the approved roof load capacity, the
approved gross vehicle weight or the axle loads
when loading the rack.
You can find the specified weights under
Weights on page241.
Distribute the roof load uniformly. The load
must not be too large in area. Always stow the
heaviest pieces on the bottom. Be sure that
adequate clearance is maintained for raising the
glass sunroof, and that objects do not project
into the opening path of the luggage compart-
ment lid/tailgate.
Secure roof-mounted cargo correctly and
securely to prevent it from shifting or falling off
during the trip.