phone BMW 535I XDRIVE SEDAN 2013 Owners Manual
[x] Cancel search | Manufacturer: BMW, Model Year: 2013, Model line: 535I XDRIVE SEDAN, Model: BMW 535I XDRIVE SEDAN 2013Pages: 273, PDF Size: 6.63 MB
Page 13 of 273
cating in an emergency, enable certain vehicle
data to be transmitted from the vehicle.
Event Data Recorder EDR
This vehicle is equipped with an event data reâ
corder EDR. The main purpose of an EDR is to
record, in certain crash or near crash-like situaâ
tions, such as an air bag deployment or hitting
a road obstacle, data that will assist in underâ
standing how a vehicleâs systems performed.
The EDR is designed to record data related to
vehicle dynamics and safety systems for a
short period of time, typically 30 seconds or
less.
The EDR in this vehicle is designed to record
such data as:âˇHow various systems in your vehicle were
operating.âˇWhether or not the driver and passenger
safety belts were fastened.âˇHow far, if at all, the driver was depressing
the accelerator and/or brake pedal.âˇHow fast the vehicle was traveling.
These data can help provide a better underâ
standing of the circumstances in which
crashes and injuries occur.
EDR data are recorded by your vehicle only if a
nontrivial crash situation occurs; no data are
recorded by the EDR under normal driving
conditions and no personal data, e.g., name,
gender, age, and crash location, are recorded.
However, other parties, such as law enforceâ
ment, could combine the EDR data with the
type of personally identifying data routinely acâ
quired during a crash investigation.
To read data recorded by an EDR, special
equipment is required, and access to the vehiâ
cle or the EDR is needed. In addition to the veâ
hicle manufacturer, other parties, such as law
enforcement, that have the special equipment,
can read the information if they have access to
the vehicle or the EDR.
Reporting safety defects
For US customers
The following only applies to vehicles owned
and operated in the US.
If you believe that your vehicle has a defect
which could cause a crash or could cause inâ
jury or death, you should immediately inform
the National Highway Traffic Safety Adminisâ
tration NHTSA, in addition to notifying BMW of
North America, LLC, P.O. Box 1227, Westâ
wood, New Jersey 07675-1227, Telephone
1-800-831-1117.
If NHTSA receives similar complaints, it may
open an investigation, and if it finds that a
safety defect exists in a group of vehicles, it
may order a recall and remedy campaign.
However, NHTSA cannot become involved in
individual problems between you, your dealer,
or BMW of North America, LLC.
To contact NHTSA, you may call the Vehicle
Safety Hotline toll-free at 1-888-327-4236
(TTY: 1-800-424-9153); go to http://
www.safercar.gov; or write to: Administrator,
NHTSA, 400 Seventh Street, SW., Washingâ
ton, DC 20590. You can also obtain other inâ
formation about motor vehicle safety from
http://www.safercar.gov
For Canadian customers Canadian customers who wish to report a
safety-related defect to Transport Canada, Deâ
fect Investigations and Recalls, may telephone
the toll-free hotline 1-800-333-0510. You can
also obtain other information about motor vehiâ
cle safety from http://www.tc.gc.ca/roadsafety.Seite 9Notes9
Online Edition for Part no. 01 40 2 911 177 - VI/13
Page 17 of 273
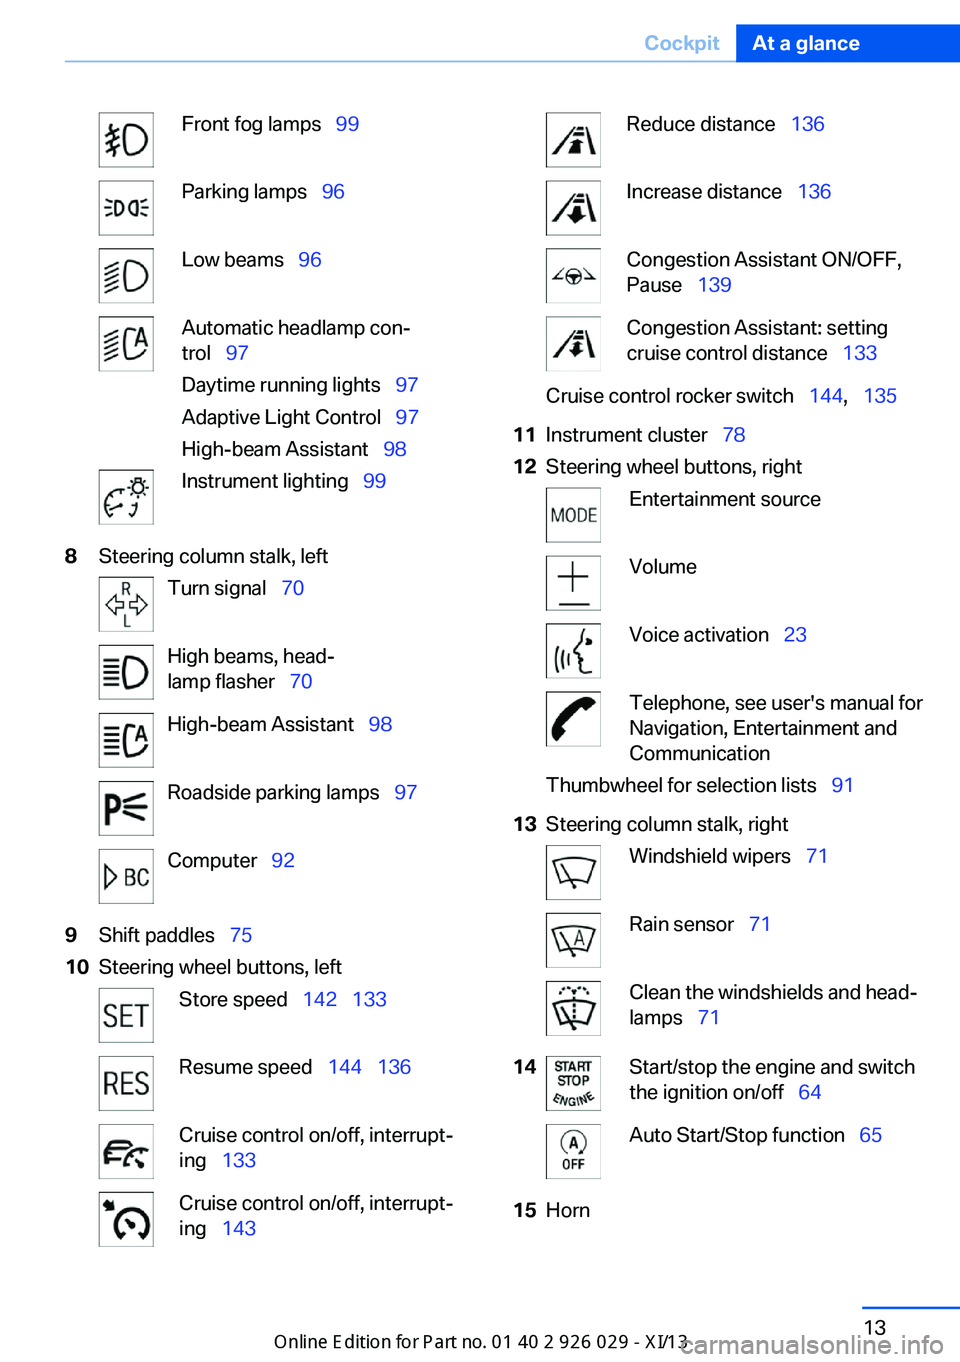
Front fog lampsââ
99Parking lampsââ
96Low beamsââ
96Automatic headlamp conâ
trolââ
97
Daytime running lightsââ
97
Adaptive Light Controlââ
97
High-beam Assistantââ
98Instrument lightingââ
998Steering column stalk, leftTurn signalââ
70High beams, headâ
lamp flasherââ
70High-beam Assistantââ
98Roadside parking lampsââ
97Computerââ
929Shift paddlesââ
7510Steering wheel buttons, leftStore speedââ
142ââ
133Resume speedââ
144ââ
136Cruise control on/off, interruptâ
ingââ
133Cruise control on/off, interruptâ
ingââ
143Reduce distanceââ
136Increase distanceââ
136Congestion Assistant ON/OFF,
Pauseââ
139Congestion Assistant: setting
cruise control distanceââ
133Cruise control rocker switchââ
144,ââ
13511Instrument clusterââ
7812Steering wheel buttons, rightEntertainment sourceVolumeVoice activationââ
23Telephone, see user's manual for
Navigation, Entertainment and
CommunicationThumbwheel for selection listsââ
9113Steering column stalk, rightWindshield wipersââ
71Rain sensorââ
71Clean the windshields and headâ
lampsââ
7114Start/stop the engine and switch
the ignition on/offââ
64Auto Start/Stop functionââ
6515HornSeite 13CockpitAt a glance13
Online Edition for Part no. 01 40 2 911 177 - VI/13
Page 21 of 273
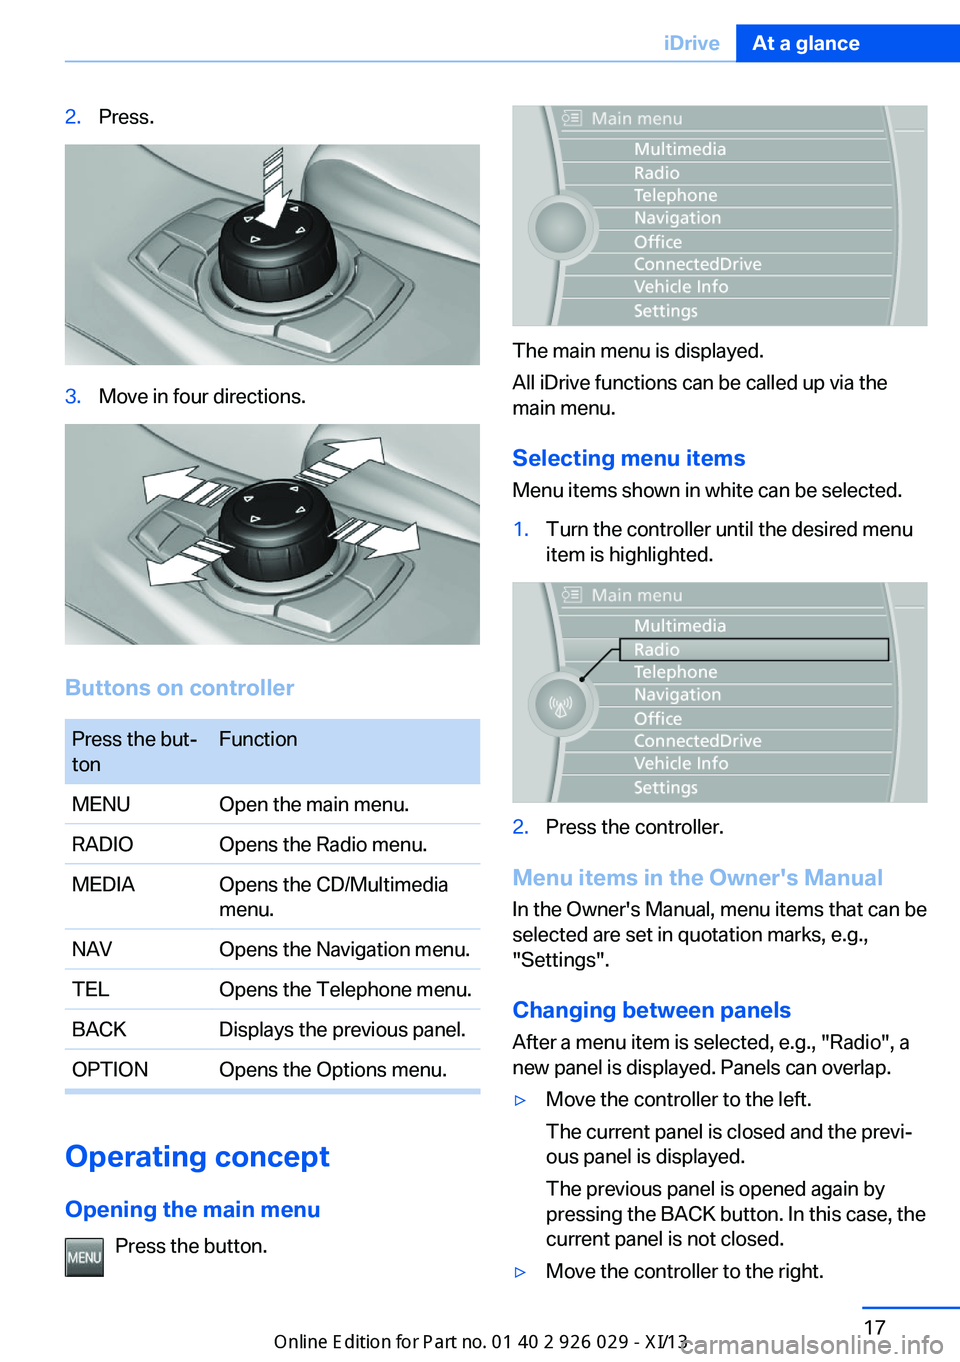
2.Press.3.Move in four directions.
Buttons on controller
Press the butâ
tonFunctionMENUOpen the main menu.RADIOOpens the Radio menu.MEDIAOpens the CD/Multimedia
menu.NAVOpens the Navigation menu.TELOpens the Telephone menu.BACKDisplays the previous panel.OPTIONOpens the Options menu.
Operating concept
Opening the main menu Press the button.
The main menu is displayed.
All iDrive functions can be called up via the
main menu.
Selecting menu items
Menu items shown in white can be selected.
1.Turn the controller until the desired menu
item is highlighted.2.Press the controller.
Menu items in the Owner's Manual
In the Owner's Manual, menu items that can be
selected are set in quotation marks, e.g.,
"Settings".
Changing between panels
After a menu item is selected, e.g., "Radio", a
new panel is displayed. Panels can overlap.
âˇMove the controller to the left.
The current panel is closed and the previâ
ous panel is displayed.
The previous panel is opened again by
pressing the BACK button. In this case, the
current panel is not closed.âˇMove the controller to the right.Seite 17iDriveAt a glance17
Online Edition for Part no. 01 40 2 911 177 - VI/13
Page 24 of 273
6.Turn the controller to set the hours and
press the controller.7.Turn the controller to set the minutes and
press the controller.
Status information
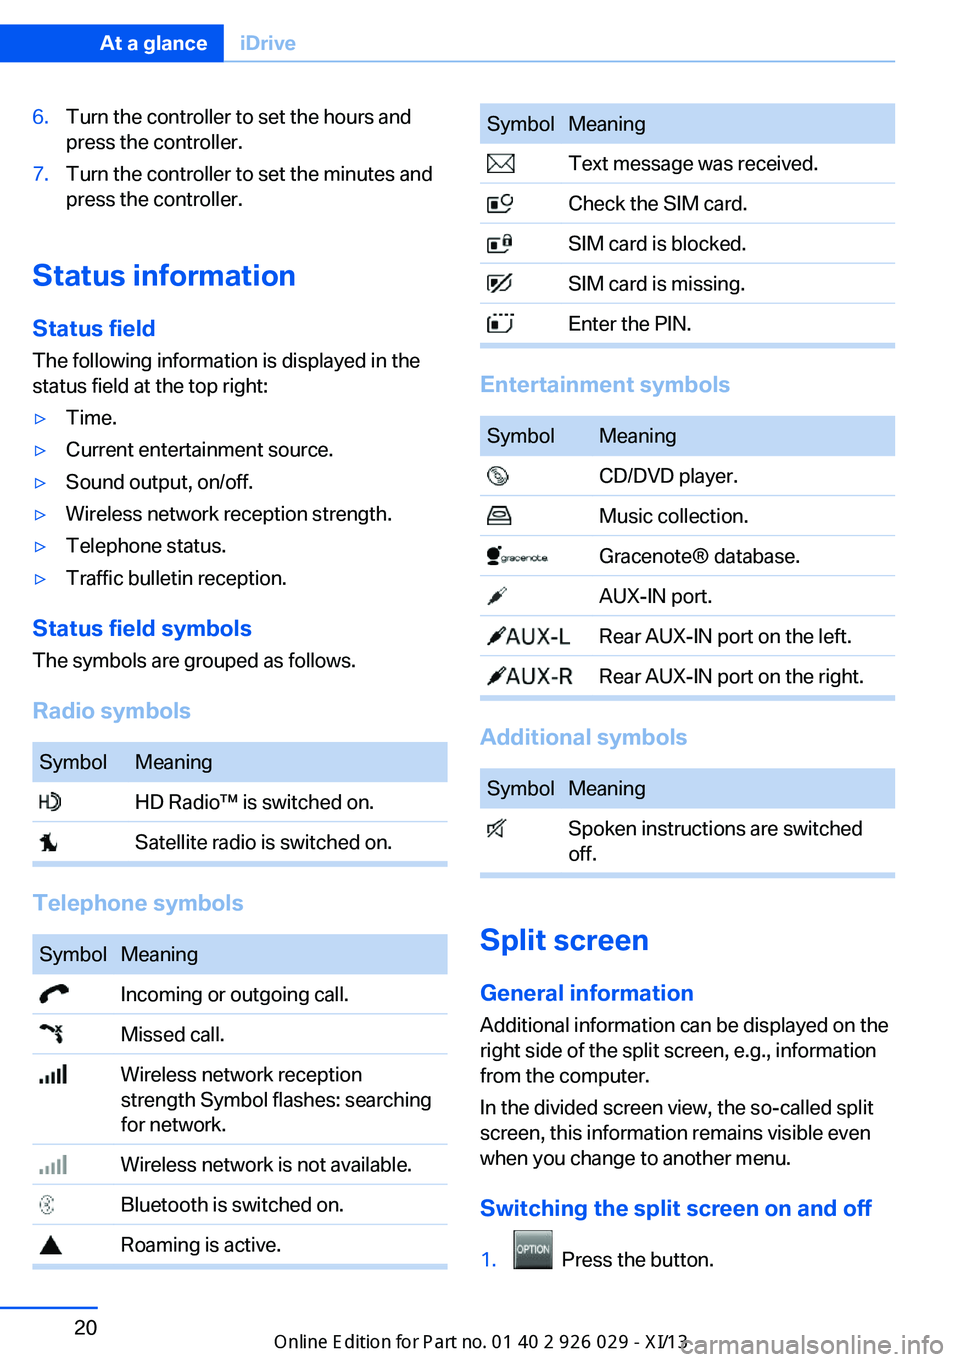
Status field The following information is displayed in the
status field at the top right:
âˇTime.âˇCurrent entertainment source.âˇSound output, on/off.âˇWireless network reception strength.âˇTelephone status.âˇTraffic bulletin reception.
Status field symbols
The symbols are grouped as follows.
Radio symbols
SymbolMeaning HD Radio⢠is switched on. Satellite radio is switched on.
Telephone symbols
SymbolMeaning Incoming or outgoing call. Missed call. Wireless network reception
strength Symbol flashes: searching
for network. Wireless network is not available. Bluetooth is switched on. Roaming is active.SymbolMeaning Text message was received. Check the SIM card. SIM card is blocked. SIM card is missing. Enter the PIN.
Entertainment symbols
SymbolMeaning CD/DVD player. Music collection. GracenoteÂŽ database. AUX-IN port. Rear AUX-IN port on the left. Rear AUX-IN port on the right.
Additional symbols
SymbolMeaning Spoken instructions are switched
off.
Split screen
General information Additional information can be displayed on the
right side of the split screen, e.g., information
from the computer.
In the divided screen view, the so-called split
screen, this information remains visible even when you change to another menu.
Switching the split screen on and off
1. Press the button.
Seite 20At a glanceiDrive20
Online Edition for Part no. 01 40 2 911 177 - VI/13
Page 25 of 273
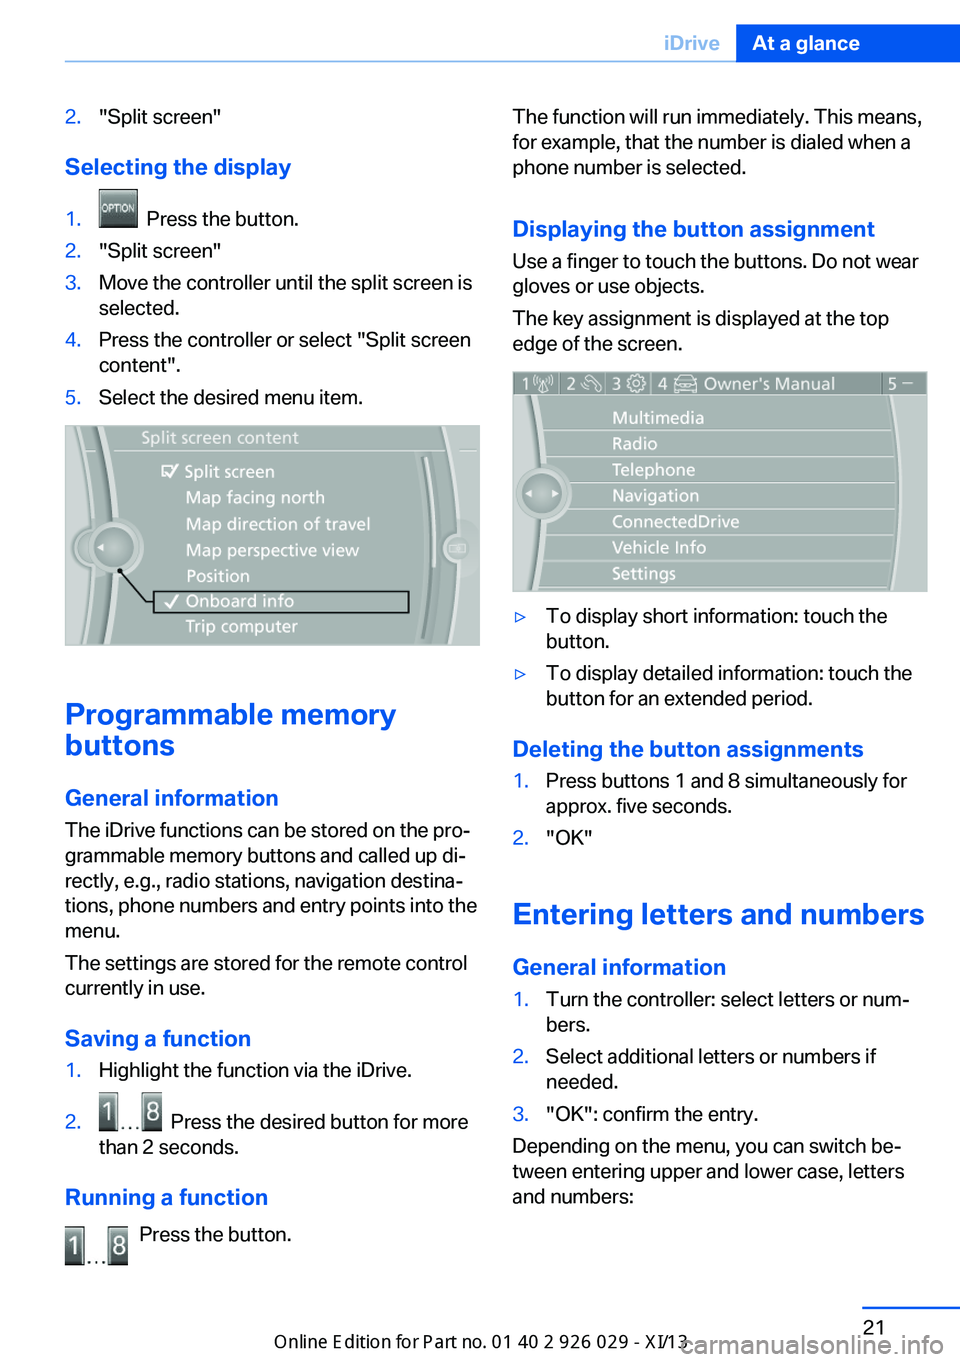
2."Split screen"
Selecting the display
1. Press the button.2."Split screen"3.Move the controller until the split screen is
selected.4.Press the controller or select "Split screen
content".5.Select the desired menu item.
Programmable memory
buttons
General information
The iDrive functions can be stored on the proâ
grammable memory buttons and called up diâ
rectly, e.g., radio stations, navigation destinaâ
tions, phone numbers and entry points into the
menu.
The settings are stored for the remote control
currently in use.
Saving a function
1.Highlight the function via the iDrive.2. Press the desired button for more
than 2 seconds.
Running a function
Press the button.
The function will run immediately. This means,
for example, that the number is dialed when a
phone number is selected.
Displaying the button assignment
Use a finger to touch the buttons. Do not wear
gloves or use objects.
The key assignment is displayed at the top
edge of the screen.âˇTo display short information: touch the
button.âˇTo display detailed information: touch the
button for an extended period.
Deleting the button assignments
1.Press buttons 1 and 8 simultaneously for
approx. five seconds.2."OK"
Entering letters and numbers
General information
1.Turn the controller: select letters or numâ
bers.2.Select additional letters or numbers if
needed.3."OK": confirm the entry.
Depending on the menu, you can switch beâ
tween entering upper and lower case, letters
and numbers:
Seite 21iDriveAt a glance21
Online Edition for Part no. 01 40 2 911 177 - VI/13
Page 27 of 273
Voice activation systemVehicle equipment
All standard, country-specific and optional
equipment that is offered in the model series is
described in this chapter. Therefore, equipâ
ment is also described that is not available in a
vehicle, e. g., because of the selected optional
equipment or country variant. This also applies
for safety-related functions and systems.
The conceptâˇMost functions that are displayed on the
Control Display can be operated by spoken
commands via the voice activation system.
The system prompts you to make your enâ
tries.âˇFunctions that can only be used when the
vehicle is stationary cannot be operated
using the voice activation system.âˇThe system uses a special microphone on
the driver's side.âˇâş...âš Verbal instructions in the Owner's
Manual to use with the voice activation
system.
Requirements
Via the Control Display, set a language that is
also supported by the voice activation system
so that the spoken commands can be identiâ
fied.
Set the language, refer to page 94.
Using voice activation
Activating the voice activation system1. Press the button on the steering
wheel.2.Wait for the signal.3.Say the command.
The command is displayed in the instruâ
ment cluster.
This symbol in the instrument cluster indiâ
cates that the voice activation system is active.
If no other commands are available, operate
the function in this case via iDrive.
Terminating the voice activation
system
Briefly press the button on the steerâ
ing wheel or âşCancelâš.
Possible commands Most menu items on the Control Display can
be voiced as commands.
The available commands depend on which
menu is currently displayed on the Control Disâ
play.
Short commands exist for many functions.
Some list entries, e.g., Phone book entries, can
also be selected via the voice activation sysâ
tem. Speak these list entries exactly as they
are displayed in the respective list.
Having possible commands read aloud
You can have the available commands read out
loud for you: âşVoice commandsâš
For example, if the "Settings" menu is disâ
played, the commands for the settings are
read out loud.
Seite 23Voice activation systemAt a glance23
Online Edition for Part no. 01 40 2 911 177 - VI/13
Page 29 of 273
Notes on Emergency
Requests
Do not use the voice activation system to iniâ
tiate an Emergency Request. In stressful situaâ
tions, the voice and vocal pitch can change.
This can unnecessarily delay the establishâ
ment of a telephone connection.
Instead, use the SOS button, refer to
page 240, in the vicinity of the interior mirror.
Environmental conditionsâˇSay the commands, numbers, and letters
smoothly and with normal volume, emphaâ
sis, and speed.âˇAlways say commands in the language of
the voice activation system.âˇKeep the doors, windows, and glass sunâ
roof closed to prevent noise interference.âˇAvoid making other noise in the vehicle
while speaking.Seite 25Voice activation systemAt a glance25
Online Edition for Part no. 01 40 2 911 177 - VI/13
Page 39 of 273
Do not place the remote control in the
cargo area
Take the remote control with you and do not
leave it in the cargo area; otherwise, the reâ
mote control is locked inside the vehicle when
the trunk lid is closed.â
The trunk lid is locked again as soon as it is
pushed closed.
Malfunction
If the vehicle can no longer be locked or unâ
locked with the remote control, the battery
may be discharged or there may be interferâ
ence from external sources such as mobile
phones, metal objects, overhead power lines,
transmission towers, etc.
If this occurs, lock or unlock the driver's door at
the door lock using the integrated key.
For US owners only
The transmitter and receiver units comply with
part 15 of the FCC/Federal Communication
Commission regulations. Operation is govâ
erned by the following:
FCC ID:âˇLX8766S.âˇLX8766E.âˇLX8CAS.âˇLX8CAS2.âˇMYTCAS4.
Compliance statement:
This device complies with part 15 of the FCC
Rules. Operation is subject to the following
two conditions:
âˇThis device may not cause harmful interâ
ference, andâˇthis device must accept any interference
received, including interference that may
cause undesired operation.
Any unauthorized modifications or changes to
these devices could void the user's authority to
operate this equipment.
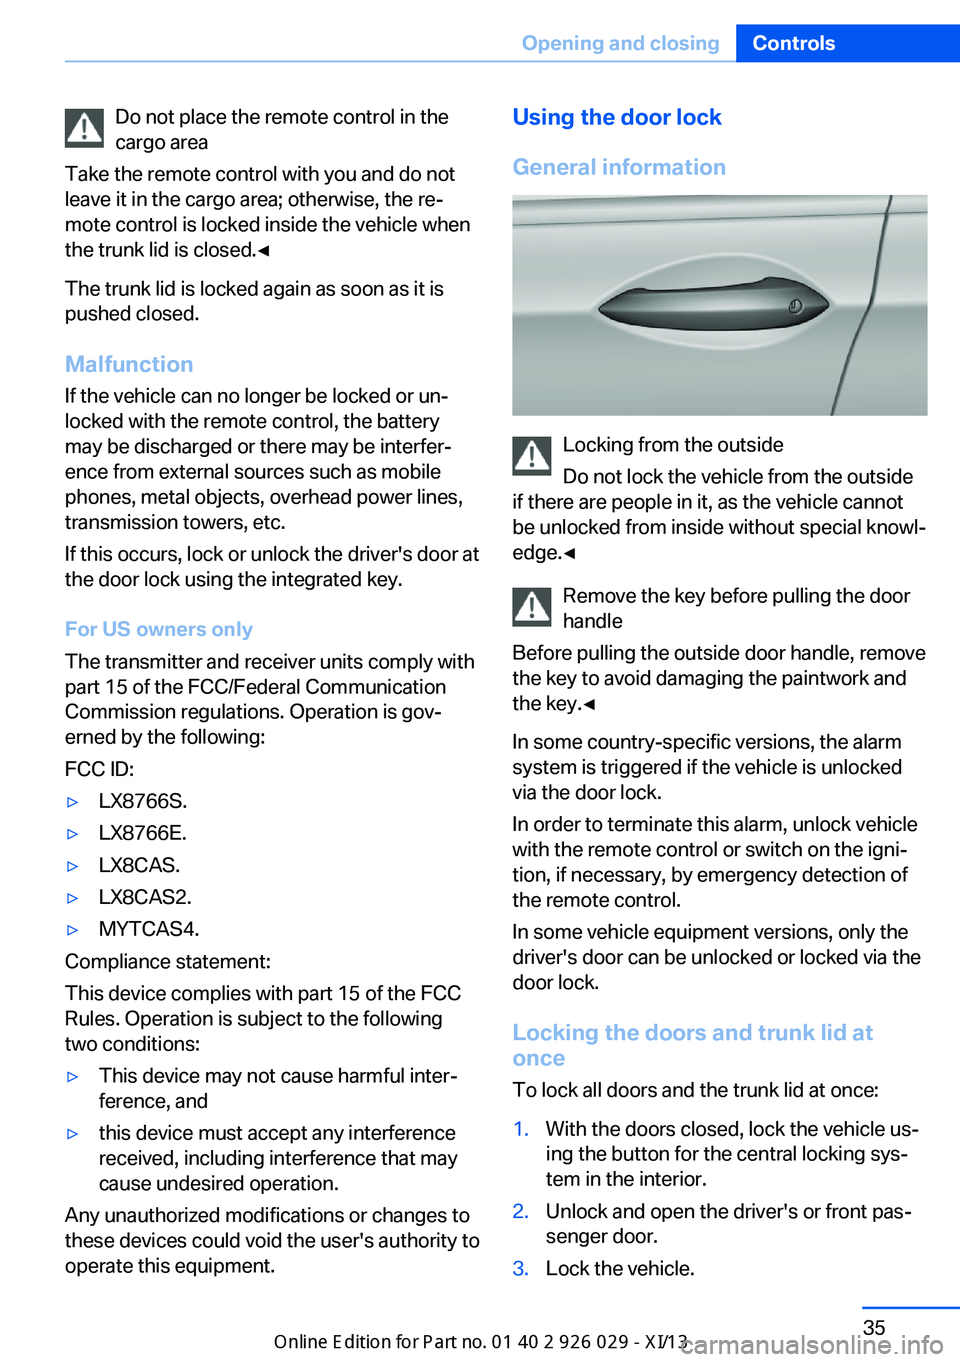
Using the door lock
General information
Locking from the outside
Do not lock the vehicle from the outside
if there are people in it, as the vehicle cannot
be unlocked from inside without special knowlâ
edge.â
Remove the key before pulling the door
handle
Before pulling the outside door handle, remove
the key to avoid damaging the paintwork and
the key.â
In some country-specific versions, the alarm
system is triggered if the vehicle is unlocked
via the door lock.
In order to terminate this alarm, unlock vehicle
with the remote control or switch on the igniâ
tion, if necessary, by emergency detection of
the remote control.
In some vehicle equipment versions, only the
driver's door can be unlocked or locked via the
door lock.
Locking the doors and trunk lid at
once
To lock all doors and the trunk lid at once:
1.With the doors closed, lock the vehicle usâ
ing the button for the central locking sysâ
tem in the interior.2.Unlock and open the driver's or front pasâ
senger door.3.Lock the vehicle.Seite 35Opening and closingControls35
Online Edition for Part no. 01 40 2 911 177 - VI/13
Page 45 of 273
Keep the closing path clear
Make sure that the closing path of the
trunk lid is clear; otherwise, injuries may reâ
sult.â
Do not place the remote control in the
cargo area
Take the remote control with you and do not
leave it in the cargo area; otherwise, the reâ
mote control is locked inside the vehicle when
the trunk lid is closed.â
Malfunction
Comfort Access may not function properly if it
experiences interference from external sourâ
ces such as mobile phones, metal objects,
overhead power lines, transmission towers,
etc.
In this case, open or close the vehicle using the
buttons on the remote control or use the
integrated key in the door lock.
If there is a malfunction, open the trunk lid with
the remote control button or with the button on
the trunk lid.
Adjusting
Unlocking The setting is stored for the remote control
currently in use.1."Settings"2."Doors/key"3. Select symbol or "Unlock button:"4.Select the desired function:âˇ"Driver's door only"
Only the driver's door and the fuel filler
flap are unlocked. Pressing again unâ
locks the entire vehicle.âˇ"All doors"
The entire vehicle is unlocked.Depending on how the vehicle is equipped or
the country-specific variant, you can set
whether the doors are also unlocked with the
button on the remote control.
Confirmation signals from the vehicle
1."Settings"2."Doors/key"3.Deactivate or activate the desired confirâ
mation signals.âˇ"Acoustic sig. lock/unlock"âˇ"Flash when lock/unlock"
Automatic locking
The setting is stored for the remote control
currently in use.
1."Settings"2."Doors/key"3.Select the desired function:âˇ"Lock if no door opened"
The vehicle locks automatically after a
short period of time if a door is not
opened.âˇ"Lock after start driving"
The vehicle locks automatically after
you drive away.
Retrieving the seat, mirror, and
steering wheel settings
The driver's seat, exterior mirror, and steering
wheel positions selected last are stored for the
currently used remote control.
When the vehicle is unlocked, these positions
are automatically retrieved if this function was
activated.
Pinch hazard when moving back the seat
If this function is used, first make sure
that the footwell behind the driver's seat is
empty. Otherwise, people can be injured or obâ
jects damaged when the seat is moved back.â
The adjustment procedure is interrupted:
Seite 41Opening and closingControls41
Online Edition for Part no. 01 40 2 911 177 - VI/13
Page 95 of 273
Speed limit detection can also be displayed in
the Head-up Display.
No Passing InformationâˇStart of No Passing zone.âˇEnd of No Passing zone.âˇNo Passing Information not
available.
No Passing Information can also be displayed
in the Head-up Display.
System limits
The system may not be fully functional and
may provide incorrect information in the folâ lowing situations:
âˇIn heavy fog, rain or snowfall.âˇWhen signs are concealed by objects.âˇWhen driving very close to the vehicle in
front of you.âˇWhen driving toward bright lights.âˇWhen the windshield behind the interior
rearview mirror is fogged over, dirty or covâ
ered by a sticker, etc.âˇIn the event of incorrect detection by the
camera.âˇIf the speed limits stored in the navigation
system are incorrect.âˇIn areas not covered by the navigation sysâ
tem.âˇWhen roads differ from the navigation,
such as due to changes in the road netâ
work.âˇWhen passing buses or trucks with a
speed sticker.âˇIf the traffic signs are non-conforming.âˇDuring calibration of the camera immediâ
ately after vehicle shipment.Selection lists in the
instrument cluster
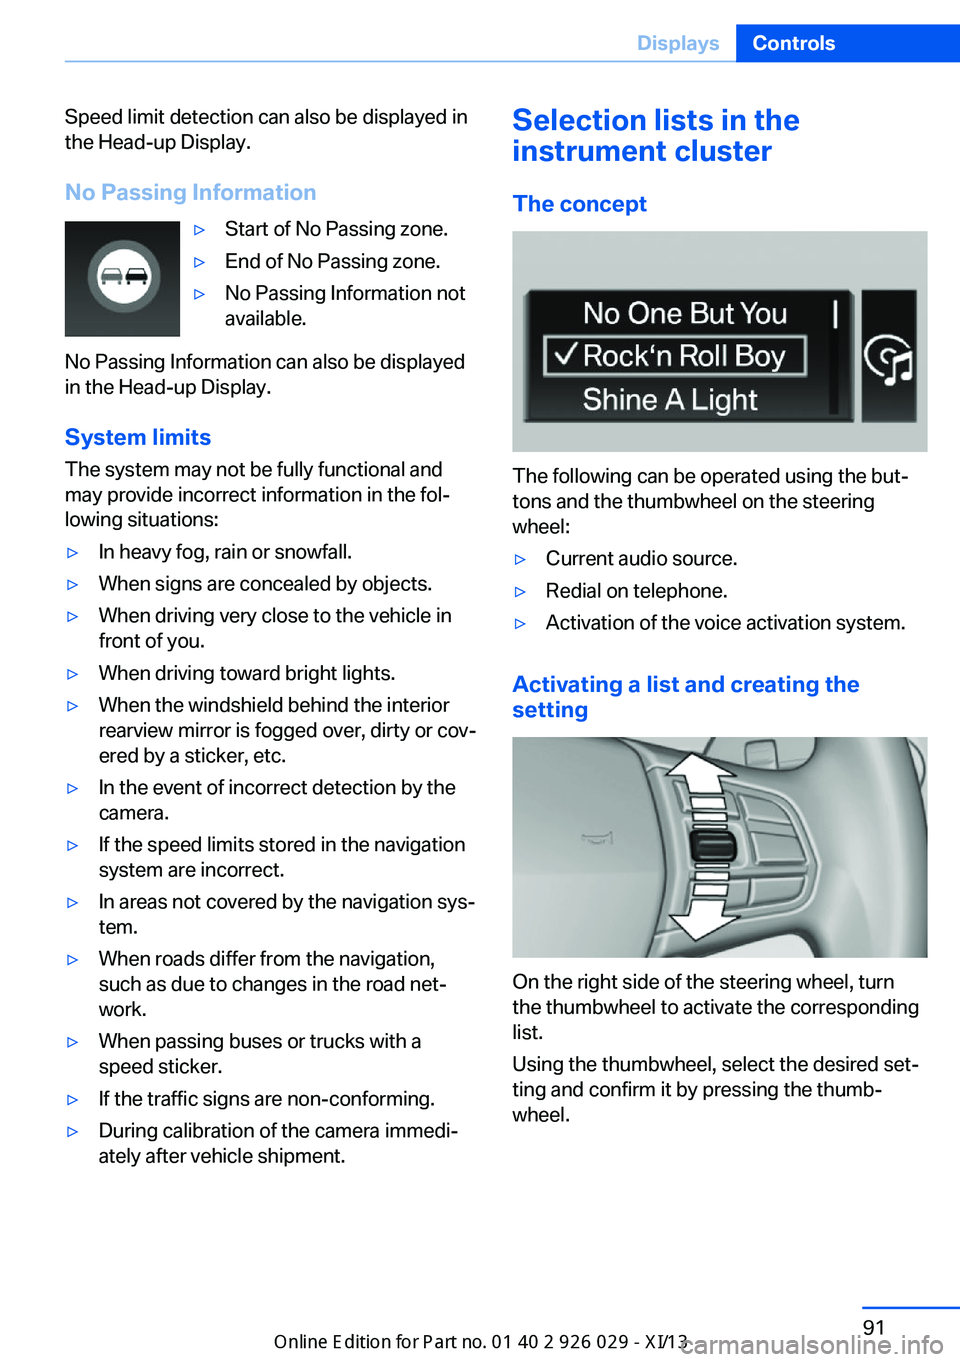
The concept
The following can be operated using the butâ
tons and the thumbwheel on the steering
wheel:
âˇCurrent audio source.âˇRedial on telephone.âˇActivation of the voice activation system.
Activating a list and creating the
setting
On the right side of the steering wheel, turn
the thumbwheel to activate the corresponding
list.
Using the thumbwheel, select the desired setâ
ting and confirm it by pressing the thumbâ
wheel.
Seite 91DisplaysControls91
Online Edition for Part no. 01 40 2 911 177 - VI/13