rear entertainment BMW 535XI SPORTS WAGON 2008 User Guide
[x] Cancel search | Manufacturer: BMW, Model Year: 2008, Model line: 535XI SPORTS WAGON, Model: BMW 535XI SPORTS WAGON 2008Pages: 292, PDF Size: 9.33 MB
Page 47 of 292
Controls
45Reference
At a glance
Driving tips
Communications
Navigation
Entertainment
Mobility
Adjusting
Sitting safely
The ideal sitting position can make a vital con-
tribution to relaxed, fatigue-free driving. In the
interaction with the safety belts, the head
restraints and the airbags, the sitting position
plays an important role in an accident. To
ensure that the safety systems operate with
optimal efficiency, we strongly urge you to
observe the instructions contained in the fol-
lowing section.
For additional information on transporting chil-
dren safely, refer to page56.
Airbags
Always maintain an adequate distance
between yourself and the airbags. Always
hold the steering wheel by its rim with hands at
the 9 o'clock and 3 o'clock positions, to mini-
mize the risk of injuries to your hands and arms
in the event of airbag deployment.
No one and nothing is to come between the air-
bags and the seat occupant.
Do not use the cover of the front airbag on the
front passenger side as a storage area. Make
sure that the front passenger is sitting correctly
and does not rest feet or legs on the instrument
panel, otherwise leg injuries can occur if the
front airbags are triggered.
Make sure that occupants do not rest their head
on the side or head airbags, otherwise injuries
can occur if the airbags are triggered.<
Even if you adhere to all the instructions, inju-
ries resulting from contact with airbags cannot
be fully excluded, depending on the circum-
stances. The ignition and inflation noise may
provoke a mild hearing loss in extremely sensi-
tive individuals. This effect is usually only tem-
porary.
For airbag locations and additional information
on airbags, refer to page99.
Head restraints
A correctly adjusted head restraint reduces the
risk of spinal injury in the event of an accident.
Adjust the head restraint so that its center
is approx. at ear level. Otherwise there is
increased danger of injury in the event of an
accident.<
Head restraints, refer to page49.
Safety belts
Before every drive, make sure that safety belts
are being worn at all of the occupied seats. Air-
bags complement the safety belt as an addi-
tional safety device, but they do not represent a
substitute.
Your vehicle is provided with five seats, which
are all equipped with a safety belt.
Never allow more than one person to
wear a single safety belt. Never allow
infants or small children to ride in a passenger's
lap. Make sure that the belt lies low around the
hips in the lap area and does not press on the
abdomen. The safety belt must not lie across
the neck, rub against sharp edges, be routed
over solid or breakable objects or be pinched.
Wear the safety belt without twisting, snugly
across the lap and shoulders, as close to the
body as possible. Otherwise the belt can slip
over the hips in the lap area in a frontal impact
and injure the abdomen. Avoid wearing clothing
that prevents the belt from fitting properly and
pull the belt in the upper body area periodically
to readjust the tension, in order to avoid a
reduction in the restraint of the safety belt.
Sports Wagon: if the center safety belt in the
rear is used, the larger backrest half must be
locked, refer to page127, otherwise the middle
safety belt has no restraining action.<
Safety belts, refer to page50.
Page 49 of 292
Controls
47Reference
At a glance
Driving tips
Communications
Navigation
Entertainment
Mobility
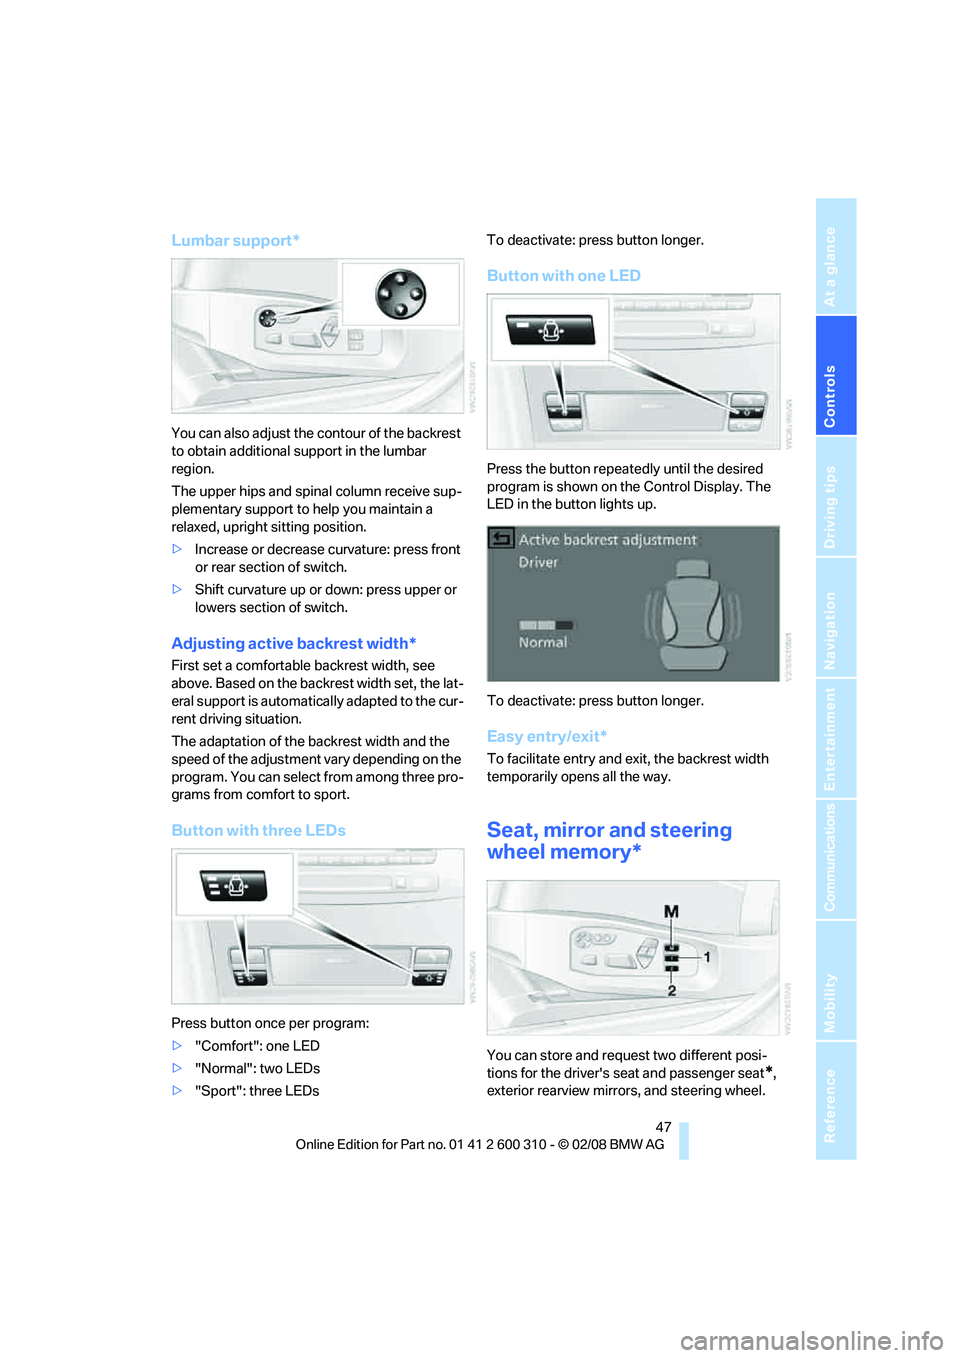
Lumbar support*
You can also adjust the contour of the backrest
to obtain additional support in the lumbar
region.
The upper hips and spinal column receive sup-
plementary support to help you maintain a
relaxed, upright sitting position.
>Increase or decrease curvature: press front
or rear section of switch.
>Shift curvature up or down: press upper or
lowers section of switch.
Adjusting active backrest width*
First set a comfortable backrest width, see
above. Based on the backrest width set, the lat-
eral support is automatically adapted to the cur-
rent driving situation.
The adaptation of the backrest width and the
speed of the adjustment vary depending on the
program. You can select from among three pro-
grams from comfort to sport.
Button with three LEDs
Press button once per program:
>"Comfort": one LED
>"Normal": two LEDs
>"Sport": three LEDsTo deactivate: press button longer.
Button with one LED
Press the button repeatedly until the desired
program is shown on the Control Display. The
LED in the button lights up.
To deactivate: press button longer.
Easy entry/exit*
To facilitate entry and exit, the backrest width
temporarily opens all the way.
Seat, mirror and steering
wheel memory*
You can store and request two different posi-
tions for the driver's seat and passenger seat
*,
exterior rearview mirrors, and steering wheel.
Page 51 of 292
Controls
49Reference
At a glance
Driving tips
Communications
Navigation
Entertainment
Mobility
To cancel the request:
Select "Deactivated" and press the controller.
Head restraints
A correctly adjusted head restraint reduces the
risk of spinal injury in the event of an accident.
Adjust the head restraint so that its center
is approximately at ear level. Otherwise
there is increased danger of injury in the event
of an accident. Only remove the head restraints
if no one will be sitting on the seat in question.
Reinstall the head restraints before transport-
ing passengers, as otherwise the head restraint
cannot provide its protective function.<
Active front head restraints
In the event of a rear-end collision of sufficient
severity, the active head restraint reduces the
distance to the head.
Do not use seat covers or head restraint
covers that could impede the proper
functioning of the active head restraint. Other-
wise, there is no assurance that the active head
restraint will perform its protective function and
it is not possible to take advantage of its injury-
reducing potential in the event of a rear-end
collision.
Have the active head restraints reset after they
are triggered in a rear-end collision. Only have
this work carried out by a BMW center or a
workshop that works according to BMW repair
procedures with correspondingly trained per-
sonnel. Otherwise, this safety equipment will
not function properly.<
Please contact a BMW center if you wish
to have the front head restraints removed
and installed.<
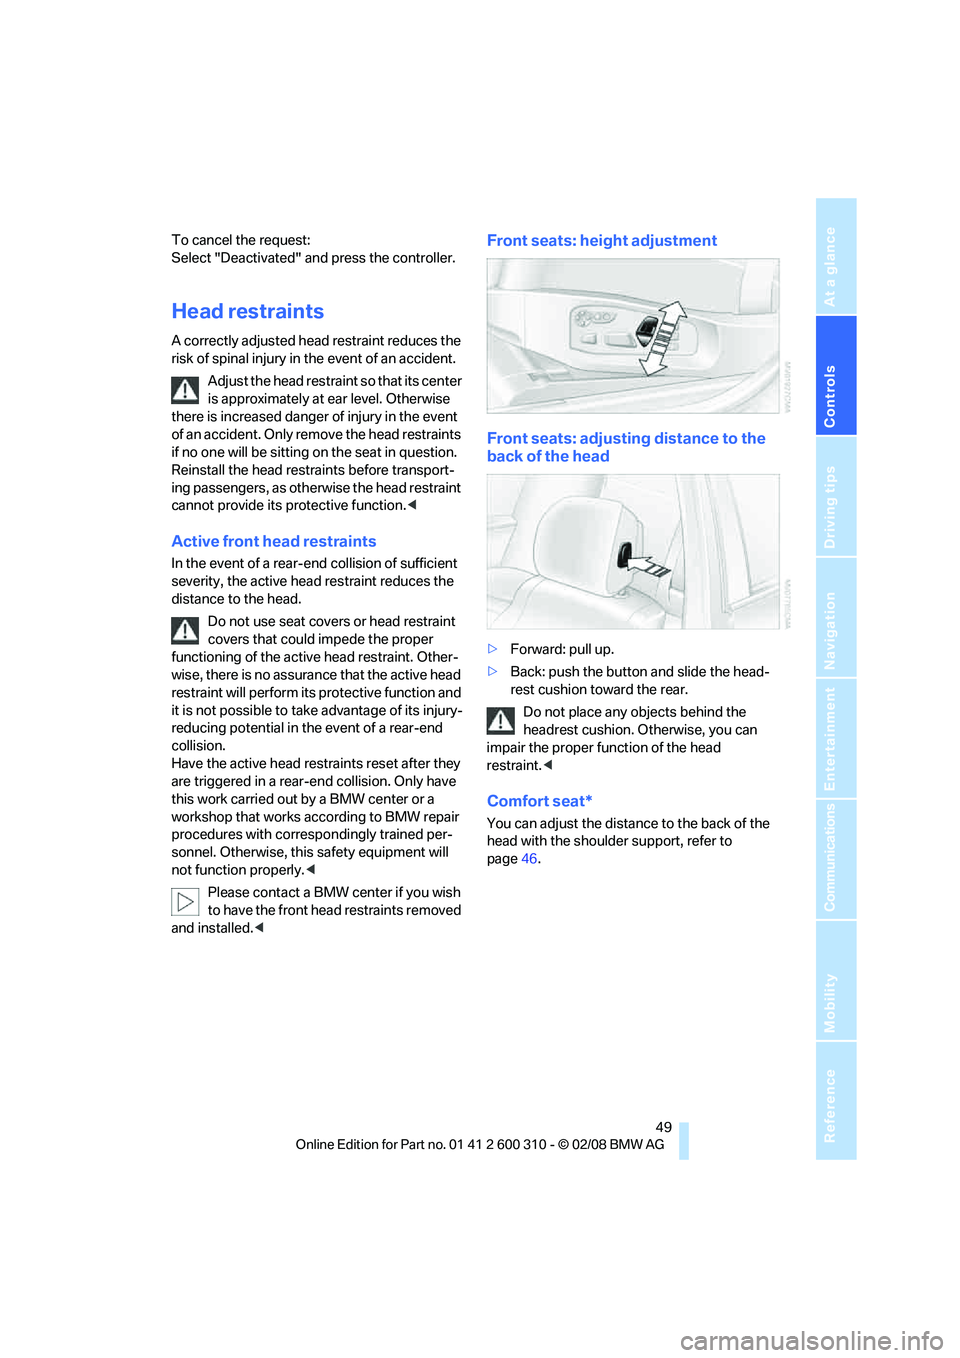
Front seats: height adjustment
Front seats: adjusting distance to the
back of the head
>Forward: pull up.
>Back: push the button and slide the head-
rest cushion toward the rear.
Do not place any objects behind the
headrest cushion. Otherwise, you can
impair the proper function of the head
restraint.<
Comfort seat*
You can adjust the distance to the back of the
head with the shoulder support, refer to
page46.
Page 55 of 292

Controls
53Reference
At a glance
Driving tips
Communications
Navigation
Entertainment
Mobility
Mirrors
Exterior mirrors
The mirror on the passenger's side is
more curved than the driver's mirror.
Objects reflected in the mirror are closer than
they appear. Do not estimate the distance of
following traffic based on what you see in the
mirrors, otherwise there is an increased acci-
dent risk.<
1Adjusting
2Switching to the other mirror or to the auto-
matic curb monitor
3Folding mirrors in and out
*
Storing the mirror positions, refer to Seat, mir-
ror and steering wheel memory on page47.
Adjusting manually
You can also adjust the mirrors manually by
pressing against the outer edges of their mirror
glass.
Folding mirrors in and out*
Pressing button3 allows you to fold mirrors
in and out up to a speed of approx. 20 mph/
30 km/h. This is advantageous, for example, in
car washes, narrow streets or for bringing mir-
r o rs t h a t h a v e b e e n m a n u a l ly f o l d e d in b a c k i n t o
the correct position. Mirrors that were folded in
are folded out automatically at a speed of
approx. 25 mph/40 km/h.
Before going through a car wash, fold the
mirrors in manually, or with button 3, oth-
erwise they could be damaged, depending on
the width of the car wash system.<
Automatic heating
Below a certain outdoor temperature, both
exterior mirrors are heated whenever the
engine is running or the ignition is switched on.
Tilting down passenger-side exterior
mirror – automatic curb monitor*
Activating
1.Slide switch into the driver's side mirror
position, arrow 1.
2.Shift into reverse or move selector lever into
position R.
The mirror glass tilts downward somewhat
on the passenger's side. This allows the
driver to see the area immediately adjacent
to the vehicle – such as a curb – when park-
ing, etc.
Deactivating
Slide switch into the passenger side mirror
position, arrow 2.
Interior rearview mirror
To reduce the dazzle effect of following vehi-
cles at night, turn the knob.
Page 59 of 292
Controls
57Reference
At a glance
Driving tips
Communications
Navigation
Entertainment
Mobility
Unlocking safety belt
1.Open the belt buckle.
2.Remove the child restraint system.
3.Allow the belt webbing to retract com-
pletely.
LATCH child restraint fixing system
LATCH: Lower Anchor and Tethers for CHil-
dren.
Follow the system manufacturer's
instructions on installation and use of
LATCH child restraint systems in order not to
impair their protective function.<
Before attaching the LATCH child's seat, pull
the belt away from the region of the child
restraint fixing system.
Make sure that the LATCH mounts have
properly clicked into place and that the
child restraint system is resting snugly against
the backrest. Otherwise, the protective action
may be impeded.<
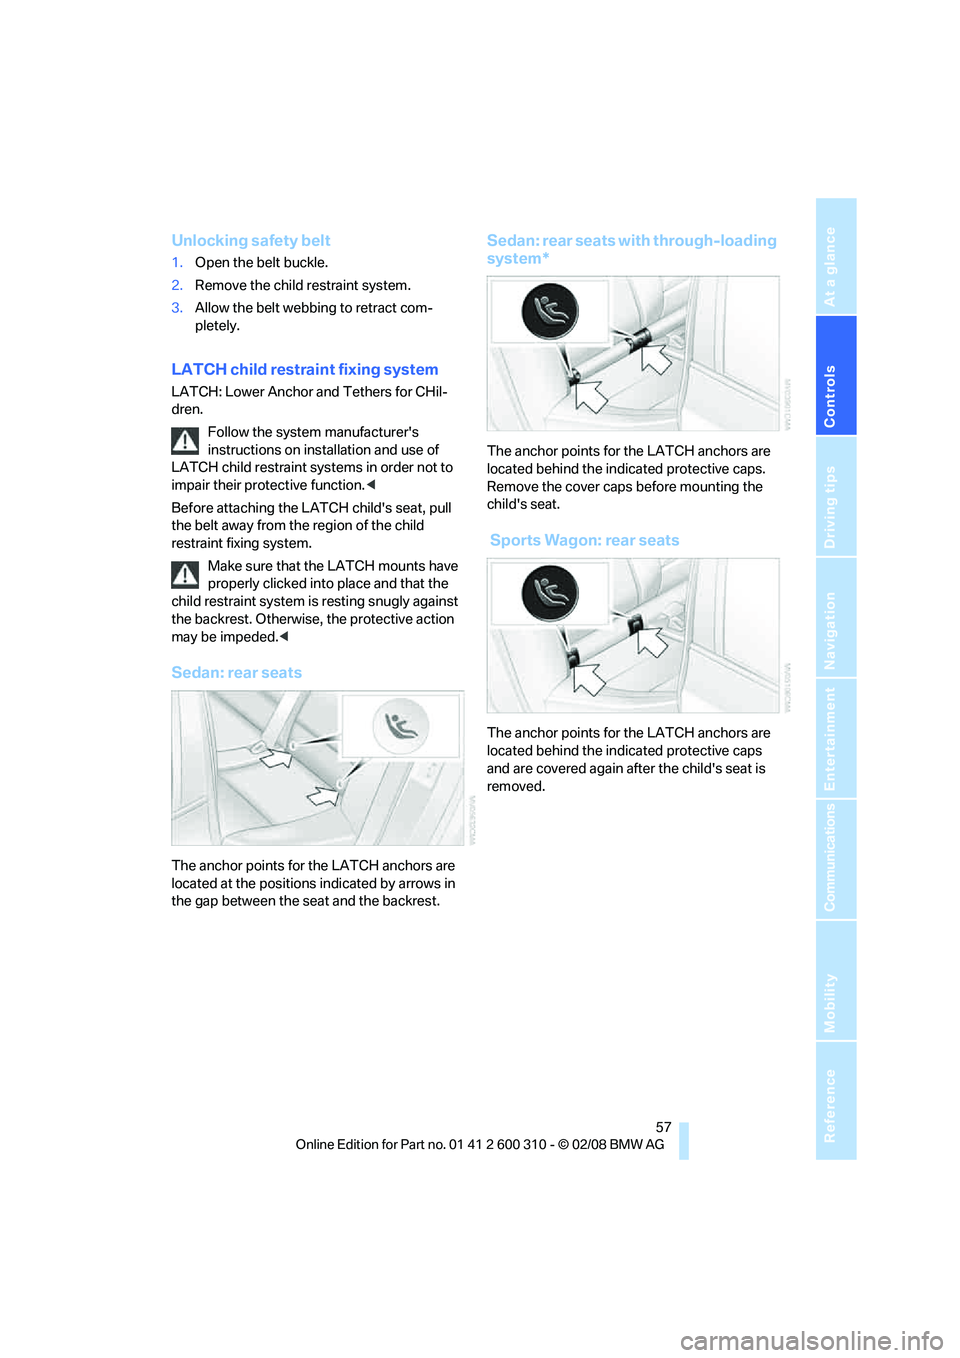
Sedan: rear seats
The anchor points for the LATCH anchors are
located at the positions indicated by arrows in
the gap between the seat and the backrest.
Sedan: rear seats with through-loading
system*
The anchor points for the LATCH anchors are
located behind the indicated protective caps.
Remove the cover caps before mounting the
child's seat.
Sports Wagon: rear seats
The anchor points for the LATCH anchors are
located behind the indicated protective caps
and are covered again after the child's seat is
removed.
Page 61 of 292
Controls
59Reference
At a glance
Driving tips
Communications
Navigation
Entertainment
Mobility
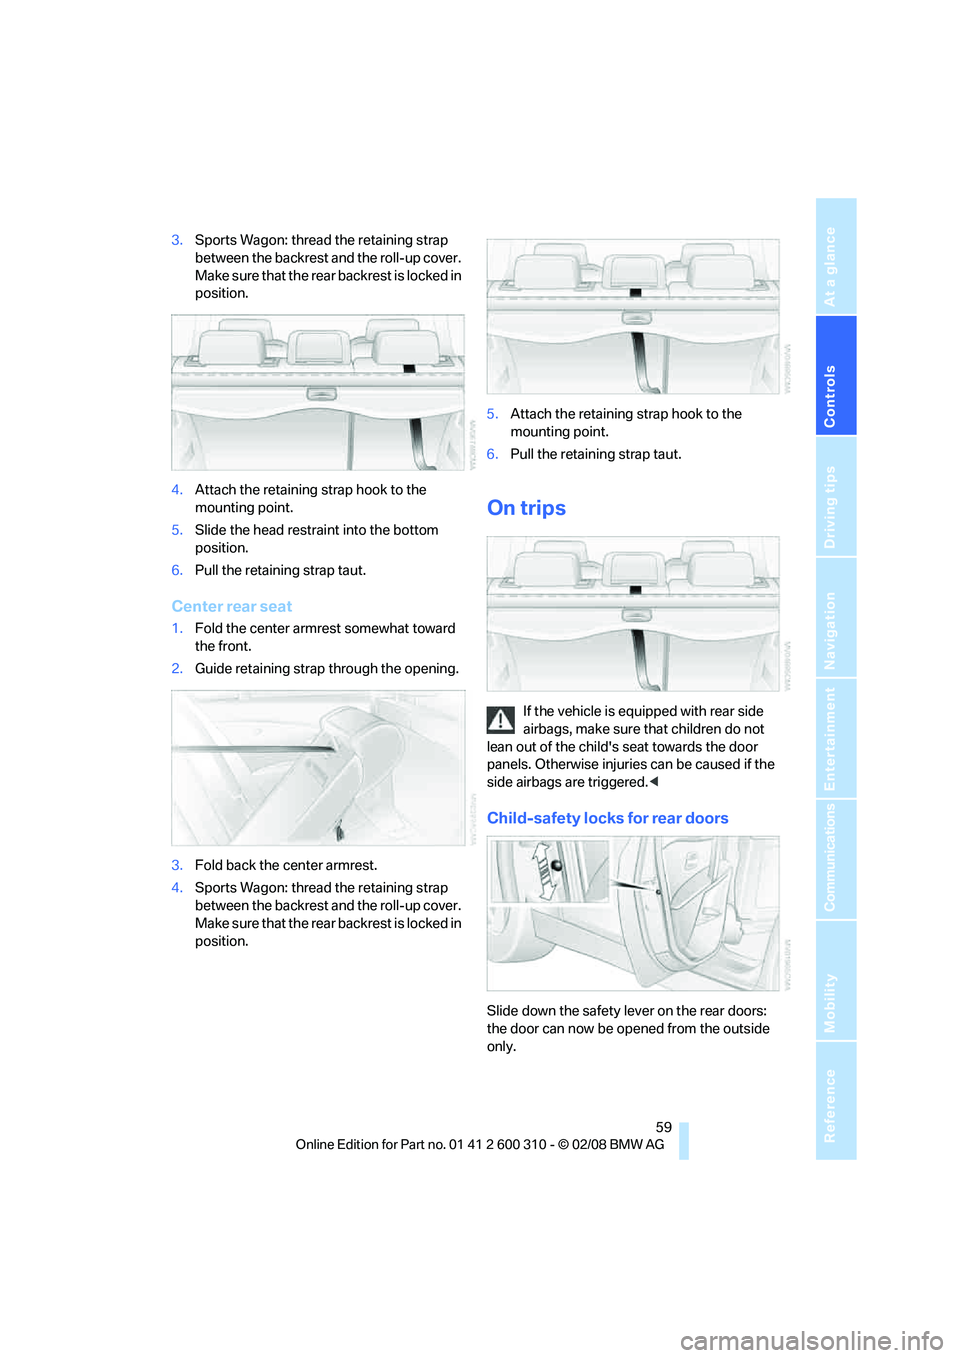
3.Sports Wagon: thread the retaining strap
between the backrest and the roll-up cover.
M a k e s u r e t h a t t h e r e a r b a c k r e s t i s l o c k e d i n
position.
4.Attach the retaining strap hook to the
mounting point.
5.Slide the head restraint into the bottom
position.
6.Pull the retaining strap taut.
Center rear seat
1.Fold the center armrest somewhat toward
the front.
2.Guide retaining strap through the opening.
3.Fold back the center armrest.
4.Sports Wagon: thread the retaining strap
between the backrest and the roll-up cover.
M a k e s u r e t h a t t h e r e a r b a c k r e s t i s l o c k e d i n
position.5.Attach the retaining strap hook to the
mounting point.
6.Pull the retaining strap taut.
On trips
If the vehicle is equipped with rear side
airbags, make sure that children do not
lean out of the child's seat towards the door
panels. Otherwise injuries can be caused if the
side airbags are triggered.<
Child-safety locks for rear doors
Slide down the safety lever on the rear doors:
the door can now be opened from the outside
only.
Page 65 of 292
Controls
63Reference
At a glance
Driving tips
Communications
Navigation
Entertainment
Mobility
>if you remove the remote control from the
ignition lock
Handbrake
The handbrake is primarily intended to prevent
the vehicle from rolling while parked; it brakes
the rear wheels.
Indicator lamp
The indicator lamp lights up, and a sig-
nal also sounds when starting off. The
handbrake is applied.
Indicator lamp for Canadian models.
Applying
The lever locks in position automatically.
Releasing
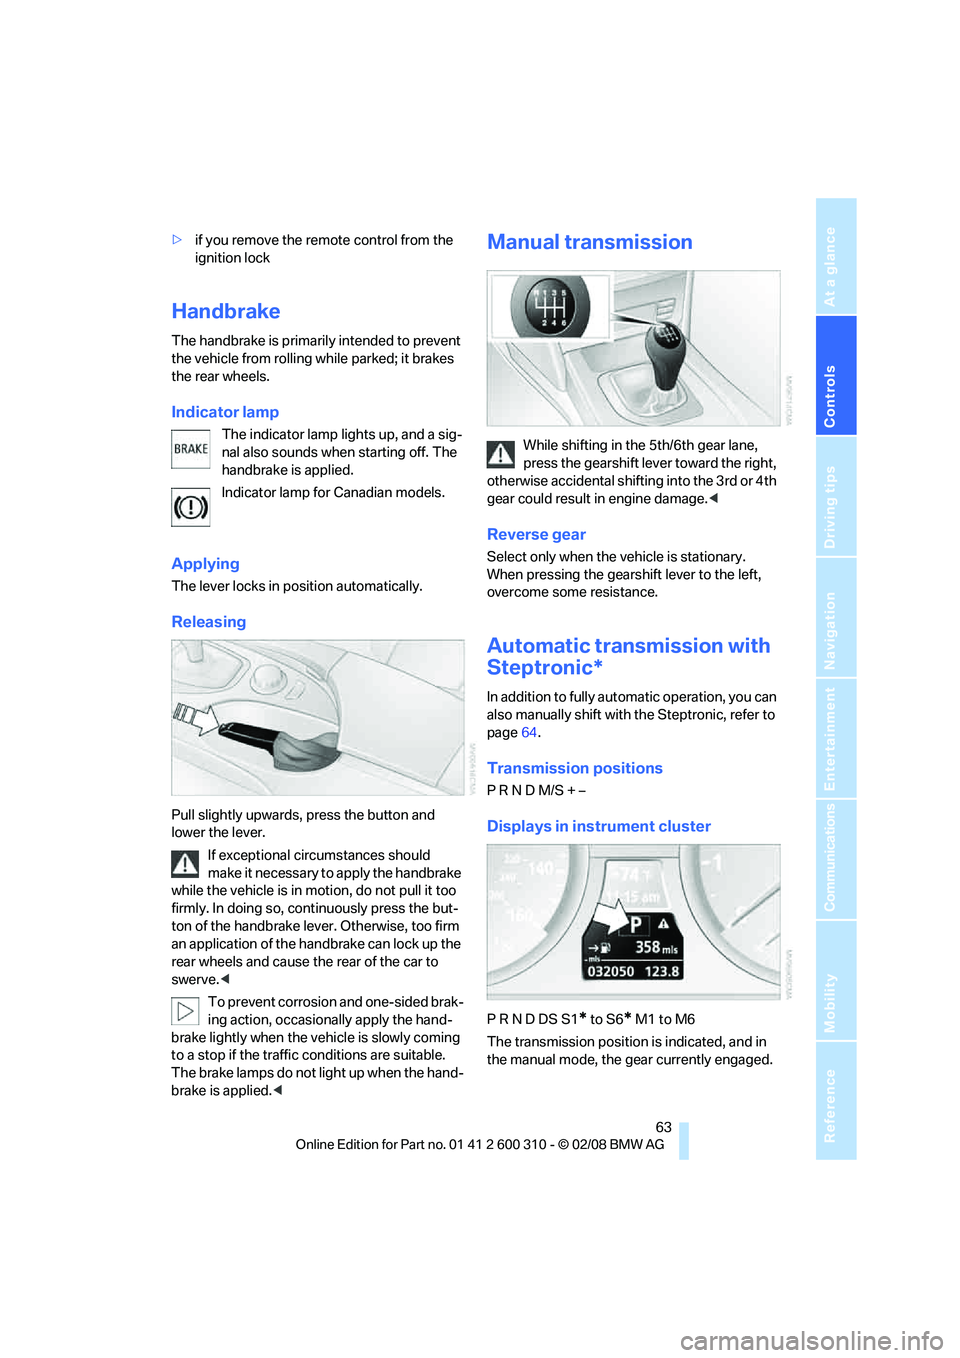
Pull slightly upwards, press the button and
lower the lever.
If exceptional circumstances should
make it necessary to apply the handbrake
while the vehicle is in motion, do not pull it too
firmly. In doing so, continuously press the but-
ton of the handbrake lever. Otherwise, too firm
an application of the handbrake can lock up the
rear wheels and cause the rear of the car to
swerve.<
To prevent corrosion and one-sided brak-
ing action, occasionally apply the hand-
brake lightly when the vehicle is slowly coming
to a stop if the traffic conditions are suitable.
The brake lamps do not light up when the hand-
brake is applied.<
Manual transmission
While shifting in the 5th/6th gear lane,
press the gearshift lever toward the right,
otherwise accidental shifting into the 3rd or 4th
gear could result in engine damage.<
Reverse gear
Select only when the vehicle is stationary.
When pressing the gearshift lever to the left,
overcome some resistance.
Automatic transmission with
Steptronic*
In addition to fully automatic operation, you can
also manually shift with the Steptronic, refer to
page64.
Transmission positions
P R N D M/S + –
Displays in instrument cluster
P R N D DS S1* to S6* M1 to M6
The transmission position is indicated, and in
the manual mode, the gear currently engaged.
Page 67 of 292
Controls
65Reference
At a glance
Driving tips
Communications
Navigation
Entertainment
Mobility
When the selector lever is pressed forward or
back, the manual mode is activated and the
Steptronic shifts the gear. The instrument clus-
ter shows M1 through M6.
Upshifts and downshifts are only carried out at a
suitable engine and vehicle speed, e.g. a down-
shift is not carried out at excessively high
engine speeds. The selected gear is briefly dis-
played in the instrument cluster, followed by the
current gear.
To resume automatic mode, press the selector
lever to the right.
Manually unlocking and locking
transmission lock
In case of a power failure, e.g. when the battery
is drained or disconnected, or an electrical fault,
manually release the transmission lock, as oth-
erwise the rear wheels are blocked and the
vehicle cannot be towed.
Only manually release the transmission lock for
towing and firmly apply the handbrake before-
hand so that the vehicle cannot roll. Reengage
the transmission lock after parking the vehicle
at its destination.
Unlocking
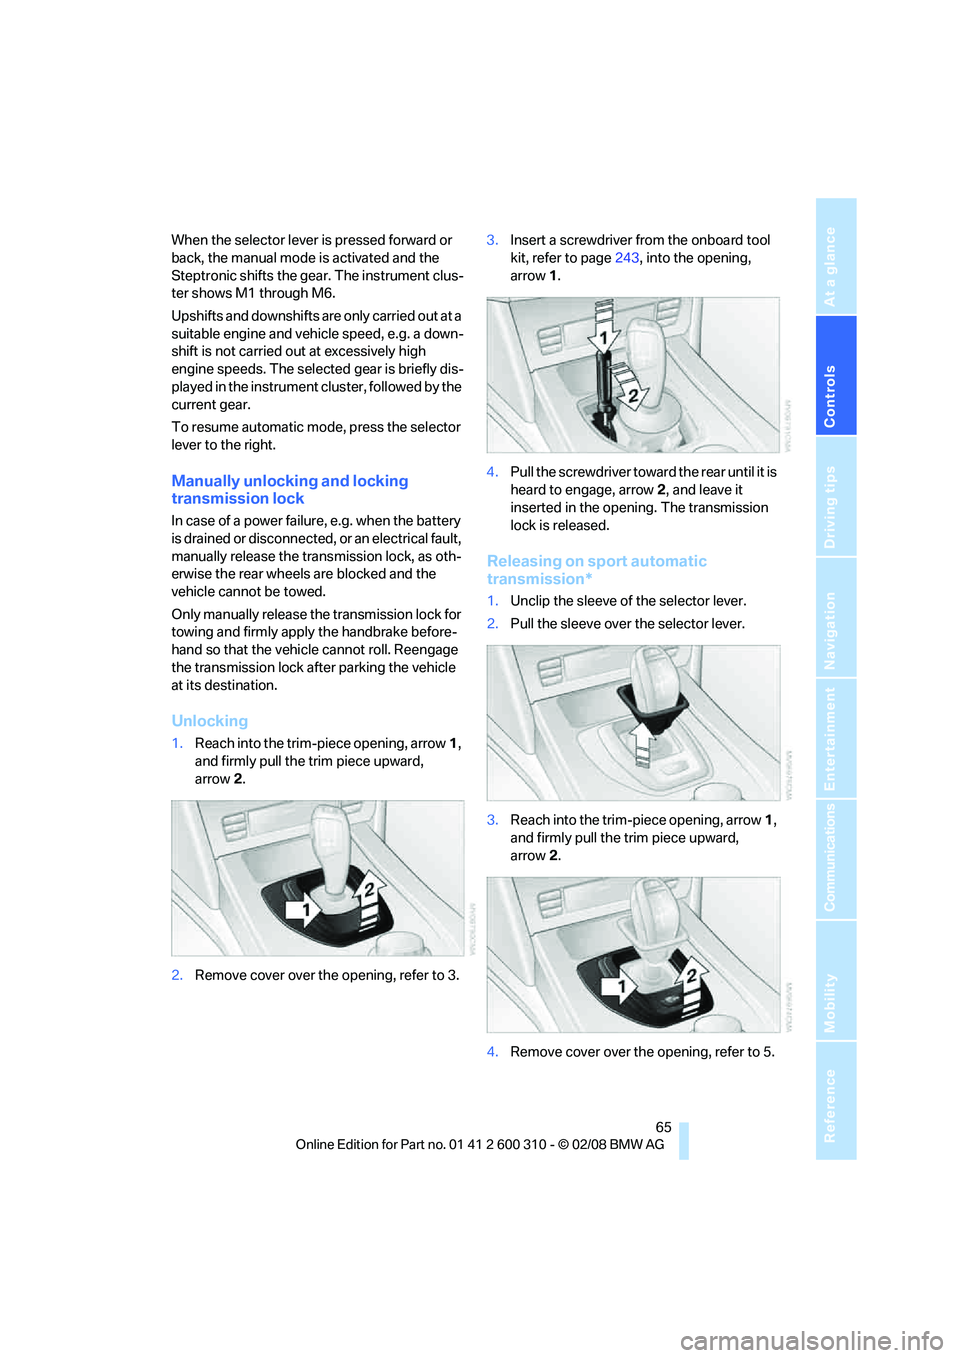
1.Reach into the trim-piece opening, arrow1,
and firmly pull the trim piece upward,
arrow2.
2.Remove cover over the opening, refer to 3.3.Insert a screwdriver from the onboard tool
kit, refer to page243, into the opening,
arrow1.
4.Pull the screwdriver toward the rear until it is
heard to engage, arrow2, and leave it
inserted in the opening. The transmission
lock is released.
Releasing on sport automatic
transmission*
1.Unclip the sleeve of the selector lever.
2.Pull the sleeve over the selector lever.
3.Reach into the trim-piece opening, arrow1,
and firmly pull the trim piece upward,
arrow2.
4.Remove cover over the opening, refer to 5.
Page 71 of 292
Controls
69Reference
At a glance
Driving tips
Communications
Navigation
Entertainment
Mobility
Windshield washer nozzles
The windshield washer nozzles are heated
when the engine is running or the ignition is
switched on.
Sports Wagon:
Rear window wiper
1Intermittent mode. When reverse gear is
engaged, continuous operation is switched
on automatically
2Cleaning the rear window
Do not use washing mechanisms when
the washer fluid reservoir is empty, other-
wise you will damage the washer pump.<
Washer fluid
Washer fluid antifreeze is flammable. For
this reason, keep it away from ignition
sources and store only in the closed original
container out of reach of children. Otherwise,
there is the danger of bodily injury. Always
observe the instructions for use provided on the
containers.<
Filler neck for washer fluid
Only add washer fluid with the engine
cooled down to exclude contact with hot
engine components. Otherwise there is a dan-
ger of fire and to personal safety if the fluid is
spilled.
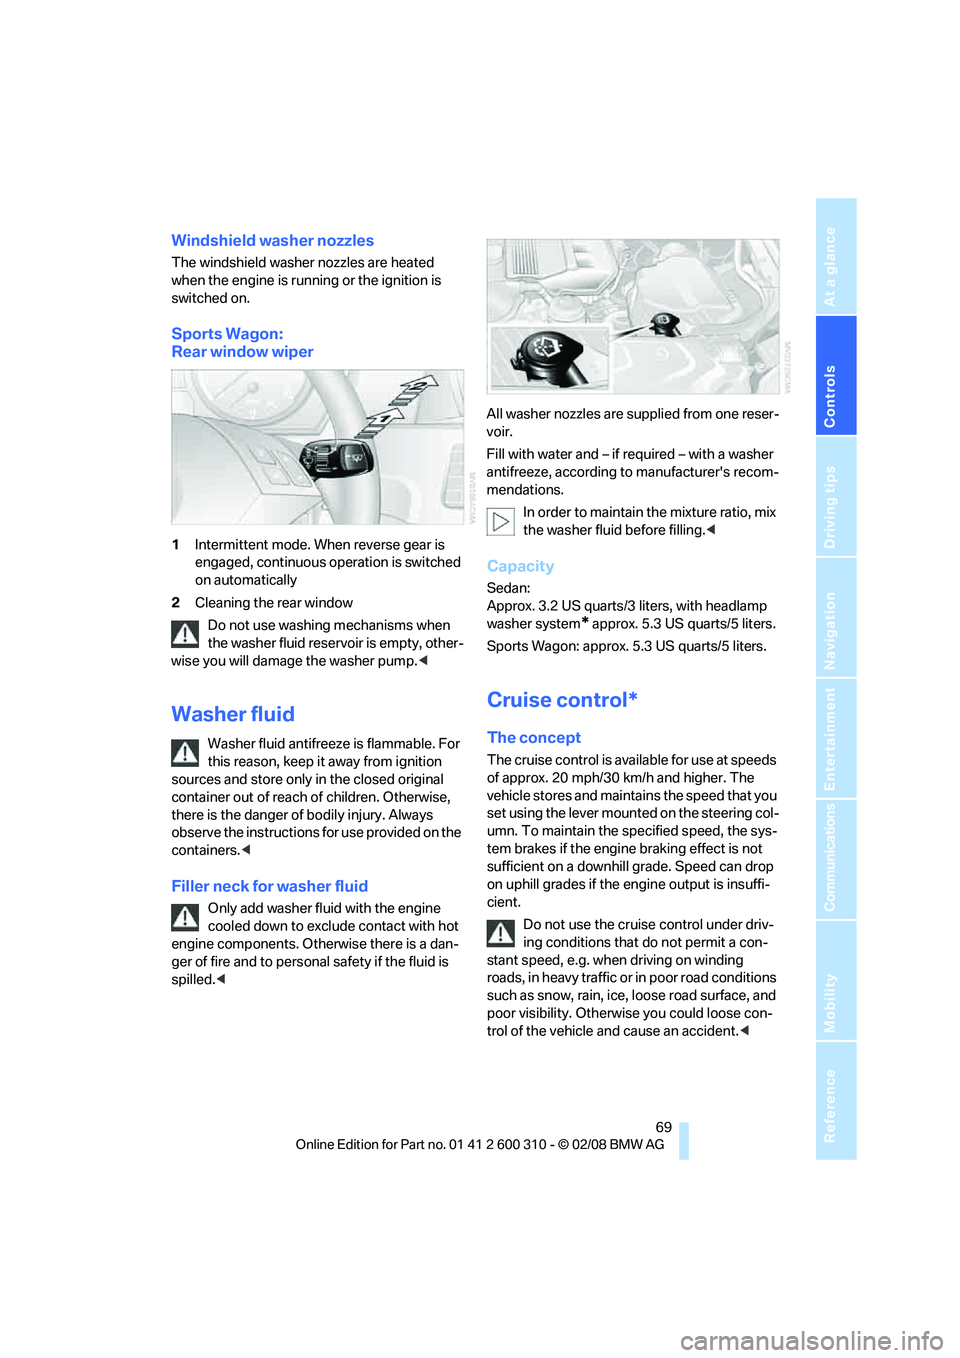
Fill with water and – if required – with a washer
antifreeze, according to manufacturer's recom-
mendations.
In order to maintain the mixture ratio, mix
the washer fluid before filling.<
Capacity
Sedan:
Approx. 3.2 US quarts/3 liters, with headlamp
washer system
* approx. 5.3 US quarts/5 liters.
Sports Wagon: approx. 5.3 US quarts/5 liters.
Cruise control*
The concept
The cruise control is available for use at speeds
of approx. 20 mph/30 km/h and higher. The
vehicle stores and maintains the speed that you
set using the lever mounted on the steering col-
umn. To maintain the specified speed, the sys-
tem brakes if the engine braking effect is not
sufficient on a downhill grade. Speed can drop
on uphill grades if the engine output is insuffi-
cient.
Do not use the cruise control under driv-
ing conditions that do not permit a con-
stant speed, e.g. when driving on winding
roads, in heavy traffic or in poor road conditions
such as snow, rain, ice, loose road surface, and
poor visibility. Otherwise you could loose con-
trol of the vehicle and cause an accident.<
Page 91 of 292
Controls
89Reference
At a glance
Driving tips
Communications
Navigation
Entertainment
Mobility
Technology for comfort, convenience and
safety
PDC Park Distance Control*
The concept
The PDC assists you when you are parking.
Acoustic signals and an optical display
* alert
you to the approach of an object from behind
your vehicle. To measure the distance, there
are four ultrasonic sensors in each bumper.
The range of these sensors is approx. 7 ft/2 m.
However, an acoustic warning first sounds for
the sensors at the front and at the two rear cor-
ners at approx. 24 in/60 cm, and for the center
rear sensors at approx. 5 ft/1.50 m.
PDC is a parking aid that can indicate
objects when they are approached
slowly, as is usually the case when parking.
Avoid approaching an object at high speed, oth-
erwise the physical circumstances would mean
that the system warning was too late.<
Automatic activation
The system starts to operate approx. one sec-
ond after you shift into reverse or move the
selector lever into position R with the engine
running or the ignition switched on.
Wait this short time before driving off.
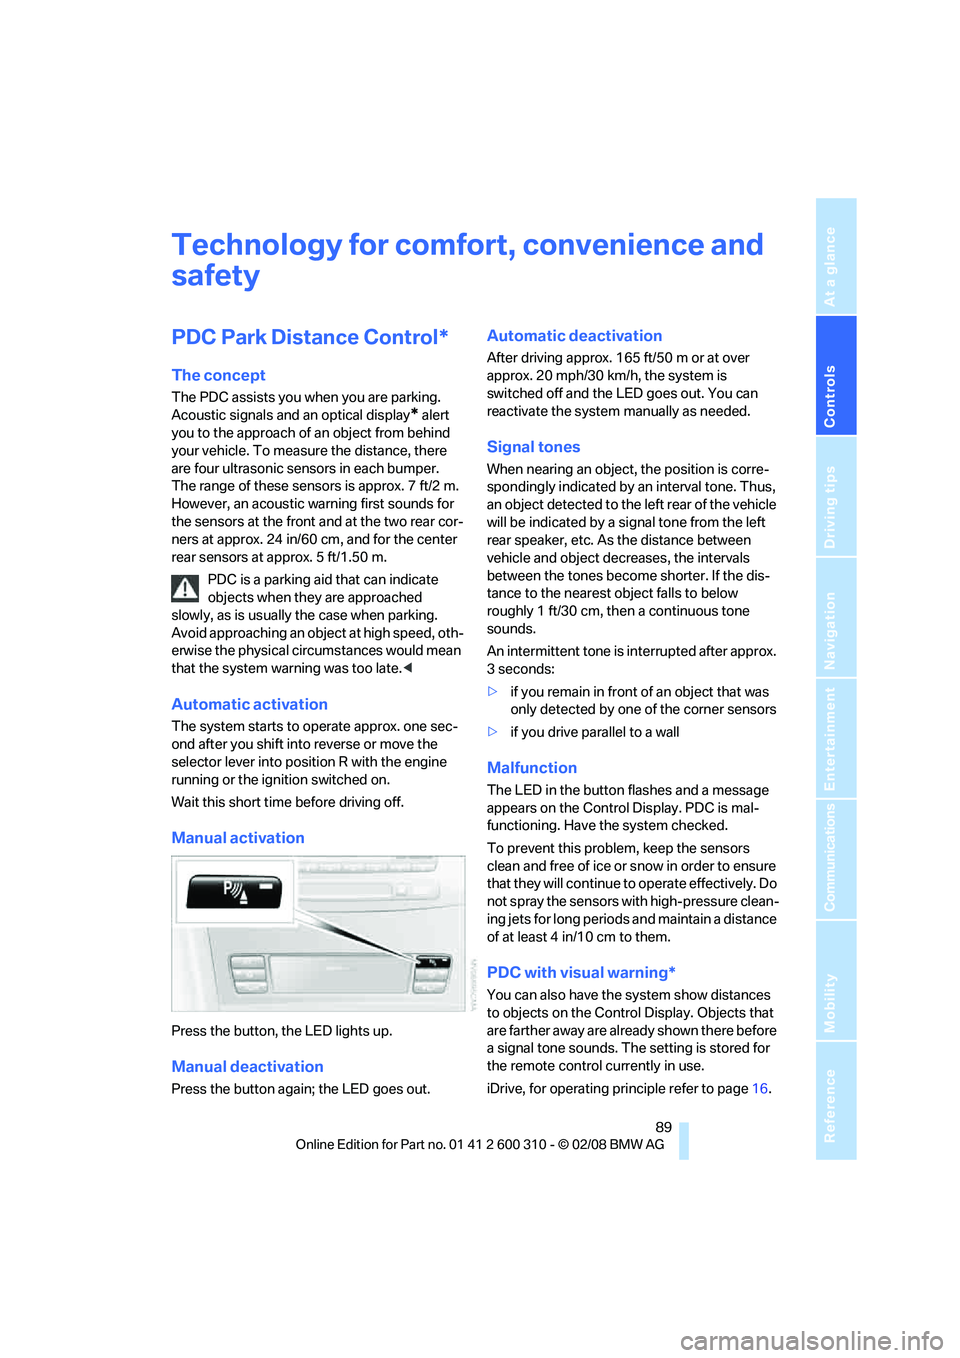
Manual activation
Press the button, the LED lights up.
Manual deactivation
Press the button again; the LED goes out.
Automatic deactivation
After driving approx. 165 ft/50 m or at over
approx. 20 mph/30 km/h, the system is
switched off and the LED goes out. You can
reactivate the system manually as needed.
Signal tones
When nearing an object, the position is corre-
spondingly indicated by an interval tone. Thus,
an object detected to the left rear of the vehicle
will be indicated by a signal tone from the left
rear speaker, etc. As the distance between
vehicle and object decreases, the intervals
between the tones become shorter. If the dis-
tance to the nearest object falls to below
roughly 1 ft/30 cm, then a continuous tone
sounds.
An intermittent tone is interrupted after approx.
3seconds:
>if you remain in front of an object that was
only detected by one of the corner sensors
>if you drive parallel to a wall
Malfunction
The LED in the button flashes and a message
appears on the Control Display. PDC is mal-
functioning. Have the system checked.
To prevent this problem, keep the sensors
clean and free of ice or snow in order to ensure
that they will continue to operate effectively. Do
not spray the sensors with high-pressure clean-
ing jets for long periods and maintain a distance
of at least 4 in/10 cm to them.
PDC with visual warning*
You can also have the system show distances
to objects on the Control Display. Objects that
are farther away are already shown there before
a signal tone sounds. The setting is stored for
the remote control currently in use.
iDrive, for operating principle refer to page16.