240 BMW 540i 1998 E39 Owner's Guide
[x] Cancel search | Manufacturer: BMW, Model Year: 1998, Model line: 540i, Model: BMW 540i 1998 E39Pages: 1002
Page 575 of 1002
Downloaded from www.Manualslib.com manuals search engine
230-1 1
Manual ~ransmissionl
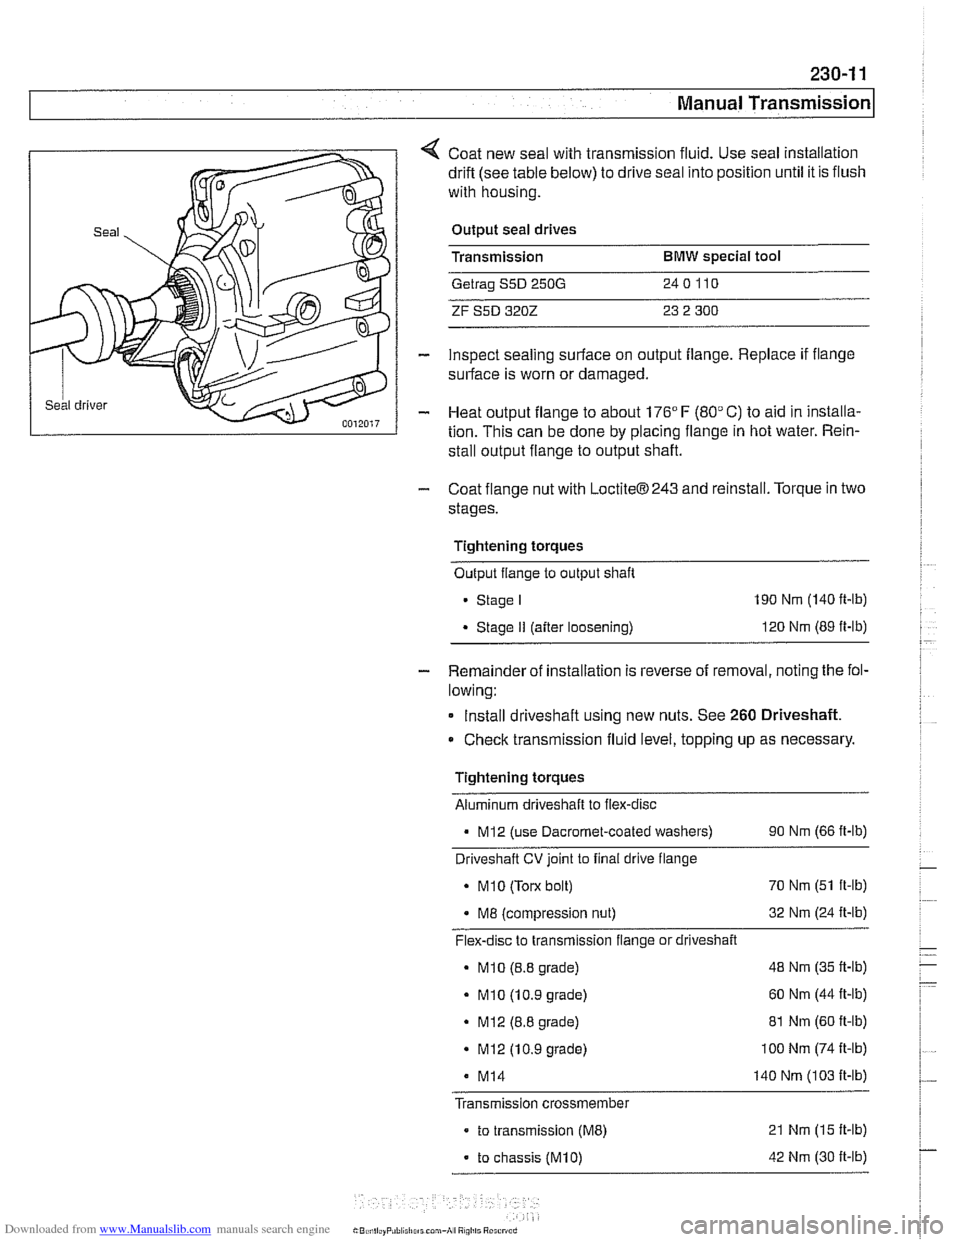
Coat new seal with transmission fluid. Use seal installation
drift (see table below) to drive seal into position until it is flush
with housing.
Output seal drives
Transmission
BMW special tool
Getrag S5D 250G 240110
ZF S5D 3202 23 2 300
inspect sealing surface on output flange. Replace if flange
surface is worn or damaged.
Heat output flange to about 176"
F (80" C) to aid in installa-
tion. This can be done by placing flange in hot water. Rein-
stall output flange to output shaft.
- Coat flange nut with LoctiteB243 and reinstall. Torque in two
stages.
Tightening torques Output flange to output shaft
Stage I 190 Nm (140 ft-lb)
Stage II (after loosening) 120
Nm (89 ft-lb)
- Remainder of installation is reverse of removal, noting the fol-
lowing:
Install driveshaft using new nuts. See
260 Driveshaft.
Check transmission fluid level, topping up as necessary
Tightening torques Aluminum driveshaft to flex-disc
- MI2 (use Dacromet-coated washers) 90 Nm (66 ft-lb)
Driveshaft
CV joint to final drive flange
. MI0 (Torx bolt) 70
Nm (51 ft-lb)
. M8 (compression nut) 32
Nm (24 ft-lb)
Flex-disc to transmission flange or driveshaft
- MI0 (8.8 grade) 48
Nm (35 ft-lb)
- MI0 (10.9 grade) 60
Nm (44 It-lb)
. MI2 (8.8 grade) 81 Nm (60 ft-lb)
. MI2 (10.9 grade) I00 Nm (74 It-lb)
M14 140 Nm (103 It-lb)
Transmission crossmember
- to transmission (ME) 21 Nm (15 It-lb)
- to chassis (M10) 42 Nm (30 It-lb)
Page 585 of 1002
Downloaded from www.Manualslib.com manuals search engine
240 Automatic Transmission
General . . . . . . . . . . . . . . . . . . . . . .
Special tools . . . . . . . . . . . . . . . . . . .
Automatic transmission applications
. . . . . ,240-2 ATF, draining and filling . . . . . . . . . . . . . . . . 240-7
. . . . . ,240-2 Automatic transmission fluid
. . . . . ,240-4 pan and strainer. . . . . . . . . . . . . . . . . . . . . . 240-9
Troubleshooting . . . . . . . . . . . . . . . . . . .240-4 Transmission Removal
and Installation
. . . . . . . . . . . . . . . . . . . 240-10 Automatic Transmission Fluid Transmission, removing and installing . . . 240-10 (ATF) Service . . . . . . . . . . . . . . . . . . . . . ,240-6
Automatic transmission fluid (ATF) . . . . . . . ,240-6
ATF level, checking . . . . . . . . . . . . . . . . . . ,240-6
Page 586 of 1002
Downloaded from www.Manualslib.com manuals search engine
240-2
/ ~utomatic Transmission
This section covers maintenance and replacement of the
automatic transmission for
E39 models.
Automatic transmission internal repairs are not covered.
Such repairs require special service equipment and knowl-
edge. If it is determined that transmission internal
sewice is
required, consult an authorized BMW dealer about a factory
reconditioned unit or a transmission rebuild.
CAUTION-
ATF does not circulate unless the engine is running. When
towing an automatic transmission vehicle, use a flat bed truck
or raise the rear wheels off the ground.
Special tools
Some special tools are required for the removal and installa-
tion of an automatic transmission on the
E39 BMW models.
While these tools are not absolutely necessary, they are es-
pecially helpful when dealing with the removal and replace-
ment of the torque converter.
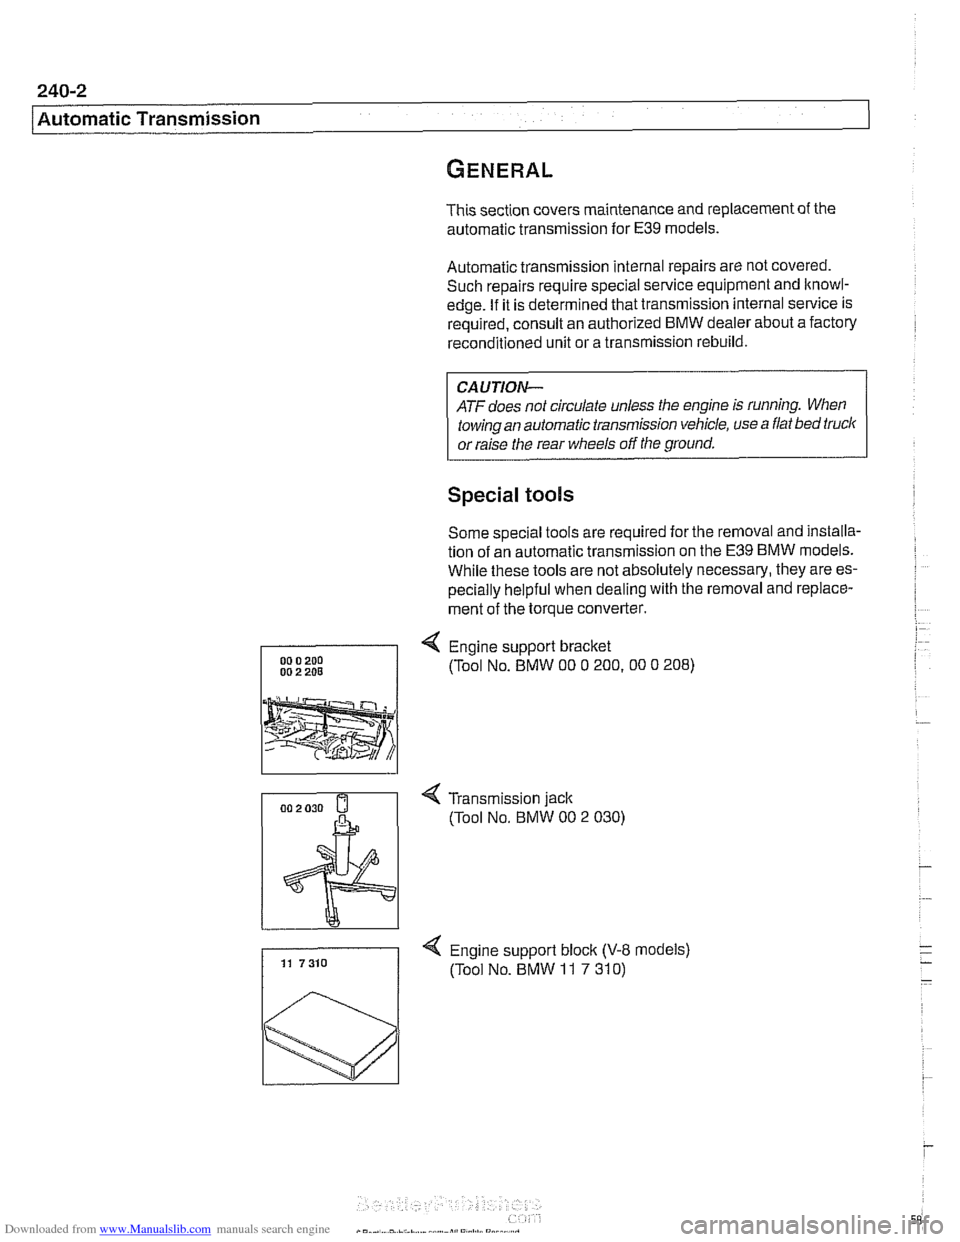
4 Engine support bracket
(Tool No. BMW
00 0 200.00 0 208)
4 Transmission jack
(Tool No.
BMW 00 2 030)
4 Engine support block (V-8 models) 11 7310 (Tool No. BMW 11 7 310)
Page 587 of 1002
Downloaded from www.Manualslib.com manuals search engine
240-3
Automatic Transmission
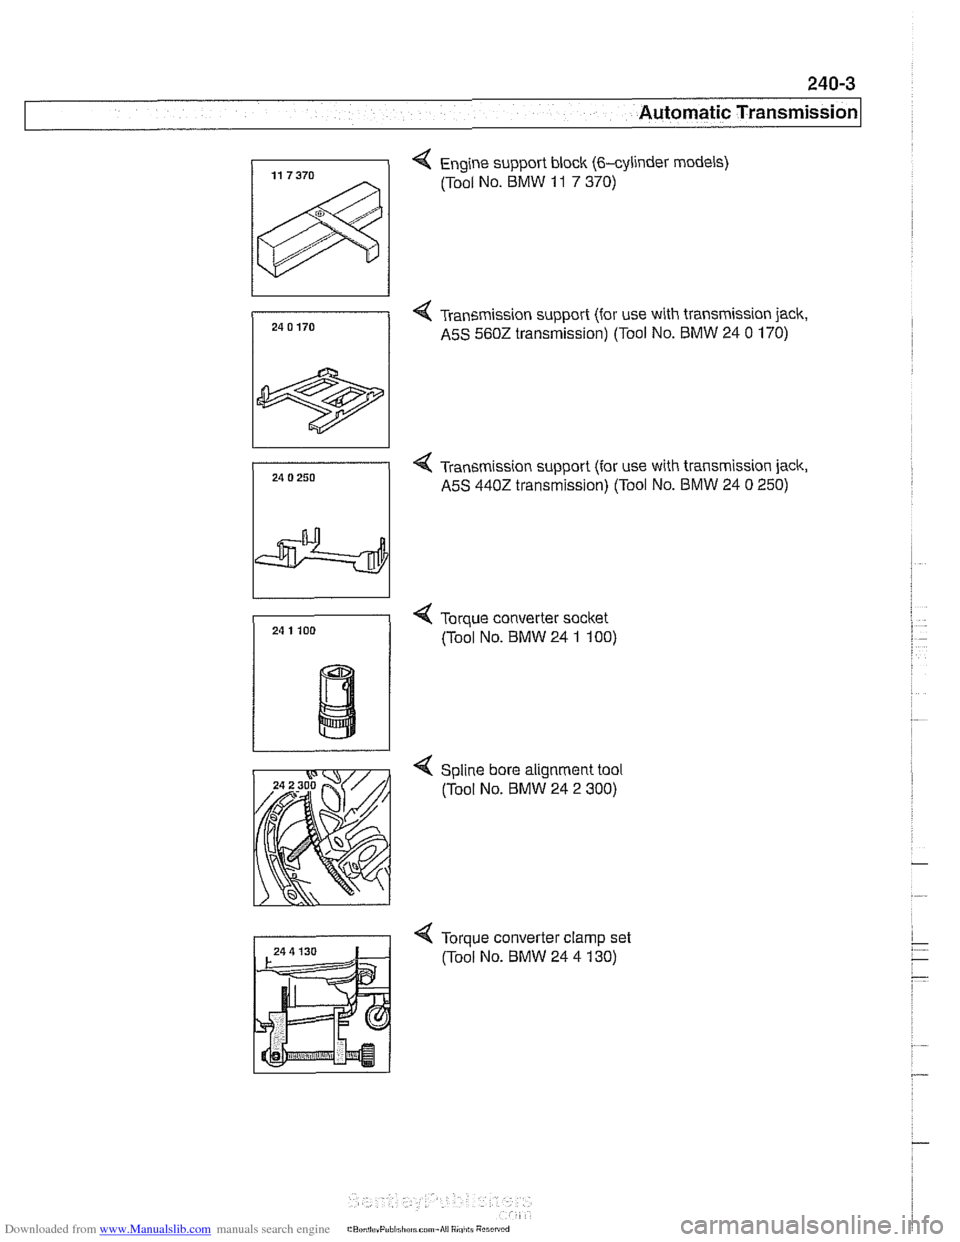
4 Engine support block (&cylinder models)
(Tool No. BMW
11 7 370)
4 Tran5mission support (for use with transmission jack,
A5S 560Z transmission) (Tool No. BMW 24
0 170)
4 Transmission support (for use with transmission jack,
A5S
4402 transmission) (Tool No. BMW 24 0 250)
4 Torque converter socket
(Tool No. BMW 24 1 100)
< Spline bore alignment tool
(Tool No.
BMW 24 2 300)
Page 590 of 1002
Downloaded from www.Manualslib.com manuals search engine
240-6
I Automatic Transmission Automatic transmission fluid (ATF)
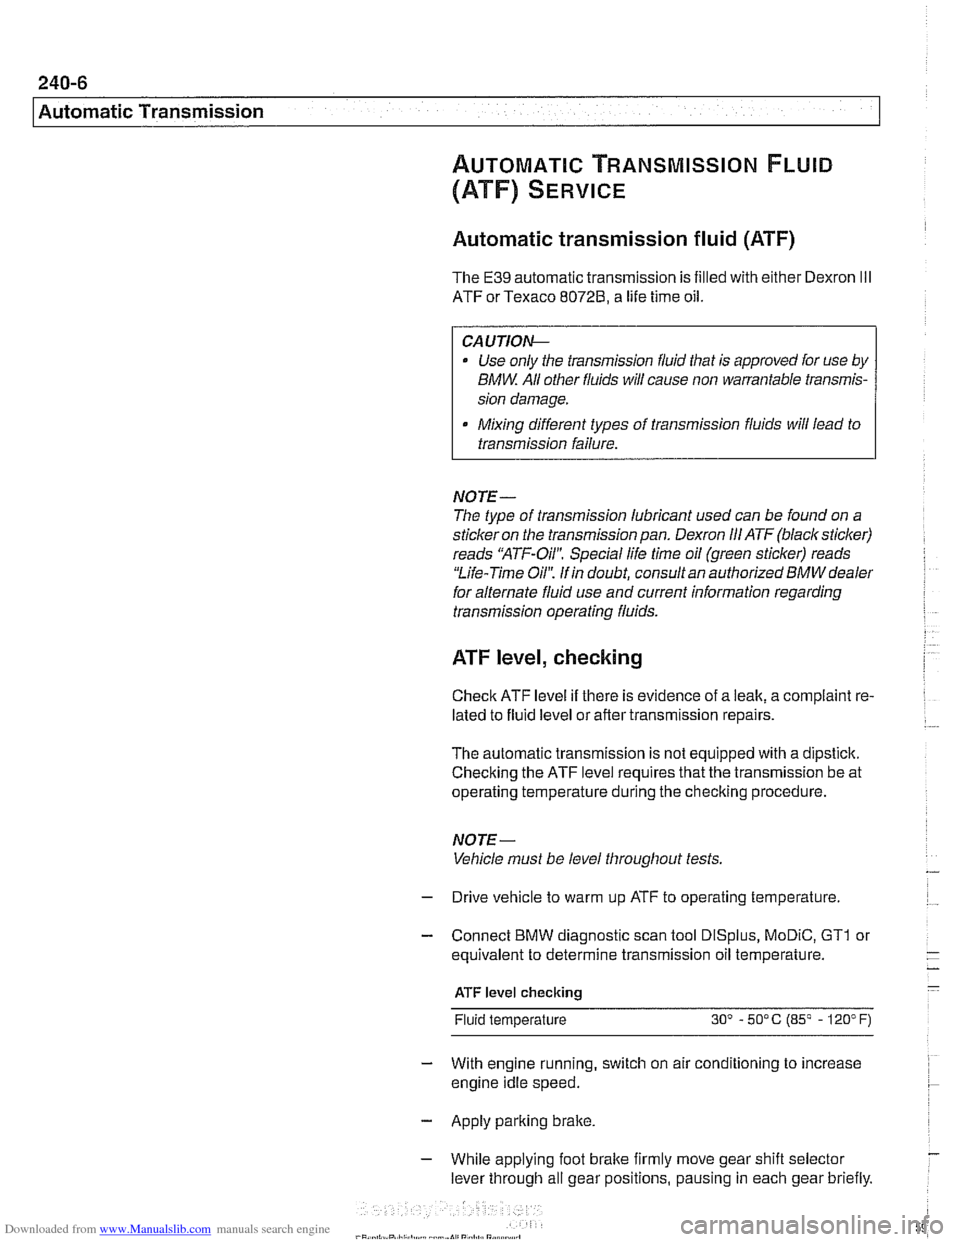
The E39 automatic transmission is filled with either Dexron Ill
ATF or Texaco 80728, a life time oil.
CA UTIOI\C
Use only the transmission fluid that is approved for use by
BMW All other fluids will cause non warrantable transmis-
I sion damage.
Mixing different types of transmission fluids will lead to
transmission failure.
NOTE-
The type of transmission lubricant used can be found on a
stickeron the transmission pan. Dexron
111ATF (blacksticker)
reads "ATF-Oil': Special life time oil (green sticker) reads
'Life-Time Oil': If in doubt, consult an authorized
BMW dealer
for alternate fluid use and current information regarding
transmission operating fluids.
ATF level, checking
Check ATF level if there is evidence of a leak, a complaint re-
lated to fluid level or afler transmission repairs.
The automatic transmission is not equipped with a dipstick.
Checking the ATF level requires that the transmission be at
operating temperature during the checking procedure.
NOTE-
Vehicle must be level throughout tests
- Drive vehicle to warm up ATF to operating temperature.
- Connect BMW diagnostic scan tool DiSplus, MoDiC, GTI or
equivalent to determine transmission oil temperature.
ATF level checking
Fluid temperature
30' - 50°C (85' - 120" F)
- With engine running, switch on air conditioning to increase
engine idle speed.
- Apply parking brake.
- While applying foot brake firmly move gear shift selector
lever through
all gear positions, pausing in each gear briefly.
Page 593 of 1002
Downloaded from www.Manualslib.com manuals search engine
240-9
Automatic Transmission
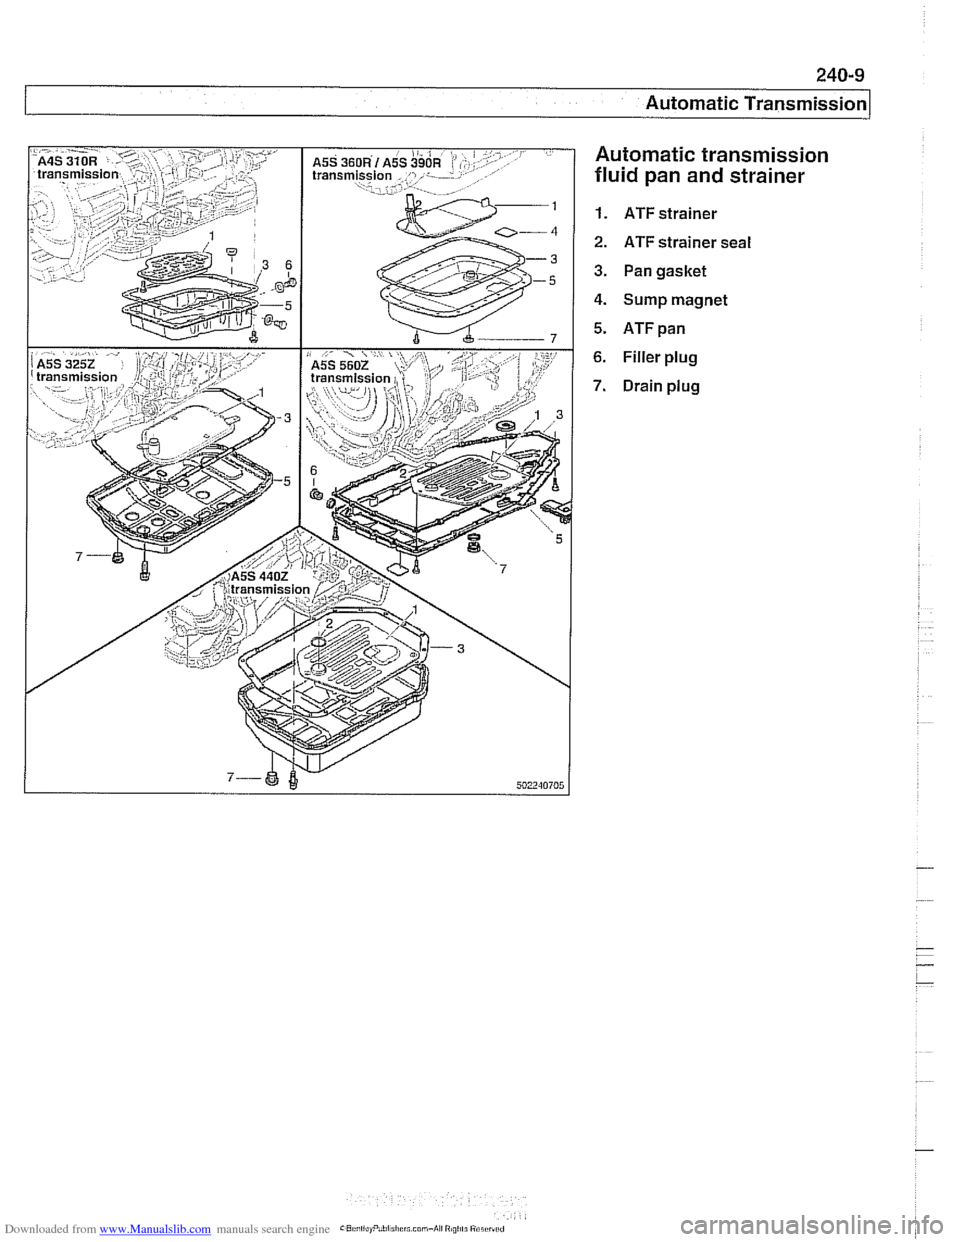
Automatic transmission
fluid pan and strainer
1. ATF strainer
2. ATF strainer seal
3. Pan gasket
4. Sump magnet
5. ATFpan
6. Filler plug
7. Drain plug
Page 594 of 1002
Downloaded from www.Manualslib.com manuals search engine
240-1 0
Automatic Transmission
TRANSMISSION REMOVAL AND
INSTALLATION
Removal and installation of the transmission is best accorn-
plished on an automotive lift using a transmission jack. Use
caution and safe workshop practices when working beneath
car and lowering transmission.
Torx-head bolts are used to mount the transmission to the
bellhousing.
Besure to have appropriate tools on hand before
starting the job.
WARNING-
Be sure the vehicle is properly supported. The removal of the
transmission may upset the balance of the vehicle on a lift
CAUJION-
Tilting the engine to remove the transmission can lead to
damaae to various components due to
laclc of clearance. 1
Transmission, removing and installing
WARNING -
Allow engine and transmission to cool down before starting
work on the transmission.
- Disconnect negative (-) cable from battery.
CAUTION-
Prior to disconnecting the battery, read the battery discon-
nection cautions given in
001 General Cautions and
Warninas.
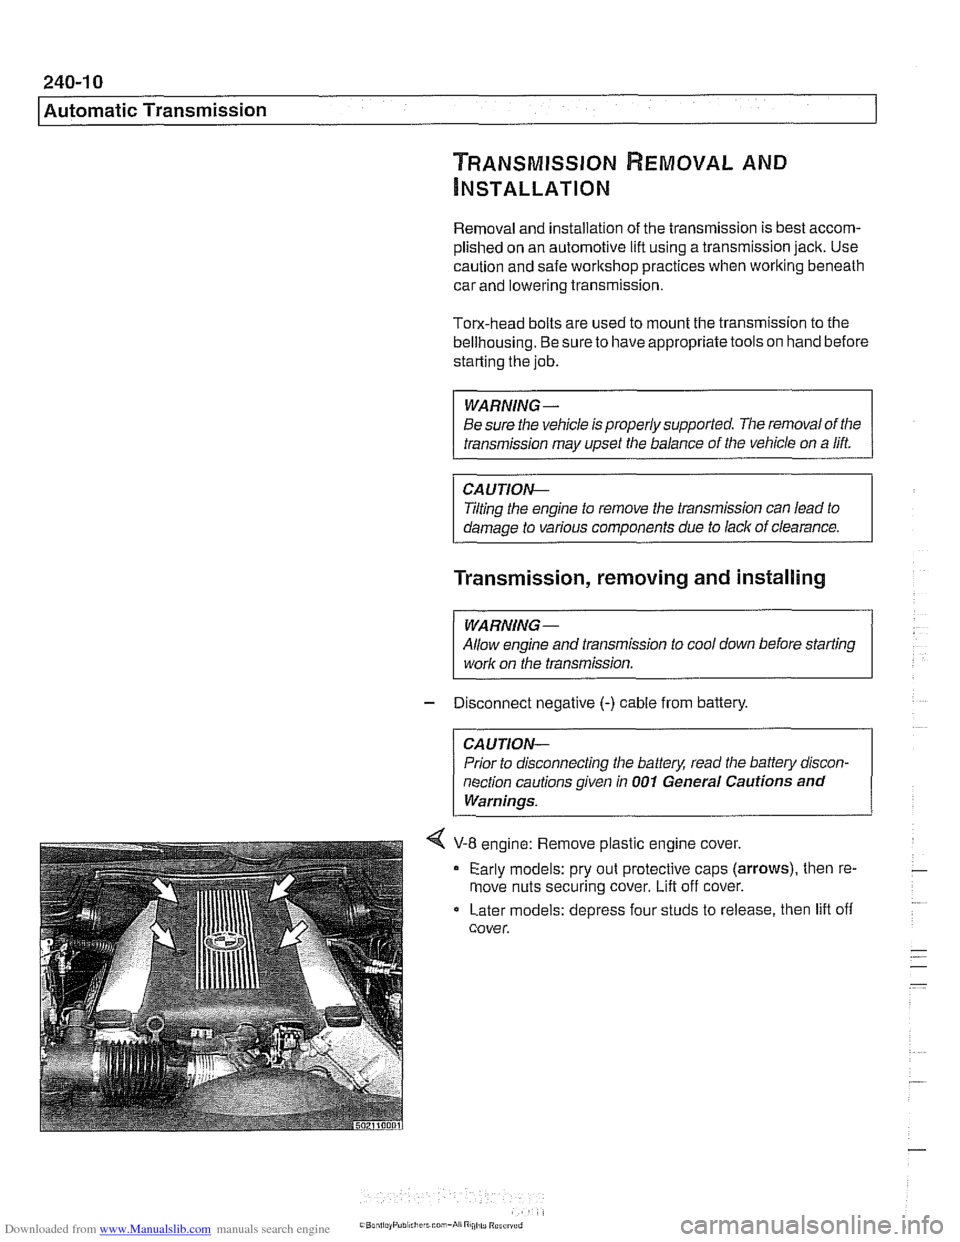
4 V-8 engine: Remove plastic engine cover.
Early models: pry out protective caps
(arrows), then re-
move nuts securing cover.
Lift off cover.
Later models: depress four studs to release, then lift off
cover.
Page 597 of 1002
Downloaded from www.Manualslib.com manuals search engine
240-1 3
Automatic ~ransmissionl
- Blow out oil cooler lines with low-pressure compressed air
and flush cooler with clean ATF twice before reattaching lines
to transmission.
CA UTIOG
Wear safety glasses when worling with compressed air:
@ Do not reuse ATF used for flushing.
- Remainder of installation is reverse of removal, noting the fol-
lowing:
Reinstall driveshafl using new nuts.
Install new sealing washers on transmission cooling line
banjo bolts.
Install new O-rings on transmission cooler lines, where
applicable.
Inspect engine drive plate (flywheel) for cracks or elongat-
ed holes. Replace
if necessary.
Be sure bellhousing alignment dowel sleeves are located
correctly. Replace damaged sleeves.
Checlc to be sure torque converter is seated correctly in
transmission during final installation.
Use
BMW special tool 24 2 300 to align three mounting
tabs on torque converter with indentations on drive plate
(flywheel).
Fill transmission with clean ATF until oil level is even with
fill hole. Then check fluid level as described earlier.
Adjust gearshift mechanism. See
250 Gearshift Linkage.
NOTE-
In order to avoid difficulties in transmission removal at a fu-
ture time, use washers with Torx-head mounting bolts.
Page 639 of 1002
Downloaded from www.Manualslib.com manuals search engine
Front Suspension
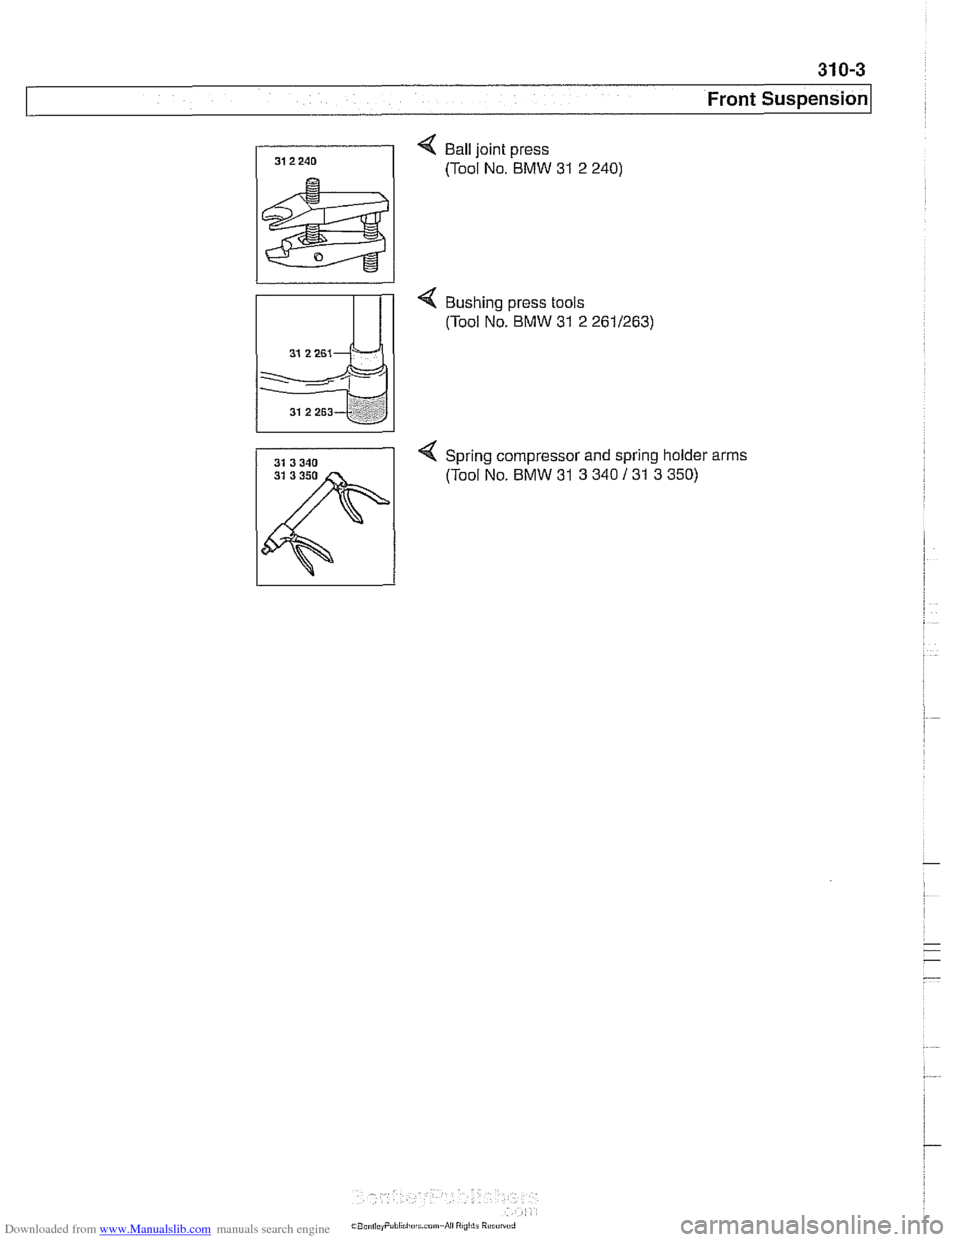
< Ball joint press
(Tool No. BMW
31 2 240)
< Bushing press tools
(Tool No. BMW
31 2 2611263)
4 Spring compressor and spring holder arms
31 3 350 (Tool No. BMW 31 3 340 131 3 350)
Page 641 of 1002
Downloaded from www.Manualslib.com manuals search engine
31 0-5
Front ~uspensionl
Front strut assembly, removing and
installing
- Raise car and remove front wheel.
WARNING-
Make sure that the car is firmly supported on jack stands de-
signed for the purpose. Place jack stands underneath struc-
tural chassis points.
Do not place jack stands under
suspension
parts.
- Unbolt bralte caliper assembly, lkeeping bralte hose connect-
ed. Secure brake caliper to body with wire. Do not let it hang
from brake hose. See
340 Brakes.
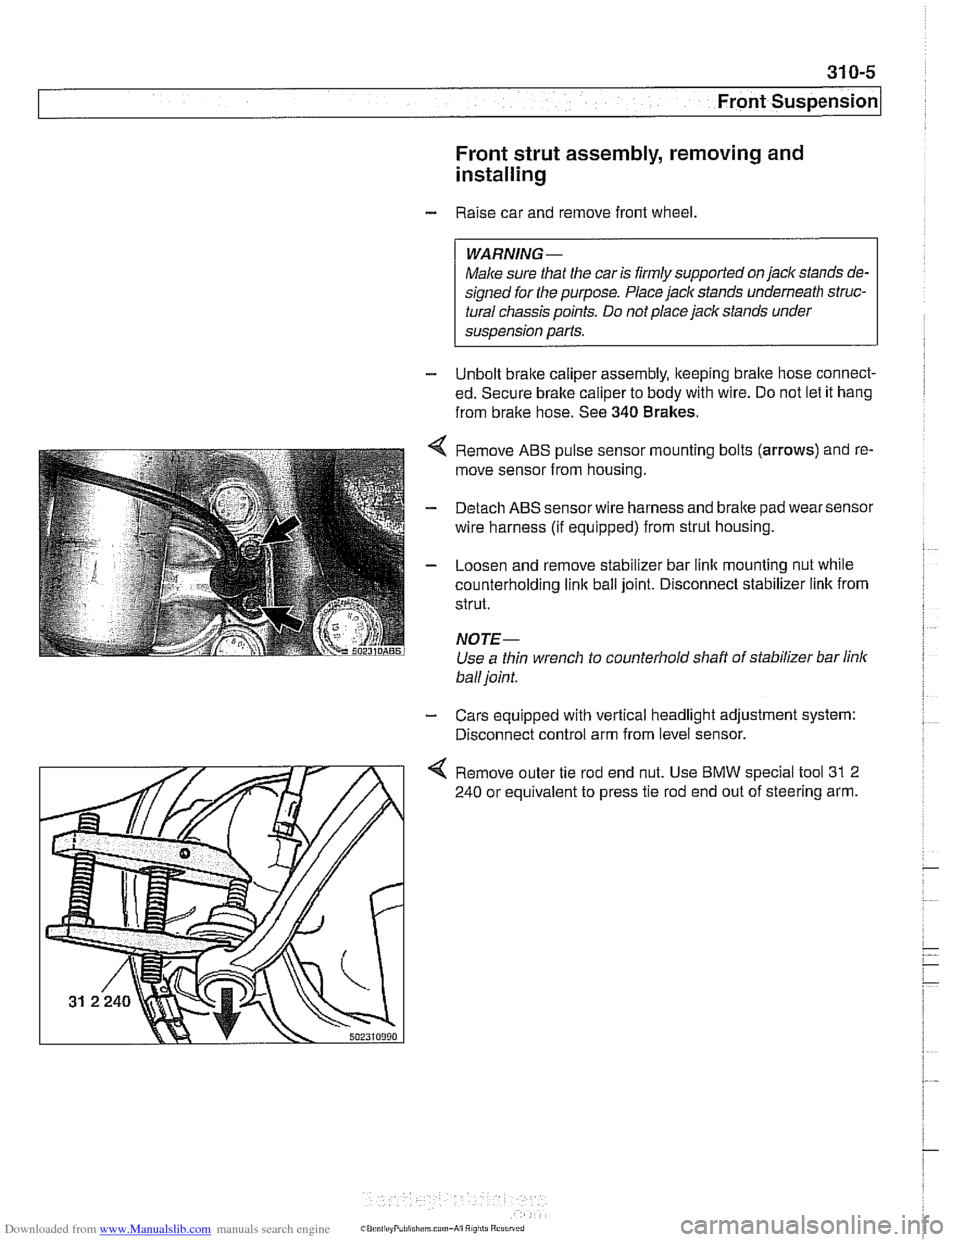
Remove ABS pulse sensor mounting bolts (arrows) and re-
move sensor from housing.
Detach ABS sensor wire harness and bralte pad wear sensor
wire harness (if equipped) from strut housing.
Loosen and remove stabilizer bar link mounting nut while
counterholding
link ball joint. Disconnect stabilizer link from
strut.
NOTE-
Use a thin wrench to counterhold shaft of stabilizer bar link
ball joint.
- Cars equipped with vertical headlight adjustment system:
Disconnect control arm from level sensor.
4 Remove outer tie rod end nut. Use BMW special tool 31 2
240 or equivalent to press tie rod end out of steering arm.