rear view mirror BMW 540i 1998 E39 Workshop Manual
[x] Cancel search | Manufacturer: BMW, Model Year: 1998, Model line: 540i, Model: BMW 540i 1998 E39Pages: 1002
Page 803 of 1002

Downloaded from www.Manualslib.com manuals search engine
400-9
Body-General
Battery safety terminal
(BST)
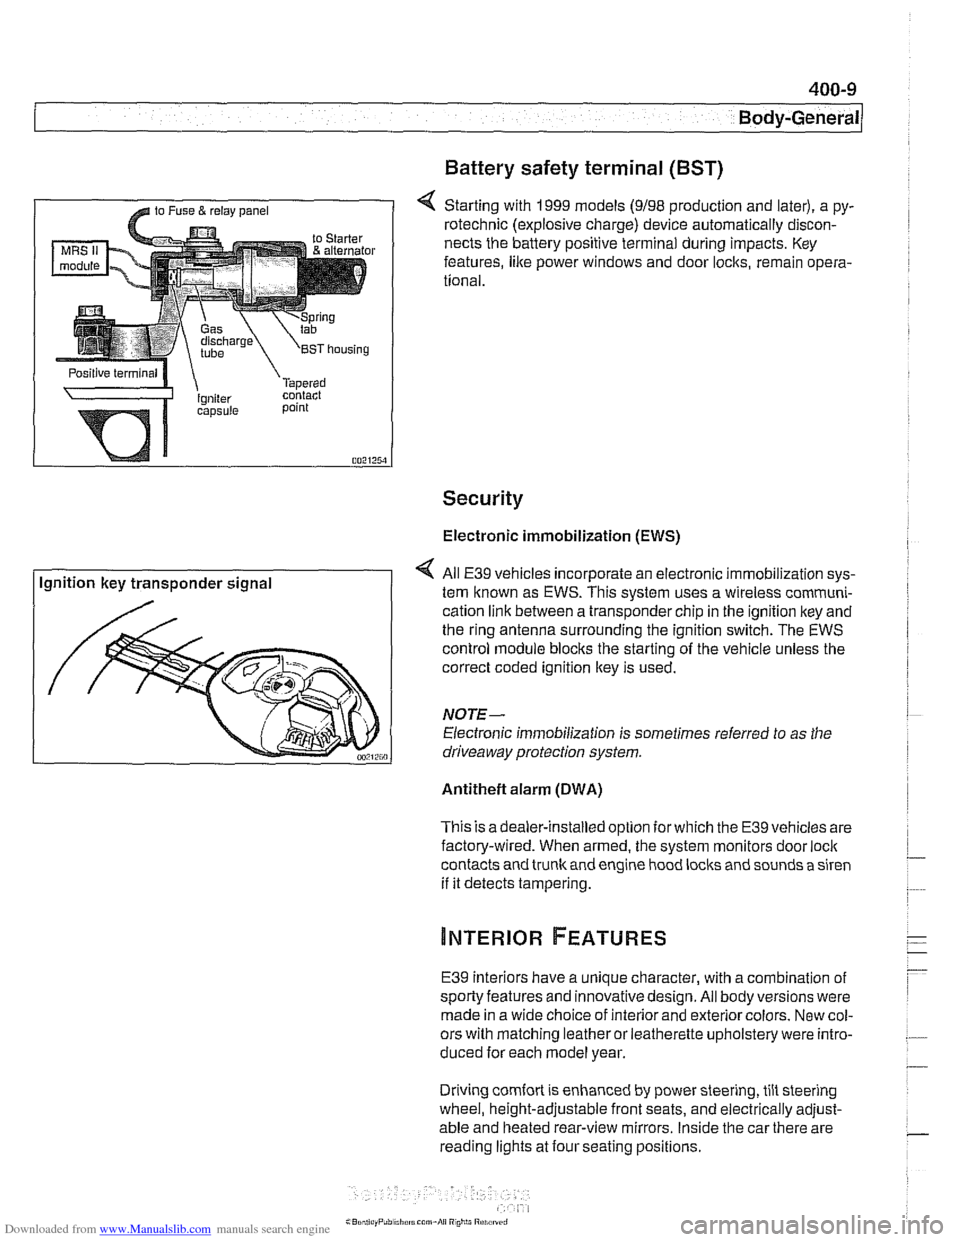
4 Starting with 1999 models (9198 production and later), a py-
rotechnic (explosive charge) device automatically discon-
nects the battery positive terminal during impacts. Key
features,
like power windows and door locks, remain opera-
tional.
Security
Electronic immobilization (EWS)
Ignition key transponder signal All
E39 vehicles incorporate an electronic immobilization sys-
tem known as EWS. This svstem uses a wireless comrnuni-
cation link between a transponder chip in the ignition key and
the ring antenna surrounding the ignition switch. The EWS
control module blocks the starting of the vehicle unless the
correct coded ignition key is used.
NOTE-
Electronic immobilization is sometimes referred to as the
driveaway protection system.
Antitheft alarm (DWA)
This is adealer-installed option for which the E39 vehicles are
factory-wired. When armed, the system monitors door
loci(
contacts and trunk and engine hood locks and sounds a siren
if it detects tampering.
E39 interiors have a unique character, with a combination
of
sporty features and innovativedesign. All body versions were
made in a wide choice of interior and exterior colors. New col-
ors with matching leather or leatherette upholstery were intro-
duced for each model year.
Driving
comfort is enhanced by power steering, tilt steering
wheel, height-adjustable front seats, and electrically adjust-
able and heated rear-view mirrors. Inside the car there are
reading lights at four seating positions.
Page 851 of 1002

Downloaded from www.Manualslib.com manuals search engine
51 0 Exterior Trim. Bumpers
General ........................... .51 0.2 Exterior Trim ...................... 51 0-1 3
Outside Rear View Mirrors
Outside mirror glass. replacing
Outside mirror housing.
removing and installing
......
Outside mirror assemblv .
BMW emblem. removing and installing ... 510-13 .......... .51 0.2
Body side molding. replacing ........... 51 0-13 .......... .51 0.2
Radiator grill. removing and installing .... 51 0-1 4
Headlight housing trim panel.
.......... .51 0.3
removing and installing ............... 510-14 . .
removing and installing ................ .51 0.4
Bumpers ......................... .51 0.5
Front bumper assembly
............... .51 0.6
Front bumper, removing and installing
.... .51 0.7
Front bumper impact absorber. replacing
. .51 0.8
Rear bumper assembly ............... .51 0.9
Rear bumper. removing and installing
... .51 0.10
Rear bumper impact absorber. replacing
. .51 0.1 1
Front bumper height. adjusting
......... .51 0.12
Page 852 of 1002

Downloaded from www.Manualslib.com manuals search engine
-
Exterior Trim, Bumpers
This repair group includes repair information for the outside
rearview mirrors, front and rear bumpers, and the easily re-
movable exterior trim parts.
Many of the mirror components are separately available from
an authorized
BMW dealer, including the glass and outside .
plastic housing.
The
E39 models offered two types of outside mirrors, stan-
dard mirrors or automatic dip mirrors.
Outside mirror glass, replacing
CAUTIOI\C
Mirrorshould be at or above room temperature before remov-
al.
Othe~lise, small plastic parfs or glass may break.
Outside mirror glass without automatic dip control,
replacing
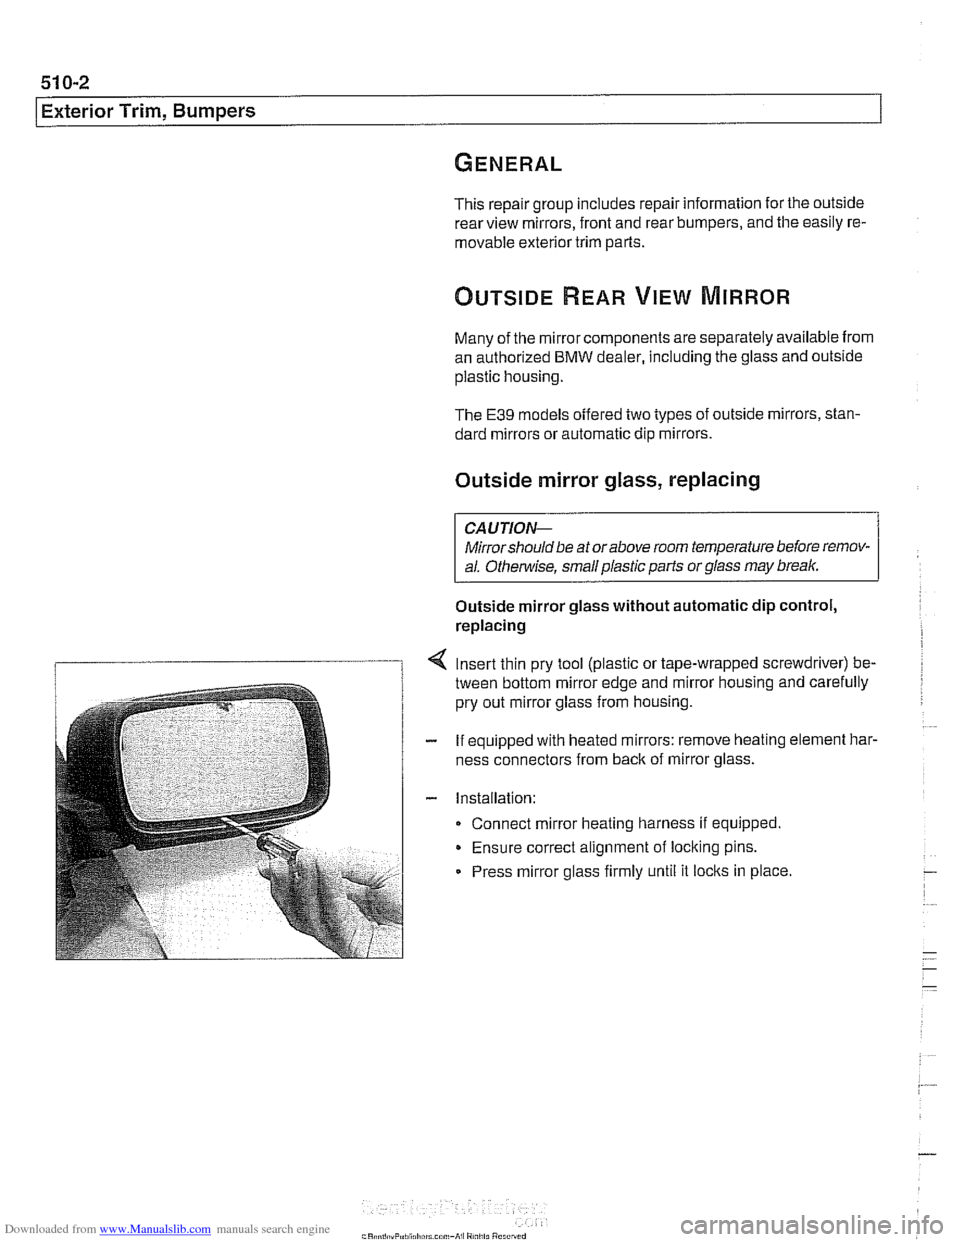
Insert thin pry tool (plastic or tape-wrapped screwdriver) be-
tween bottom mirror edge and mirror housing and carefully
pry out mirror glass from housing.
If equipped with heated mirrors: remove heating element
har.
ness connectors from back of mirror glass.
Installation: Connect mirror heating harness if equipped.
Ensure correct alignment of locking pins.
Press mirror glass firmly until it
locks in place.
Page 918 of 1002

Downloaded from www.Manualslib.com manuals search engine
51 5-24
l~entral Locking and Anti-Theft
ANTI-THEFT SYSTEM (DWA)
When the anti-then system (DWA) is armed, the doors, hood,
windows, trunk lid or tailgate are monitored against forcible
entry by switches and sensors. The vehicle is protected
against being jacked up or towed away by a tilt sensor.
The control electronics for DWA are integrated in the General
Module (GM). In addition to the control electronics, the sys-
tem includes the following components.
* DWA horn
DWA LED indicator
- Tilt sensor
- Monitoring switches and sensors
The system can be armed or disarmed from the driver's door
lock,
trunklid lock, tailgate lockorthe remote transmitter (FZV
Itey). When armed, the alarm horn
soundsfor30seconds and
the low beam headlights and turn signals flash for
5 minutes.
The electronic immobilizer (EWS) is also activated when
DWA is activated.
The alarm is switched off immediately if key is inserted in door
loclt or FZV key button is used.
DWA LED Status
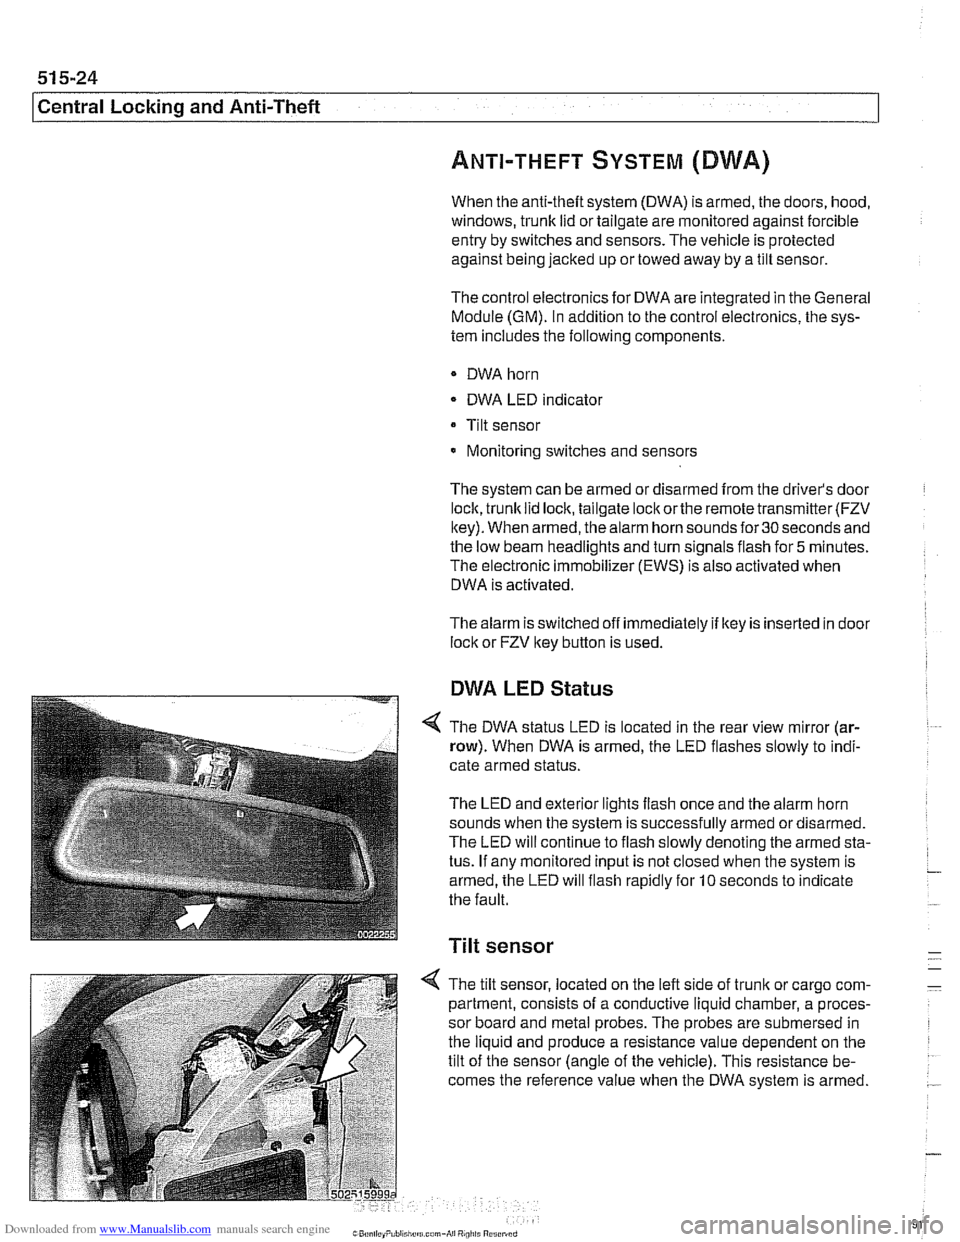
The DWA status LED is located in the rear view mirror (ar-
row). When DWA is armed, the LED flashes slowly to indi-
cate armed status.
The LED and exterior lights flash once and the alarm horn
sounds when the system is successfully armed ordisarmed.
The LED will continue to flash slowly denoting the armed sta-
tus. If any monitored input is not closed when the system is
armed, the LED will flash rapidly for
10 seconds to indicate
the fault.
Tilt sensor
-
4 The tilt sensor, located on the left side of trunlt or cargo com- -
partment, consists of a conductive liquid chamber, a proces-
sor board and metal probes. The probes are submersed in
the liquid and produce a resistance value dependent on the
tilt of the sensor (angle of the vehicle). This resistance be-
comes the reference value when the DWA system is armed.
.-