set BMW 540i 1999 E39 Workshop Manual
[x] Cancel search | Manufacturer: BMW, Model Year: 1999, Model line: 540i, Model: BMW 540i 1999 E39Pages: 1002
Page 5 of 1002
Downloaded from www.Manualslib.com manuals search engine
Foreword
For the BMW owner with basic mechanical skills and for independent auto service professionals.
this manual includes many of the specifications and procedures that were available to an
authorized BMW dealer service deoartment as this manual went to
Dress. The BMW owner with , no intention of working on his or her car will find that owning and referring to this manual makes it
possible to be better informed and to more
Itnowledgeably discuss repairs with a professional
automotive technician.
If you are a BMW owner intending to do maintenance and repair work, make sure you have
screwdrivers, a set of metric wrenches and sockets and metric Allen and
Torx wrenches, since
these basic hand tools are needed for most of the work described in
this manual. Many procedures
also require a torque wrench to ensure that fasteners are tightened properly and in accordance
with specifications. Additional information on basic tools and other tips are in
010 General. In
some cases, the text refers to special tools that are recommended or required to accomplish
adjustments or repairs. These tools are usually identified by their
BMW special tool number and
illustrated.
Disclaimer
We have endeavored to ensure the accuracy of the information in this manual. When the vast
array of data presented in the manual is
talten into account, however, no claim to infallibility can
be made. We therefore cannot be responsible for the result of any errors that may have crept into
the text. Please also read the Important Safety Notice on the copyright page at the beginning of
this book.
Prior to starting a repair procedure, read the procedure,
001 General Warnings and Cautions
and the warnigns and cautions that accompany the procedure. Reading a procedure before
beginning
work will help you determine in advance the need for specific skills, identify hazards,
prepare for appropriate capture and handling of hazardous materials, and the need for particular
tools and replacement parts such as gasltets.
Bentley Publishers encourages comments from the readers of this manual with regard to errors,
and/or suggestions for improvement of our product. These communications have been and will be
carefully considered in the preparation of this and other manuals. If you identify inconsistencies in
the manual, you may have found an error. Please contact the publisher and we will endeavor to
post applicable corrections on our
website. Posted corrections (errata) should be reviewed before
beginning
worlc. Please see the following web address:
BMW offers extensive warranties, especially on components of the fuel delivery and emission
control systems. Therefore, before deciding to repair a BMW that may be covered wholly or in part
by any warranties issued by
BMW of North America, LLC, consult your authorized BMW dealer.
You may find that the dealer can
make the repair either free or at minimum cost. Regardless of its
age, or whether it is under warranty, your BMW
Is both an easy car to service and an easy car to
get serviced. So
if at any time a repair is needed that you feel is too difficult to do yourself, a trained
BMW technician is ready to do the job for you.
Bentley Publishers
Page 7 of 1002
Downloaded from www.Manualslib.com manuals search engine
001 General Warnings and Cautions
PLEASE READ THESE WARNINGS AND CAUTIONS
BEFORE PROCEEDING
WITH MAINTENANCE AND REPAIR WORK.
WARNINGS-
See also CAUTIONS
- Some repairs may be beyond your capability. If you lack the skills, - Catch draining fuel, oil, or brake fluid in suitable containers. Do
tools and equipment, or a suitable workplace for any procedure
not use
foodor beverage containers that might mislead someone
described in this manual, we suggest you leave such repairs to
into
drinking from them. Store flammable fluids away from fire
an authorized BMW dealer service department or other qualified
hazards. Wipe up spills at once, but do not store the oily rags,
shop. which can ignite and burn spontaneously.
. Do not reuse any fasteners that are worn or deformed. Many fas- Always observe good worRshop practices. Wear qoqqles when
teners are designed to be used only once and become
unreliable you operate machine tools or work with battery acid:kloves or
and mav fail when used a second time. This includes, but is not other
~rotective clothino should be worn whenever the iob re-
limited io, nuts, bolts, washers, self-locking nuts or bolts, clrclips yires' working with harmful substances.
and cotter pins. Always replace these fasteners with new parts.
Greases, lubricants and other automotive chemicals contain toxic
. Never work under a lifted car unless it is solidly supported on
substances, many of which are absorbed directly through the
stands
desiqned for the purpose. Do not supeort a car on cinder
skin. Read the manufacturer's instructions and warninos careful-
blochs, hollow tiles orotherbrops that may drurnbie undercontin-
uous toad. Never work under a car that is supported solely by a
iack. Never work under the car
while the enqine is runninq. - -
If you aregoing to work underacaron the ground, makesure that
the ground is level. Block the wheels to
keep the car from rolling.
Disconnect the battery negative
(-) terminal to prevent others
from starting the car while you are under it.
- Never run the engine unless the work area is well ventilated. Car-
bon monoxide kills.
Rings, bracelets and other jewelry should be removed so that
they cannot cause electrical shorts, get caught in running ma-
chinery, or be crushed by heavy parts.
- Tie long hair behind your head. Do not wear a necktie, a scarf.
loose clothing, or a necklace when you work near machine tools
or running engines. if your hair, clothing, or jewelry were to get
caught in the machinery, severe injury could result.
DO not attempt to
work on your car if you do not feel well. You in-
crease the
danger of injuryto yourseliand others if you are tired,
uDset or have taken medication or anv other substance that mav
keep you from being fully alert.
Illuminate your work area adequately but safely. Use a portable
iy. Use hand and eye protection. Avoid direct skin conGct.
Disconnect the battery negative (-) terminal whenever you work
on the fuel system
orthe electrical system. Do not smokeorwork
near heaters or other fire hazards. Keep an approved fire extin-
guisher handy.
. Friction materials (such as brake pads or shoes or clutch discs)
contain asbestos fibers or other friction materials. Do not create
dust by grinding, sanding, or by cleaning with compressed air.
Avoid breathing dust. Breathing any
friclion material dust can
lead to serious diseases and may result in death.
Batteries
giveoff explosive hydrogen gas during charging. Keep
sparks, lighted matches and open flame away from the top of the
battery. If hydrogen gas escaping from the cap vents is ignited, it
will ignite gas trapped in the cells and cause the battery to ex-
plode.
Connect and disconnect battery cables, jumper cables or a bat-
tery charger only wilh the ignition switched off. Do not disconnect
the battery while the engine is running.
Do not quick-charge the battery (for boost starting) for longer
than one minute. Wait at least one minute before boosting the
battery a second time.
. . safety lighiforworking lnsideor under the car. Make sure the bulb - Do not allow battery charging vollage to exceed 16.5 volts. If the
is enclosed bv a wire caoe. The hot filament of an accidentallv
batten! beoins ~roducina oas or boilino violentiv, reduce the
broken bulb can ignite spilled
fuel, vapors or oil. , - - - charglng rate. ~oostlng a sutfaled battery at a igh charging rate
can cause an
explosion.
-
Continued on next page
Page 16 of 1002
Downloaded from www.Manualslib.com manuals search engine
(General
WARNING-
Do not rely on the transmission or the parking brake to
keep the car from rolling. They are not
a substitute forpos-
itively bloclcing the opposite wheel.
Never
work undera car that is supported only by a jaclc.
Use jack stands designed to support the car. See
Tools.
Working under car
- Disconnect negative (-) cable from battery so that car cannot
be started. Let others know what you will be doing.
CAUTION-- Prior to disconnecting the battery, read the battery discon-
nection cautions given in
001 General Cautions and
Warnings.
- Raise car slowly as described above.
- Use at least two jack stands to support car. Use jack stands
designed for the purpose of supporting a car. See Tools.
WARNING-
* A jaclc is a temporary lifting device and should not be used
alone to support the car while you are under it.
Do not use wood, concrete
blocks, or bricks to support
a
ca,: Wood may split Blocks and bricks, while strong,
are not designed for that kind of load, and may break or
- Place jaclc stands on firm, solid surface. If necessary, use a
flat board or similar solid object to provide a firm footing.
- Lower car slowly until its weight is fully supported by jack
stands. Watch to
make sure that the jack stands do not tip or
lean as the car settles on them.
- Observe all jacking precautions again when raising car to re-
move jack stands.
Page 24 of 1002
Downloaded from www.Manualslib.com manuals search engine
01 0-1 4
General
Specialty tool suppliers
Peake Research, Automotive Products Division
P.O. Box 28776
San Jose, CA 95159
408-369-0406
[email protected]
http://www.peakeresearch.com
Basic tool requirements
The basic hand tools described below can be used to accom-
plish most of the simple maintenance and repair tasks.
Screwdrivers
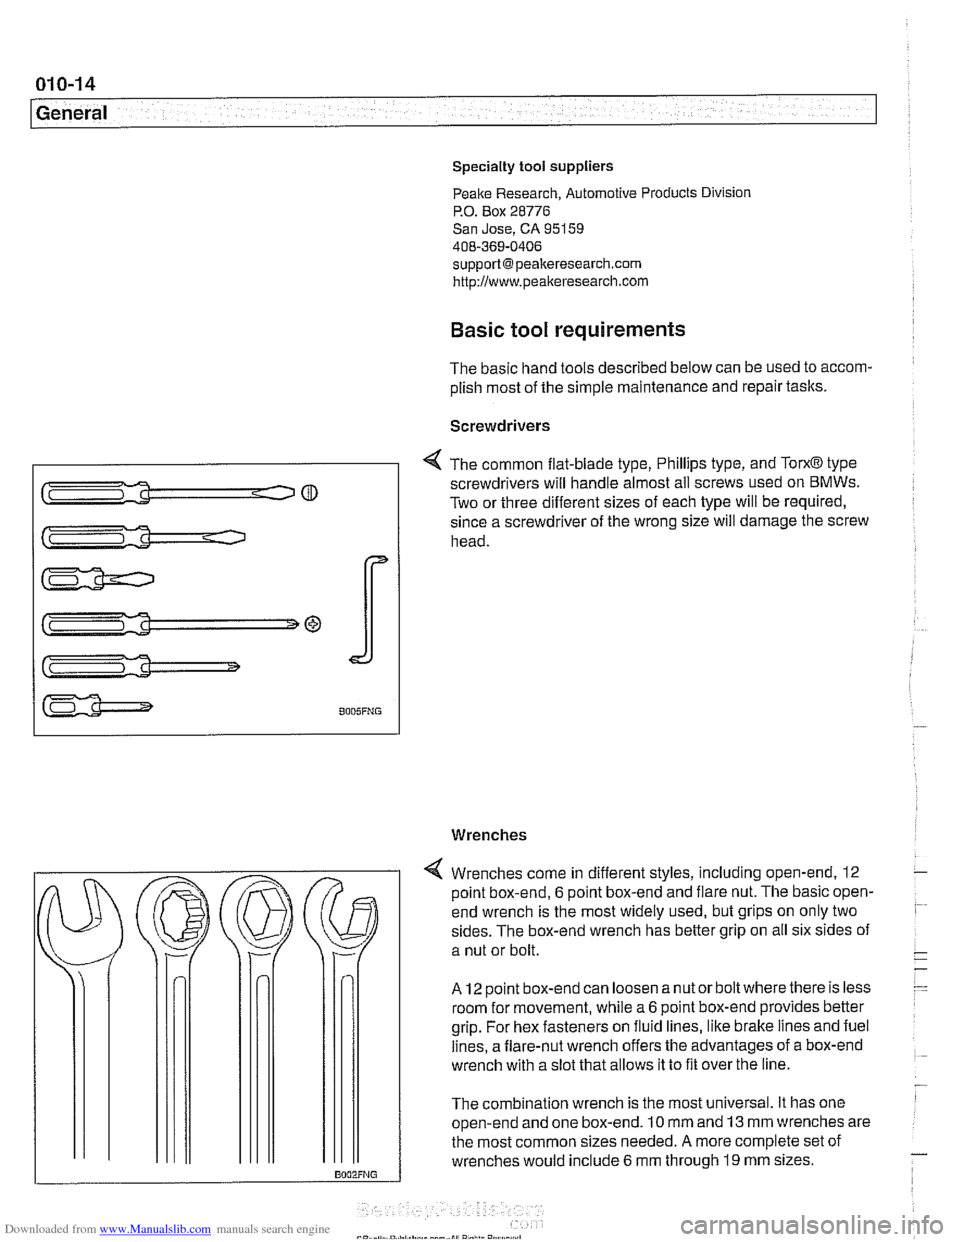
4 The common flat-blade type, Phillips type, and TorxO type
screwdrivers will handle almost all screws used on
BMWs.
Two or three different sizes of each type will be required,
since a screwdriver of the wrong size will damage the screw
head.
Wrenches
4 Wrenches come in different styles, including open-end. 12
point box-end,
6 point box-end and flare nut. The basic open-
end wrench is the most widely used, but grips on only two
sides. The box-end wrench has better grip on all six sides of
a nut or bolt.
A 12 point box-end can loosen a nut or bolt where there is less
room for movement, while
a 6 point box-end provides better
grip. For hex fasteners on fluid lines, like brake lines and fuel
lines, a flare-nut wrench offers the advantages of a box-end
wrench with a slot that allows it to fit over the line.
The combination wrench is the most universal. It has one
open-end and one box-end. 10 mm and 13 mm wrenches are
the most common sizes needed.
A more complete set of
wrenches would include
6 mm through 19 mm sizes.
Page 27 of 1002
Downloaded from www.Manualslib.com manuals search engine
.
General
Torque wrench
A torque wrench is used to precisely tighten threaded fasten-
ers to a predetermined value. Many of the repair procedures
in this manual include BMW-specified torque values
in New-
ton-meters (Nm) and the equivalent values in foot-pounds
(ft-
Ib).
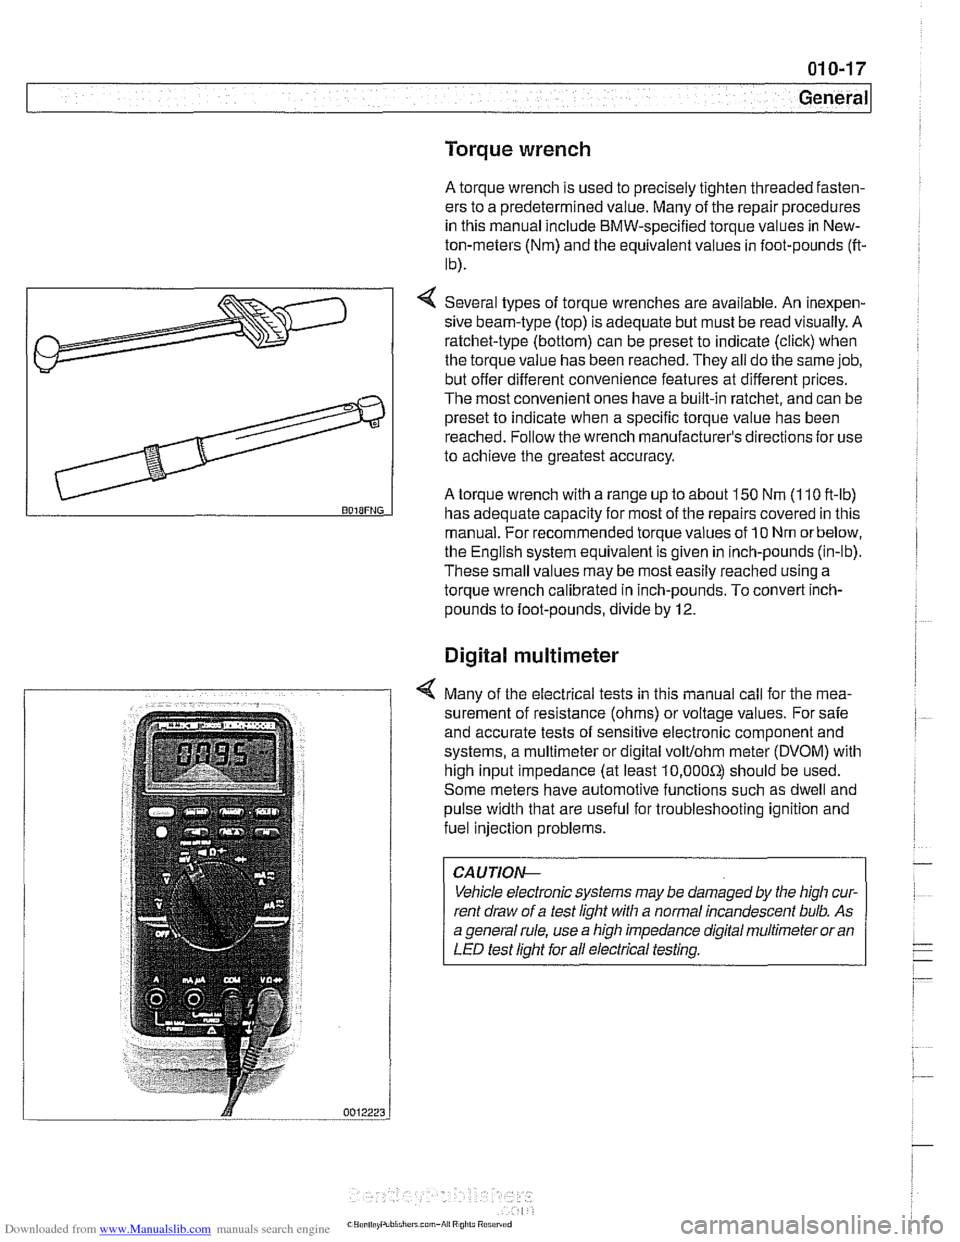
4 Several types of torque wrenches are available. An inexpen-
sive beam-type (top) is adequate but must be read visually. A
ratchet-type (bottom) can be preset to indicate (click) when
the torque value has been reached. They all do the same job,
but offer different convenience features at different prices.
The most convenient ones have a built-in ratchet, and can be
preset to indicate when a specific torque value has been
reached. Follow the wrench manufacturer's directions
for use
to achieve the greatest accuracy.
A torque wrench with a range up to about 150 Nm (1 10 ft-lb) BOIBFNG has adequate capacity for most of the repairs covered in this
manual. For recommended torque values of
10 Nm orbelow,
the English system equivalent is given in inch-pounds (in-lb).
These small values may be most easily reached using a
torque wrench calibrated in inch-pounds. To convert
inch-
pounds to foot-pounds, divide by 12.
Digital multimeter
4 Many of the electrical tests in this manual call for the mea-
surement of resistance (ohms) or voltage values. For safe
and accurate tests of sensitive electronic component and
systems, a multimeter or digital
volt/ohm meter (DVOM) with
high input impedance (at least
10,000Sr) should be used.
Some meters have automotive functions such as dwell and
pulse width that are useful for troubleshooting ignition and
fuel injection problems.
CAUTIOI\C
Vehicle electronic systems may be damaged by the high cur-
rent draw of a test light with a normal incandescent bulb. As
a general rule, use a high impedance digital multimeter or an
LED test light for all electrical testing.
Page 28 of 1002
Downloaded from www.Manualslib.com manuals search engine
-
General
BMW special tools
Many repairs covered in this manual call for the use of BMW
special tools. Many of the BMW special tools mentioned in
this manual are simply the best thing to use to do the job cor-
rectly. In these cases, the tool is identified with a
BMW parl
number. See your authorized BMW dealer parts department
for information on how to order special tools.
There are some jobs for which expensive special tools are es-
sential, and not a cost-effective purchase for a one time repair
by the do-it-yourself owner. This manual includes such re-
pairs for the benefit of those with the necessary experience
and access to tools. For the do-it-yourselfer, the need for spe-
cial tools is noted in the text, and whether or not BMW dealer
service is recommended.
Changing a tire
- Stop car on as flat a surface as possible, in a place where you
can be easily seen by other drivers. Avoid stopping just over
the crest of a hill.
WARNING -
If a tire goes flat while driving, pull well off the road. Changing
a tire on a busy slreet or liigliway is very dangerous. If
nec-
essag drive a short distance on the flat tire to get to a safe
place. It is much better to ruin a tire or rim than to
risk being
hit.
-
- Turn on emergency flashers, and set out flares or emergency
markers well behind car.
Choclc wheel (wheel chock located
in trunk) diagonally opposite to the one being changed. Pas-
sengers should get out of car and stand well away from road.
- Take jaclc and tools from tool area beneath trunk mat. Re-
move spare tire from tire storage tray.
- Loosen wheel bolts while car is on ground, but leave them a
little snug.
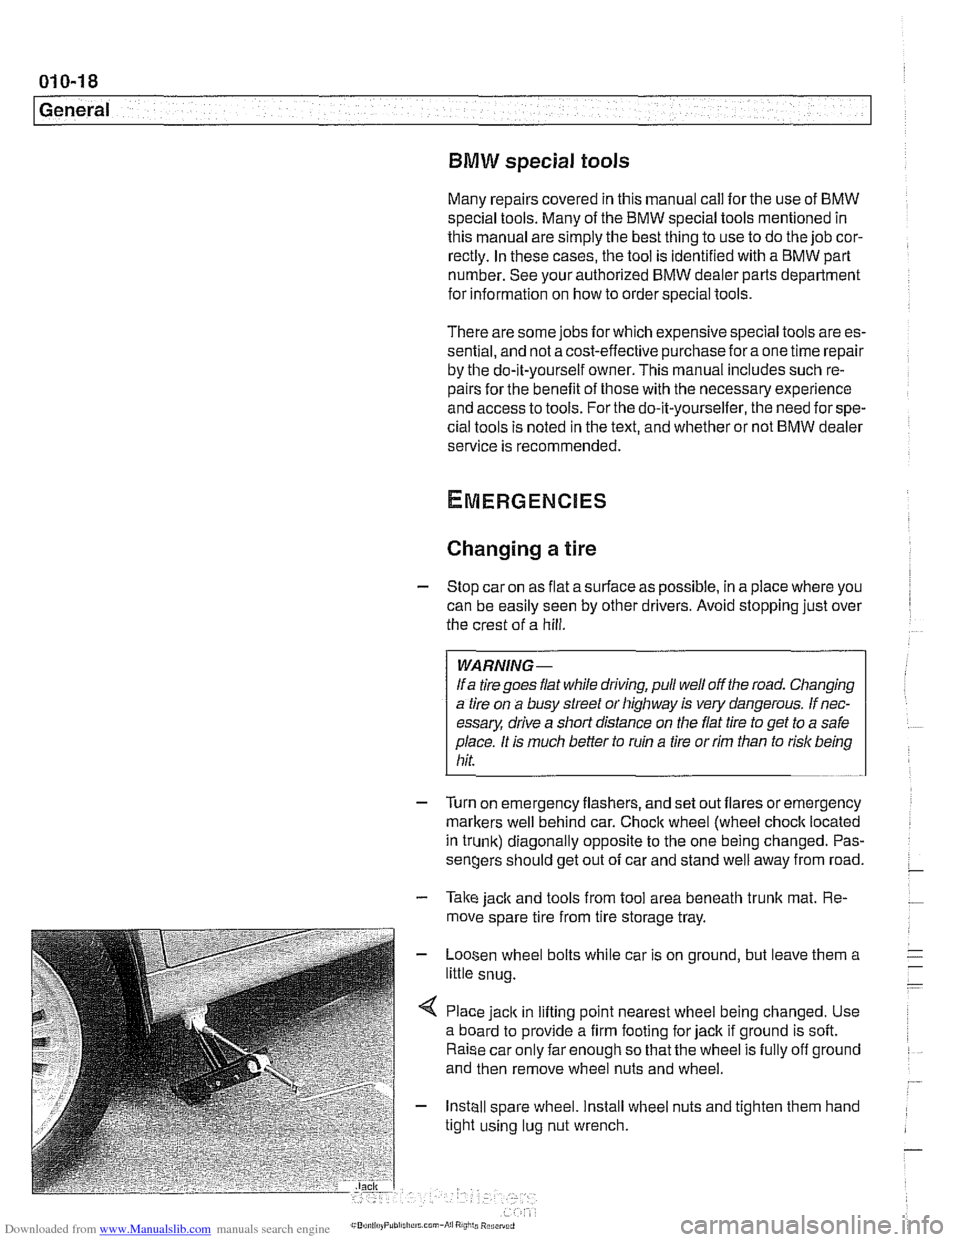
< Place jack in lifting point nearest wheel being changed. Use
a board to provide a firm footing for jack if ground is soft.
Raise car only far enough so that the wheel is fully off ground
and then remove wheel nuts and wheel.
- Install spare wheel. Install wheel nuts and tighten them hand
tight using lug nut wrench.
Page 31 of 1002
Downloaded from www.Manualslib.com manuals search engine
Spare parts kit
Carrying a basic set of spare parts can prevent a rninorbreak-
down from turning into a major repair annoyance. The list be-
low is a good place to start.
Spare parts kit
- basic
Polyribbed drive
belt(s)
BMW engine oil: one or two quarts
BMW engine coolant:
1 gallon of premixed 50150 BMW
anti-freeze and water
Fuse assortment:
7.5A. IOA, 1 5A, 20A, 30A. 50A
Radiator hoses: upper and lower
Spare parts
kit - additional contents
Exterior lighting bulbs: headlight, bralte light, turn signal,
and taillight
* Wiper blades or blade inserts
Brake fluid: new, unopened bottle, DOT
4 specification
Main relay for DME system
Page 33 of 1002
Downloaded from www.Manualslib.com manuals search engine
020 Maintenance
General ........................... .02 0.2
Special tools ........................ .02 0.2
Service Interval Indicator (Sll) ........... .02 0.3
Service Interval Indicator (Sll), resetting ... .02 0.3
Inspection I, Inspection 11 ............... .02 0.5
Maintenance Tables ................ .02 0.6
Fluid and Lubricant Specifications .. .02 0.9
Fluids and lubricants ................. .02 0.10
Engine Oil Service ................ .02 0.1 I
Engine oil. checking level ............. .02 0.12
Engine oil and filter. changing .......... .02 0-13
Engine Compartment Maintenance . .02 0.14
Accelerator and linkage ............... .02 0.14
Air filter. replacing ................... .02 0.1 4
Cooling system service ............... .02 0.15
Engine drive belt service .............. .02 0.16
Idlespeed .......................... 020-19
Catalytic converter and oxygen sensors .. .02 0.19
Power steering fluid, checking level ..... .02 0.20
Spark plugs ........................ .02 0.20
Spark plugs, replacing ................ .02 0.21
Interior ventilation microfilter, replacing ... .02 0.22
Other Mechanical Maintenance ..... .02 0.22
Battery, checking. cleaning. and replacing .02 0-22
Brake fluid. replacing ................. .02 0-24
Brake pad 1 rotor wear. checking ........ .02 0.24
Brake system, inspecting ............. .02 0.25
Parking brake. checking ............... 020-25
Clutch fluid. checking ................. 020-26
Differential oil level. checking ........... 020-26
Drive axle joint (CV joint) boots. inspecting 020-27
Exhaust system. inspecting ............ 020-27
Fuel filter. replacing .................. 020-27
Fuel tank and fuel lines. inspecting ...... 020-28
Suspension. front. inspecting ........... 020-29
Suspension. rear. inspecting ........... 020-29
Tires. checking inflation pressure ........ 020-29
Tires. rotating ....................... 020-29
Transmission service. automatic ........ 020-29
Transmission service. manual .......... 020-30
Transmission fluid. checking and filling
(manual transmission)
................ 020-30
Wheels. aligning ..................... 020-30
Body and Interior Maintenance ..... 020-31
Body and hinges. lubricating ........... 020-31
Exterior washing ..................... 020-31
Interior care ........................ 020-31
Leather upholstery and trim ............ 020-31
Polishing ........................... 020-32
Seat belts .......................... 020-32
Special cleaning ..................... 020-32
Washing chassis ..................... 020-32
Waxing ............................ 020-32
Windshield wiper blade maintenance ..... 020-33
Page 35 of 1002
Downloaded from www.Manualslib.com manuals search engine
Maintenance
Service Interval lndicator (Sll)
The BMW Service Interval lndicator (SII) notifies the driver
when oil change and other service is required. The
Sll dis-
plays the phrase "OIL SERVICE"
or"INSPECTI0N" and 7
light emitting diodes (LEDs) in the Instrumentcluster: 5green,
one yellow and one red.
For the
1997 and later 5 Series, BMW introduced an oil
change interval based on fuel consumption. The advantages
of this system are:
Fuel consumption is an accurate method of determining
engine load and the need for service.
The processing electronics are simple.
Resetting of indicator before the scheduled time will not
affect the time to the next service.
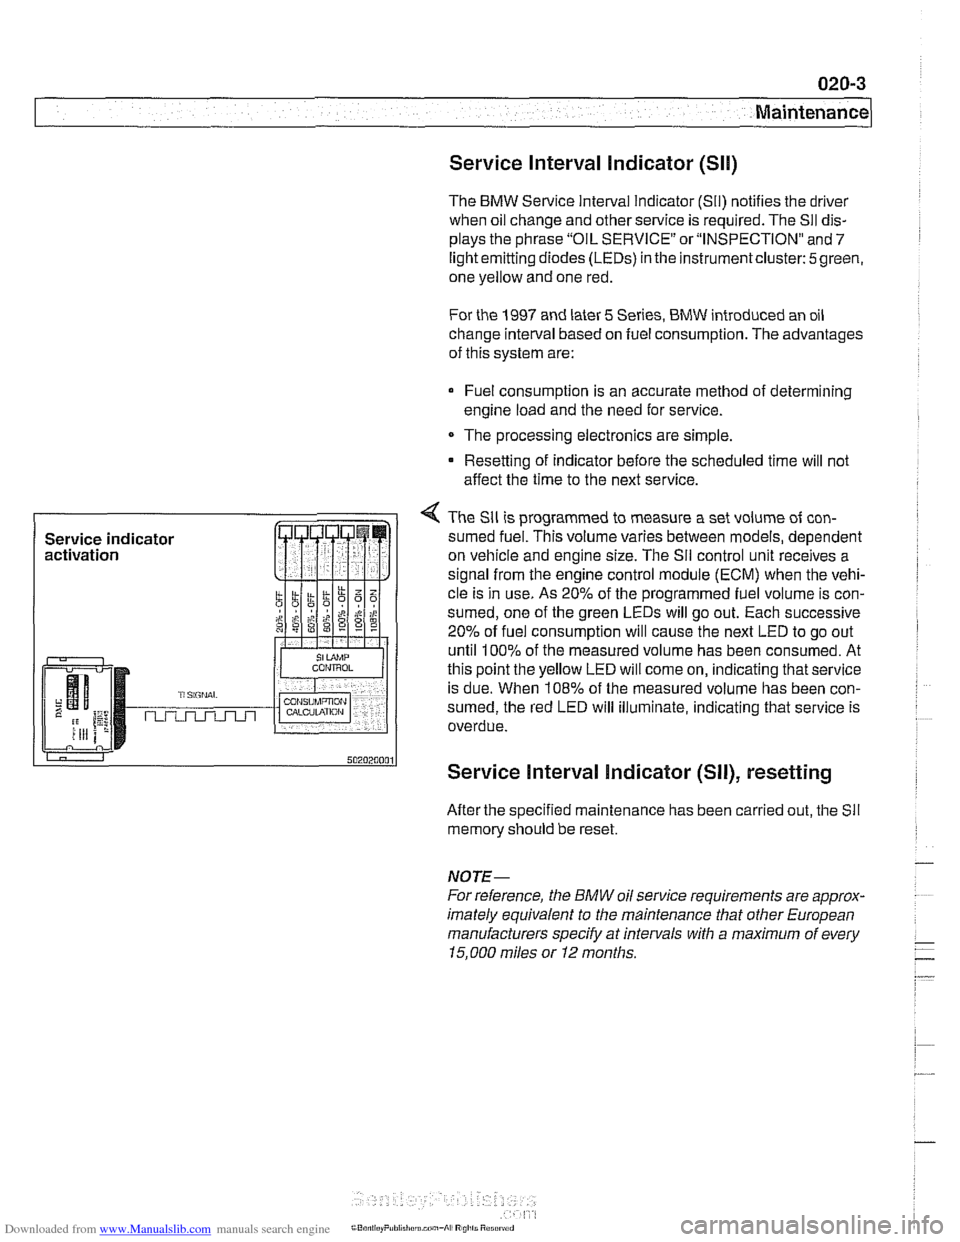
4 The Sll is programmed to measure a set volume of con-
sumed fuel. This volume varies between models, dependent
on vehicle and engine size. The
Sil control unit receives a
signal from the engine control module (ECM) when the vehi-
cle is in use. As
20% of the programmed fuel volume is con-
sumed, one of the green LEDs will go out. Each successive
20% of fuel consumption will cause the next LED to go out
until
100% of the measured volume has been consumed. At
this point the yellow LED will come on, indicating that service
is due. When
108% of the measured volume has been con-
sumed, the red LED will illuminate, indicating that service is
overdue.
Service Interval Indicator (SII), resetting
After the specified maintenance has been carried out, the Sll
memory should be reset.
NOTE-
For reference, the BMW oil service requirements are approx-
imately equivalent to the maintenance tliat other European
manufacturers specify at intervals with a maximum of every
15.000 miles or I2 months.
Page 36 of 1002
Downloaded from www.Manualslib.com manuals search engine
020-4
Maintenance
1997 to 2000 models
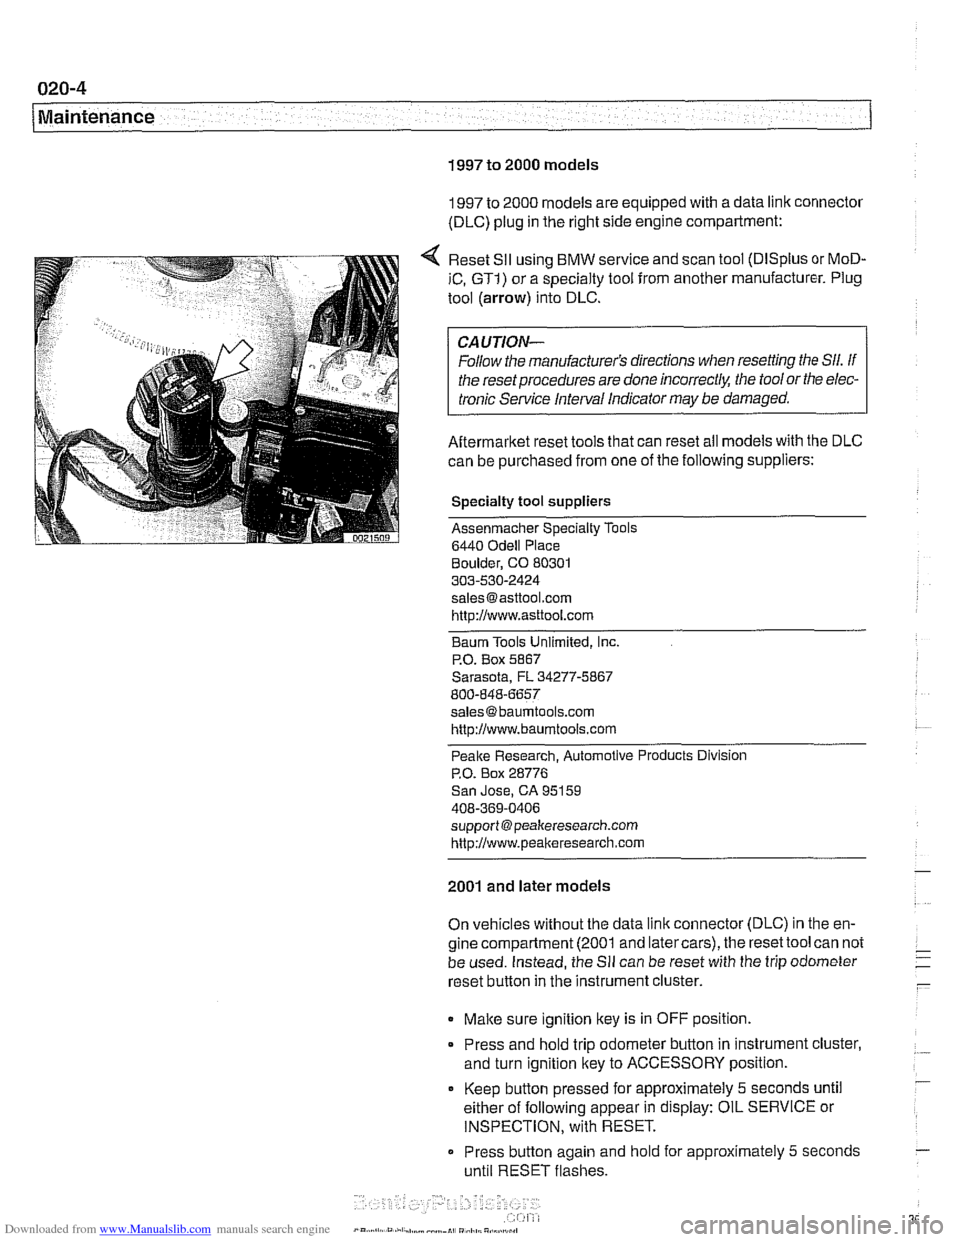
1997 to 2000 models are equipped with a data link connector
(DLC) plug in the right side engine compartment:
Reset
SII using BMW service and scan tool (DISplus or MoD-
iC, GTI) or a specialty tool from another manufacturer. Plug
tool (arrow) into DLC.
CAUTION-
Follow the manufacturer's directions when resetting the Sll. If
the reset procedures are done
incorrect& the tool or the elec-
tronic Service Interval Indicator
may be damaged.
Aftermarket reset tools that can reset all models with the DLC
can be purchased from one of the following suppliers:
Specialty tool suppliers
Assenmacher Specialty Tools
6440
Odell Place
Boulder, CO 80301
303-530-2424
[email protected] http://www.asttool.com
Baum Tools Unlimited,
Inc.
P.O. Box 5867
Sarasota, FL 34277-5867
800-848-6657
[email protected]
http://www.baumtools.com
Peake Research. Automotive Products Division
P.O. Box 28776
San Jose, CA 95159
408-369-0406
support @peakeresearch.com
http://www.peal~eresearch.com
2001 and later models
On vehicles without the data link connector (DLC) in the en-
gine compartment (2001 and latercars), the reset tool can not
be used. Instead, the
Sll can be reset with the trip odometer
reset button in the instrument cluster.
Make sure ignition key is in OFF position.
* Press and hold trip odometer button in instrument cluster,
and turn ignition key to ACCESSORY position.
Keep
button pressed for approximately 5 seconds until
either of following appear in display: OIL SERVICE or
INSPECTION, with RESET.
Press button again and
hold for approximately 5 seconds
until RESET flashes.