tow BMW 540I SEDAN 2001 Owners Manual
[x] Cancel search | Manufacturer: BMW, Model Year: 2001, Model line: 540I SEDAN, Model: BMW 540I SEDAN 2001Pages: 238, PDF Size: 2.44 MB
Page 12 of 238
Contents
Operation, care and maintenance
Owner service procedures
Advanced technology
Under the hood:
Hood159
Engine compartment160
Washer fluids164
Washer nozzles164
Engine oil165
Coolant167
Brake fluid168
Vehicle Identification
Number169
Care and maintenance:
The BMW Maintenance
System170
Caring for your car171
Airbags176
Vehicle storage176
Laws and regulations:
Technical modifications177
California Proposition
65 Warning177
OBD interface socket178
Replacement procedures:
Onboard tool kit182
Wiper blades182
Lamps and bulbs183
Changing a wheel190
Battery193
Fuses196
In case of electrical
malfunction:
Fuel filler door198
Sliding/Tilt sunroof198
Tailgate199
Assistance, giving and
receiving:
Jump-starting200
Towing the vehicle201Airbags206
Adaptive Transmission Control
(ATC)207
Automatic Stability Control plus
Traction (ASC+T)/Dynamic
Stability Control (DSC)208
BMW active seat210
Safety belt tensioner210
DSP sound system211
Mirrors with automatic
dimmer211
Rain sensor212
Tire Pressure Control (RDC)213
Integrated rear suspension214
Level control system214
Xenon lamps215
Page 47 of 238
IndexDataTechnologyRepairsCar careControlsOverview
47n
Alarm systemThe conceptThe vehicle alarm system responds:
>When a door, the hood or the lug-
gage compartment lid/tailgate is
opened.
>To movement inside the vehicle
(interior motion sensor).
>To variations in the vehicle tilt sensor
such as occur during attempts to
steal the wheels or tow the vehicle.
>To interruption of battery voltage.
The system responds to unauthorized
vehicle entry and attempted theft by
simultaneously activating the following:
>Sounding an acoustical alarm for
30 seconds.
>The hazard warning flashers are
activated for approx. five minutes.
>The high beams flash on and off in
the same rhythm.
To arm and disarm the
alarm systemWhen the vehicle is locked or unlocked
with the key or the remote control, the
alarm system is also simultaneously
armed or disarmed.
The interior motion sensor is activated
approx. 30 seconds after you have fin-
ished locking the car.
The system indicates that it has been
correctly armed by switching on the
hazard flashers for a single cycle and by
emitting an acoustical signal.
You can have different acknowl-
edgment signals set to confirm
arming and disarming.<
When the system is armed, you can still
gain access to the luggage compart-
ment lid/tailgate by pressing button 3
on the remote control (refer to page 41).
When you close the luggage compart-
ment lid/tailgate, it locks again.
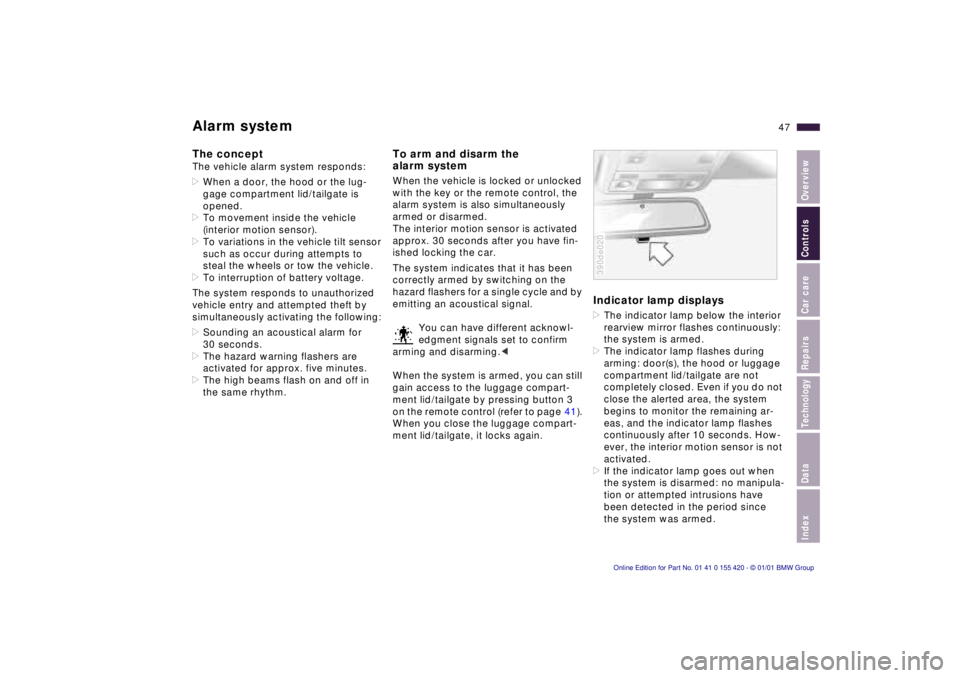
Indicator lamp displays>The indicator lamp below the interior
rearview mirror flashes continuously:
the system is armed.
>The indicator lamp flashes during
arming: door(s), the hood or luggage
compartment lid/tailgate are not
completely closed. Even if you do not
close the alerted area, the system
begins to monitor the remaining ar-
eas, and the indicator lamp flashes
continuously after 10 seconds. How-
ever, the interior motion sensor is not
activated.
>If the indicator lamp goes out when
the system is disarmed: no manipula-
tion or attempted intrusions have
been detected in the period since
the system was armed.390de020
Page 51 of 238
IndexDataTechnologyRepairsCar careControlsOverview
51n
Sliding/Tilt sunroof
*
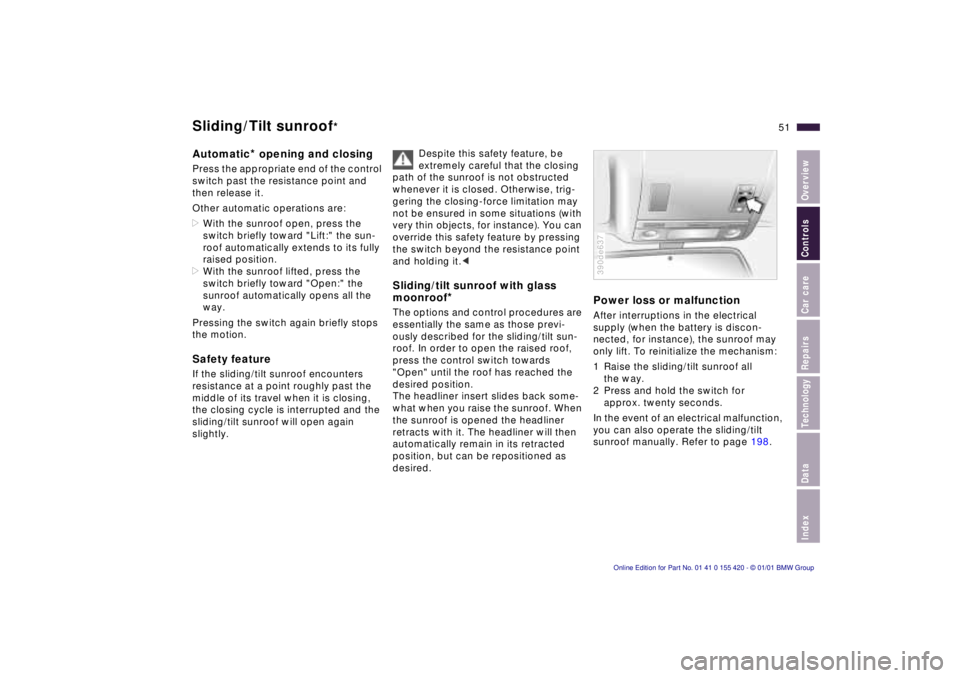
Automatic
* opening and closing
Press the appropriate end of the control
switch past the resistance point and
then release it.
Other automatic operations are:
>With the sunroof open, press the
switch briefly toward "Lift:" the sun-
roof automatically extends to its fully
raised position.
>With the sunroof lifted, press the
switch briefly toward "Open:" the
sunroof automatically opens all the
way.
Pressing the switch again briefly stops
the motion.Safety featureIf the sliding/tilt sunroof encounters
resistance at a point roughly past the
middle of its travel when it is closing,
the closing cycle is interrupted and the
sliding/tilt sunroof will open again
slightly.Despite this safety feature, be
extremely careful that the closing
path of the sunroof is not obstructed
whenever it is closed. Otherwise, trig-
gering the closing-force limitation may
not be ensured in some situations (with
very thin objects, for instance). You can
override this safety feature by pressing
the switch beyond the resistance point
and holding it.<
Sliding/tilt sunroof with glass
moonroof
*
The options and control procedures are
essentially the same as those previ-
ously described for the sliding/tilt sun-
roof. In order to open the raised roof,
press the control switch towards
"Open" until the roof has reached the
desired position.
The headliner insert slides back some-
what when you raise the sunroof. When
the sunroof is opened the headliner
retracts with it. The headliner will then
automatically remain in its retracted
position, but can be repositioned as
desired.
Power loss or malfunctionAfter interruptions in the electrical
supply (when the battery is discon-
nected, for instance), the sunroof may
only lift. To reinitialize the mechanism:
1 Raise the sliding/tilt sunroof all
the way.
2 Press and hold the switch for
approx. twenty seconds.
In the event of an electrical malfunction,
you can also operate the sliding/tilt
sunroof manually. Refer to page 198.390de637
Page 57 of 238
IndexDataTechnologyRepairsCar careControlsOverview
57n
Mirrors
The mirror on the passenger's
side features a lens with a more
convex surface than the mirror installed
on the driver's side. When estimating
the distance between yourself and
other traffic, bear in mind that the
objects reflected in the mirror are
closer than they appear. This means
that estimations of the distance to
following traffic should not be regarded
as precise.<
Electric heatersBoth mirrors are heated automatically
with the ignition key in position 2.
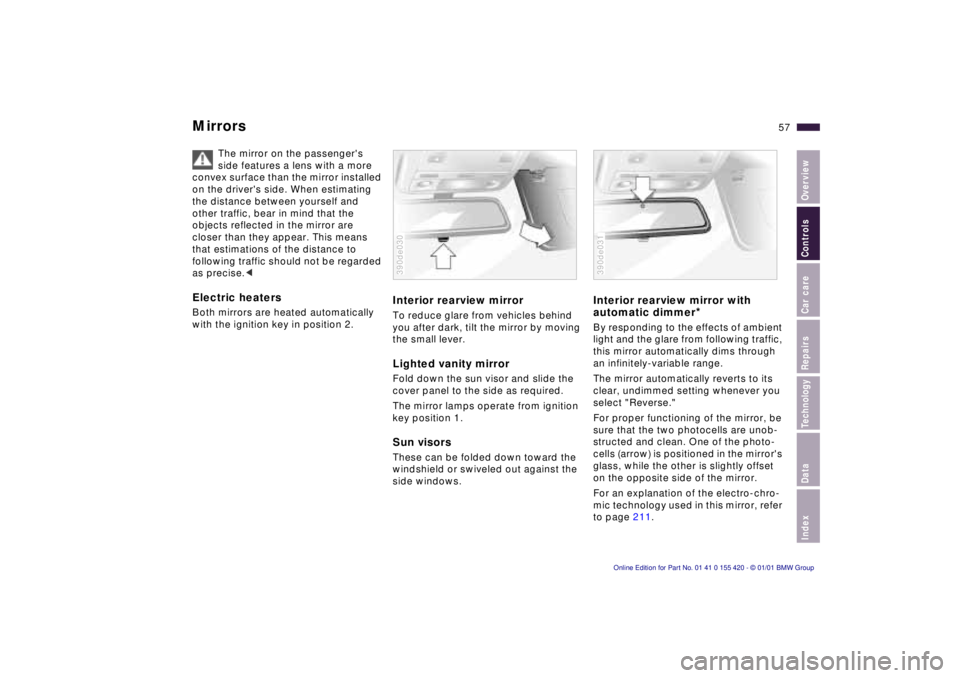
Interior rearview mirrorTo reduce glare from vehicles behind
you after dark, tilt the mirror by moving
the small lever.Lighted vanity mirrorFold down the sun visor and slide the
cover panel to the side as required.
The mirror lamps operate from ignition
key position 1.Sun visorsThese can be folded down toward the
windshield or swiveled out against the
side windows.390de030
Interior rearview mirror with
automatic dimmer
*
By responding to the effects of ambient
light and the glare from following traffic,
this mirror automatically dims through
an infinitely-variable range.
The mirror automatically reverts to its
clear, undimmed setting whenever you
select "Reverse."
For proper functioning of the mirror, be
sure that the two photocells are unob-
structed and clean. One of the photo-
cells (arrow) is positioned in the mirror's
glass, while the other is slightly offset
on the opposite side of the mirror.
For an explanation of the electro-chro-
mic technology used in this mirror, refer
to page 211.390de031
Page 74 of 238
74n
Automatic transmission
*
Electronic transmission control
module
If the indicator lamp comes on
or if the message "TRANS.
FAILSAFE PROG" appears in
the Check Control
*, there is a malfunc-
tion in the transmission system.
Bring the vehicle to a stop, select the
"Park" position, apply the parking brake
and shut the engine off (ignition key po-
sition 0). Restart the engine after a few
seconds. If the indicator lamp goes out
again after a few seconds, the normal
transmission functions have been re-
stored. You may continue to drive as
usual.
If the indicator lamp does not go out,
you can place the selector lever in all
positions. However, the vehicle will now
only drive forward with limited gear
selection.
Under these circumstances, avoid ex-
treme engine loads and consult the
nearest BMW center.
Do not work in the engine com-
partment when a drive gear (for-
ward or reverse) is engaged. If you do
this, the vehicle could move.<
For jump-starting, towing and tow-
starting, refer to pages 200 and 201.
Page 77 of 238
IndexDataTechnologyRepairsCar careControlsOverview
77n
Automatic transmission with Steptronic
*
Upshifts or downshifts will be carried
out by the ATC only at appropriate
engine speeds and road speeds. For
instance, if engine speed is too high, a
downshift will not be executed. The
gear selected will appear briefly in the
instrument cluster followed by the
current gear.
If you are driving in the manual
mode and wish to accelerate
rapidly from low road speeds (when
passing, for instance), you must shift
down manually or with the "Kickdown"
function.<
You can only change from "M/S" to
selector lever positions "P," "R," and
"N" via the "D" position.
In the following situations, the Step-
tronic "thinks" for you in the manual
mode:
>In order to prevent engine over-
speeding, the transmission shifts
automatically to the next higher gear.
shortly before the RPM cutoff point
>At low speeds, the transmission
shifts down automatically – you do
not have to act.
>In the "Kickdown" mode, the trans-
mission shifts down to the lowest
gear which is possible, depending on
the engine speed.
>According to the situation, for
instance in wintry conditions, the
vehicle can be started in 2nd or
3rd gear.Electronic transmission control
module
If the indicator lamp comes on
or the message "TRANS.FAIL-
SAFE PROG" appears in the
Check Control
*, there is a fault in the
transmission system.
Bring the vehicle to a stop. Move the
transmission selector lever to "P." Set
the parking brake and turn the engine
off (ignition key to position 0).
Wait a few seconds, then start the
engine.
If the indicator lamp goes out after a
few seconds, normal transmission
performance has been restored. You
may continue to drive as usual. If the
indicator lamp does not go out, you can
place the selector lever in all positions.
However, the vehicle will now only drive
forward with limited gear selection.
If this happens, avoid extreme engine
loads and consult the nearest BMW
center.
Do not work in the engine com-
partment when a drive gear (for-
ward or reverse) is engaged. If you do
this, the vehicle could move.<
For jump-starting, towing and tow-
starting, refer to pages 200 and 201.
Page 101 of 238
IndexDataTechnologyRepairsCar careControlsOverview
101n
Park Distance Control (PDC)
*
The PDC does not remove the
driver's personal responsibility
for evaluating the distance between the
vehicle and any obstacles. Even when
sensors are involved, there is a blind
spot in which objects cannot be de-
tected. This applies especially in those
cases where the system approaches
the physical limits of ultrasonic mea-
surement, as occurs with tow bars and
trailer couplings, and in the vicinity of
thin and painted objects.
Certain sources of sound, such as a
loud radio, could drown the PDC signal
tone.<
Keep the sensors clean and free
of ice or snow in order to ensure
that they continue to operate effectively.
Do not apply high pressure spray to the
sensors for a prolonged period of time.
Maintain an adequate distance of more
than approx. 4 in (10 cm).<
Page 109 of 238
IndexDataTechnologyRepairsCar careControlsOverview
109n
Air conditioner1 Air flow directed toward the wind-
shield and side windows
2 Air flow for the upper body
The side rotary dials allow you to
open and close the air supply over
an infinitely-variable range, while
the levers change the airflow direc-
tion. The center rotary dial controls
the temperature of the air as it flows
out, refer to page 111
3 Front footwell ventilation
4 Rear footwell ventilation
5 Airflow for the upper body in
the rear111
6 Temperature110
7 Air distribution toward
>the windows
>the upper body
>the footwell
All intermediate settings are
possible. Refer to page 110
8 Air supply110
The climate control is active when
the blower is switched on
9 Rear window defroster110
10 Cooling110
11 Recirculated air mode111
Page 110 of 238
110n
Air conditionerTips for a pleasant driving
experienceTemperature 6 is recommended for a
comfortable setting at 707 (226).
Turn the air distribution 7 to the
"6 o'clock" position. Adjust the air sup-
ply 8 to the center setting. Set the out-
lets 2 so that the air flows past you and
is not directed straight at you. Set the
rotary dial between the outlets 2 for the
upper body to a central position so that
cooler air helps prevent fatigue during
the journey.
The following description will lead you
through additional individual adjust-
ments.Temperature
The graduations on the dial
provide general reference val-
ues for the interior tempera-
ture. We recommend 707
(226) as a comfortable setting. When
you start the vehicle, this system ad-
justs the air to the selected temperature
as quickly as possible, and then main-
tains that temperature constantly.
Air distribution
You can direct air to flow onto
the windows , toward the
upper body and into the
footwell . You can also
select all intermediate settings. In the
setting, there is a low flow of air onto
the windows to keep them free of con-
densation. The "6 o'clock" setting is
recommended for normal conditions
(refer to the illustration and overview on
page 108).
Air supply
You can adjust the air supply
over an infinitely-variable
range. The heating and venti-
lation become increasingly
effective as the air supply settings are
increased. In the "0" setting, the blower
and climate control are switched off
and the outside air supply is blocked.
Rear window defroster
When the rear window de-
froster is activated, the indi-
cator lamp comes on. The rear window
defroster switches off automatically.
Cooling
The air is cooled and dehu-
midified and – depending on
the temperature setting – warmed again
with the air conditioner system
switched on. Depending on the
weather, the windshield may fog over
briefly when the engine is started.
Switch off the air conditioner at outside
temperatures below approx. 427
(56). This will help to prevent the
windows from fogging up.
If the windows fog over after switching
the air conditioner off, switch it back
on.
Condensation forms in the air
conditioner system during opera-
tion, which then exits under the vehicle.
Traces of condensed water of this kind
are thus normal.<
Page 111 of 238
IndexDataTechnologyRepairsCar careControlsOverview
111n
Air conditionerRecirculated air mode
If there are unpleasant
odors in the outside air, you
can temporarily block the flow of air.
The system then recirculates the air
currently within the vehicle
If you have a multifunction steering
wheel with the button for recirculated
air, you can also use this button to
switch to the recirculated air mode
(refer to page 25).
If the windows fog over in the re-
circulated air mode, switch the re-
circulated air off and increase the air
supply as required.<
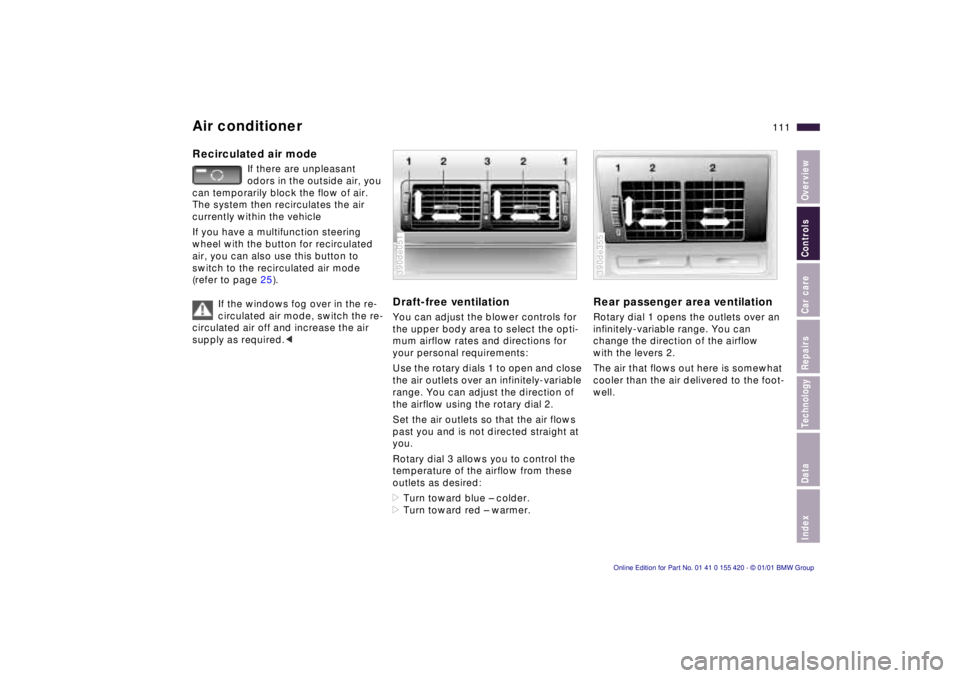
Draft-free ventilation You can adjust the blower controls for
the upper body area to select the opti-
mum airflow rates and directions for
your personal requirements:
Use the rotary dials 1 to open and close
the air outlets over an infinitely-variable
range. You can adjust the direction of
the airflow using the rotary dial 2.
Set the air outlets so that the air flows
past you and is not directed straight at
you.
Rotary dial 3 allows you to control the
temperature of the airflow from these
outlets as desired:
>Turn toward blue – colder.
>Turn toward red – warmer.390de051
Rear passenger area ventilationRotary dial 1 opens the outlets over an
infinitely-variable range. You can
change the direction of the airflow
with the levers 2.
The air that flows out here is somewhat
cooler than the air delivered to the foot-
well.390de355