alarm BMW 540I SEDAN 2002 Owners Manual
[x] Cancel search | Manufacturer: BMW, Model Year: 2002, Model line: 540I SEDAN, Model: BMW 540I SEDAN 2002Pages: 186, PDF Size: 2.77 MB
Page 4 of 186

Contents
© 2001 Bayerische Motoren Werke
Aktiengesellschaft
Munich, Germany
Reprinting, including excerpts, only with the
written consent of BMW AG, Munich.
Order No. 01 41 0 156 213
US English VIII/2001
Printed in Germany
Printed on environmentally friendly paper
(bleached without chlorine, suitable for recycling).
Overview
Controls and features
Cockpit14
Instrument cluster15
Indicator and warning lamps19
Steering wheel with multifunction
buttons22
Warning triangle23
First-aid kit23
Refueling24
Fuel specifications25
Tire inflation pressure26
Locks and security systems:
Keys32
Central locking system32
Opening and closing Ð via the
door lock33
Opening and closing Ð via the
remote control34
Opening and closing Ð from the
inside37
Luggage compartment lid/
Tailgate38
Rear window40
Luggage compartment42
Alarm system42
Electric power windows44
Sliding/tilt sunroof46
Adjustments:
Correct sitting posture48
Seats48
Manually-adjusted seat49
Electric power seats50
Head restraints52
BMW actice seat52
Safety belts53
Seat, mirror and steering wheel
memory54
Seat heating55
Adjusting steering wheel56
Heated steering wheel56
Mirrors57
Passenger safety systems:
Airbags58
Transporting children safely61
Vehicle Memory, Key
Memory64
Driving:
Steering/Ignition lock66
Starting the engine66
Switching off the engine68
Parking brake68
Manual transmission69
Automatic transmission70
Automatic transmission with
Steptronic73
Indicator/Headlamp flasher76
Washer/Wiper system/Rain
sensor76
Cruise control78
Everything under control:
Odometer, outside temperature
display80
Tachometer81
Energy control81
Fuel gauge81
Coolant temperature gauge82
Service Interval Display82
Check Control83
Computer86
Multi-Information Display
(MID)87
Digital clock in the MID89
Computer in the MID91
Contents
Page 10 of 186
10n
For your own safety
Use unleaded gasoline only. Fuels
containing up to and including
10 % ethanol or other oxygenates with
up to 2.8 % oxygen by weight (i.e. 15 %
MTBE or 3 % methanol plus an equiva-
lent amount of co-solvent) will not void
the applicable warranties covering
defects in materials or workmanship.
Field experience has indicated signifi-
cant differences in fuel quality (volatility,
composition, additives, etc.) among
gasolines offered for sale in the United
States and Canada. The use of poor-
quality fuels may result in driveability,
starting and stalling problems, espe-
cially under certain environmental
conditions, such as high ambient
temperature and high altitude.
Should you encounter driveability prob-
lems that you suspect could be related
to the fuel you are using, we recom-
mend that you respond by switching to
a recognized high-quality brand.
Failure to comply with these recom-
mendations may result in unscheduled
maintenance.
Follow all applicable safety rules when
you are handling gasoline.
<
Important safety information!
For your own safety, use genuine parts
and accessories approved by BMW.
When you purchase accessories tested
and approved by BMW and Original
BMW Parts, you simultaneously acquire
the assurance that they have been thor-
oughly tested by BMW to ensure
optimum performance when installed
on your vehicle.
BMW warrants these parts to be free
from defects in material and workman-
ship.
BMW will not accept any liability for
damage resulting from installation of
parts and accessories not approved by
BMW.
BMW cannot test every product from
other manufacturers to confirm that it
can be used on a BMW safely and
without risk to either the vehicle, its
operation, or its occupants.
Original BMW Parts, BMW Accessories
and other products approved by BMW,
together with professional advice on
using these items, are available from all
BMW centers.
Installation and operation of non-BMW
approved accessories such as alarms,
radios, amplifiers, radar detectors,
wheels, suspension components, brake
dust shields, telephones (including
operation of any portable cellular phone
from within the vehicle without using an
externally-mounted antenna) or trans-
ceiver equipment (for instance, CBs,
walkie-talkie, ham radio or similar
accessories) may cause extensive
damage to the vehicle, compromise its
safety, interfere with the vehicle's elec-
trical system, or affect the validity of the
BMW Limited Warranty. See your BMW
center for additional information.
<
Maintenance, replacement, or
repair of the emission control
devices and systems may be performed
by any automotive repair establishment
or individual using any certified auto-
motive part.
<
Symbol on vehicle parts
Indicates that you should consult
the relevant section of this
Owner's Manual for information on a
particular part or assembly.
For your own safety
Page 32 of 186
32n
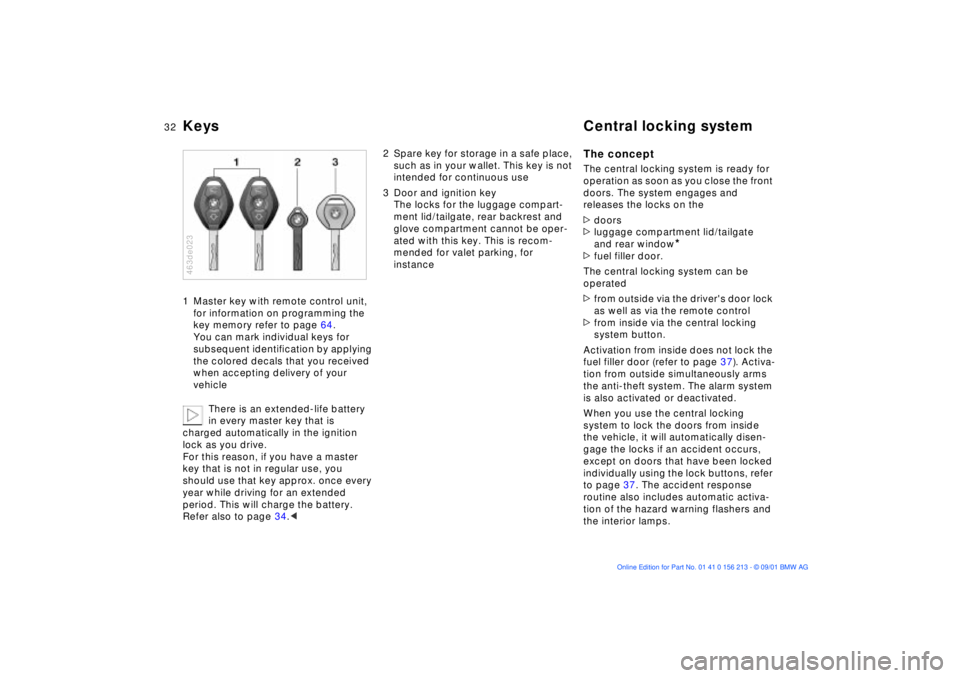
Keys Central locking system1 Master key with remote control unit,
for information on programming the
key memory refer to page 64.
You can mark individual keys for
subsequent identification by applying
the colored decals that you received
when accepting delivery of your
vehicle
There is an extended-life battery
in every master key that is
charged automatically in the ignition
lock as you drive.
For this reason, if you have a master
key that is not in regular use, you
should use that key approx. once every
year while driving for an extended
period. This will charge the battery.
Refer also to page 34.< 463de023
2 Spare key for storage in a safe place,
such as in your wallet. This key is not
intended for continuous use
3 Door and ignition key
The locks for the luggage compart-
ment lid/tailgate, rear backrest and
glove compartment cannot be oper-
ated with this key. This is recom-
mended for valet parking, for
instance
The conceptThe central locking system is ready for
operation as soon as you close the front
doors. The system engages and
releases the locks on the
>doors
>luggage compartment lid/tailgate
and rear window
*
>fuel filler door.
The central locking system can be
operated
>from outside via the driver's door lock
as well as via the remote control
>from inside via the central locking
system button.
Activation from inside does not lock the
fuel filler door (refer to page 37). Activa-
tion from outside simultaneously arms
the anti-theft system. The alarm system
is also activated or deactivated.
When you use the central locking
system to lock the doors from inside
the vehicle, it will automatically disen-
gage the locks if an accident occurs,
except on doors that have been locked
individually using the lock buttons, refer
to page 37. The accident response
routine also includes automatic activa-
tion of the hazard warning flashers and
the interior lamps.
Page 34 of 186
34n
Opening and closing Ð via the remote controlThe conceptThe remote control makes opening and
locking the doors of your vehicle very
convenient. Furthermore, it provides
three additional functions which you
can only execute via the remote control:
>To switch on interior lamps, refer to
page 35.
With this function, you can also
"search for" your vehicle, when
parked in an underground garage, for
instance
>To open the luggage compartment
lid/tailgate, refer to page 35.
The luggage compartment lid/tailgate
will open slightly, regardless of
whether it was previously locked or
unlocked
>Panic mode
In case of danger, you can trigger the
alarm.
Whenever you unlock (lock) the vehicle,
you simultaneously deactivate (activate)
the anti-theft system, disarm (arm) the
alarm system and switch the interior
lamps on (off).
You can have a signal set to
confirm that the vehicle's locks
have engaged securely.<
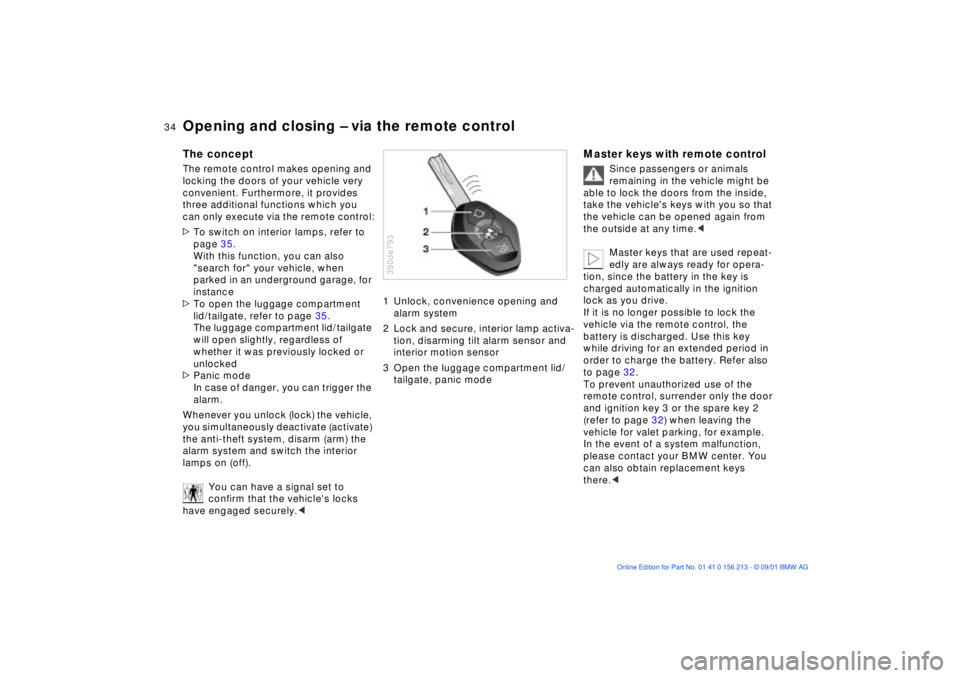
1 Unlock, convenience opening and
alarm system
2 Lock and secure, interior lamp activa-
tion, disarming tilt alarm sensor and
interior motion sensor
3 Open the luggage compartment lid/
tailgate, panic mode390de793
Master keys with remote control
Since passengers or animals
remaining in the vehicle might be
able to lock the doors from the inside,
take the vehicle's keys with you so that
the vehicle can be opened again from
the outside at any time.<
Master keys that are used repeat-
edly are always ready for opera-
tion, since the battery in the key is
charged automatically in the ignition
lock as you drive.
If it is no longer possible to lock the
vehicle via the remote control, the
battery is discharged. Use this key
while driving for an extended period in
order to charge the battery. Refer also
to page 32.
To prevent unauthorized use of the
remote control, surrender only the door
and ignition key 3 or the spare key 2
(refer to page 32) when leaving the
vehicle for valet parking, for example.
In the event of a system malfunction,
please contact your BMW center. You
can also obtain replacement keys
there.<
Page 35 of 186
35n
OverviewControlsMaintenanceRepairsDataIndex
Opening and closing Ð via the remote controlTo unlockPress button.
Press the button once to unlock the
driver's door only; press a second time
to unlock all remaining doors as well as
the luggage compartment lid/tailgate
and fuel filler door.Convenience opening modePress and hold button to open the elec-
tric power windows and sliding/tilt
sunroof.
To lock and securePress button.
Vehicles without armored glass:
do not lock the vehicle if anyone
will be remaining inside, as it would
then be impossible for the occupant(s)
to disengage the locks from the
inside.< To deactivate the tilt alarm sensor
and interior motion sensorPress button a second time immedi-
ately after locking.
For additional information, refer to
page 43.To switch on the interior lampsWith the vehicle locked, press button.
To open the luggage
compartment lid/tailgatePress button.
The luggage compartment lid/tailgate
will open slightly, regardless of whether
it was previously locked or unlocked.
Before and after a trip, be sure
that the luggage compartment lid/
tailgate has not been opened uninten-
tionally.< Panic modeProvided that the alarm system is
armed, you can respond to imminent
danger by holding down the button for
between two and five seconds.
To cancel alarm
Press button.
Page 42 of 186
42n
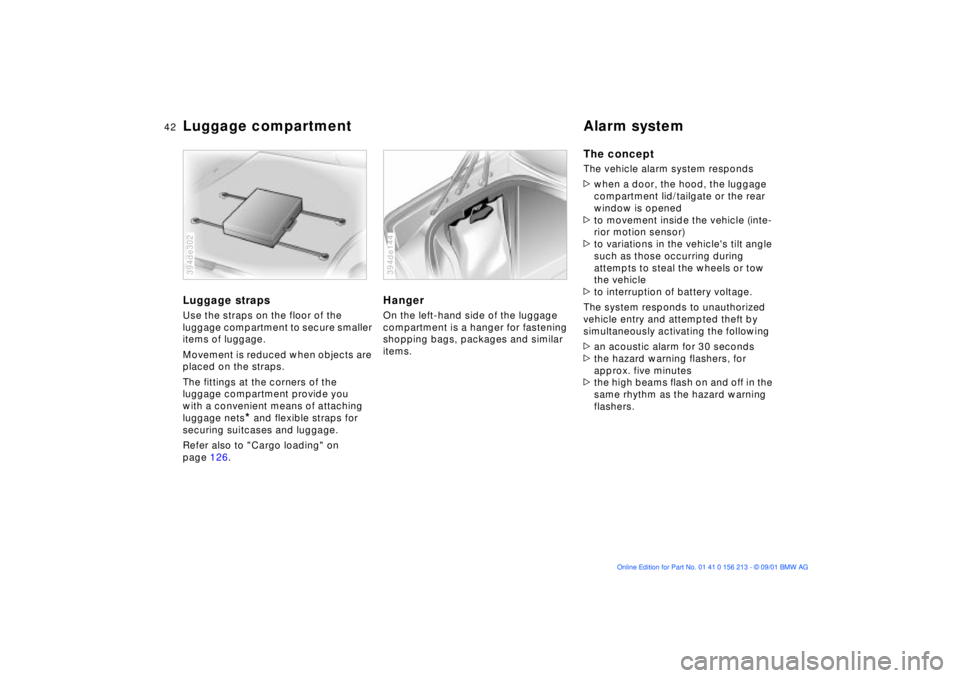
Luggage compartment Alarm systemLuggage strapsUse the straps on the floor of the
luggage compartment to secure smaller
items of luggage.
Movement is reduced when objects are
placed on the straps.
The fittings at the corners of the
luggage compartment provide you
with a convenient means of attaching
luggage nets
* and flexible straps for
securing suitcases and luggage.
Refer also to "Cargo loading" on
page 126.
394de302
HangerOn the left-hand side of the luggage
compartment is a hanger for fastening
shopping bags, packages and similar
items.394de144
The conceptThe vehicle alarm system responds
>when a door, the hood, the luggage
compartment lid/tailgate or the rear
window is opened
>to movement inside the vehicle (inte-
rior motion sensor)
>to variations in the vehicle's tilt angle
such as those occurring during
attempts to steal the wheels or tow
the vehicle
>to interruption of battery voltage.
The system responds to unauthorized
vehicle entry and attempted theft by
simultaneously activating the following
>an acoustic alarm for 30 seconds
>the hazard warning flashers, for
approx. five minutes
>the high beams flash on and off in the
same rhythm as the hazard warning
flashers.
Page 43 of 186
43n
OverviewControlsMaintenanceRepairsDataIndex
Alarm systemTo arm and disarm the alarm
systemWhen the vehicle is locked or unlocked
with the key or the remote control, the
alarm system is also simultaneously
armed or disarmed.
You can have different acknowl-
edgment signals set to confirm
arming and disarming.<
You can also open the luggage
compartment lid/tailgate when the
system is armed by pressing the button
on the remote control (refer to page 35).
When you close the luggage compart-
ment lid/tailgate, the luggage compart-
ment is secured again.
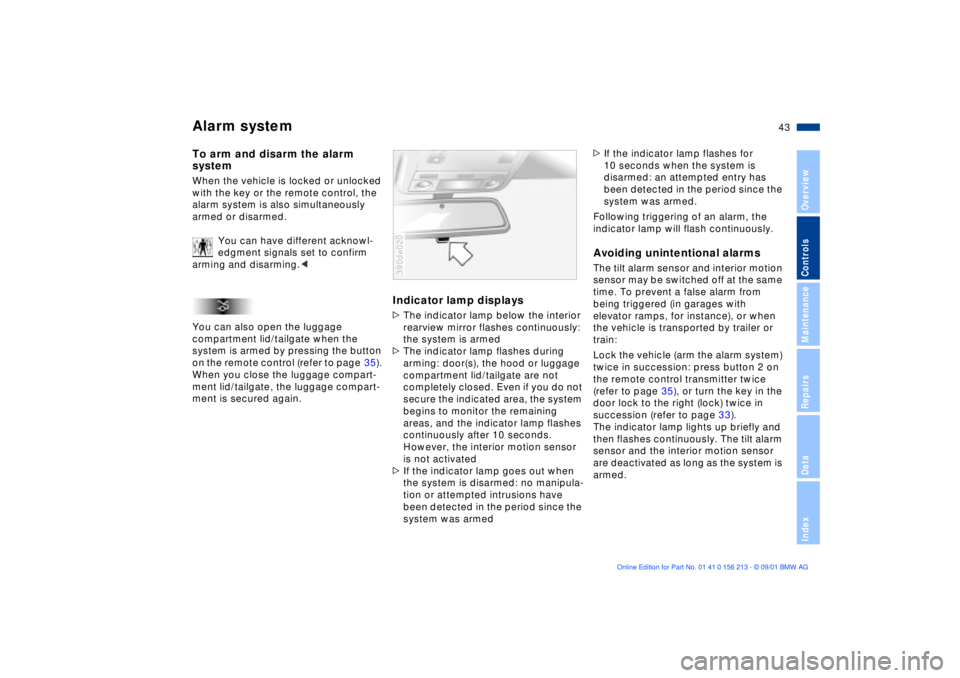
Indicator lamp displays>The indicator lamp below the interior
rearview mirror flashes continuously:
the system is armed
>The indicator lamp flashes during
arming: door(s), the hood or luggage
compartment lid/tailgate are not
completely closed. Even if you do not
secure the indicated area, the system
begins to monitor the remaining
areas, and the indicator lamp flashes
continuously after 10 seconds.
However, the interior motion sensor
is not activated
>If the indicator lamp goes out when
the system is disarmed: no manipula-
tion or attempted intrusions have
been detected in the period since the
system was armed390de020
>If the indicator lamp flashes for
10 seconds when the system is
disarmed: an attempted entry has
been detected in the period since the
system was armed.
Following triggering of an alarm, the
indicator lamp will flash continuously.Avoiding unintentional alarmsThe tilt alarm sensor and interior motion
sensor may be switched off at the same
time. To prevent a false alarm from
being triggered (in garages with
elevator ramps, for instance), or when
the vehicle is transported by trailer or
train:
Lock the vehicle (arm the alarm system)
twice in succession: press button 2 on
the remote control transmitter twice
(refer to page 35), or turn the key in the
door lock to the right (lock) twice in
succession (refer to page 33).
The indicator lamp lights up briefly and
then flashes continuously. The tilt alarm
sensor and the interior motion sensor
are deactivated as long as the system is
armed.
Page 44 of 186
44n
Alarm system Electric power windowsInterior motion sensorIn order for the interior motion sensor to
function properly, the windows and
sliding/tilt sunroof must be completely
closed.
Nevertheless, you should deactivate
the interior motion sensor (refer to
"Avoiding unintentional alarms") if you
>leave children or animals in the
vehicle
>intend to leave the windows or
sliding/tilt sunroof open.
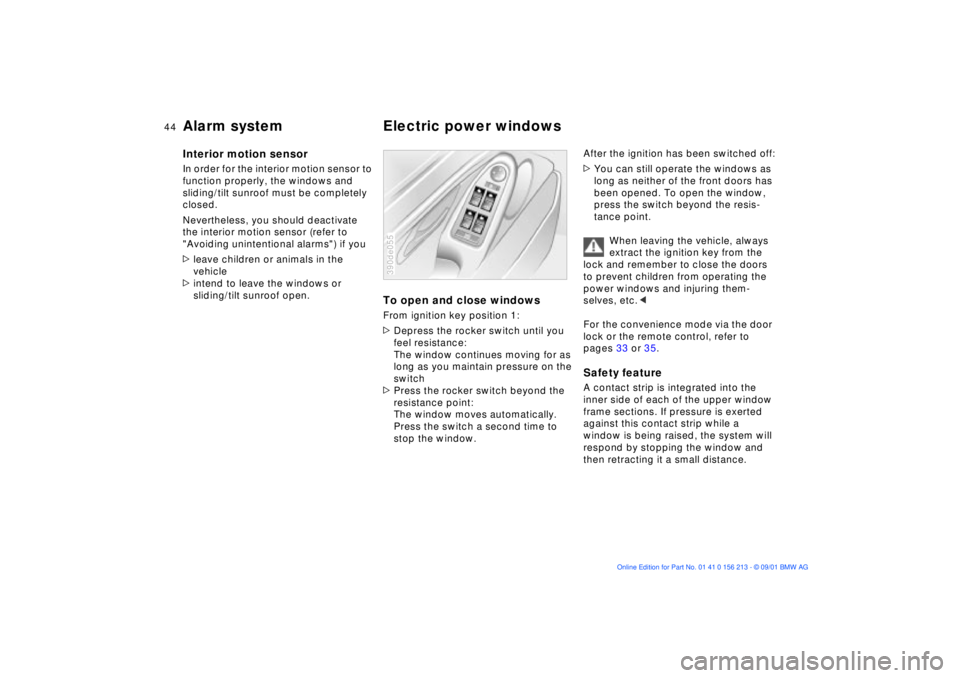
To open and close windowsFrom ignition key position 1:
>Depress the rocker switch until you
feel resistance:
The window continues moving for as
long as you maintain pressure on the
switch
>Press the rocker switch beyond the
resistance point:
The window moves automatically.
Press the switch a second time to
stop the window.390de055
After the ignition has been switched off:
>You can still operate the windows as
long as neither of the front doors has
been opened. To open the window,
press the switch beyond the resis-
tance point.
When leaving the vehicle, always
extract the ignition key from the
lock and remember to close the doors
to prevent children from operating the
power windows and injuring them-
selves, etc.<
For the convenience mode via the door
lock or the remote control, refer to
pages 33 or 35.Safety featureA contact strip is integrated into the
inner side of each of the upper window
frame sections. If pressure is exerted
against this contact strip while a
window is being raised, the system will
respond by stopping the window and
then retracting it a small distance.
Page 95 of 186
95n
OverviewControlsMaintenanceRepairsDataIndex
Computer in the MID
*
After three incorrect code entries, or
three attempts to start the engine
without a code entry, the alarm will
sound for 30 seconds on vehicles
equipped with an alarm.
Deactivating the alarm in an emer-
gency:
If you have forgotten the code, proceed
as follows:
1. Disconnect the battery, wait approx.
2 minutes, then reconnect it. Note
that on vehicles with an alarm, this
will sound
2. Set the ignition key to position 1:
The time display will count down for
the next ten minutes
3. After ten minutes, start the engine.
If the code becomes available
again in the meantime, it can be
entered during the waiting period after
pressing the CODE button.<
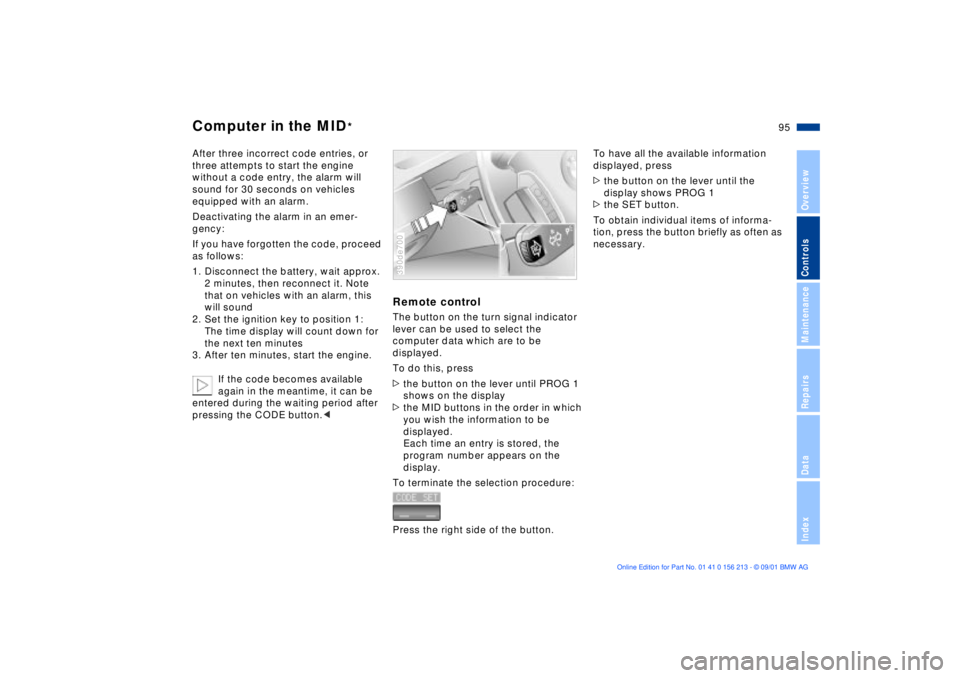
Remote controlThe button on the turn signal indicator
lever can be used to select the
computer data which are to be
displayed.
To do this, press
>the button on the lever until PROG 1
shows on the display
>the MID buttons in the order in which
you wish the information to be
displayed.
Each time an entry is stored, the
program number appears on the
display.
To terminate the selection procedure:
Press the right side of the button.390de700
To have all the available information
displayed, press
>the button on the lever until the
display shows PROG 1
>the SET button.
To obtain individual items of informa-
tion, press the button briefly as often as
necessary.
Page 113 of 186
113n
OverviewControlsMaintenanceRepairsDataIndex
The conceptThe BMW Universal Transmitter
replaces up to three hand-held transmit-
ters to control different devices such as
a garage door opener, alarm systems or
a door locking system. The BMW
Universal Transmitter recognizes and
"learns" the transmitted signal from each
of the original hand-held transmitters.
The signal of an original hand-held
transmitter can be programmed on one
of the three channel buttons. Following
that, each of the devices can be actu-ated with the appropriately-programmed
channel button. The indicator lamp
flashes to confirm transmission of the
signal.
Before you sell your vehicle, the
programmed channel buttons should
be cleared. Refer to page 115 for the
description of this process.
To prevent potential injuries or
damage during the programming
operation and before every remote trig-
gering of a programmed device using
the BMW Universal Transmitter, be sure
that there are no persons, animals or
objects within the range of movement
of the respective device. Also, comply
with the safety precautions of the orig-
inal hand-held transmitter.<
To Canadian residents:
During programming, your hand-
held transmitter may automatically stop
transmitting after two seconds. This
may not be long enough to program the
BMW Universal Transmitter. If you are
programming from one of these hand-
held transmitters, the Universal Trans-
mitter's lamp may begin to flash in a
series of double flashes. If this occurs,
continue to hold the button on the
Universal Transmitter while you reacti-
vate your hand-held transmitter. You
may have to repeat this function several
times while programming.<
Before programming, read the
"User's information" section on
page 115.<
The original hand-held transmitter
If this symbol is depicted on the
packaging or in the user's
instructions for the original
hand-held transmitter, it may be
assumed that this original hand-held
transmitter is compatible with the BMW
Universal Transmitter.
Checking for the change codeIn order to determine whether the orig-
inal hand-held transmitter is equipped
with a change code system, you may
either refer to the instructions for the
original hand-held transmitter or
program a channel button as described
in the left column on page 114 under
"Programming."
Following that, press and hold the
programmed channel button of the
BMW Universal Transmitter. If the indi-
cator lamp of the BMW Universal
Transmitter flashes rapidly for two
seconds and then stays on continu-
ously, the original hand-held transmitter
is equipped with a change code
system. If the change code system is
available, program the channel buttons
as described in the right-hand column
on page 114 under "Programming a
hand-held transmitter with change
code."
If you have additional questions,
please consult your BMW center
or call 1-800-355-3515.<
BMW Universal Transmitter
*