spare tire BMW 540I SEDAN 2003 Owners Manual
[x] Cancel search | Manufacturer: BMW, Model Year: 2003, Model line: 540I SEDAN, Model: BMW 540I SEDAN 2003Pages: 187, PDF Size: 2.3 MB
Page 26 of 187
26n
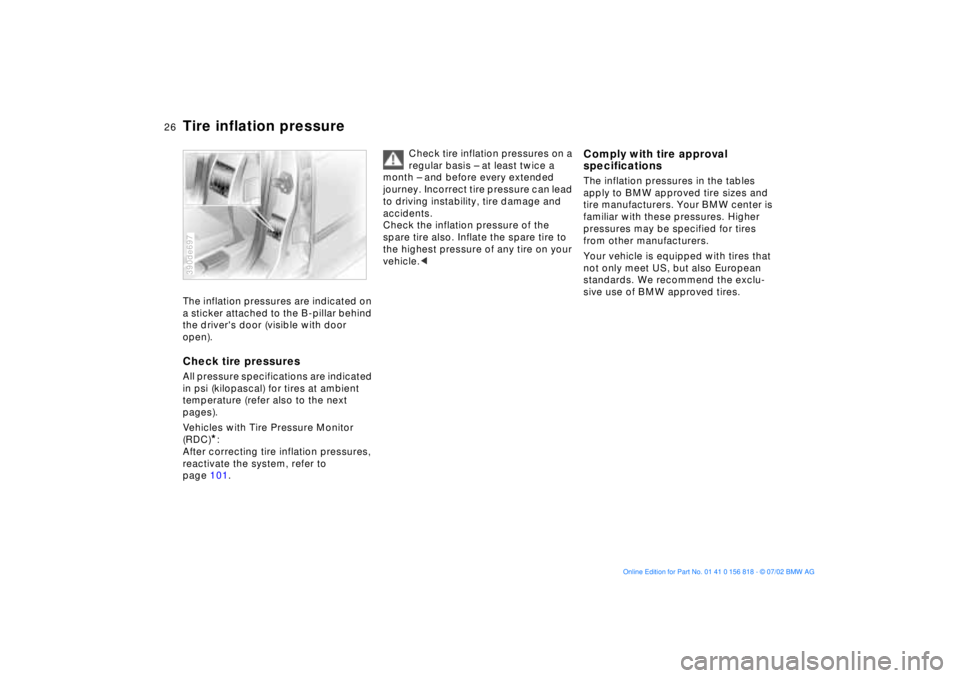
Tire inflation pressureThe inflation pressures are indicated on
a sticker attached to the B-pillar behind
the driver's door (visible with door
open).Check tire pressuresAll pressure specifications are indicated
in psi (kilopascal) for tires at ambient
temperature (refer also to the next
pages).
Vehicles with Tire Pressure Monitor
(RDC)
*:
After correcting tire inflation pressures,
reactivate the system, refer to
page 101.
390de697
Check tire inflation pressures on a
regular basis Ð at least twice a
month Ð and before every extended
journey. Incorrect tire pressure can lead
to driving instability, tire damage and
accidents.
Check the inflation pressure of the
spare tire also. Inflate the spare tire to
the highest pressure of any tire on your
vehicle.<
Comply with tire approval
specificationsThe inflation pressures in the tables
apply to BMW approved tire sizes and
tire manufacturers. Your BMW center is
familiar with these pressures. Higher
pressures may be specified for tires
from other manufacturers.
Your vehicle is equipped with tires that
not only meet US, but also European
standards. We recommend the exclu-
sive use of BMW approved tires.
Page 102 of 187

102n
Tire Pressure Monitor (RDC)*Loss of tire pressureIf, after a certain period of time, the
inflation pressure has gone down sig-
nificantly (which is normal for any tire),
the yellow indicator lamp comes on or
the message "CHECK TIRE PRES-
SURE" appears in the Check Control.
This alerts you that you should have the
tires inflated to the specified pressures
as soon as possible.
If you are prompted to check the
tire pressure shortly after a cor-
rection has been made, this indicates
that the corrected values were not
accurate. Please check the inflation
pressure again and make corrections
according to the inflation pressure
table.<
Flat tireIf there is a tire failure with a loss of
inflation pressure, the red indicator
lamp comes on or the message "TIRE
DEFECT" appears in the Check Control.
In addition, a gong sounds.
If this occurs, reduce vehicle speed
immediately and stop the vehicle in a
safe location. Avoid hard brake applica-
tions. Do not oversteer. Replace the flat
tire.
The spare tire which is available in
your vehicle as standard equip-
ment is equipped with the electronics
required for RDC and, following activa-
tion of the system, is also monitored
after it is mounted.<
The RDC cannot alert you to
severe and sudden tire damage
caused by external factors.<
Have the tires changed at your
BMW center.
Your BMW center has the information
needed for working with RDC and is
equipped with the necessary special
tools.<
System interferenceDuring the period of the malfunction,
the yellow indicator lamp comes on
or the message "TIRECONTROL INAC-
TIVE" appears in the Check Control.
You will also see the same message
>in the event of a system fault
>if a wheel is mounted without the
RDC electronics
>if, in addition to the spare tire, addi-
tional wheels with RDC electronics
are on board.
Please contact your BMW center for
additional information.
Page 127 of 187
127n
OverviewControlsMaintenanceRepairsDataIndex
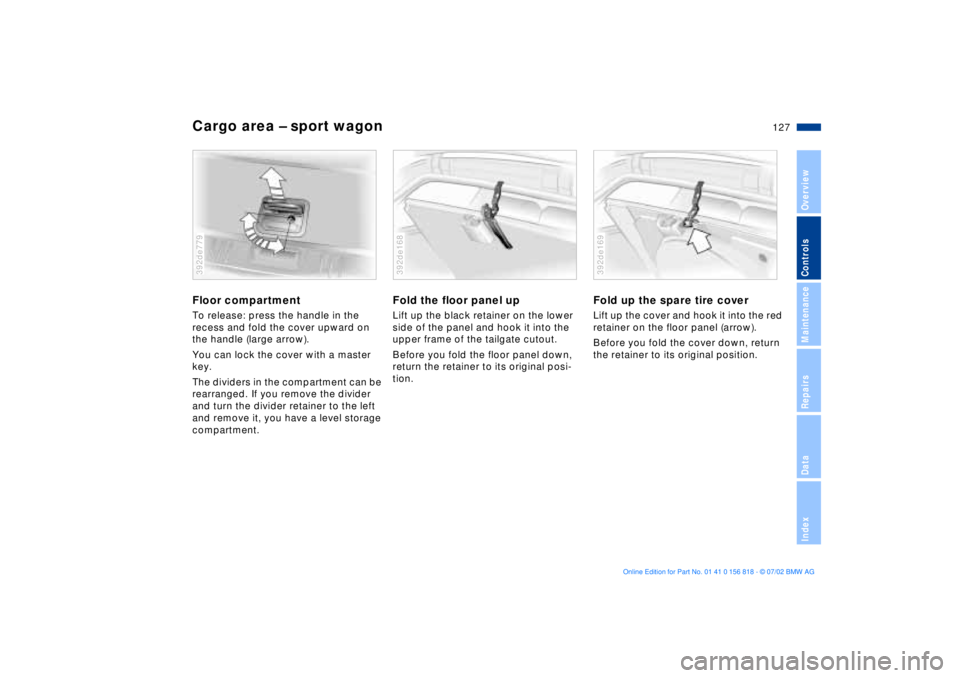
Cargo area Ð sport wagonFloor compartmentTo release: press the handle in the
recess and fold the cover upward on
the handle (large arrow).
You can lock the cover with a master
key.
The dividers in the compartment can be
rearranged. If you remove the divider
and turn the divider retainer to the left
and remove it, you have a level storage
compartment.392de779
Fold the floor panel upLift up the black retainer on the lower
side of the panel and hook it into the
upper frame of the tailgate cutout.
Before you fold the floor panel down,
return the retainer to its original posi-
tion.392de168
Fold up the spare tire coverLift up the cover and hook it into the red
retainer on the floor panel (arrow).
Before you fold the cover down, return
the retainer to its original position.392de169
Page 128 of 187
128n
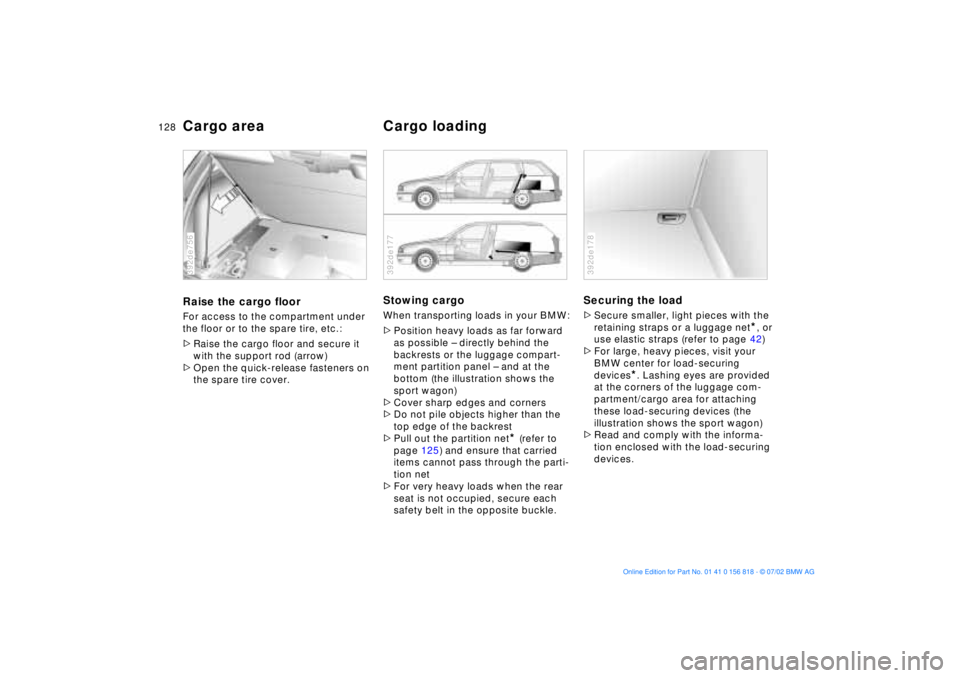
Cargo area Cargo loadingRaise the cargo floorFor access to the compartment under
the floor or to the spare tire, etc.:
>Raise the cargo floor and secure it
with the support rod (arrow)
>Open the quick-release fasteners on
the spare tire cover.392de756
Stowing cargoWhen transporting loads in your BMW:
>Position heavy loads as far forward
as possible Ð directly behind the
backrests or the luggage compart-
ment partition panel Ð and at the
bottom (the illustration shows the
sport wagon)
>Cover sharp edges and corners
>Do not pile objects higher than the
top edge of the backrest
>Pull out the partition net
* (refer to
page 125) and ensure that carried
items cannot pass through the parti-
tion net
>For very heavy loads when the rear
seat is not occupied, secure each
safety belt in the opposite buckle.
392de177
Securing the load>Secure smaller, light pieces with the
retaining straps or a luggage net
*, or
use elastic straps (refer to page 42)
>For large, heavy pieces, visit your
BMW center for load-securing
devices
*. Lashing eyes are provided
at the corners of the luggage com-
partment/cargo area for attaching
these load-securing devices (the
illustration shows the sport wagon)
>Read and comply with the informa-
tion enclosed with the load-securing
devices.
392de178
Page 135 of 187
135n
OverviewControlsMaintenanceRepairsDataIndex
Information for your safetyThe factory-approved radial tires are
matched to the vehicle and have been
selected to provide optimum safety and
driving comfort.
It is not merely the tire's service life, but
also driving comfort and Ð above all else
Ð driving safety which depend on the
condition of the tires and the mainte-
nance of the specified tire inflation
pressure.
Incorrect inflation pressures are a
frequent cause of tire problems
and flat tires. Tire pressure also has a
major effect on your BMW's handling
response. We recommend that you
check the tire pressure Ð remember to
check the spare tire as well Ð before
every extended trip, as well as at least
every two weeks in normal use (refer to
page 26). Failure to observe these pre-
cautions can result in incorrect tire
pressures, which cause instable han-
dling response as well as tire damage,
and can ultimately lead to an acci-
dent.<
Tire tread Ð Tire damageInspect your tires frequently for tread
wear, signs of damage and for foreign
objects lodged in the tread. Check the
tread depth.
The tread depth should not drop
below 0.12 in (3 mm), even though, for
example the legally specified minimum
tread depth in Europe is only 0.063 in
(1.6 mm). Below a tread depth of
0.12 in (3 mm) there is an increased risk
of hydroplaning, even at relatively mod-
erate speeds and with only small
amounts of water on the road.
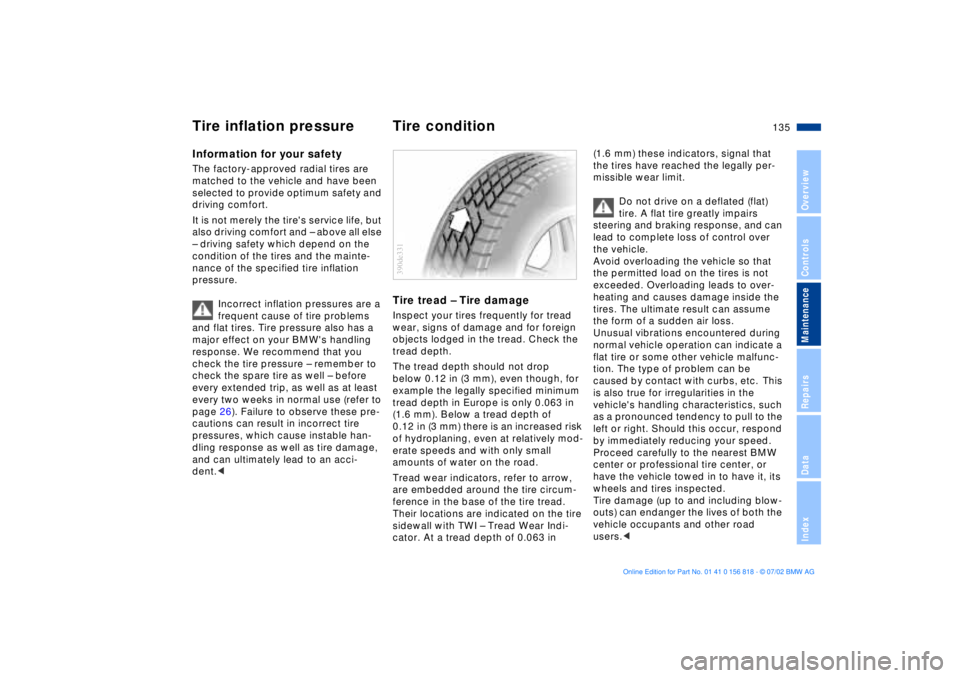
Tread wear indicators, refer to arrow,
are embedded around the tire circum-
ference in the base of the tire tread.
Their locations are indicated on the tire
sidewall with TWI Ð Tread Wear Indi-
cator. At a tread depth of 0.063 in 390de331
(1.6 mm) these indicators, signal that
the tires have reached the legally per-
missible wear limit.
Do not drive on a deflated (flat)
tire. A flat tire greatly impairs
steering and braking response, and can
lead to complete loss of control over
the vehicle.
Avoid overloading the vehicle so that
the permitted load on the tires is not
exceeded. Overloading leads to over-
heating and causes damage inside the
tires. The ultimate result can assume
the form of a sudden air loss.
Unusual vibrations encountered during
normal vehicle operation can indicate a
flat tire or some other vehicle malfunc-
tion. The type of problem can be
caused by contact with curbs, etc. This
is also true for irregularities in the
vehicle's handling characteristics, such
as a pronounced tendency to pull to the
left or right. Should this occur, respond
by immediately reducing your speed.
Proceed carefully to the nearest BMW
center or professional tire center, or
have the vehicle towed in to have it, its
wheels and tires inspected.
Tire damage (up to and including blow-
outs) can endanger the lives of both the
vehicle occupants and other road
users.<
Tire inflation pressure Tire condition
Page 137 of 187

137n
OverviewControlsMaintenanceRepairsDataIndex
Tire replacement Wheel and tire combinationsUniform Tire Quality GradingQuality grades can be found where
applicable on the tire sidewall between
tread shoulder and maximum section
width. For example:
Treadwear 200 Traction AA
Temperature A
Do not use retreaded tires, since
driving safety may be impaired.
This is due to the possible variations in
casing structures and, in some cases,
to their extreme age, which can lead to
a decrease in their durability.< Tire ageThe date on which the tire was manu-
factured is indicated by the code on the
sidewall:
DOT ... 2601 indicates that the tire was
manufactured in Week 26 of the year
2001.
Although tires may have a theoretical
service life of up to 10 years, BMW
strongly recommends that you replace
all tires after an absolute maximum of
6 years.
The right choice
Never mount wheels and tires that
have not been specifically
approved by BMW for use on your par-
ticular model. Although other wheels
and tires may theoretically have the
same dimensions, variations in factors
such as manufacturing tolerances can
result in contact between tire and body-
work, ultimately leading to serious acci-
dents. If non-approved wheels and tires
are used, BMW cannot evaluate their
suitability, and therefore cannot be held
liable for driving safety.<
BMW has tested certain tires for each
tire size, rated them according to road
safety and approved them. Your BMW
center can inform you which tires have
been tested in this way. Observe pos-
sible national guidelines, e.g. regarding
entry into vehicle documents.
The correct wheel and tire combi-
nation affects different systems
such as ABS, ATC, ASC+T/DSC.
The function of these systems is
impaired if improper wheel and tire
combinations are used.
Always ensure that all of the tires
mounted on the vehicle are the same
series, from the same manufacturer and
with the same tread pattern. If you have
to mount the spare tire in response to a
flat tire, etc., you should remount a tire
of the correct specifications as soon as
possible.<
The use of rims and wheel bolts
that do not meet the specifica-
tions of the original factory-installed
equipment will affect the safe operation
of your vehicle and may cause an acci-
dent and personal injury.
Never mix tires of different design, such
as steel-belted radials with radial bias-
belted or bias-ply tires, etc. Mixing tire
types will adversely affect roadholding
and can lead to loss of vehicle con-
trol.< Storage Store tires in a cool, dry place, pro-
tecting them against light whenever
possible. Protect the tires against con-
tact with oil, grease and fuel.
Page 159 of 187
159n
OverviewControlsMaintenanceRepairsDataIndex
Changing a wheelWhat you will needIn order to avoid rattling noises later,
note the position of the tools when you
remove them and return them to their
original positions when you are through
using them.
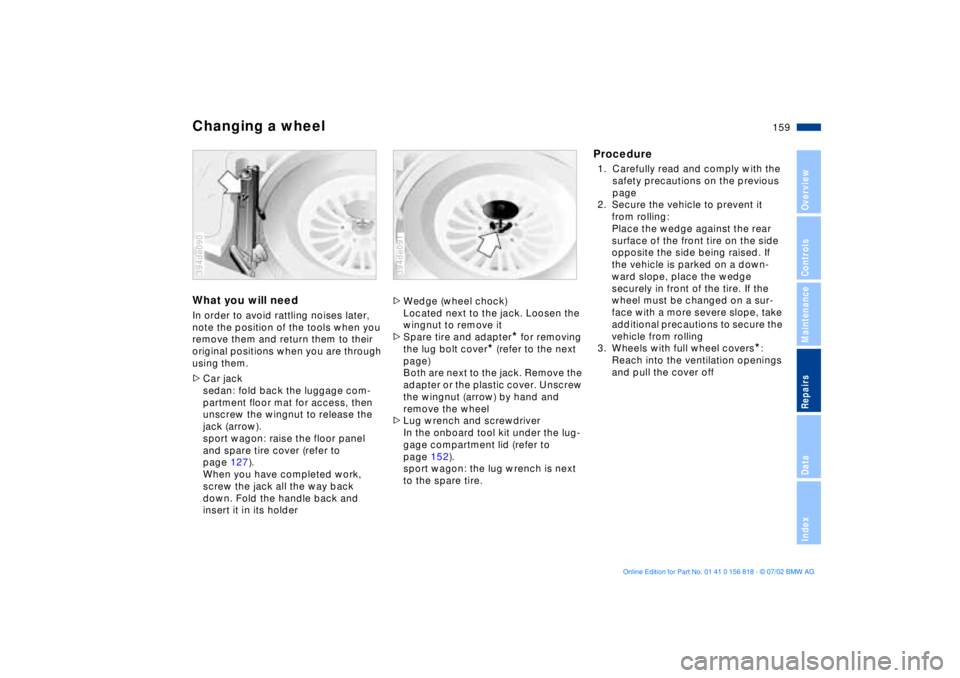
>Car jack
sedan: fold back the luggage com-
partment floor mat for access, then
unscrew the wingnut to release the
jack (arrow).
sport wagon: raise the floor panel
and spare tire cover (refer to
page 127).
When you have completed work,
screw the jack all the way back
down. Fold the handle back and
insert it in its holder394de090
>Wedge (wheel chock)
Located next to the jack. Loosen the
wingnut to remove it
>Spare tire and adapter
* for removing
the lug bolt cover
* (refer to the next
page)
Both are next to the jack. Remove the
adapter or the plastic cover. Unscrew
the wingnut (arrow) by hand and
remove the wheel
>Lug wrench and screwdriver
In the onboard tool kit under the lug-
gage compartment lid (refer to
page 152).
sport wagon: the lug wrench is next
to the spare tire.
394de091
Procedure1. Carefully read and comply with the
safety precautions on the previous
page
2. Secure the vehicle to prevent it
from rolling:
Place the wedge against the rear
surface of the front tire on the side
opposite the side being raised. If
the vehicle is parked on a down-
ward slope, place the wedge
securely in front of the tire. If the
wheel must be changed on a sur-
face with a more severe slope, take
additional precautions to secure the
vehicle from rolling
3. Wheels with full wheel covers
*:
Reach into the ventilation openings
and pull the cover off
Page 160 of 187
160n
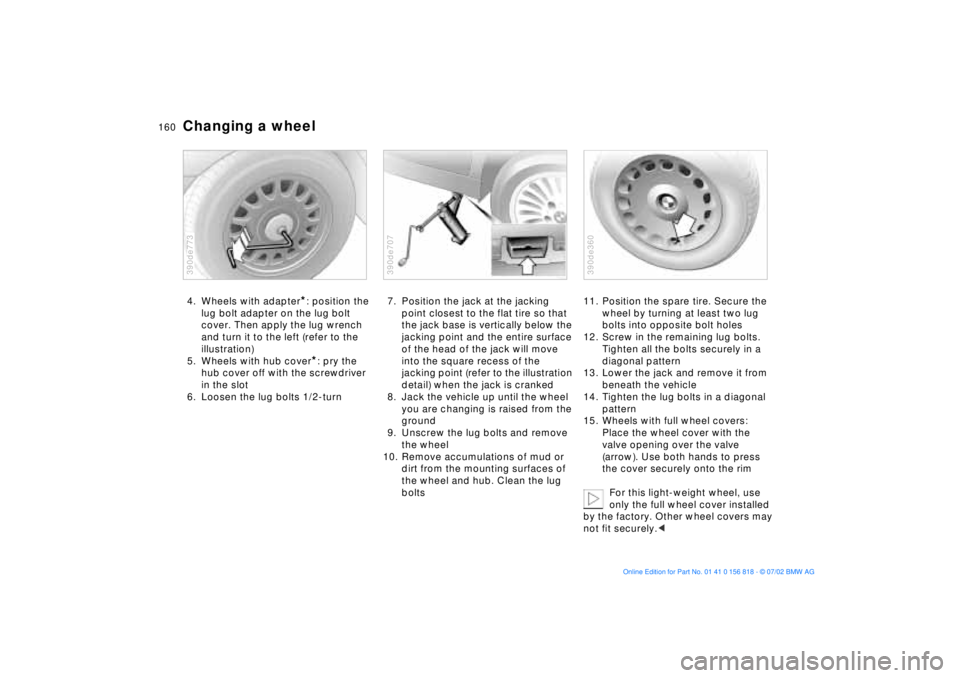
Changing a wheel4. Wheels with adapter
*: position the
lug bolt adapter on the lug bolt
cover. Then apply the lug wrench
and turn it to the left (refer to the
illustration)
5. Wheels with hub cover*: pry the
hub cover off with the screwdriver
in the slot
6. Loosen the lug bolts 1/2-turn
390de773
7. Position the jack at the jacking
point closest to the flat tire so that
the jack base is vertically below the
jacking point and the entire surface
of the head of the jack will move
into the square recess of the
jacking point (refer to the illustration
detail) when the jack is cranked
8. Jack the vehicle up until the wheel
you are changing is raised from the
ground
9. Unscrew the lug bolts and remove
the wheel
10. Remove accumulations of mud or
dirt from the mounting surfaces of
the wheel and hub. Clean the lug
bolts390de707
11. Position the spare tire. Secure the
wheel by turning at least two lug
bolts into opposite bolt holes
12. Screw in the remaining lug bolts.
Tighten all the bolts securely in a
diagonal pattern
13. Lower the jack and remove it from
beneath the vehicle
14. Tighten the lug bolts in a diagonal
pattern
15. Wheels with full wheel covers:
Place the wheel cover with the
valve opening over the valve
(arrow). Use both hands to press
the cover securely onto the rim
For this light-weight wheel, use
only the full wheel cover installed
by the factory. Other wheel covers may
not fit securely.< 390de360
Page 161 of 187

161n
OverviewControlsMaintenanceRepairsDataIndex
Changing a wheel16. Wheels with hub covers:
Position the hub cover and press it
on tightly
17. If equipped with lug bolt covers:
Align the arrow on the cover with
the line in the wheel and press the
cover into place
18. Check and correct the tire inflation
pressure at the earliest opportunity.
For vehicles with Tire Pressure
Monitor (RDC)
*:
After mounting the spare tire or cor-
recting the inflation pressure, reac-
tivate the system. Refer to
page 101.
The vehicle jack is designed for
changing wheels only. Do not
attempt to raise another vehicle model
with it or to raise any load of any kind.
To do so could cause accidents and
personal injury.
To ensure continued safety, have the
lug bolts checked with a calibrated
torque wrench [torque specification
72 lb-ft (100 Nm)] at the earliest
opportunity.<
When storing the wheel, take care to
ensure that you do not damage the
retaining pin in the spare tire recess.
If light-alloy wheels other than original
BMW light-alloy wheels have been
mounted, it may be necessary to use
different lug bolts for those wheels.
Replace the defective tire as soon as
possible and have the new wheel/tire
balanced.
Protect valve inserts against dirt using
screw-on valve stem caps. Dirty valve
stems frequently lead to slow pressure
loss.
Size 255/40 R17 94 W
* tires on
the rear axle:
In the event of a flat tire, it may be nec-
essary to mount the spare tire of dif-
ferent size at the rear. This tire is suit-
able for use in all load and speed
ranges. Nevertheless, you should
remount a tire of the correct size as
soon as possible.<
Page 183 of 187

Everything from A to Z
183n
OverviewControlsMaintenanceRepairsDataIndex
Service Interval
Display84, 146
Shiftlock72, 75
Shoulder support51
Side airbags59
Side Impact Head Protection
System59
Side lamps
bulb replacement154t
Side turn signal indicators
bulb replacement155t
Sitting safely48
with airbags48
with safety belt48
Ski bag122
Ski bag in the sport
wagon124
Sliding/tilt sunroof46
manual operation47
with glass moonroof47
Snow chains138
Socket for attaching
electrical appliances120
Spare tire159t
Speaker119
Special characteristics of
winter tires138
Special oil143t
Speed96
Speed limit93
Speed, average88, 96
Speedometer15, 16, 17 sport wagon
cargo area125
compartments in the cargo
area126
cover in the cargo
area126
folding down the rear
backrest125
lashing eyes128
load-securing
devices128
opening the rear
window40
partition net125
rear window wiper, blade
replacement152t
releasing the tailgate after
an electrical
malfunction39
roll-up cover125
securing a load128
ski bag124
tail lamp assembly, bulb
replacement156t
Standing lamps104
Starting assistance164t
Starting problems69t
Starting the engine69
Steering wheel
heating56
lock68
memory setting54 Steering wheel with
multifunction buttons22
Steptronic75
Stopwatch91
for additional information
refer to the "Owner's
Manual for Onboard
Computer"
Storage compartments118
in the cargo area126
Summer tires137
Sun blinds114
Sunroof46
Switching off the engine70
Switch-on times for parked-
car ventilation92
Symbols8
T
Tachometer83
Tail lamps156
bulb replacement156t
Tailgate
manual operation39
manual release39
opening from the
inside40
opening from the
outside39
Technical
modifications9, 147
Telephone preparation119 Temperature display82, 88
Temperature gauge84
Temperature
layering108, 113
Tether strap62
Third brake lamp157
Through-loading
system121
Tilt alarm sensor42, 43
avoiding unintentional
alarms44
deactivate35
Tilt function, passenger-side
mirror55
Time
calling up90
changing90
of arrival, estimated95
Timer90
for additional information
refer to the "Owner's
Manual for Onboard
Computer"
Tire
change158t
damage135t
inflation pressure26, 135
pressure
monitoring101, 135
replacement136
tread135
Tire inflation pressure26