drive belt BMW 550I SEDAN 2008 E60 Owner's Manual
[x] Cancel search | Manufacturer: BMW, Model Year: 2008, Model line: 550I SEDAN, Model: BMW 550I SEDAN 2008 E60Pages: 288, PDF Size: 7.03 MB
Page 47 of 288
Controls
45Reference
At a glance
Driving tips
Communications
Navigation
Entertainment
Mobility
Adjusting
Sitting safely
The ideal sitting position can make a vital con-
tribution to relaxed, fatigue-free driving. In the
interaction with the safety belts, the head
restraints and the airbags, the sitting position
plays an important role in an accident. To
ensure that the safety systems operate with
optimal efficiency, we strongly urge you to
observe the instructions contained in the fol-
lowing section.
For additional information on transporting chil-
dren safely, refer to page56.
Airbags
Always maintain an adequate distance
between yourself and the airbags. Always
hold the steering wheel by its rim with hands at
the 9 o'clock and 3 o'clock positions, to mini-
mize the risk of injuries to your hands and arms
in the event of airbag deployment.
No one and nothing is to come between the air-
bags and the seat occupant.
Do not use the cover of the front airbag on the
front passenger side as a storage area. Make
sure that the front passenger is sitting correctly
and does not rest feet or legs on the instrument
panel, otherwise leg injuries can occur if the
front airbags are triggered.
Make sure that occupants do not rest their head
on the side or head airbags, otherwise injuries
can occur if the airbags are triggered.<
Even if you adhere to all the instructions, inju-
ries resulting from contact with airbags cannot
be fully excluded, depending on the circum-
stances. The ignition and inflation noise may
provoke a mild hearing loss in extremely sensi-
tive individuals. This effect is usually only tem-
porary.
For airbag locations and additional information
on airbags, refer to page100.
Head restraints
A correctly adjusted head restraint reduces the
risk of spinal injury in the event of an accident.
Adjust the head restraint so that its center
is approx. at ear level. Otherwise there is
increased danger of injury in the event of an
accident.<
Head restraints, refer to page49.
Safety belts
Before every drive, make sure that safety belts
are being worn at all of the occupied seats. Air-
bags complement the safety belt as an addi-
tional safety device, but they do not represent a
substitute.
Your vehicle is provided with five seats, which
are all equipped with a safety belt.
Never allow more than one person to
wear a single safety belt. Never allow
infants or small children to ride in a passenger's
lap. Make sure that the belt lies low around the
hips in the lap area and does not press on the
abdomen. The safety belt must not lie across
the neck, rub against sharp edges, be routed
over solid or breakable objects or be pinched.
Wear the safety belt without twisting, snugly
across the lap and shoulders, as close to the
body as possible. Otherwise the belt can slip
over the hips in the lap area in a frontal impact
and injure the abdomen. Avoid wearing clothing
that prevents the belt from fitting properly and
pull the belt in the upper body area periodically
to readjust the tension, in order to avoid a
reduction in the restraint of the safety belt.
Sports Wagon: if the center safety belt in the
rear is used, the larger backrest half must be
locked, refer to page128, otherwise the middle
safety belt has no restraining action.<
Safety belts, refer to page50.
Page 48 of 288
Adjusting
46
Seats
Note before adjusting
Never attempt to adjust your seat while
the vehicle is moving. The seat could
respond with unexpected movement, and the
ensuing loss of vehicle control could lead to an
accident.
Also on the passenger side, do not incline the
backrest too far to the rear while the vehicle is
being driven, otherwise there is a danger in the
event of an accident of sliding under the safety
belt, eliminating the protection normally pro-
vided by the belt.<
Please follow the instructions on damage to
safety belts provided on page51 and the infor-
mation on the active front head restraints
on
page49.
Adjusting seat
To ensure that the safety systems con-
tinue to provide optimized protection,
please observe the adjustment instructions on
page45.<
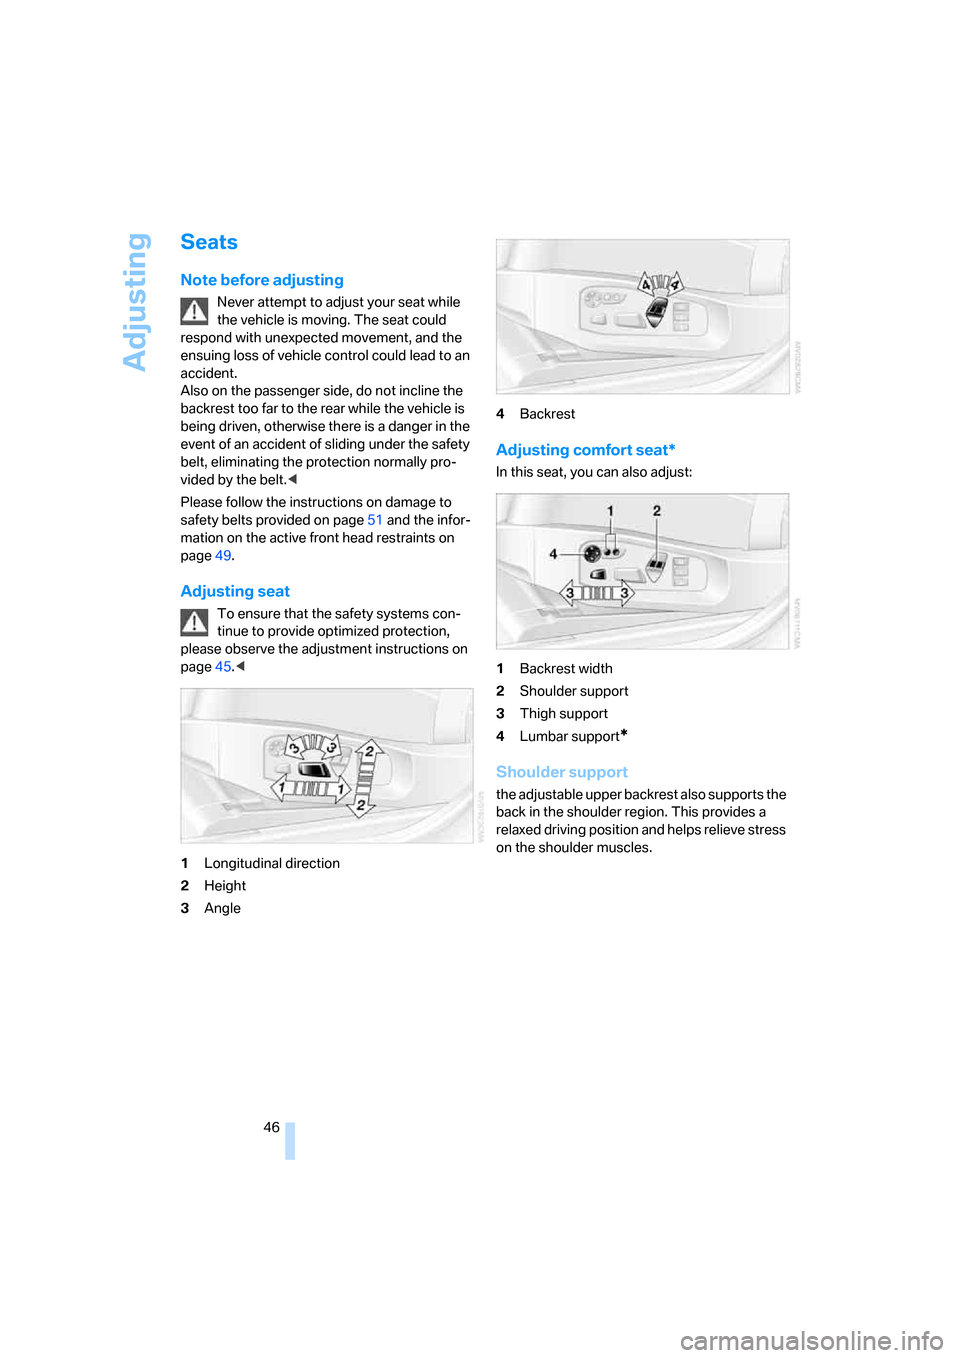
1Longitudinal direction
2Height
3Angle4Backrest
Adjusting comfort seat*
In this seat, you can also adjust:
1Backrest width
2Shoulder support
3Thigh support
4Lumbar support
*
Shoulder support
the adjustable upper backrest also supports the
back in the shoulder region. This provides a
relaxed driving position and helps relieve stress
on the shoulder muscles.
Page 52 of 288
Adjusting
50
Adjusting side extensions
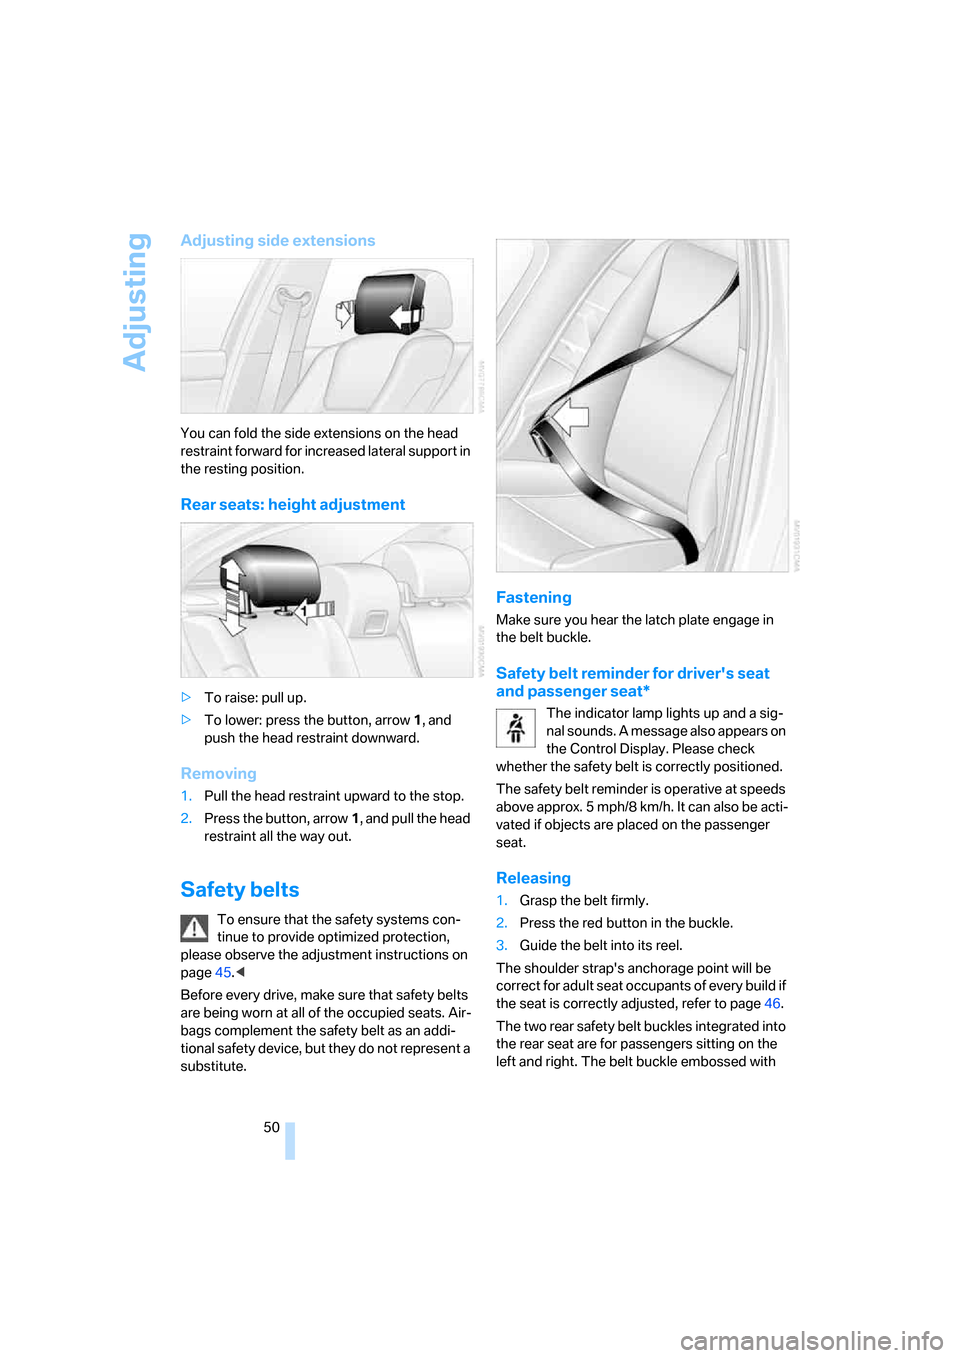
You can fold the side extensions on the head
restraint forward for increased lateral support in
the resting position.
Rear seats: height adjustment
>To raise: pull up.
>To lower: press the button, arrow1, and
push the head restraint downward.
Removing
1.Pull the head restraint upward to the stop.
2.Press the button, arrow1, and pull the head
restraint all the way out.
Safety belts
To ensure that the safety systems con-
tinue to provide optimized protection,
please observe the adjustment instructions on
page45.<
Before every drive, make sure that safety belts
are being worn at all of the occupied seats. Air-
bags complement the safety belt as an addi-
tional safety device, but they do not represent a
substitute.
Fastening
Make sure you hear the latch plate engage in
the belt buckle.
Safety belt reminder for driver's seat
and passenger seat*
The indicator lamp lights up and a sig-
nal sounds. A message also appears on
the Control Display. Please check
whether the safety belt is correctly positioned.
The safety belt reminder is operative at speeds
above approx. 5 mph/8 km/h. It can also be acti-
vated if objects are placed on the passenger
seat.
Releasing
1.Grasp the belt firmly.
2.Press the red button in the buckle.
3.Guide the belt into its reel.
The shoulder strap's anchorage point will be
correct for adult seat occupants of every build if
the seat is correctly adjusted, refer to page46.
The two rear safety belt buckles integrated into
the rear seat are for passengers sitting on the
left and right. The belt buckle embossed with
Page 53 of 288
Controls
51Reference
At a glance
Driving tips
Communications
Navigation
Entertainment
Mobility
the word CENTER is intended exclusively for
use by passengers riding in the center position.
Damage to safety belts
When subjected to strain due to an acci-
dent or in the event of damage, replace
the safety belts, the belt tensioners, and any
child restraint systems and have the belt anchor
points checked. Only have this work carried out
at a BMW center or at a workshop that works
according to BMW repair procedures with cor-
respondingly trained personnel. Otherwise cor-
rect operation of this safety equipment is not
guaranteed.<
Seat heating*
Front
The appearance and arrangement of the but-
tons may vary depending on the equipment.
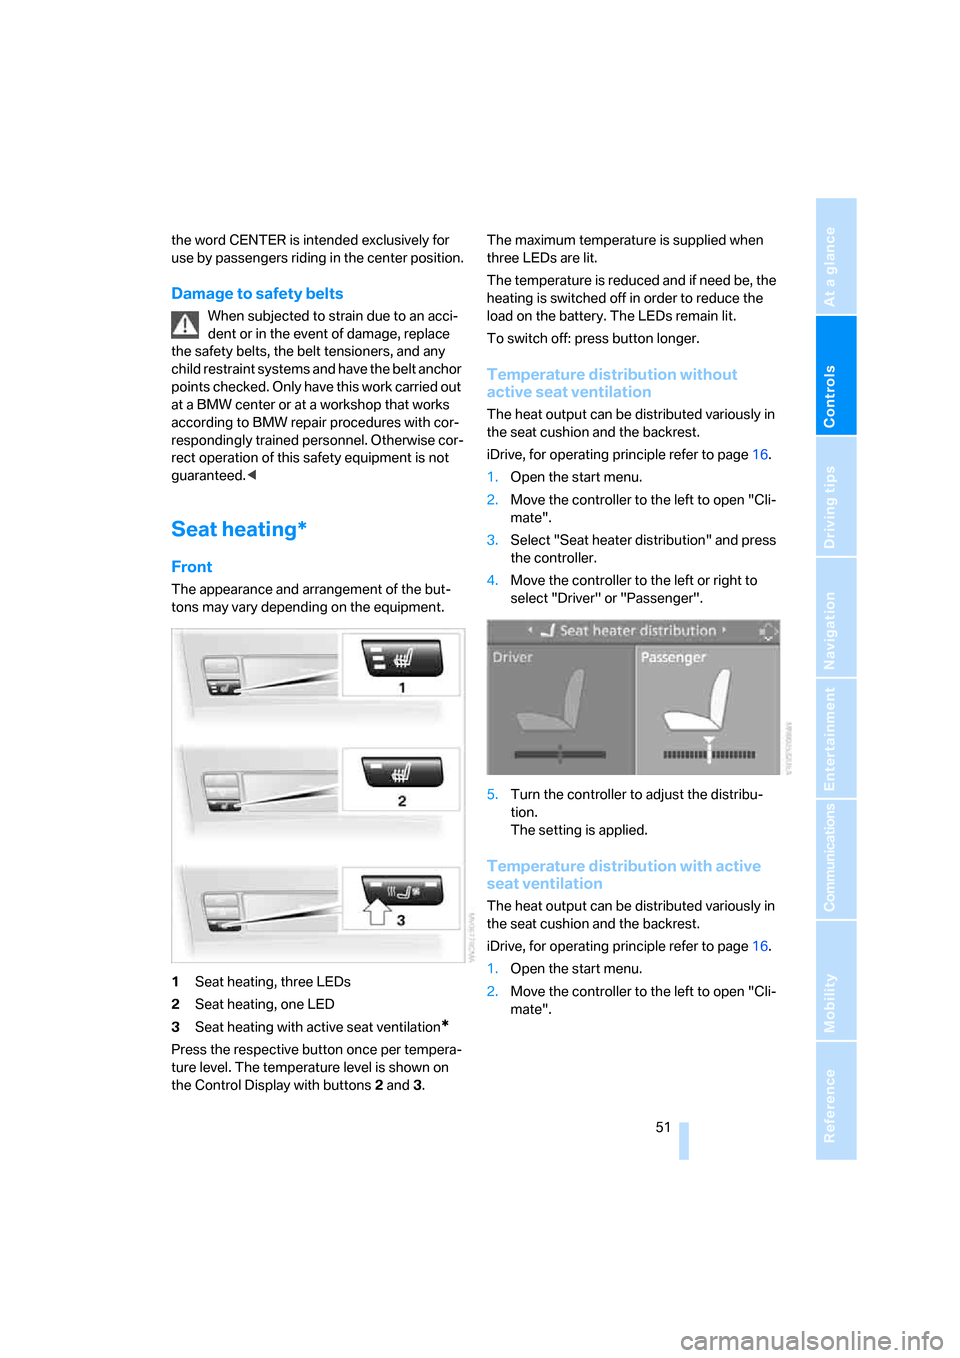
1Seat heating, three LEDs
2Seat heating, one LED
3Seat heating with active seat ventilation
*
Press the respective button once per tempera-
ture level. The temperature level is shown on
the Control Display with buttons2 and3. The maximum temperature is supplied when
three LEDs are lit.
The temperature is reduced and if need be, the
heating is switched off in order to reduce the
load on the battery. The LEDs remain lit.
To switch off: press button longer.
Temperature distribution without
active seat ventilation
The heat output can be distributed variously in
the seat cushion and the backrest.
iDrive, for operating principle refer to page16.
1.Open the start menu.
2.Move the controller to the left to open "Cli-
mate".
3.Select "Seat heater distribution" and press
the controller.
4.Move the controller to the left or right to
select "Driver" or "Passenger".
5.Turn the controller to adjust the distribu-
tion.
The setting is applied.
Temperature distribution with active
seat ventilation
The heat output can be distributed variously in
the seat cushion and the backrest.
iDrive, for operating principle refer to page16.
1.Open the start menu.
2.Move the controller to the left to open "Cli-
mate".
Page 75 of 288
Controls
73Reference
At a glance
Driving tips
Communications
Navigation
Entertainment
Mobility
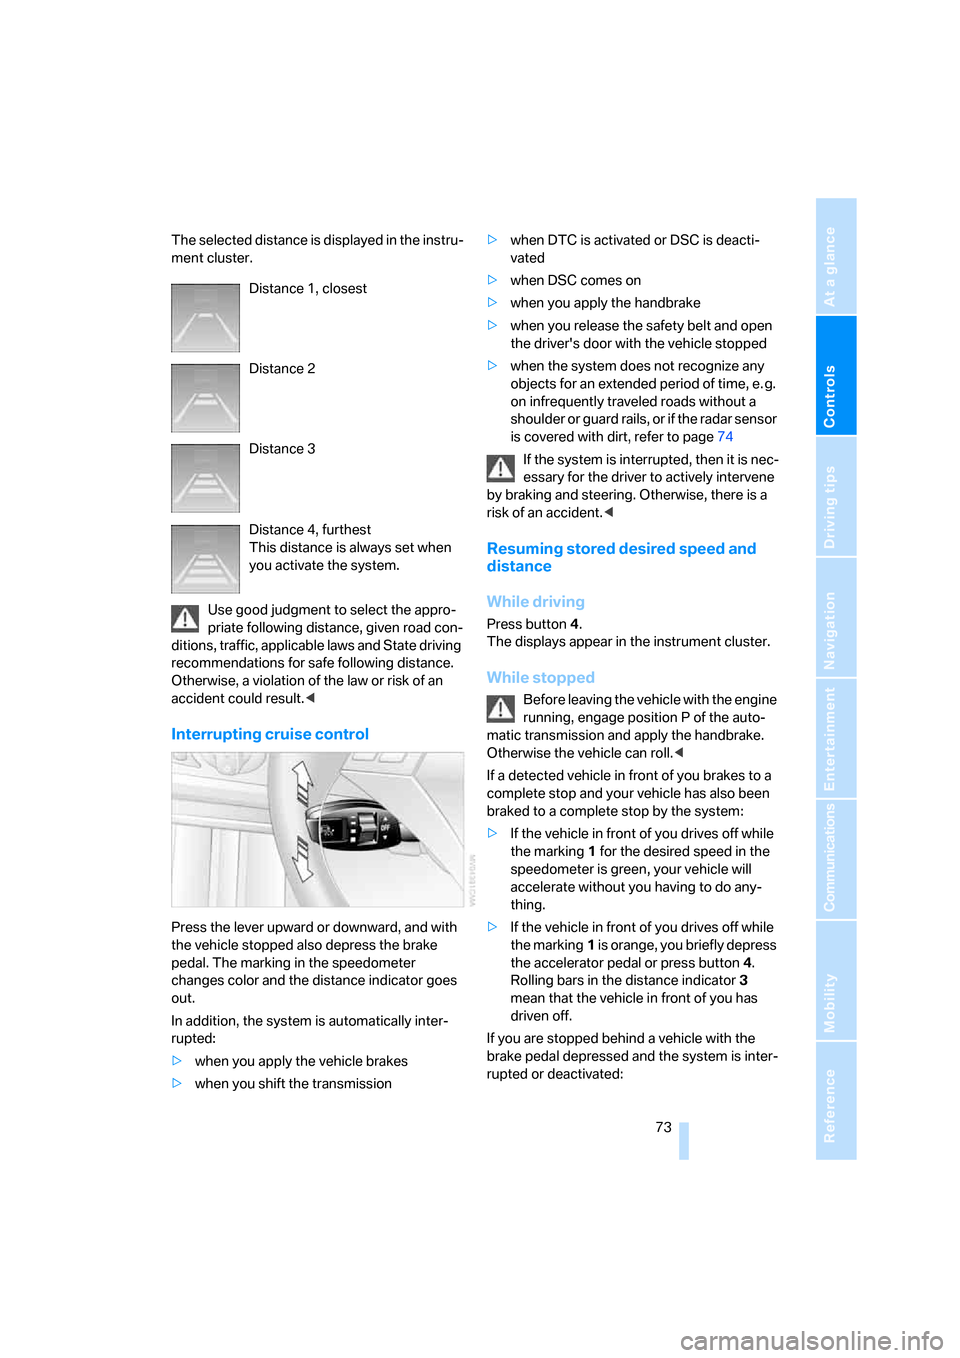
The selected distance is displayed in the instru-
ment cluster.
Use good judgment to select the appro-
priate following distance, given road con-
ditions, traffic, applicable laws and State driving
recommendations for safe following distance.
Otherwise, a violation of the law or risk of an
accident could result.<
Interrupting cruise control
Press the lever upward or downward, and with
the vehicle stopped also depress the brake
pedal. The marking in the speedometer
changes color and the distance indicator goes
out.
In addition, the system is automatically inter-
rupted:
>when you apply the vehicle brakes
>when you shift the transmission>when DTC is activated or DSC is deacti-
vated
>when DSC comes on
>when you apply the handbrake
>when you release the safety belt and open
the driver's door with the vehicle stopped
>when the system does not recognize any
objects for an extended period of time, e. g.
on infrequently traveled roads without a
shoulder or guard rails, or if the radar sensor
is covered with dirt, refer to page74
If the system is interrupted, then it is nec-
essary for the driver to actively intervene
by braking and steering. Otherwise, there is a
risk of an accident.<
Resuming stored desired speed and
distance
While driving
Press button4.
The displays appear in the instrument cluster.
While stopped
Before leaving the vehicle with the engine
running, engage position P of the auto-
matic transmission and apply the handbrake.
Otherwise the vehicle can roll.<
If a detected vehicle in front of you brakes to a
complete stop and your vehicle has also been
braked to a complete stop by the system:
>If the vehicle in front of you drives off while
the marking1 for the desired speed in the
speedometer is green, your vehicle will
accelerate without you having to do any-
thing.
>If the vehicle in front of you drives off while
the marking1 is orange, you briefly depress
the accelerator pedal or press button4.
Rolling bars in the distance indicator3
mean that the vehicle in front of you has
driven off.
If you are stopped behind a vehicle with the
brake pedal depressed and the system is inter-
rupted or deactivated: Distance 1, closest
Distance 2
Distance 3
Distance 4, furthest
This distance is always set when
you activate the system.
Page 91 of 288
Controls
89Reference
At a glance
Driving tips
Communications
Navigation
Entertainment
Mobility
The setting is stored for the remote control cur-
rently in use.
Volume of warning tones*
On vehicles equipped with a single drive, you
can increase or decrease the volume of the
warning tones, e.g. for the safety belt reminder,
compared to the entertainment sound output.
The warning tones have a specified minimum
and maximum volume that cannot be dropped
below or exceeded.
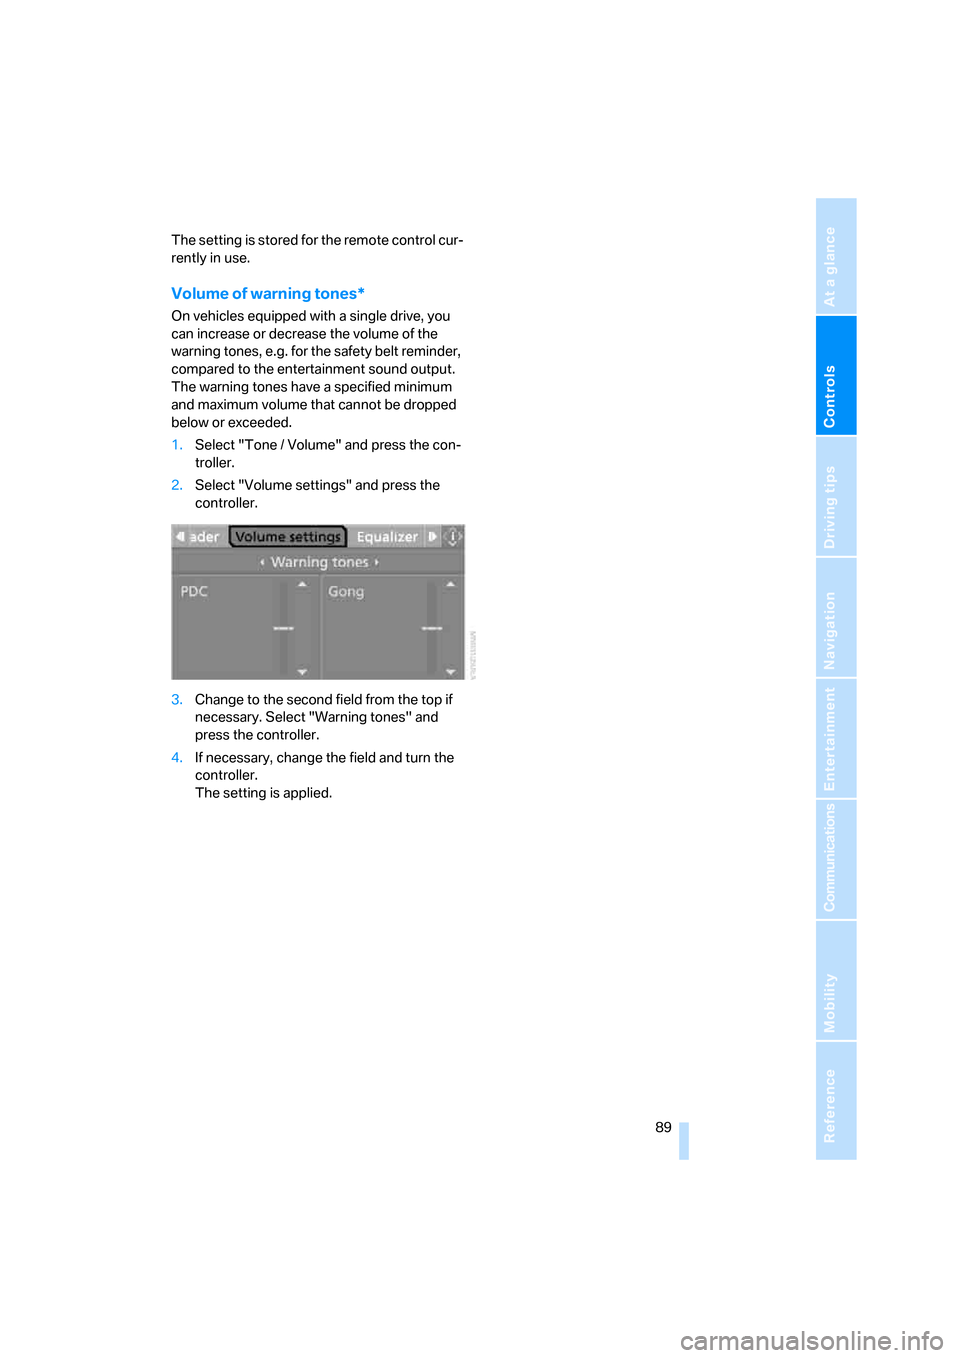
1.Select "Tone / Volume" and press the con-
troller.
2.Select "Volume settings" and press the
controller.
3.Change to the second field from the top if
necessary. Select "Warning tones" and
press the controller.
4.If necessary, change the field and turn the
controller.
The setting is applied.
Page 102 of 288
Technology for comfort, convenience and safety
100 In critical situations, the system can make tar-
geted corrections to the steering angle pro-
vided by the driver and thus stabilize the vehicle
before the driver intervenes. This stabilizing
intervention is simultaneously deactivated
when DSC is switched off, refer to page92.
Malfunction
The warning lamp lights up yellow and
a message is shown on the Control
Display. The active steering is no
longer operational. At low speeds, greater
steering wheel movements are required,
whereas at higher speeds, the vehicle reacts
more sensitively to steering wheel movements.
The stability-promoting intervention can also
be deactivated. Proceed cautiously and drive
defensively. Have the system checked.
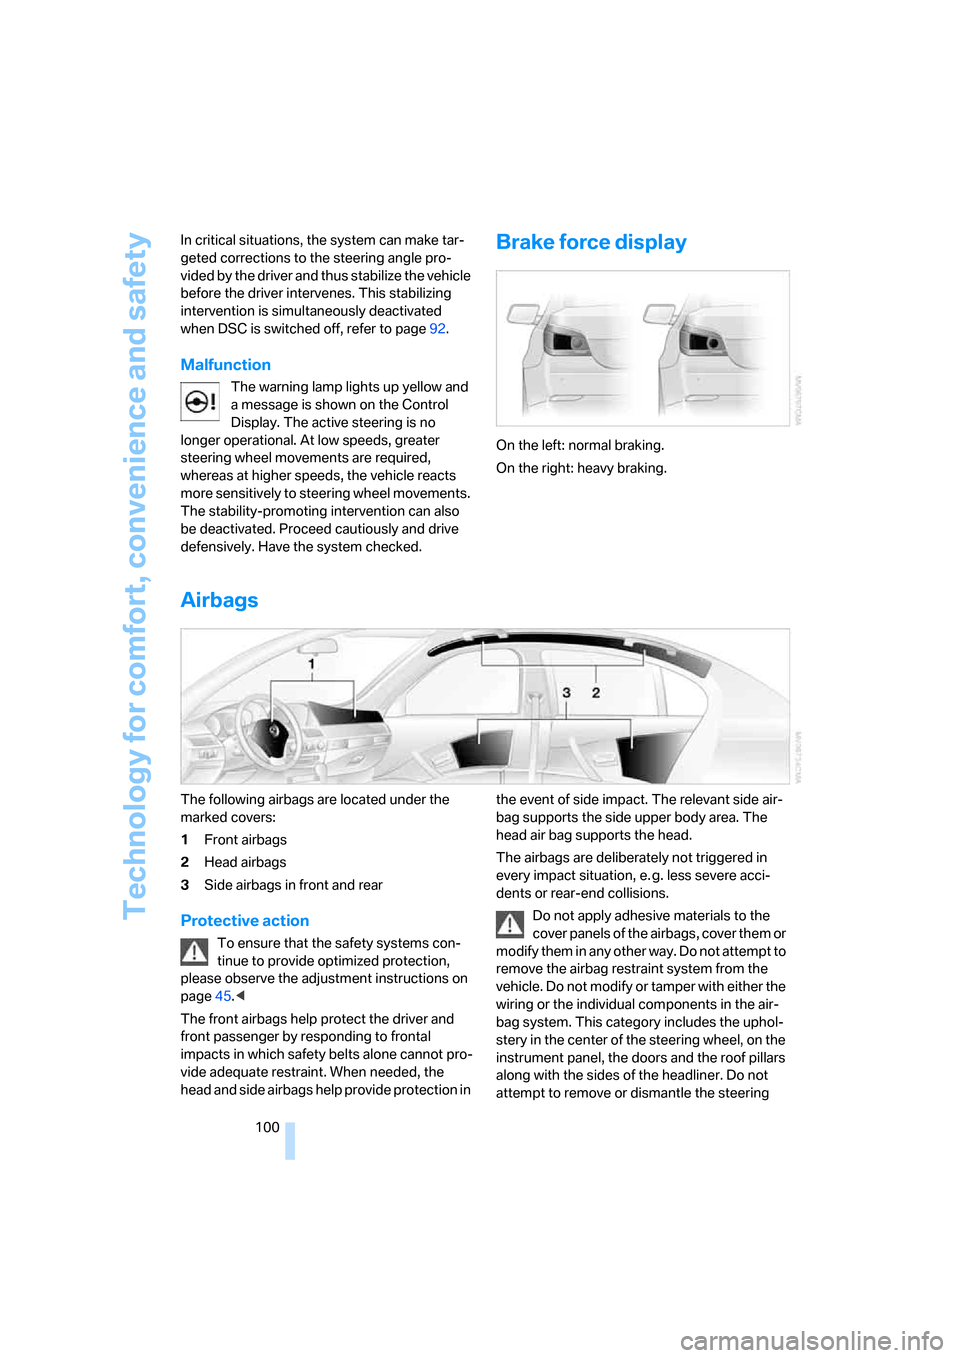
Brake force display
On the left: normal braking.
On the right: heavy braking.
Airbags
The following airbags are located under the
marked covers:
1Front airbags
2Head airbags
3Side airbags in front and rear
Protective action
To ensure that the safety systems con-
tinue to provide optimized protection,
please observe the adjustment instructions on
page45.<
The front airbags help protect the driver and
front passenger by responding to frontal
impacts in which safety belts alone cannot pro-
vide adequate restraint. When needed, the
head and side airbags help provide protection in the event of side impact. The relevant side air-
bag supports the side upper body area. The
head air bag supports the head.
The airbags are deliberately not triggered in
every impact situation, e. g. less severe acci-
dents or rear-end collisions.
Do not apply adhesive materials to the
cover panels of the airbags, cover them or
modify them in any other way. Do not attempt to
remove the airbag restraint system from the
vehicle. Do not modify or tamper with either the
wiring or the individual components in the air-
bag system. This category includes the uphol-
stery in the center of the steering wheel, on the
instrument panel, the doors and the roof pillars
along with the sides of the headliner. Do not
attempt to remove or dismantle the steering
Page 104 of 288
Technology for comfort, convenience and safety
102
Operational readiness of airbag system
From radio readiness, refer to page61, the
warning lamp lights up briefly, indicating the
operational readiness of the entire airbag sys-
tem and the safety belt tensioners.
Airbag system malfunction
>Warning lamp does not light up from radio
readiness.
>Warning lamp lights up continuously.
Have the airbag system checked immedi-
ately in case of a malfunction, otherwise
there is a danger that the airbag system may not
respond in the expected manner in an accident
despite an impact of corresponding intensity.<
Head-Up Display*
The concept
With the Head-Up Display important informa-
tion is projected into the driver's field of view,
e.g. navigation instructions. This enables you to
take in this information without looking away
from the road.
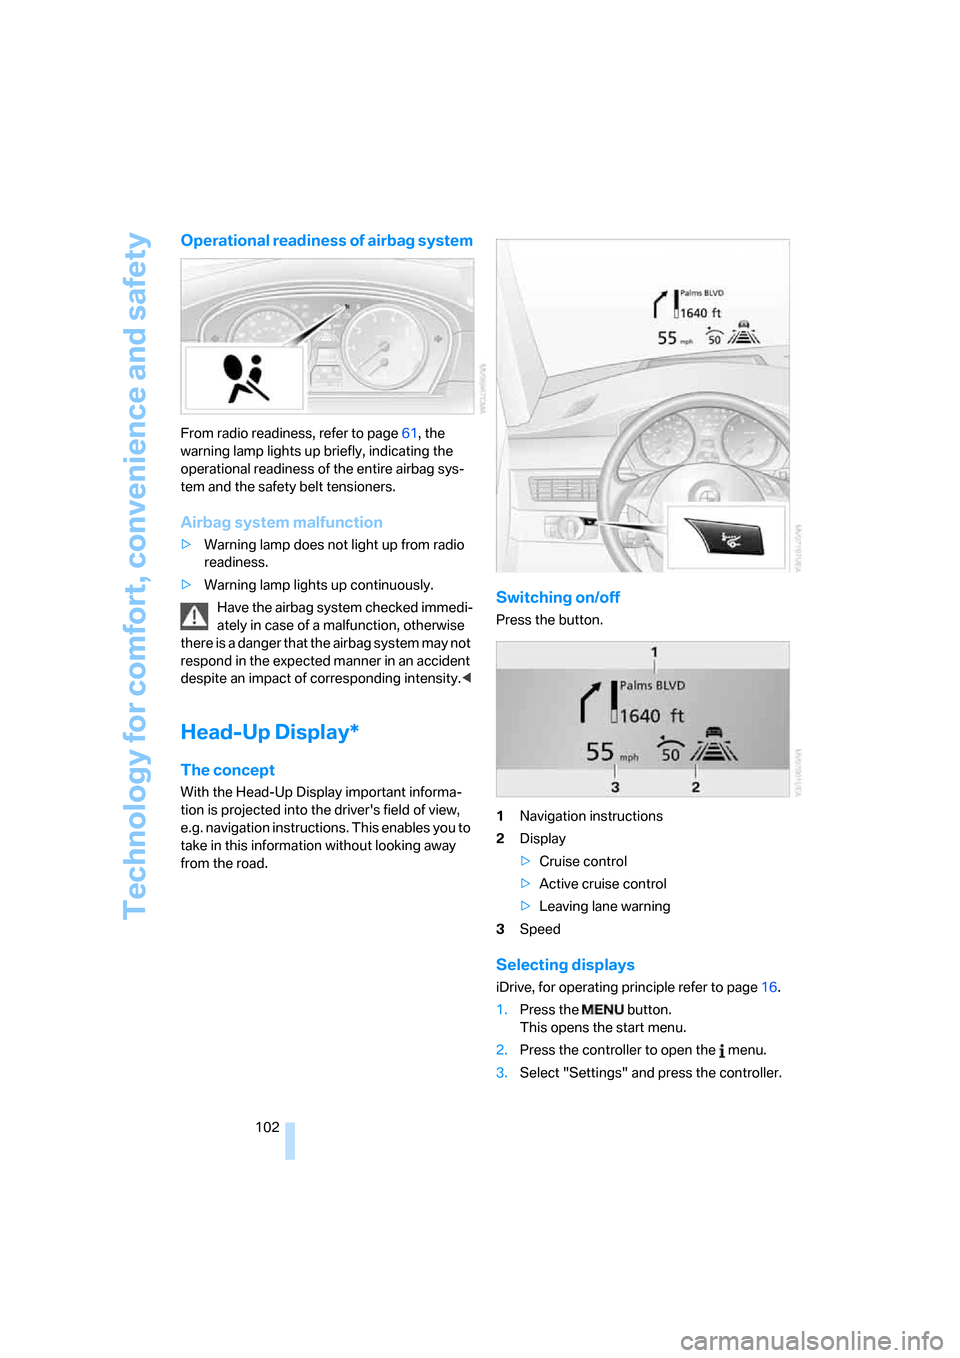
Switching on/off
Press the button.
1Navigation instructions
2Display
>Cruise control
>Active cruise control
>Leaving lane warning
3Speed
Selecting displays
iDrive, for operating principle refer to page16.
1.Press the button.
This opens the start menu.
2.Press the controller to open the menu.
3.Select "Settings" and press the controller.
Page 272 of 288
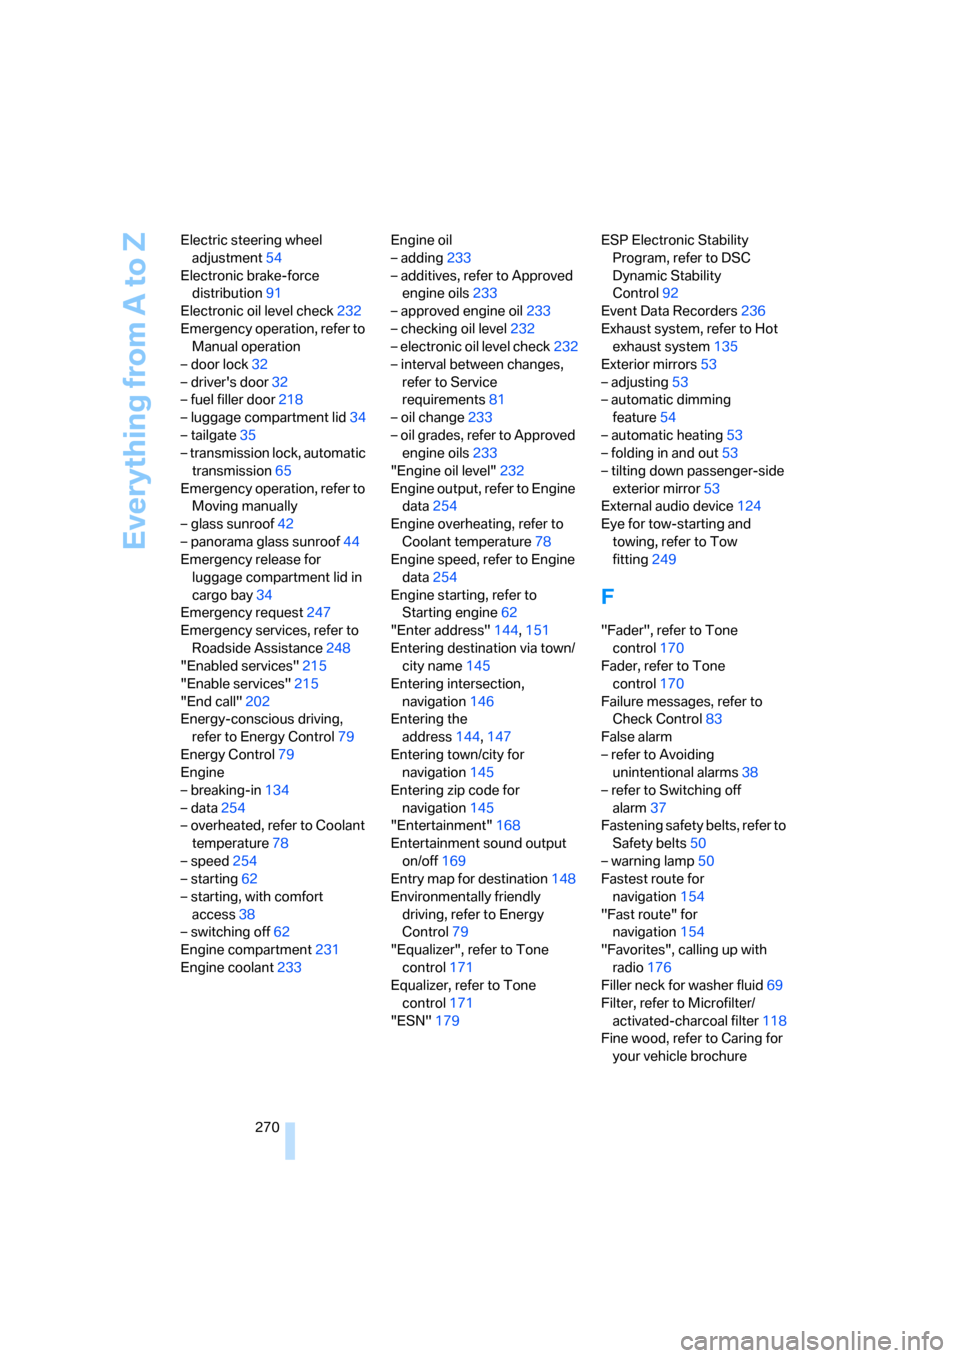
Everything from A to Z
270 Electric steering wheel
adjustment54
Electronic brake-force
distribution91
Electronic oil level check232
Emergency operation, refer to
Manual operation
– door lock32
– driver's door32
– fuel filler door218
– luggage compartment lid34
– tailgate35
– transmission lock, automatic
transmission65
Emergency operation, refer to
Moving manually
– glass sunroof42
– panorama glass sunroof44
Emergency release for
luggage compartment lid in
cargo bay34
Emergency request247
Emergency services, refer to
Roadside Assistance248
"Enabled services"215
"Enable services"215
"End call"202
Energy-conscious driving,
refer to Energy Control79
Energy Control79
Engine
– breaking-in134
– data254
– overheated, refer to Coolant
temperature78
– speed254
– starting62
– starting, with comfort
access38
– switching off62
Engine compartment231
Engine coolant233Engine oil
– adding233
– additives, refer to Approved
engine oils233
– approved engine oil233
– checking oil level232
– electronic oil level check232
– interval between changes,
refer to Service
requirements81
– oil change233
– oil grades, refer to Approved
engine oils233
"Engine oil level"232
Engine output, refer to Engine
data254
Engine overheating, refer to
Coolant temperature78
Engine speed, refer to Engine
data
254
Engine starting, refer to
Starting engine62
"Enter address"144,151
Entering destination via town/
city name145
Entering intersection,
navigation146
Entering the
address144,147
Entering town/city for
navigation145
Entering zip code for
navigation145
"Entertainment"168
Entertainment sound output
on/off169
Entry map for destination148
Environmentally friendly
driving, refer to Energy
Control79
"Equalizer", refer to Tone
control171
Equalizer, refer to Tone
control171
"ESN"179ESP Electronic Stability
Program, refer to DSC
Dynamic Stability
Control92
Event Data Recorders236
Exhaust system, refer to Hot
exhaust system135
Exterior mirrors53
– adjusting53
– automatic dimming
feature54
– automatic heating53
– folding in and out53
– tilting down passenger-side
exterior mirror53
External audio device124
Eye for tow-starting and
towing, refer to Tow
fitting249
F
"Fader", refer to Tone
control170
Fader, refer to Tone
control170
Failure messages, refer to
Check Control83
False alarm
– refer to Avoiding
unintentional alarms38
– refer to Switching off
alarm37
Fastening safety belts, refer to
Safety belts50
– warning lamp50
Fastest route for
navigation154
"Fast route" for
navigation154
"Favorites", calling up with
radio176
Filler neck for washer fluid69
Filter, refer to Microfilter/
activated-charcoal filter118
Fine wood, refer to Caring for
your vehicle brochure
Page 274 of 288
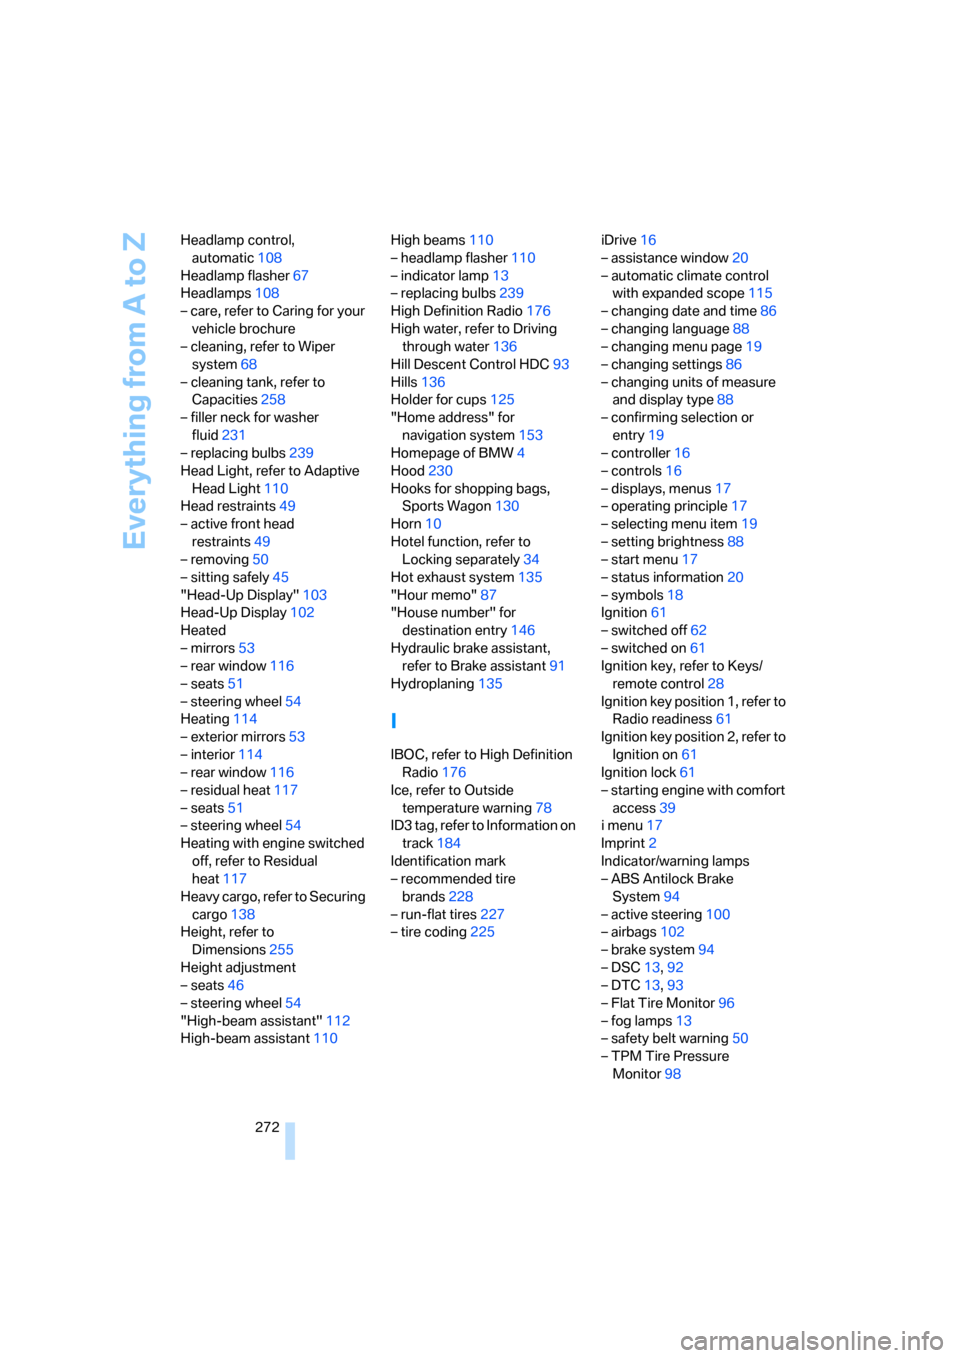
Everything from A to Z
272 Headlamp control,
automatic108
Headlamp flasher67
Headlamps108
– care, refer to Caring for your
vehicle brochure
– cleaning, refer to Wiper
system68
– cleaning tank, refer to
Capacities258
– filler neck for washer
fluid231
– replacing bulbs239
Head Light, refer to Adaptive
Head Light110
Head restraints49
– active front head
restraints49
– removing50
– sitting safely45
"Head-Up Display"103
Head-Up Display102
Heated
– mirrors53
– rear window116
– seats51
– steering wheel54
Heating114
– exterior mirrors53
– interior114
– rear window116
– residual heat117
– seats51
– steering wheel54
Heating with engine switched
off, refer to Residual
heat117
Heavy cargo, refer to Securing
cargo138
Height, refer to
Dimensions255
Height adjustment
– seats46
– steering wheel54
"High-beam assistant"112
High-beam assistant110High beams110
– headlamp flasher110
– indicator lamp13
– replacing bulbs239
High Definition Radio176
High water, refer to Driving
through water136
Hill Descent Control HDC93
Hills136
Holder for cups125
"Home address" for
navigation system153
Homepage of BMW
4
Hood230
Hooks for shopping bags,
Sports Wagon130
Horn10
Hotel function, refer to
Locking separately34
Hot exhaust system135
"Hour memo"87
"House number" for
destination entry146
Hydraulic brake assistant,
refer to Brake assistant91
Hydroplaning135
I
IBOC, refer to High Definition
Radio176
Ice, refer to Outside
temperature warning78
ID3 tag, refer to Information on
track184
Identification mark
– recommended tire
brands228
– run-flat tires227
– tire coding225iDrive16
– assistance window20
– automatic climate control
with expanded scope115
– changing date and time86
– changing language88
– changing menu page19
– changing settings86
– changing units of measure
and display type88
– confirming selection or
entry19
– controller16
– controls16
– displays, menus17
– operating principle17
– selecting menu item19
– setting brightness88
– start menu17
– status information20
– symbols18
Ignition61
– switched off62
– switched on61
Ignition key, refer to Keys/
remote control28
Ignition key position 1, refer to
Radio readiness61
Ignition key position 2, refer to
Ignition on61
Ignition lock61
– starting engine with comfort
access39
i menu17
Imprint2
Indicator/warning lamps
– ABS Antilock Brake
System94
– active steering100
– airbags102
– brake system94
– DSC13,92
– DTC13,93
– Flat Tire Monitor96
– fog lamps
13
– safety belt warning50
– TPM Tire Pressure
Monitor98